george
Full Member
  
Member since: February 2014
Posts: 279 
|
Post by george on Mar 10, 2014 16:48:50 GMT -5
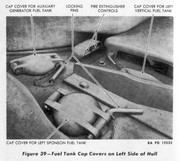
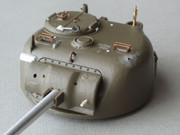
Hi, Ben. Here some reference photo:   As for a chains, one side of a chain connected to locking pins of a cap cover, other side to the hull.  On my earlier project I made a periscope guards from 0,3mm wire glued with superglue. |
|
Hinksy
Full Member
  
Member since: June 2012
THE ENGLISH LIONHEART - HINKSY!
Posts: 1,016
Jun 22, 2012 16:46:21 GMT -5
Jun 22, 2012 16:46:21 GMT -5
|
Post by Hinksy on Mar 10, 2014 18:08:05 GMT -5
Thanks George! That's excellent - I can get the chains in the right place now and those periscope guards are superb, lovely work. That's what I'll be making! Thanks for taking the time to sort them photos dude, Ben  |
|
|
|
Post by rbaer on Mar 12, 2014 10:22:28 GMT -5
Ben, here's a couple of pics of the drivers' "open" periscopes:   All I did was to shave off the closed periscope cover, slice the top of an Academy periscope off and glue it to the flat spot on the driver's hatch. A piece of plastic stock would work fine as well, I just happened to have some extra Academy parts. The guard is also Academy, visibly over-scale, but workable for me. The hull is the same one in your kit, hatches are Italeri but they fit in the Tamiya hull like they were meant for it. Gotta love the Sherman. Edit: Barely visible is the periscope guard on the loader's periscope. It's a Dragon part, from the kit the turret came from. Much better part. I used the others in that kit on something else, I guess..... |
|
|
|
Post by bullardino on Mar 12, 2014 11:24:04 GMT -5
Really nice job, Russ.
|
|
|
|
Post by deafpanzer on Mar 12, 2014 12:05:42 GMT -5
How many kits did you hijack from? It is really looking great!!!
|
|
|
|
Post by robbo on Mar 12, 2014 12:13:09 GMT -5
Learning a lot about Shermans by visiting this blog. Keep it going chaps  |
|
AndyArgent.
Senior Member
    Aug 2013 MoM Winner
Member since: November 2011
Andy Bodge Argent - Aug 2013 MoM Winner
Posts: 1,746
Nov 17, 2011 17:09:43 GMT -5
Nov 17, 2011 17:09:43 GMT -5
|
Post by AndyArgent. on Mar 12, 2014 12:54:51 GMT -5
Ben PM sent on Milmod.
|
|
Hinksy
Full Member
  
Member since: June 2012
THE ENGLISH LIONHEART - HINKSY!
Posts: 1,016
Jun 22, 2012 16:46:21 GMT -5
Jun 22, 2012 16:46:21 GMT -5
|
Post by Hinksy on Mar 12, 2014 15:48:05 GMT -5
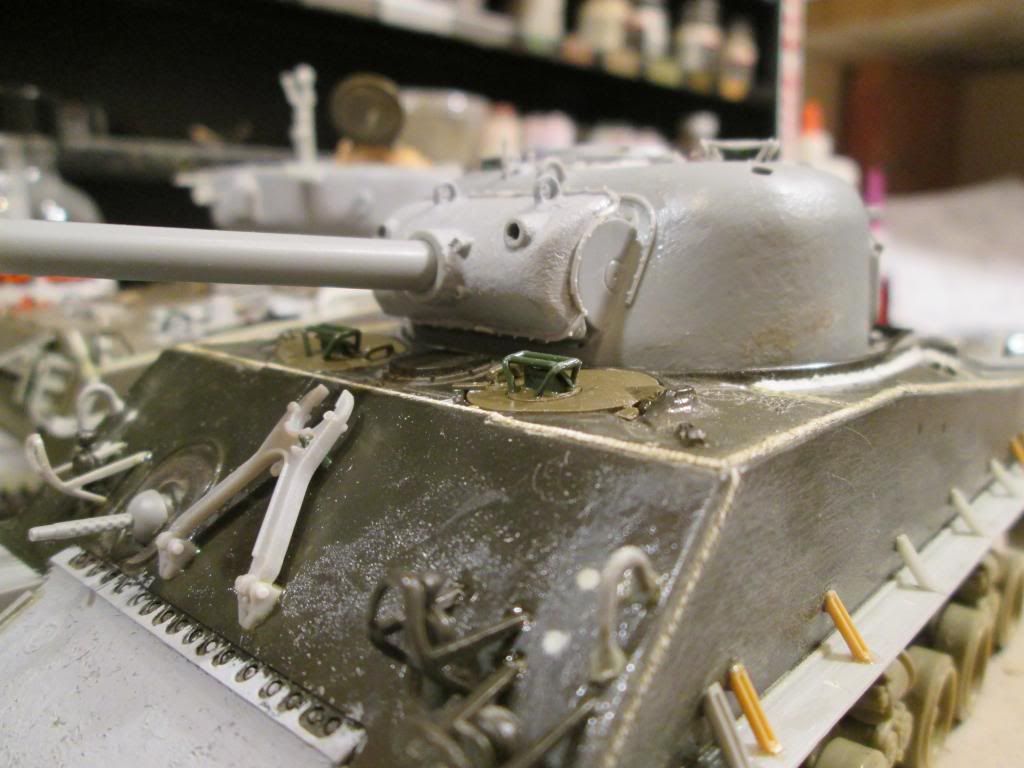
Ben just saw your post over on Mil Mod forum the bug looks as if its got hold iam afraid it can be with you for a very long time, just when you think you are over it bang its back again, iam sure there are others on here who know what I mean, Cheers guys! I've really enjoyed this build so far somtec and definately want to do more. I've spent the last 5 years slowly learning about German armour and accruing a stash of German armour I feel it's time to expand and start learning a bit more - where next? Allied Armour! Apart from this Tamiya build, which has been very simple and VERY enjoyable so far, I have Bronco's Comet with full upgrade set and Friuls and the Dragon El-Alamein Sherman to tide me over but I think a couple of items from my very nice selection of Dragon Smart Kit German Armour could be sacrificed to be swapped for some nice Sherman variants to vary the stash a bit more. It wasn't easy deciding on the potential kits to be swapped mind you!  Onto the current build: Onto the current build:Assembly wise It's pretty much done. The replacement Aber barrel is going to be delayed by a week or two which sucks a bit so it's the kit barrel for now which is ok. The MG that is currently fitted is the one saved from my old Pershing build which became a test bed! It's nice knowing that I have a spare if I screw up the RB .50cal replacement kit which is due any day this week  I found an old RB PE set for Allied vehicle antennae bases so that's dropped straight onto the turret and looks a lot better than the kit item (how long should the Antennae be on a Sherman like this out of interest. I've left all the hatches off as I'm not sure what I'm going to do regarding modifying them yet but I do know that any hatch modifications I undertake will be a lot easier to do OFF the build! I'm definately going to have a crack at painting the Commander figure with Binoculars and try and get some good stowage worked out - I've found some great Verlinden netting and my buddy Alan has given me some soft medical netting which he has dyed green and it's a perfect scale for 1/35 work. Finally the turret was a really loose fit so a sliver of plasticard fitted inside the hull ring has tightened it up nicely        I hope you like her so far - please point out anything that would help me in improving this buildI have a couple of questions guys: I hope you like her so far - please point out anything that would help me in improving this buildI have a couple of questions guys:i) The 'Lantern' thing on the turret - does that require any lens detailing or should there be anything visible inside the current hollow Lantern body? ii) If I were to add an antennae how long should it be? iii) When it comes to detail painting should what's the best colour to use on the Cupola vision blocks AND the insides of the hatches? Thanks for looking fellas, Ben  |
|
|
|
Post by bullardino on Mar 12, 2014 16:09:48 GMT -5
Me likey  |
|
|
|
Post by wbill76 on Mar 12, 2014 20:04:06 GMT -5
Looking good Ben! Inside of the hatches should be OD. As for the cupola vision blocks, I'd recommend using Tamiya Clear Smoke or something similar.
|
|
|
|
Post by deafpanzer on Mar 12, 2014 21:12:28 GMT -5
I am glad you enjoying this build. RB barrel replacement for the 50 cal will look much better for sure. Bill has answered your questions I am not sure about the lantern thing. Hopefully BigJohn or somebody can answer your question. You can always end him a message...
|
|
george
Full Member
  
Member since: February 2014
Posts: 279 
|
Post by george on Mar 12, 2014 21:29:05 GMT -5
|
|
Hinksy
Full Member
  
Member since: June 2012
THE ENGLISH LIONHEART - HINKSY!
Posts: 1,016
Jun 22, 2012 16:46:21 GMT -5
Jun 22, 2012 16:46:21 GMT -5
|
Post by Hinksy on Mar 13, 2014 8:27:05 GMT -5
Hi guys, Thanks for the kind comments  That's a great link George - I'll sort them holes out shortly. Apart from the already asked questions regarding the antennae length and turret lantern I have another one for you:
i) On the suspension units, what are the single rollers that sit at the top made from - rubber? Do I paint them as 'rubber' or are they metal?Thanks guys, Ben  |
|
george
Full Member
  
Member since: February 2014
Posts: 279 
|
Post by george on Mar 13, 2014 10:25:50 GMT -5
That rollers made of metal.
|
|
Deleted
Member since: January 1970
Posts: 0
Nov 29, 2024 4:29:19 GMT -5
Nov 29, 2024 4:29:19 GMT -5
|
Post by Deleted on Mar 13, 2014 10:45:25 GMT -5
nice clean build looks great
|
|
george
Full Member
  
Member since: February 2014
Posts: 279 
|
Post by george on Mar 13, 2014 12:57:47 GMT -5
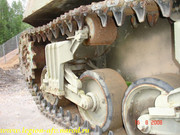
Here a picture, the roller is rusty 
Ben, if you have a picture of a prototype, check the location of lifting hooks at front plate, they were at two different positions depending of production time. |
|
Hinksy
Full Member
  
Member since: June 2012
THE ENGLISH LIONHEART - HINKSY!
Posts: 1,016
Jun 22, 2012 16:46:21 GMT -5
Jun 22, 2012 16:46:21 GMT -5
|
Post by Hinksy on Mar 14, 2014 10:44:19 GMT -5
Thanks Pete and George  The Tasca Jumbo that I ordered yesterday arrived today and with the El-Alamein Sherman Sherman in the stash waiting to be built I'm going to get a shuffle on with this Tamiya build now - I'll be starting the Alamein Sherman as soon as I've completed this build and the Tasca one one return from my 12 weeks away which is starting sometime in May. Oh look - some more questions relating to my build:  * No-one has been able to help re the Antennae length and the Turret lantern so I'm still looking into them?i) * No-one has been able to help re the Antennae length and the Turret lantern so I'm still looking into them?i) In the Dragon El-Alamein Sherman kit there are 2 moulded Periscope guards included but they are shown as not used on the parts layout guide and are not called for anywhere in the build BUT the box art shows one guard in use on the turret? This Alamein Sherman is an M4A1 (I think) so is it just a case of some had periscope guards and some didn't? If they are not needed I'll pinch the two from the Dragon kit and use them on this Tamiya build - I'll scratch a third one for the turret. ii) When it comes to painting the one-piece tracks I suppose the main parts will be rubber and will need painting as such. What about the end connecting links and outer guide horns? I was thinking metallic with a rusted look? Is this right? Thanks guys, Ben  |
|
george
Full Member
  
Member since: February 2014
Posts: 279 
|
Post by george on Mar 14, 2014 18:47:46 GMT -5
|
|
Hinksy
Full Member
  
Member since: June 2012
THE ENGLISH LIONHEART - HINKSY!
Posts: 1,016
Jun 22, 2012 16:46:21 GMT -5
Jun 22, 2012 16:46:21 GMT -5
|
Post by Hinksy on Mar 15, 2014 6:08:07 GMT -5
George - you are a research machine dude! Thanks ever so much for them great photos matey  I had planned to paint and start detailing the Tamiya Sherman today - not sure what time I'll get started as a few things have come up as usual. Watch this space! Ben  |
|
sabre
Full Member
  
Member since: September 2013
Posts: 414 
|
Post by sabre on Mar 15, 2014 8:28:14 GMT -5
Ben from what I been able to gather the length of the antenna was about 9 feet and 15 feet for a Battalion Commander's antenna Radio types: SCR 538 FM/voice only, range 10 miles 9' whip (typical early radio, no transmitter?) SCR 528 FM/voice only, range 10 miles 9' whip (later radio, platoon level) SCR 508 FM/voice only, range 10 miles 9' whip (company commander) SCR 506 AM, range 25-50 miles (voice) 75-100 miles (key) 15' whip (battalion commander) and a 4" inch or 10.5 cm long piece of brass rod of .008 to .010 in size is recommend for the antenna at 1/35 scale. Steel Antenna Review |
|
Hinksy
Full Member
  
Member since: June 2012
THE ENGLISH LIONHEART - HINKSY!
Posts: 1,016
Jun 22, 2012 16:46:21 GMT -5
Jun 22, 2012 16:46:21 GMT -5
|
Post by Hinksy on Mar 16, 2014 9:15:15 GMT -5
Thanks for that Sabre  I'll look at getting Antennae sorted later on. I was perusing an old magazine last night and a chap had done a SBS build of this very kit  A great job he'd done too. He hadn't bothered with adding weld detail or stops for the engine doors for when they are open (which I have now done) BUT he did add mounting skirts for sand shields i.e. he had fitted on either side short strips of plasticard with about 4 holes drilled in it. He then had second, longer central pieces with about 10-15 holes then a final short piece at the back again which looks like the same size as the front piece. The angle the magazine photo is taken at makes it impossible to count the correct amount of holes. Is anyone able to look at one of their existing M4A3's with these mounting rails fitted and have a quick measure up for me and let me have the spacings of the holes on each section and the correct scale length of each section - I think it'll add a nice touch. I'll see if I can find a 1/35 diagram but if anyone can help that would be grand  I'm a bit off my game this weekend. I went out for a ride on the mountain bike yesterday morning, locked the wheels up, hit a log and flew through the air into a ditch  Straight away I knew I'd dislocated my right Patella (kneecap) as I've dislocated the same kneecap twice before already so reached for my phone which wasn't there (must have come out my pocket during the fall) and knew it would be a waste of time shouting as I was miles from anywhere so that was it - pop it back in myself. I managed to do it as the doctor who assessed me after they had to pop my kneecap back in last time had said my kneecap hadn't developed properly, would be prone to further 'pops'and told me what to do if the very thing that happened yesterday morning did! You have to sort of push your leg out straight whilst applying pressure from the side of the kneecap. It's currently swollen up like a balloon and I'll certainly be very restricted with what I can do this week. I feel like I've been beaten up  Anyway, if anyone can help with the shield mounting measurements that would be great  Ben  |
|
george
Full Member
  
Member since: February 2014
Posts: 279 
|
Post by george on Mar 16, 2014 9:34:23 GMT -5
Hi, Ben. My suggestion - to copy this measurements from your M4A3E2 Jumbo Sherman from Tasca. Tasca did very good research, so be sure about accuracy.
Take care, mate.
|
|
Hinksy
Full Member
  
Member since: June 2012
THE ENGLISH LIONHEART - HINKSY!
Posts: 1,016
Jun 22, 2012 16:46:21 GMT -5
Jun 22, 2012 16:46:21 GMT -5
|
Post by Hinksy on Mar 16, 2014 10:26:41 GMT -5
Hi George, Thanks for pointing out the obvious mate! DOH! They have separate mouldings for the shield mountings so I take the measurements directly from them. It's only now that I realise that I haven't got any thin card stock so I'll be buying a few sheets of that tomorrow along with some plastic rod for the welding. I was hoping to get this build all but done by now but with my knee in the state it is I'll be lucky to get this done for next weekend now  Cheers for you help dude, Ben  |
|
Hinksy
Full Member
  
Member since: June 2012
THE ENGLISH LIONHEART - HINKSY!
Posts: 1,016
Jun 22, 2012 16:46:21 GMT -5
Jun 22, 2012 16:46:21 GMT -5
|
Post by Hinksy on Mar 16, 2014 12:34:59 GMT -5
Hi, Ben. My suggestion - to copy this measurements from your M4A3E2 Jumbo Sherman from Tasca. Tasca did very good research, so be sure about accuracy. Take care, mate. Cheers guys, yep - it's the bloody third time I've done it now Somtec. Last time I did it the specialist said I'd have to have my kneecaps 'screwed' to prevent this happening more and more - apparently it's a nasty operation, too  After you replied, George I got a pm from Big John saying there are two variants of sand shield mountings within the Tasca Jumbo kit. There are some chunky ones meant for the Tasca Jumbo and some slimmer ones that are unused - I've mounted them on my Tamiya one already! I've got to pick up some thinner card stock for the rear portions of the sand shield holders and some thin plastic rod for the weld beads tomorrow from my LHS (actually my old man has volunteered as I can't drive with a knackered knee). Once that's sorted I'll make a start on stowage assembly as I'm going to struggle using the airbrush for a few days as it's set up in the workshop and there's no way I'll be able to run about sorting a spray job out until my knee has gone down a bit - next weekend it should be easier. I can paint the figure at least!   Cheers guys - not much to show but with the weld beads added there's not much more to do. Ben  |
|
|
|
Post by bullardino on Mar 16, 2014 12:57:33 GMT -5
Nice progress Ben. Hope the knee will be better soon  |
|
|
|
Post by deafpanzer on Mar 16, 2014 12:59:47 GMT -5
Man it is starting to look great especially the wheels. They look even!
|
|
Hinksy
Full Member
  
Member since: June 2012
THE ENGLISH LIONHEART - HINKSY!
Posts: 1,016
Jun 22, 2012 16:46:21 GMT -5
Jun 22, 2012 16:46:21 GMT -5
|
Post by Hinksy on Mar 16, 2014 13:15:46 GMT -5
Cheers guys  There won't be any airbrushing for the next few days 'cos I'm not allowed to airbrush in the house and instead have my set-up in the workshop which means a lot of coming and going which will kill me  I'll definately be trying to get that commander figure painted and the stowage sorted. Have a good week y'all! Ben  |
|
|
|
Post by Leon on Mar 16, 2014 13:29:20 GMT -5
Making really good progress Ben  .Take it easy on the knee buddy.  |
|
|
|
Post by wbill76 on Mar 16, 2014 15:01:59 GMT -5
Knee issues are never fun Ben, hope you recover soon! Sherman's looking good so far.  |
|
desertrat
Full Member
  
Member since: October 2013
Posts: 934 
|
Post by desertrat on Mar 17, 2014 13:43:31 GMT -5
liking the bronson! hope your knee getting better (oouch)
|
|