Deleted
Member since: January 1970
Posts: 0
Nov 29, 2024 4:34:35 GMT -5
Nov 29, 2024 4:34:35 GMT -5
|
Post by Deleted on Mar 22, 2014 14:14:19 GMT -5
looks good re the tool paint em however you want mate it's your model
|
|
|
|
Post by bullardino on Mar 22, 2014 16:05:27 GMT -5
I really like it  |
|
|
|
Post by wbill76 on Mar 22, 2014 19:59:04 GMT -5
Coming along nicely Ben, chalk up the Surfacer experience in the 'learning' column and don't sweat it!  |
|
desertrat
Full Member
  
Member since: October 2013
Posts: 934 
|
Post by desertrat on Mar 23, 2014 4:39:22 GMT -5
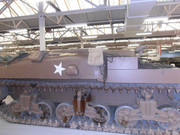
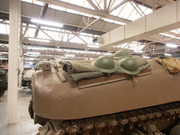
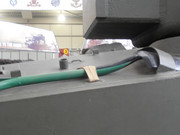
hi Ben, took these at bovington, they might help?    looking good turret finish looks spot on!! |
|
Hinksy
Full Member
  
Member since: June 2012
THE ENGLISH LIONHEART - HINKSY!
Posts: 1,016
Jun 22, 2012 16:46:21 GMT -5
Jun 22, 2012 16:46:21 GMT -5
|
Post by Hinksy on Mar 23, 2014 7:03:50 GMT -5
Hi fellas, Thanks for the feedback chaps. It's coming together all rather well now I think. A tamiya sherman is definately the way to go when building your first! I'll get them bif Turret decals on later to hide the splodgy areas of Surfacer on the sides. The rest looks ok now. Thanks for the the photos Desert Rat - interesting tool handle colour there! I think I'll use my artistic license and just paint them as I would standard tools BUT first I will peruse photos on the web to see what's what. Update later, Ben  |
|
|
|
Post by ceresvesta. on Mar 23, 2014 7:06:52 GMT -5
Nice progress. Keep it up Ben!
|
|
Hinksy
Full Member
  
Member since: June 2012
THE ENGLISH LIONHEART - HINKSY!
Posts: 1,016
Jun 22, 2012 16:46:21 GMT -5
Jun 22, 2012 16:46:21 GMT -5
|
Post by Hinksy on Mar 23, 2014 11:43:06 GMT -5
Hi fellas, I've just done a quick couple of hours and got the decals on and the tool handles painted - definately brings the Sherman to life. The plank up front is a Maccy D's wooden coffee stirrer given a very light brown wash. As I'm going to whitewash this like the box art machine I'm not too sure how much weathering to do 'pre-w/wash'? I reckon some good dark pinwashes below the white will look good and I've got some nice lime coloured shades to add some scuff marks to her etc. I'll get the whitewash on then add plenty of winter grime and mud spatter - particulary around the running gear. I haven't painted the front lights yet - the instructions call for white but I'm not sure - any suggestions?If you were wondering I'm going to paint the wheels later on tonight          Thanks for looking guys, Ben  |
|
|
|
Post by bullardino on Mar 23, 2014 15:59:14 GMT -5
Great progress, Ben.
|
|
desertrat
Full Member
  
Member since: October 2013
Posts: 934 
|
Post by desertrat on Mar 23, 2014 16:12:41 GMT -5
Thats one cool looking sherman!
|
|
|
|
Post by wbill76 on Mar 23, 2014 17:46:30 GMT -5
Looking good Ben! Personally I wouldn't bother doing very much 'pre-white-wash' in terms of weathering unless you're going to have a very worn or 'barely there' ww look. Otherwise you're just adding more time for something that will be covered up and invisible in the end. Kee
|
|
Hinksy
Full Member
  
Member since: June 2012
THE ENGLISH LIONHEART - HINKSY!
Posts: 1,016
Jun 22, 2012 16:46:21 GMT -5
Jun 22, 2012 16:46:21 GMT -5
|
Post by Hinksy on Mar 24, 2014 13:07:47 GMT -5
Cheers fellas, I've just laid the whitewash on and worn down some select areas followed by a sealing coat of Satin Varnish. I used a bit of Flat Earth against the wheel sidewalls and suspensension housing as the base for what will be a pretty mucky lower hull. At present it's just the AMMO 'Washable White' straight from the bottle - I'm going to leave it overnight then lay down an all-over coat of brown filter to take the edge off the bright white then start the streaking and spattering!> One interesting thing I did notice was that after 6 minutes drying time was that it was getting almost impossible to shift that white (I used Tamiya for the basecoat) whereas when I used it before on a Vallejo painted model it was still coming off really easily. Something to be careful of when using Tamiya paints!         I hope you like the whitewash chaps  As the parents are away for the week I've set up the airbrush and a selection of weathering stuff in the kitchen on the big table! God it's so nice to have proper permanent bench! Update tomorrow, Ben  |
|
|
|
Post by deafpanzer on Mar 24, 2014 13:12:08 GMT -5
OH YEAH It is looking GREAT! Are you still planning to replace the barrel?
Have to try that new stuff from AMMO! Thanks for doing this!
|
|
desertrat
Full Member
  
Member since: October 2013
Posts: 934 
|
Post by desertrat on Mar 24, 2014 13:38:25 GMT -5
nice white wash, feeling cold looking at it!!
|
|
Hinksy
Full Member
  
Member since: June 2012
THE ENGLISH LIONHEART - HINKSY!
Posts: 1,016
Jun 22, 2012 16:46:21 GMT -5
Jun 22, 2012 16:46:21 GMT -5
|
Post by Hinksy on Mar 24, 2014 13:43:01 GMT -5
OH YEAH It is looking GREAT! Are you still planning to replace the barrel? Have to try that new stuff from AMMO! Thanks for doing this! Hi guys, Definately try it Andy - what build have you got lined up next after the bust? It's coming along really well mate. I'm not sure how far I'm going to go with the stowage - I reckon a few bits up front on the plank like a spare wheel and the small drum that comes with the kit. There's a load of Jerry cans, K Ration boxes with decals, ammo cans with decals and I was thinking about making some tarps and also using some netting I have rolled up and strapped somewhere? I've ordered some Tamiya Fast Epoxy Putty stuff - it's supposed to be perfect for making larger tarps etc - I was going to bunch a load of stuff up on the rear deck and then cover it with the putty stuff whilst it's still nice and pliable so I'm able to get some nice nice creases and folds going before I lash it down. I'll see how it goes! Update tomorrow, Ben  |
|
beast
Full Member
  
Member since: August 2013
Posts: 410 
|
Post by beast on Mar 24, 2014 14:48:42 GMT -5
Hey bro, better late than never!
Just went through your blog start to finish and it's looking brilliant mate. Really like the surface effect on the turret, it works really well especially with the white wash.
Looking forward to more updates.
Stuart.
|
|
Hinksy
Full Member
  
Member since: June 2012
THE ENGLISH LIONHEART - HINKSY!
Posts: 1,016
Jun 22, 2012 16:46:21 GMT -5
Jun 22, 2012 16:46:21 GMT -5
|
Post by Hinksy on Mar 24, 2014 15:13:27 GMT -5
Cheers Stuart, Not that I'm one to blow my own trumpet  but in the flesh (so to speak) this think looks killer! It looks like it's frozen! I think I'm going to go easy with the weathering on the upper hull - just limit it to a light filter to tone down the white and add some dark pinwashes and winter streaks to break up the surface. I'm going to concentrate all the mud and crud on the lower hull and wheels etc and use the trusty AK mud mix loaded up on a brush and blow the bristles with the airbrush to give a great spatter effect. It's a shame the Aber barrel hasn't turned up yet. The supplier said it was back order and looking at the dates it should be here NOW! The kit barrel looks ok but the seam wasn't easy to shift and is still visible close up. I'll go with it for now and keep the barrel in the spares tub! They are hard to get so it may come in handy one day! Ben  |
|
george
Full Member
  
Member since: February 2014
Posts: 279 
|
Post by george on Mar 24, 2014 15:29:30 GMT -5
What an impressive whitewash, I really like it, need to try this product too. Keep going, Ben.
|
|
|
|
Post by deafpanzer on Mar 24, 2014 15:36:08 GMT -5
Definately try it Andy - what build have you got lined up next after the bust? 232... DAK version of course! You know I have been itchin' to build a DAK thing. It will be for Got Wheels Got Gun GB here. Probably will start after my vacation in April...  |
|
|
|
Post by Tojo72 on Mar 24, 2014 17:29:56 GMT -5
Very nice look to that whitewash,congrats on a nice job Ben,now dirty it up a bit
|
|
|
|
Post by robbo on Mar 24, 2014 17:39:03 GMT -5
Well done Ben, this is looking great mate, faded white looks swell
|
|
Hinksy
Full Member
  
Member since: June 2012
THE ENGLISH LIONHEART - HINKSY!
Posts: 1,016
Jun 22, 2012 16:46:21 GMT -5
Jun 22, 2012 16:46:21 GMT -5
|
Post by Hinksy on Mar 24, 2014 18:02:45 GMT -5
Hi fellas, Thanks loads for the great comments and feedback guys!  I'm glad you like her. I didn't do anything different this time with the washable white than I did when using it on the Hetzer - the only change in variable was the type of paint used for basecoating (I used Tamiya this time, as previously mentioned as opposed to the usual Model Air) but that's all. The Model Air was VERY glossy and even though this time the Tamiya had a quick gloss sealant coat for the decals it still felt fairly matt in places so I'm assuming that's the key. I hope a few of you give it a go as I'll be real keen to see how others get on with it. Cheers guys, Ben  |
|
|
|
Post by bbd468 on Mar 24, 2014 18:28:54 GMT -5
Hey Brother Ben, Man, that looks ferkin awesome bro looks as close to the box art as ive seen....well done mate!  |
|
|
|
Post by wbill76 on Mar 24, 2014 20:02:43 GMT -5
Looking good Ben, just the right amount IMHO.
|
|
|
|
Post by Leon on Mar 24, 2014 20:16:25 GMT -5
Awesome job on the white wash Ben,looks good mate.   |
|
Deleted
Member since: January 1970
Posts: 0
Nov 29, 2024 4:34:35 GMT -5
Nov 29, 2024 4:34:35 GMT -5
|
Post by Deleted on Mar 25, 2014 2:15:33 GMT -5
nice white wash effect there chap looking good!
|
|
|
|
Post by bullardino on Mar 25, 2014 6:19:00 GMT -5
Nice ww, Ben.
|
|
Hinksy
Full Member
  
Member since: June 2012
THE ENGLISH LIONHEART - HINKSY!
Posts: 1,016
Jun 22, 2012 16:46:21 GMT -5
Jun 22, 2012 16:46:21 GMT -5
|
Post by Hinksy on Mar 25, 2014 9:02:29 GMT -5
Great feedback guys  Highly appreciated! Ben  |
|
|
|
Post by rbaer on Mar 25, 2014 11:52:19 GMT -5
Whitewash looks very good, Ben. I have yet to try doing a winter scheme, so I'm watching closely.
|
|
Hinksy
Full Member
  
Member since: June 2012
THE ENGLISH LIONHEART - HINKSY!
Posts: 1,016
Jun 22, 2012 16:46:21 GMT -5
Jun 22, 2012 16:46:21 GMT -5
|
Post by Hinksy on Mar 25, 2014 15:12:18 GMT -5
Hi guys, I have a quick question - instead of stacking and painting a bunch of stowage for the rear deck I'm going to place some items on there but cover them up with a really detailed canvas cover. I got the idea here - I thought I'd at least give it a go: www.youtube.com/watch?v=cOJkUpDe90QI can see here he's using 'Magic Sculp' putty to make the canvas? I've looked at my UK supplier websites and can't find any - only a quick look so I'm sure I'll find it. Out of interest, when it comes to making Canvas like this, how does Tamiya Fast Epoxy shape up? Also, I assume I can use Milliput or Squadron putty for this job? What colours are the best when it comes to Milliput and Squadron putty? Any input appreciated or other stowage suggestions really appreciated! I've only used external stowage once before and that was ages ago.Thanks chaps, Ben  |
|
|
|
Post by bullardino on Mar 25, 2014 15:30:47 GMT -5
I got magic sculpt from my german smuggler (can't remember if it was Modellbau Koenig or Der Sockelshop, they both have it)
|
|