|
|
Post by bbd468 on Jul 13, 2014 18:36:59 GMT -5
Hey Jeff, good to see an update bro! Feels like i been here before!   |
|
|
|
Post by imatanker on Jul 14, 2014 7:03:45 GMT -5
Nice, nice, nice, nice, nice  |
|
|
|
Post by wbill76 on Jul 14, 2014 10:16:33 GMT -5
Nice to see this one come back around once more Jeff.  |
|
pantherf..-Email Not Valid
Full Member
  
Member since: July 2013
"Best Job I've Ever Had"
Posts: 1,253 
|
Post by pantherf..-Email Not Valid on Jul 14, 2014 20:04:31 GMT -5
Oh, I have everything that I started... nothing gets tossed. I get on them when I can. Tomorrow morning I start this special infusion process every other week that will help lower my sky-high antibody level. This will increase my chances of getting to that third "life saving" procedure.  It also carries the risk of making me very ill (flue like symptoms) so if it all goes the wrong way... Jeff |
|
|
|
Post by TRM on Jul 14, 2014 20:17:38 GMT -5
Hang in there Jeff!! Fingers and toes are crossed and will say a prayer or two if need be my friend!! Do what you need to for yourself...the builds are here and will be waiting for you as will all of us!!  |
|
|
|
Post by wbill76 on Jul 15, 2014 12:34:17 GMT -5
Take care of yourself there Jeff!
|
|
pantherf..-Email Not Valid
Full Member
  
Member since: July 2013
"Best Job I've Ever Had"
Posts: 1,253 
|
Post by pantherf..-Email Not Valid on Jul 15, 2014 14:43:05 GMT -5
Thanks guys for the support!  Made it through the first session okay. A little flu-like feeling started coming over me but a second dose of Benadryl saved the day. SO it looks like I may beat this thing after all after getting through the compatibly phase. Just hope the labs indicate it that way. I want so much to return to a normal life, get back to a career that I can enjoy and feel... almost human!  Now, to the bench for a little R&R.  Jeff |
|
pantherf..-Email Not Valid
Full Member
  
Member since: July 2013
"Best Job I've Ever Had"
Posts: 1,253 
|
Post by pantherf..-Email Not Valid on Jul 15, 2014 17:36:02 GMT -5
I never thought about this until I reached this stage, but what is the best adhesive to use for clear windows? They are kit supplied windows... so I think they are styrene. Is it best to install AFTER painting, because I can see and do that. I use liquid cement and I am afraid the capillary action will ruin the window. Gluing it in afterwards could be accomplished with some strong white glue? But I want some advise on this one (my baby) and then some more trucks are in the near future!  Jeff |
|
|
|
Post by TRM on Jul 15, 2014 17:44:33 GMT -5
Hi Jeff! Glad to here things might be working out for you on the health side of thins...got fingers still crossed for you buddy!
As for the windows...if you are unsure about installing with thin cement or CA, go with that white glue (PVA). Try to use as little as possible just to keep bleed out to a minimal. It will dry clear and strong as CA. Not that you want to spend any more money than you have to...MicroScale has Krystal Klear which is a PVA but has some extra qualities you might like. It dries clearer than the standard PVA and on small window and opening requiting faux glass...this can be stretched with a toothpick to make a window.
Good luck!
|
|
pantherf..-Email Not Valid
Full Member
  
Member since: July 2013
"Best Job I've Ever Had"
Posts: 1,253 
|
Post by pantherf..-Email Not Valid on Jul 16, 2014 7:31:34 GMT -5
Thanks for the tips! Did a bit of work last night on the Grad. 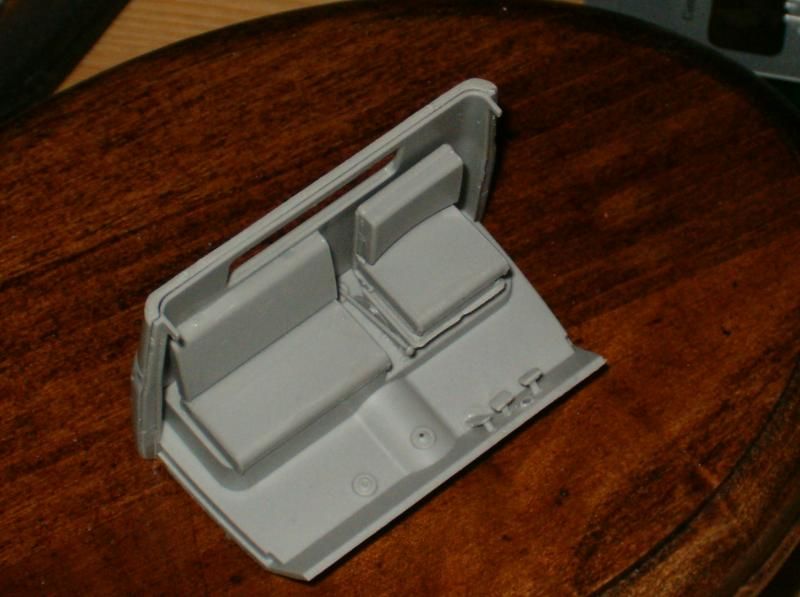 Slowly I am getting there!  Jeff |
|
|
|
Post by wbill76 on Jul 16, 2014 12:59:58 GMT -5
Good to hear the treatment isn't kicking you too hard Jeff. Good to see some progress on the Grad.  |
|
|
|
Post by bullardino on Jul 16, 2014 14:19:54 GMT -5
Really nice Jeff
|
|
pantherf..-Email Not Valid
Full Member
  
Member since: July 2013
"Best Job I've Ever Had"
Posts: 1,253 
|
Post by pantherf..-Email Not Valid on Jul 17, 2014 16:54:03 GMT -5
Oh my gosh guys. I spent about 40 minutes on it today, and the interior was the target stage to complete. There were about 9 pieces to complete something that is attached to the dash on the passenger side that I have no idea what it is... Infra-Red or a separate radio system? Then I looked a little further on that step and there are smaller than pin-head sized knobs that are in styrene and in PE that must be used. WTF?!!! How can they be cut out let alone be cemented in?
This has memories of that Bronco Tankette (yes, the one I dug out of the trash) that had spark plugs to attach to the engine. Holy crap... I gotta skip some of this or go blind for sure OR spend all day looking for them when they spring out of my hands. LOL
I thought I was doing good gluing the dashboard vents made out of PE in there... gawd, now I need that drink Andy!
(pictures later... I think)
Jeff
|
|
|
|
Post by TRM on Jul 17, 2014 17:07:55 GMT -5
No worries brotha. Don't make it more complicated in your head than it needs to be.
You said PE and Styrene? First I would say if you have any small styrene rod or if you want to stretch some sprue, cut the styrene ones you self unless you can get them off the sprue with little effort.
The PE are not to bad either. If you have a hard cutting surface, take some painters tape, tear off one piece and flip it so the sticky side is up and then use two smaller pieces of tape to tape this to the cutting surface. Lay the PE sheet on it where the knobs are, cut them off with a sharp razor. The tape will keep you from losing them.
For the CA and PE Application...What you want to do is use either a small gauge piece of wire, pin or something small you don't mind getting clue on. If you dip the wire in the CA and just lightly touch the spot where it is to go, leave a tiny drop for the piece. After you carefully removed the PE knobs, you can do one of two things...a sharp #11 will pick the piece up if you just stick the tip to it. Place it on the CA and you are done. The other method is a toothpick. Wet it with you tongue lightly, touch the piece and it will pick it up and then attach it where you want.
The same applied for the styrene but you can use thin cement or CA if you like. An extremely fine brush is used to put the cement in the spot you want. If you keep another clean brush handy, after the part is placed you can use the second brush to quickly wick the extra cement away with a quick touch!
If you need me to explain anything different, let me know...or I can take some picks!!
|
|
pantherf..-Email Not Valid
Full Member
  
Member since: July 2013
"Best Job I've Ever Had"
Posts: 1,253 
|
Post by pantherf..-Email Not Valid on Jul 17, 2014 19:59:21 GMT -5
Oh, you're so right and thanks for the eye openers! Check out the latest from PMMS: www.perthmilitarymodelling.com/newkitnews/panzershop.htmlScroll down to the bottom... the BAT-2 Combat engineer vehicle and the 2K52 Luna-M / Frog- 7 short- range ballistic missile wheeled system have everything I need.  Jeff |
|
|
|
Post by TRM on Jul 17, 2014 20:15:59 GMT -5
That BAT-2 is kickin' Jeff!! Very cool! And comes with all the bells and whistles!! LOL!! Nice sticker too..only $215!!  Not sure I want to dump that on one right now!! But it is really cool!!  |
|
|
|
Post by Leon on Jul 18, 2014 16:26:47 GMT -5
Glad to hear your doing well Jeff and making progress on the Grad.   |
|
pantherf..-Email Not Valid
Full Member
  
Member since: July 2013
"Best Job I've Ever Had"
Posts: 1,253 
|
Post by pantherf..-Email Not Valid on Jul 19, 2014 9:14:49 GMT -5
Thanks Leon and Todd. Time to see what else I can stress over today! (just kiddin') It's more of a challenge for me than anything as I enjoy building 1/16 more. I think $215 is a lot of money for anything, but if it has everything you like and are looking for than I would rather have one project cost that than 4 or 5 $60 kits that really do nothing for me. And it's resin so the challenge is on.  Jeff |
|
|
|
Post by TRM on Jul 19, 2014 11:09:48 GMT -5
I think you are right there Jeff. After buying a high end kit (if they ever made something like this) and buying lets say one PE set and a set of Froot-loops the price tag would be close to that, no question. I would like to see more about their cast before I dump the money ...LOL!! Having a look around for reviews and such!!  |
|
pantherf..-Email Not Valid
Full Member
  
Member since: July 2013
"Best Job I've Ever Had"
Posts: 1,253 
|
Post by pantherf..-Email Not Valid on Jul 19, 2014 19:49:50 GMT -5
Exactly! Well, here's what I have so far... minus those knobs and levers I was talking about.  Especially the right side dash mounted equipment. One of which they had you "close up" but I wanted it opened as there is some detail there that I wanted to see.   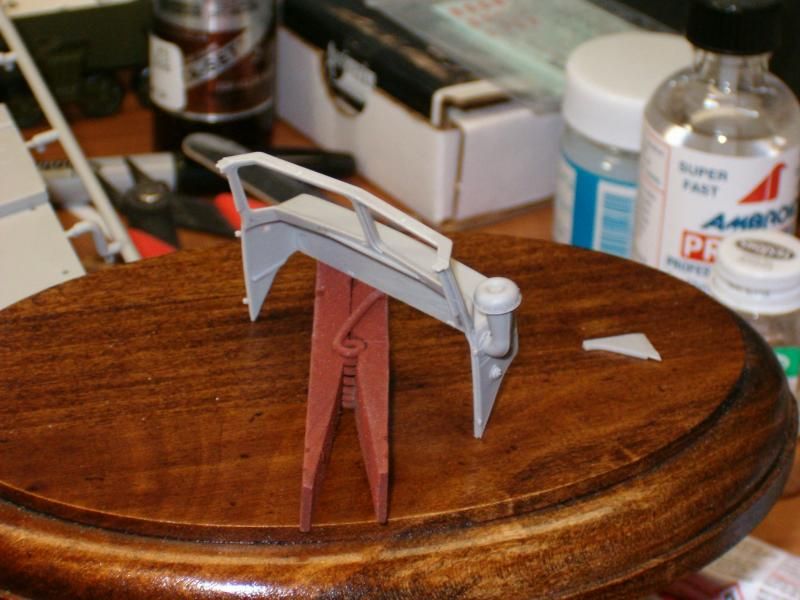 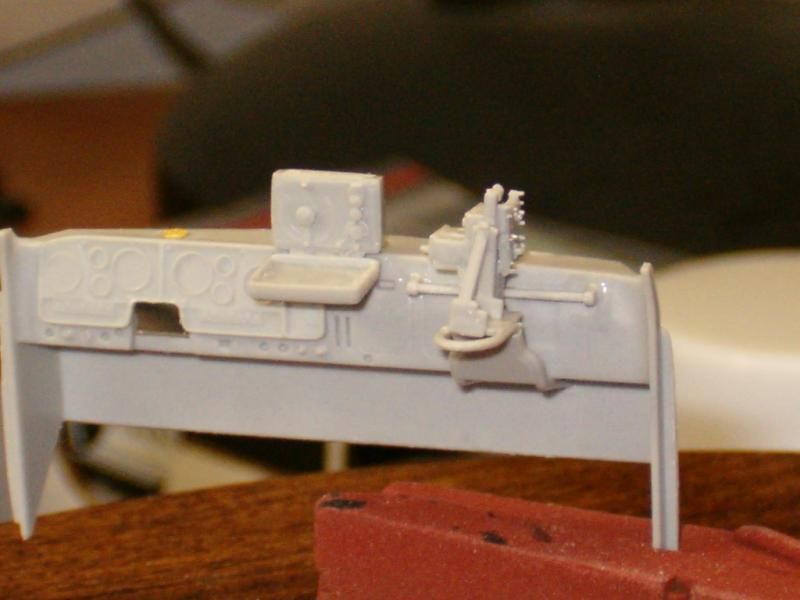 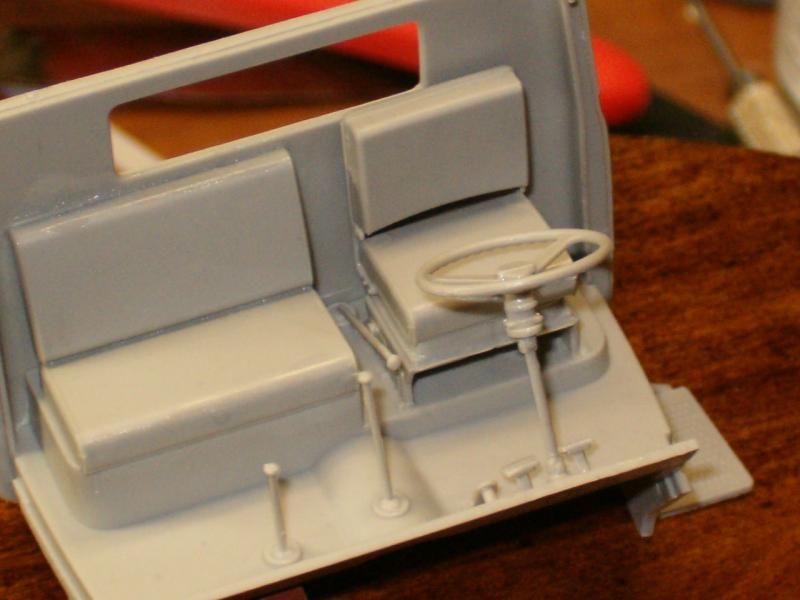 Most will all collide together soon and will paint the interior as there is a dash decal that must be placed. I'll get the knobs and levers in place before all that. Jeff |
|
|
|
Post by Leon on Jul 19, 2014 20:12:38 GMT -5
Dash is coming along nicely Jeff,going to look great under paint.   |
|
|
|
Post by imatanker on Jul 20, 2014 2:42:33 GMT -5
Well, that's really coming along nicely Bub.  Keep at it. Good work with the PE. |
|
|
|
Post by TRM on Jul 20, 2014 9:25:05 GMT -5
Looking good there Jeff!! You will overcome the Tiny Little Buggers!!  |
|
doogsatx/
Senior Member
    Feb and Sept 2014_ MoM Winner
Member since: November 2012
Posts: 1,642
Nov 14, 2012 21:29:10 GMT -5
Nov 14, 2012 21:29:10 GMT -5
|
Post by doogsatx/ on Jul 20, 2014 9:38:30 GMT -5
Looking really good so far! Frustrating though that they've gone with decals for the gauges. Some acetate gauges would really pop in there, I think!
|
|
|
|
Post by wbill76 on Jul 20, 2014 16:38:36 GMT -5
Looking good on that cab interior Jeff. Just don't have the collisions be too energetic and you'll be just fine.  |
|
pantherf..-Email Not Valid
Full Member
  
Member since: July 2013
"Best Job I've Ever Had"
Posts: 1,253 
|
Post by pantherf..-Email Not Valid on Jul 20, 2014 19:35:29 GMT -5
Thanks guys!  Well I took some of Todd's suggestions and removed not just the part, but the attached pour line to the part to cement it to the correct spot... then when dried I will snip it clear and then sand it clean. I took maybe 7 shots of this but I guess the camera is crap and the color just gets' washed out. Worked on the doors and will add more knobs and levers later! 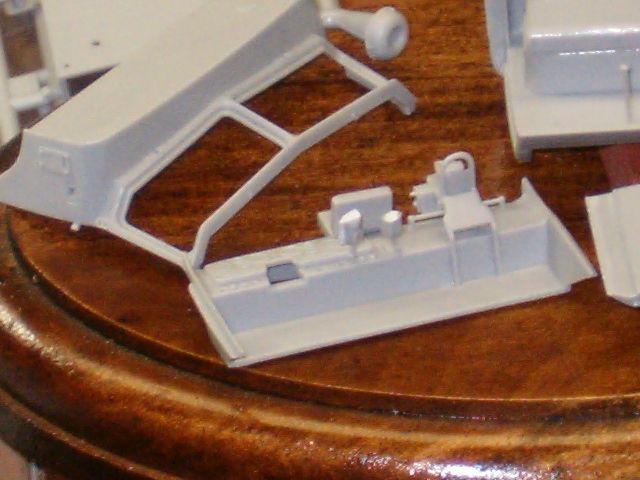 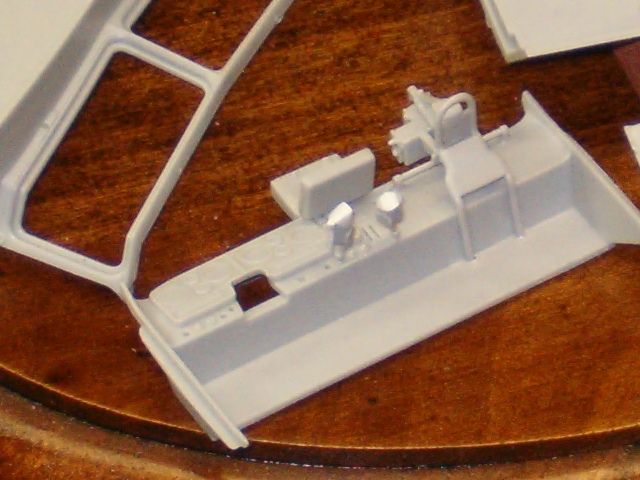 More later.  Jeff |
|
|
|
Post by deafpanzer on Jul 20, 2014 20:04:48 GMT -5
Catching up here... making nice process there!
|
|
|
|
Post by dupes on Jul 20, 2014 21:19:58 GMT -5
I would like to see more about their cast before I dump the money ...LOL!! Having a look around for reviews and such!!  Todd - I have two Panzershop kits...they are nothing but spectacular. If you want to take a look at them, let me know and I'll bring them to one of the shows this fall. |
|
|
|
Post by bullardino on Jul 21, 2014 3:05:10 GMT -5
Wow, what a job on the dashboard Jeff.
|
|
pantherf..-Email Not Valid
Full Member
  
Member since: July 2013
"Best Job I've Ever Had"
Posts: 1,253 
|
Post by pantherf..-Email Not Valid on Jul 21, 2014 6:23:56 GMT -5
I would like to see more about their cast before I dump the money ...LOL!! Having a look around for reviews and such!!  Todd - I have two Panzershop kits...they are nothing but spectacular. If you want to take a look at them, let me know and I'll bring them to one of the shows this fall. Now I want to have a "look see" too!  Jeff |
|