|
|
Post by wbill76 on Jul 13, 2014 7:59:11 GMT -5
Happy Star Wars Day everyone, May the 4th be with you!  Ok, so now that's out of the way, work continued on the pocket Tiger by virtue of getting the interior weathering completed and the components ready for final assembly into the hull. I stippled some Burnt Umber to simulate scuffs/scrapes on the Panzer Interior Buff surfaces then applied a light wash of Raw Umber over that for general grime/dirt. Once that had dried, I dry-brushed more of the Panzer Interior Buff to blend things back in a bit and then joined the transmission housing and rear bulkhead with the floor and installed the commander's seat in position. 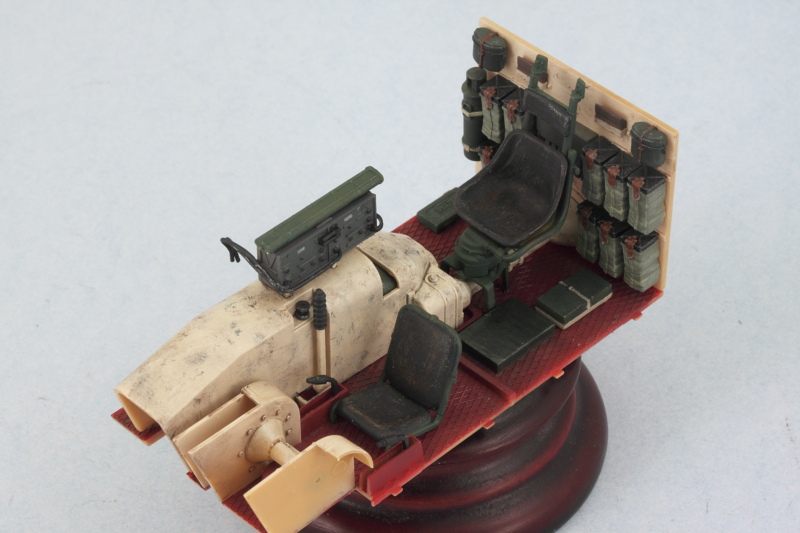 The hull sides got the same weathering treatment and I hand painted some of the primer red for the escape hatch opening rims as reference shots show a marked color contrast here which makes sense when you consider how the hatches closed. 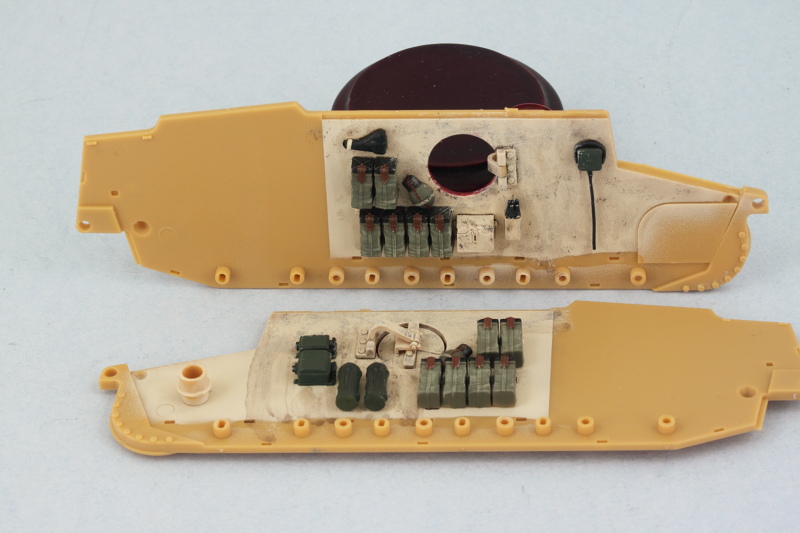 Getting all the hull components together requires some careful thought due to the way the suspension installs. Each swing arm has its own torsion bar that has to fit into a socket on the opposing hull side, so I decided to install the fighting compartment floor and interior first so that it would help hold the hull sides together, then installed the torsion bars while I could still access them from the underside. 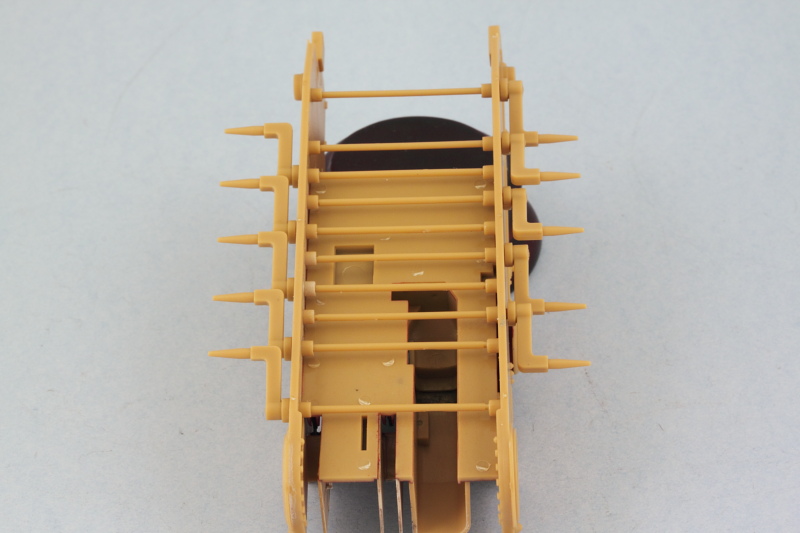 While the hull still had some flexibility to it, I added the hull bottom and rear plates, carefully slipping their tabs into position on one side and then gently flexing the other side until they slid into place. 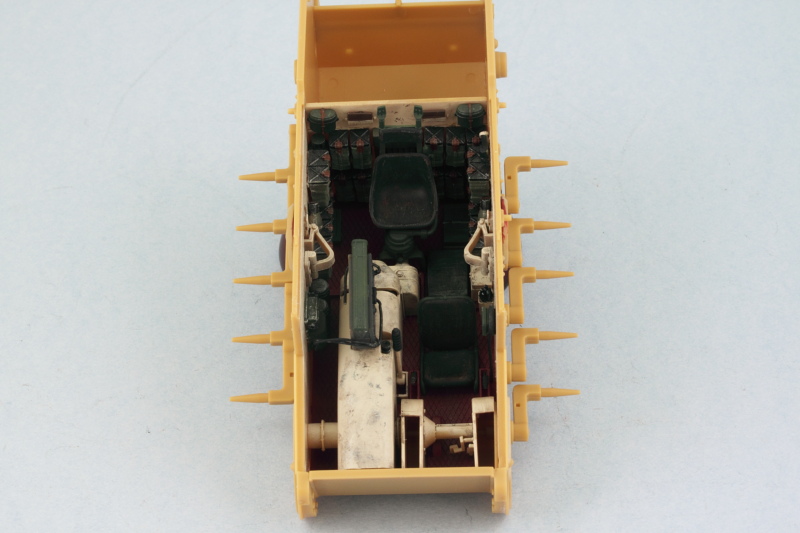 No exactly spacious accommodations by any stretch! 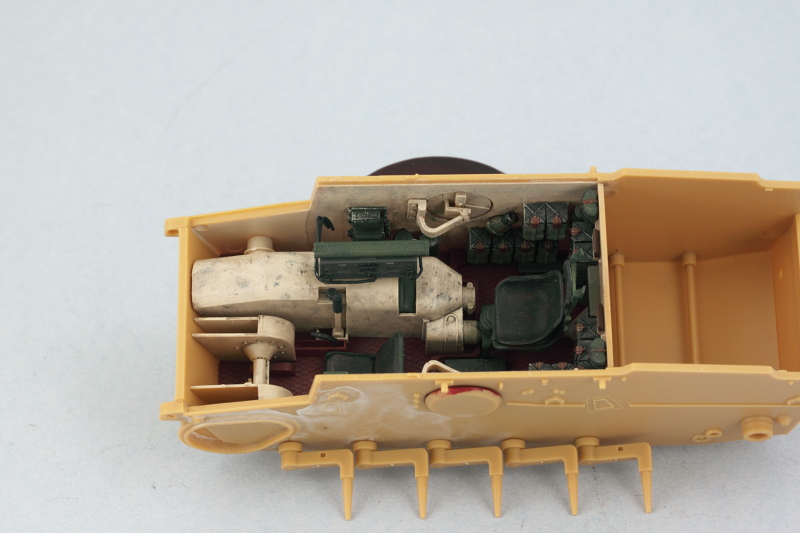 And just for grins, I tested out the side escape hatch and it works flawlessly. 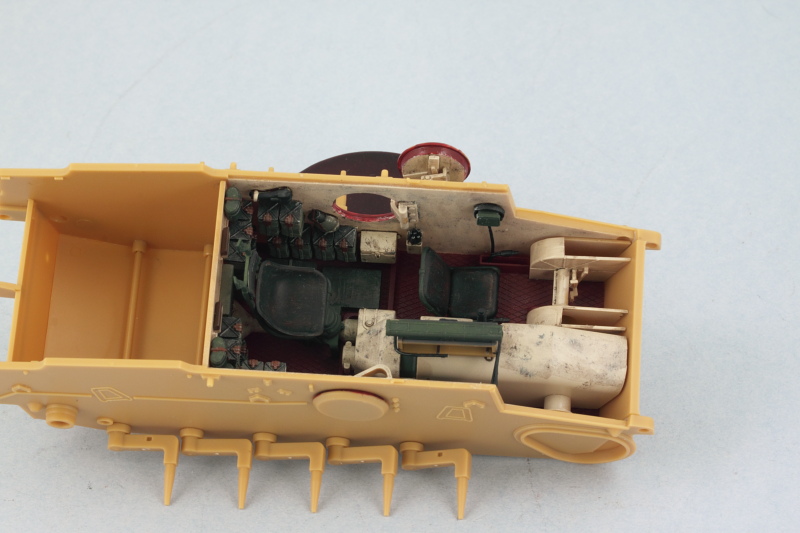 One key element of the working suspension is to ensure that they sit at the right height. Working quickly before the glue set from the previous effort, I added the shock absorbers and used the already assembled road wheels to ensure everything was playing nice in this department. I let that set up overnight to be sure there wouldn't be problems down the road.  Returning back to the remaining interior bits, some test fits with the front compartment panel showed that the Bronco engineered tolerances were very tight. The added wiring on the radio that I put in interfered with the little side gauge on the driver's panel, so I had to sand it down a mm or two to adjust. The main instrument panel was also installed at this point and the compartment roof received the driver's head crash pad and side-facing periscope. 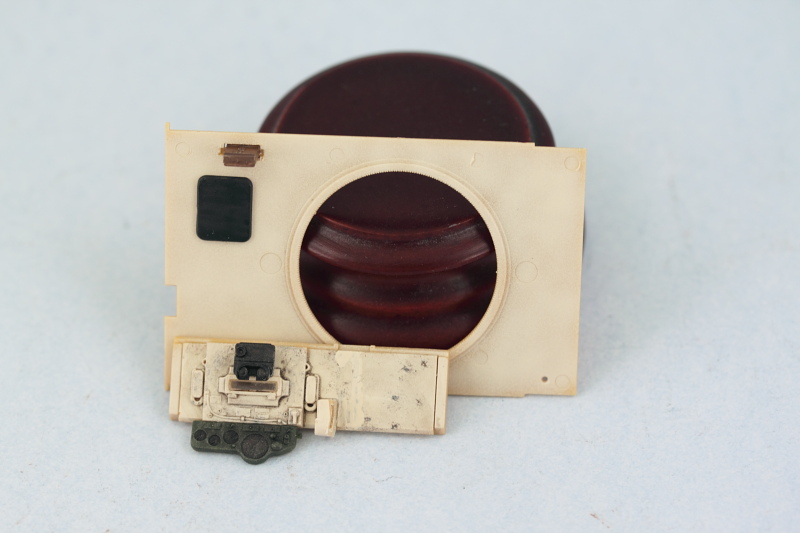 Then the moment of truth, the glacis, compartment front panel, and compartment roof were all installed. The rear part of the hull had a tendency to flex out a bit at the top so a rubber band was used to ensure that all set up nice and square. 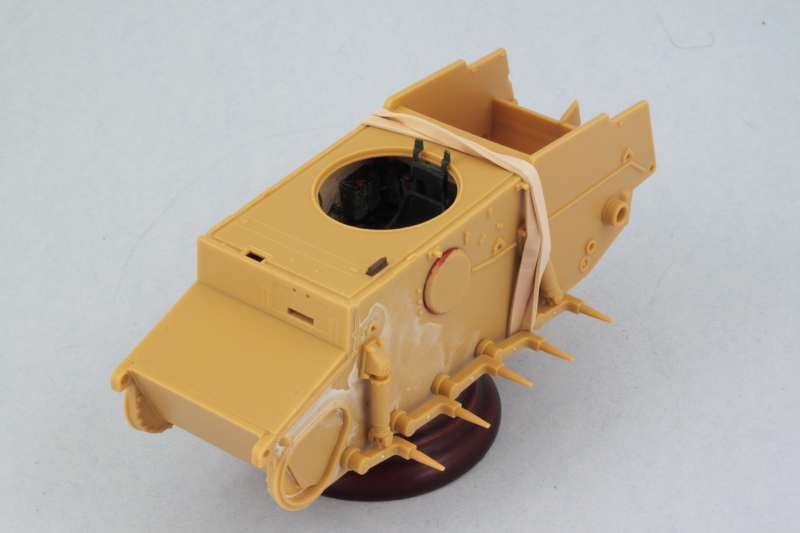 Once that had set up, I added the engine compartment access panels and rear hull top plate. I found it easiest to install the hinge plate part first so that it met up squarely with the rear hull plate and then added the 4 access hatches afterward. These all have to line up just so with each other between the hull sides with no gaps and again Bronco has this down pat with the engineering. The PE screens were installed using liquid glue around their edges to soften the kit plastic and give them something to grip onto. 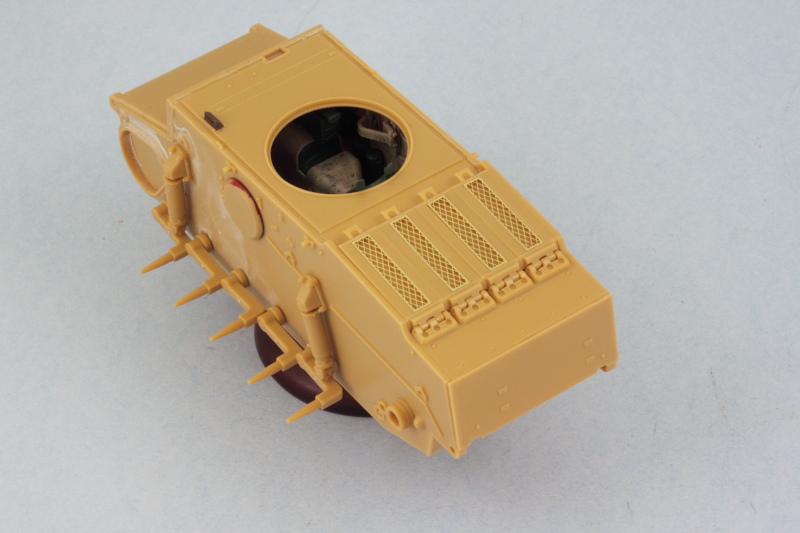 Rounding out this session, I returned to the hull front and added the tow shackles, final drive housings, and the armored visor for the driver's view port. The visor is shown here in the closed position but remains workable which will be handy for painting later on. I also added the little PE vent screen and the turret splash guard as well as the periscope guard for the driver's side periscope. The periscope itself received some blue-tack poster putty masking to protect its face later on in the painting stages. 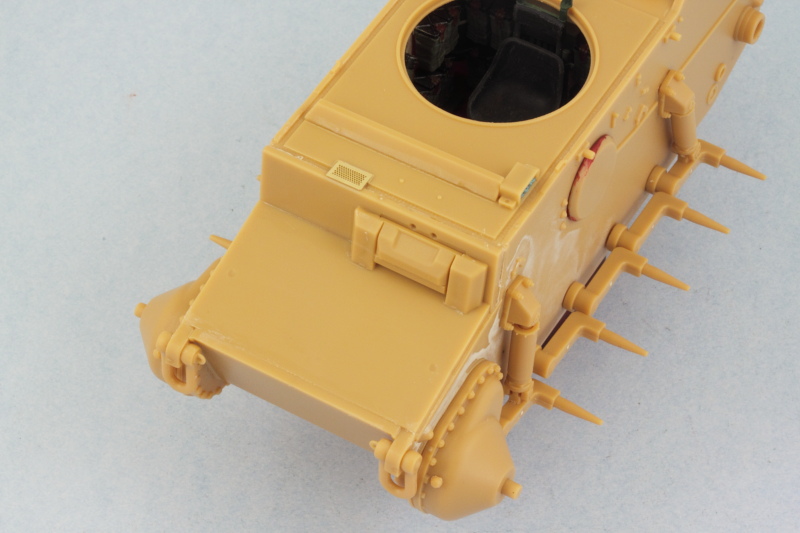 |
|
|
|
Post by wbill76 on Jul 13, 2014 7:59:43 GMT -5
Made some more progress today on the exterior details although, as usual, didn't get quite as far as I would have liked but that's the way the cookie crumbles. Picking up from last week, I worked on the rear hull plate as called for in Step 6. The smoke grenade box is a multi-part affair that doesn't have any locating points provided for the different parts of the box so some careful work was needed here to assemble it square and then mount it on the hull. The kit-supplied PE spare track holders were mounted in position after using a couple of the workable tracks as a guide to get them in the right spot. The pair of locator lines molded onto the plate are too far apart, so I used some Gator Grip glue to give me some work time and the ability to adjust the position to the right separation. The exhaust and heat shield were also added at this point. 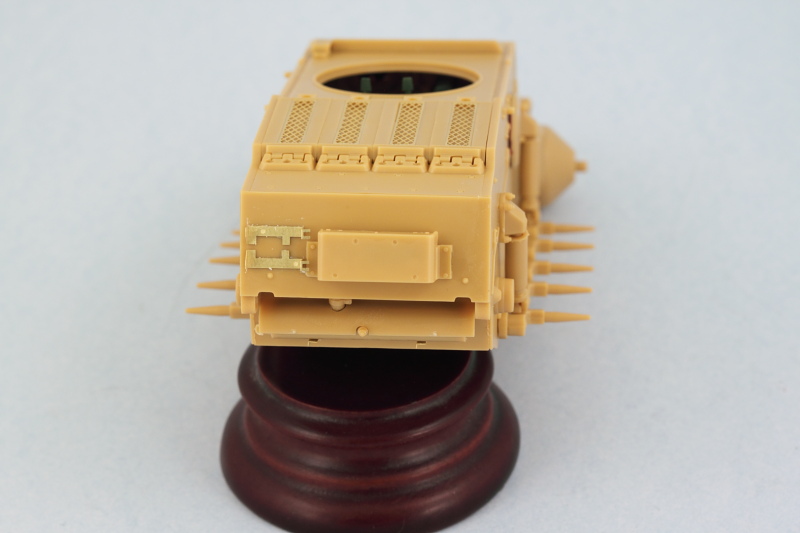 Next up were the fenders, Bronco gives you a choice for the front fenders between ones with and ones without the front mud flaps. I opted for the ones without as the reference photos I've found show some with and some without them on a regular basis in the field and I thought it would give it a 'meaner' look to have them off. In the instructions, Steps 13 through 17 deal with the fender sections and their relevant details. Bronco would have you install all the details onto the fenders first and then add them to the hull but that makes life pretty challenging especially for painting and detailing, so I made some adjustments. Starting with the front portions of the fenders, I installed the fenders themselves first to the hull and used a small bottle of paint to support the edges to keep them from sagging until the glue set. Then all the various details were added except the fire extinguisher and jack block which will come later. 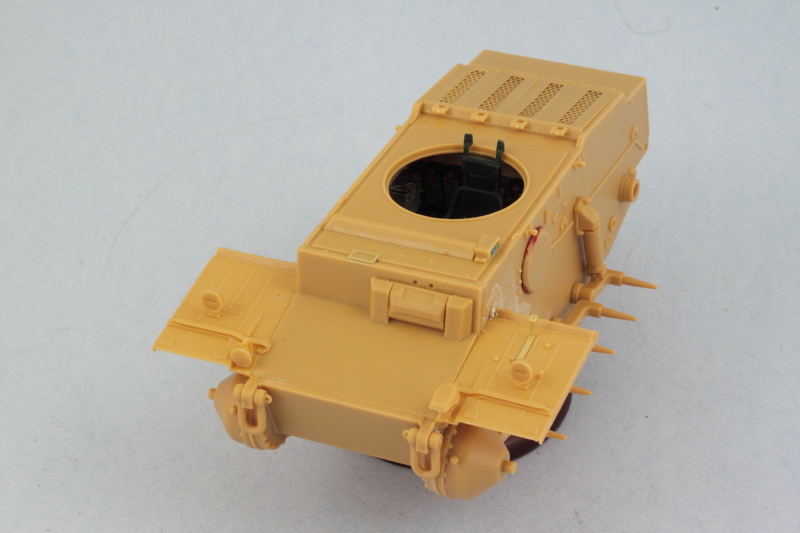 While the front fenders set up, I also worked on the rear fenders. Same approach as the front, I added the fenders only to the hull and let them set up. The rear mud flaps were added and their PE stops installed along with the rear Notek light and brake light. The lights have very delicate PE mounts with tiny contact surfaces so hopefully they won't go missing between now and the finish! 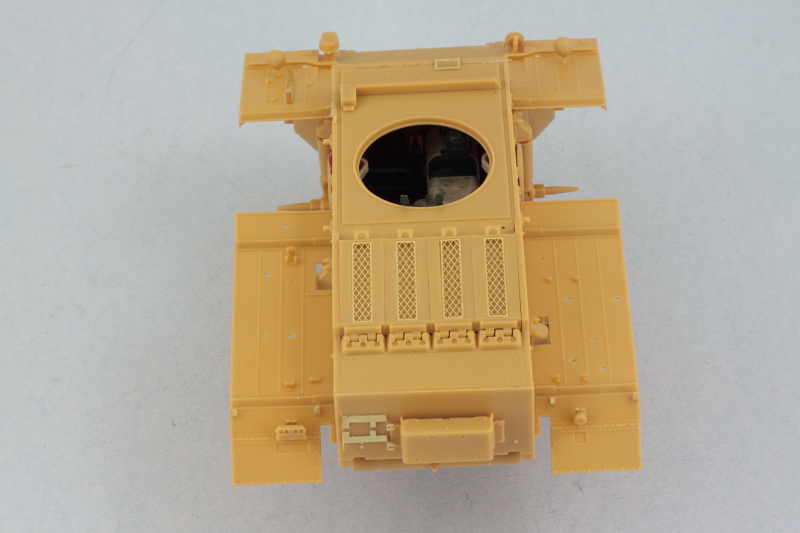 Just a few small details to add to the hull sides around the crew escape hatches and then it will be time to tackle the turret and get it ready for painting. |
|
|
|
Post by wbill76 on Jul 13, 2014 8:00:13 GMT -5
Made some solid headway on the remaining details on the pocket Tiger, although as usual I thought I would get further along than I did because this little kit is deceptive in the amount of time it takes to assemble all the little detail parts and get things just so. Part of that is the need to assemble a little bit, let the glue set, then come back and assemble some more. It means a lot of jumping around to different areas and I'm rapidly running out of those, so there was more 'wait' than 'hurry' this time around. On to the fun! Progress continued on the fenders, I cleaned up all the necessary tools, assembled the boxes, and the jack. Bronco has you assemble two stowage boxes out of 6 parts each...4 sides, top, and bottom, and have to say I'm not a fan of that approach. I got the large one together pretty easily but the smaller one didn't play nice at all...and after checking references, it doesn't appear either of those boxes were commonly used in the field and only show up on the 'factory yard' photos...so I ditched them. This has the added benefit of also showing off the tools on the left side which otherwise would've been covered up by the larger box. The tools fit very tightly together on the left fender so I used the Bronco-supplied PE clamp handles and didn't replace the clamps completely as test fits showed that my Griffon clamps were larger and wouldn't work in the space available on this fender. Some putty filled the mount hole for the smaller box that I'm not using. Tools are only dry-fit for now and will be detailed separately. 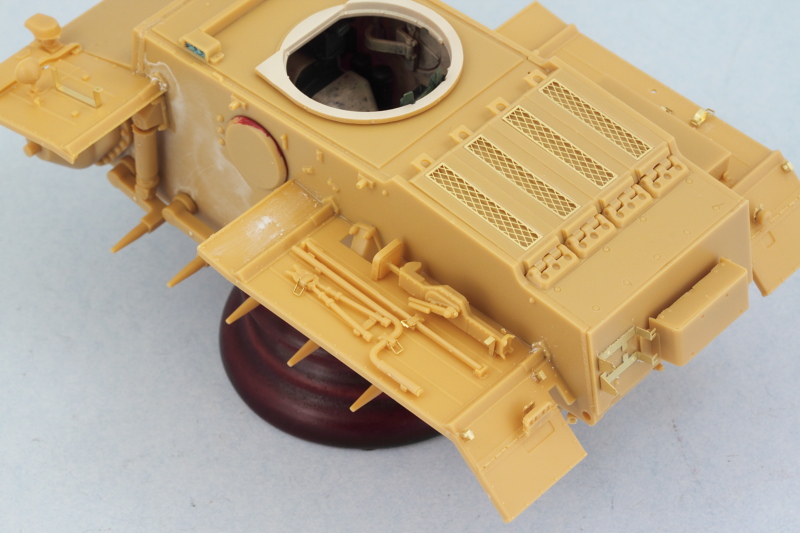 The right side fender got more attention. Bronco has the clamp for the shovel in the wrong spot according to the layout shown in Panzer Tracts 1-2, so I shaved down both it and the axe and replaced their clamps with Griffon PE clamps. The clamps are closed and the handles of both tools can be carefully slid in and out, so I can detail the tools separately off the vehicle and install permanently later. 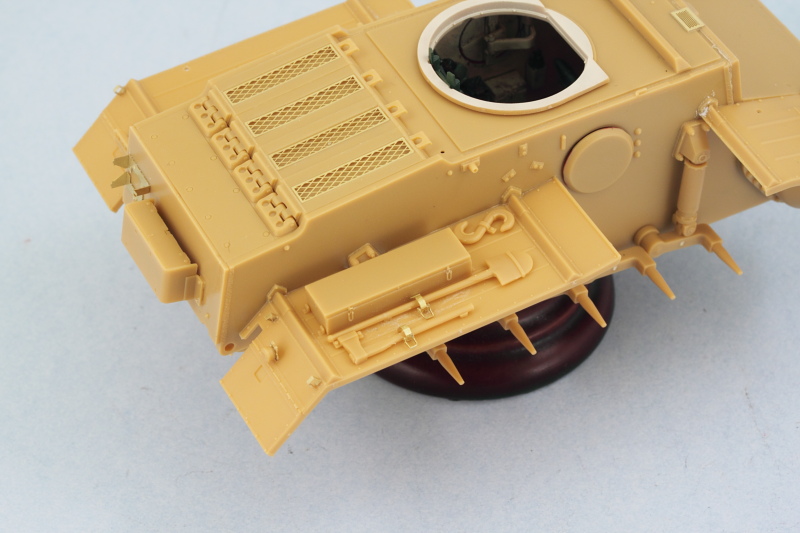 The last little remaining details for the hull were added in the form of the PE hooks for the tow cable mounts, the side hatch grab handles, and the antenna base. The antenna base was drilled out to prep it for an RB brass antenna later on, the kit supplied item is too short for a standard German antenna. I had planned to fit tow cables since the kit doesn't provide them but the PE hooks don't appear to be sturdy enough for me to carry through on that. In hindsight, these would've been better off removed and some strip brass used to create a stronger hook but once the fenders were fitted, getting at the molded on ones to remove them is near impossible...so no cables for this baby. 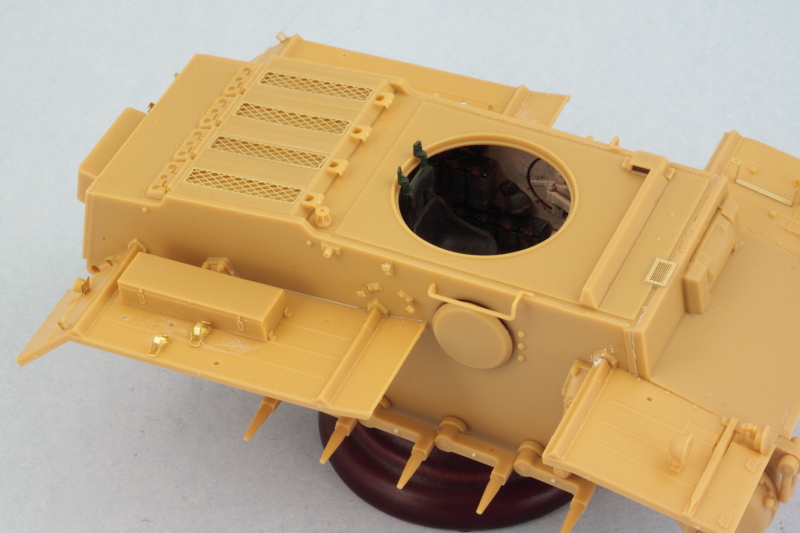 Attention also turned to the turret details, I assembled the external mantlet's MG sleeves and their little guards. The kit instructions would have you add the guards to the sleeves first and then install the sleeves to the mantlet but I did the opposite to avoid damaging them as they are a little fragile until the glue sets up. The MGs were assembled and these babies are very nicely detailed...but that also means lots of little parts for them, so these were done in stages. The instructions would have you add the ammo bags to the guns and then install the guns into the mantlet from inside the turret, but after doing some tests it's possible to install the guns into the mantlet first, then install the mantlet and guns to the turret, and then add the ammo bags from below, so that's the way I will do it. 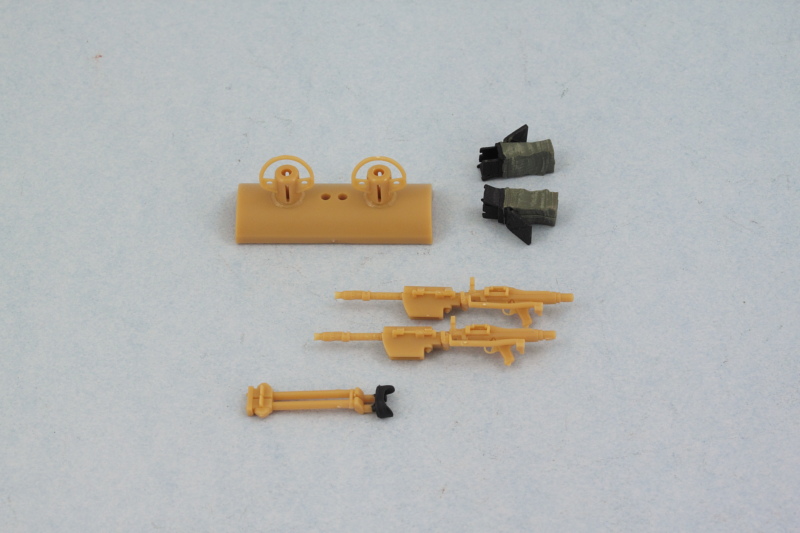 Last but not least for the day, the turret was weathered and the commander's periscopes detailed and installed. 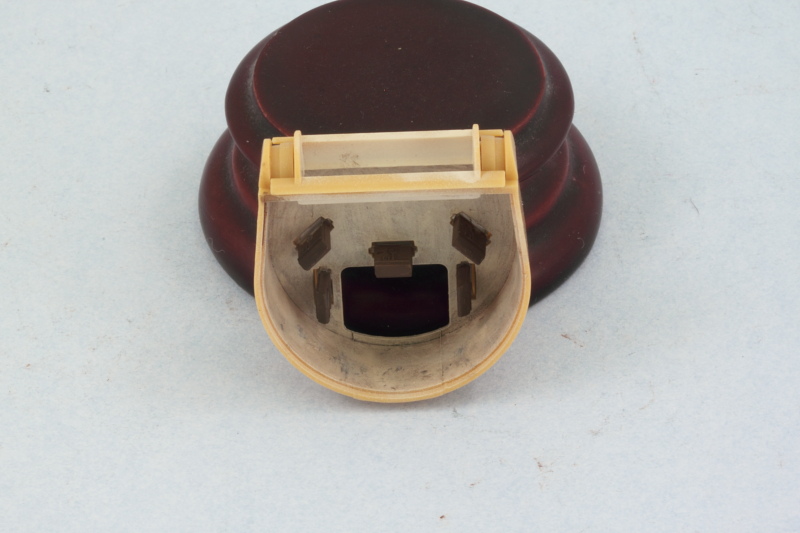 Next up will be finishing the details on the guns and the turret bottom and then getting the turret together so exterior painting can commence. |
|
|
|
Post by wbill76 on Jul 13, 2014 8:00:45 GMT -5
The long holiday weekend means more bench time than usual and I'm taking full advantage of it! Of course it's more than a three-day weekend, this is also a chance to remember those who have given the ultimate in service to their country and I'd be remiss without acknowledging that and also extending my respect and admiration for all our men and women who serve in uniform. The last remaining detail on my pocket Tiger is the turret. Earlier I'd mentioned that I was deviating a little bit from the Bronco instructions in terms of the assembly order and I elected to detail and install the twin MGs and sights into the mantlet first and then add the ammo bags after it was in place. This provide to be a good call as it made it much easier to detail them and install them properly into the mantlet while doing test fits along the way to make sure everything played nice with the rest of the turret interior. The MGs were detailed with Testors Model Master non-buffing Metalizer Gunmetal and then lightly dry-brushed with enamel Steel for their finish. 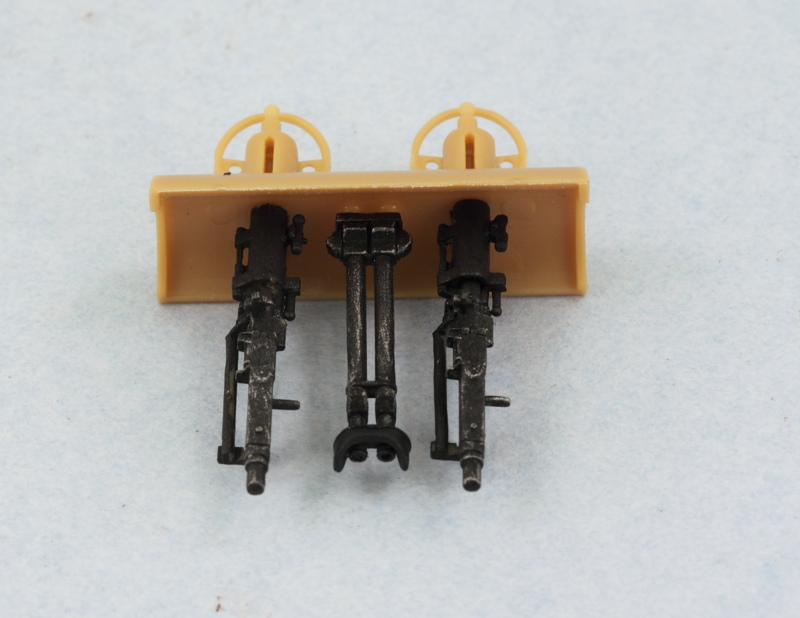 Here's the bottom up view of the turret after the mantlet was installed and the ammo bags added. I also need point out an instruction diagram-induced error that you can see in this pic. Notice that slight gap at the bottom of the mantlet? Turns out way back when I installed the rear part of the mantlet, part D44, into the turret, I used the instruction diagram as a guide and it shows the larger part of the piece on the bottom with the thinner piece on top. Problem is that the external mantlet is designed to fit that part the other way around...and the MG barrel sleeves are keyed as are the MG mounts on the inside to specific alignments...which will result in everything being upside down. Not a good thing...and once I realized the problem, it was no good trying to get the mounts out and flip it around...so I had to trim the part instead to allow it to fit correctly and remove the 'extra' that hung over the bottom...and produced that slight gap. Once painted it will look fine and of course will only be visible if the turret is off and flipped over...but a word of caution to anyone coming along behind!  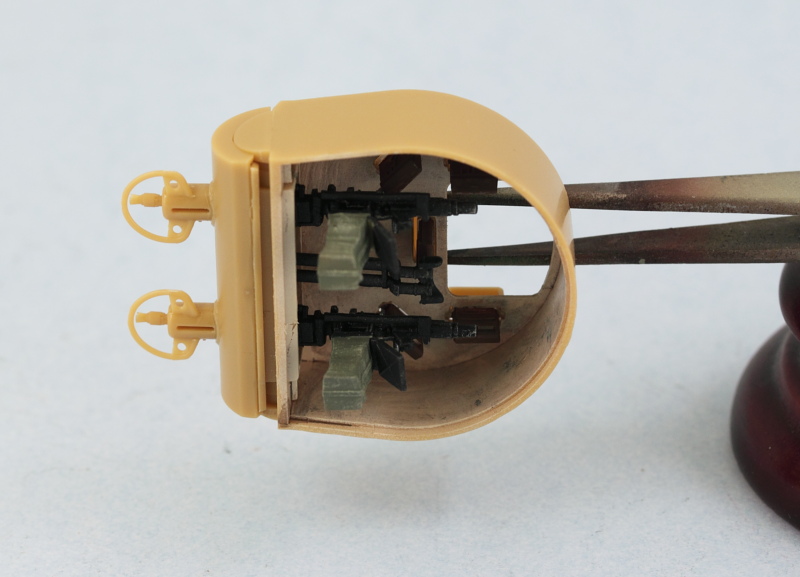 The base of the turret came next. The elevation and traverse wheels and gears were assembled and installed...they are delicate multi-part assemblies and were actually done last weekend and left off to the side to fully dry before handling. They were detailed and installed and the underside given a dose of red-oxide primer. After the paint was dry, the turret floor was installed in place. 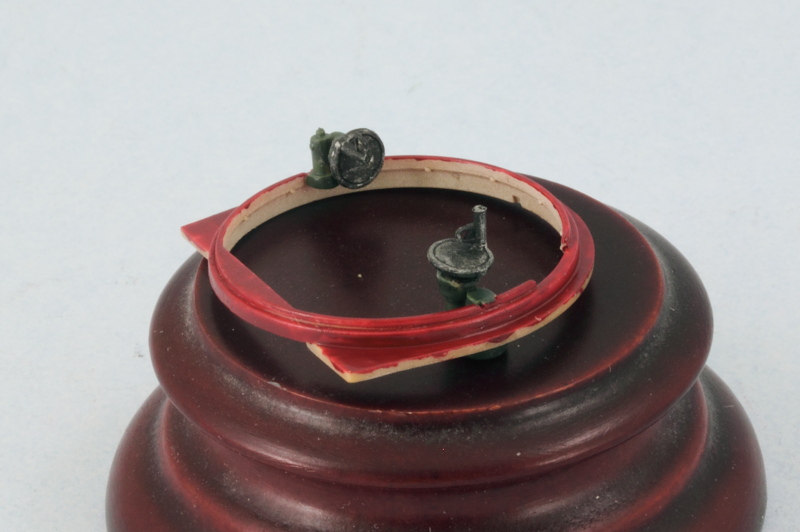 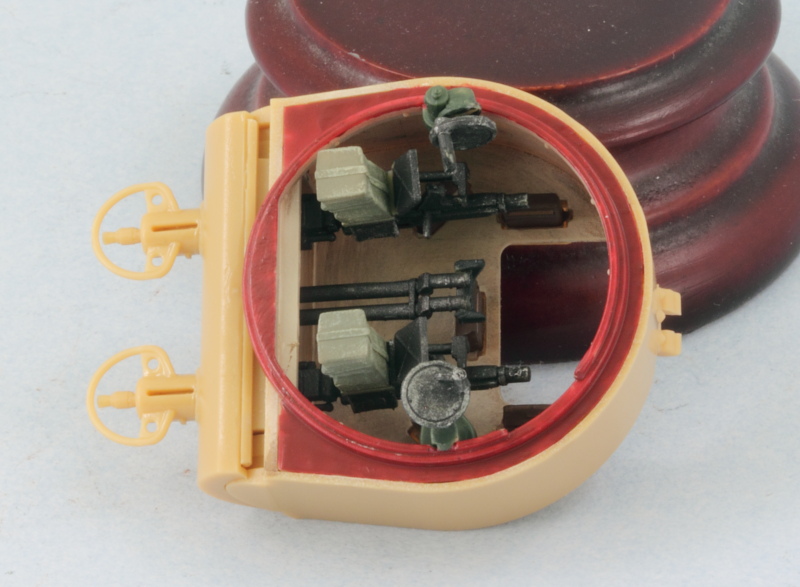 Moving back topside on the turret, I detailed the commander's hatch using a 50/50 mix of Light Gray/Panzer Dunkelgelb so it will match what eventually will be the vehicle's exterior color and detailed the head pad. Bronco designed the hatch to remain workable and relies on a tight friction fit on the hinge to achieve this. A small note, the hatch stops on the edge of the turret swiveled on the real vehicle but Bronco has you position them in the 'open' stance, so a word to the wise if you decide to pose your hatch closed.  Mine will be left open on the final display but will be kept closed during painting to help protect the interior. The add-on armor for the turret was also installed along with the lifting eyes to round things out. 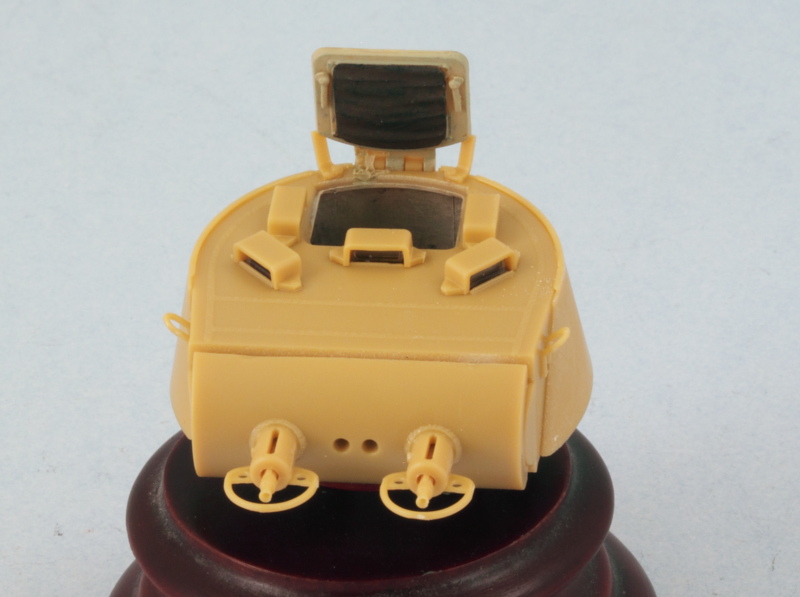 The key to the add-on armor is that it only touches the actual turret at the top edges and where the angled front pieces meet the turret sides. Be careful with the fit at the back, reference photos showed this was smooth so after the glue set, I did some light sanding to remove the join line that is inevitable. 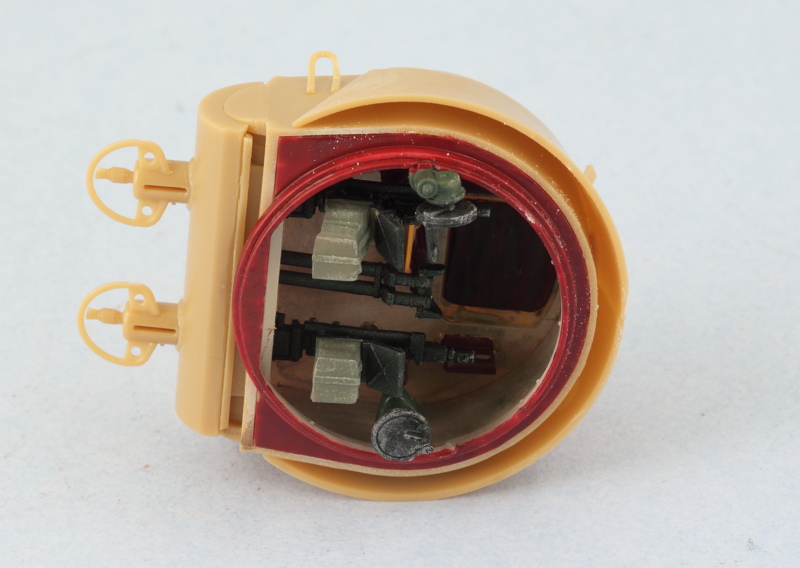 A quick test fit shows the turret sits properly in the hull and can be easily removed for painting and detailing...just have to remember that the commander's chair supports stick up slightly so you have to use the turret ring to push that forward slightly when you go to add the turret in place. The turret will rotate but not 360 degrees obviously because of interference with other detail items in the turret hull and the fact that the commander's chair itself doesn't rotate with the turret, so don't try to do too much here or you may knock something loose in the process! 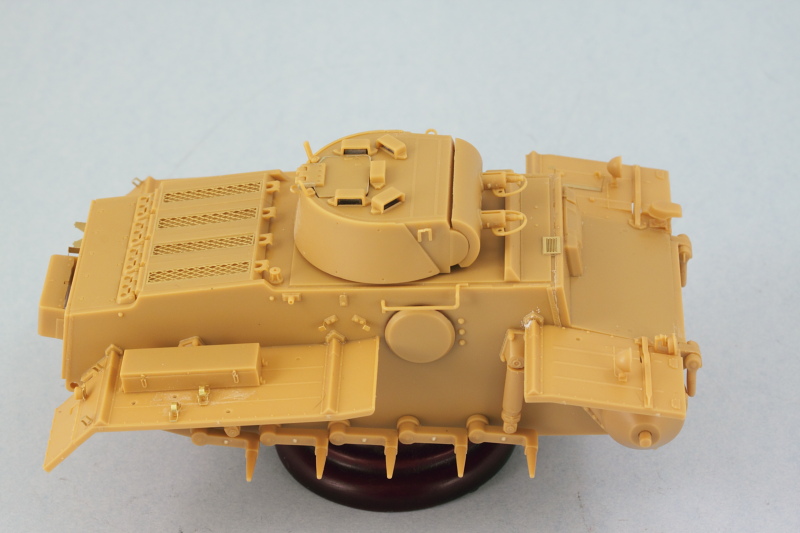 Next up will be getting everything ready for paint! |
|
|
|
Post by wbill76 on Jul 13, 2014 8:01:16 GMT -5
Made some more progress over the last couple of days in the paint-slinging department. First up was the usual prep work to get things ready...so some poster blue-tack was used to mask off the wheel mount points on the suspension and to create the ever-necessary 'wheels on a stick' for those components. I also used very small amounts of the blue-tack to mask the periscope faces on the turret and some painter's blue tape on the fighting compartment interior and it was time for paint. 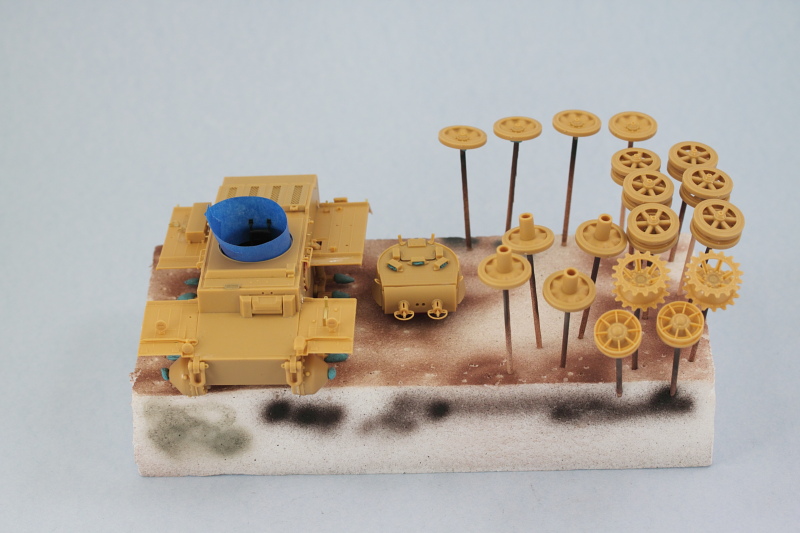 First up was a primer coat of MM enamel Italian Dark Brown. 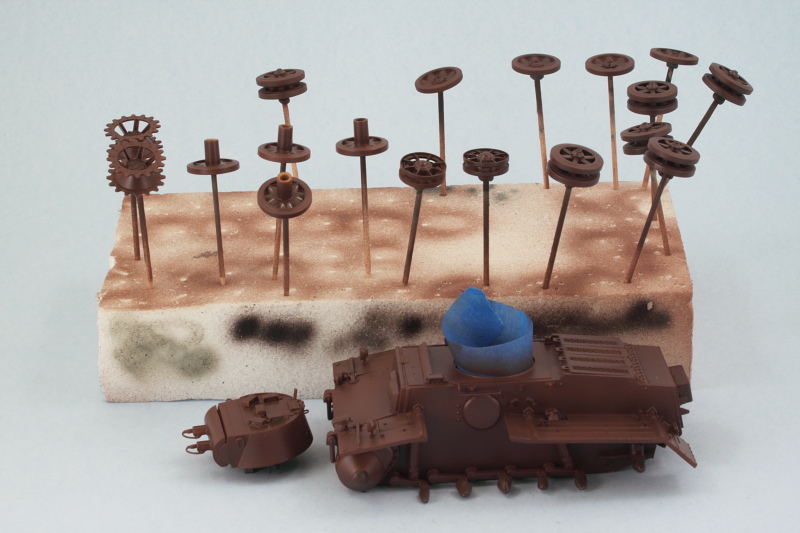 Then a base coat of a custom mix of 50/50 MM enamel Light Gray/Panzer Dunkelgelb. 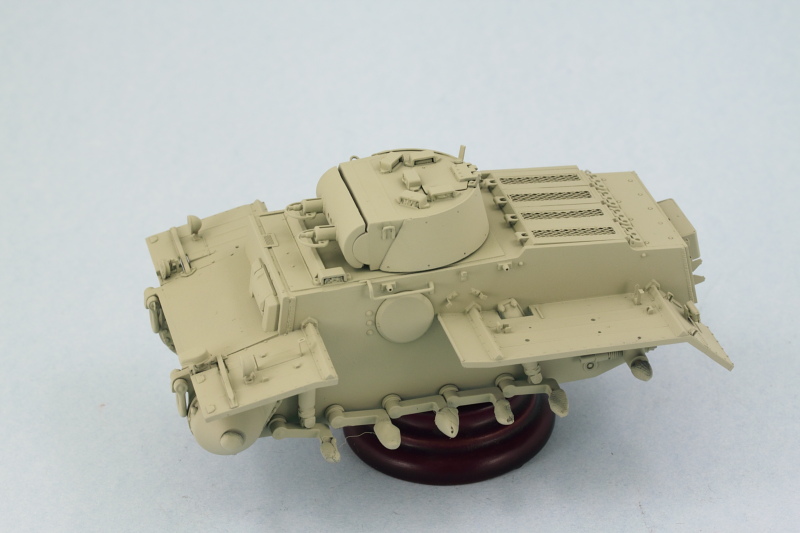 Road wheels got their rubber rims done after the primer coat using MM enamel Gunmetal. The hubs were masked using a draftsman's circle template and the base coat airbrushed on the outer facing wheels while the inner surfaces were left in the primer color. 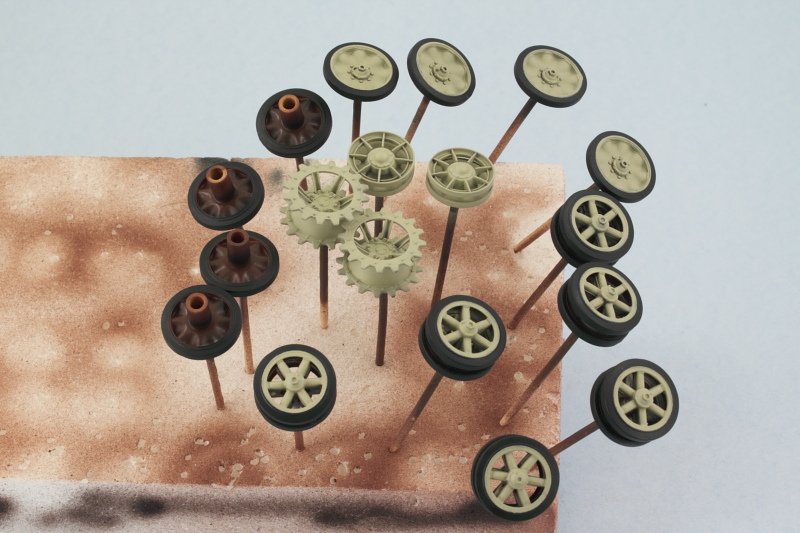 Next up will be applying the camo pattern. |
|
|
|
Post by wbill76 on Jul 13, 2014 8:02:26 GMT -5
More paint progress to report today. Camo pattern is on. I applied it free-hand and used MM enamel Khaki for the green splotches first then added the brown splotches with a custom mix of 50/50 MM enamel Leather and Military Brown. Some adjustments with the basecoat mix here and there and then a light misting coat of highly thinned basecoat mix to tie it all together. 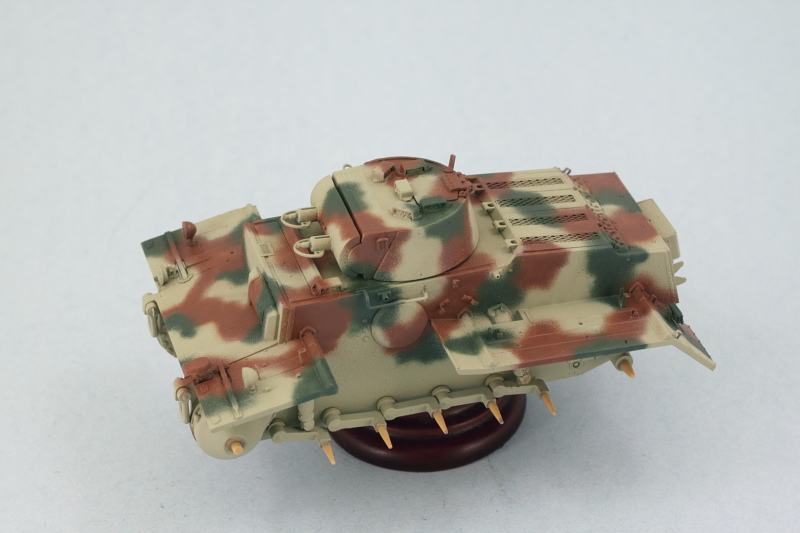 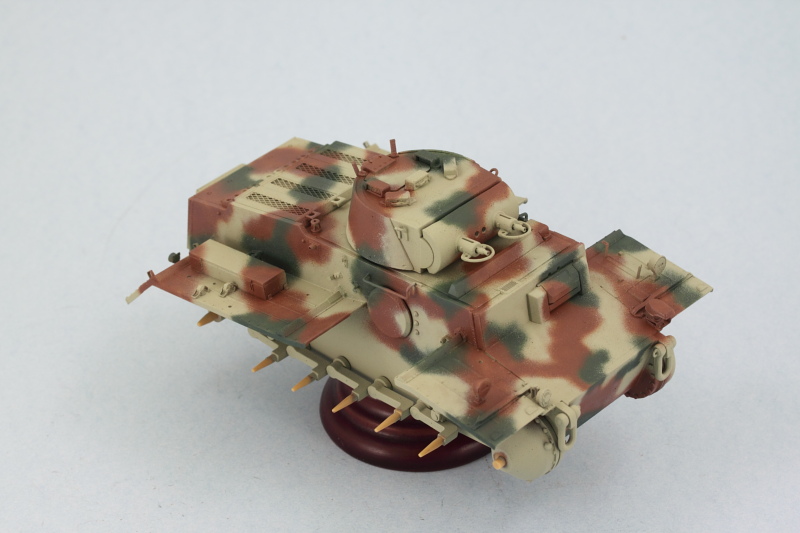 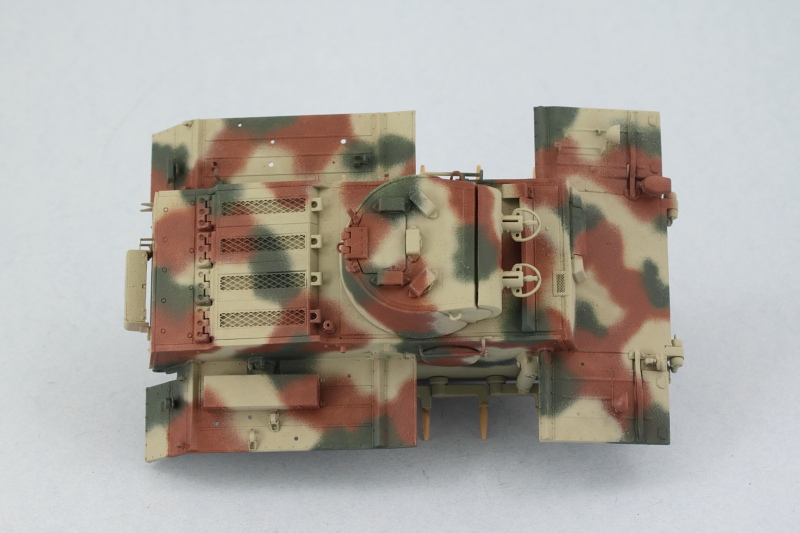 Next up will be getting the suspension installed and start work on the other remaining details. |
|
|
|
Post by wbill76 on Jul 13, 2014 8:12:44 GMT -5
More progress to report, this time in the suspension and tracks department. I removed all the blue tack that had masked the mounting points and then did some 'pre-weathering' on the lower hull and suspension areas. I stippled some enamel MM Burnt Umber to create some scuffing/chipping given where the tracks would run and likely wear that would occur. Much of this area is going to be obscured by the road wheels but some of it will still be visible and of course more weathering will be applied later with pigments. 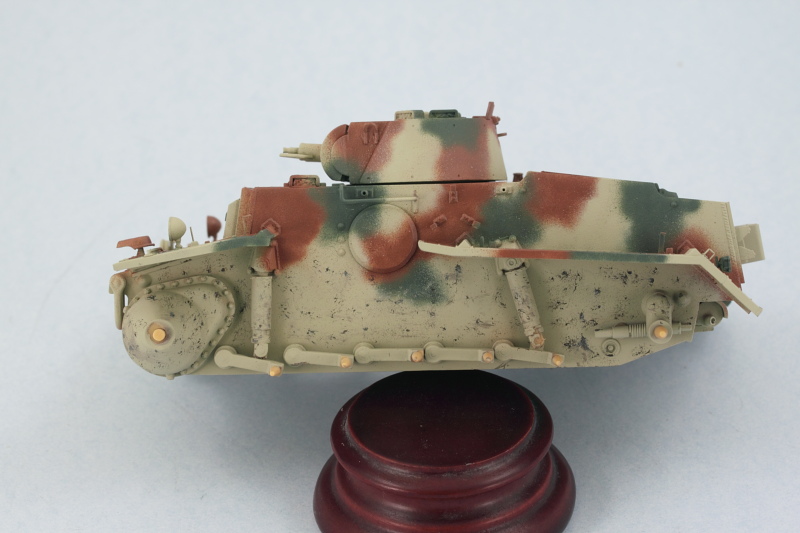 Next up where the road wheels, these were installed and the track runs used to ensure that the outermost wheels set up level since their attachment points to the inner hubs isn't very large and the wheels have a tendency to bow out slightly as a result. The contact surfaces on the sprocket teeth and idler wheel were treated with a base of non-buffing MM Metalizer Steel and then dry-brushed with enamel Burnt Umber to create their foundation for the later weathering. The sprockets were carefully glued in place on the rotating pins so that they could move freely to facilitate fitting the workable tracks. The idler wheels aren't adjustable in terms of their position so they weren't glued down and only dry fit to make sure everything lined up correctly. 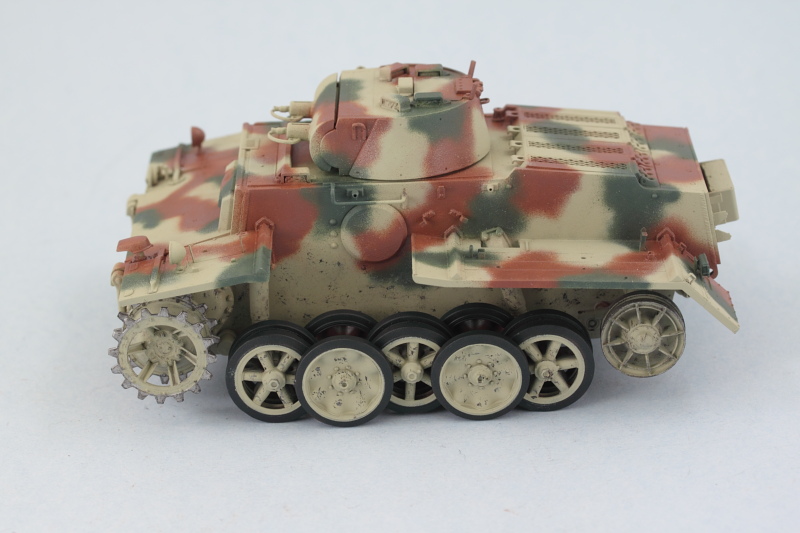 Earlier when I was airbrushing the primer coat I got a little ahead of myself and also airbrushed the 60-link runs with some MM enamel Burnt Umber. I say I got ahead because they hadn't been test-fitted to the suspension yet and I knew I was going to need more links, just not sure how many...so these will get some more paint attention now that the runs are the right length. Bronco's instructions call for 66 links per side but I only needed 65 per side to get the right amount of sag. If you do use 66, then the idler will have to be modified to be adjustable to take up the extra slack of that added link...you can do that by removing the raised pin on the tension rod (part F28) that the idler attaches to. This will allow the idler to move in its mount but of course the rod won't adjust with it...not a big deal really but I didn't need to do this since the 65 links worked out just fine. 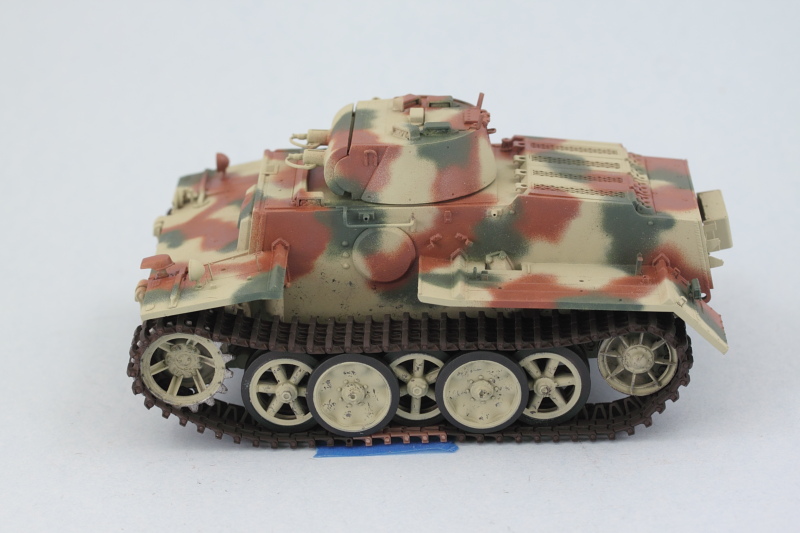 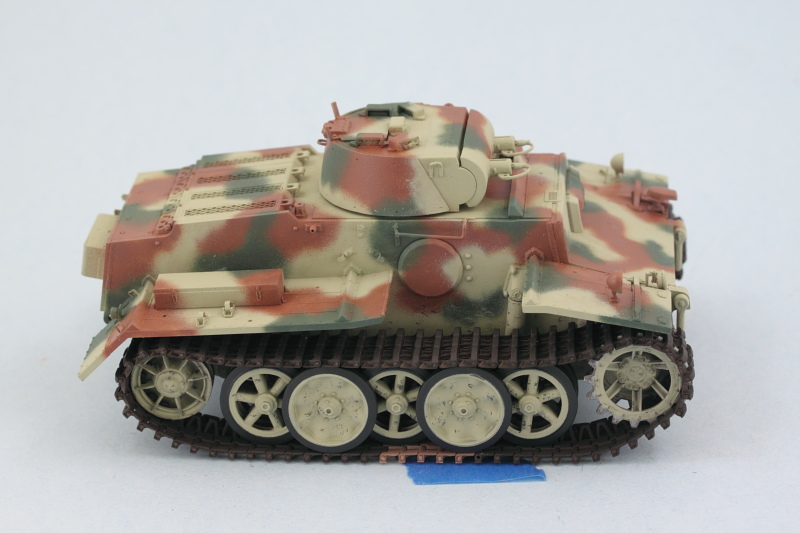 Tracks will get more weathering attention later as well before their final installation. Baby's got her shoes on now! |
|
|
|
Post by wbill76 on Jul 13, 2014 8:13:08 GMT -5
Today's 'regular' Sunday update isn't too heavy on pics but does cover an essential step, the install of the on-board tools and equipment. All of the tools were hand detailed using different methods. For the metal portions, these were base coated with MM non-buffing Metalizer Gunmetal and lightly dry-brushed with MM enamel Steel. For the wood portions, these were base coated with the 50/50 Dunkelgelb/Light Gray mix used earlier and then given a light wash of MM enamel Leather followed by a dusting of Burnt Umber artist pastels to create their look. On the jack block, I scribed in some wood-grain detail using the point of a needle file to add some extra detail. Bakelite handles on the wire cutters and the engine crank were done with MM enamel Italian Dark Brown. For the jack and fire extinguisher, I mixed up a slightly darker shade of Dunkelgelb/Light Gray to provide some contrast for those parts as they would've come from a different manufacturer/supplier so their shade would naturally be different from the vehicle itself. For good measure, I also detailed the turret MGs while I was at it. So without further ado, here's where the pocket Tiger stands for now: 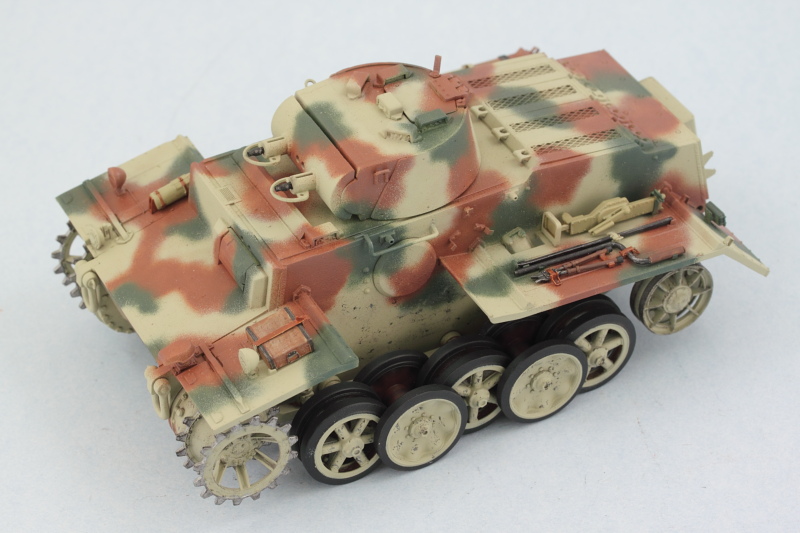 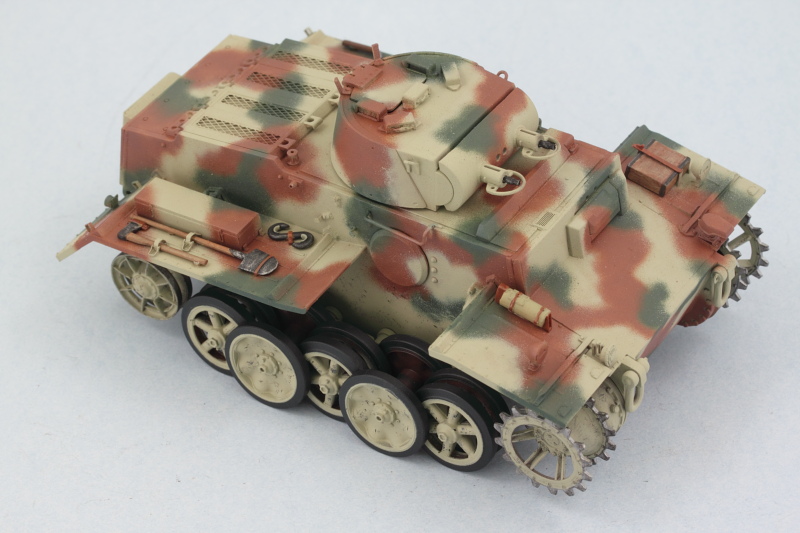 Next up will be working on the rear hull details like the spare tracks, exhaust, tail lights, etc. before this one's ready for the decals and the weathering process to begin. |
|
|
|
Post by wbill76 on Jul 13, 2014 8:13:51 GMT -5
Another round of progress to report! Finished off the details that were left on the rear hull. I detailed the two spare links using a combination of dry-brushed Steel, a light wash of Rust, and then some artist pastel treatment using various hues before installing them in place in the rack. Brake lights were picked out with Tamiya Clear Red and the exhaust weathered up to finish things up using a similar approach as that used on the spare tracks minus the Steel dry-brushing. 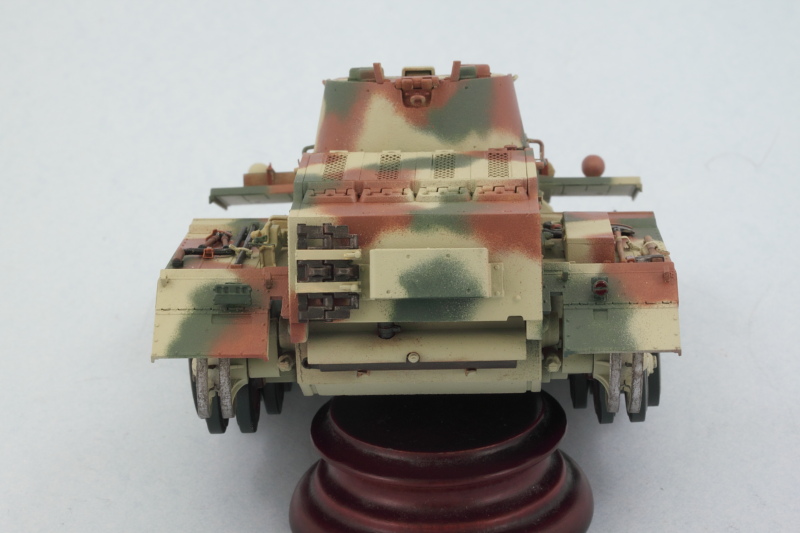 I also did some work on the track runs. These were dry-brushed with Steel followed by a wash of thinned enamel Raw Umber. More weathering to follow later on with the pigments of course. 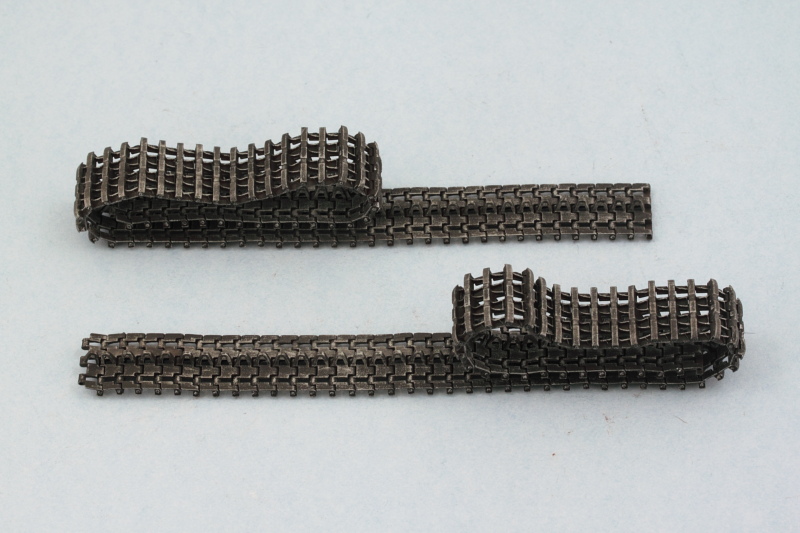 Then it was time to seal it all up with some Future to protect the foundation paint work and set the stage for the weathering. Airbrushed a Future coat and let that stand for an hour before applying the decal markings. Speaking of which, the kit-supplied decal sheet was a bit of a let-down. The sheet provides markings for three different vehicles but most of the crosses were printed off register...I was able to salvage enough from the different sets though to get a decent single set to apply to mine though it was a close thing. 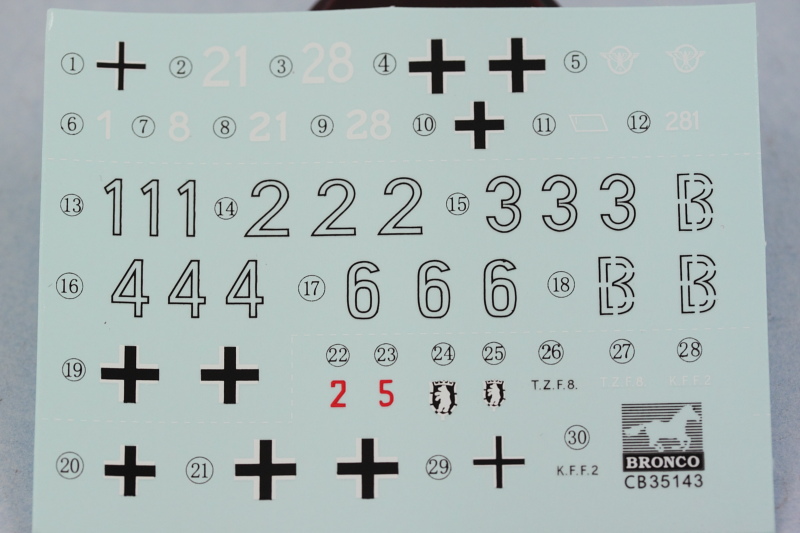 Markings were applied along with some Solvaset to help them snug down. I'll apply a 2nd coat of Future tomorrow to seal that all in and let that set up for at least 24 hours before going any further. Markings are for a vehicle with Panzer Regiment 1 in Russia, 1943. 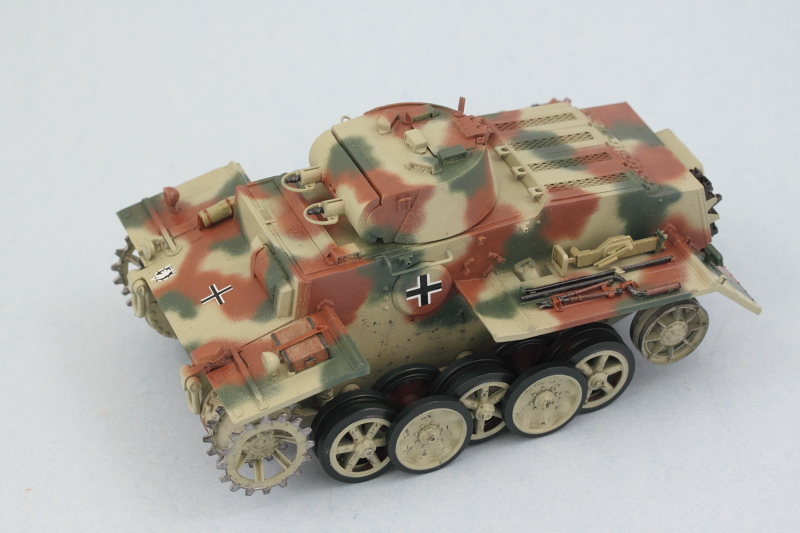 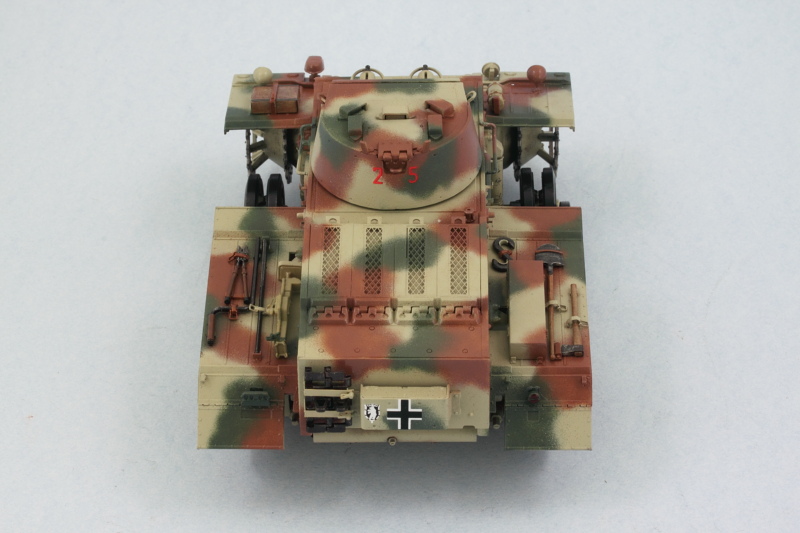 That's it for now, next up will begin the weathering adventure! |
|
|
|
Post by wbill76 on Jul 13, 2014 8:14:15 GMT -5
Picking up where I left off last time, I applied a second coat of Future over the decals once they had fully set and let that cure for a good 24 hours before starting in on the weathering process. First order of business was the application of a thinned MM enamel overall wash of Raw Umber (roughly 90/10 thinner-to-paint). 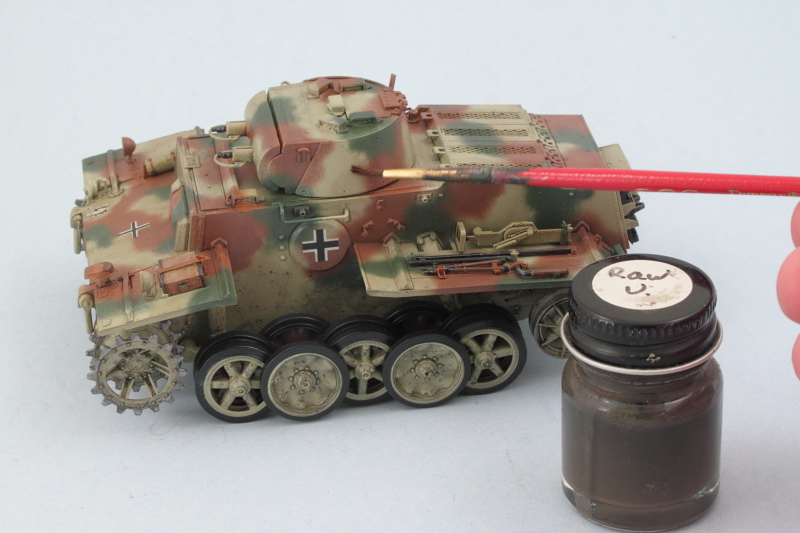 This inevitably darkens the overall finish but never fear, the next step addresses that using a dot filter approach. I applied small dots of MM enamel Light Gray, Raw Sienna, and the 50/50 base coat mix from earlier. The dots are blended together using a square brush lightly dampened with thinner to produce a nice filter and streaking result. I worked small sections at a time and wore a breather mask due to the high thinner exposure during this process starting at the front of the hull and working my way back. 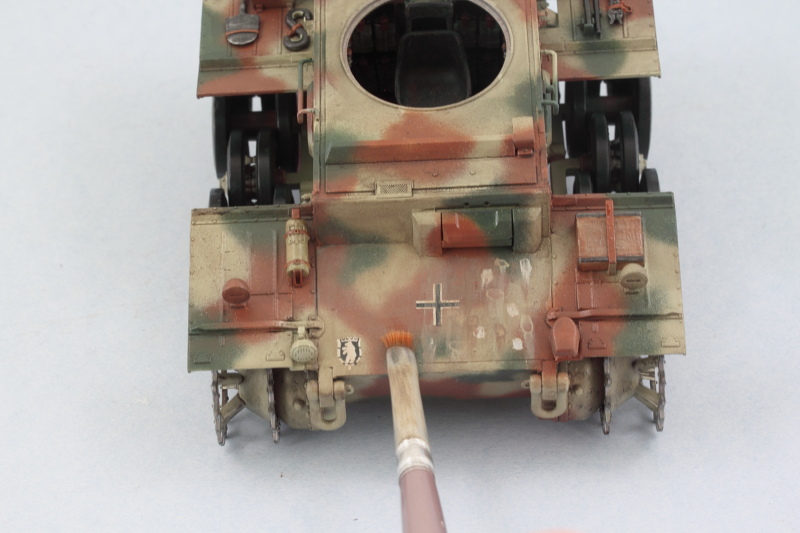 After a couple hours, the dot filter was done on the hull and turret. Next up will be a pin wash to bring out some of the detail further and get things ready for the pigment weathering stage on the suspension and tracks. 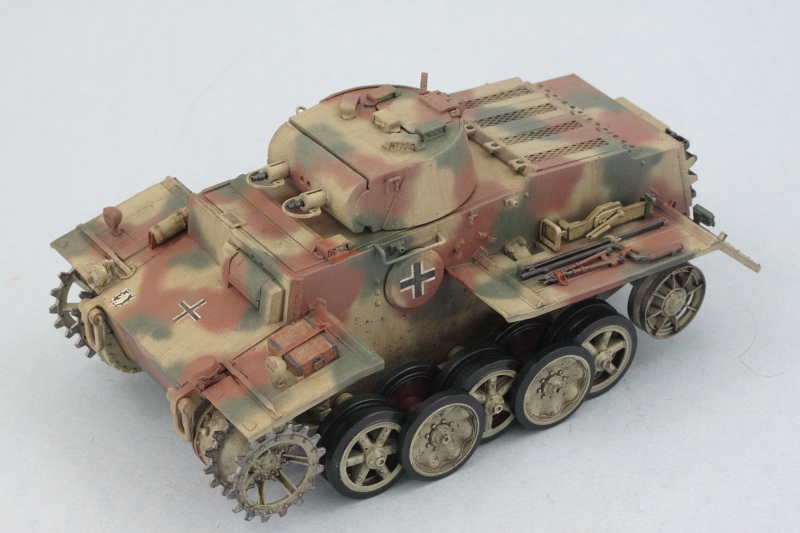 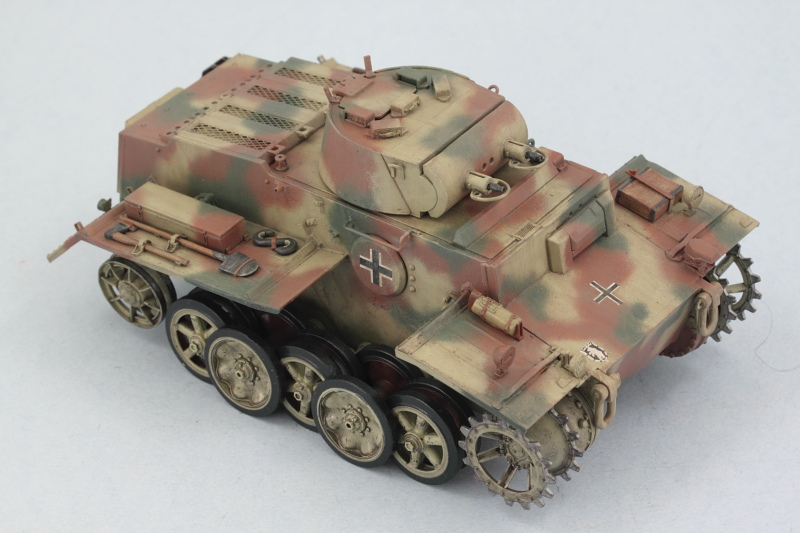 |
|
|
|
Post by wbill76 on Jul 13, 2014 8:14:42 GMT -5
Made some more progress on the weathering front. First up was the application of a pin wash using thinned MM enamel Burnt Umber and a pointed 10/0 brush to bring out the details. Excess wash was cleaned up here and there with clean thinner and the same brush to make adjustments where needed. 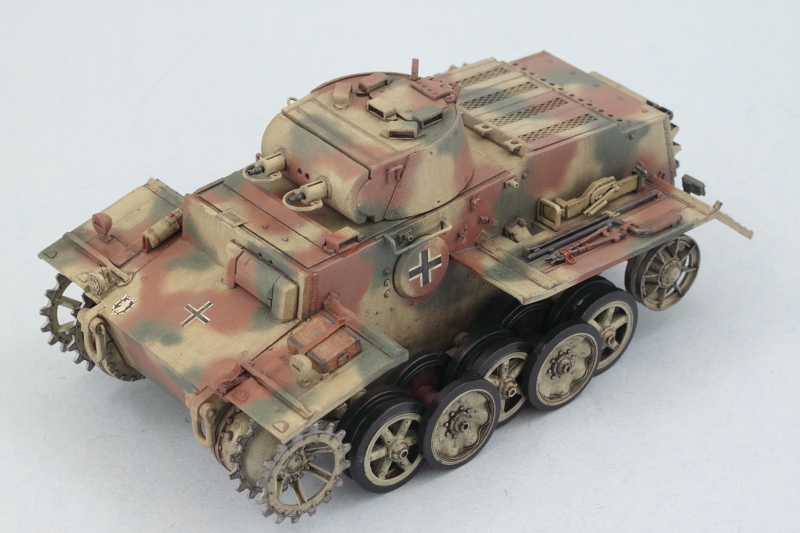 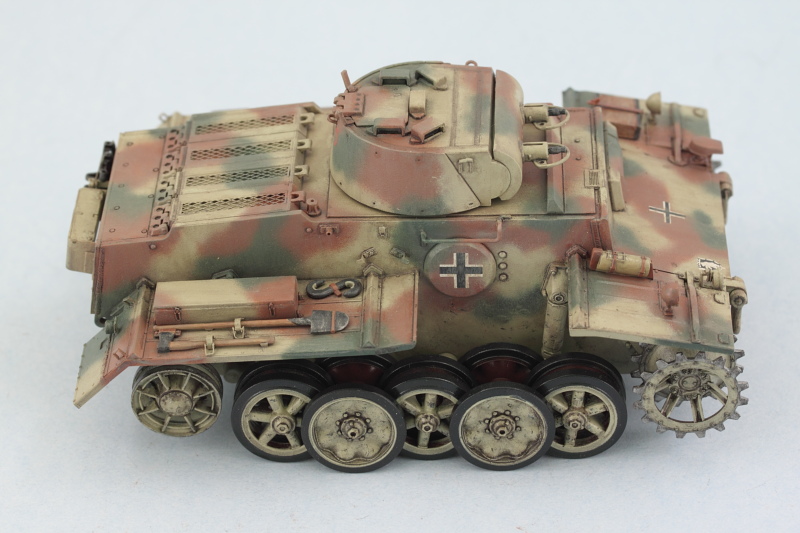 The lower hull got some pigment treatment using Mig Dark Mud pigments. This was applied as a wet mixture using tap water with a drop of liquid dishwashing soap added to break the surface tension and left to air dry. After removing excess pigment with stiff bristled brushes and some wet and dry Q-tips, the lower hull and suspension had the look I was after. 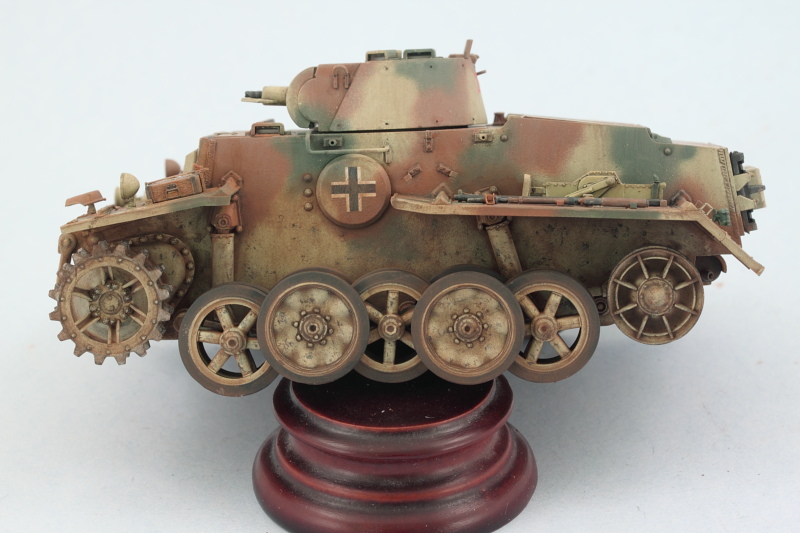 Next up will be the weathering on the tracks. Almost home on this one! |
|
|
|
Post by wbill76 on Jul 13, 2014 8:15:06 GMT -5
Pigment weathering continued with the tracks. For these I used Mig Productions Dry Mud, applied it wet, let air dry, then removed the excess pigment with a large round stiff bristle brush until I was happy with the look. 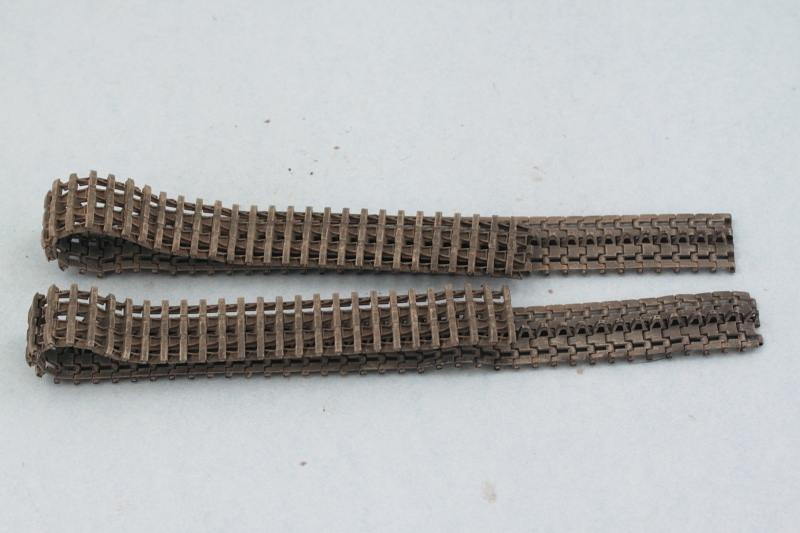 Then it was time to finally fit baby with its shoes! After feeding the tracks in over the sprockets and idlers, I used a small amount of liquid glue to fix the idlers permanently in place but left the sprockets movable to allow for handling and small tension adjustments where needed. 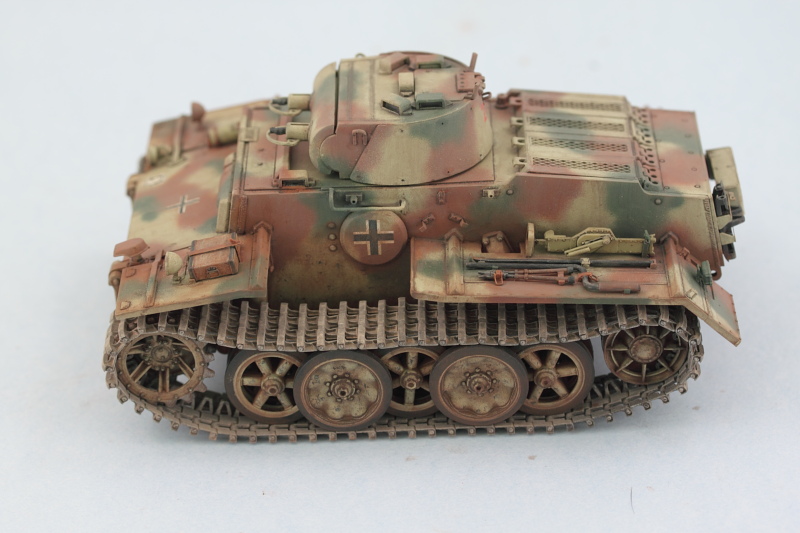 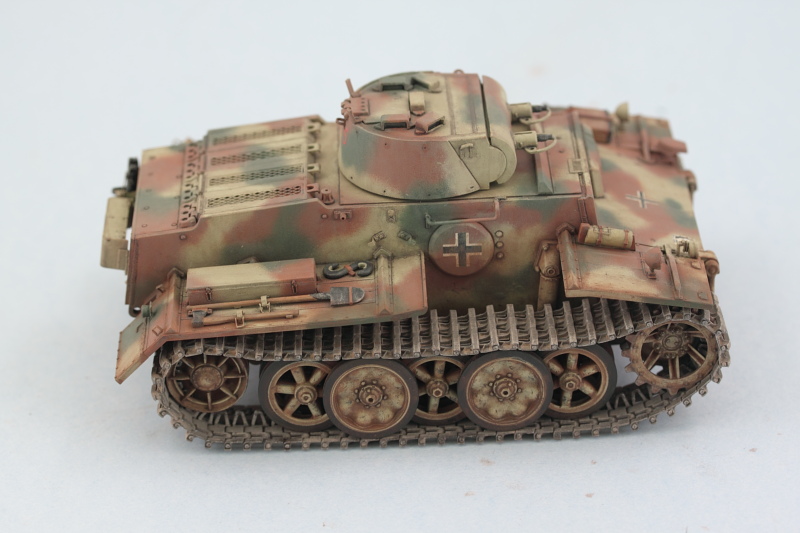 Then under the 'minor detail' department I added some of the dried left-over pigment dust from the tracks and applied it to blend things in with the darker pigment weathering done earlier. I've found that the 'dried' pigment ends up being much finer and easier to work with vs. the straight dry powder in the container for this type of thing plus you use far less pigment in the process and achieve the same end. I also installed the RB Models 2m brass antenna and painted it up to round things out there. 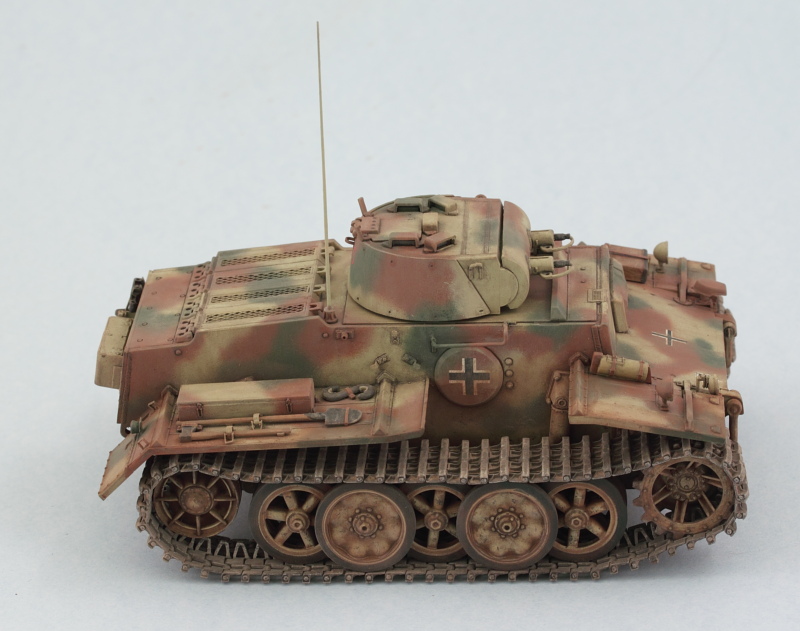 Will let this sit overnight and give it a once over with fresh eyes tomorrow to see if there's anything I missed or need to fine tune before declaring this one 'done'! |
|
|
|
Post by wbill76 on Jul 13, 2014 8:15:30 GMT -5
|
|
|
|
Post by Leon on Jul 13, 2014 8:19:41 GMT -5
Bill you are making great progress on this and the detail painting is outstanding.   |
|
|
|
Post by wbill76 on Jul 13, 2014 8:21:59 GMT -5
Thanks Leon! Had a blast with this build so figured it should be brought back over in one piece while I still could.  |
|
|
|
Post by Leon on Jul 13, 2014 8:25:57 GMT -5
Fantastic finish as usual Bill.   |
|
|
|
Post by dupes on Jul 13, 2014 8:48:45 GMT -5
Nice build! Didn't you finish that a while back? Thought you had a new WIP already.
|
|
|
|
Post by wbill76 on Jul 13, 2014 9:50:35 GMT -5
I do Dupes, just 'reconnecting' the parts on this one so it's all together in place before the MHISC goes dark on the 1st.  |
|
Deleted
Member since: January 1970
Posts: 0
Nov 30, 2024 5:18:55 GMT -5
Nov 30, 2024 5:18:55 GMT -5
|
Post by Deleted on Jul 13, 2014 17:38:45 GMT -5
Holy smolly that's was a bunch of good lookin pics to be lookin at Bill .
|
|
|
|
Post by wbill76 on Jul 13, 2014 19:31:20 GMT -5
Thanks Carl! Glad to see you pop in one more time on this little beauty.  |
|
|
|
Post by imatanker on Jul 14, 2014 7:07:42 GMT -5
Yesterday was Sunday right? Thought so  |
|
|
|
Post by wbill76 on Jul 14, 2014 10:04:12 GMT -5
Yesterday was Sunday right? Thought so  Have to keep that tradition alive at least, eh Jeff?  |
|
desertrat
Full Member
  
Member since: October 2013
Posts: 934 
|
Post by desertrat on Jul 19, 2014 8:09:48 GMT -5
superb!! pity all that work on the interior is hidden, love the camo!!
|
|
|
|
Post by wbill76 on Jul 19, 2014 18:36:21 GMT -5
superb!! pity all that work on the interior is hidden, love the camo!! Thanks DR! Yes sadly the interior is largely hidden away but all that is needed to peek inside is to pop off the turret...maybe a once a year thing!  |
|


