|
|
Post by Leon on Mar 7, 2015 20:18:54 GMT -5
Great progress Ari! Tracks and primer are looking good,
|
|
delta
Full Member

Member since: January 2015
Posts: 365 
|
Post by delta on Mar 7, 2015 21:10:35 GMT -5
Thanks!
|
|
|
|
Post by TRM on Mar 7, 2015 21:29:25 GMT -5
Nice job Ari! Way to muscle through those tracks!! Looking great!! Keep things going!
|
|
|
|
Post by JimD on Mar 7, 2015 21:33:25 GMT -5
Great stuff. Keep at it and before you know it all those spikes will be a distant memory...or nightmare...either way it will pay off in the end!
|
|
delta
Full Member
Member since: January 2015
Posts: 365
|
Post by delta on Mar 7, 2015 22:08:39 GMT -5
Thank you both  |
|
delta
Full Member
Member since: January 2015
Posts: 365
|
Post by delta on Mar 8, 2015 2:02:20 GMT -5
Okay so after a brief adventure in the color brown, the tank is now a new color alleged to be green. 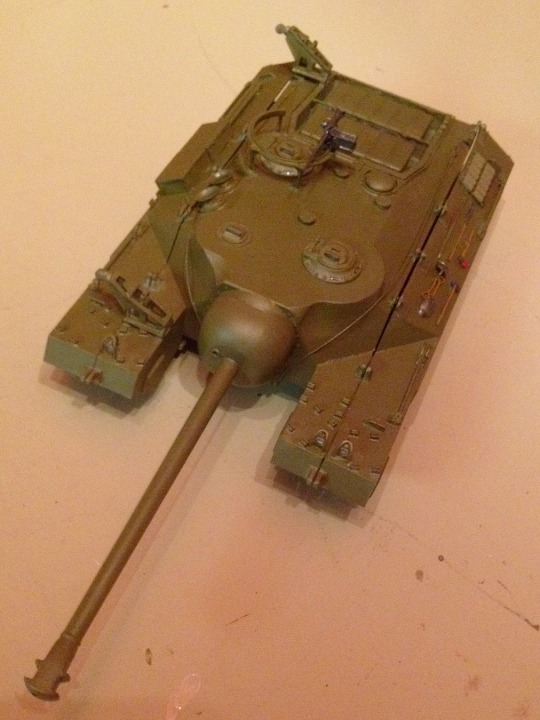 When I plug this photo into Adobe Photoshop though, it still says it's dark orange-yellow. So I have no idea what color this thing is now. Hopefully it's something resembling one of the possible colors the military may have once painted it. |
|
delta
Full Member
Member since: January 2015
Posts: 365
|
Post by delta on Mar 8, 2015 19:12:11 GMT -5
400 spikes and the tracks are assembled!!! 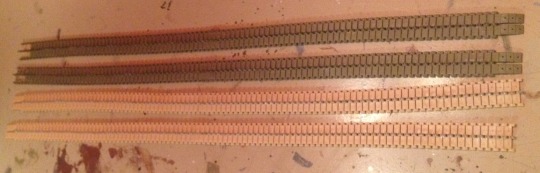 30 of the little things left to spare. I've also started shading the panels of the tank body-  Not as subtle as I usually see but there will be a wash over most of it so I think think this is about right. I don't know if I should do the overcoat with the brown I had before or if that would clash. I'm going for a dusty, worn sort of olive drab as if the tank has been sun-bleached over time. So maybe tan? Will have to try a few things with the spare parts. Not the spikes, larger things. This kit finished out at just under 1000 parts, but it has about 200 left on the sprues. |
|
|
|
Post by Leon on Mar 8, 2015 19:21:44 GMT -5
Great work finishing the tracks Ari!  Panel shading is looking good. |
|
delta
Full Member
Member since: January 2015
Posts: 365
|
Post by delta on Mar 8, 2015 21:44:52 GMT -5
Thanks Leon! More progress- The tracks are now painted and applied: 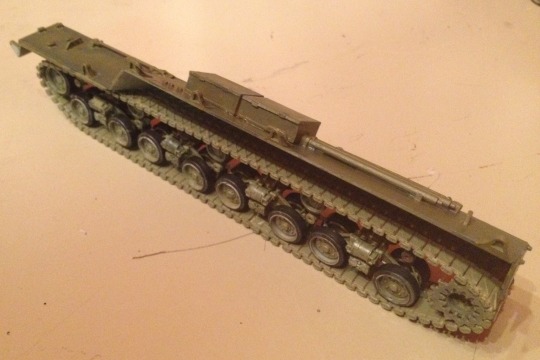 And the sides are on: 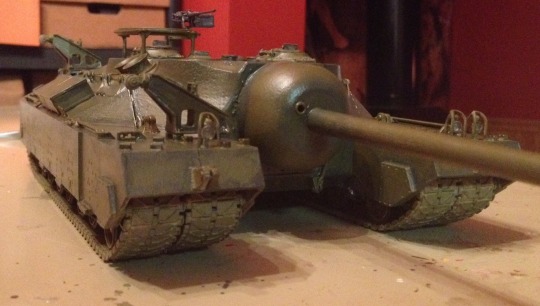 And it finally reads as green in Photoshop! (The sides in this shot are not yet glued) 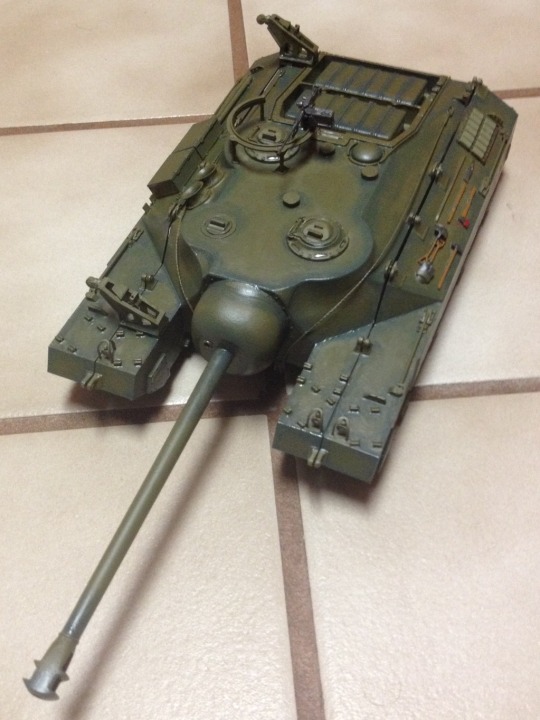 With assembly complete (unless I put some ropes on the cranes or other extras) all that remains is weathering. I don't think I'll go for ancient and rusty, but after the Churchill I feel more confident about making it somewhat used. |
|
|
|
Post by wbill76 on Mar 9, 2015 16:03:45 GMT -5
Really bringing the monster to life! As for the Photoshop impressions of the color, that's probably down to your camera WB settings, the lighting, and the color you're using as a backdrop/spot to shoot the photos from. Always tricky to get them all to play nice when you don't have a controlled space for it.
|
|
delta
Full Member
Member since: January 2015
Posts: 365
|
Post by delta on Mar 9, 2015 16:13:04 GMT -5
Thanks! You're quite right, the camera and light are definitely to blame for some of my confusion. I don't believe my phone has a white balance option and shooting it under incandescent or fluorescent light is sure to make it green or yellow. I'd not place much stock in it but sometimes it helps warn me if what I'm seeing is inaccurate. Without checking I'd have thought the original coat was bright green, the guys at the model shop usually help me match things when there are no color numbers listed on the box, but they aren't infallible either. So any color notes anyone shares here are all the more valuable, I'm bound to get some things drastically wrong from time to time and won't ever be disgruntled to hear painting advice, for accuracy or aesthetics. I'm also looking into setting up a better photo "studio" and using a better camera for my models, everyone's here are incredibly vibrant and clear. I'd like to join those ranks |
|
|
|
Post by deafpanzer on Mar 9, 2015 23:10:03 GMT -5
That beast is looking sharp! I got one of those little photo tents from a local photography shop for about $25 and it made a huge difference. I use it for final shots only if possible.
|
|
delta
Full Member
Member since: January 2015
Posts: 365
|
Post by delta on Mar 9, 2015 23:42:11 GMT -5
I think I may actually have one of those around somewhere, or something similar at last. Thank you!
|
|
delta
Full Member
Member since: January 2015
Posts: 365
|
Post by delta on Mar 10, 2015 1:42:59 GMT -5
Decals and dullcoat and dust wash: 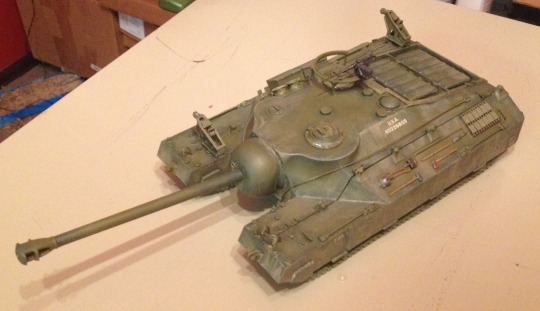  I did an experiment this time and used acrylics for the wash, which turned out fairly well, I think. It looks fairly close to a real dusting and with a wet toothpick I can simulate drips, as they sometimes appear on the side of vehicles. I may have overdone it a bit, but I chose to err on the side of too much as with acrylics on top of enamels, I can simply wash anything off and try again. The wash is burnt sienna, white, yellow and black so hopefully it's dust looking. It looks right to me at least. I've not seen any tutorials yet that advise the technique used here but I'm quite happy with it. Is acrylic wash on dull laquered enamel fairly common? Or what I've supposed to have been doing all along? Or have I done something that will only make it worse when it comes time to add pigments and other details? |
|
sabre
Full Member
Member since: September 2013
Posts: 414
|
Post by sabre on Mar 10, 2015 8:01:25 GMT -5
Looking good Delta, that photo of it on the tiles came through as clear as a bell.
|
|
|
|
Post by wbill76 on Mar 10, 2015 19:07:36 GMT -5
You shouldn't have any issues with the pigments unless you use something to fix them in place that interacts with the acrylics (assuming you haven't sealed the acrylics with anything). It looks good from here!
|
|
|
|
Post by deafpanzer on Mar 10, 2015 22:10:21 GMT -5
It is looking fantastic now with dullcoat now!
|
|
delta
Full Member
Member since: January 2015
Posts: 365
|
Post by delta on Mar 11, 2015 0:56:43 GMT -5
Thanks Sabre, I'll use the light there more often until I can develop a full shooting set up Thanks as well Bill! And thank you DeafPanzer, always happy to see you watching! And... I think it's done: 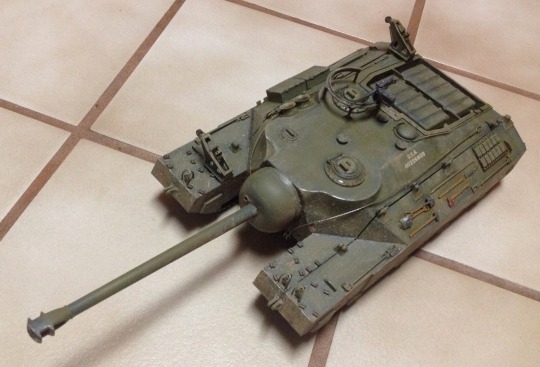 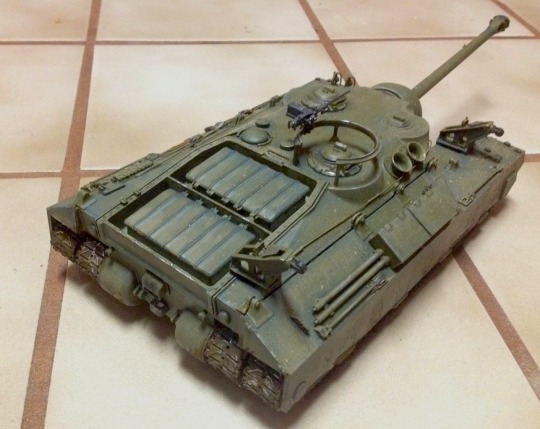 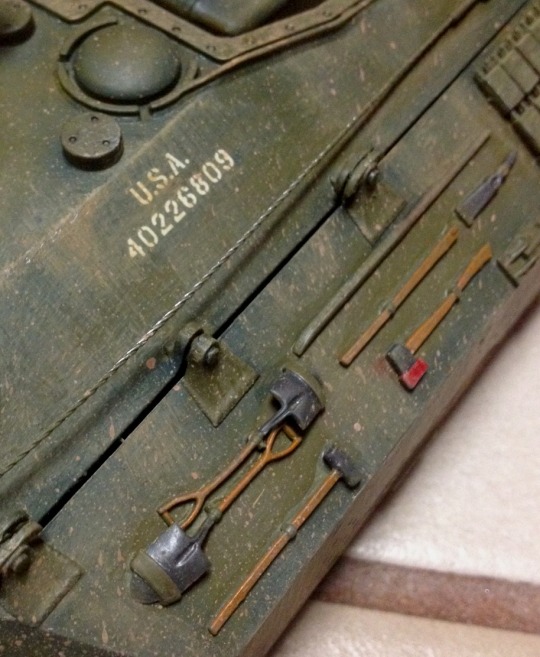  I'm very happy with it, I think it's my best weathering yet and it was a hell of a build. And best of all, incredibly fun to make. I can see why so many here are devoted to armor! I may have to go pick up another tank tomorrow... |
|
|
|
Post by deafpanzer on Mar 11, 2015 7:43:51 GMT -5
Oh yeah!!! Fantastic job on weathering! That last close shot is a great example...
|
|
delta
Full Member
Member since: January 2015
Posts: 365
|
Post by delta on Mar 11, 2015 11:06:09 GMT -5
Thank you! |
|
|
|
Post by wbill76 on Mar 11, 2015 12:36:33 GMT -5
Sounds like you hit all the important points Delta...you are happy with it and you had fun, what's not to like about that combination!  Plus the results look good! Now you know why they call armor building the dark side...once you try it, you're never the same again. |
|
|
|
Post by mrt51 on Mar 11, 2015 13:02:18 GMT -5
Looks good!
Terry
|
|
delta
Full Member
Member since: January 2015
Posts: 365
|
Post by delta on Mar 11, 2015 15:15:48 GMT -5
Thank you both! |
|
|
|
Post by Leon on Mar 11, 2015 15:35:17 GMT -5
Ari! Great finish and the weathering looks fantastic. |
|
delta
Full Member
Member since: January 2015
Posts: 365
|
Post by delta on Mar 11, 2015 16:05:23 GMT -5
Thanks Leon! I'm very glad to hear it!
|
|
sabre
Full Member
Member since: September 2013
Posts: 414
|
Post by sabre on Mar 11, 2015 22:50:57 GMT -5
Nicely done Delta it really turned out looking great.
|
|
delta
Full Member
Member since: January 2015
Posts: 365
|
Post by delta on Mar 11, 2015 23:04:26 GMT -5
Thanks Sabre, your help made it possible |
|
afvfan
Senior Member

Member since: December 2012
Bob
Posts: 1,772
Dec 10, 2012 17:32:38 GMT -5
Dec 10, 2012 17:32:38 GMT -5
|
Post by afvfan on Mar 12, 2015 0:56:40 GMT -5
Turned out really nice. You did a great job on the finish, but I do have 2 minor nits to pick. First, why did you do the axe blade mount red? It seems out of place. Second is an observation. The center hole of the pick head should be open. You might think about putting a little dab of very dark grey there to give the impression that it is (personally, I would have drilled it out deeper). Just a little food for thought....
|
|
delta
Full Member
Member since: January 2015
Posts: 365
|
Post by delta on Mar 12, 2015 1:15:46 GMT -5
Thanks! The axe blade mount is red because I thought it was one of those caution covers that go on fire axes and didn't realize it was a mount. I can fix that and drill out the center hole of the pick head, I don't recall if it came filled in or if it got filled up with paint after a few coats, but that's easily changed. Thank you for the notes, or nits, whichever they were I'm glad you mentioned them I'll fix them shortly. EDIT: On Google Images I can't find an example of the red cover I was thinking of. I have no clue why I thought fire axes always had red covers. |
|
|
|
Post by wbill76 on Mar 12, 2015 13:33:14 GMT -5
It's often a common misperception Delta that modern stuff (like red fire extinguishers for example) apply to the past and it doesn't help that often the kit manufacturers make the same mistake in their painting/finishing recommendations in the instructions! Sometimes modern rules apply depending, sometimes they don't. All depends on how far back you go and the circumstances. Fire axes (and other types of axe as well) tend to have red heads in modern usage to keep them from rusting, so that may be what you were thinking of instead of the cover for its edge? Should be an easy fix though! |
|


 Panel shading is looking good.


 Plus the results look good! Now you know why they call armor building the dark side...once you try it, you're never the same again.