charleygnarlyp290
Full Member
  
Member since: October 2014
Posts: 136 
|
Post by charleygnarlyp290 on Jun 14, 2015 16:28:49 GMT -5
My next project will be the Panzer IV Ausf D from Tamiya. This is one of the older kits from Tamiya, and the date molded on the lower hull is 1975. This particular kit has been reviewed countless times, and many have noted that since this kit was first molded, at a time when motorized models were popular, the allowances for motors, batteries, and switches rendered the dimensions of the model to non-scale proportions. Because of this, some modelers pooh-pooh this kit as inaccurate, and not really worth the time and effort, especially considering that there are much more detailed and accurate representations of this particular subject. In addition to that, the details are considered simple, somewhat "soft," or lacking altogether. However, because of its age, this kit has a number of pluses. First, it is pretty inexpensive. I got this one at a local hobby shop for $21.xx, out the door. It can be found for about the same online via online dealers, or EBay. Second, due to the lack of lots of small detail, and a lower parts count (compared to more recent kit releases,) and Tamiya's ability to manufacture kits that fit like they are supposed to, beginners can build this kit into a nice representation of the Panzer IV. The instructions are easy to follow, and the parts, even though they are coming from molds that are quite old, are free from flash and heavy mold lines. This makes clean up and assembly that mush easier. Third, for a modeller that may be a bit more experienced, but wants to try some new techniques, or perhaps some scratchbuilding, this kit is a great candidate. The low price and general quality of the kit parts would allow a person to try out some new stuff without too much worry of money wasted if things go bad. As for me, I plan on building this one pretty much out of the box. I want to feature this build on my YouTube channel and focus on newer kit builders. This will also be the first time I have finished a WWII German vehicle in grey. All of my German vehicle builds in the past have been in the usual dark yellow and/or camo schemes.  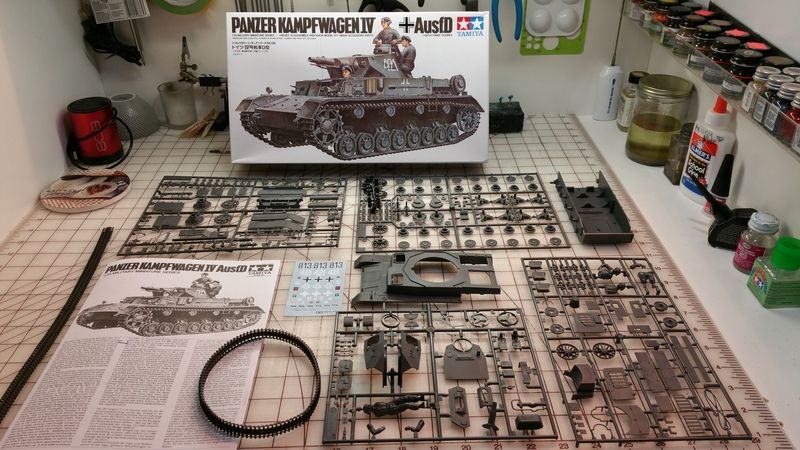 |
|
reserve
Senior Member
   
Member since: July 2012
Si vis pacem para bellum
Posts: 2,372
Jul 11, 2012 9:11:45 GMT -5
Jul 11, 2012 9:11:45 GMT -5
|
Post by reserve on Jun 14, 2015 16:39:32 GMT -5
Good kit, did one years ago. Will have to ride along
Regards,
Mark
|
|
|
|
Post by wbill76 on Jun 14, 2015 19:03:58 GMT -5
Sounds like the perfect project for what you need Charley! Looking forward to seeing what you do with it.  |
|
|
|
Post by Tojo72 on Jun 15, 2015 7:37:34 GMT -5
Wow I did that one in the 80's as one of my early efforts,it's long gone.Looking forward to your modern handling of it.
|
|
|
|
Post by deafpanzer on Jun 20, 2015 20:35:02 GMT -5
Freaking cool... can't go wrong with the workhorse Pz IV!!!
|
|
elco
Full Member
   July & Oct 2014 MoM Winner
Member since: May 2013
MOY 2014 Winner
Posts: 660 
|
Post by elco on Jun 21, 2015 4:42:09 GMT -5
Cool, looking forward for more  |
|
|
|
Post by wing_nut on Jun 21, 2015 19:56:24 GMT -5
Cool, looking forward for more  Yeah. .. That. |
|
Deleted
Member since: January 1970
Posts: 0
Nov 23, 2024 16:55:53 GMT -5
Nov 23, 2024 16:55:53 GMT -5
|
Post by Deleted on Jun 22, 2015 14:13:17 GMT -5
made this one when I got back into ,great kit loved making it so will be watching too see how you get,Oz
|
|
|
|
Post by rbaer on Jul 2, 2015 10:26:15 GMT -5
That looks like a perfect subject for me to try a DAK yellow-over-gray scheme on......
Watching, popcorn in hand.
|
|
desertrat
Full Member
  
Member since: October 2013
Posts: 934 
|
Post by desertrat on Jul 2, 2015 12:25:22 GMT -5
can't beat a pnz iv. pulling up my chair,
|
|
Wes
Full Member
  
Member since: November 2011
Posts: 686
Nov 16, 2011 9:34:50 GMT -5
Nov 16, 2011 9:34:50 GMT -5
|
Post by Wes on Jul 3, 2015 5:22:48 GMT -5
Count me in too.
|
|
charleygnarlyp290
Full Member
  
Member since: October 2014
Posts: 136 
|
Post by charleygnarlyp290 on Aug 30, 2015 23:20:51 GMT -5
Crickey! I didn't realize that it has been a month since I posted anything about this model. I have been focusing more on the Youtube channel and blog for updates, so, sorry for a lack of posts for those interested. So, I am going to update and catch up with three posts. Thus far I have completed the majority of construction. I have built it in sub-assemblies for ease of painting. Like a bonehead, I accidentally erased the few construction photos I had, but there isn't much to show. In typical Tamiya fashion, the kit fit together flawlessly. Not one, single surprise. Instructions clear and easy to follow. Yesterday, I was able to prime it and get the visible interior painted white. With that done, I will do a quick weather job on the interior parts, then get cracking with the paint. Here is how it sits right now. 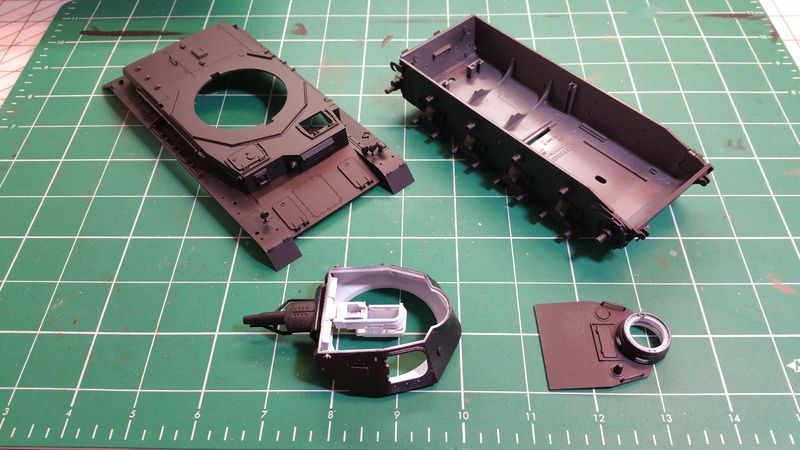 |
|
charleygnarlyp290
Full Member
  
Member since: October 2014
Posts: 136 
|
Post by charleygnarlyp290 on Aug 30, 2015 23:22:07 GMT -5
Time for a long overdue update. I finally got some paint on this thing. I used Vallejo Model Air Panzer Grey. Since I have more German kits coming up, I got the German armor set. Here are the parts I got painted. 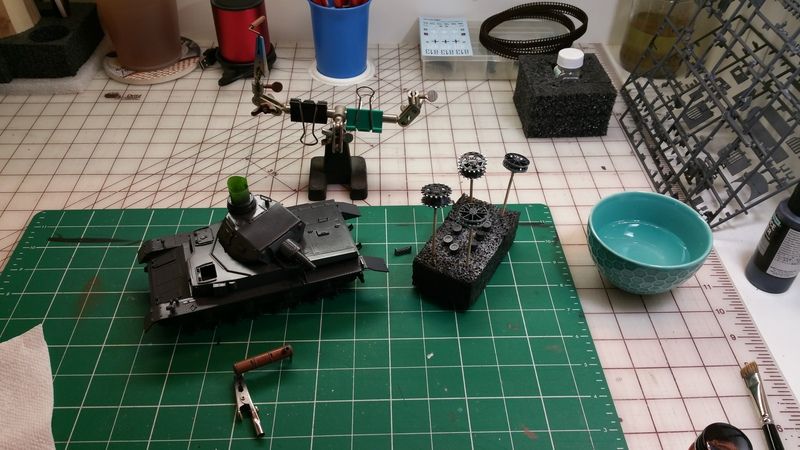 I got the drive sprockets, idlers, return rollers, and wheels (not pictured) painted. On the wheels, I painted the the rubber portion first with a brush, then using a circle template, I sprayed the metal part grey. I also got the teeth of the sprockets and the part of the idlers that comes in contact with the tracks painted silver to simulate wear to the bare metal. 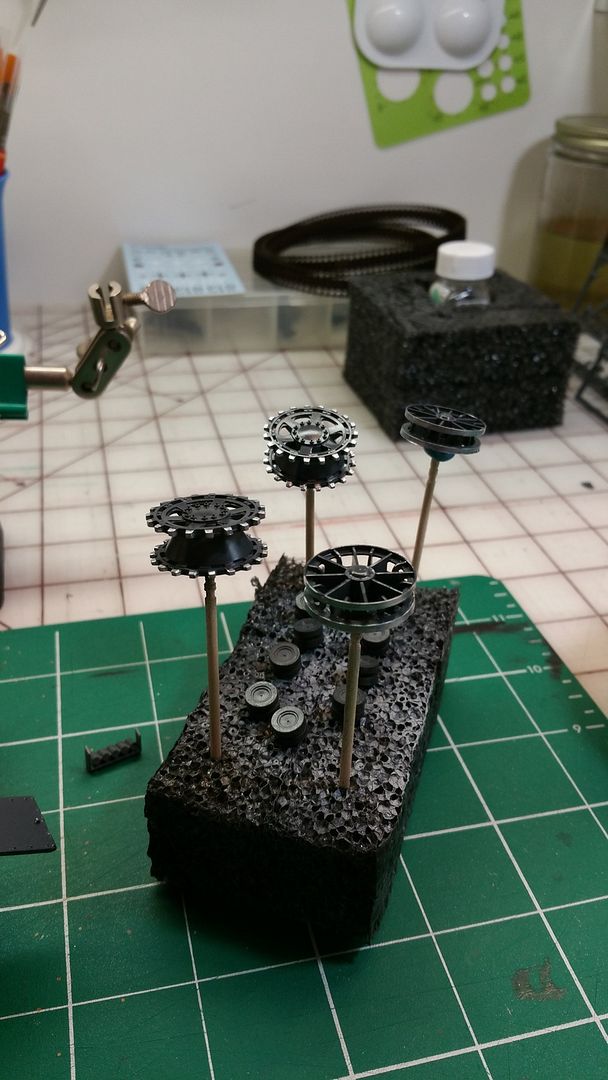 I also got the muffler and auxiliary generator exhaust painted then rusted. I used Model Master enamels for that... military brown as a base, then a rust color over that. I used brown as a base so it wouldn't come out too orange. 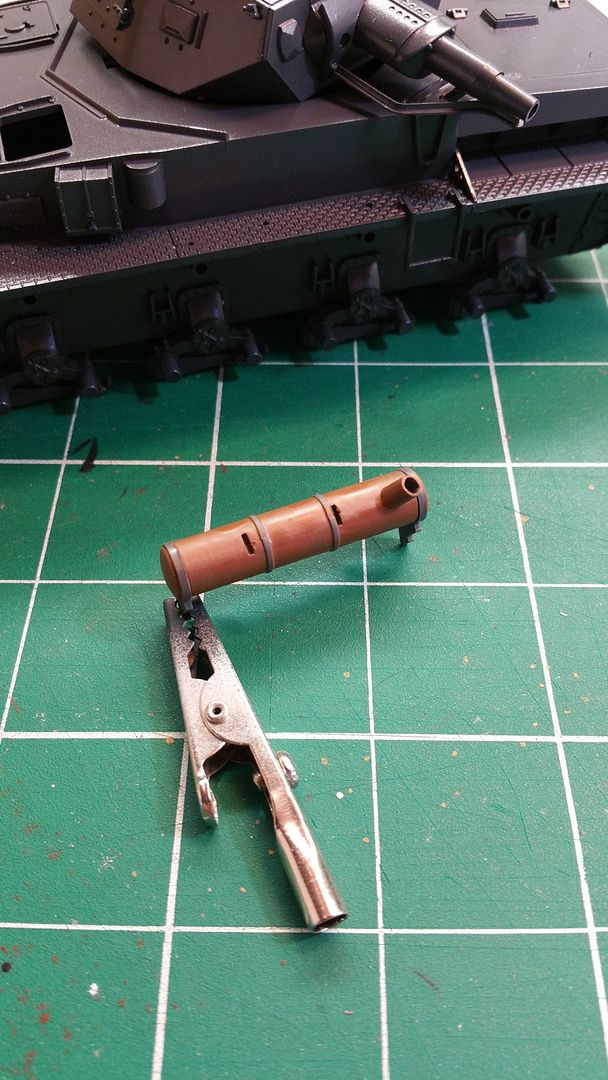 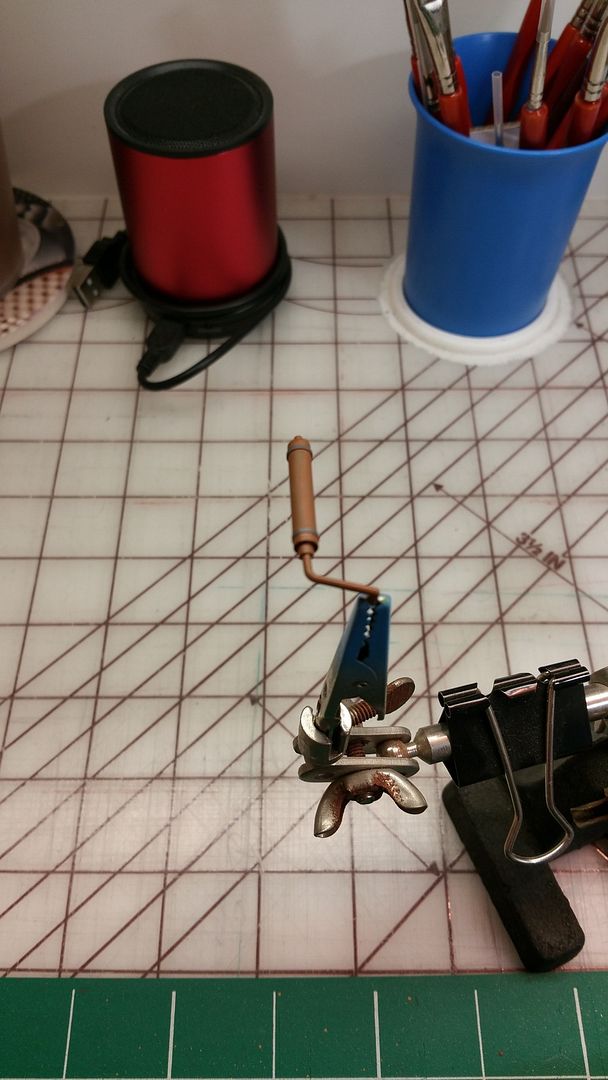 After I painted everything, I gave everything except the muffler and exhaust a coat of Future for decal application. Next up will be decals and detail painting prior to weathering. |
|
charleygnarlyp290
Full Member
  
Member since: October 2014
Posts: 136 
|
Post by charleygnarlyp290 on Aug 30, 2015 23:22:59 GMT -5
The Panzer has been painted and clear coated, so it is time for the decals. Here is a quick rundown on what I use to apply decals. For tools, I have a hobby knife, tweezers, a brush for decal setting solution, and a bowl of water. I use Testors decal set and a very old bottle of Solvaset. I cut out the decal and drop it in the water. As it soaks, I brush a bit of decal set on the area where the decal is going to be applied... not much, but just enough to dampen the area. Then I pick up the decal with the tweezers and use the same brush to slide the decal into position. If it is a little crooked, I use the brush to line it up. I try to avoid touching the decal with my fingers. If the decal solution and/or residual water puddles up, I use the corner of a napkin to soak the extra fluid off, again, not touching the decal itself with the napkin, but just along the edge. After it sets up a bit, I brush on the Solvaset. If that puddles up I leave it. Once it dries, I check it and if the decal has settled into the surface detail (rivets, panel lines, etc.,) I move on. If not, I apply it again. I also applied a black, acrylic wash. This was my first time using an acrylic wash and mainly wanted to see how it worked compared to an oil wash. 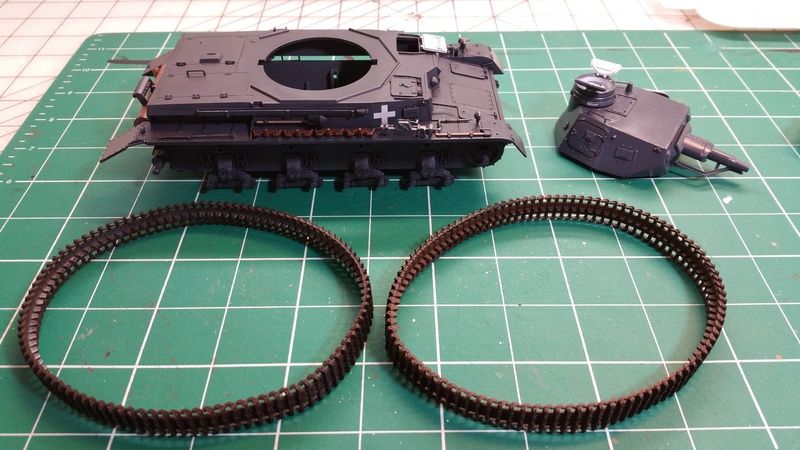 The turret has not had a wash applied yet, since I want to demo that on my YouTube channel. Also, I got my figures painted... mostly. I have never been much of a figure painter and have a long way to go, but this is a start. 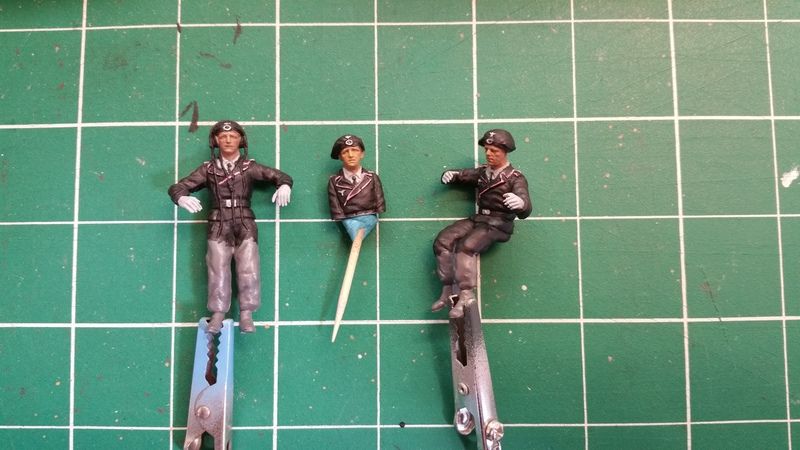 Next up will be some weathering. |
|
|
|
Post by wbill76 on Aug 31, 2015 18:39:10 GMT -5
Coming along nicely Charley! Figures are looking the part so far.  |
|
|
|
Post by Leon on Aug 31, 2015 18:50:56 GMT -5
WOW....Nice progress Charley! The figures are looking good.  |
|
reserve
Senior Member
   
Member since: July 2012
Si vis pacem para bellum
Posts: 2,372
Jul 11, 2012 9:11:45 GMT -5
Jul 11, 2012 9:11:45 GMT -5
|
Post by reserve on Aug 31, 2015 21:09:33 GMT -5
Nice Charlie it's looking great
Regards,
Mark
|
|
charleygnarlyp290
Full Member
  
Member since: October 2014
Posts: 136 
|
Post by charleygnarlyp290 on Sept 9, 2015 21:59:03 GMT -5
OK, then. The Panzer IV is done! (except for a final flat coat... waiting on thinner.) Here are my thoughts on this kit. First, it is old. 1975 old. What does that mean? Not a thing! To me anyway. Even though this is an old kit, it still holds up well. I guess there are dimensional issues, but I think that has more to do with the fact that originally this kit was designed to be filled with batteries and a motor so one could run it across the floor. True, it doesn't have the crisp detail of modern kits, but keeping in mind that it is a 40 year old mold... I can live with it. And since these kits are generally pretty cheap, one could buy one and practice some scratch building and simple modifications and turn out a really nice finished product. Second, in typical Tamiya fashion, it fits together exactly as it should. I didn't have to monkey around with anything. It fit together perfectly. Third, the instructions are spot on. No surprises. I don't know if anyone reading this has been following my YouTube channel series on this build, but I mention early on that it is a stellar kit for beginners. No issues to deal with. Easy to build. Some halfway decent figures to liven the kit up little and add some scale. I built this kit for two reasons, one being an attempt at a tutorial for beginners. The other reason I chose this kit, is I have never built a German vehicle in early war markings and grey paint. So, overall, I really enjoyed this project. It is a kit that I always wanted when I was in school, but could never find one. 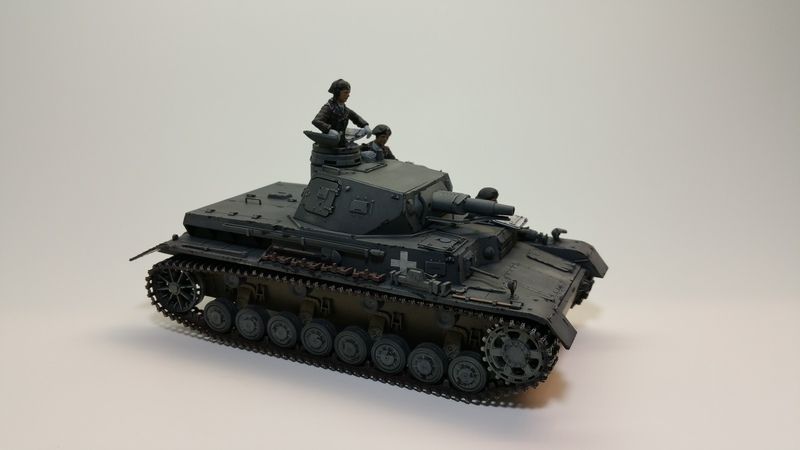 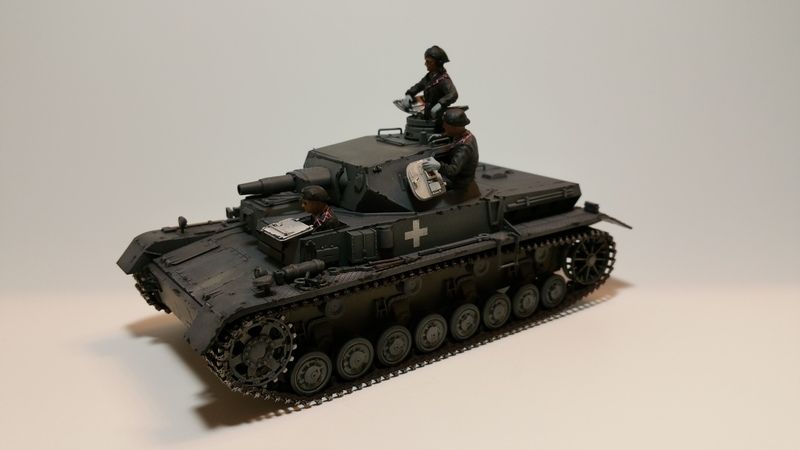  |
|
John Everett
Full Member
  
Member since: January 2012
July, 2016 MoM Winner
Posts: 1,278
Jan 17, 2012 0:53:48 GMT -5
Jan 17, 2012 0:53:48 GMT -5
|
Post by John Everett on Sept 9, 2015 22:40:51 GMT -5
This iconic Tamiya kit was my first tank...........You've done a considerably better job than I did.  |
|
|
|
Post by dierk on Sept 10, 2015 1:42:15 GMT -5
Nice, clean build Thumbs Up!
|
|
|
|
Post by Leon on Sept 10, 2015 3:58:11 GMT -5
Nice finish on the oldie Charley!  |
|
|
|
Post by wbill76 on Sept 10, 2015 12:02:25 GMT -5
The old girl still builds up just fine despite the age and other issues that go with it. Nice work Charley!
|
|
desertrat
Full Member
  
Member since: October 2013
Posts: 934 
|
Post by desertrat on Sept 10, 2015 14:36:04 GMT -5
superb, good old tamiya...
|
|
|
|
Post by dupes on Sept 11, 2015 16:54:56 GMT -5
Looks great! Can't beat the older Tamiya stuff in terms of price and overall buildability.
|
|


