|
|
Post by deafpanzer on Jan 23, 2016 12:04:31 GMT -5
Those guns are looking real good!
|
|
mrversatile
Full Member
   July '23 Showcased Build Awarded
Member since: January 2013
Posts: 681
Jan 20, 2013 10:52:24 GMT -5
Jan 20, 2013 10:52:24 GMT -5
|
Post by mrversatile on Feb 5, 2016 12:11:29 GMT -5
I have been chipping away at this one little by little and have finished adding the major superstructure parts. I originally took a picture of the main funnel prior to detailing with the intention of showing the before and after pics but the original pic was somehow missing on the camera. (see previous post for funnel pic in background). So the following pics will show the aforementioned superstructure parts including the completed funnel assembly as well as the bridge superstructure. Items of note include the vented base structure under the funnel which is a total replacement in photo etch. Also note the cross members on the bridge supports. These are also photo etch replacements. They are much more delicate and to scale than the originals. The kit parts were originally all one part with the supports and cross members attached and required the builder to separate same before adding them to the superstrucure and adding the photo etch pieces. A frustrating endeavor at best. Still many details to add to the bridge area. 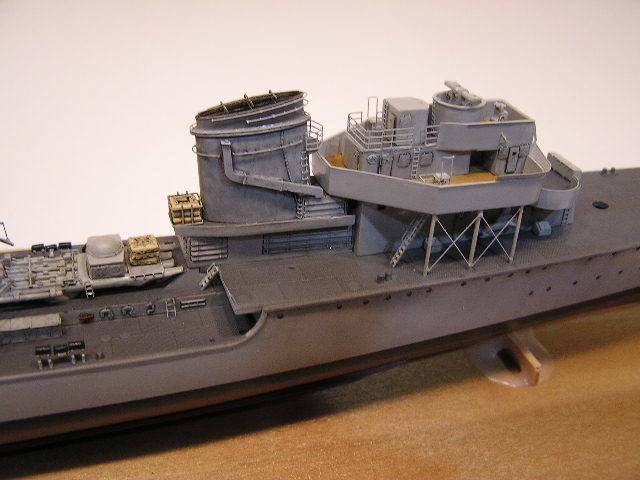 Before the cross members added 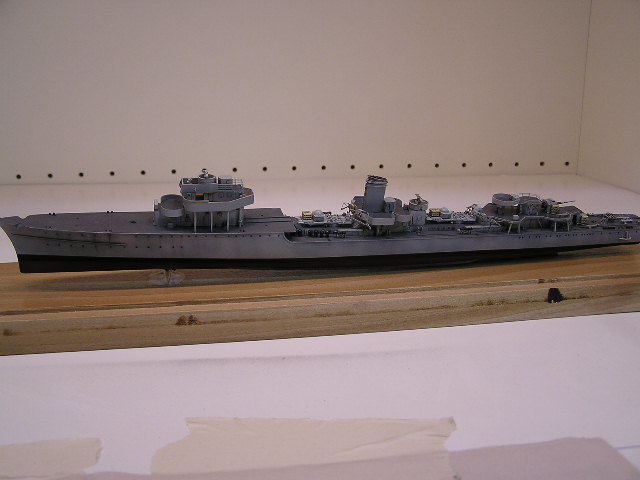 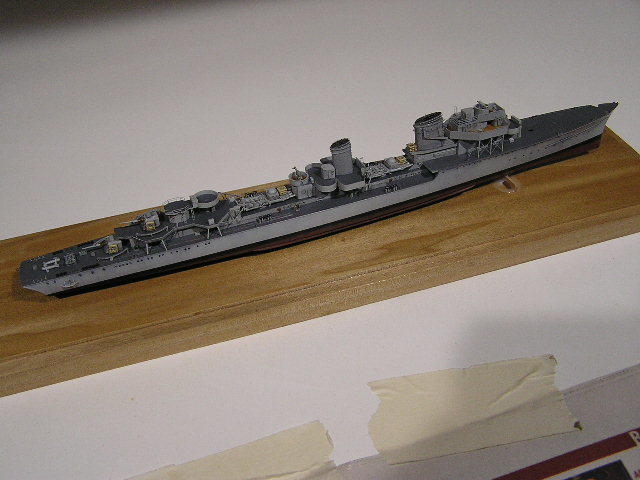 |
|
|
|
Post by Leon on Feb 5, 2016 12:24:16 GMT -5
Nice progress Gil! Looking really good.
|
|
|
|
Post by deafpanzer on Feb 5, 2016 12:27:17 GMT -5
WOW! She is really looking GREAT!!!
|
|
|
|
Post by wbill76 on Feb 6, 2016 13:00:43 GMT -5
PE is worth the effort Gil, details are coming together nicely.
|
|
mrversatile
Full Member
   July '23 Showcased Build Awarded
Member since: January 2013
Posts: 681
Jan 20, 2013 10:52:24 GMT -5
Jan 20, 2013 10:52:24 GMT -5
|
Post by mrversatile on Feb 14, 2016 20:11:35 GMT -5
Thanks guys, and Bill, I couldn't agree more. Photo etch work is essential in shipbuilding because of the busyness in such a small scale. It plays with the mind but when it begins to come together, like now, it really makes a difference. I have finished adding more cranes, life rafts, radar arrays, and bridge details. I also put together the photo etch replacement "break water." This beauty entailed putting two long pieces together, bending, and then adding about 12 braces. I also installed the twin mount behind the "break water" and added the anchor handling details. The Flyhawk set includes photo etch anchor chains which are more satisfactory than molded on chain but I still opted to order some scale chain. (I didn't have enough in my stash). I began detailing the motor launch and lifeboats. The motor launch will have a photo etch replacement cabin which requires the removal of the molded plastic cabin from the kit part. The picture below shows this as well as the unistalled photo etch replacement. It also shows the bumper ridge seen on these boats which I added with a styrene replacement. Two portholes per side were additionally drilled out because they were absent from the kit part. 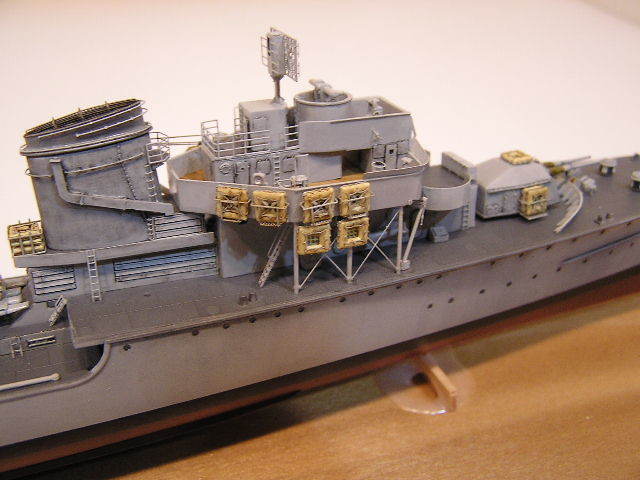 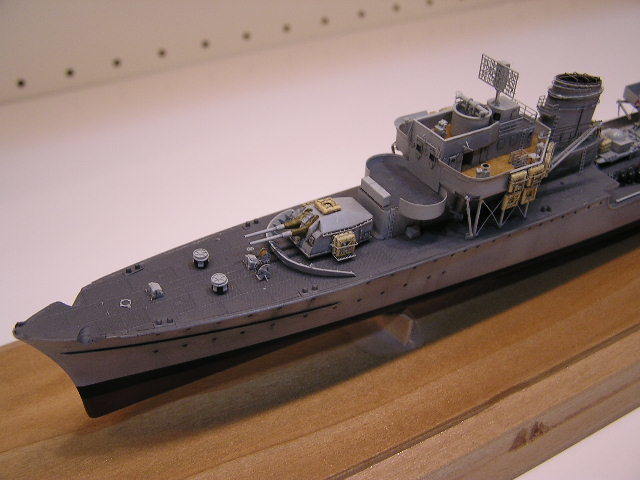 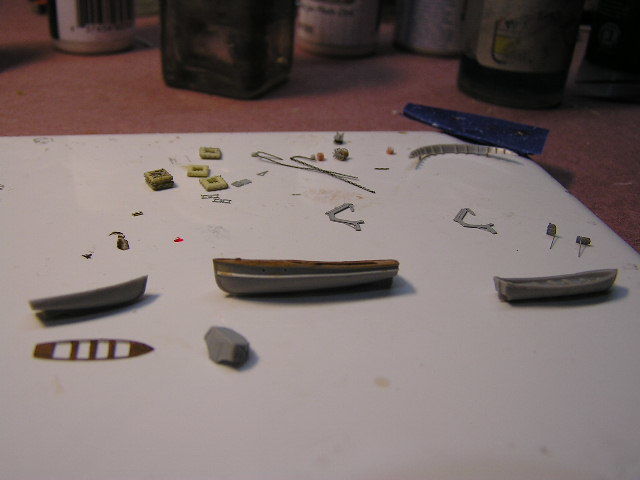 |
|
|
|
Post by Leon on Feb 14, 2016 20:20:59 GMT -5
Nice progress Gil! The PE is a big improvement.  |
|
|
|
Post by wbill76 on Feb 15, 2016 20:43:00 GMT -5
You're brave and patient for tackling that breakwater arrangement! Very sharp.
|
|
mrversatile
Full Member
   July '23 Showcased Build Awarded
Member since: January 2013
Posts: 681
Jan 20, 2013 10:52:24 GMT -5
Jan 20, 2013 10:52:24 GMT -5
|
Post by mrversatile on Feb 15, 2016 21:43:17 GMT -5
Yeah Bill, that breakwater thought went something like.....Should I build it? Is it worth the trouble?...then I looked at the kit part and thought,...well, let me make the attempt, if I screw up I will trash it and use the lesser kit part. Luckily, my patience paid off bc it is a much improved piece.
Thanks for checking in Leon.
|
|
adt70hk
Forum Moderator     
Member since: November 2015
Currently attempting to build something decent!!! ;)
Posts: 2,831 
MSC Staff
|
Post by adt70hk on Feb 16, 2016 7:33:50 GMT -5
Gil
That is looking very, very nice indeed!! Karma +1
Andrew
|
|
mrversatile
Full Member
   July '23 Showcased Build Awarded
Member since: January 2013
Posts: 681
Jan 20, 2013 10:52:24 GMT -5
Jan 20, 2013 10:52:24 GMT -5
|
Post by mrversatile on Feb 21, 2016 11:52:09 GMT -5
|
|
|
|
Post by Leon on Feb 21, 2016 13:55:00 GMT -5
That is looking fantastic Gil! Nice start on the guns.  |
|
|
|
Post by wbill76 on Feb 21, 2016 17:56:50 GMT -5
Got to love all the little detail touches you're adding to this one Gil, the boat details in particular are pretty sweet!
|
|
mrversatile
Full Member
   July '23 Showcased Build Awarded
Member since: January 2013
Posts: 681
Jan 20, 2013 10:52:24 GMT -5
Jan 20, 2013 10:52:24 GMT -5
|
Post by mrversatile on Feb 27, 2016 15:54:51 GMT -5
After taking pictures with my old reliable Comedia camera, I again noticed that strange things were occurring such as: old deled pictures still remaining on card and new pictures, which can be viewed after first taking them, do not save when trying to upload them. I have now tried to use my cell phone instead and the pictures are much better, but are unable to take low resolution or sized pictures. Well, enough of that. The following pictures are of some of the finished guns installed on the ship. I originally took "in progress" pics, but of course, you know what happened to those....So far I have completed 3 different types of guns. You have seen the 37mm twin mounts (4 each), I have finished pics of these below as well as a single 20mm (2 each), and one of four 37mm bofors guns. Like the previous, these guns are totally photoetch and resin replacements for the kit parts with metal barrels, and you can see why. These are 2 of the previous 37mm guns painted and installed  Below is one of the finished 37mm single mount bofors guns. Note the replacement brass barrel 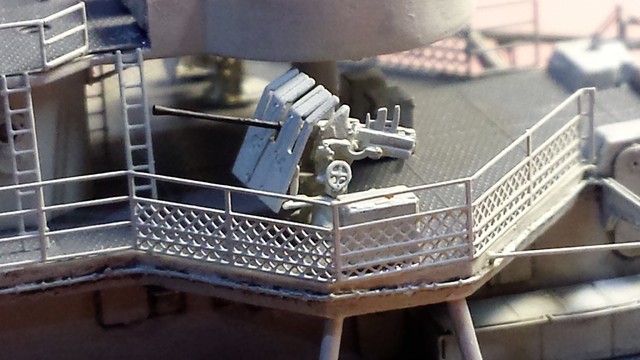 Here is one of two single 20mm mounts this has a resin base and metal replacement barrel. You can also see the anchor chain detil as well as phot etch rope guides attached to the photoetch textured decking. 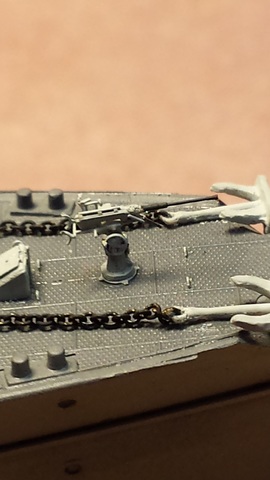 |
|
|
|
Post by wbill76 on Feb 27, 2016 16:04:58 GMT -5
Makes a huge difference with those replacement details on the guns and other bits Gil. Nice!
|
|
|
|
Post by Leon on Feb 27, 2016 18:47:28 GMT -5
Those guns are a great improvement Gil!
|
|
mrversatile
Full Member
   July '23 Showcased Build Awarded
Member since: January 2013
Posts: 681
Jan 20, 2013 10:52:24 GMT -5
Jan 20, 2013 10:52:24 GMT -5
|
Post by mrversatile on Mar 1, 2016 17:23:12 GMT -5
YEEEEEEEEES! I am finally finished the 16 total AA guns. Now I know why I saved them for the end of the build. These tested all of my micro skills. The last of them are the twin mount 20mm guns (4 each) and the quad mount flakvierlings (2 each). I thought the quads would be the toughest to construct because of the amount of brass barrels that need to be incorporated into each, but they turned out to be easier than all the others. I just had to take my time and it helps to add the photoetch parts in a sequence which makes it easier to assemble. These quad mounts are the only ones that utilized a kit part, the base, and then more than 10 photoetch parts and 4 brass barrels were attached to this. Now the final steps of the build include: 1) installing outside railing, 2) building and installing masts as well as rigging. and 3) creating the waterscape and adding some weathering. The 20mm twin mounts. Resin bases, photetch, and brass barrels 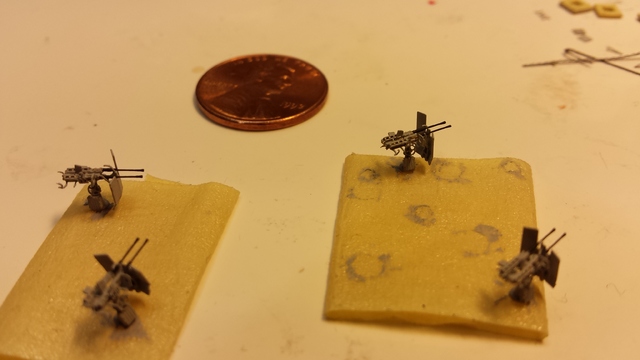 Here is one mounted on the port side. Also a good fiew of the breakwater detail. 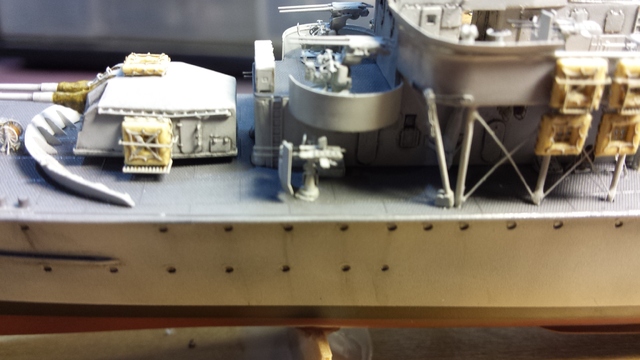 The quad mounts. Kit part base covered in photetch and brass barrels. 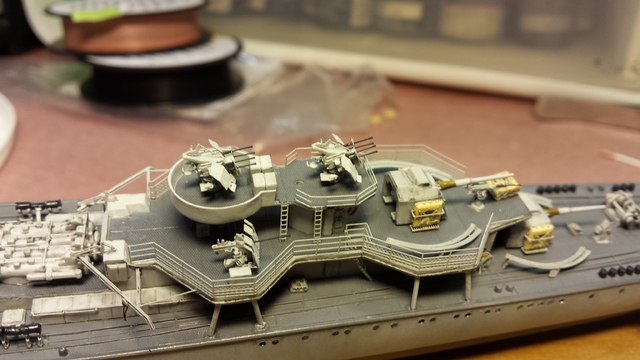 |
|
|
|
Post by Leon on Mar 1, 2016 17:33:07 GMT -5
Excellent work on the guns Gil!  |
|
|
|
Post by deafpanzer on Mar 4, 2016 23:57:12 GMT -5
I love those little guns! What a huge difference between kit and aftermarket guns...
|
|
mrversatile
Full Member
   July '23 Showcased Build Awarded
Member since: January 2013
Posts: 681
Jan 20, 2013 10:52:24 GMT -5
Jan 20, 2013 10:52:24 GMT -5
|
Post by mrversatile on Mar 8, 2016 20:05:15 GMT -5
|
|
|
|
Post by wing_nut on Mar 8, 2016 20:25:27 GMT -5
Boy howdy does that look nice. Those AA's are sierra hotel.
|
|
captfue
Full Member
  
Member since: October 2012
Posts: 311
Oct 1, 2012 22:25:19 GMT -5
Oct 1, 2012 22:25:19 GMT -5
|
Post by captfue on Mar 8, 2016 23:31:43 GMT -5
Great work, enjoyed the details....
|
|
|
|
Post by TRM on Mar 8, 2016 23:45:18 GMT -5
Outstanding Gil!! Looking forward to seeing this one in November maybe....yes?  |
|
|
|
Post by Leon on Mar 9, 2016 5:51:58 GMT -5
Great work on the rigging and railings Gil!  |
|
Deleted
Member since: January 1970
Posts: 0
Nov 22, 2024 14:18:17 GMT -5
Nov 22, 2024 14:18:17 GMT -5
|
Post by Deleted on Mar 9, 2016 10:55:37 GMT -5
WOW! 
|
|
mrversatile
Full Member
   July '23 Showcased Build Awarded
Member since: January 2013
Posts: 681
Jan 20, 2013 10:52:24 GMT -5
Jan 20, 2013 10:52:24 GMT -5
|
Post by mrversatile on Mar 9, 2016 18:05:53 GMT -5
Thanks everyone. I am really starting to see the proverbial light at the end of the tunnel. Did some weathering to the hull and just have to finish the railings and small details before tackling the rough seascape. Yes Todd, I think I will have this one on the table at Baycon in November. Hopefully I have a few more projects completed by then.
|
|
|
|
Post by wbill76 on Mar 9, 2016 20:13:50 GMT -5
Getting close to the finish line here Gil, looking good! You're right about those railing sections, the added 3-D element really makes a difference.
|
|
adt70hk
Forum Moderator     
Member since: November 2015
Currently attempting to build something decent!!! ;)
Posts: 2,831 
MSC Staff
|
Post by adt70hk on Mar 10, 2016 8:08:03 GMT -5
A nice update!! Any idea how many hours this has taken so far??
Andrew
|
|
|
|
Post by dierk on Mar 10, 2016 12:51:39 GMT -5
That is a stunning result! Not a term I use lightly, but truly awesome!
|
|
mrversatile
Full Member
   July '23 Showcased Build Awarded
Member since: January 2013
Posts: 681
Jan 20, 2013 10:52:24 GMT -5
Jan 20, 2013 10:52:24 GMT -5
|
Post by mrversatile on Mar 11, 2016 0:10:16 GMT -5
A nice update!! Any idea how many hours this has taken so far?? Andrew Andrew, I don't know exactly but I had completed the hull and deck before October but really got into daily toward the end of October until now. I am thinking at least 100 to 200 hours a couple of hours at a time. Has to be well over 1000 photoetch parts crammed into a small space. Bill, this is my first experience with these railings and I agree that the extra work shows in the results. I have been really impressed with this Flyhawk set, even more so than the set I used for the Prinz Eugen I built a couple of years ago. Thanks for all your encouragement. I am in the home stretch so check back for the final updates. |
|