|
|
Post by armorguy on Dec 15, 2015 10:41:16 GMT -5
You're launched now Shay, the garage door looks pretty cool now, the oil barrels are a nice touch and the figures really look "zombie" ! Keep them pics coming !
|
|
|
|
Post by Leon on Dec 15, 2015 12:22:31 GMT -5
Nice progress Shay! Keep it coming mate.
|
|
|
|
Post by wbill76 on Dec 15, 2015 13:34:05 GMT -5
There are easier ways to get time off to work at the bench Shay!  Off and rolling on this one. |
|
|
|
Post by tigrazor on Dec 15, 2015 15:27:20 GMT -5
Im pretty sure Shay hurt himself to see how bruises and cuts look like in real life - as a reference for the zombie figures. Nothing is better than good reference pictures, you know?  No really - get well soon and keep on building that dio - looks awesome so far! |
|
|
|
Post by deafpanzer on Dec 19, 2015 10:43:04 GMT -5
LOOKING GOOD!!!
|
|
coro69
Full Member

Member since: January 2015
Posts: 351 
|
Post by coro69 on Dec 19, 2015 12:03:20 GMT -5
holla shay, great to see you doing a diorama... can't wait to see more...
oli
|
|
kiwibelg
Full Member
Member since: December 2014
Posts: 613
|
Post by kiwibelg on Dec 23, 2015 17:24:39 GMT -5
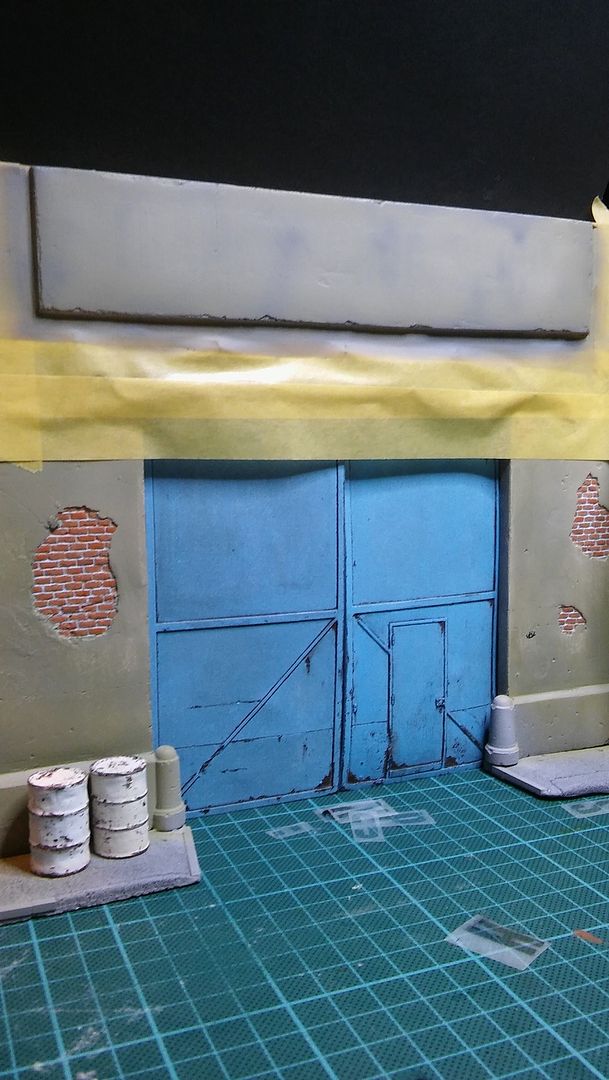
Thanks for your replies guys, Hasn't been a very productive week..the thumb has been killing me since my fall down the stairs. I did manage to start trying my new airbrush out on the workshop facade..still plenty of weathering to do and I plan on adding some graffiti on one of the walls. I also came across a great video tutorial on the Vallejo website involving airbrushing graffiti on a train. I do need some advice however with the "advertising" space above the workshop doors. Any ideas how I could go about adding some text to it? 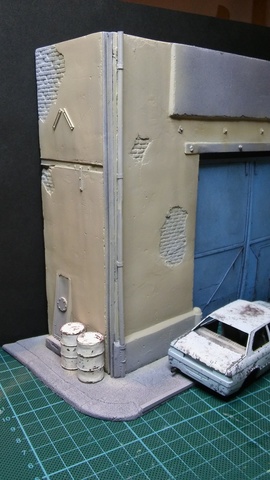 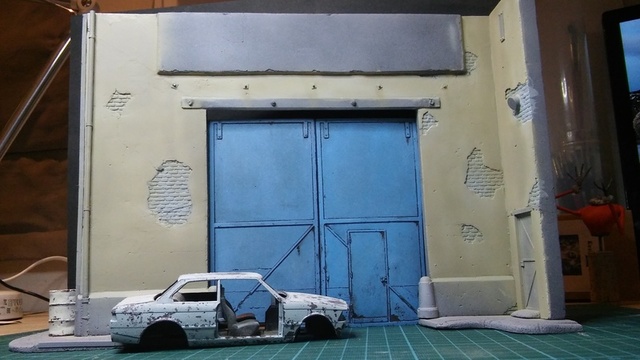 |
|
|
|
Post by Leon on Dec 23, 2015 17:31:23 GMT -5
Nice start on the work shop Shay!  |
|
|
|
Post by armorguy on Dec 23, 2015 17:45:56 GMT -5
Looks pretty cool Shay, I like the blue of that big door so much !
|
|
kiwibelg
Full Member
Member since: December 2014
Posts: 613
|
Post by kiwibelg on Dec 23, 2015 18:19:15 GMT -5
Looks pretty cool Shay, I like the blue of that big door so much ! Thanks Leon and Guy! Those doors...it was risky having such a bold colour and I'm hoping the zombies will stand out a little more, showing them in all of their ugly glory  |
|
|
|
Post by tiking on Dec 23, 2015 18:27:14 GMT -5
I'm loving where you're going with this. That color on that door is beautiful. I love it. What brand and type of blue is that?
|
|
kiwibelg
Full Member
Member since: December 2014
Posts: 613
|
Post by kiwibelg on Dec 23, 2015 18:38:13 GMT -5
Thanks mate, the blue is from a pre-made acrylic spray can..I didn't have an airbrush at the time! I will look tomorrow for the brand name (up in the mancave now) |
|
k1w1
Full Member
Member since: February 2015
Posts: 873
Feb 18, 2015 8:07:41 GMT -5
Feb 18, 2015 8:07:41 GMT -5
|
Post by k1w1 on Dec 23, 2015 19:36:04 GMT -5
Adding text. I have only tried this once - on my Mods and Rockers diorama. I read it somewhere, a model train magazine I think. From a stationery shop I brought some rub on black letters. These are available in many different fonts. I put them on a pre painted thin piece of wood. You can then lightly sand them to give them a worn aged look. Then glue the panel to your building. I guess you could try adding them directly to your building ?
Graffiti - my only attempt was not good. You can buy nice graffiti decals. I got some on ebay. Mostly model railroad stuff. |
|
kiwibelg
Full Member
Member since: December 2014
Posts: 613
|
Post by kiwibelg on Dec 23, 2015 20:07:18 GMT -5
Thanks Kiwi..that was my first idea using the rub on letters, I picked some up by chance while Xmas shopping! I also think your idea to source some decals for the graffiti would be a better idea, being a newbie with airbrushing I could ruin the facade quite easily. Once again, thanks for your input and I will be doing a test run with the lava product you kindly mentioned.
I better get some sleep now...a full house here later today with the whanau (family)!!
|
|
|
|
Post by TRM on Dec 23, 2015 21:28:06 GMT -5
Still looking good Shay! As for the lettering...the dry transfers you picked up sound like a solid plan. With a light touch, you can chip back some of the transfers to show wear. I don't have the link at the moment, but if you search through some of Ray Dunkin's stuff here on site, he did have a little SBS type thing where he was adding lettering to a store front. Check out the Uschi van der Rosten site for graffiti decals. He has some really nice stuff...works excellent and easy to use! LOL...maybe a name with a play on words to the scene like..."Joe's Body Shop" with a sub-heading of "used body part dirt cheap" "we're dying for you business"! |
|
moramarth
Full Member
Member since: March 2014
Posts: 455
|
Post by moramarth on Dec 23, 2015 23:30:26 GMT -5
Another way to use dry transfers: paint the area of the sign with the colour you want the writing to be. Apply dry transfers but DO NOT do the burnishing down stage. Over spray with the base colour of the sign. When dry, put full-strength sellotape (not low tack) over sign and rub down firmly. Pull off sellotape, should bring the dry-print with it - it's a sort of reverse stencil. I used this to put lettering on a car body years ago, mostly worked O.K. - IIRC there was a bit of fine brush touching up, so if you pick at the dry transfers you should get a distressed effect.
Cheers,
M
p.s. - On the side of a tow truck, when I was a kid: UBENDEMWEMENDEM
|
|
|
|
Post by tiking on Dec 24, 2015 2:34:10 GMT -5
Is that the new BMW, with the insurgent figure?
|
|
|
|
Post by wbill76 on Dec 24, 2015 13:12:52 GMT -5
Making good progress Shay, got to love those blue tones. Definitely an eye-catcher.
|
|
pt109
Full Member
Member since: April 2013
Stop staring at me! heheheh
Posts: 491
|
Post by pt109 on Dec 25, 2015 17:59:52 GMT -5
An interesting and colorful project.....I like it.
Paul
|
|
|
|
Post by tigrazor on Dec 25, 2015 18:45:23 GMT -5
What the others said. Im looking forward how it will turn out at the end. |
|
k1w1
Full Member
Member since: February 2015
Posts: 873
Feb 18, 2015 8:07:41 GMT -5
Feb 18, 2015 8:07:41 GMT -5
|
Post by k1w1 on Dec 26, 2015 19:51:23 GMT -5
I saw your big haul in Show Us What You Got. I see you now have some Vallejo Black Lava. Try a little on some card or something. The texture is great for Asphalt but I worry that it may be a bit heavy for 1/35. Spread it thinly. I use a small plastic spatula then I use a toothpick to spread it around in any small areas that get missed. The less strokes to spread it the better as lumps of it stick to the spatula then start tearing up the surface on the next stroke.
|
|
kiwibelg
Full Member
Member since: December 2014
Posts: 613
|
Post by kiwibelg on Dec 29, 2015 18:55:02 GMT -5
I'm loving where you're going with this. That color on that door is beautiful. I love it. What brand and type of blue is that? The blue is from a rattle can from Dupli-colour "baby blue", it will be the last time I use it as at last I have an airbrush! tiking..indeed, this is Takom's version of a modern? looking European car. This is my first ever 1/35 vehicle and so far no issues at all, like wise with the second civillian Takom 4x4. TRM..thanks for your post about "Uschi van der Rosten", I have ordered a few decals from him that will be arriving either this year or the next 
tigrazor/ pt109 / moramarth / wbill76 glad you guys like the colour and how it's going! Thanks for the tip Moramarth!!
My led lamp died the other day and my girlfriend kindly paid for a new one as an extra Xmas present..feeling very lucky right now!
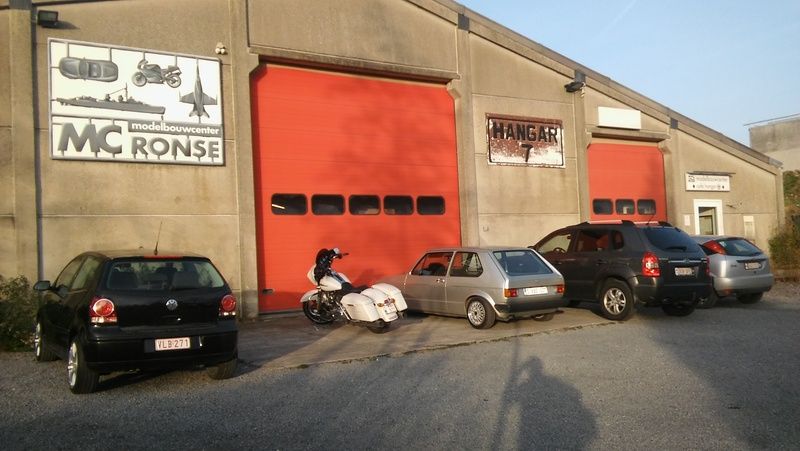
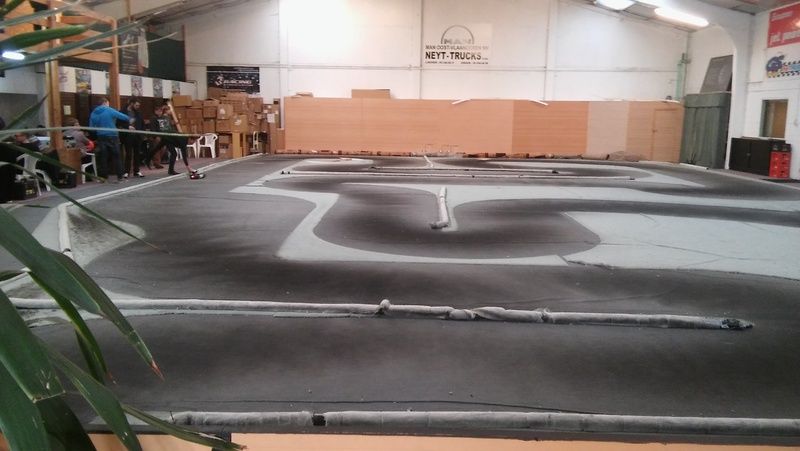
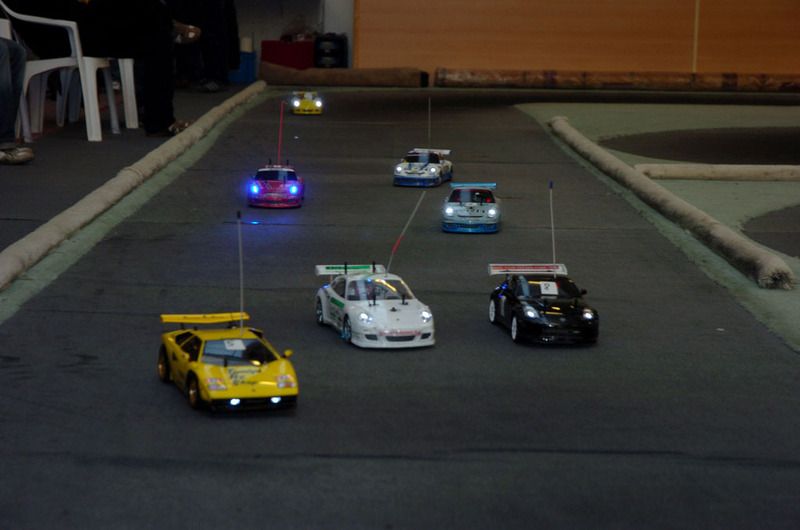
I had to venture out on Sunday to pick it up from a hobbystore that I haven't been to yet and ended up in some strange industrial zone here in Belgium..a strange place to find a modelling shop!!
Anyways, they have an indoor R/C track and a huge amount of kits to suit all types of modelling..didn't get a photo of the shop but took a few from inside and out:
k1w1..I did various experiments with the Vallejo "Lava", unfortunately the results were mixed and varied...to be honest I think it is a little to course to be used in 1/35 scale for what i want to achieve. However, it is a great product that I will use on other future projects!
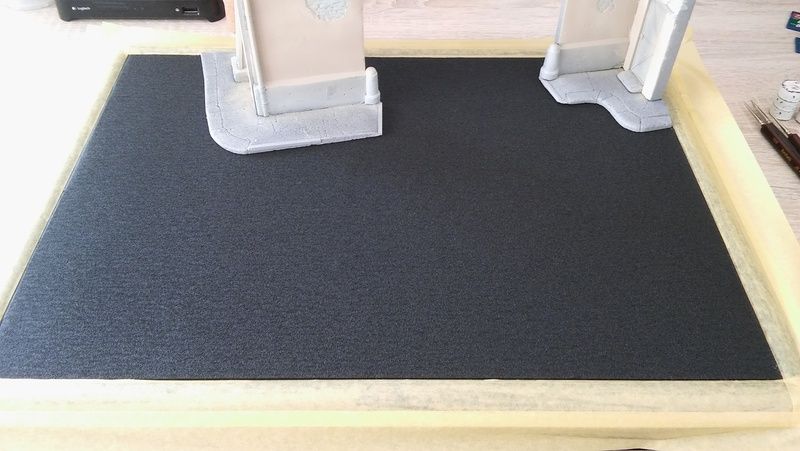
Instead I decided to go for the skateboard deck coverage, I still skate everynow and then and had a few spare pieces laying around..it has a subtle and even course that I think is more suitable.
Firstly I added a flat black primer to it, followed by a darker grey then a lighter one misted on from Vallejo Air Colour range.
Flat black primer:
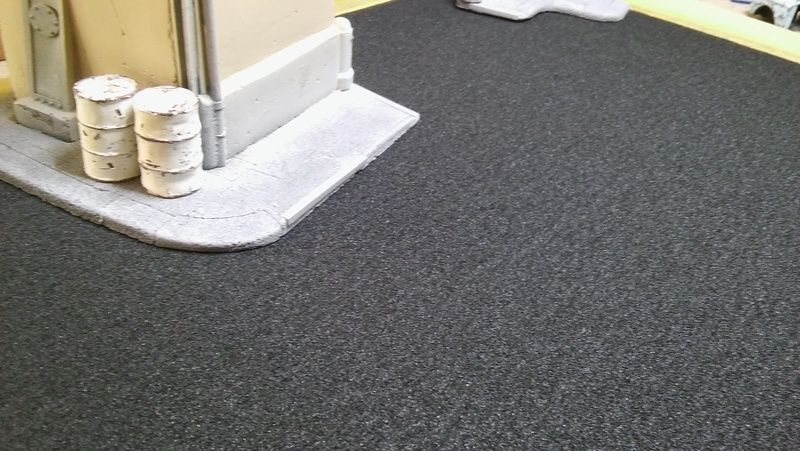
Darker grey:
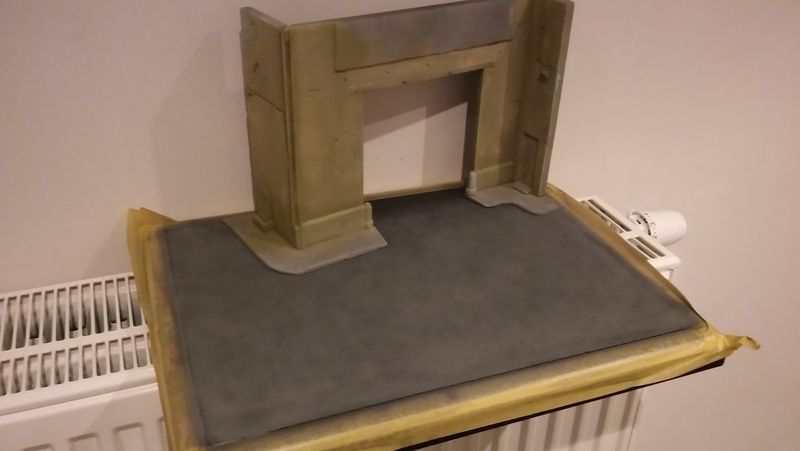
 Misted layer of light grey: Misted layer of light grey: (radiator is 1:1 scale )
I also started to do some shading work with my new airbrush..getting addicted to this thing! What a pleasure to work with!! The next week or so will be focused on the diorama as I have had to strip ALL of my figures...the rattle primer that I used from Vallejo has produced a slight over sprayed look..this was found out during the painting process. Fourteen figures in total..you win some/ you lose some  Thanks to everyone who has checked in on this and given me some extra tips and input! Shay |
|
|
|
Post by Leon on Dec 29, 2015 19:33:20 GMT -5
Nice progress on the base Shay! Asphalt and building are looking really good. BTW....That looks like an awesome hobby shop. |
|
|
|
Post by tiking on Dec 30, 2015 3:07:36 GMT -5
Loving the progress so far.
|
|
|
|
Post by kaytermarram on Dec 30, 2015 7:34:49 GMT -5
Yeah, that board stuff is cool for imitating asphalt, but you could have it cheaper: use wet and dry sandpaper in a fitting scale (maybe 400er?). Harhar, and I have seen doing such stuff using CAT LITTER, pressed with a tool into white glue. Becomes rock hard with an absolute plan surface and looks really good. Cat litter is available in different diameters.
Do not forget garbage galore on the base!
Frank
|
|
|
|
Post by wbill76 on Dec 30, 2015 20:11:56 GMT -5
Looks like you found a good shop in an unusual spot Shay, just be careful if someone offers you a good deal around back out of a spare shipping container. Base is coming together nicely, airbrush is getting a workout! |
|
|
|
Post by armorguy on Dec 31, 2015 2:50:59 GMT -5
I like the base Shay, great concrete street effect ! And the building looks better and better !
|
|
|
|
Post by tiking on Dec 31, 2015 7:41:32 GMT -5
Yeah, that board stuff is cool for imitating asphalt, but you could have it cheaper: use wet and dry sandpaper in a fitting scale (maybe 400er?). Harhar, and I have seen doing such stuff using CAT LITTER, pressed with a tool into white glue. Becomes rock hard with an absolute plan surface and looks really good. Cat litter is available in different diameters. Do not forget garbage galore on the base! Frank Agree with Frank. I used sand paper on my previous and present dios. |
|
kiwibelg
Full Member
Member since: December 2014
Posts: 613
|
Post by kiwibelg on Jan 3, 2016 16:50:59 GMT -5
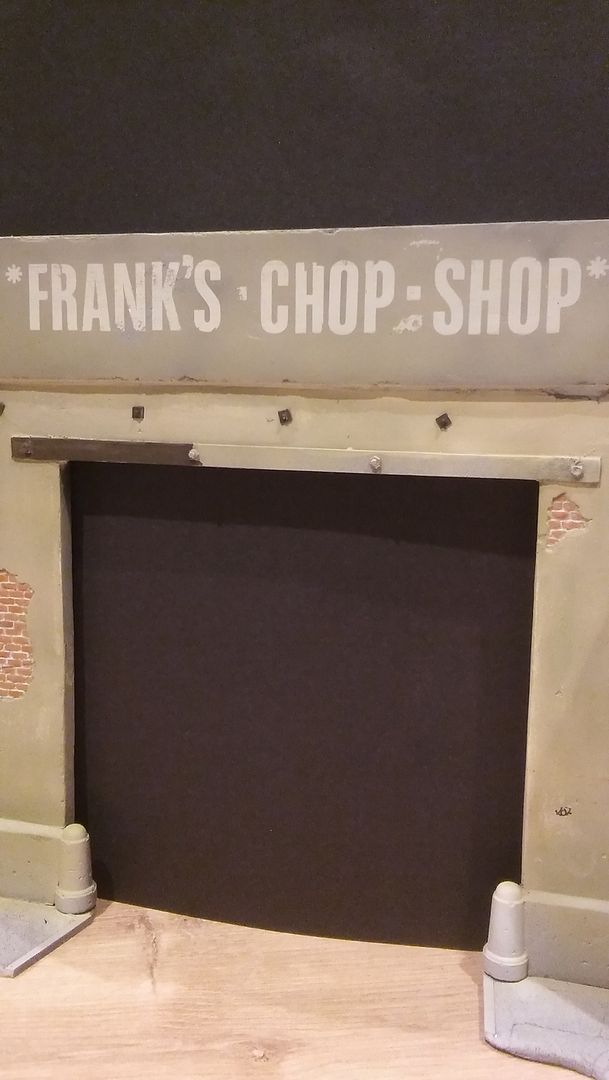
Another way to use dry transfers: paint the area of the sign with the colour you want the writing to be. Apply dry transfers but DO NOT do the burnishing down stage. Over spray with the base colour of the sign. When dry, put full-strength sellotape (not low tack) over sign and rub down firmly. Pull off sellotape, should bring the dry-print with it - it's a sort of reverse stencil. I used this to put lettering on a car body years ago, mostly worked O.K. - IIRC there was a bit of fine brush touching up, so if you pick at the dry transfers you should get a distressed effect. Cheers, M p.s. - On the side of a tow truck, when I was a kid: UBENDEMWEMENDEM
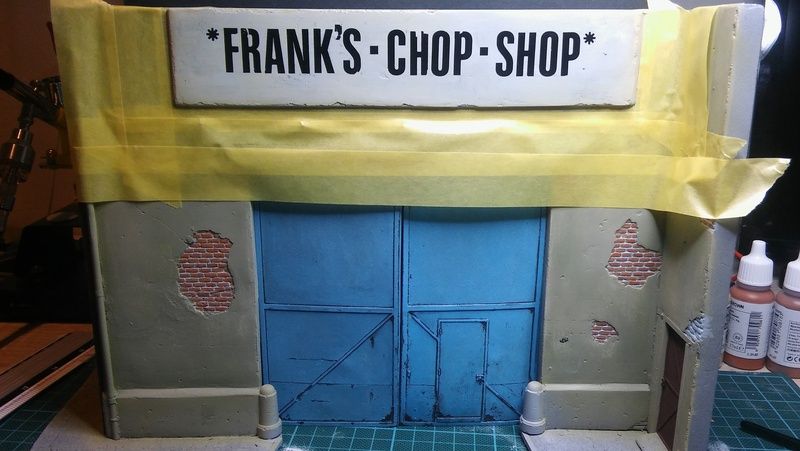
Just a quick/small update: Thankyou very much for this tip moramarth !! I had been messing around with various ways to recreate signwriting and nothing seemed to work...until I gave your method a shot, still some work to be done but quite pleased on how it turned out Brickwork has it's foundation colours put down and metal beams are painted. Just waiting on my Uschi and Maim graffiti sets to turn up in the post and my rust/steel wool mixture to settle and then on to the weathering stage.
Loving working with my new airbrush/mini compressor..makes me want to get stuck into an old Russian K.V 2 from Trumpeter that I have in my stash somewhere!!
Rub on letters:
Light build up of colour with AB over entire sign:
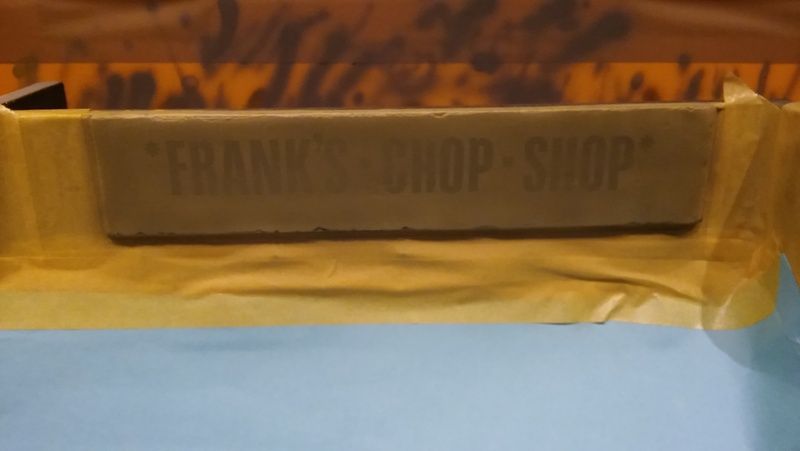
Various shades partially hit with the AB:
![]() 
Allowed paint to dry..then a layer of sticky brown tape placed over entire sign (pressed down until text raised):
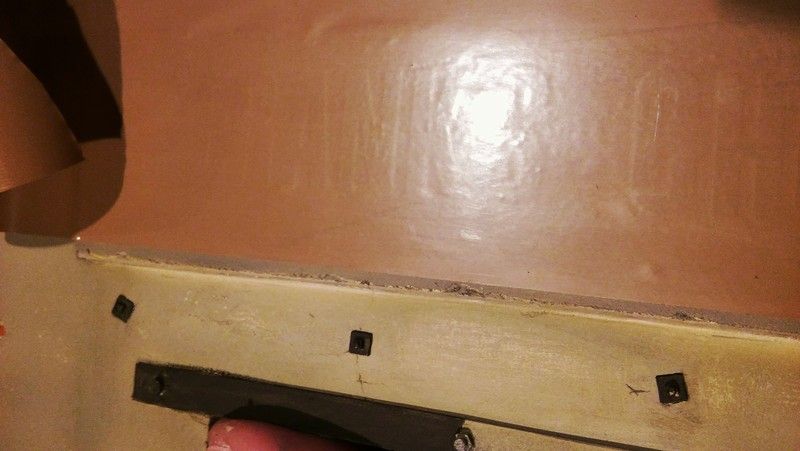
View after removal of tape:
Thanks for looking in, any comments or ways to improve my work would be appreciated!!
Shay
|
|
|
|
Post by Leon on Jan 3, 2016 17:04:51 GMT -5
Awesome work on the sign Shay! Looks really good. |
|


 Off and rolling on this one.