|
|
Post by wbill76 on Mar 14, 2016 16:45:03 GMT -5
Stepping outside my normal realm a little bit with this next project. The folks over at Armorama asked if I would like to do an OOB build of the recent Tamiya 1/35 kit #35348 and the timing worked out great, so I'll be dealing in Russian Green for a bit as a result! First impressions are that it's up to the usual Tamiya standards and has an interesting approach to the tracks...more to come! 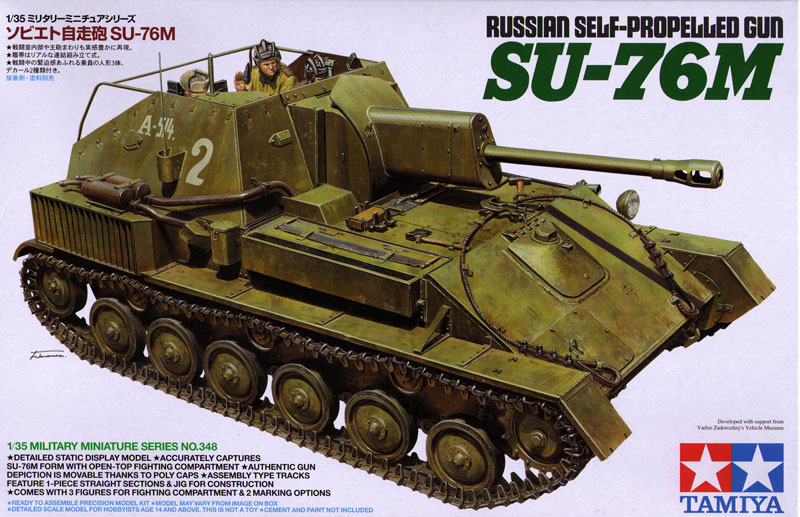 |
|
Tojo72
Forum Moderator      Sept '24 Showcased Model Awarded
Member since: November 2012
Posts: 5,324
Member is Online
MSC Staff
|
Post by Tojo72 on Mar 14, 2016 17:31:58 GMT -5
Looking forward to grabbing one of these,along with that French Tank they have coming out also.
Will be checking in.
|
|
|
|
Post by Leon on Mar 14, 2016 17:35:58 GMT -5
I'll be following along Bill!  Never seen you do Russian armor before.  |
|
sturmbird
Full Member
  
Member since: June 2012
Posts: 1,406
Jun 21, 2012 13:51:45 GMT -5
Jun 21, 2012 13:51:45 GMT -5
|
Post by sturmbird on Mar 14, 2016 17:38:00 GMT -5
This one is on my want list. I hope it's as good as some are saying it is!
gary
|
|
|
|
Post by wbill76 on Mar 14, 2016 18:19:48 GMT -5
Glad to have you along for the ride Anthony and Gary! Leon, it's been a while...did a Beute T-34 not all that long ago as well as a KV-1. This one's a little different as an SPG.  |
|
|
|
Post by Leon on Mar 14, 2016 18:23:42 GMT -5
Ahhh,thats right!  How quickly the old mind forgets!  |
|
|
|
Post by deafpanzer on Mar 14, 2016 18:23:48 GMT -5
OMG!!! Our friend Bill has officially lost his mind... its a freaking Russian SPG!!! Somebody better call his wife now...
|
|
|
|
Post by wbill76 on Mar 14, 2016 18:25:10 GMT -5
OMG!!! Our friend Bill has officially lost his mind... its a freaking Russian SPG!!! Somebody better call his wife now... Well the Tiger has its enemies after all!  |
|
|
|
Post by deafpanzer on Mar 14, 2016 18:45:25 GMT -5
Wait a minute... how so nice of you! You figured the Tiger needed 'targets'.  |
|
|
|
Post by tonylee-Rest In Peace on Mar 15, 2016 18:42:41 GMT -5
Hey Tex what's the hold up here?
I bet it will be a push over compared to the original kit I built,it was a battle everyday.
Tony Lee
|
|
|
|
Post by wbill76 on Mar 15, 2016 19:38:35 GMT -5
Hey Tex what's the hold up here? I bet it will be a push over compared to the original kit I built,it was a battle everyday. Tony Lee Will be interesting to see how it builds up...it's got some unusual features (for Tamiya) like a multi-part hull tub and link-and-length tracks, but should be a fun project all the same. That and it's molded in green plastic.  |
|
|
|
Post by wbill76 on Mar 18, 2016 17:15:25 GMT -5
Kicked this one off today and duly started in on Step 1. This is a simple step, it just assembles the base of the gun mount complete with a polycap and gets the hull nose plate ready for install later on in Step 3. I deliberately left off the hook details for now as I prefer to avoid adding details to plates until after they are in place to prevent damage, loss, etc. 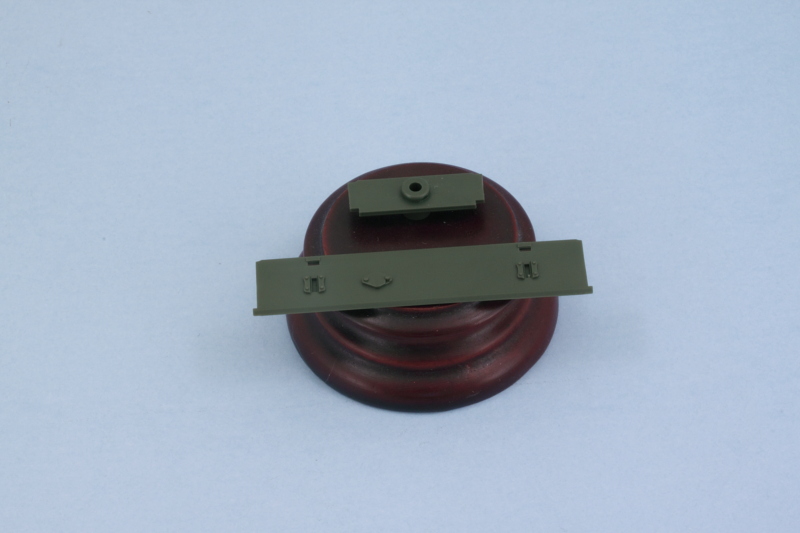 Step 2 builds up the front plate of the fighting compartment. This part does double duty as the main hull support bulkhead, so it plays an important role. First order of business was dealing with the many small ejector marks on the interior face. They aren't deep but some of them are in hard to reach spots. I used some custom cut sanding sticks that keep on hand for just this type of thing and sanded them down. It was only after I sanded smooth the large square area on the right side that I realized it gets covered up completely with additional parts later, but I was in full-on EPM removal mode.  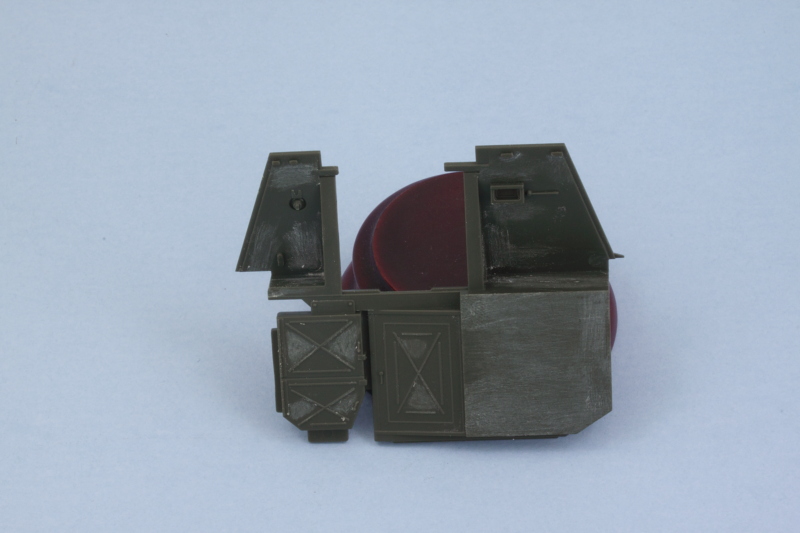 With those taken care of, I completed the assembly as called for in the step. 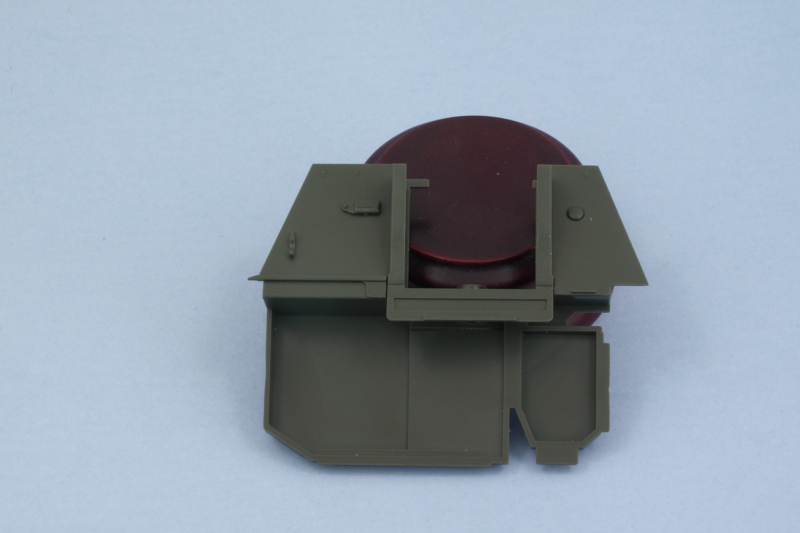 Step 3 deals with the multi-panel hull assembly. I know some have reservations about this type of approach vs. a one-piece tub, but Tamiya did a great job with the fit and engineering here. First up though, you guessed it, more little ejector marks to deal with. Most of these are around the suspension arm mounts and would most likely be covered by the road wheels but I didn't want to take any chances. Others were in highly visible areas and had to go, so more delicate sanding/trimming with a sharp #11 blade did the trick. 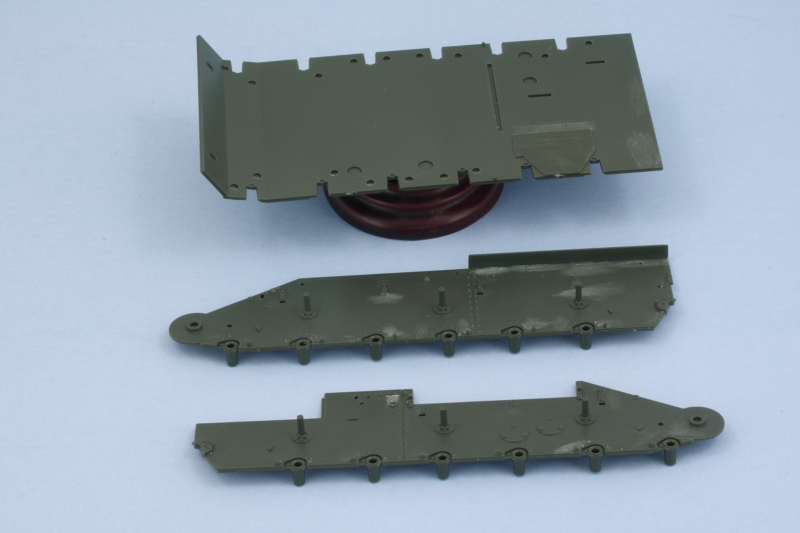 The instructions clearly direct you to assemble the hull in a specific sequence of events to avoid any problems. The nose plate goes on first, then the sides are attached to the floor pan, then the superstructure plate slides in between them to lock it all together. I used liquid glue to attach everything and encountered zero problems in the process. 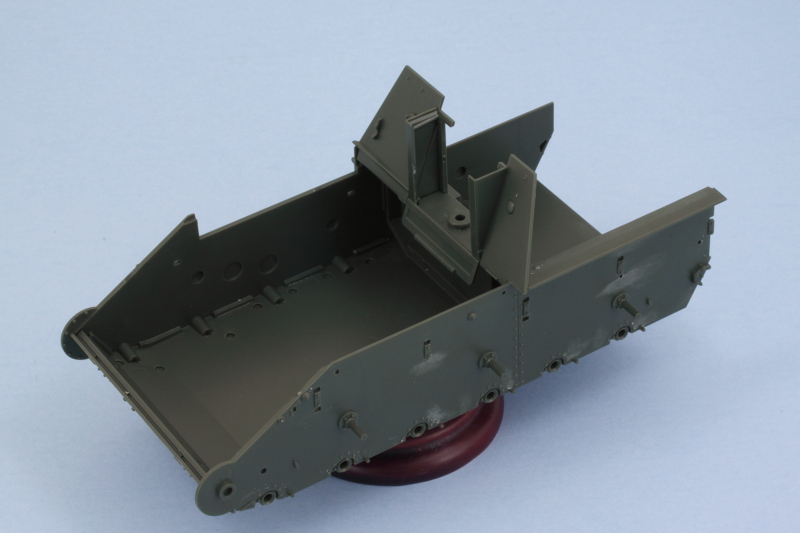 Just to be sure I wouldn't have any problems later on, I skipped ahead to Step 15 and added in the glacis and engine deck plates. There's no real good reason I could see in the instruction order to wait to attach them and it has the added bonus of ensuring the hull would set up square. For good measure, I did a test fit with the compartment back plate, part B8, and held it in place with masking tape. Everything fit like a glove. 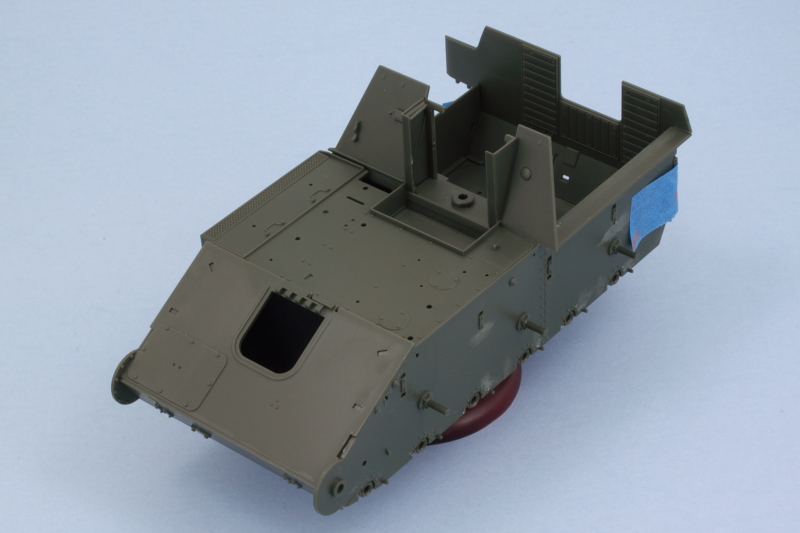 So far so good! Once the hull is fully set, I'll circle back and add the details called for to the nose plate and also work on the suspension components. Steps 4-13 deal with the fighting compartment interior and will be skipped for a while until I'm ready to tackle that area given all the detail work it involves. |
|
|
|
Post by Leon on Mar 18, 2016 17:39:01 GMT -5
Off to a nice start and looking good Bill!  |
|
|
|
Post by wbill76 on Mar 18, 2016 19:42:21 GMT -5
Thanks Leon! It's a tiny little guy, about the same size as a Marder II on the German side.
|
|
dupes
Head Moderator      Jan '16 MoM Winner
Member since: March 2012
Need to build 80 kits per year until I'm 100 to deplete my stash. Maybe I should sell a couple.
Posts: 7,186
Member is Online
MSC Staff
|
Post by dupes on Mar 18, 2016 22:04:56 GMT -5
Innnnnnteresting...and it's actually a new-tooled Tamiya offering? Guess I missed the pre-hype about this one coming out!
|
|
|
|
Post by wbill76 on Mar 18, 2016 22:18:12 GMT -5
Innnnnnteresting...and it's actually a new-tooled Tamiya offering? Guess I missed the pre-hype about this one coming out! Yep, all new, all Tamiya!  |
|
adt70hk
Forum Moderator      November '24 Showcased Model Awarded
Member since: November 2015
Currently attempting to build something decent!!! ;)
Posts: 2,834 
MSC Staff
|
Post by adt70hk on Mar 19, 2016 1:07:38 GMT -5
Joining the audience!!! Nice start so far Bill!!
|
|
|
|
Post by wbill76 on Mar 19, 2016 11:13:02 GMT -5
Joining the audience!!! Nice start so far Bill!! Plenty of room available Andrew, join the group!  |
|
martslay
Full Member
  
Member since: February 2016
Posts: 1,113 
|
Post by martslay on Mar 19, 2016 11:22:51 GMT -5
Good start Bill  |
|
|
|
Post by armorguy on Mar 19, 2016 11:42:56 GMT -5
Here we go again, off for another modeling adventure, I always like your threads a lot and they're pure gold for other members on this forum. Thanks for the neverending flow of inspiration Bill !
|
|
|
|
Post by wbill76 on Mar 19, 2016 12:43:40 GMT -5
Thanks Vyacheslav! Here we go again, off for another modeling adventure, I always like your threads a lot and they're pure gold for other members on this forum. Thanks for the neverending flow of inspiration Bill ! I could say the same to you AG!  Will do my best to provide some insight on this particular kit, it seems to have people very interested given the problems that many encounter with the Miniart offering.  |
|
reserve
Senior Member
   
Member since: July 2012
Si vis pacem para bellum
Posts: 2,372
Jul 11, 2012 9:11:45 GMT -5
Jul 11, 2012 9:11:45 GMT -5
|
Post by reserve on Mar 19, 2016 13:21:24 GMT -5
Three piece tub and pin marks eh? Very un-Tamiya like. I wonder whose rebox this is then. Will be watching as I seem to be doing quite a bit of Soviet stuff lately
Regards,
Mark
|
|
martslay
Full Member
  
Member since: February 2016
Posts: 1,113 
|
Post by martslay on Mar 19, 2016 13:41:30 GMT -5
Bill, what decals Tamiya has put in a box?
|
|
|
|
Post by wbill76 on Mar 19, 2016 13:52:20 GMT -5
Three piece tub and pin marks eh? Very un-Tamiya like. I wonder whose rebox this is then. Will be watching as I seem to be doing quite a bit of Soviet stuff lately Regards, Mark No one's rebox Mark, 100% Tamiya. From what I understand, they've used the flat-pack hull design on a couple of their other more recent kits. To be fair, the majority of the ejector marks are in places that would likely be hidden with a few exceptions but I'm not taking any chances. The pin marks that are present are shallow and easily dealt with if you're careful, not the crater-like marks that often accompany older kits or reboxes.  |
|
|
|
Post by wbill76 on Mar 19, 2016 13:57:17 GMT -5
Bill, what decals Tamiya has put in a box? There are two markings options included, both Soviet WW2 vehicles. One is with the 11th Guards Self-Propelled Artillery Battalion, East Prussia, 1944. The other is Unit Unknown, Karlshorst District, Berlin, 1945. Here's the full markings page from the instructions as a guide:  |
|
martslay
Full Member
  
Member since: February 2016
Posts: 1,113 
|
Post by martslay on Mar 19, 2016 14:03:37 GMT -5
It is good that there are no unclear inscriptions. Eternally Soviet/Russian inscriptions print with mistakes.  |
|
vlpbruce
Full Member
  
Member since: March 2013
Posts: 1,463 
|
Post by vlpbruce on Mar 19, 2016 14:52:01 GMT -5
Looking good Bill.
Pulling up a chair.
|
|
|
|
Post by wbill76 on Mar 19, 2016 15:21:17 GMT -5
I agree Vyacheslav, it's amazing how they can screw up simple things like 'Za Rodina' or similar.  Glad to have you along Bruce!  |
|
Deleted
Member since: January 1970
Posts: 0
Nov 24, 2024 19:19:57 GMT -5
Nov 24, 2024 19:19:57 GMT -5
|
Post by Deleted on Mar 19, 2016 16:17:08 GMT -5
Have my pop corn all ready! 
|
|
|
|
Post by wbill76 on Mar 19, 2016 17:35:56 GMT -5
Just in time Bruce!  More progress to report! I went back to Step 1 and duly added in the tow hook arrangments to the nose plate so I wouldn't forget about it later on. Easily done, you just have to be sure to add the small triangular parts, A6, first and then the main hooks to avoid any issues. 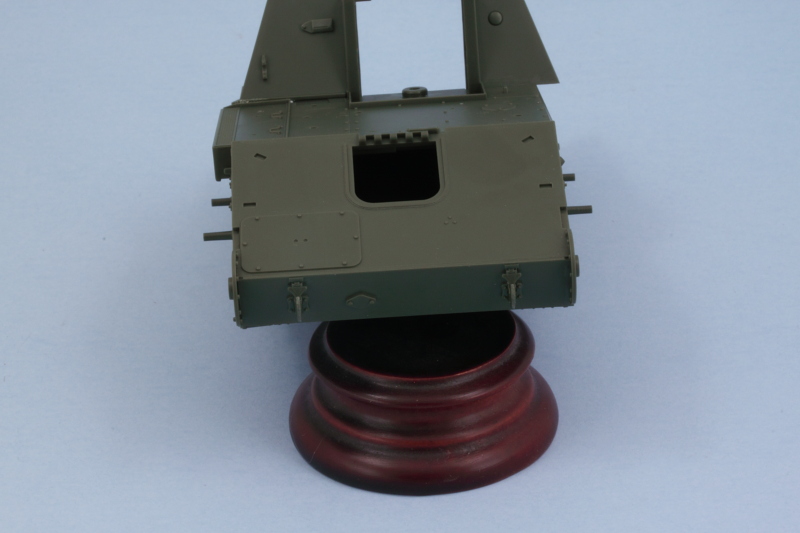 Rather than move on to the suspension as I originally planned, I instead started in on the interior modules to complete what I could there so that it would make painting and assembly easier when I get to that stage. First up, I assembled the main parts of the two right-hand side shell racks as called out in Step 4. The bases have small tabs that extend beyond the rack wall and are used to install them into the fighting compartment, so I wanted to see how easy that would be if the compartment wall itself was already installed. The right side of the compartment is assembled in Step 5 out of two separate large pieces. I used the main hull to help ensure they were lined up properly in relation to each other and the angled front part of the compartment, then carefully applied liquid glue to the join and let it set inside the compartment before popping it out so it would behave as a single piece going forward. A quick test with the shell racks showed that the recommended order in the instructions of installing them to the compartment side first is a good one...it's a pretty tight fit, so I will deal with them separately in the painting and detailing department. It's also worth noting here that Tamiya did something a little funny with the shell rack components. The retaining clips for each round are molded onto the rounds themselves, so there are no clips present for the empty round places in the racks. Tamiya deliberately left several round places empty in all three racks, so that leaves something for the aftermarket boys or the adventurous scratch-builders to address.  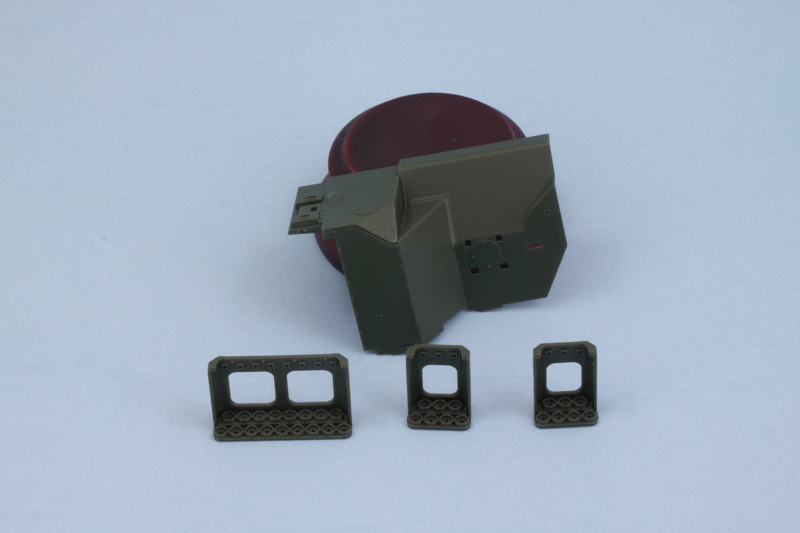 Skipping over to Step 11, I worked on the compartment rear plate. Some ejector marks that would be visible were removed and I installed the bench seat and supports so I could work with this as another interior module for painting. 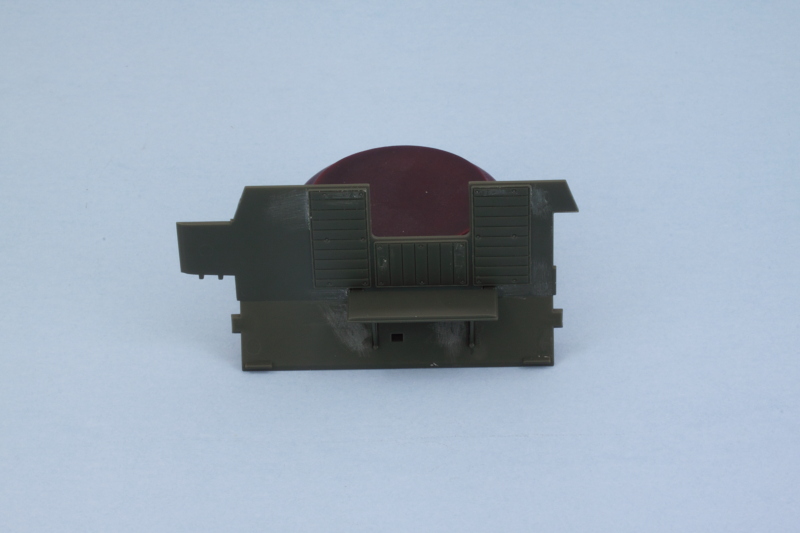 A quick mock-up with some masking tape and poster putty shows just how cramped/tight the interior is with all this stuff. I deliberately left off the little commander's jump seat on the right wall as it will be easier to detail it separately and then install it due to how closely it fits against the rear shell rack. 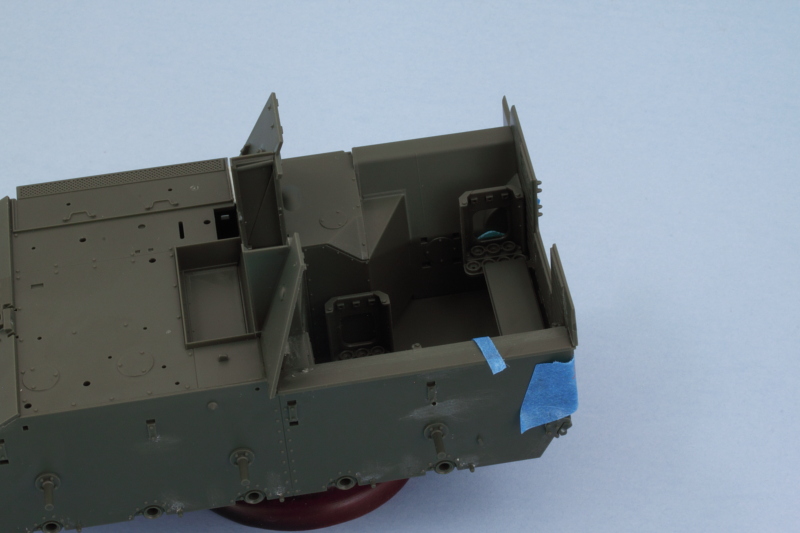 I also noticed that there was a small gap/opening on the right side between the engine deck and the angled superstructure front. As near as I could tell after consulting available reference photos of the actual vehicle, there is supposed to be a small gap here but not one that would extend all the way down into the hull itself. To address that, I added a small length of white styrene rod and applied liquid glue to soften it then shaped it with a wooden toothpick to fill in the base hull area while still leaving the superficial gap between the superstructure and the engine deck area. Not sure if that's 100% accurate, but it looks better to my eye vs. having this small crack down into the interior.  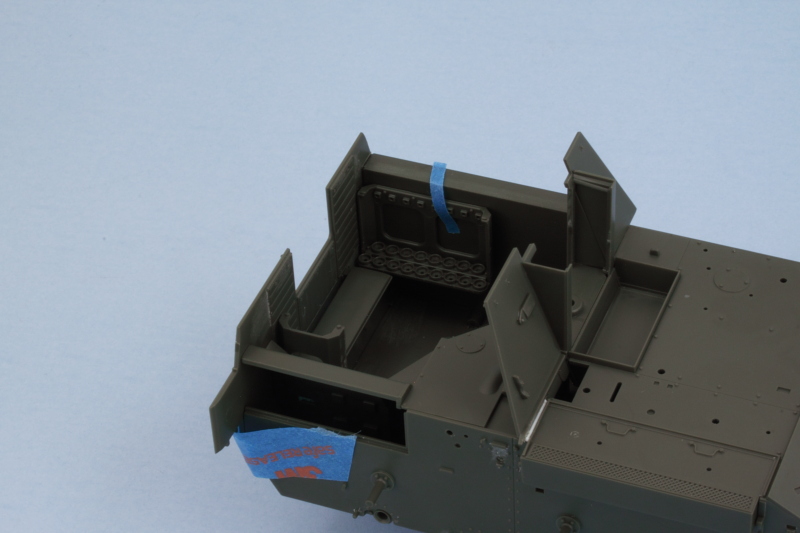 Next up will be spending some time on the fighting compartment upper sides to get them ready for paint. |
|