mrversatile
Full Member
   July '23 Showcased Build Awarded
Member since: January 2013
Posts: 682
Jan 20, 2013 10:52:24 GMT -5
Jan 20, 2013 10:52:24 GMT -5
|
Post by mrversatile on Mar 8, 2017 21:21:51 GMT -5
I think it is time for a car kit now that I am temporarily off my "Russian subject" kick. Presented is the 1/24 scale Mercedes 300sl gullwing from the year 1955. I recently acquired Mercedes "ivory" for the exterior color from Gravity Paints and plan to do a red leather interior. I also acquired the photo-etch set from Hobby Design and am trying to get my hands on a "luggage set" for the rear interior deck readily seen in these classics. 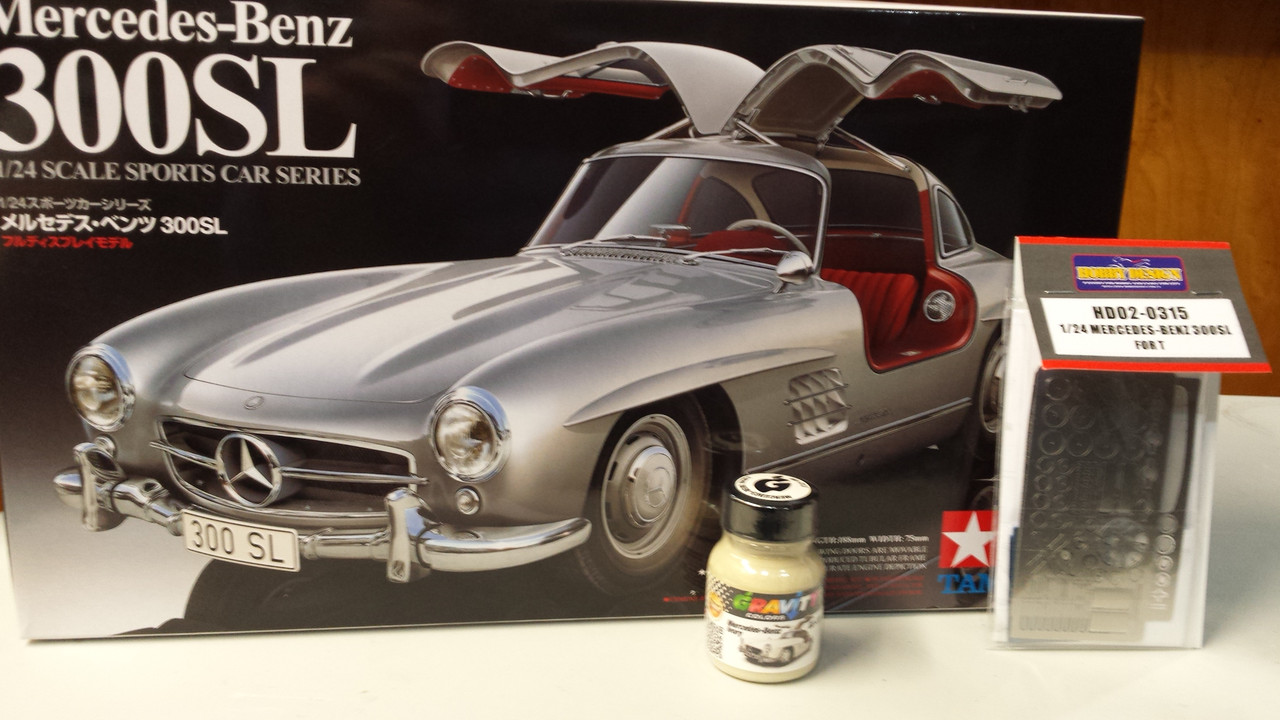 |
|
afvfan
Senior Member
   
Member since: December 2012
Bob
Posts: 1,772
Dec 10, 2012 17:32:38 GMT -5
Dec 10, 2012 17:32:38 GMT -5
|
Post by afvfan on Mar 9, 2017 1:11:44 GMT -5
Ah, the ultimate '50s car. One of these is on the short list of things to buy if I ever hit the lottery.
|
|
|
|
Post by Leon on Mar 9, 2017 5:27:43 GMT -5
That is sharp looking Gil! I'll be following a long.
|
|
joelsmith
Full Member
  
Member since: July 2012
There no winners in war, only survivors.
Posts: 1,404
Jul 5, 2012 22:33:58 GMT -5
Jul 5, 2012 22:33:58 GMT -5
|
Post by joelsmith on Mar 9, 2017 7:05:14 GMT -5
Gil, Tamiya Model Magazine had a build article on this kit and mentioned a resin luggage kit being available. Also mentioned were a set of "knockoff" wheels being made by the same company. I will try to find my copy and get you the info.
|
|
mrversatile
Full Member
   July '23 Showcased Build Awarded
Member since: January 2013
Posts: 682
Jan 20, 2013 10:52:24 GMT -5
Jan 20, 2013 10:52:24 GMT -5
|
Post by mrversatile on Mar 9, 2017 14:30:44 GMT -5
Yes Joel, I believe HRM are making the wheel sets but there is a guy in Hungary who makes both. You may be referring to him. I have reached out to him in a number of ways to no avail so far. That info should help nevertheless.
|
|
Wes
Full Member
  
Member since: November 2011
Posts: 686
Nov 16, 2011 9:34:50 GMT -5
Nov 16, 2011 9:34:50 GMT -5
|
Post by Wes on Mar 9, 2017 15:27:49 GMT -5
Count me in bud
|
|
|
|
Post by deafpanzer on Mar 10, 2017 11:38:48 GMT -5
NICE!!!
|
|
mrversatile
Full Member
   July '23 Showcased Build Awarded
Member since: January 2013
Posts: 682
Jan 20, 2013 10:52:24 GMT -5
Jan 20, 2013 10:52:24 GMT -5
|
Post by mrversatile on Mar 14, 2017 19:51:28 GMT -5
Got a quick update for you all. I have primed the body and exterior colored parts. Two problems arose in this regard. The stock wheels have the center hubs painted in the body color. That wouldn't necessarily be problematic but the outside of the hub cap is chrome and contains a chrome Mercedes emblem in the center which is embossed on the chrome part. So, I decided to sand the center emblem off, create a mask for each, prime, paint, and then replace the emblem with the one's supplied in the photo etch set. The ones on the left are untouched and the ones on the right are sanded. 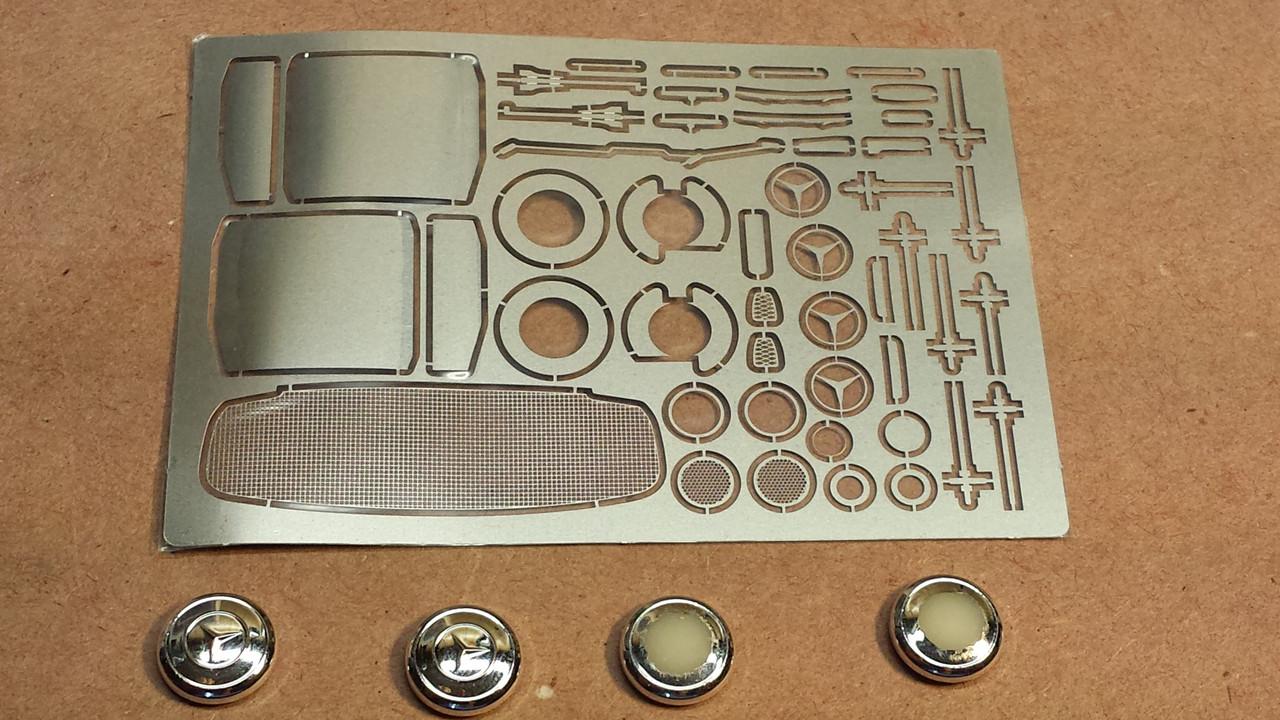 Below, are the hubcaps primed and ready for color: 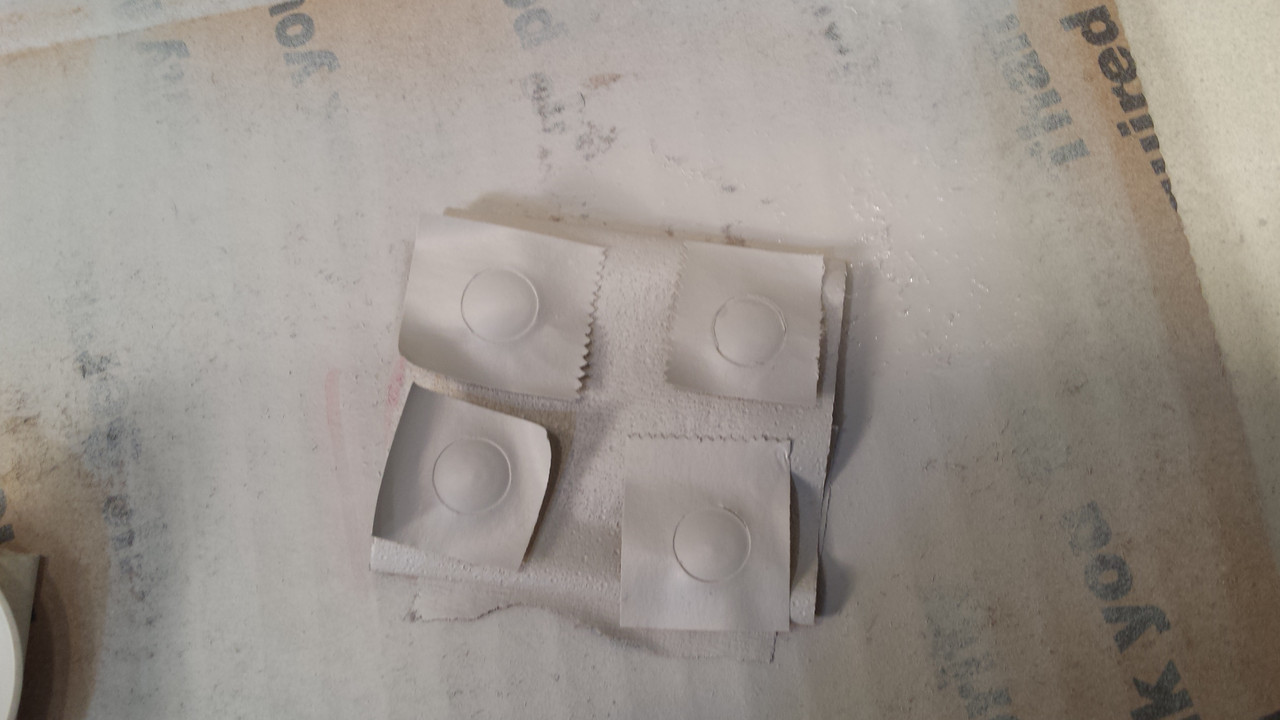 Now the next problem involved the body color application to the instrument panel which is also a chrome part. The trouble with this is the instrument bezels are all chrome and the lower part of the panel is the interior color separated by a chrome bezel of controls. For this problem I decided to use liquid mask to cover the whole part and then trim around each bezel with a #11 blade to remove the material in order to paint the exterior and interior colors and hopefully leave the chrome bezels neatly outlined. Below is the primed result. 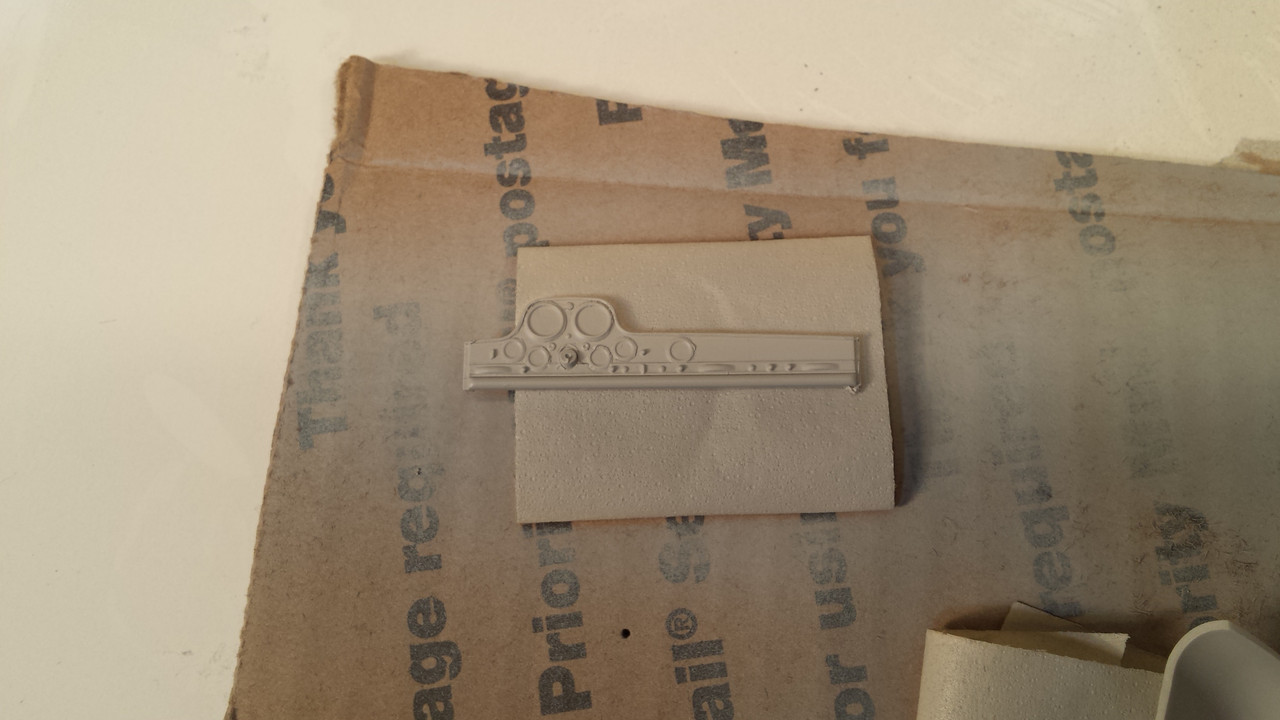 And finally, the body, hood, and doors primed and sanded with 3200 grit to level the finish before color: 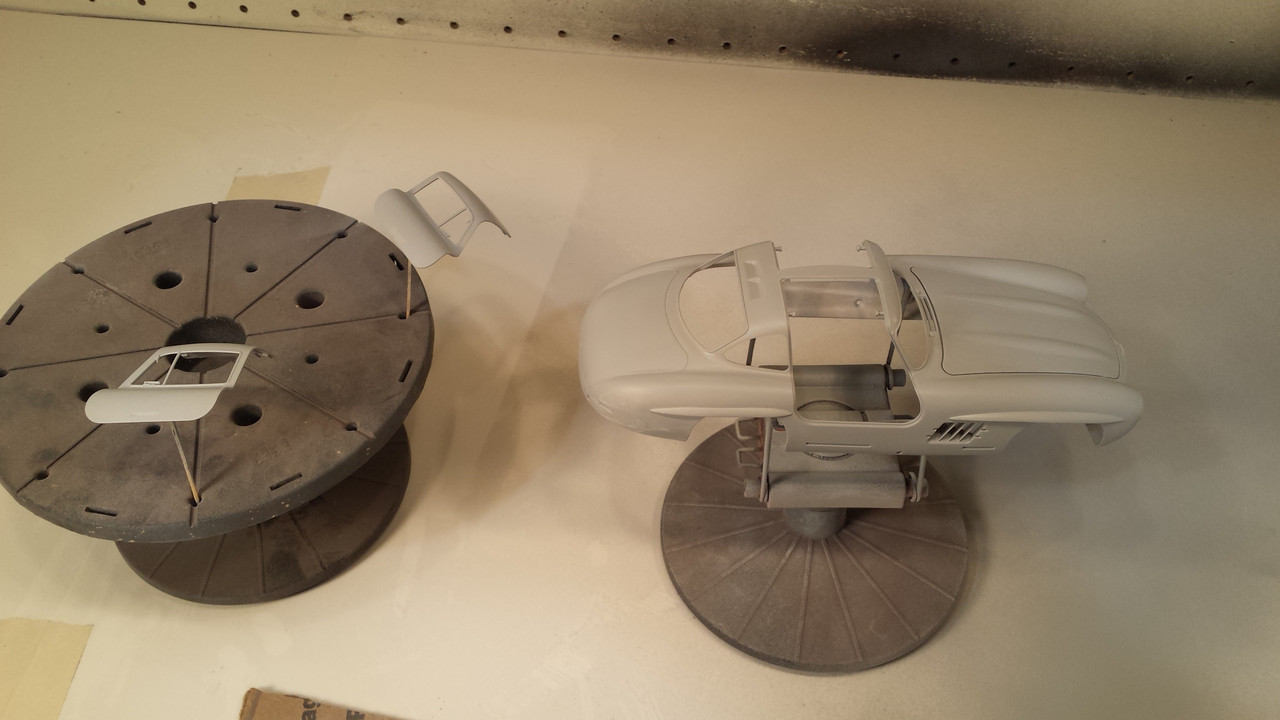 |
|
|
|
Post by Leon on Mar 14, 2017 20:06:50 GMT -5
Primer looks good Gil!
|
|
midnightprowler
Full Member
  
Member since: February 2016
Posts: 701 
|
Post by midnightprowler on Mar 18, 2017 7:30:09 GMT -5
Looking good so far.
|
|
mrversatile
Full Member
   July '23 Showcased Build Awarded
Member since: January 2013
Posts: 682
Jan 20, 2013 10:52:24 GMT -5
Jan 20, 2013 10:52:24 GMT -5
|
Post by mrversatile on Mar 20, 2017 21:35:38 GMT -5
An update and a crisis....I painted the color coat with my first attempt with Gravity Colors paints. It didn't go as planned. I have used lacquers numerous times from different companies and have learned early on that low air pressure and proper thinning are paramount. That being said, and after checking out some YouTube review videos to head off any surprises, I embarked on my first attempt. I use a fan spray airbrush and had the pressure at less than 20psi with the paint used straight from the bottle. It appeared that splatters of clumped pigment were spewing from the AB and mixing with the wet paint. The result was a grainy surface, not like a quick drying effect, but loose impediments. So I sanded the car and filtered the paint before respraying with the same result. I even used a different airbrush to no avail. So sand smooth again and fix a "contact gouge" which occurred when handling. I finally decided to further thin the paint with 40% Dupont auto lacquer and lowered the psi to less than 15. This seemed to help but in the final analysis, I think the factory ratio wasn't thinned enough and some pigment was "falling out" of the solution. So I finally got the color coat finished and washed the parts after a quick wet sanding with 4000 grit, and was preparing to blow the water off with the AB to prepare for the clear coat. The body was resting on my right leg and began to slip between my legs to the floor. My immediate reaction was to quickly close my legs to prevent the fall. Wrong move, the result was that my legs closed over the roof which collapsed and broke the passenger side A pillar. The pillar broke cleanly through with the driver's side flexed causing the paint to crack on that side. Below is the colored body and then the repair with MR Surfacer brushed on and sanded. 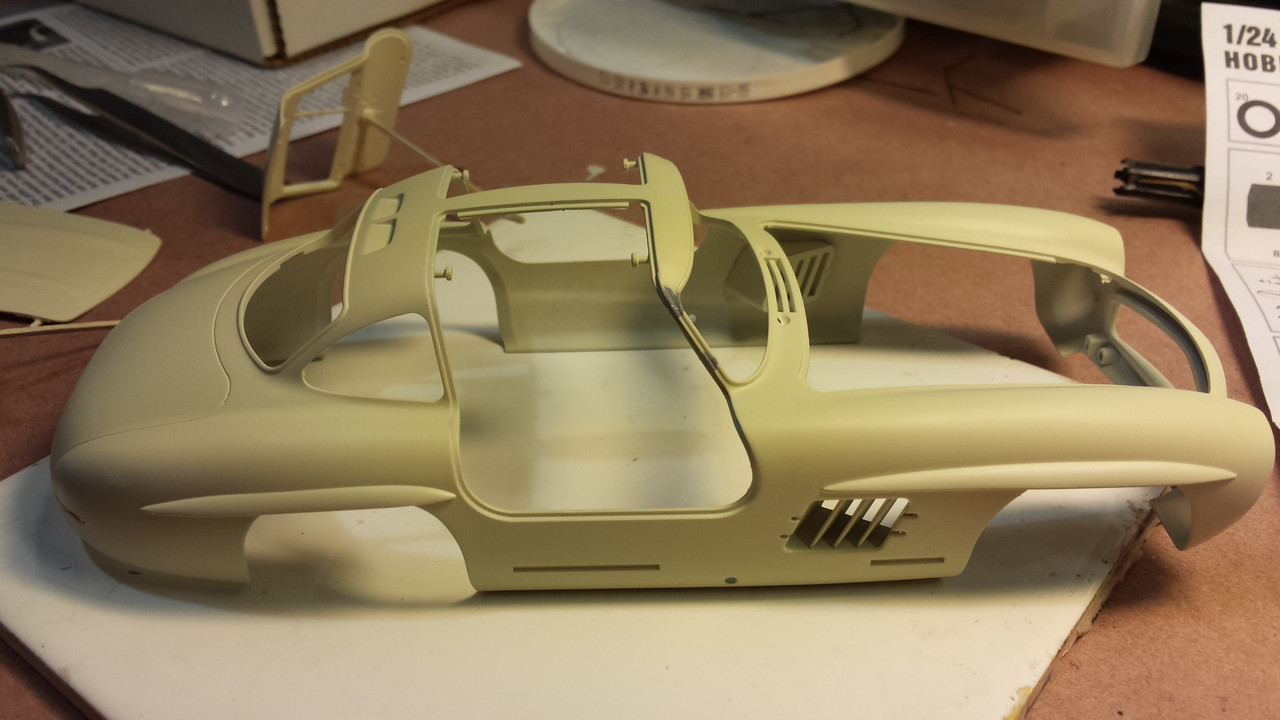 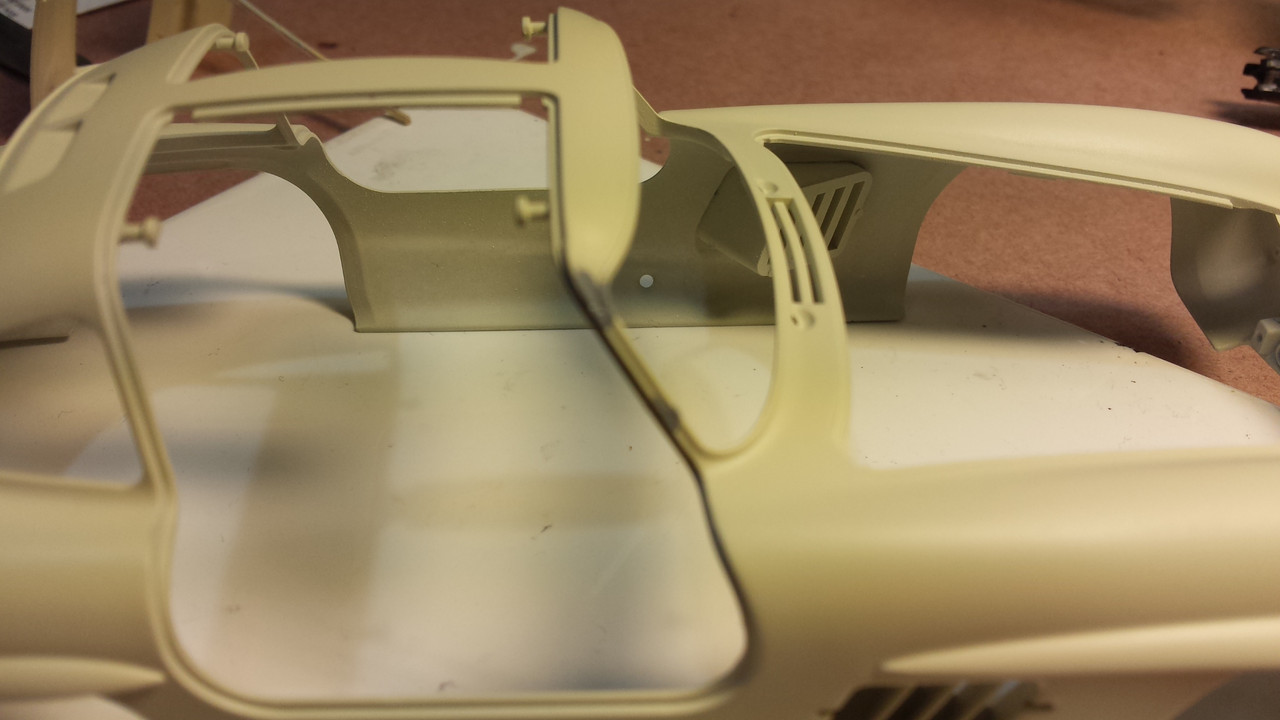 The next update will be the clear coated body. I am going against one of my pet peeves here by using a basecoat/clearcoat on a pre-1970 car. I like to just polish out the paint like the 1:1 cars of the day but this particular paint required the clearcoat so I will try to keep it thin enough so it doesn't look deep like a modern car. |
|
|
|
Post by Leon on Mar 21, 2017 4:29:43 GMT -5
Nice work on the paint and repair Gil!  |
|
|
|
Post by eastrock on Mar 21, 2017 11:00:36 GMT -5
well its a common reaction gil, good thing is not a blade that fall off I'm almost done it but a friend of mine did and the curses he could think of... anyway the color looks great!!!
Cheers!!!
|
|
mrversatile
Full Member
   July '23 Showcased Build Awarded
Member since: January 2013
Posts: 682
Jan 20, 2013 10:52:24 GMT -5
Jan 20, 2013 10:52:24 GMT -5
|
Post by mrversatile on Apr 2, 2017 11:56:27 GMT -5
Quick update: I finally finished applying clear coat (which of course dried with "orange peel") and used much elbow grease sanding with 6 different grit sanding cloths, then 4 different polish grades. The pictures are what I came out with. Notice the repair doesn't look too apparent. Also, the issues with the hub caps and instrument panel mentioned earlier. Both are painted with the exterior color and the top part of the instrument panel has been unmasked with good effect. The lower part of the panel still has to be painted the interior color before it is totally unmasked. The hub caps are pictured next to the photo etched Mercedes emblems which will replace the sanded off embossed originals. These photo etched pieces were coated with one of my "liquid chrome" pens and are ready to be added. Also, I contacted "Gravity Paints" about the problem I had and they admitted it may have been a bad batch and sent me another bottle free of charge. I used the new paint for the steering wheel and other small parts and it worked flawlessly. 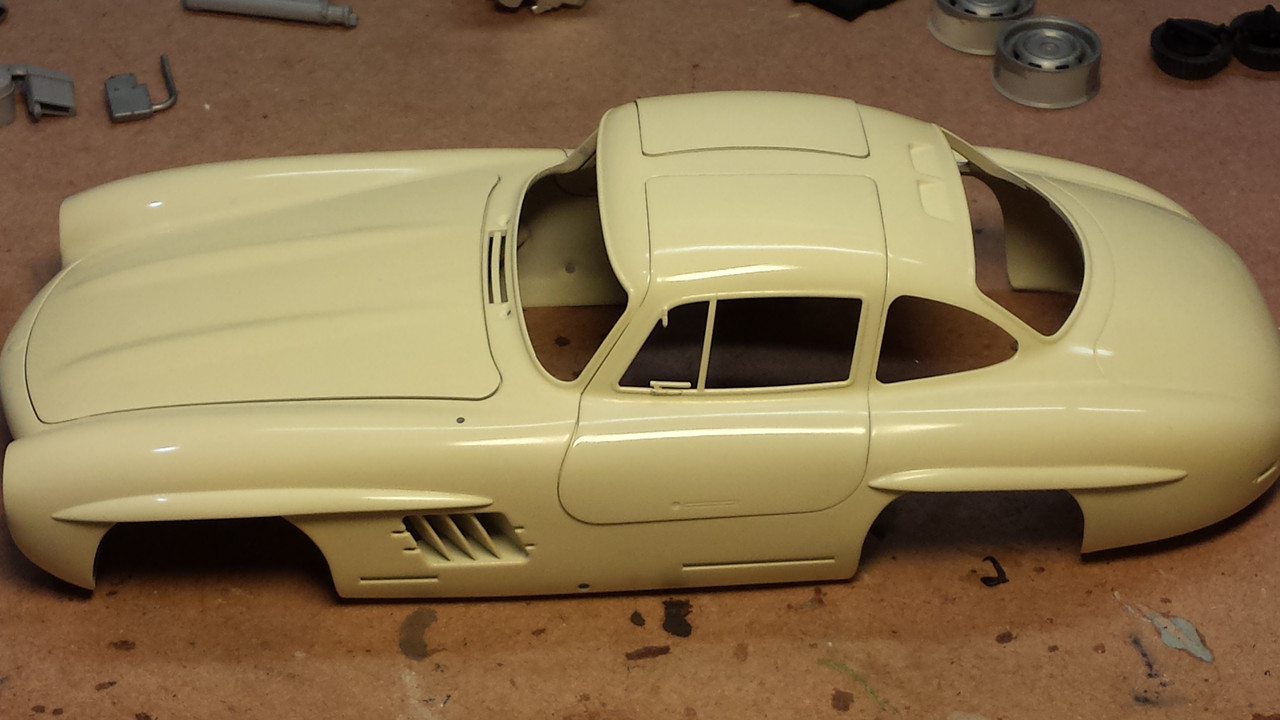 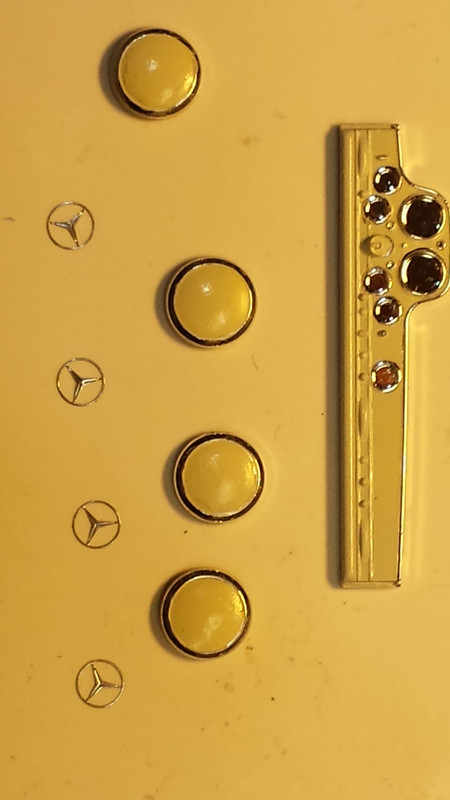 |
|
midnightprowler
Full Member
  
Member since: February 2016
Posts: 701 
|
Post by midnightprowler on Apr 2, 2017 12:54:48 GMT -5
Looking great.
|
|
|
|
Post by mustang1989 on Apr 20, 2017 6:34:56 GMT -5
Man have I been missing out!!!! This is great!!!!!!!!!
|
|
|
|
Post by Leon on Apr 21, 2017 7:26:29 GMT -5
Painting looks fantastic Gil!
|
|
mrversatile
Full Member
   July '23 Showcased Build Awarded
Member since: January 2013
Posts: 682
Jan 20, 2013 10:52:24 GMT -5
Jan 20, 2013 10:52:24 GMT -5
|
Post by mrversatile on May 2, 2017 23:54:51 GMT -5
I know it has been a while but I haven't quite stopped the progress, only slowed it. I kind of lost some motivation with spring starting along with its projects, and three baseball leagues I am playing in. But I digress. What I have done is complete the engine with added wiring and plumbing. Interior is base painted and the difficult wheel hub caps and instrument panel are completed. Soon I will totally paint the red leather seats and interior parts with Vallejo acrylics, not unlike the way figures are painted. I think this will give them more depth and realistic appearance. Then it will be on to the body details and I am not looking forward to the chrome foiling, especially since the same A pillar, which was previously damaged, cracked again on its lower weak spot. Well, on to the pictures: Engine with interior tub dryfitted. Notice the rug made with embossing powder 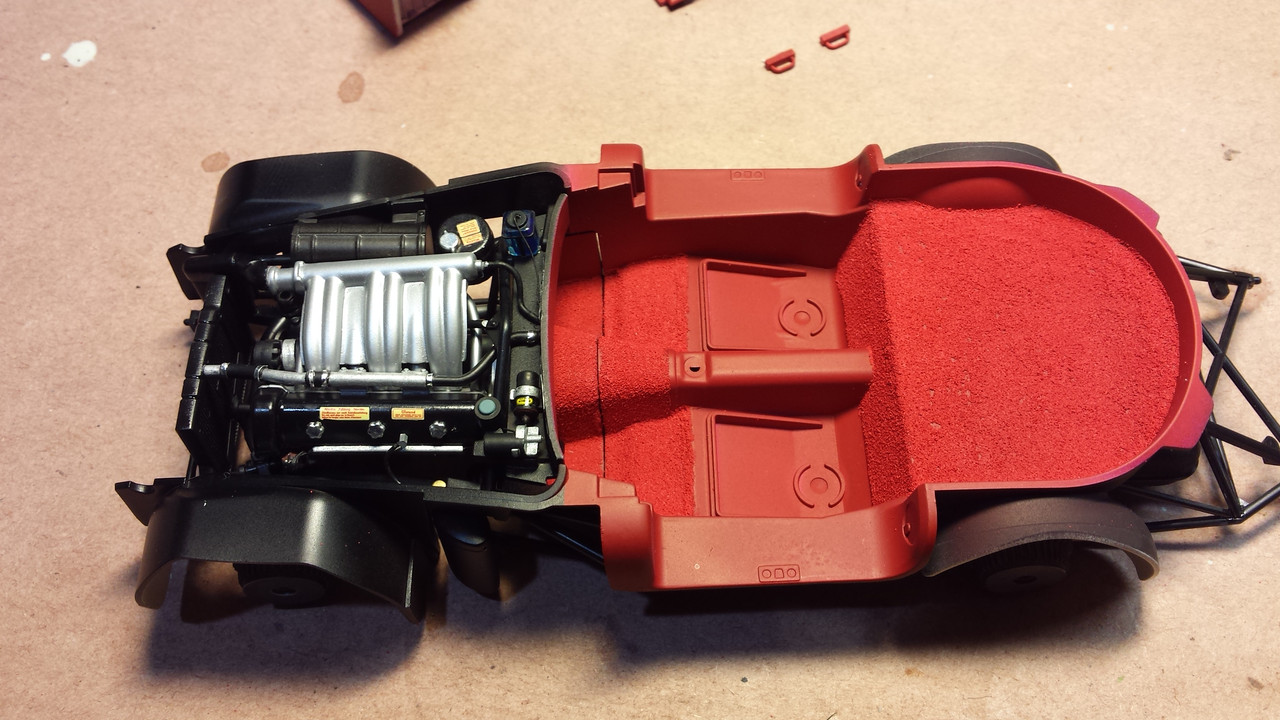 Now with the tub removed: 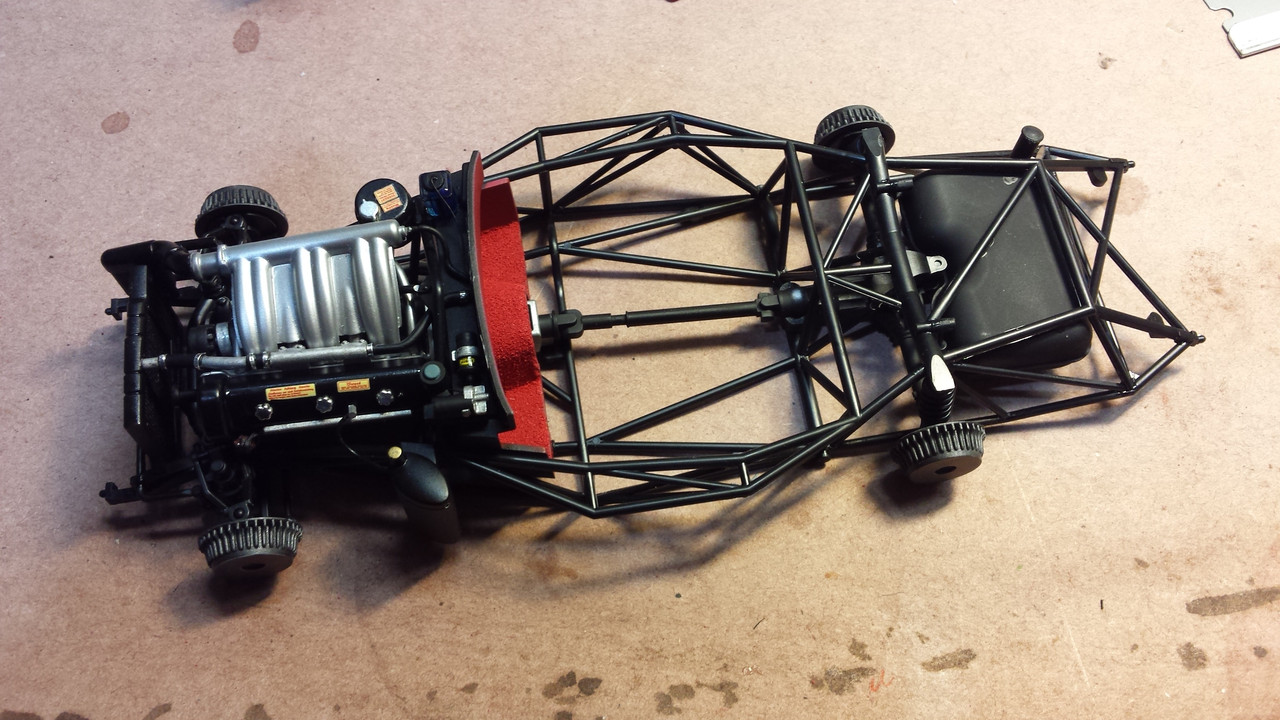 Engine closeup 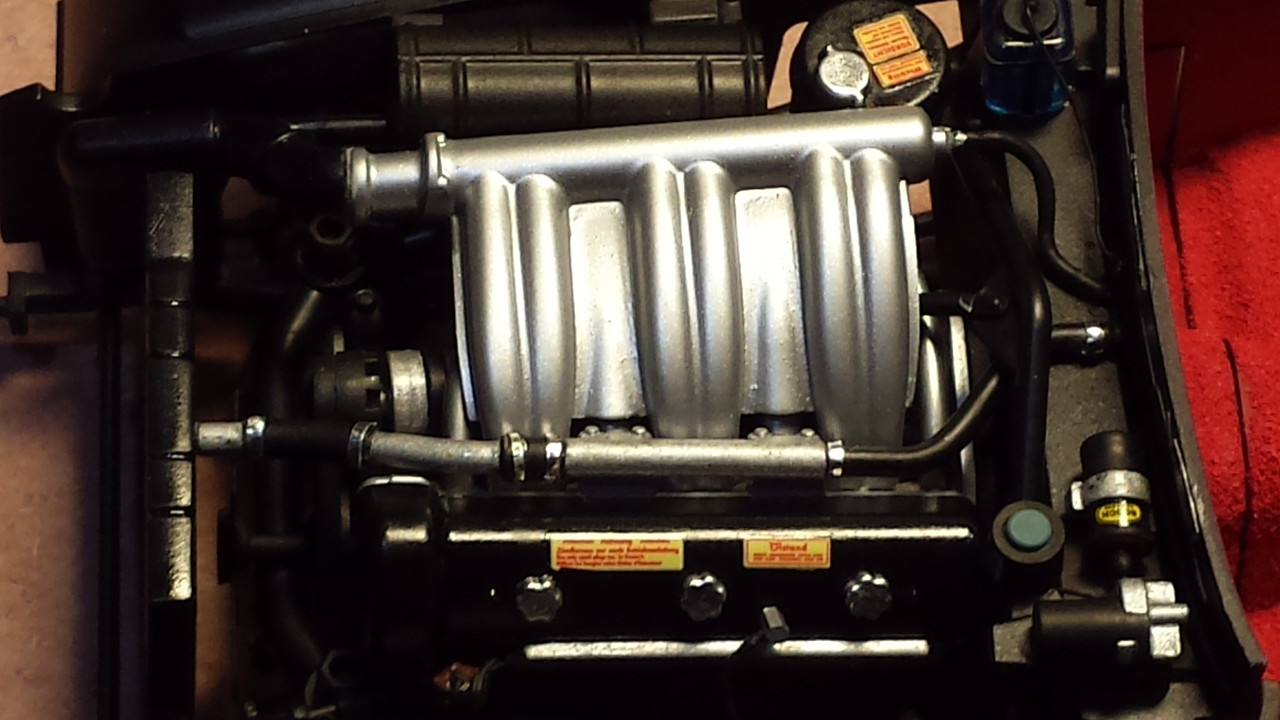 Completed instrument panel: 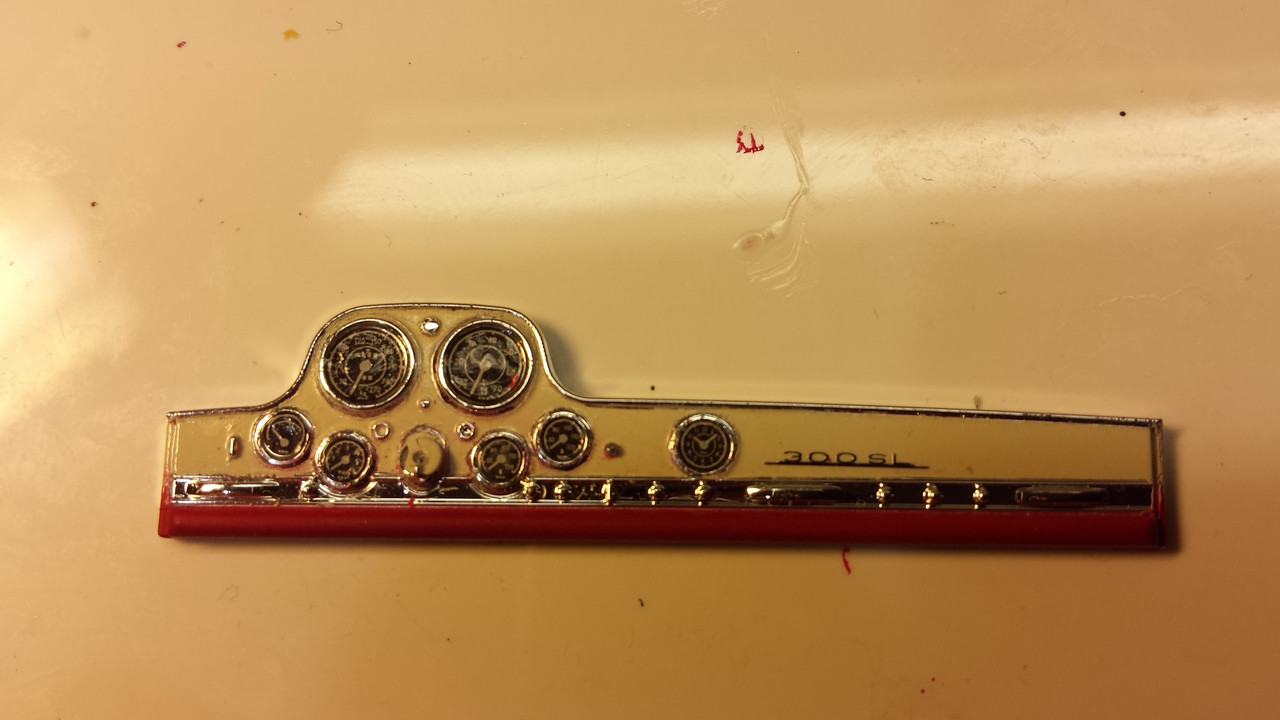 and painted hub caps with photo etched Mercedes emblem attached. 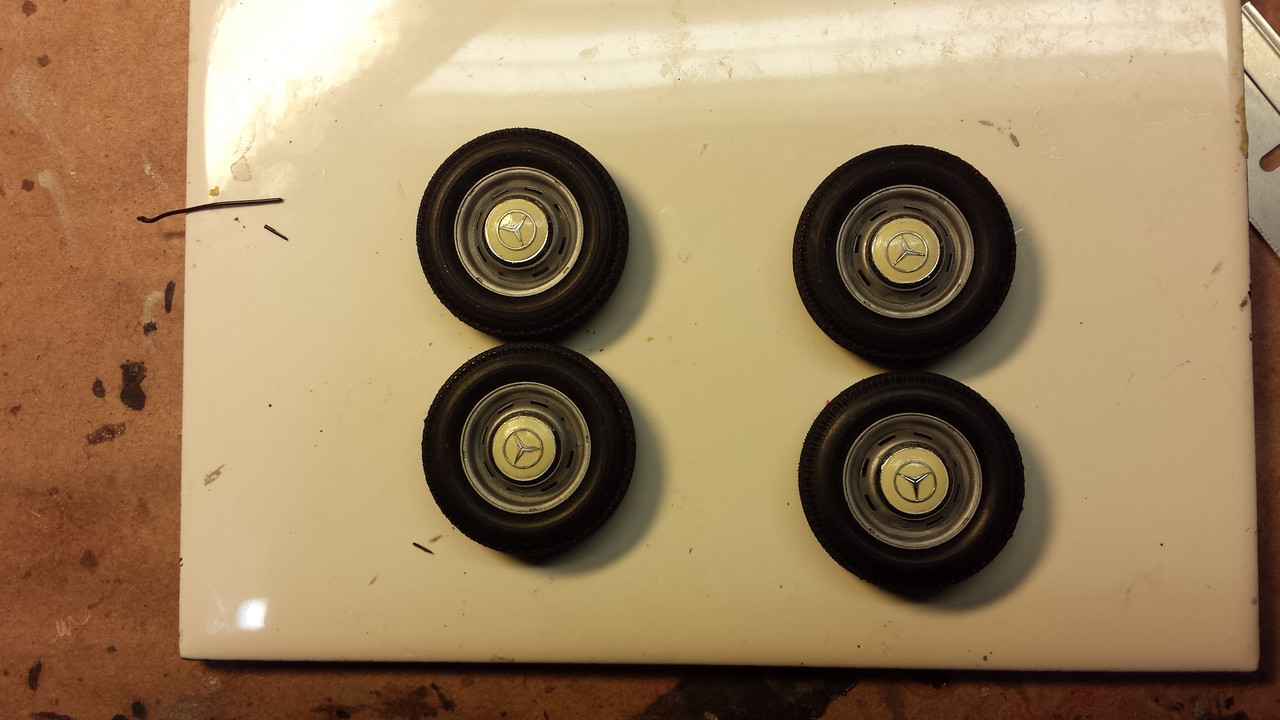 |
|
k1w1
Full Member
  
Member since: February 2015
Posts: 873
Feb 18, 2015 8:07:41 GMT -5
Feb 18, 2015 8:07:41 GMT -5
|
Post by k1w1 on May 3, 2017 0:10:27 GMT -5
Instrument panel looks great.
|
|
|
|
Post by Leon on May 3, 2017 4:46:59 GMT -5
This is looking fantastic Gil!  |
|
|
|
Post by dierk on May 3, 2017 9:01:11 GMT -5
Love the dashboard a lot, for the rest I just have basic, run of the mill, love  I'll stick with me Russian stuff - could not be ar$ed with the work required for the paintjob. |
|
mrversatile
Full Member
   July '23 Showcased Build Awarded
Member since: January 2013
Posts: 682
Jan 20, 2013 10:52:24 GMT -5
Jan 20, 2013 10:52:24 GMT -5
|
Post by mrversatile on May 25, 2017 22:46:32 GMT -5
I can see the light at the end of the tunnel on this one, but still plenty of chrome to add to the body. I have now completed the interior including the inside door panels which have photoetch snaps and lever and is pretty complicated in it's array of colors and textures. The windows and chrome window trim is finished and I am attempting to subtly replicate the black weatherstripping around the trim by blackening it from the inner window and then using a black wash around the exterior trim later. Even after the A pillar was repaired the windshield fit perfectly so the doors should line up when installed. I like the way the interior came out and I shaded and highlighted the seats to give them depth. I hope you like it. The next update will probably be the completed pics but for now here are the updates: 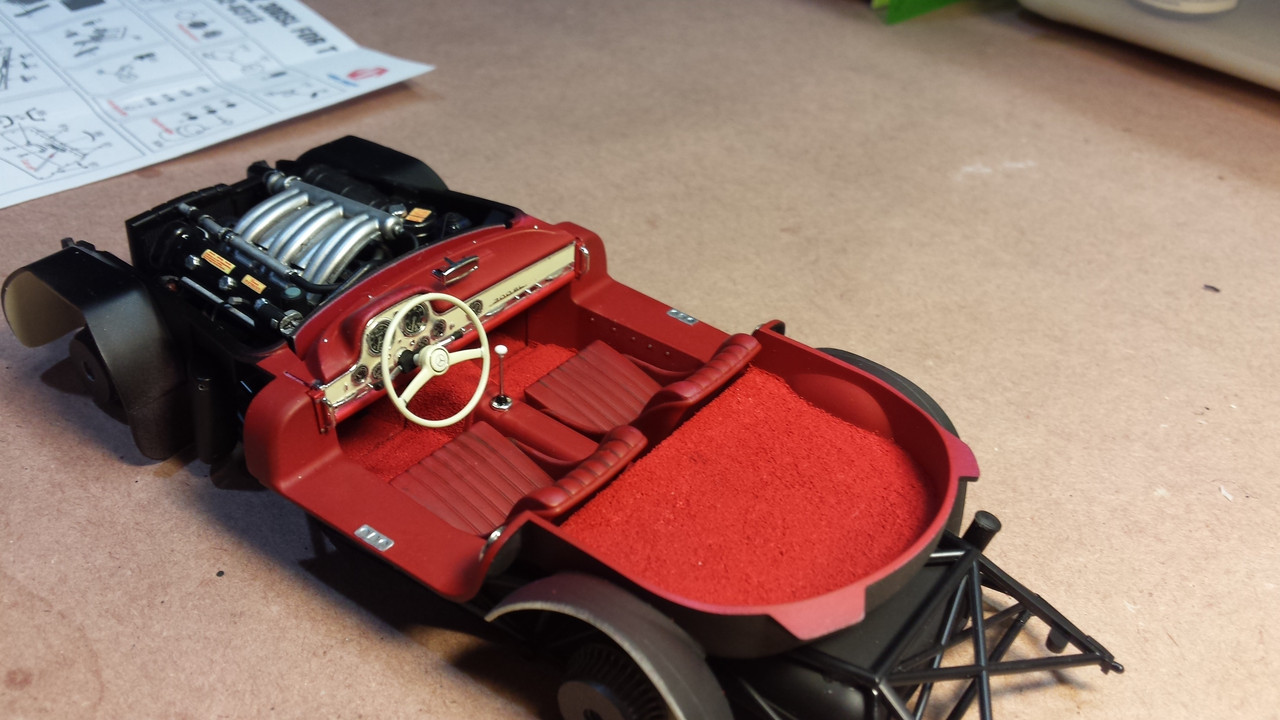 Here is the interior of the door. The hinges were coated with a Art Primo Chrome marker. 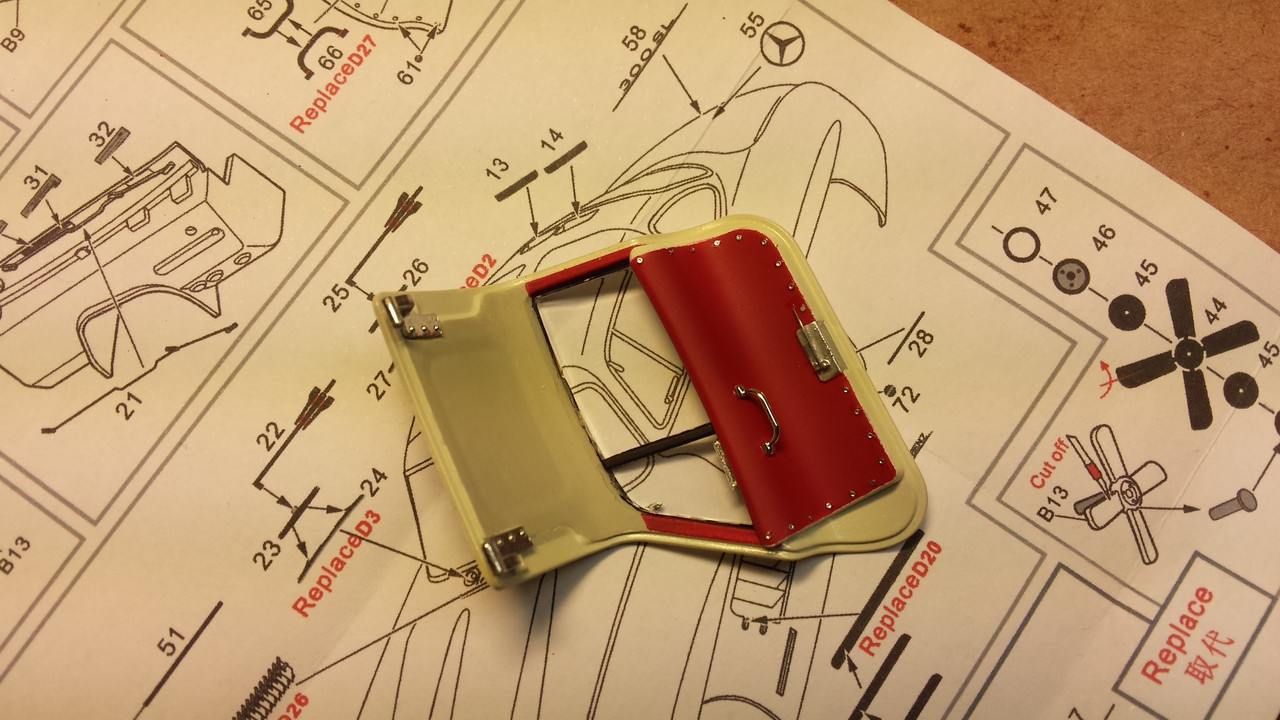 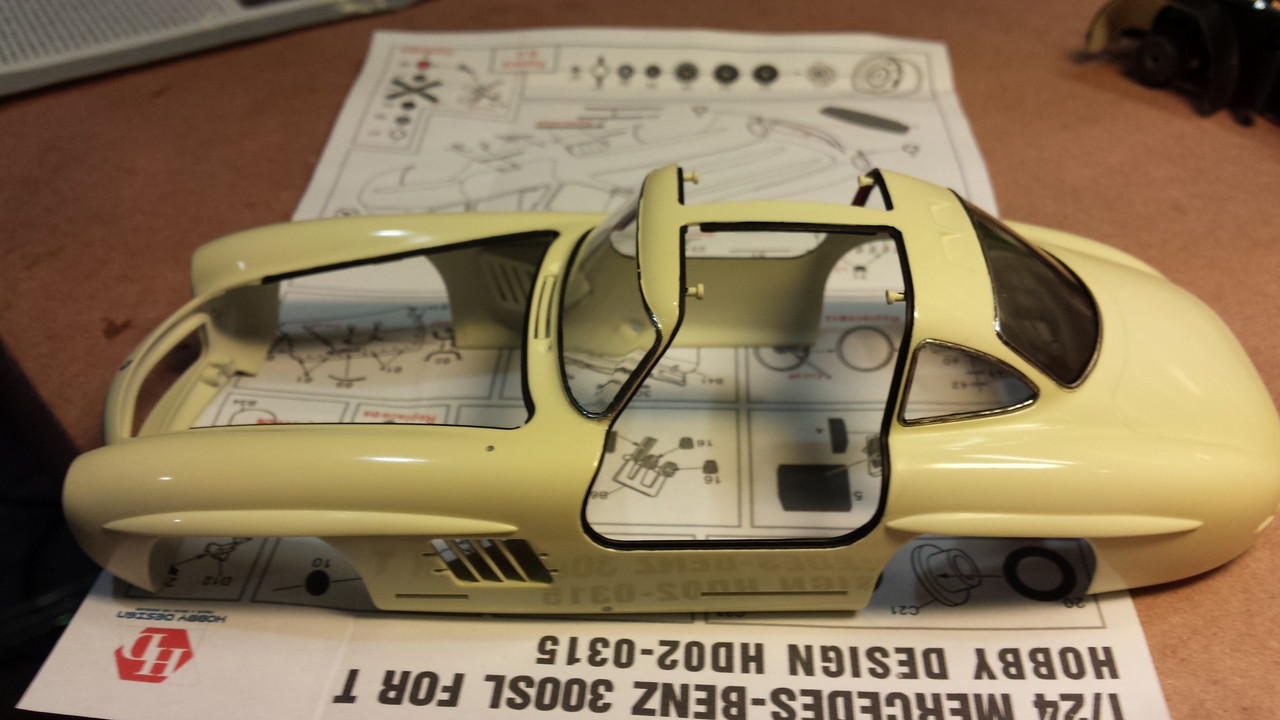 |
|
|
|
Post by Leon on May 26, 2017 4:01:31 GMT -5
WOW....Very nice work Gil! The interior looks awesome.  |
|
mrversatile
Full Member
   July '23 Showcased Build Awarded
Member since: January 2013
Posts: 682
Jan 20, 2013 10:52:24 GMT -5
Jan 20, 2013 10:52:24 GMT -5
|
Post by mrversatile on Jun 2, 2017 10:54:34 GMT -5
|
|
|
|
Post by Leon on Jun 2, 2017 11:05:32 GMT -5
That's a real beauty Gil! Very nicely done.
|
|
midnightprowler
Full Member
  
Member since: February 2016
Posts: 701 
|
Post by midnightprowler on Jun 3, 2017 5:45:22 GMT -5
Beautiful!
|
|
|
|
Post by dierk on Jun 3, 2017 11:46:48 GMT -5
Stunning result!
|
|
|
|
Post by dupes on Jun 3, 2017 21:29:21 GMT -5
Whoah...excellent build! Dang! Notice the rug made with embossing powder  Talk to me, Goose. "Embossing powder"? |
|
k1w1
Full Member
  
Member since: February 2015
Posts: 873
Feb 18, 2015 8:07:41 GMT -5
Feb 18, 2015 8:07:41 GMT -5
|
Post by k1w1 on Jun 4, 2017 5:32:03 GMT -5
Nice work !
|
|
mrversatile
Full Member
   July '23 Showcased Build Awarded
Member since: January 2013
Posts: 682
Jan 20, 2013 10:52:24 GMT -5
Jan 20, 2013 10:52:24 GMT -5
|
Post by mrversatile on Jun 4, 2017 20:16:35 GMT -5
Dupes, embossing powder is a fine powder that comes in small plastic containers. What it is used for in the embossing hobby, I am not sure. It can be had at craft stores and is easily applied with thin white glue.
|
|