|
|
Post by dierk on Nov 29, 2017 12:18:19 GMT -5
|
|
|
|
Post by Tojo72 on Nov 29, 2017 12:37:44 GMT -5
Well,I got one,so will be checking in on this one.
|
|
|
|
Post by TRM on Nov 29, 2017 22:52:55 GMT -5
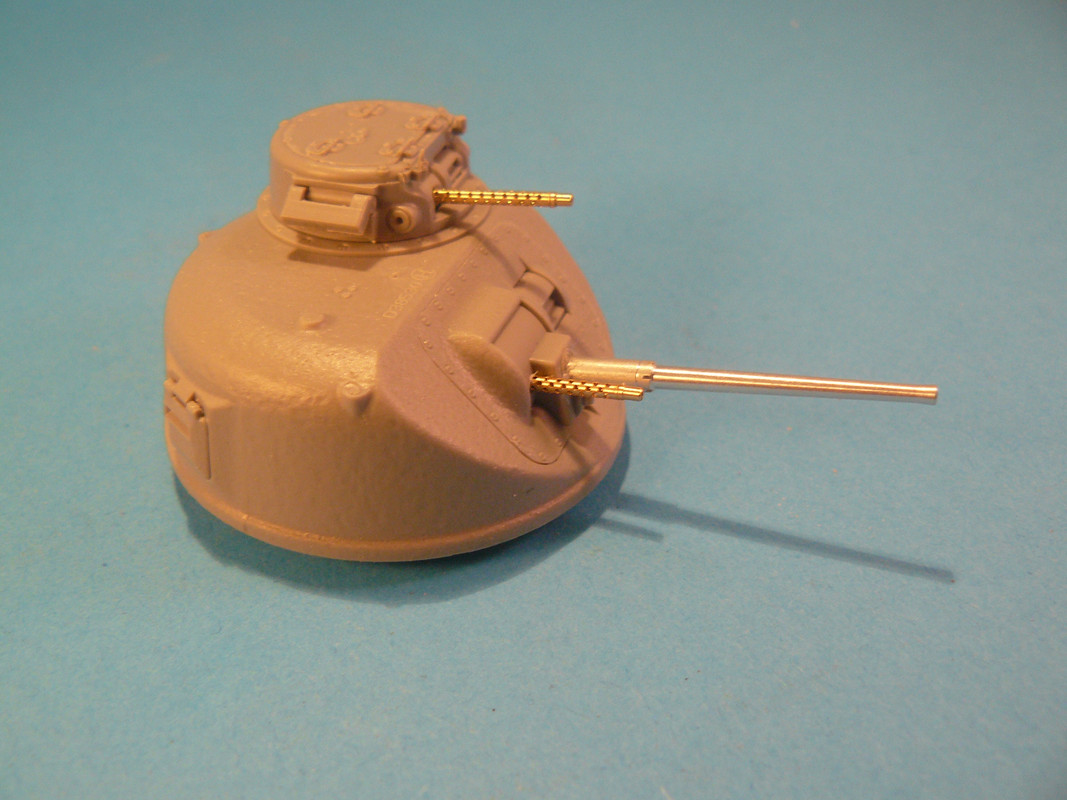
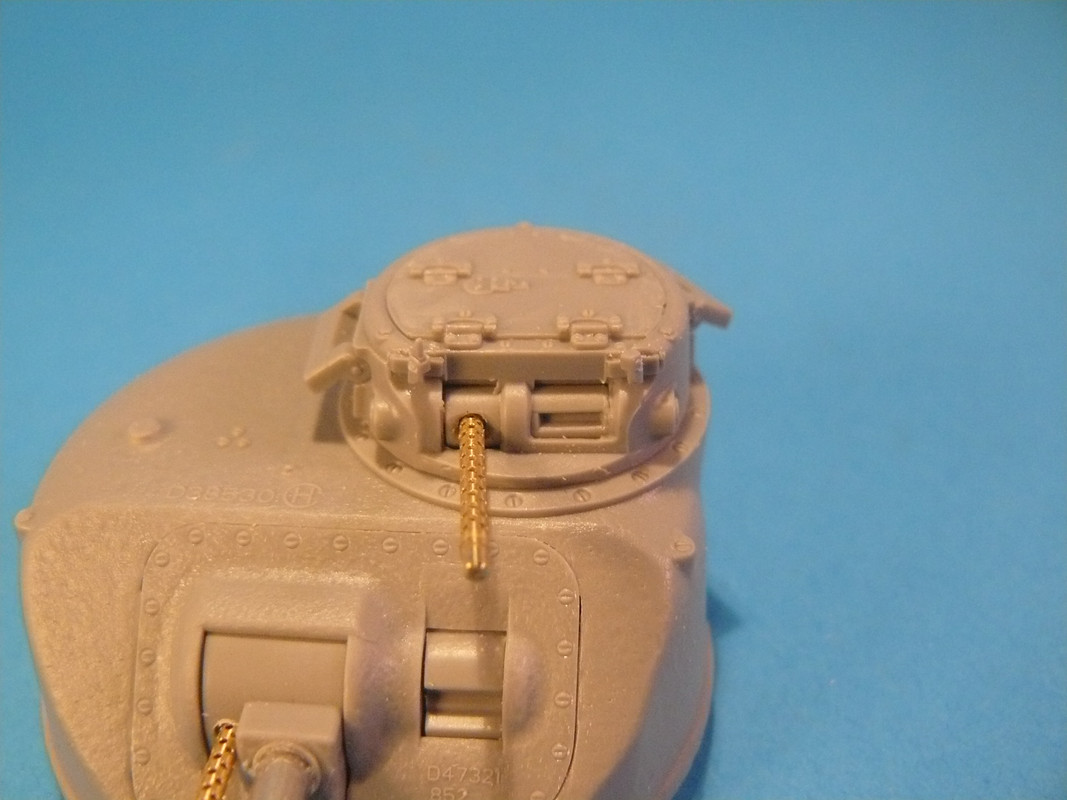
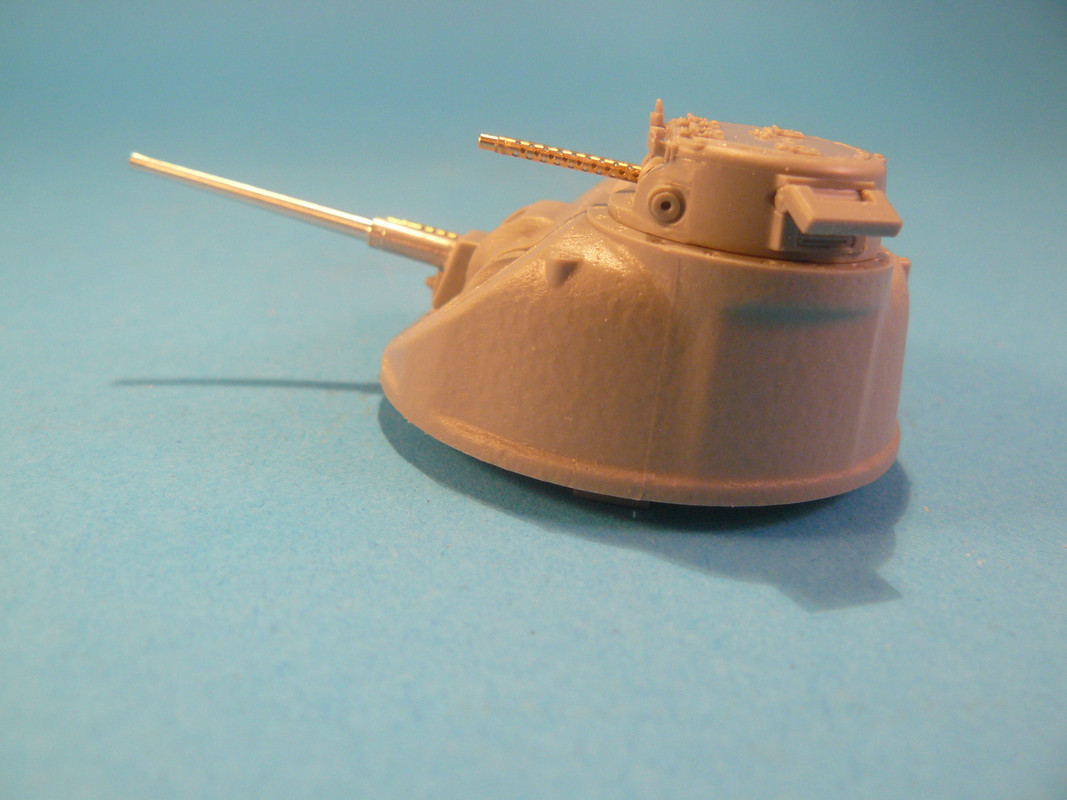
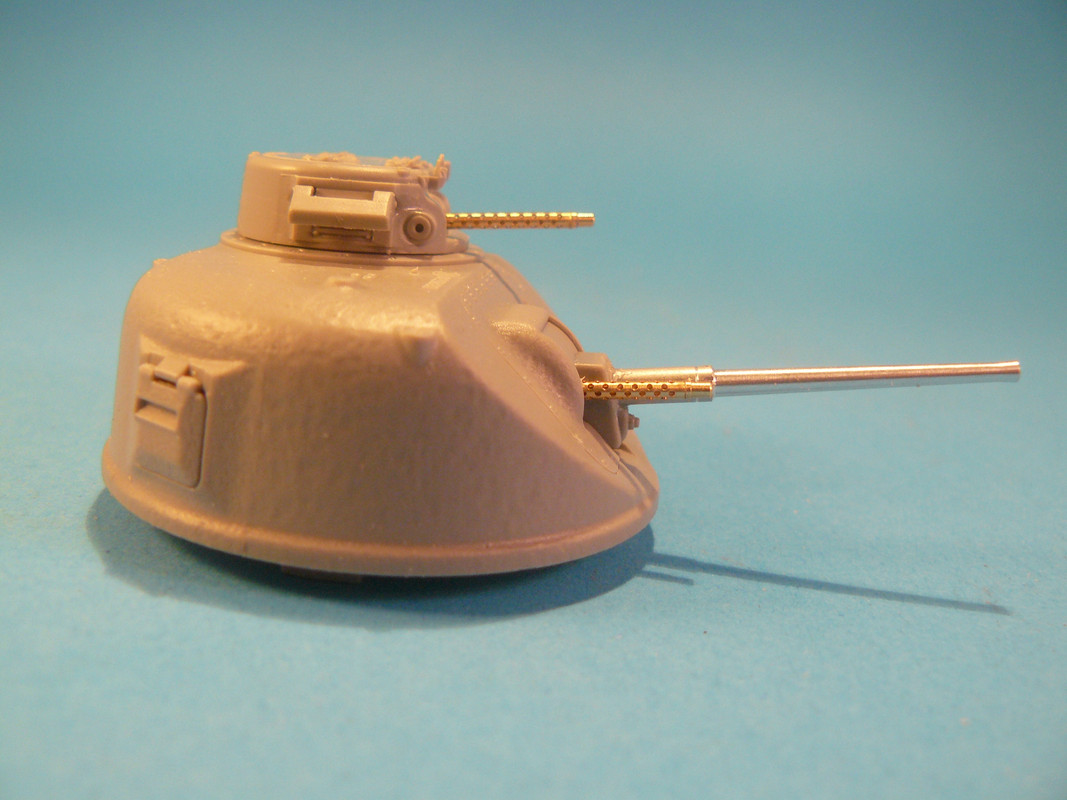
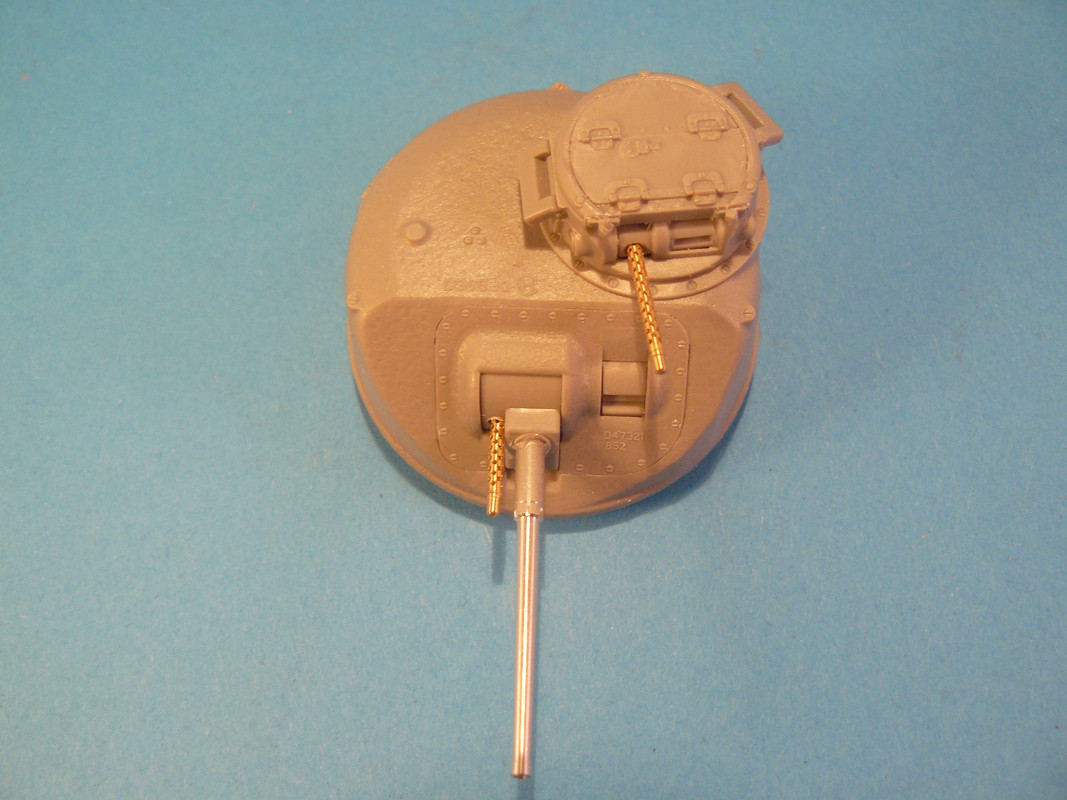
Looking good Dierk! Changing barrels is almost a no brainier with most kits...cheap enough! See this built up a couple times recently...looks like there is plenty of potential.
|
|
|
|
Post by Leon on Nov 30, 2017 4:41:25 GMT -5
Looking good Dierk!  |
|
flmlm
Full Member

Member since: March 2016
Crack open that kit and smell the build ????
Posts: 170 
|
Post by flmlm on Nov 30, 2017 8:39:19 GMT -5
Nice clean looking build. Thanks for sharing.
I've added one of these to my stash as well. Interested to see how it comes together.
Regards
Mike
|
|
|
|
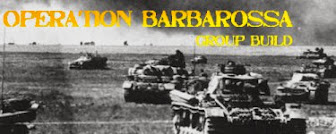
Post by dierk on Dec 1, 2017 7:39:06 GMT -5
Well,I got one,so will be checking in on this one. Nice clean looking build. Thanks for sharing. I've added one of these to my stash as well. Interested to see how it comes together. Regards Mike Don't be put off by some of the other builds you may have seen, where the builders seem to have had some fit issues with the hull. Under no circumstances should you take a break between stages 5/6/7. If my experience is anything to go by, the sidewalls have a tendency to lean in almost imperceptively - if you were to wait til the glue's set, you'd be buggered at this stage. I used Mr. Cement Deluxe initially, which is fairly thick and slow curing, which gives you time to line up the various panels - an additional set of hands would be handy, too  Once I was happyish I ran Tamiya extra thin along all the seams, and let it cure over night. Next day I fitted the various hatches and vision ports. Hope this helps. |
|
|
|
Post by deafpanzer on Dec 1, 2017 13:53:49 GMT -5
AWESOME!!! I hope to get this kit for Christmas. LOL Looking good!
|
|
flmlm
Full Member
Member since: March 2016
Crack open that kit and smell the build ????
Posts: 170
|
Post by flmlm on Dec 1, 2017 16:08:28 GMT -5
"Under no circumstances should you take a break between stages 5/6/7."
That a really good heads up for me. Thanks a lot!
Regards
Mike
|
|
sturmbird
Full Member
Member since: June 2012
Posts: 1,406
Jun 21, 2012 13:51:45 GMT -5
Jun 21, 2012 13:51:45 GMT -5
|
Post by sturmbird on Dec 1, 2017 16:29:52 GMT -5
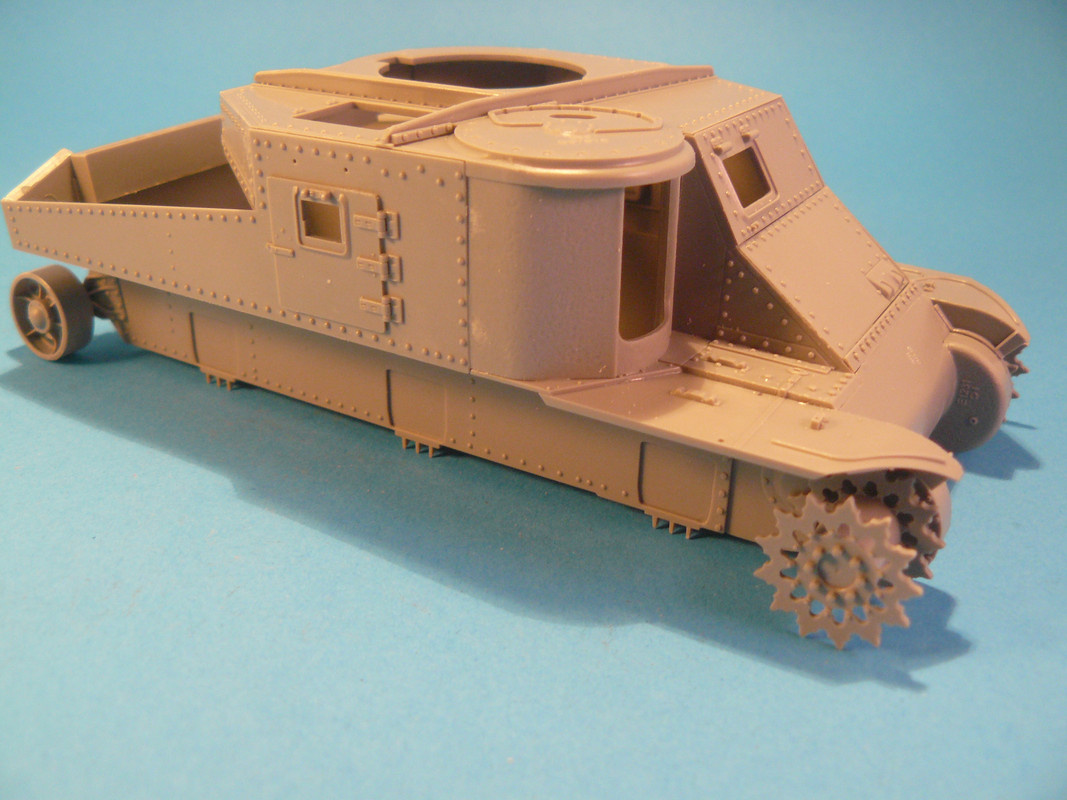
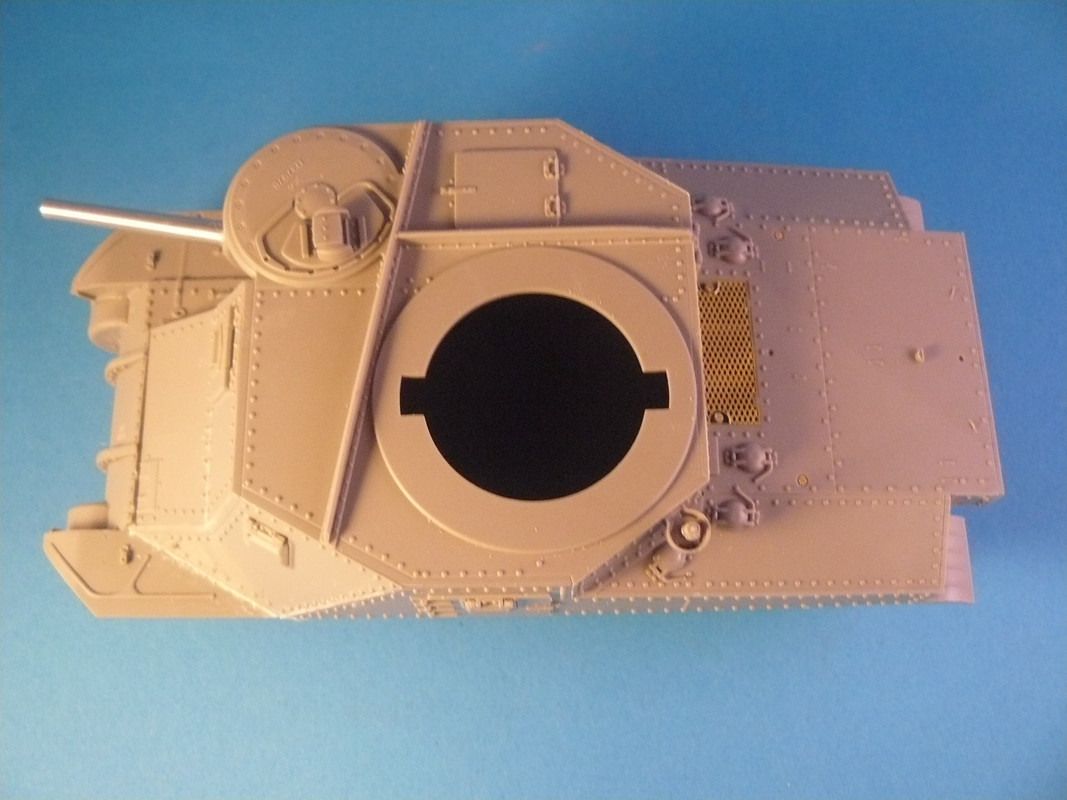
well I have a deep interest in this tank hull, and have been watching for someone to build one. I saw that gap in the first photo, and it's really the only thing I caught. Now seeing this, I might add a very thin strip of plastic to the bottom of that plate and fit it up. Never the less I've seen a lot worse in the past.
In the one photo of the rear, it almost looked like there might have been some warp age where the idler assembly attaches to the hull, but even then not much Gotta get the kit before they dry up. Also want the new M31 ARV.
gary
|
|
|
|
Post by dierk on Dec 2, 2017 3:33:29 GMT -5
"Under no circumstances should you take a break between stages 5/6/7." That a really good heads up for me. Thanks a lot! Regards Mike I mentioned it because you said you had it in your stash Seen a few others where the builders seemed to have some serious fit issues. The first one I came across was on 'the modelling news' - nearly put me off building this one...he carved away at locating tabs and all sorts. I really don't see what his problems were  well I have a deep interest in this tank hull, and have been watching for someone to build one. I saw that gap in the first photo, and it's really the only thing I caught. Now seeing this, I might add a very thin strip of plastic to the bottom of that plate and fit it up. Never the less I've seen a lot worse in the past. In the one photo of the rear, it almost looked like there might have been some warp age where the idler assembly attaches to the hull, but even then not much Gotta get the kit before they dry up. Also want the new M31 ARV. gary Welcome to the party Gary. The Roof was only dry-fitted in the first photo, hence the gap. What looks like warpage in the idler assembly is an optical illusion: the blue card sheet isn't totally flat... Pre-ordered the M-31 a couple of months ago, as the shop offered a discount - should be with me next week. |
|
|
|
Post by wbill76 on Dec 2, 2017 21:08:45 GMT -5
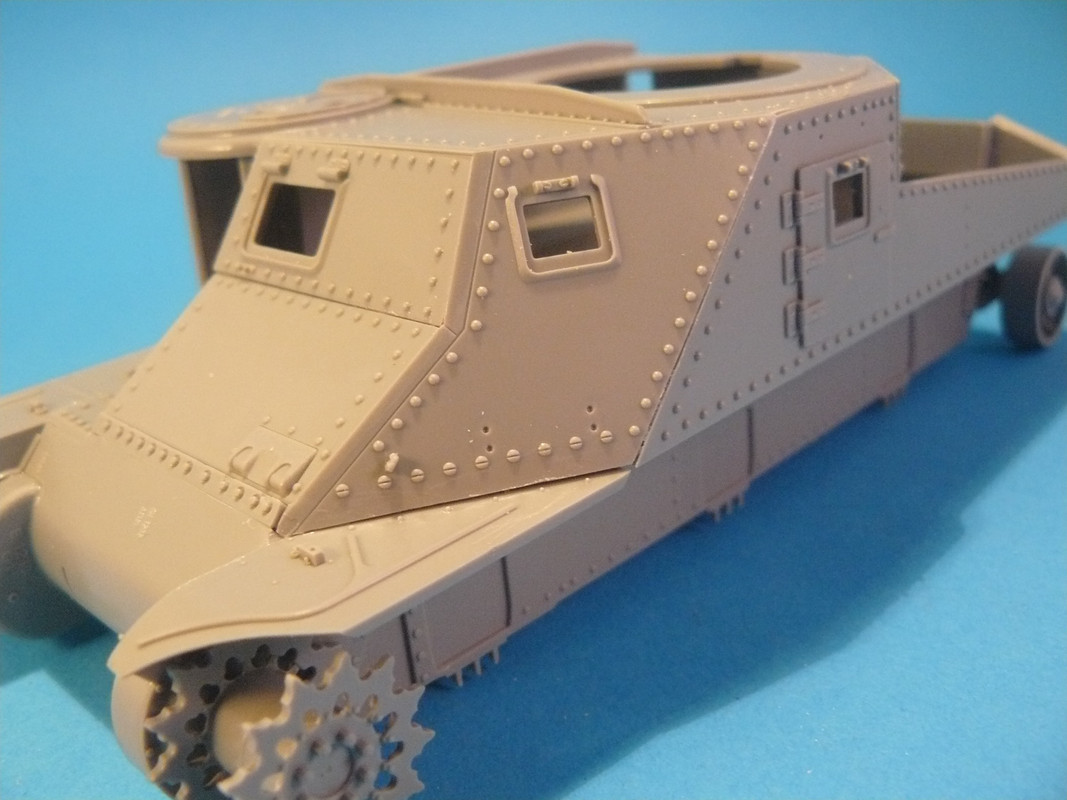
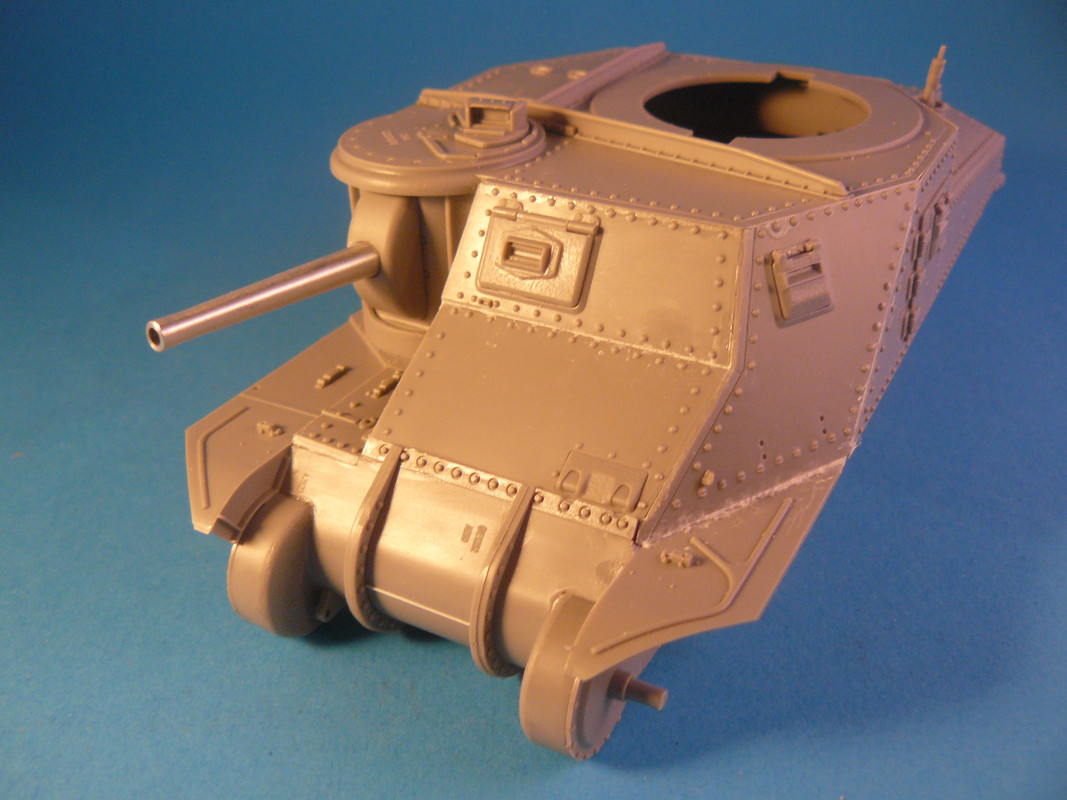
Got to love this particular vehicle design if for no other reason than all those rivets!  Looking good so far Dierk. |
|
|
|
Post by dierk on Dec 3, 2017 3:55:25 GMT -5
Got to love this particular vehicle design if for no other reason than all those rivets! Looking good so far Dierk. Indeed Bill! I built the Tamiya kit when I was a teen. Been after a decent version of the M3 for years now - I was even contemplating going the Academy/Legend route. The Takom kit came out just in time to stop me from having to sell a kidney Really looking forward to the painting stage! Got another little session in yesterday, adding the cast texture to the bow plates, bogies, etc. Wired up the headlights and siren. |
|
|
|
Post by dierk on Dec 9, 2017 4:54:24 GMT -5
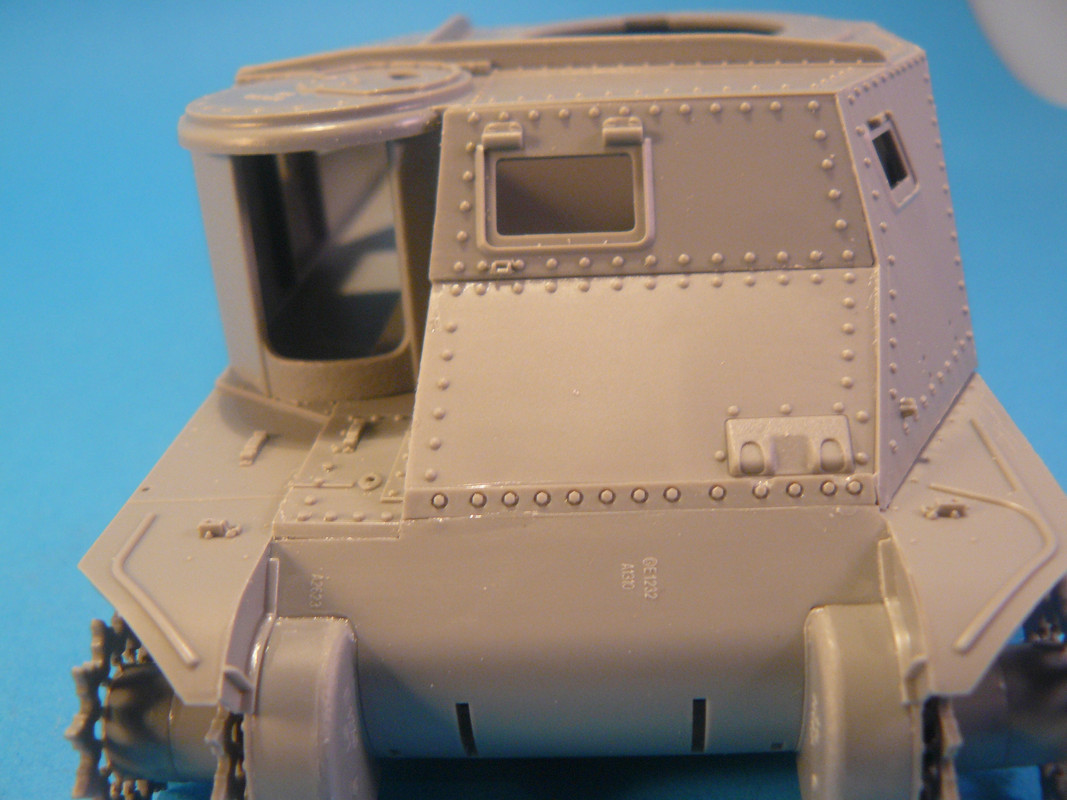
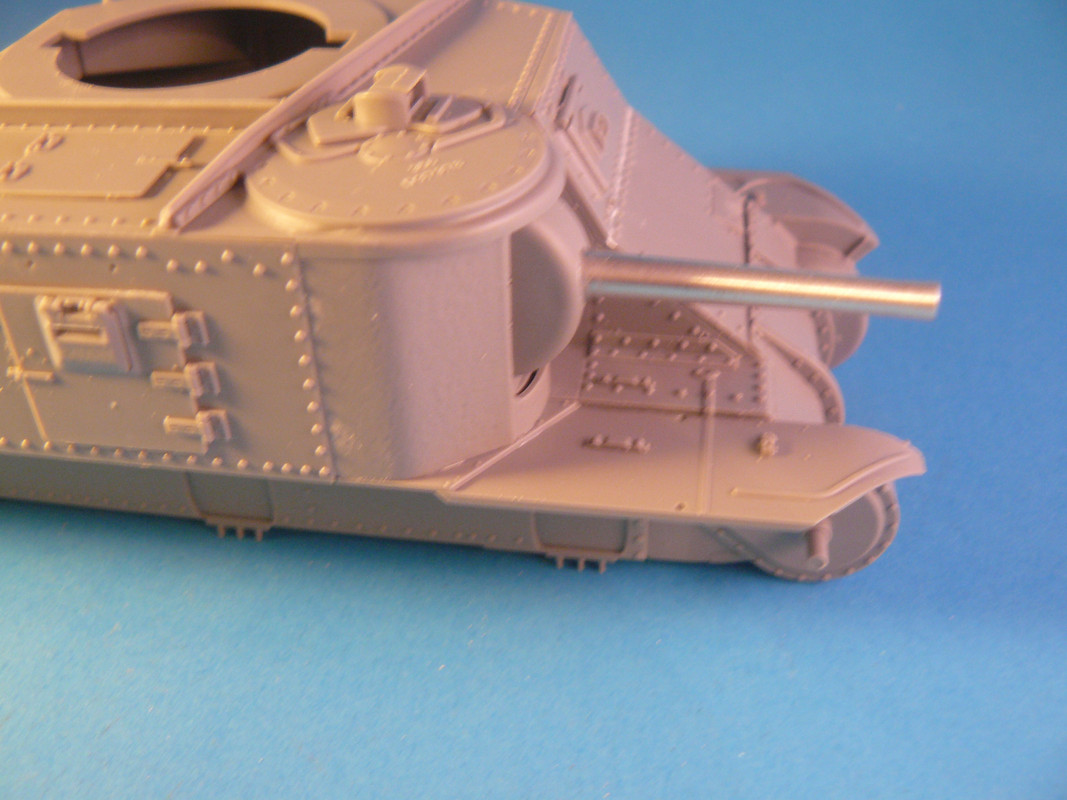
The centre panel of the bow plate had slightly rougher texture than the outer ones, so that was done using Mr. Surfacer 500. All other bits of texture were done using a semblance of Mr. S 1000 (it was an old pot of 500 that had completely dried, that I brought back to life with Lacquer Thinner) stippled on with an old 000 brush. Some pics of the added cast texture: 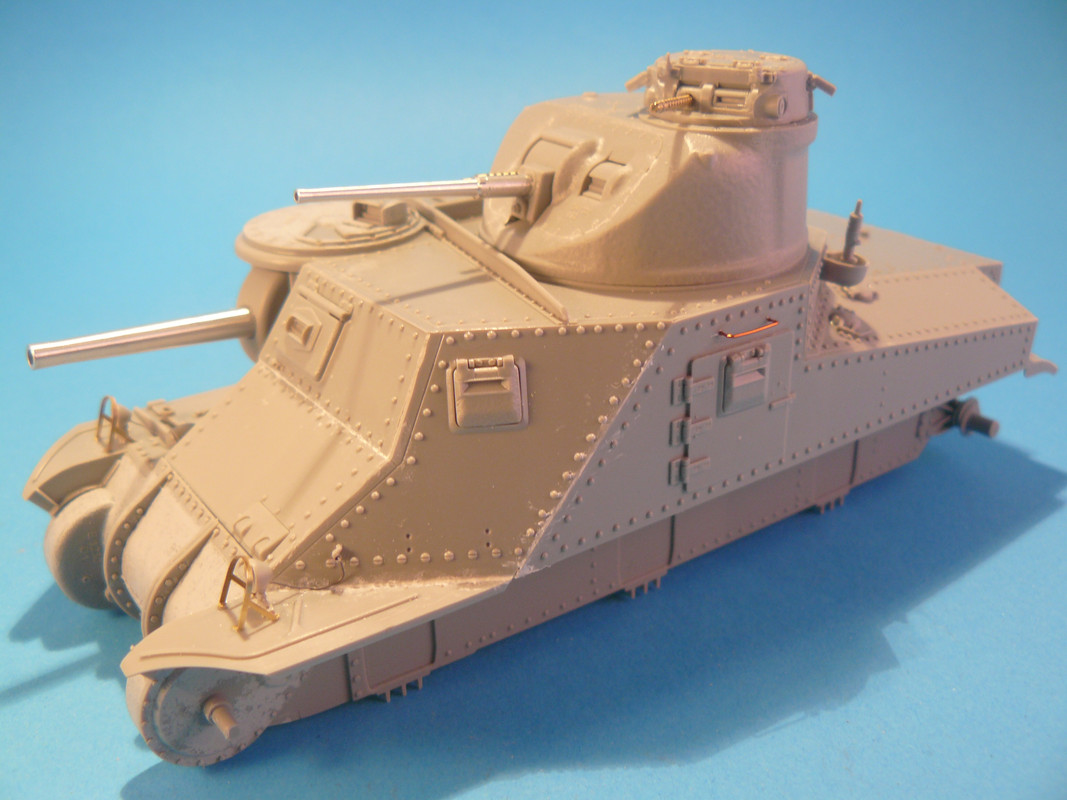 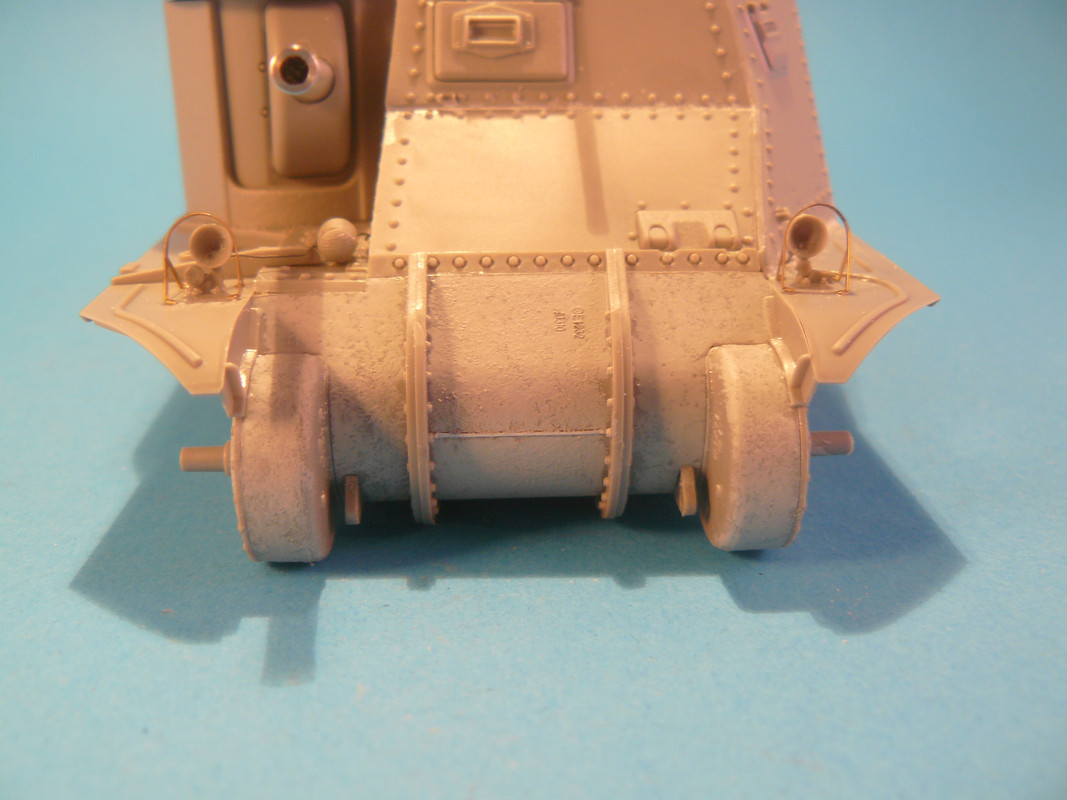  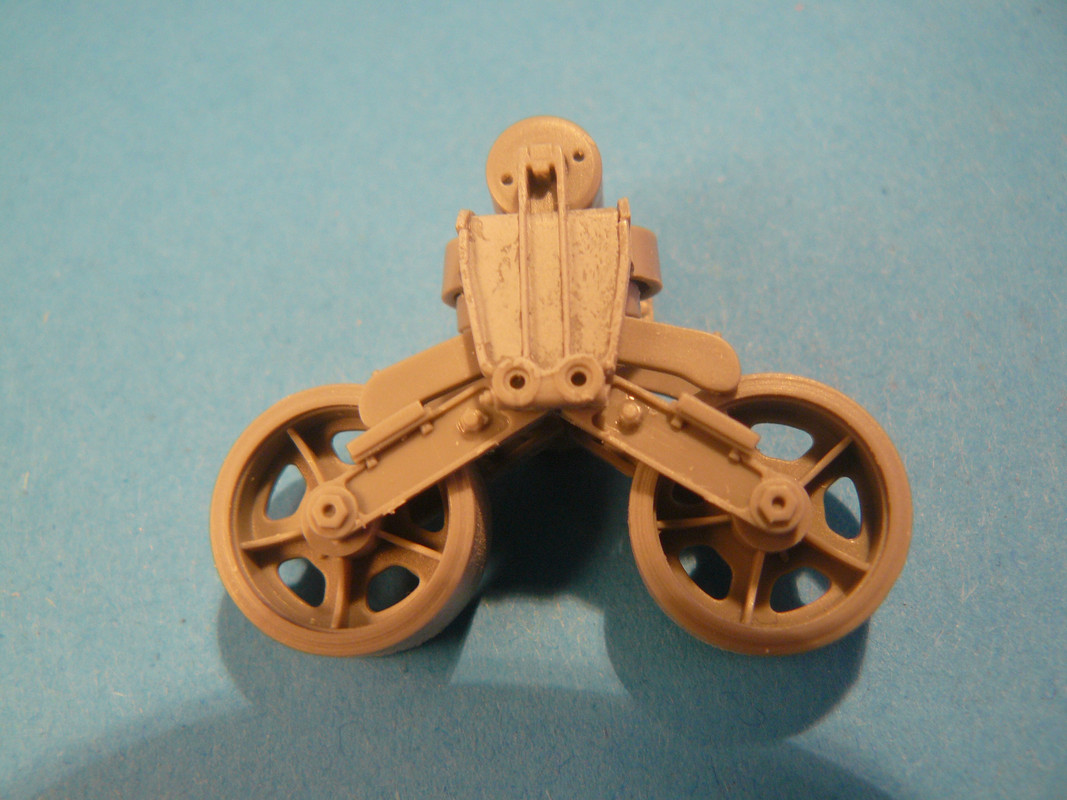 Unfortunately, one of the sidelights became Carpet Monster fodder  Little tip: add them before you attach the headlights - I, of course, did it the other way around  something to remember for when I do the M31 which has now arrived chez moi. The kit grab handles look nice, but proved to be impossible to clean up, so were replaced using 0.3mm wire. All wiring was done using 0.2mm lead wire. Just got to make up some brackets for the replacement tow cable, before ti's time to sling some paint at this. This'll be my first Olive Drab paint job, and I'll be attempting a technique pioneered by Michael Rinaldi. Basically, a reverse CM technique that he's given the somewhat unwieldy handle 'Lacquer Thinner Removal Technique' Stay tuned. |
|
|
|
Post by Leon on Dec 9, 2017 6:30:58 GMT -5
Nice work on the texture Dierk! Looking good. |
|
|
|
Post by panzerjager2 on Dec 9, 2017 7:41:48 GMT -5
Someones getting his MOJO back 
PJ2
|
|
|
|
Post by TRM on Dec 9, 2017 8:15:58 GMT -5
Forging on! Looking good Dierk!
|
|
sturmbird
Full Member
Member since: June 2012
Posts: 1,406
Jun 21, 2012 13:51:45 GMT -5
Jun 21, 2012 13:51:45 GMT -5
|
Post by sturmbird on Dec 10, 2017 15:34:37 GMT -5
I like what I see, and will build one for sure. Still want to build a N. Africa tank
gary
|
|
flmlm
Full Member
Member since: March 2016
Crack open that kit and smell the build ????
Posts: 170
|
Post by flmlm on Dec 11, 2017 10:21:07 GMT -5
Looks outstanding!
Regards
Mike
|
|
|
|
Post by deafpanzer on Dec 11, 2017 15:01:17 GMT -5
I am really following your build very closely. Great work adding the texture! Replacing the gun barrels is one of best things to do too. Did you purchase PE upgrade set for this too?
|
|
|
|
Post by dierk on Dec 12, 2017 5:52:57 GMT -5
I am really following your build very closely. Great work adding the texture! Replacing the gun barrels is one of best things to do too. Did you purchase PE upgrade set for this too? Cheers Andy, glad you're liking it. No, I didn't get a PE set - not sure there's one on the market yet. TBH, the PE included in the kit is not that great. |
|
reserve
Senior Member

Member since: July 2012
Si vis pacem para bellum
Posts: 2,368
Jul 11, 2012 9:11:45 GMT -5
Jul 11, 2012 9:11:45 GMT -5
|
Post by reserve on Dec 19, 2017 1:52:34 GMT -5
Looking fine brother
I prime my to be OD builds with a light grey enamel primer which makes it easy to what's the fancy term...Color modulate if you keep your paint thin and do light coats
Regards,
Mark
|
|
sturmbird
Full Member
Member since: June 2012
Posts: 1,406
Jun 21, 2012 13:51:45 GMT -5
Jun 21, 2012 13:51:45 GMT -5
|
Post by sturmbird on Jan 11, 2018 14:32:10 GMT -5
I bought an M3 Lee "late" from Takom a few days ago. Upon opening and inspecting the kit's sprus while still in the bag, I couldn't find the photo etch and turret. Looked three times for them only to finally find the turret stuffed inside the hull bottom. Then the PE and clear parts showed up. Liked it well enough to order an M31 ARV. My only complaint is the decal schemes were a little boring. Think Takom has hit it out of the park again!
gary
|
|
mrversatile
Full Member
Member since: January 2013
Posts: 637
Jan 20, 2013 10:52:24 GMT -5
Jan 20, 2013 10:52:24 GMT -5
|
Post by mrversatile on Feb 8, 2018 2:44:07 GMT -5
I got this as well and yours is a big help for the future. Looking good so far.
|
|
|
|
Post by dierk on Feb 8, 2018 13:10:20 GMT -5
I got this as well and yours is a big help for the future. Looking good so far. Cheers! Glad you're finding my build useful! Must get round to spending some time on it! All I've got left to do is one track and add the tools and their PE mountings - but RL keeps getting in the way and my mojo seems to upped and left... Got as far as making myself a micro chisel by sharpening a jeweller's screw driver on one of those spinny grind stone thingies and removing the cast-on tool mountings with it. |
|
|
|
Post by Tojo72 on Feb 8, 2018 13:32:24 GMT -5
Looking good,the metal barrels really help.
|
|
|
|
Post by 406 Silverado on Feb 10, 2018 9:28:16 GMT -5
Looking good so far. Looks like a nice kit, much better than the VERY outdated Tamiya kit lol.
|
|
|
|
Post by dierk on Feb 15, 2018 8:20:59 GMT -5
Looking good so far. Looks like a nice kit, much better than the VERY outdated Tamiya kit lol. I'd give this kit 8 out of 10, Rob. A lot of people seem to struggle with both the upper hull and the tracks - not really had a problem with either (loud sound of me knocking on wood, whilst having my fingers crossed ) It's certainly kicking the bejeezus out of the old Tamiya kit, and not being too kind to the Academy offering either. |
|
thug626
Senior Member
Member since: January 2013
Posts: 1,813
Jan 15, 2013 13:05:28 GMT -5
Jan 15, 2013 13:05:28 GMT -5
|
Post by thug626 on Feb 17, 2018 14:59:39 GMT -5
Definitely taking notes on this build. Thank you for all the build tips. I am really liking what you have built up thus far.
|
|


 Once I was happyish I ran Tamiya extra thin along all the seams, and let it cure over night. Next day I fitted the various hatches and vision ports. Hope this helps.


 Looking good so far Dierk.
 Little tip: add them before you attach the headlights - I, of course, did it the other way around
  something to remember for when I do the M31 which has now arrived chez moi.