thenylongag
Full Member
 Sept2013 MoM Winner
Member since: June 2012
Yes, we have 'NO' bananas
Posts: 304
Jun 7, 2012 11:20:57 GMT -5
Jun 7, 2012 11:20:57 GMT -5
|
Post by thenylongag on May 25, 2013 14:43:01 GMT -5
Ok, gocha, the fiber optics are the last things to be trimed after all the painting is complete, you can snip them a bit closer during final weathering so they don't get in the way.
When you have trimmed them to final length you can put a spot of colour on the fiber using either a sharpie, translucent paint or even future with some food colouring in it. All the fiber optics in this case will be linked up to flashing LEDs
|
|
|
|
Post by Leon on May 25, 2013 15:59:22 GMT -5
Excuse me while i reel in my jaw  Jeez Louise this build is out of this world.Out of words to describe this.NUFF SAID  |
|
|
|
Post by dupes on May 25, 2013 17:44:21 GMT -5
Sorry, meant fiber optics, not LEDs. Question answered!
But that brought up a new one. Not knowing how fiber optics works, talk to me about how you can "color" them with a Sharpie??
|
|
|
|
Post by dupes on May 25, 2013 17:45:29 GMT -5
Oh, and I know I ask for this every time...can you pan back and take a shot of the whole thing? A) I love it and B) I need to show my wife. She's going to flip out!
|
|
Deleted
Member since: January 1970
Posts: 0
May 18, 2024 3:47:59 GMT -5
May 18, 2024 3:47:59 GMT -5
|
Post by Deleted on May 25, 2013 19:06:47 GMT -5
This is one crazy build! Keep it going! AWESOME WORK!!!
|
|
thenylongag
Full Member
Sept2013 MoM Winner
Member since: June 2012
Yes, we have 'NO' bananas
Posts: 304
Jun 7, 2012 11:20:57 GMT -5
Jun 7, 2012 11:20:57 GMT -5
|
Post by thenylongag on Jun 2, 2013 16:37:46 GMT -5
Evenin All,Thank you so much for stopping by and leaving a comment guys, it really does motivate me to keep going. Oh, and I know I ask for this every time...can you pan back and take a shot of the whole thing? A) I love it and B) I need to show my wife. She's going to flip out! I haven't got many full on shots lately as the wires are hanging out of all the wrong places and it looks a bit of a mess but i'll see what i can do next week, as its you mate Just a small dot with a sharpie on a freshly trimmed Fiber optic, assuming the LED 'driving' the fiber is bright enough, is just translucient enough to give a good 'scale' look, if you look at the dash in your car, none of the lights are as overpowering as a full on bright LED, so using a slightly more solid colour like a sharpie gives the most realistic results i have found. So... rear cockpit hatch area bit. Lets have a look, eyes down for a full house. PIX Made a door out of a trailer box and a round gun support plate with some other greeblies for the locking mechanism and a bit of PE on the side walls. 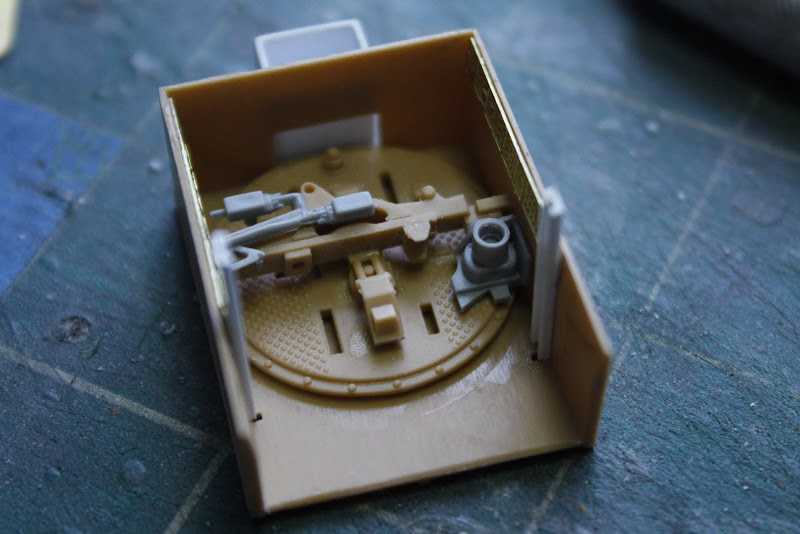 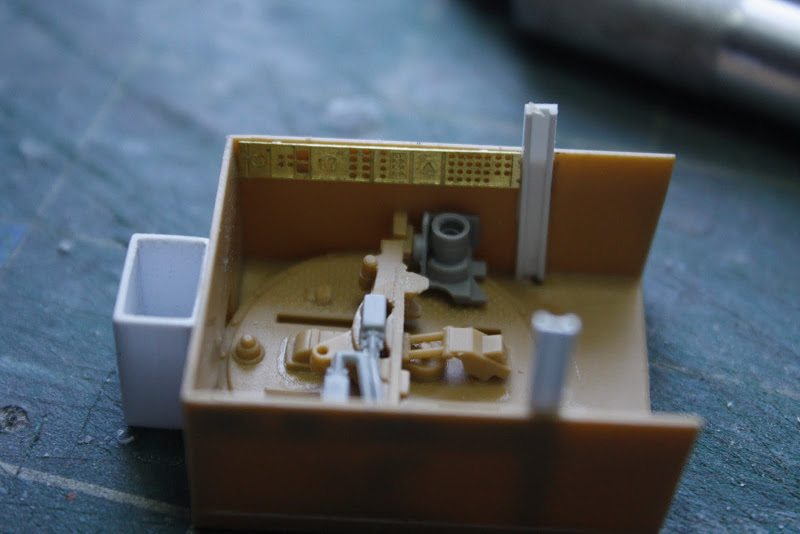 Added a square top beam to brace back from the seat assembly 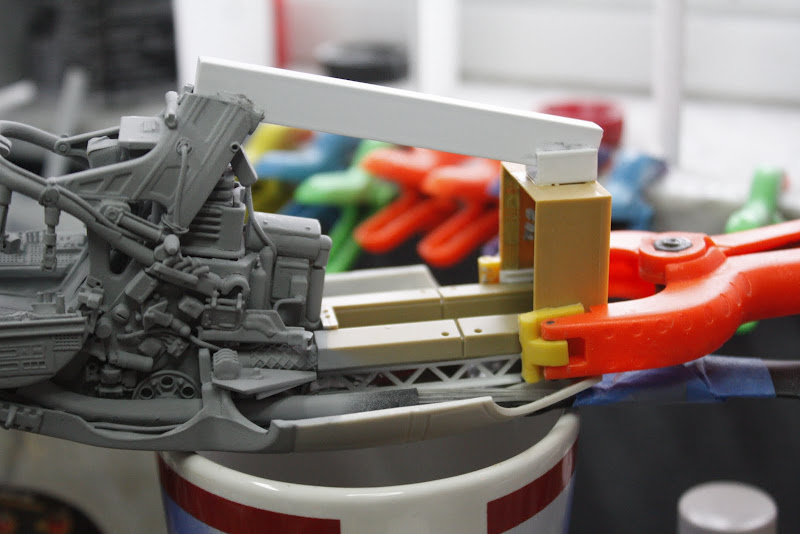 Attached some control boxes to each side wall  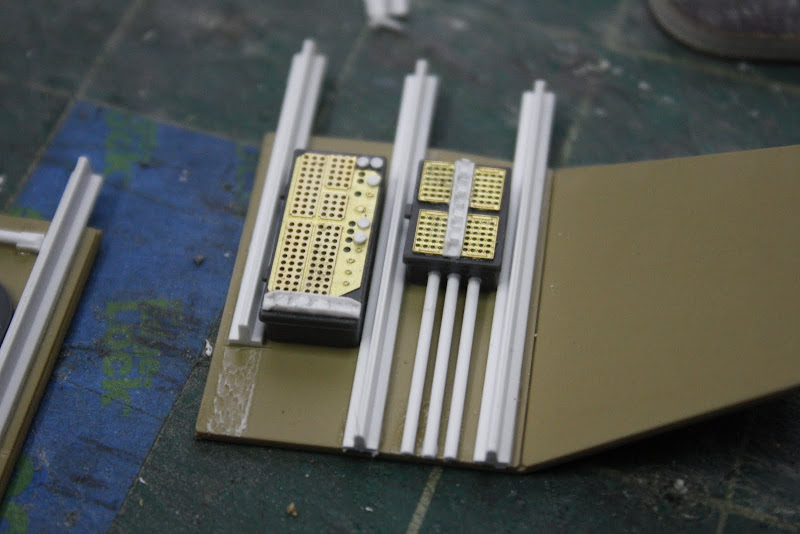 Fabricated this half ring to fill the transition and support the side walls 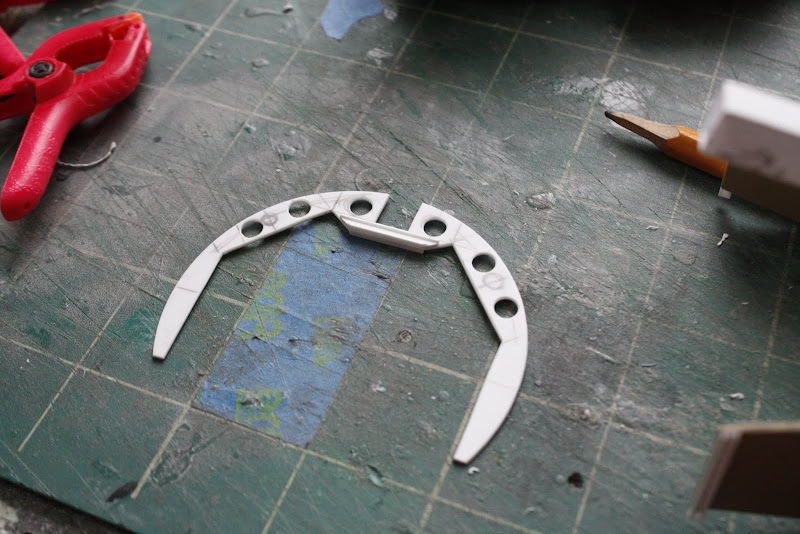 Added the side walls and put these braces on the back side to strengthen the assembly 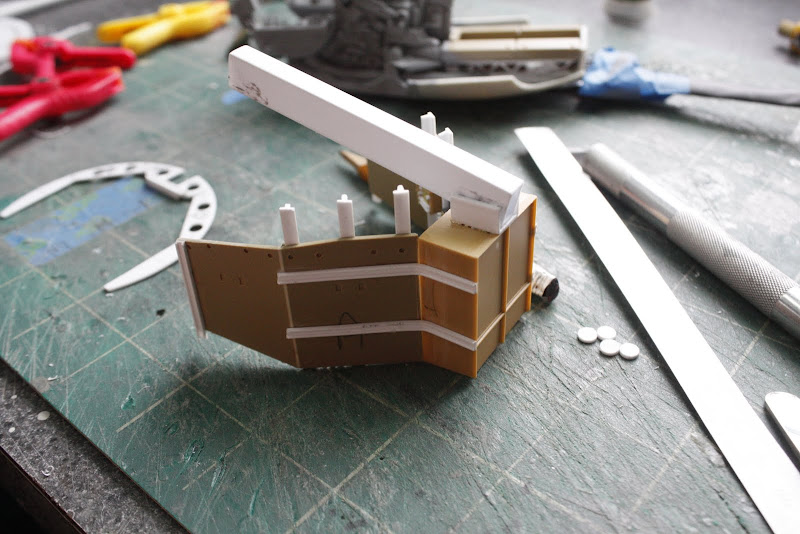 Fitted the half ring in position 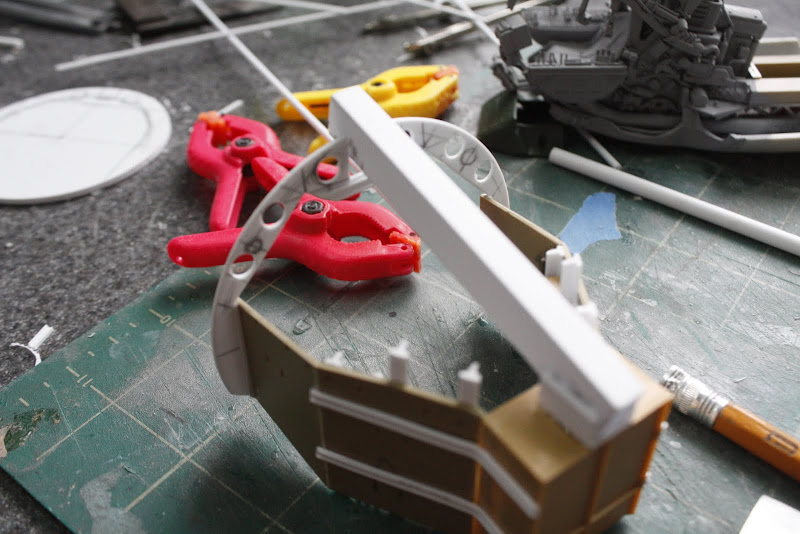  Started filling in the over head are of the corridor 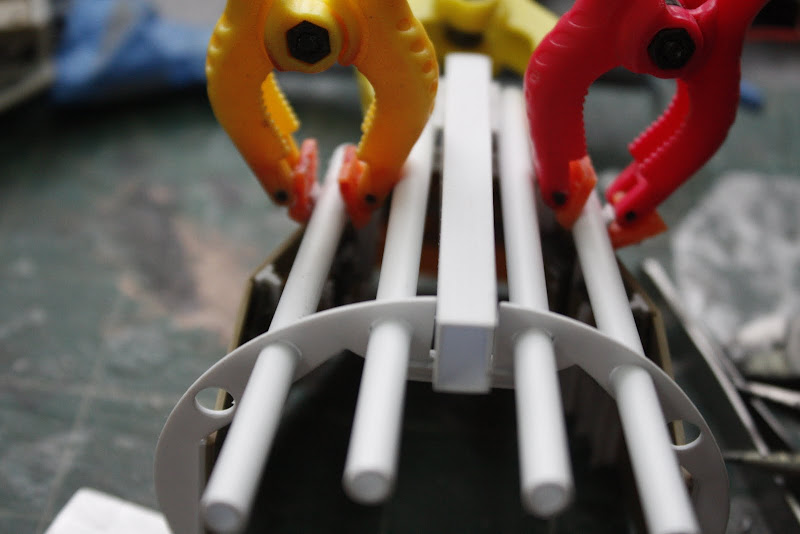 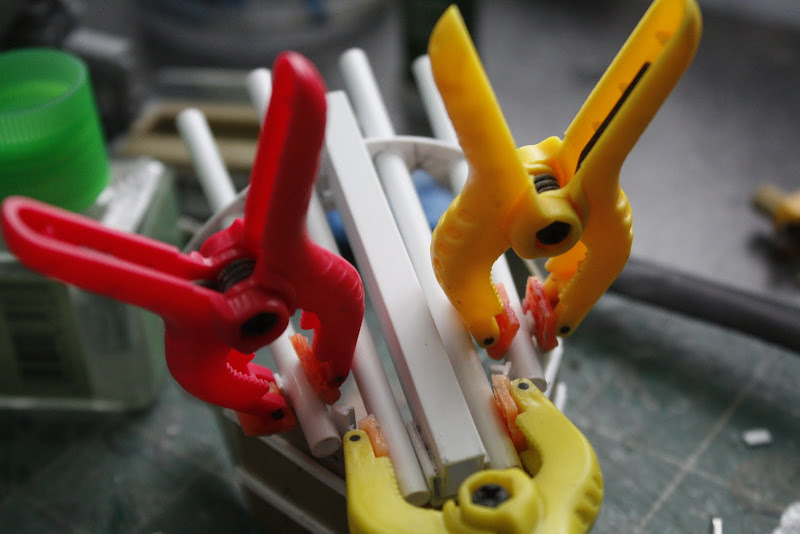 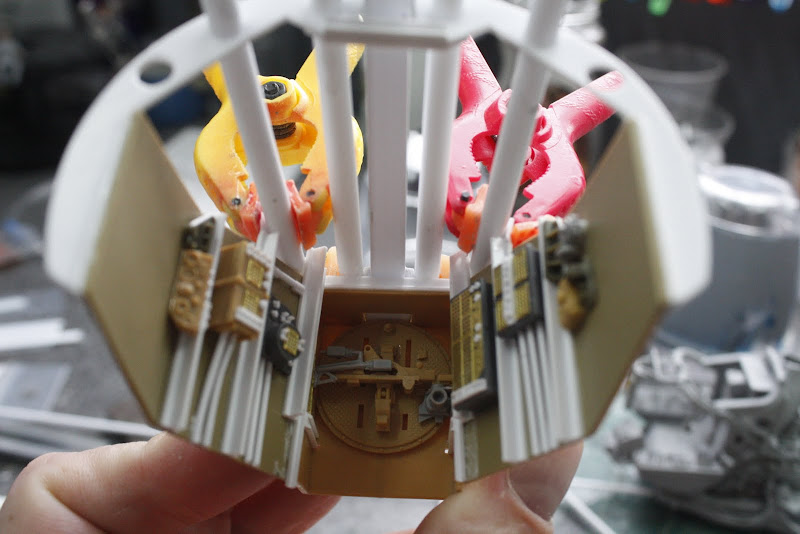 Drilled holes and installed overhead fiber optics for the corridor lighting 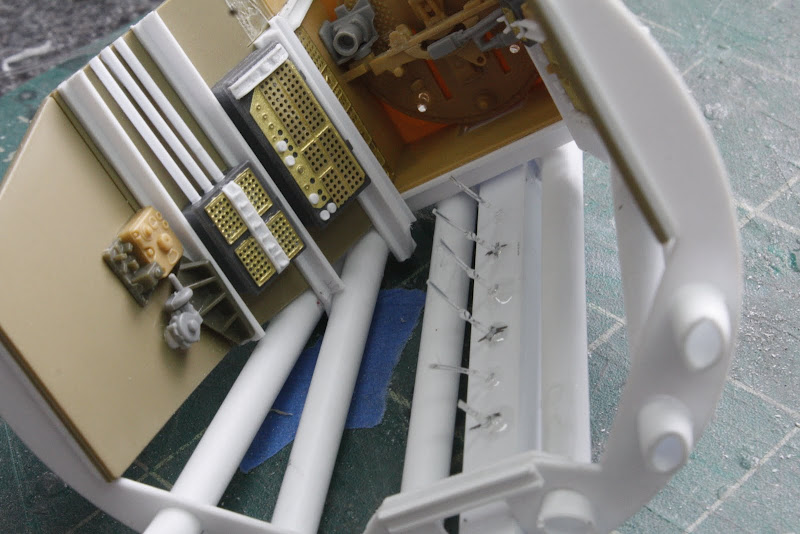 Also put two larger diameter fiber optics on the rear door, these will be attached to flashing LEDs. 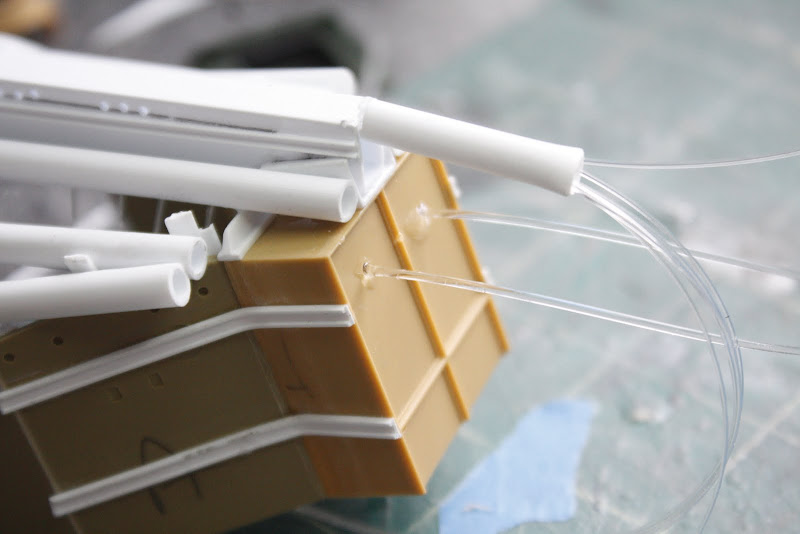 Obviously these will be trimmed down after painting Spent a few hours messing about with the wiring and finalising what goes where, the LEDs in the side pods could be brighter but i want it to be subtle so maybe it will look better when its all assembled and i've cleaned all the holes out in the PE I will be adding more details in the ceiling of the corridor next, overhead pipes and wiring, so stay tuned Take care Gag out ;D |
|
Deleted
Member since: January 1970
Posts: 0
May 18, 2024 3:47:59 GMT -5
May 18, 2024 3:47:59 GMT -5
|
Post by Deleted on Jun 2, 2013 17:23:58 GMT -5
|
|
thenylongag
Full Member
Sept2013 MoM Winner
Member since: June 2012
Yes, we have 'NO' bananas
Posts: 304
Jun 7, 2012 11:20:57 GMT -5
Jun 7, 2012 11:20:57 GMT -5
|
Post by thenylongag on Jun 2, 2013 20:05:46 GMT -5
More splendid advancements Gagster.....not content with assaulting us with eyewatering cockpittery (which sounds even ruder) we then get a set of full on jaw-dropping back passage shots!!! I'll get me coat.......  Super-duper fella My wife thinks theres something wrong with me because i'm laughing so much at a modelling site. Dicky, you friggin crack me up buddy, Thank you mate You bring tears to me eyes guvnor, oh er misses  This is rapidly turning into an issue of Viz Gag |
|
|
|
Post by Leon on Jun 2, 2013 21:13:31 GMT -5
Great update Gag,Really cool seeing all the lighting going into this.  |
|
|
|
Post by deafpanzer on Jun 2, 2013 23:10:26 GMT -5
Are you sure that you don't work for one of those movie producing companies? This is so epic!!!
|
|
mz3
Full Member
Member since: October 2012
Posts: 494
Oct 14, 2012 21:09:43 GMT -5
Oct 14, 2012 21:09:43 GMT -5
|
Post by mz3 on Jun 9, 2013 16:20:51 GMT -5
How in the hell did I miss this?!?!?
Simply amazing!!!!!
|
|
|
|
Post by `Boots` on Jun 10, 2013 13:43:05 GMT -5
Ya can always tell when Dicky`s been on ya thread...............the tone plummets completely  , fabulous work fella, ya recycling/scratch-building skills are top notch............think i need to see an overall pic of this as well coz it must look fabulous.........and BIG!! |
|
thenylongag
Full Member
Sept2013 MoM Winner
Member since: June 2012
Yes, we have 'NO' bananas
Posts: 304
Jun 7, 2012 11:20:57 GMT -5
Jun 7, 2012 11:20:57 GMT -5
|
Post by thenylongag on Jun 11, 2013 8:48:28 GMT -5
Morning Peeps Thanks for the comments Brothers, So, what have I been up to lately, lets have a look. More eyewatering cockpittery just for you Dicky Finished the outside corridor details of my back passage  Added some bracing beams PIX 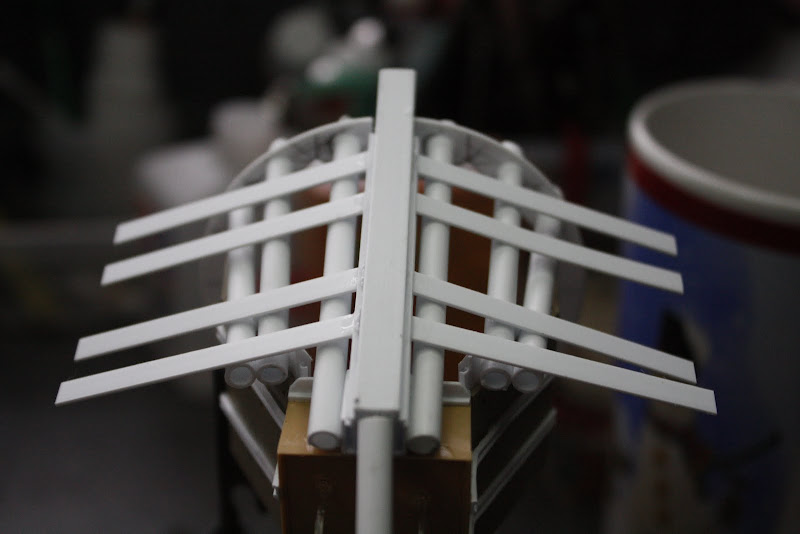 Bent the bracing over and attached to the sides  Trimmed the ends off  Added some wires and tubing on the outside  Made a small detail panel to go under the Radar assembly, I used a bit of a circuit board, some tank greeblies and tube and wire 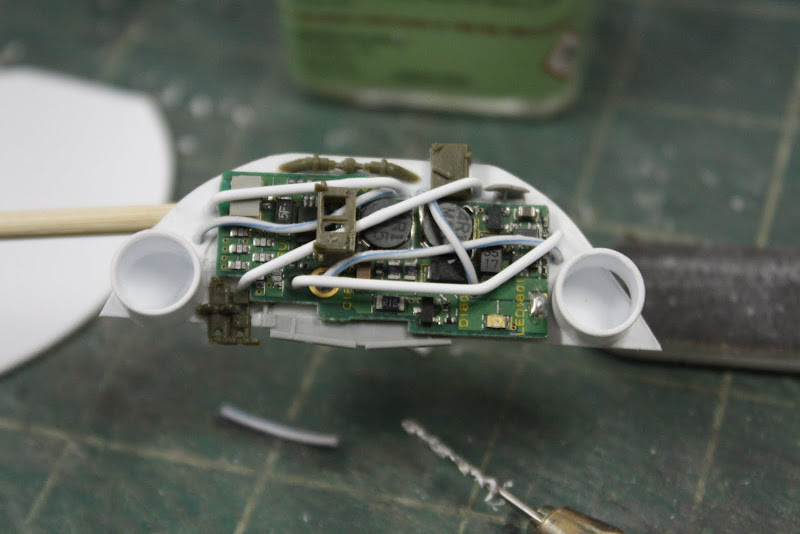 Little bit of primer, Mmmmmmm ;D 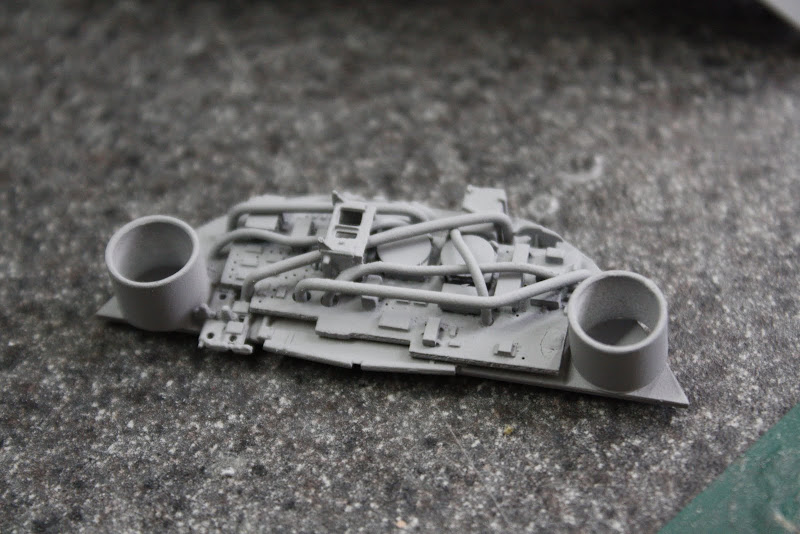 Started the radar surround top panel 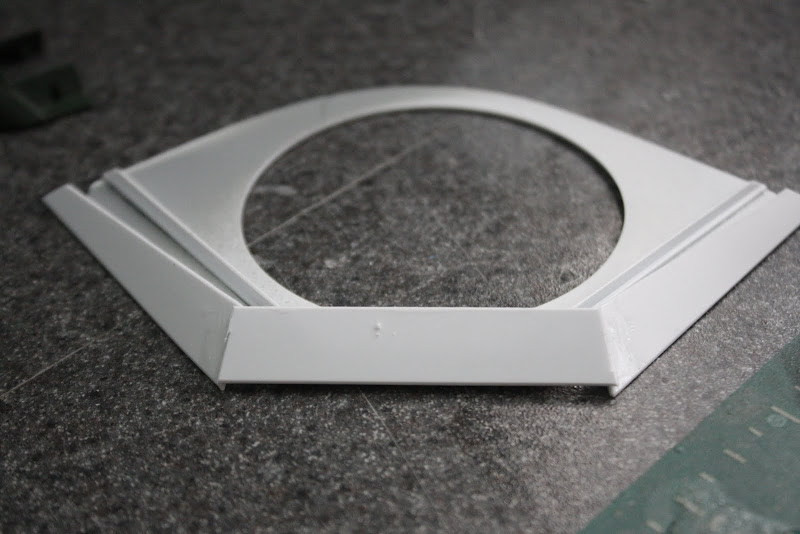 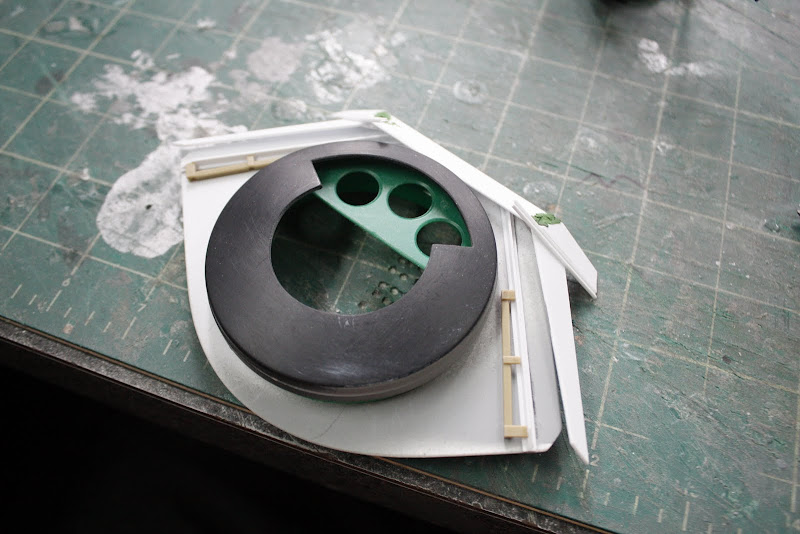 Added details and a coat of primer to all the radar base pieces  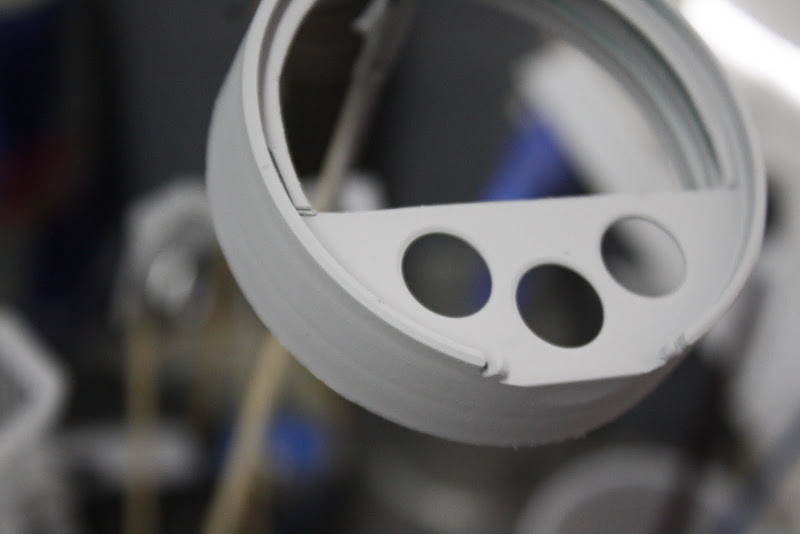 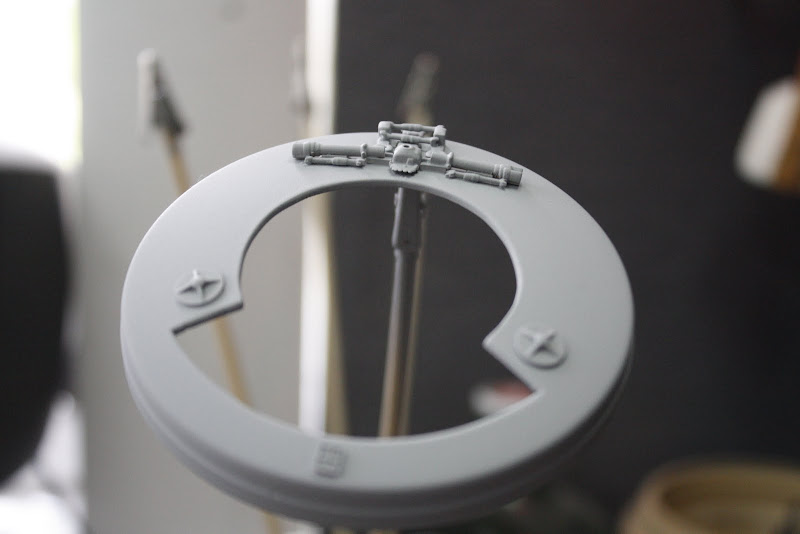 I fixed a piece of conduit steel tubing to my bench so i have better access for painting and finishing the ship 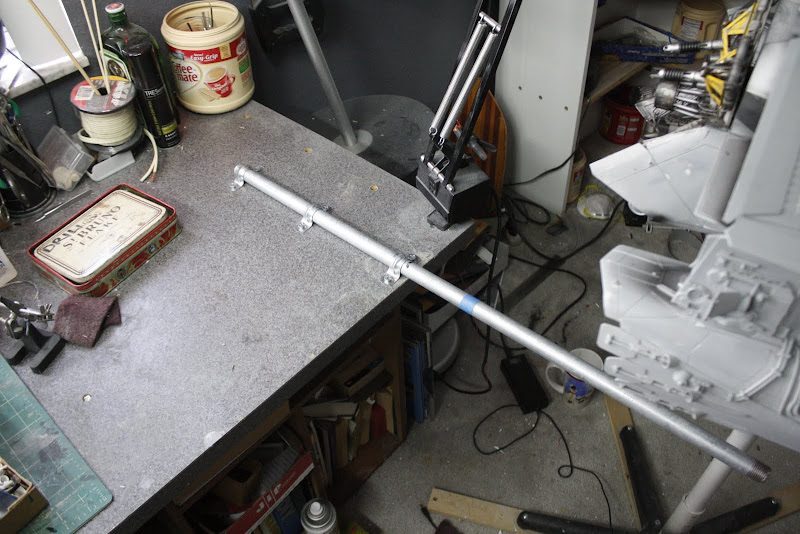 I think most of the major building is finished, I have the cockpit canopy frame to figure out but thats pretty much it folks, so this is a good opportunity for those beauty shots Brother Dupes and Brother Boots wanted to see, let me know what your wife thinks Dupes  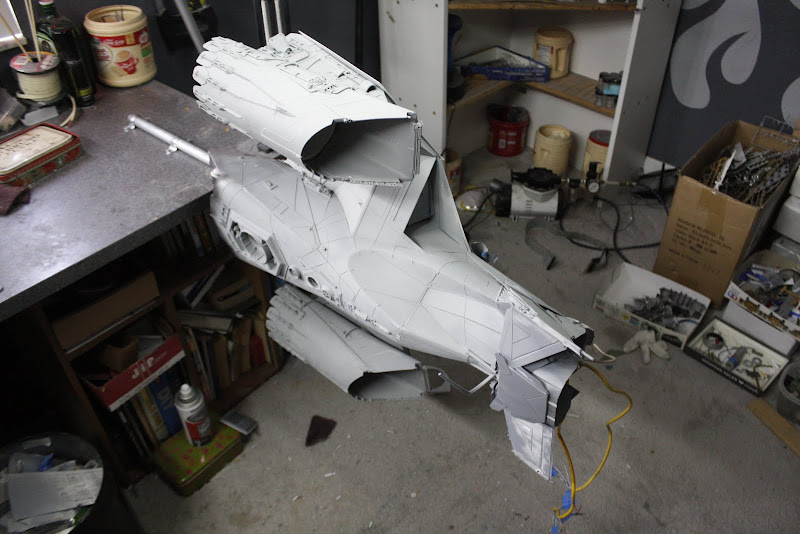  With the radar and cockpit assemblies in position, the radar will sit a bit lower on the final version  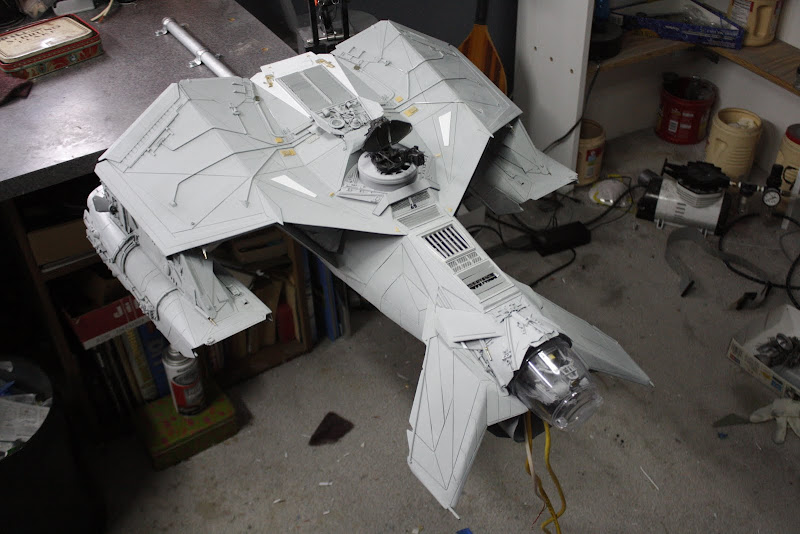 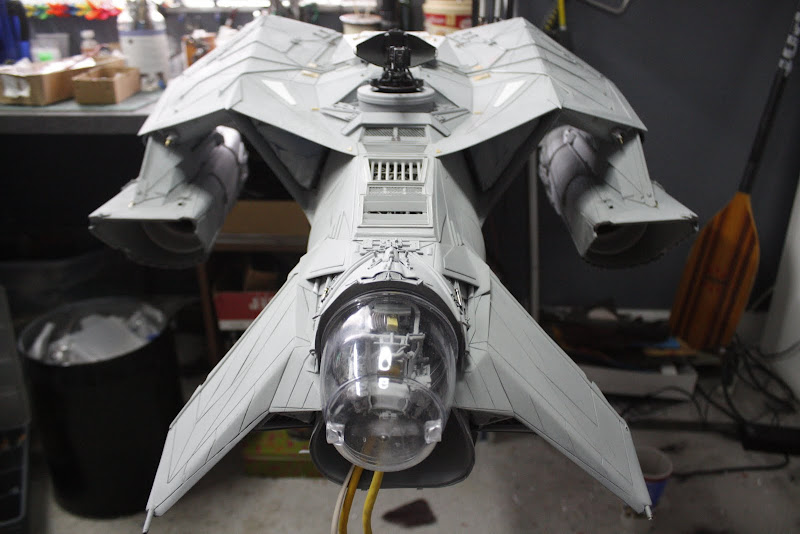 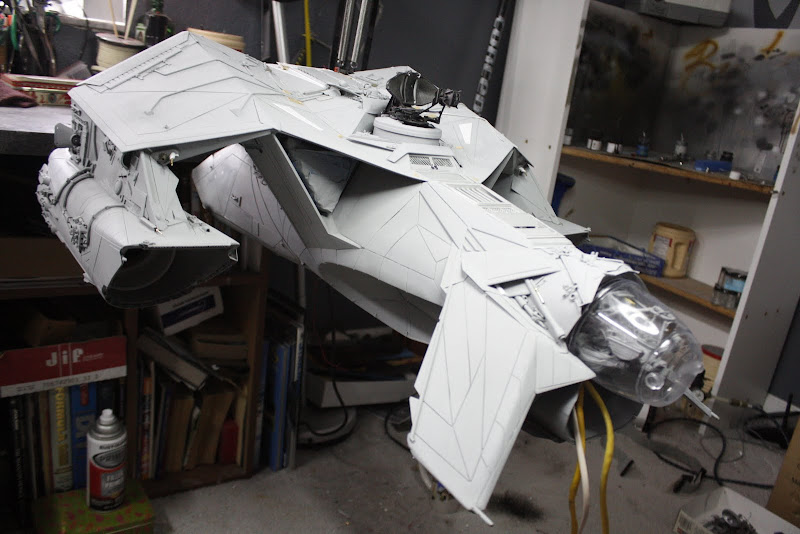 Now on to the canopy frame Stay tuned my friends Take care Gag |
|
|
|
Post by dupes on Jun 11, 2013 8:56:45 GMT -5
!!!! LOOK AT THAT RADAR ASSEMBLY!!! Interesting mount you built for the bench, too. Don't drop it! |
|
|
|
Post by dupes on Jun 11, 2013 8:58:15 GMT -5
Hahaha...I just noticed all of the cannibalized kit boxes and mountains of stripped sprues in the background! How many kits would you guess went into this beast?
|
|
Deleted
Member since: January 1970
Posts: 0
May 18, 2024 3:47:59 GMT -5
May 18, 2024 3:47:59 GMT -5
|
Post by Deleted on Jun 11, 2013 9:48:45 GMT -5
Stunningly beautiful work!!! I love this build more with every update.
|
|
thenylongag
Full Member
Sept2013 MoM Winner
Member since: June 2012
Yes, we have 'NO' bananas
Posts: 304
Jun 7, 2012 11:20:57 GMT -5
Jun 7, 2012 11:20:57 GMT -5
|
Post by thenylongag on Jun 11, 2013 11:49:16 GMT -5
Hahaha...I just noticed all of the cannibalized kit boxes and mountains of stripped sprues in the background! How many kits would you guess went into this beast? Hey Dupes This is quite literally all the kits i've used With a few small pieces from the Finemolds 1/72nd X-Wing      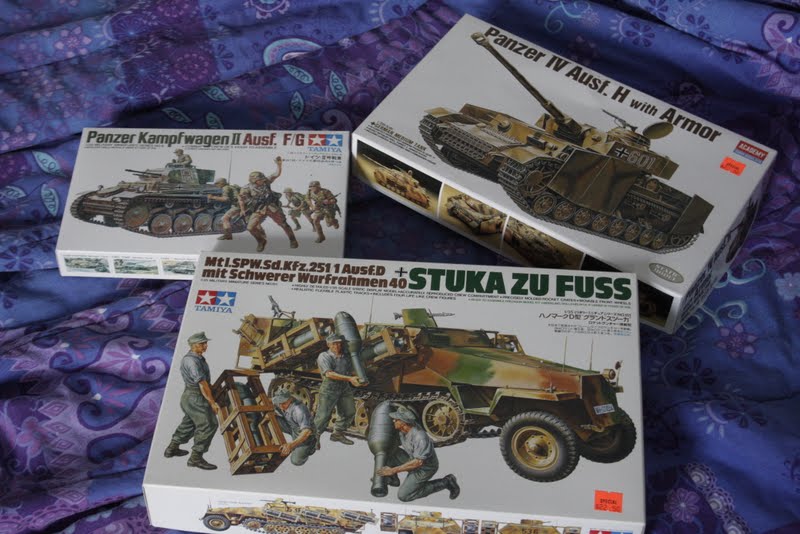 These were the ones donated by my buddy MikeJ from TheRPF forum, Top Bloke. 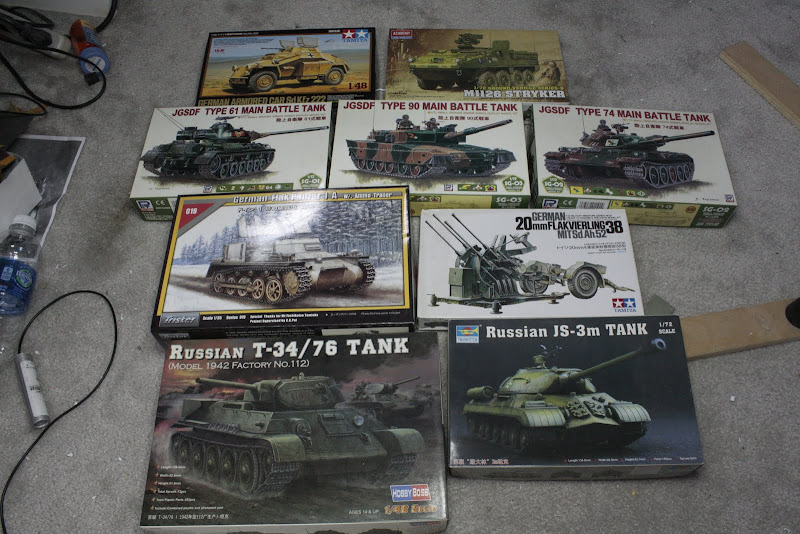 I think the total cost of all materials to date is about $1000, every time i go to Pearls fine art for a few pieces of Plastruct styrene i spend $80 But it is truly worth it just to see this vision i have in my head come to life. Originally i was also going to build a trailer for this as well, but after finding out that i will probably have to pay extra if i enter it in any competitions because its so big i think i'll leave the 8 foot trailer idea + storage at home might be a problem . Gag |
|
|
|
Post by wbill76 on Jun 15, 2013 17:36:33 GMT -5
Just dropping in on this one, that's some very impressive work there! Takes kit-bashing to a whole new level and reminds me of the stories of the original Star Wars modelers and how they took bits and pieces from all sorts of places to make up the various ships and fighters, etc.
|
|
thenylongag
Full Member
Sept2013 MoM Winner
Member since: June 2012
Yes, we have 'NO' bananas
Posts: 304
Jun 7, 2012 11:20:57 GMT -5
Jun 7, 2012 11:20:57 GMT -5
|
Post by thenylongag on Jun 16, 2013 16:23:47 GMT -5
Ello everyone, Birthday weekend update ;D Thank you all so much for your input, thanks for stopping by to say hello, it means alot to me So, birthday week, what did we accomplish, Lets take a look, This was something i was not looking forward to, the cockpit /canopy frame work. I started to construct the frame using an alternative cockpit glass 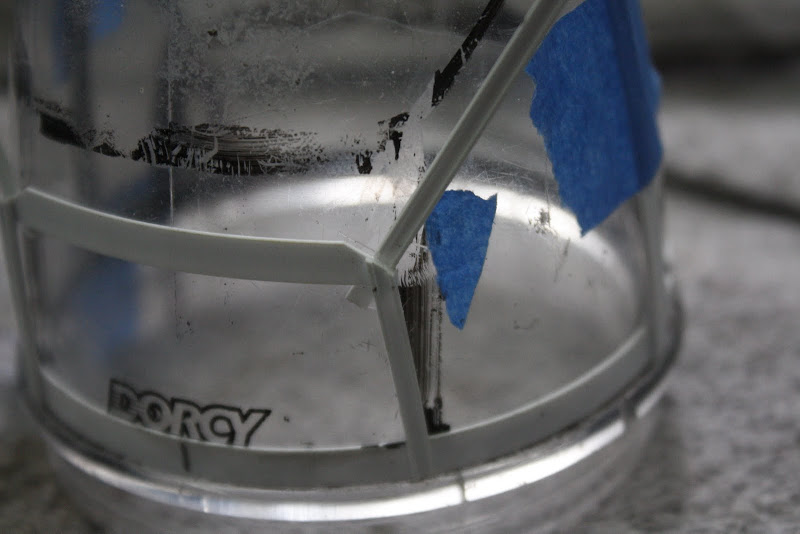 I submurged some tubing in boiling water and formed it around a smaller diameter than i required 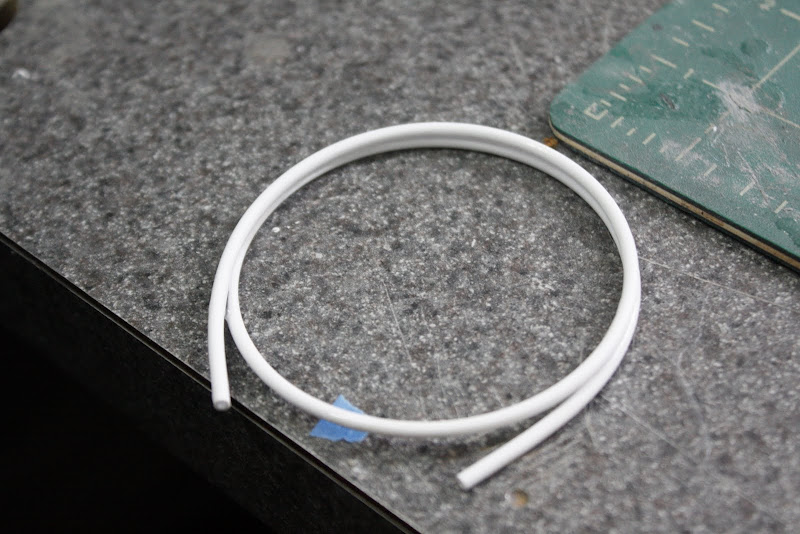 I then trimmed it to length and inserted the transition bar 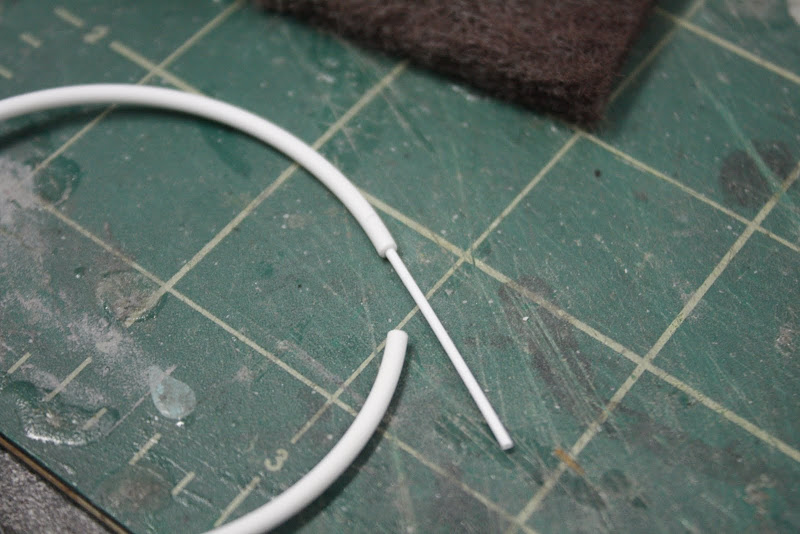 I then conscructed the frame on the dummy glass dome 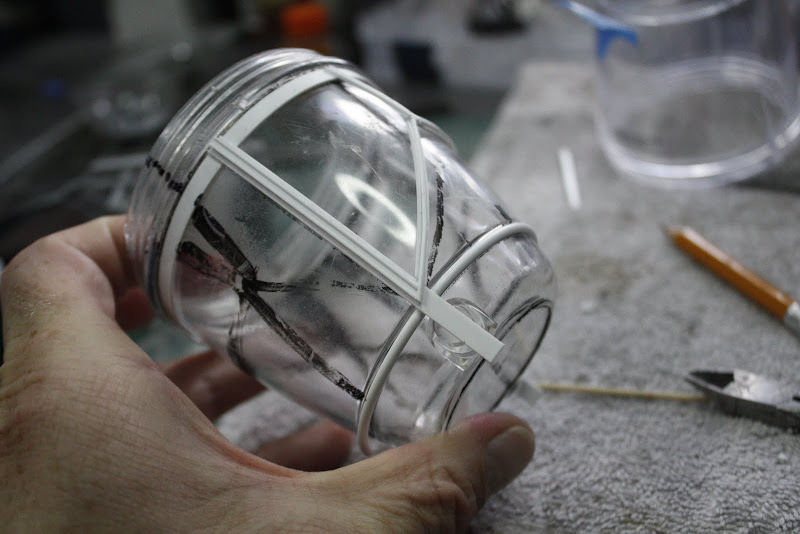 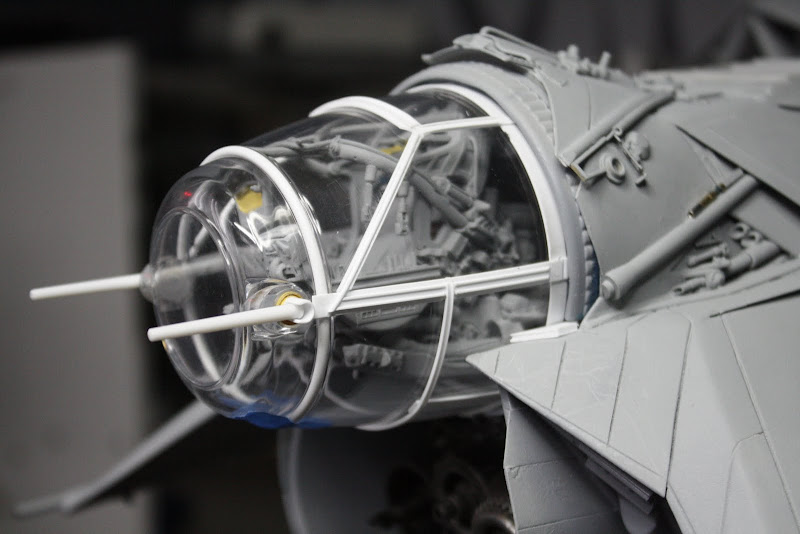  I assembled small end details 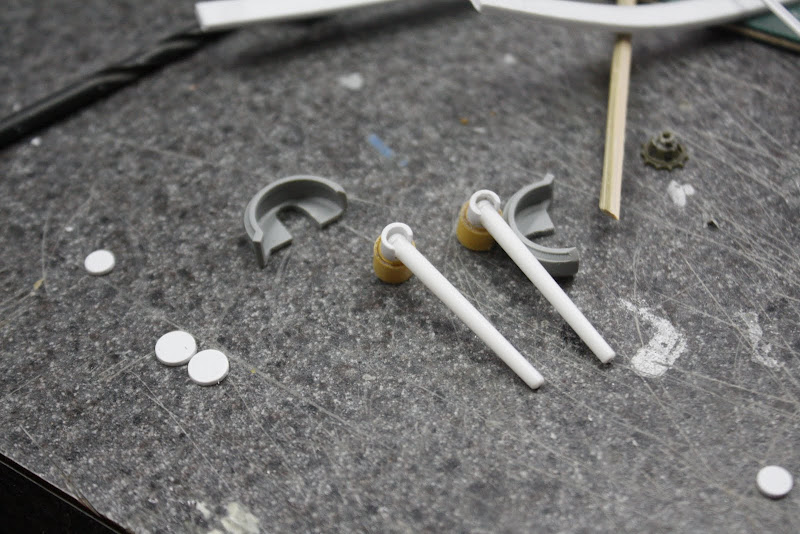 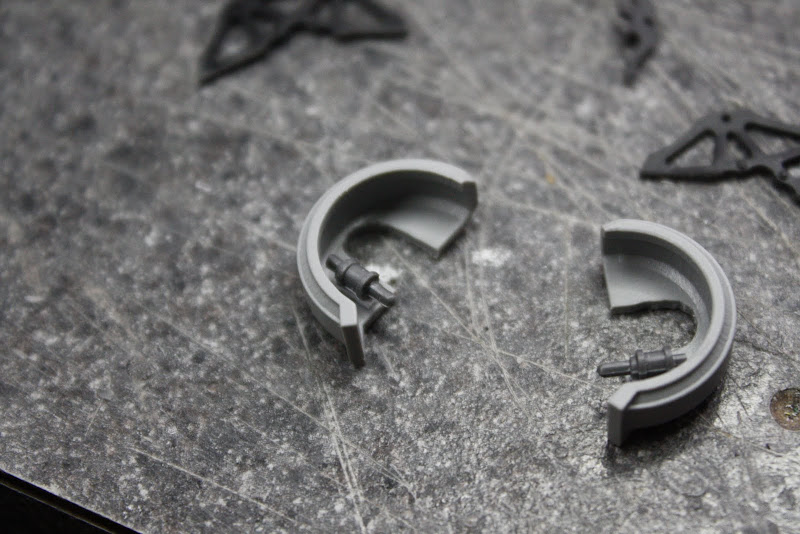 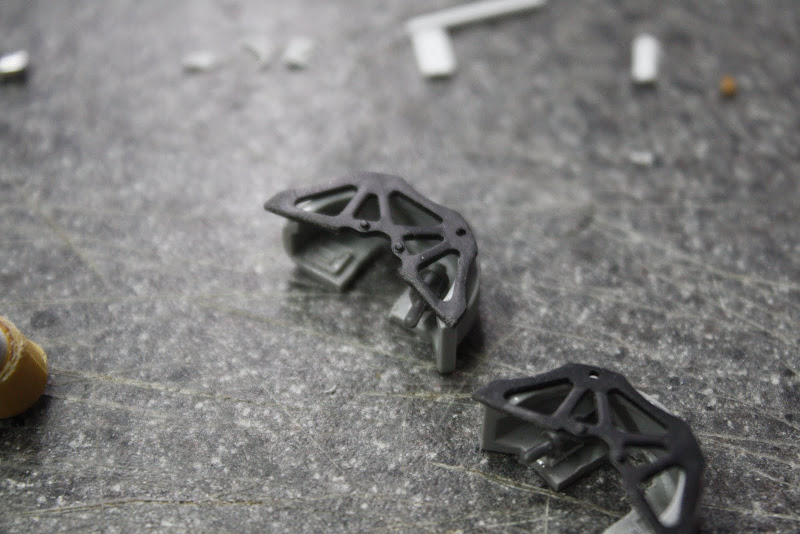 Added upper detail on the glass dome to hide a logo i could not remove 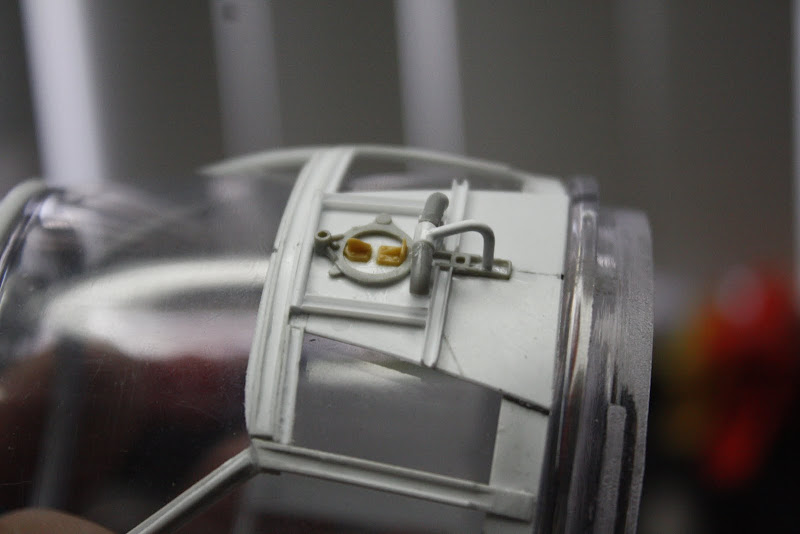 After much adjustment i finally got the cockpit dome and interior to fit as i wanted.  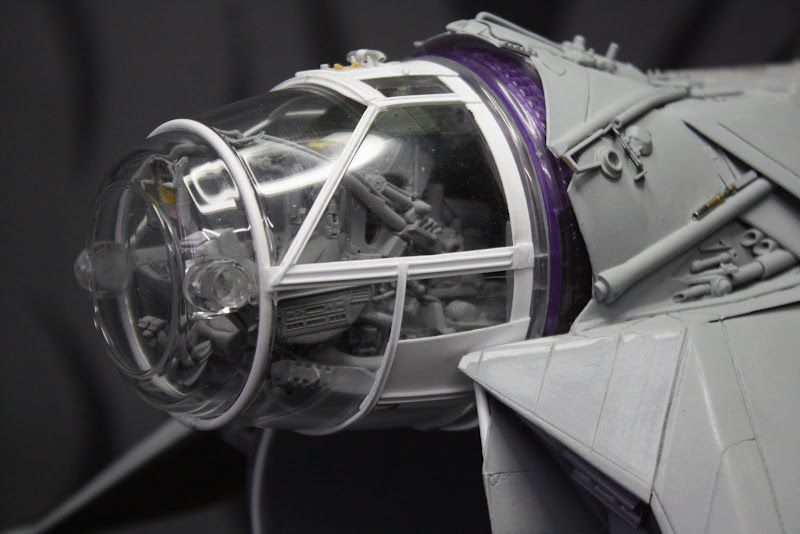 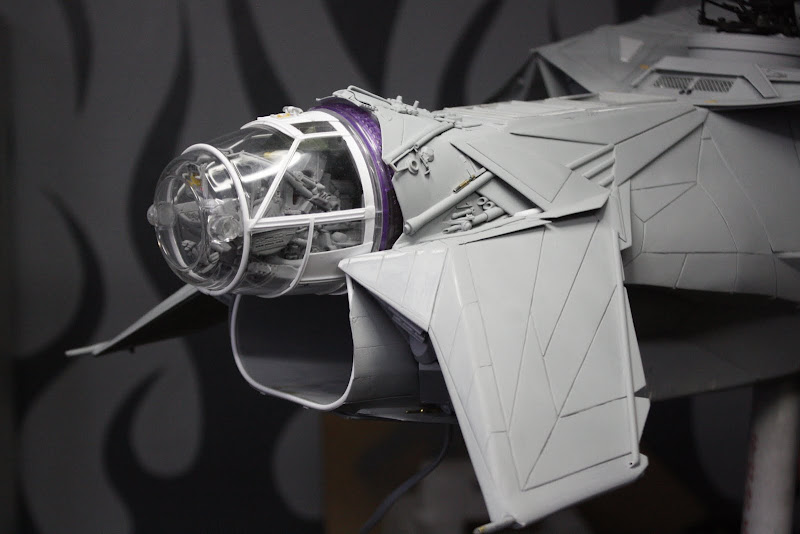 Thats all for now, A quick video to show the over all effect www.youtube.com/watch?v=JG0RYgwahLoPaint next Stay tuned Gag |
|
|
|
Post by Leon on Jun 16, 2013 21:56:16 GMT -5
Gag,that is just stunning work .Going to hate to see this come to an end  .It's been a great interplanetary ride. |
|
|
|
Post by dupes on Jun 16, 2013 22:14:55 GMT -5
I think the total cost of all materials to date is about $1000, every time i go to Pearls fine art for a few pieces of Plastruct styrene i spend $80 But it is truly worth it just to see this vision i have in my head come to life. $1000? Totally worth it! Not only for getting the vision "out of your head", but hey - you can (and should!) take this to as many IPMS Nationals competitions as you can and rake in the accolades. Killer work, my friend! Just got to check out the Youtube 360 degree video...LOVE IT |
|
thenylongag
Full Member
Sept2013 MoM Winner
Member since: June 2012
Yes, we have 'NO' bananas
Posts: 304
Jun 7, 2012 11:20:57 GMT -5
Jun 7, 2012 11:20:57 GMT -5
|
Post by thenylongag on Jun 24, 2013 11:01:18 GMT -5
Hello Every peeps, Thanks for stopping by and leaving comments it realy motivates me so much knowing so many talented builders approve of what i'm doing because i'm making this up as i go On with the show friends. Before i started painting i just wanted to add some do-dads on the upper wing so i cut out some shapes and stuck em on.  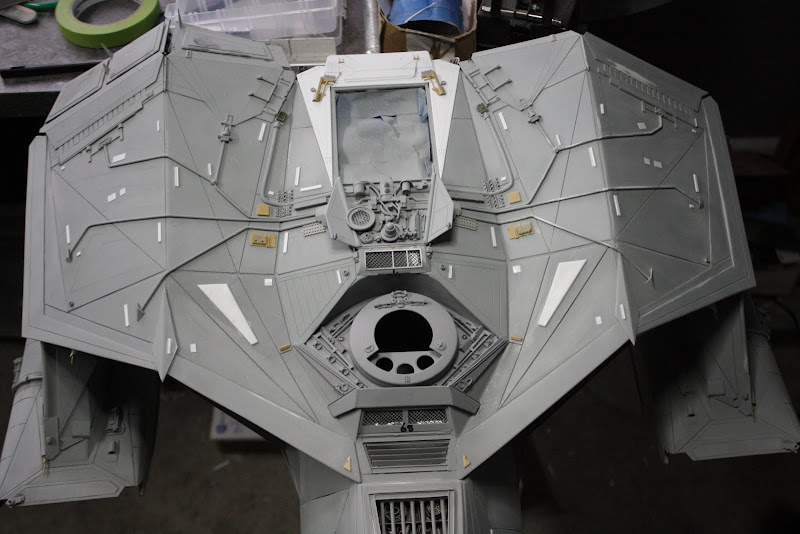 I then added some more details to the nose/canopy thingies The long white piece is made from one of those little table shaped things you get in the middle of big pizzas  I masked and primered the canopy window back seal to be painted at a later date, also i want to dip my canopy in future as well, any suggestions about doing this and not waisting all my future, can i airbrush it? 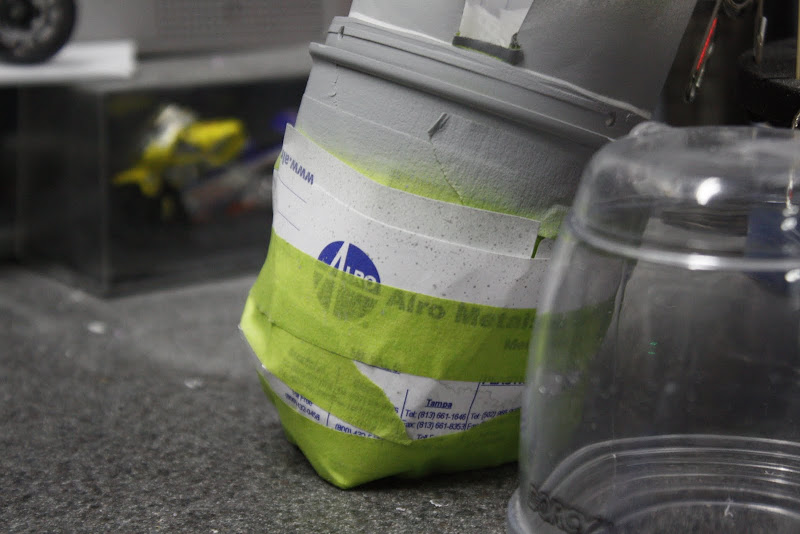 So, my favourite, NOT , Paint. I masked up the pilot module 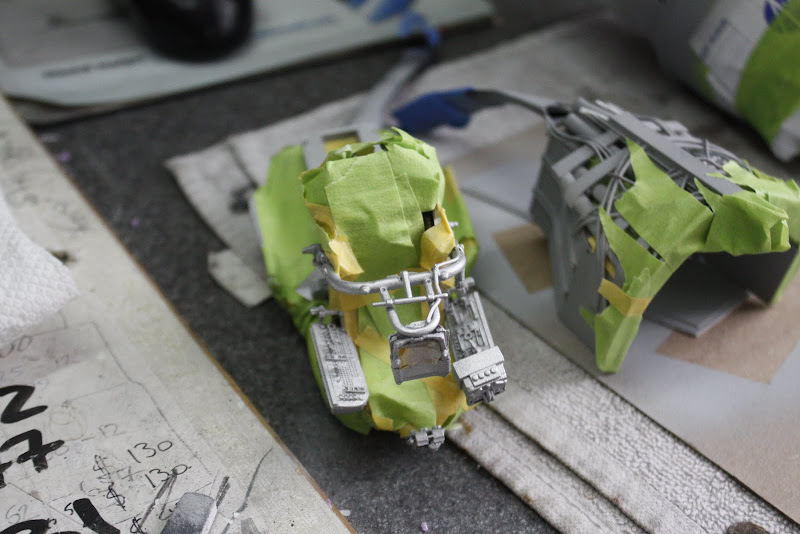 Masked off the back and the detail vents on the top 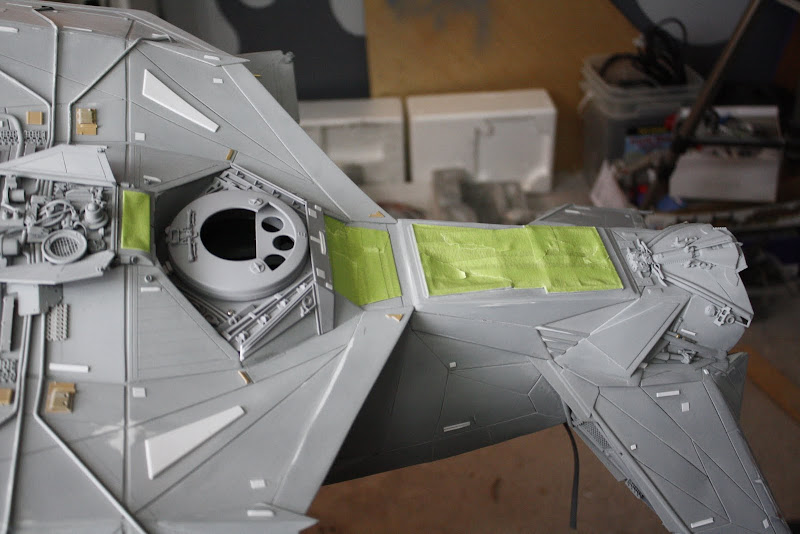 Then a final coat of primer, Mmmmmmmmmmmmmmm Primer 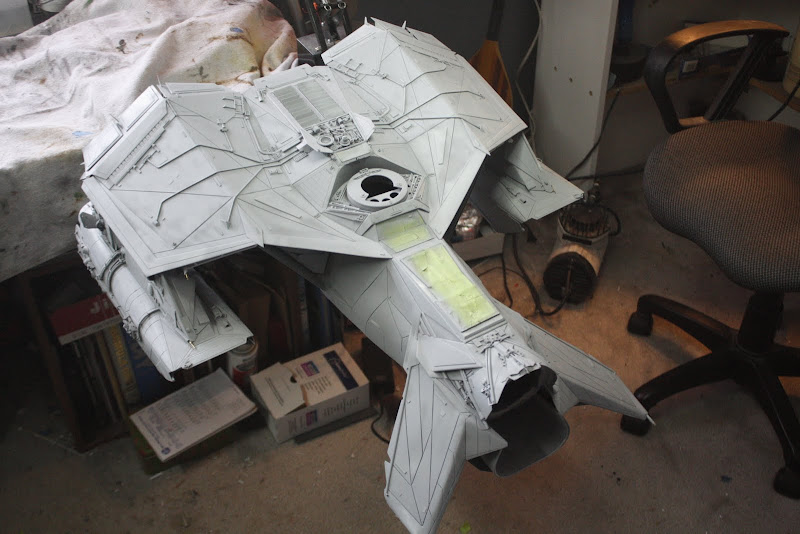  I then did the pilot seat and all its details, didn't want to over do it, tell me what you think because i'm not so sure, i messed with it so much and it still doesn't look right to me, i got to a "that will friggin do" point on Friday. I realy don't like painting because it hates me.  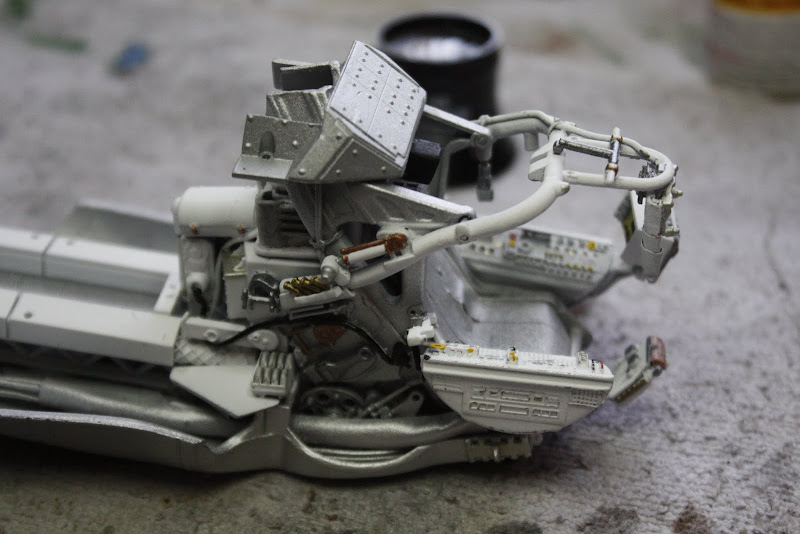 After a very light wash.  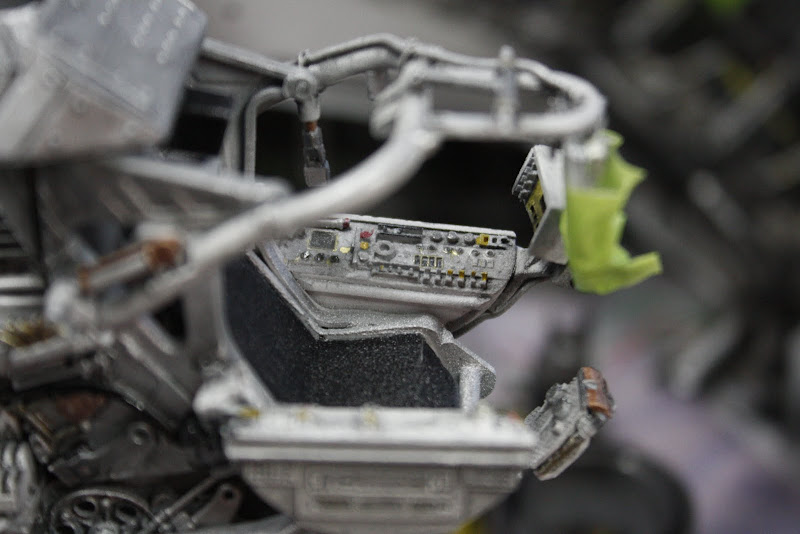 Did the same for the rear corridor  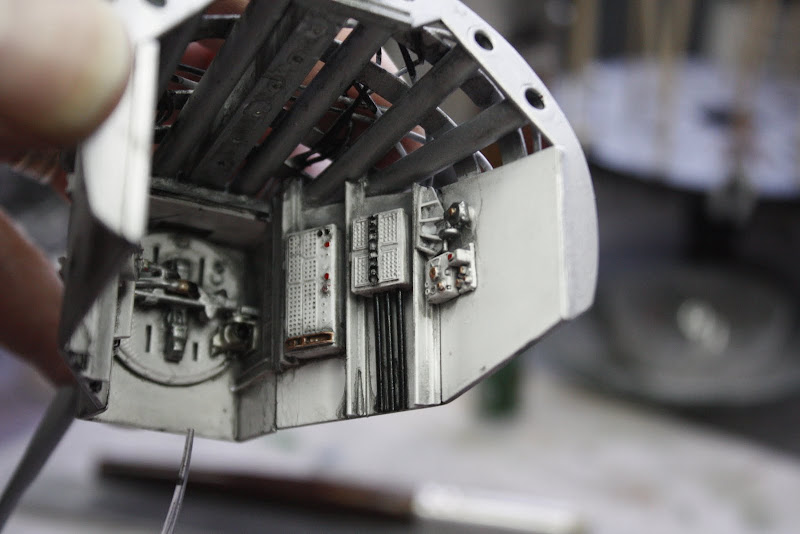 I then pre-shaded the main ship, it took quite a while but i was pleased with the results, i mean, you can't real mess up pre-shading..........or can you?  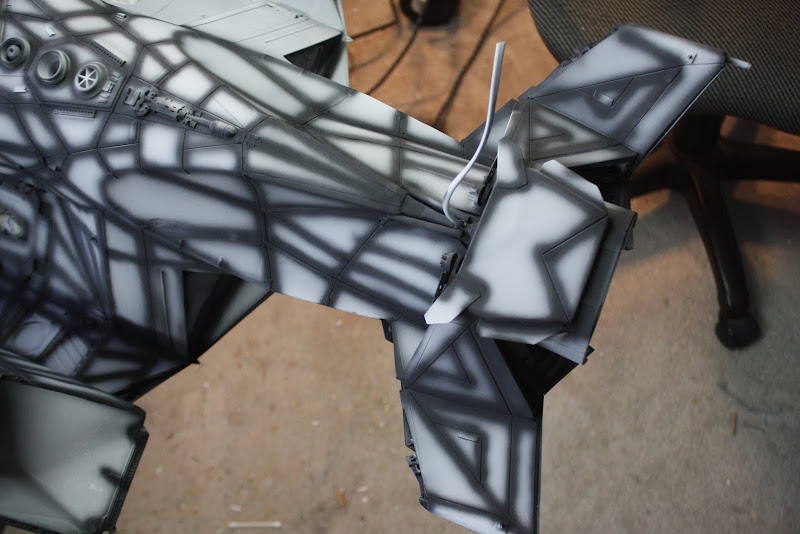 I had to take a rest half way through to let my compressor cool down a bit but i think it turned out ok. 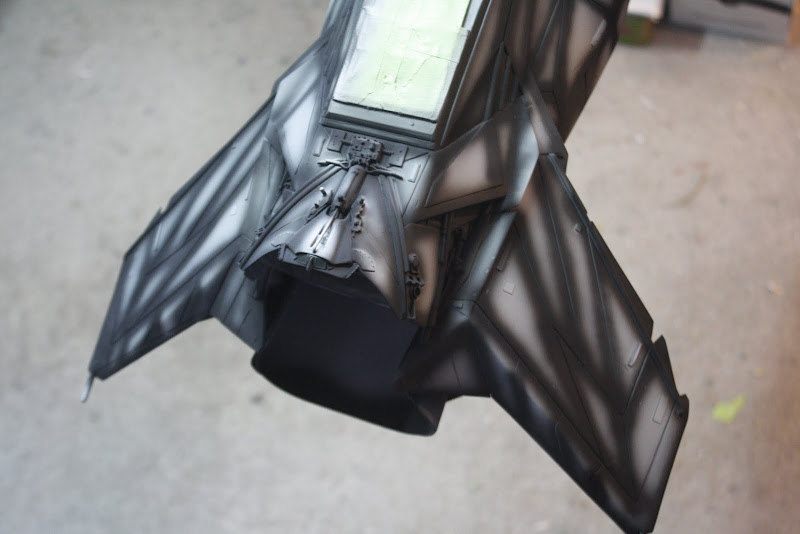 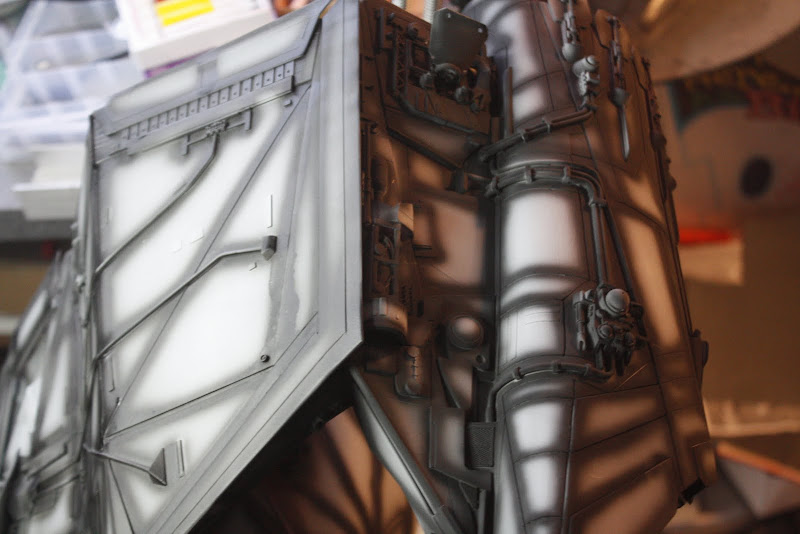 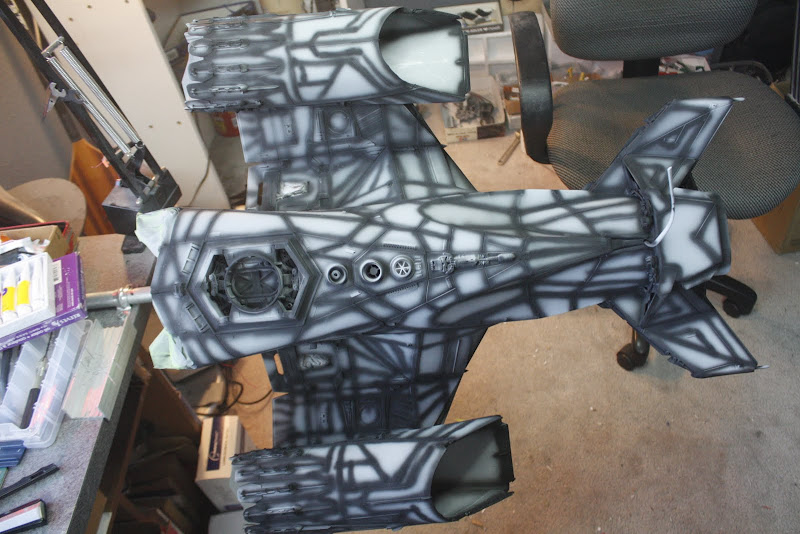 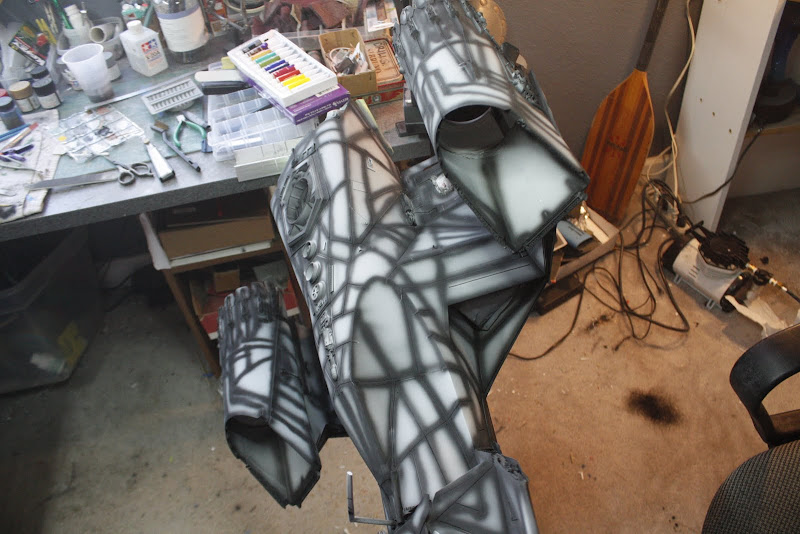 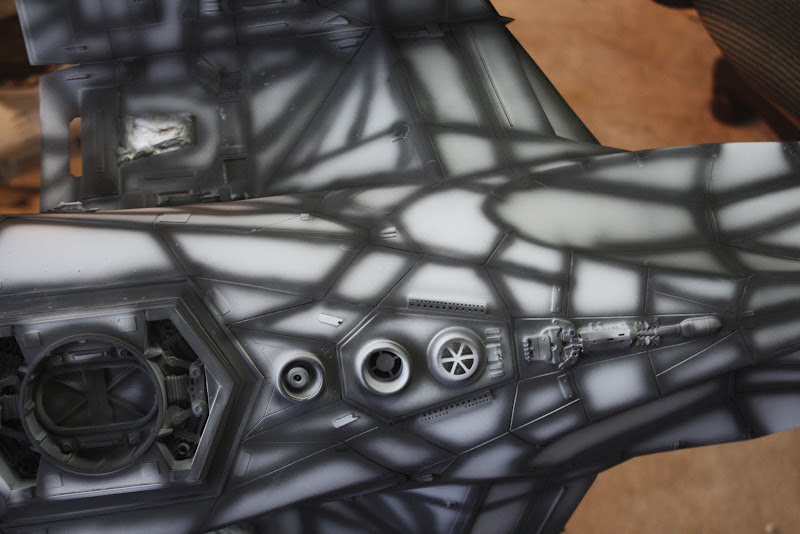  And thats where i'm at now. I need to get better ventilation before i continue and a better mask, cuz in the end it was pretty bad in the cave and the misses said i stunk up the whole house, it was acrylic, but i have a plan. Stay tuned folks, more soon. Take care Gag |
|
|
|
Post by deafpanzer on Jun 27, 2013 1:38:08 GMT -5
Can't wait to see more...
|
|
thenylongag
Full Member
Sept2013 MoM Winner
Member since: June 2012
Yes, we have 'NO' bananas
Posts: 304
Jun 7, 2012 11:20:57 GMT -5
Jun 7, 2012 11:20:57 GMT -5
|
Post by thenylongag on Jun 27, 2013 20:30:10 GMT -5
Hello Mates Thanks for the support guys, a quick update......Pix Spray booth up grade, went from this.... 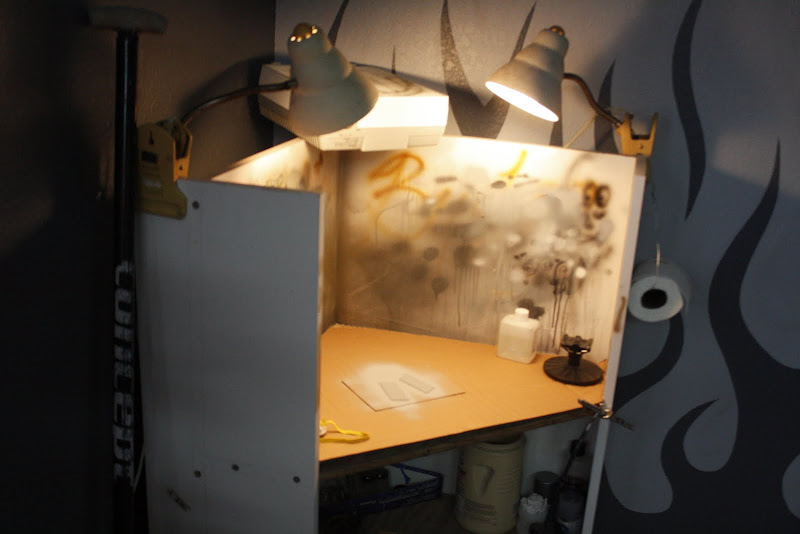 To this..... 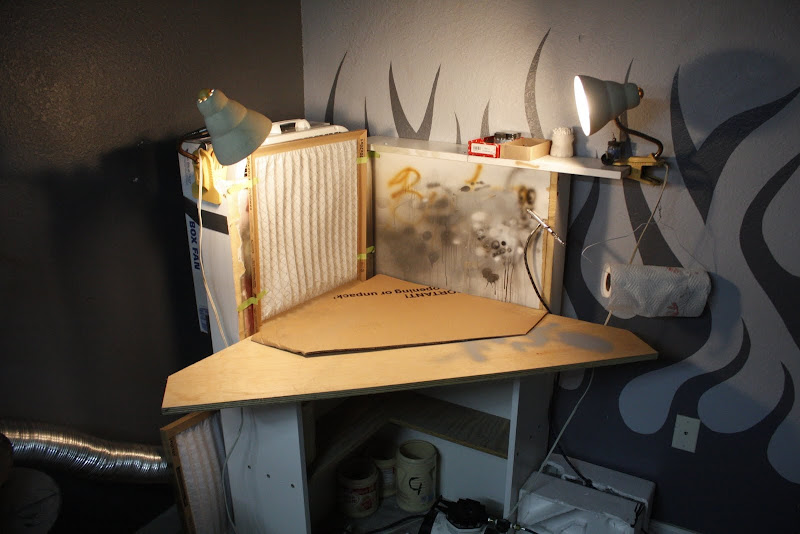 Took me an evening and $65, 20" fan ($16.88) and various fittings and lots of gaff tape, it works ok, well, the misses hasen't complained about a stinky house so far. ;D On with the show Brought some Tamiya spray cans, Silver leaf and a few other colours that I'm gunna keep you guessing over? Layed down, well used the whole can on this thing, a fine mist over the whole thing to create my 'base' colour/material effect.    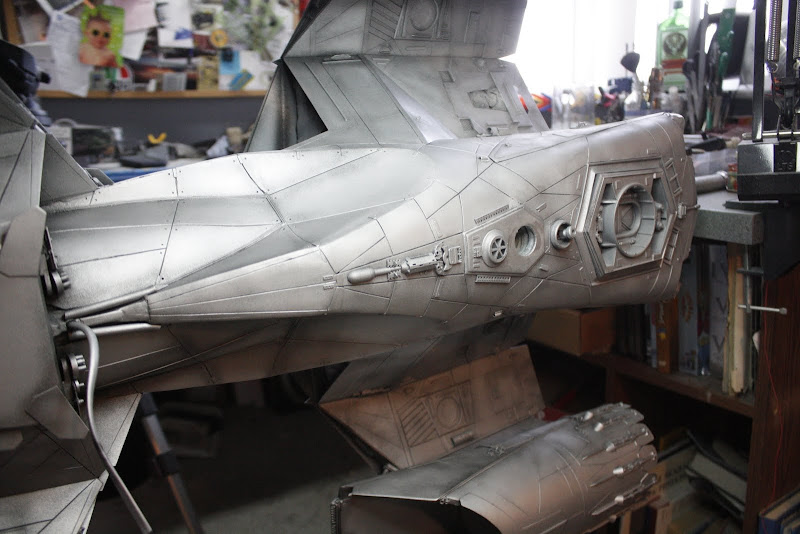 Masked the Radar for more base colour, top tip, ziplock bags are good for masking stuff. 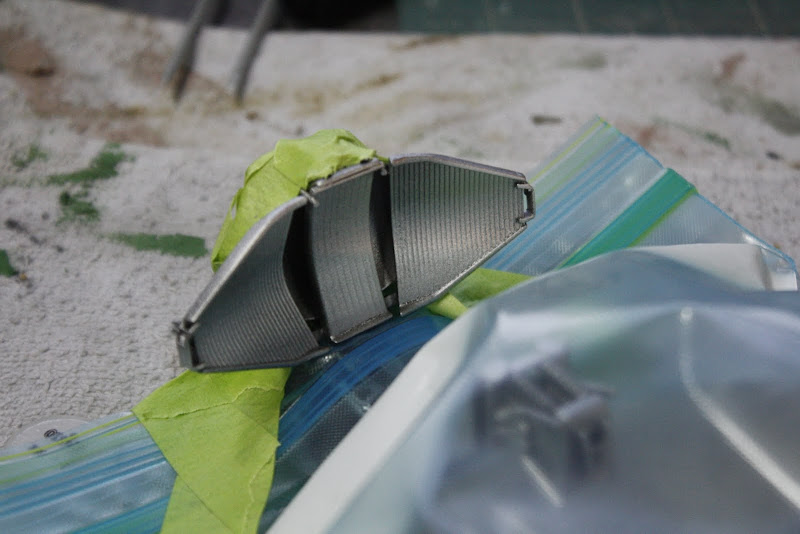 I then AB'ed the top box on the cockpit module flat black and gave it a dry brush with siver.  The radar was futured, hair srayed and salted then given a coat of the light grey, the salt was then removed with a stiff brush and tooth picks ready for a wash or two and some other weathering.  I then started to salt the underside, but I ran out of hairspray.  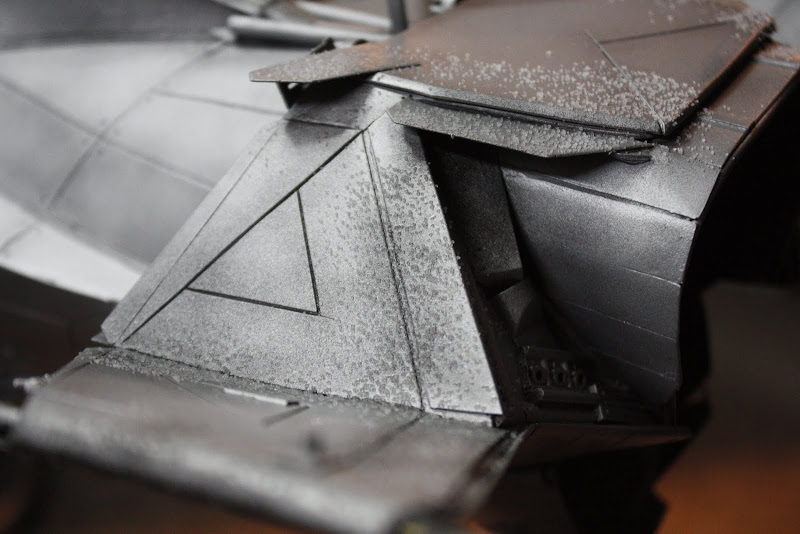 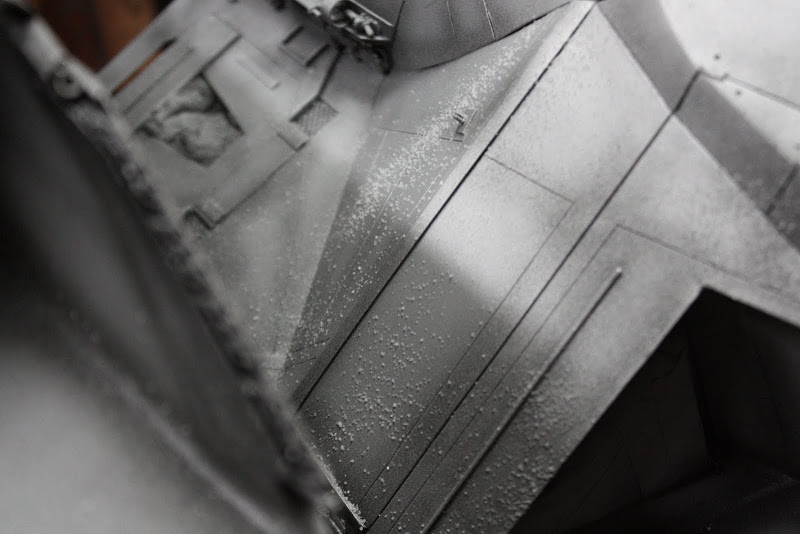 Thats it so far, off work tomorrow, got a full day of painting ahead, can't wait. Stay tuned Thanks mates Gagsterman |
|
|
|
Post by dupes on Jun 27, 2013 21:03:25 GMT -5
EGADS I can't wait to see what you do with the paint!
So question about the preshade. Do you think any of it will survive the rattle-can base plus a color coat on top?
Frickin' awesome my friend.
|
|
|
|
Post by Leon on Jun 27, 2013 21:08:37 GMT -5
Nice start on the paint and weathering Gag.That is some top notch work. |
|
bbrowniii
Full Member
Member since: March 2012
If you are not part of the solution, you are part of the precipitate.
Posts: 1,232
Mar 25, 2012 22:08:04 GMT -5
Mar 25, 2012 22:08:04 GMT -5
|
Post by bbrowniii on Jun 28, 2013 13:16:55 GMT -5
OK, a couple of things:
First, I just stumbled on this thread today. I'm a little appalled that some of my friends ("cough... cough... couDUPESgh...") didn't alert me long ago that I needed to get my butt in here, but they'll pay later...
Second... Ummm... HOLY %^&*!!!!
This is amazing not only for the quality of your work, but for the way you have documented and photographed it and laid it all out for everyone to see. You, sir, are a craftsman AND a wordsmith!
|
|
thenylongag
Full Member
Sept2013 MoM Winner
Member since: June 2012
Yes, we have 'NO' bananas
Posts: 304
Jun 7, 2012 11:20:57 GMT -5
Jun 7, 2012 11:20:57 GMT -5
|
Post by thenylongag on Jul 1, 2013 9:12:32 GMT -5
EGADS I can't wait to see what you do with the paint! So question about the preshade. Do you think any of it will survive the rattle-can base plus a color coat on top? Frickin' awesome my friend. Dupes Thanks for your support buddy, to answer your question, in hind sight i should of de-canted the silver leaf and used my air brush because as i now know the Tamiya cans are pretty 'aggresive' and not so easy to control the amount of paint. The top side is pretty much gone, it is visable in places but i intend to use several silver colours to make different panels, so then i can 'shade' the edges a bit to get the effect i want. As for the underside, the pre-shade is still quite visible, the silver is just an undercoat/material effect so when i hairspray, salt and remove, the silver will show through, I haven't gone crazy with the salt effect, less being more and all that. I was able to enhance the pre-shade by painting every panel individualy from the center outwards, with much more paint applied to the center and with just a mist on the panel edges, i saw one of those Japanese masters do this on a Sub, the effect was just what i was after. I painted the underside on Friday i just haven't posted the results yet, took me about 7 hours to get every panel done, remove all the salt and create the chipping effect. The colour i used is a special blend of about 90% flat white, 5% light grey, 5% chrome silver and just a drip or three of buff, all colours are Tamiya acrylics. It is a very light grey/off white colour but gives me a perfect base to start from. It turned out right good it did. I will be starting with pastel washes this week. Dicky I have the colours i'm gunna use mate, but not the right pattern has come to me yet, i have an idea but i have decided to get the main base colours finished first and worry about it later. So yes, i am still 'winging it' mate I'm just making this up as i go but some things are just more obvious when i get to them, if i think about them to early in the process it destracts me from where i'm at and i get all stressed. I have found if i keep my focus on the here and now things just seem to happen in an obvious way. Confused, me too. Take care friends Gag (Toe) |
|
thenylongag
Full Member
Sept2013 MoM Winner
Member since: June 2012
Yes, we have 'NO' bananas
Posts: 304
Jun 7, 2012 11:20:57 GMT -5
Jun 7, 2012 11:20:57 GMT -5
|
Post by thenylongag on Jul 1, 2013 9:39:42 GMT -5
This is amazing not only for the quality of your work, but for the way you have documented and photographed it and laid it all out for everyone to see. You, sir, are a craftsman AND a wordsmith! You flatter me sir, thank you so much. But, as for a "wordsmith" LOL I was so bad at English in school and i hated it sooooooo much this really did make me laugh out loud, but thanks anyway mate, glad you found me with or without your 'friends' help . The support i have received from then is nothing short of fantastic, a great bunch of geezers for sure. Cheers Gag |
|
thenylongag
Full Member
Sept2013 MoM Winner
Member since: June 2012
Yes, we have 'NO' bananas
Posts: 304
Jun 7, 2012 11:20:57 GMT -5
Jun 7, 2012 11:20:57 GMT -5
|
Post by thenylongag on Jul 1, 2013 9:41:42 GMT -5
Nice start on the paint and weathering Gag.That is some top notch work. Thanks Leon, i appreciate you stopping buy and commenting on my 'little' project. Gag |
|


 Jeez Louise this build is out of this world.Out of words to describe this.NUFF SAID


 .It's been a great interplanetary ride.