|
|
Post by rbaer on Apr 30, 2024 16:34:44 GMT -5
I've had most of the stuff to do this for a while, not that much is required. The Tamiya kit is solid, and I'll probably keep this nearly OOB. I have an Accurate Armor (Armour?) turret that I may use, or use as an example to improve the Tamiya turret. Not sure yet. If I use the AA turret , I'll need the stowage bins and boxes since AA modeled them as separate parts, but I have a Trumpeter kit for those if I need them. Lucky me, Sprue Bros put the Rye Field Models tracks on sale and I already had some old Eduard PE. Ingredients:  IMG_4273 IMG_4273 by Russel Baer, on Flickr  IMG_4274 IMG_4274 by Russel Baer, on Flickr  IMG_4275 IMG_4275 by Russel Baer, on Flickr I got motivated to do this from a pic in this book:  IMG_4279 IMG_4279 by Russel Baer, on Flickr Specifically this one, reproduced here for illustrative purposes only:  IMG_4277 IMG_4277 by Russel Baer, on Flickr It's missing all the rubber parts on the fenders and additional armor, and it looks like I could do some heavy weathering and be accurate. I like it a lot. So I had the Tamiya lower hull knocked together in a couple of hours, and one side of the RFM tracks done in about the same. The RFM tracks are a great fit on the Tamiya sprockets, only three parts per link and RFM's recommended 79 links are a good fit. I tried 78 links and they were too tight for comfort. |
|
|
|
Post by Tojo72 on Apr 30, 2024 17:11:51 GMT -5
Will be a nice project.
|
|
stikpusher
Forum Moderator 
Member since: April 2023
Living The Dream
Posts: 3,511 
MSC Staff
|
Post by stikpusher on Apr 30, 2024 17:13:36 GMT -5
^ What Tony said.  |
|
lyle
Forum Moderator
Member since: May 2013
On the sunny side of the dirt
Posts: 1,257
MSC Staff
|
Post by lyle on Apr 30, 2024 17:34:28 GMT -5
What they said!
|
|
handiabled
Community Relations Moderator 
Member since: February 2023
Posts: 2,579
MSC Staff
|
Post by handiabled on May 1, 2024 1:22:18 GMT -5
I'll be following along with this one
|
|
|
|
Post by rbaer on May 2, 2024 14:45:44 GMT -5
Quickie update: Tamiya lower hull pretty much assembled itself, to be expected. Then I got into some tracks. I used to RFM jig and went to town, getting one whole run done in and evening. It took longer to prep the parts (three per link, not bad) than it did to assemble them. I like them, easy to assemble, and I only got glue into one non-glue area, good for me. The tracks appear to be pretty strong and fit the Tamiya sprockets perfectly. My only "complaint" is very minor and has more to do with the fact that I'm using RFM tracks on a Tamiya kit, and that is this: RFM says 79 links per side, which is what I ended up doing, leaving the tracks looser than operationally sound. so I tried 78, which made them too tight. Of course the RFM kit has adjustable idlers, and the Tamiya kit dose not. I could have cut the idler mounts off and fiddled them, but I'd be chasing clouds since this tank has full side armor, leaving the top run of tracks hidden. I'm happy. Pic shows one run finished, hull rear about 80% done.  IMG_4281 IMG_4281 by Russel Baer, on Flickr I also decided I'll probably stick the Accurate Armor turret back in the stash since it's a very minor improvement on the Tamiya part. If I was going to show the tank with the stowage boxes opened up for maintenance it would be necessary, but that's not in the plan. All I really need to add to the Tamiya turret is anti-slip. |
|
handiabled
Community Relations Moderator
Member since: February 2023
Posts: 2,579
MSC Staff
|
Post by handiabled on May 3, 2024 2:18:00 GMT -5
Are the Rye Field tracks fairly easy to work with?
|
|
|
|
Post by rbaer on May 3, 2024 14:51:33 GMT -5
Yes they are: each link is three pieces and the jig speeds it up nicely. The worst part is getting all the pieces ready to assemble. Once that's done, they go together pretty quickly. I spent about 45 minutes getting ready to assemble 79 links, then about 30 doing it.
|
|
ossie262
Full Member

Member since: January 2015
Posts: 286
Jan 3, 2015 15:31:27 GMT -5
Jan 3, 2015 15:31:27 GMT -5
|
Post by ossie262 on May 4, 2024 2:52:08 GMT -5
Hi
Interested in this one .
Been up close and personal to challenger 2. Worked on and driven CRARRV and a bit on Challenger 2 but later then GULF WAR.
|
|
|
|
Post by rbaer on May 5, 2024 15:56:13 GMT -5
Hi Interested in this one . Been up close and personal to challenger 2. Worked on and driven CRARRV and a bit on Challenger 2 but later then GULF WAR.[/quote I'll try and keep you entertained..  Speaking of, I just got my AFV Modeller, saw your Cents in there, congrats! |
|
|
|
Post by rbaer on May 7, 2024 17:45:15 GMT -5
Trackage:  IMG_4285 IMG_4285 by Russel Baer, on Flickr  IMG_4286 IMG_4286 by Russel Baer, on Flickr The side I did tonight is only 78 links. It fit ever so slightly loose, so I tried it on the other side and it was perfect. So I took the run I did a few nights ago, removed one link and tried it, getting a good fit there also. It shouldn't be any different since this thing has hydrogas suspension units that are spaced directly opposite each other side to side. Must be how I put the idlers on. And I had another bright idea while doing the second run: instead of using this to apply glue, sometimes getting too much into a very specific area  IMG_4289 IMG_4289 by Russel Baer, on Flickr I put some of the same stuff in here:  IMG_4290 IMG_4290 by Russel Baer, on Flickr Should have done that a LONG time ago..... |
|
|
|
Post by rbaer on May 10, 2024 15:41:45 GMT -5
Skirt armor ready, extra fuel drums "converted" to dry storage, mounts ready.  IMG_4303 IMG_4303 by Russel Baer, on Flickr  IMG_4302 IMG_4302 by Russel Baer, on Flickr Scuse the fingers. I really hate covering up those lovely tracks. |
|
handiabled
Community Relations Moderator
Member since: February 2023
Posts: 2,579
MSC Staff
|
Post by handiabled on May 12, 2024 2:51:35 GMT -5
The tracks look fantastic!
|
|
|
|
Post by rbaer on May 12, 2024 16:36:04 GMT -5
The tracks look fantastic! I didn't think they would be that much improvement over the kit tracks, but I'm convinced now. I'll be using a set of RFM tracks on an upcoming Leo 2 build as well. They really do add something to the model. |
|
|
|
Post by dupes on May 12, 2024 18:47:46 GMT -5
Mmmmmmm...that reference pic vehicle is tasty!
|
|
|
|
Post by rbaer on May 14, 2024 14:20:12 GMT -5
Mmmmmmm...that reference pic vehicle is tasty! Isn't it though. It's got that "rode hard put up wet look" down nicely. I've been doing anti-slip on the hull top before I add details and getting some other sub-assemblies together, along with the engine cover details. I forgot I had an Eduard etch set for this, not much of it's an improvement on the kit parts though. |
|
|
|
Post by rbaer on May 16, 2024 18:13:20 GMT -5
Anti slip is coming along, using MrSurfacer cut with MEK. I do it right next to the open window.  IMG_4305 IMG_4305 by Russel Baer, on Flickr I removed all the molded on representations of grab handles and replaced them with plastic or wire.  IMG_4304 IMG_4304 by Russel Baer, on Flickr |
|
handiabled
Community Relations Moderator
Member since: February 2023
Posts: 2,579
MSC Staff
|
Post by handiabled on May 17, 2024 2:03:15 GMT -5
I'm looking forward to seeing the anti-slip texture with color on it
|
|
|
|
Post by rbaer on May 17, 2024 15:38:16 GMT -5
It's rather faint, but then so is the actual stuff on these tanks. It's most apparent on the turret where the bin lids don't have it and the rest of the turret does. In the pic below of my first Cr2 build, I did the same thing. Gray is "anti-slip" and the green is untextured kit plastic. 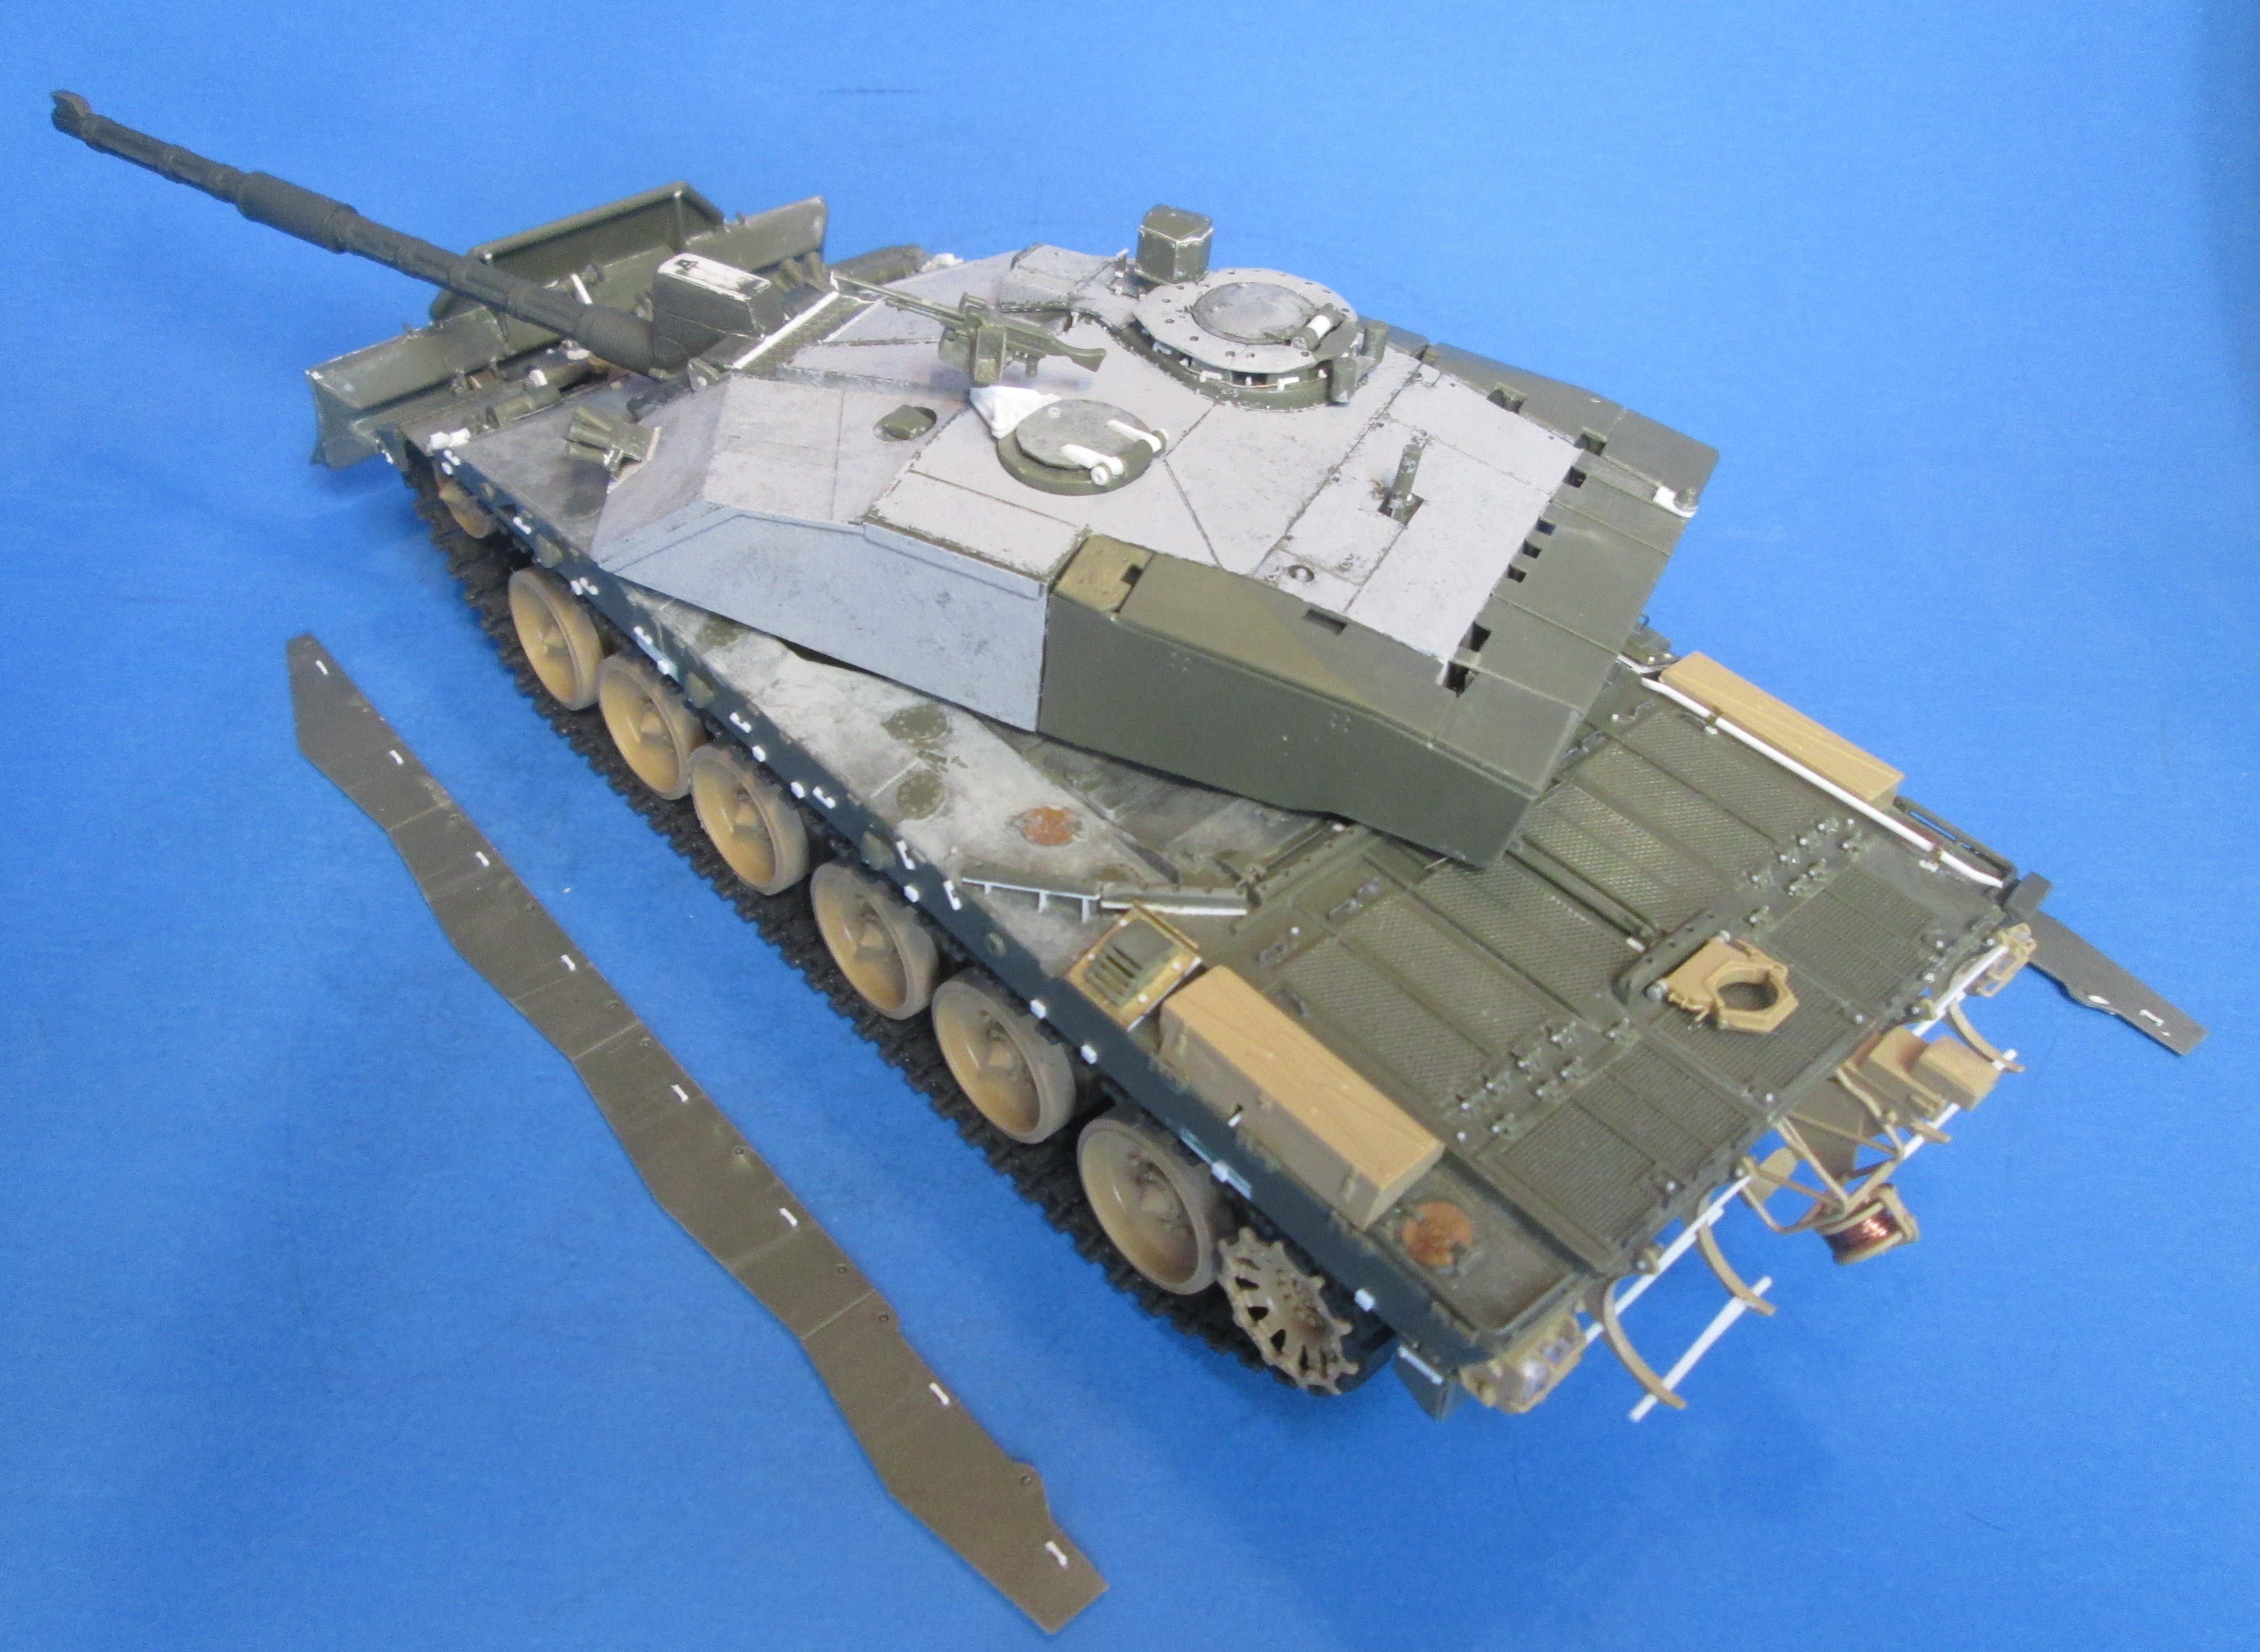 IMG_3714 IMG_3714 by Russel Baer, on Flickr |
|


 Speaking of, I just got my AFV Modeller, saw your Cents in there, congrats!
