Bronco Models SU-152 (KV-14) September 1943 Produc
Oct 29, 2012 9:39:45 GMT -5
406 Silverado, bullardino, and 3 more like this
Post by mshackleton on Oct 29, 2012 9:39:45 GMT -5
Bronco Models
SU-152 (KV-14) September 1943 Production

Catalogue No.: CB35109
Scale: 1.35
Reviewed by: Michael Shackleton
Review kit kindly supplied by Bronco Models www.bronco-model.com/en/index.php
Background
This comes as something of a surprise - at least to me - from Bronco Models. Trumpeter have been well-known for their releases of virtually the whole of the KV family of heavy Soviet tanks over the last few years. Trumpeter's kits have gained a good reputation for their choice of subject, ease of build, good price and accuracy. A very recent release was their own SU-152 – and with a second one due for release. Having a few KV's in my own collection, both unbuilt and partially-built, I can testify to what good kits they are.
Now Bronco have thrown their hat into the ring with yet another SU-152, very soon after the release of the equivalent Trumpeter kits. The biggest difference between the two is that Bronco's purports to be a mid-production vehicle whereas Trumpeter have two kits, one of which is labeled as a late version (TU05568) and the other simply as an SU-152 (TU01571). The most obvious difference between early and late versions is the addition of two roof vents on the later version, different tracks and armoured exhausts on the engine deck. I cannot find any reference to the TU01571 Trumpeter kit apart from the boxtop which doesn't give anything away, so I can't confirm the differences. I guess this is a future release.
Bronco label this kit as a vehicle produced in September 1943 which seems to tie in with drawings in Neil Stokes' excellent book KV Technical History & Variants from AirConnection.
Bronco have now announced an early production SU-152 without the roof ventilators and with un-armoured exhaust outlets clearly visible on the box-top artwork. They have also noted the unbevelled edges on the superstructure which has caused so much discussion - see below.

Introduction (adapted from Wikipedia article)
The SU-152 was a Soviet self-propelled heavy howitzer used during the Second World War. It mounted a 152 mm gun-howitzer on the chassis of a KV-1S heavy tank. It was replaced in production by the ISU-152 which used the IS tank chassis. Because of its adopted role of as an impromptu heavy tank destroyer, capable of knocking out the heaviest German armoured vehicles - Tiger and Panther tanks, and Elefant tank destroyers - it was nicknamed Zveroboy or 'beast killer'.
Development
In November 1942, the Soviet State Defence Committee ordered the development of a heavy self-propelled gun armed with the 152.4 mm ML-20 howitzer. The Red Army had already developed the large and largely unsuccessful KV-2 heavy tank armed with the 152.4 mm M-10 howitzer mounted in a huge turret. The design proved unsatisfactory for numerous reasons, including a lethally-high silhouette, a sluggish and barely-functional manual turret traverse, a slow reload rate, and a high centre of gravity. Production of KV-2s ceased in July 1941 and a few survived to November 1942. The replacement vehicle, initially known as KV-14, was designed with the same purpose in mind but with higher mobility, heavier armour, reduced cost and a more powerful and accurate gun. Mounting this gun in a turret was impossible due to its length and recoil, so it was decided that a fixed superstructure should be used.
After some discussion because various designs were in the frame, the project of Joseph Yakovlevich Kotin was chosen for mass production. This design successfully combined the ML-20 gun and the KV-1S chassis with minimal expense. Assembly of the first prototype (Object 236) began on 31 December 1942. It was completed after only 25 days! Plant trials of Object 236 began on 25 January 1943 and the prototype sailed through service trials. On 14 February 1943 the State Defence Committee accepted it for service and introduced it into mass production in March at the Chelyabinsk Kirov Plant (ChKZ). The designation of the series of self-propelled guns was changed from KV-14 to SU-152. The ML-20 gun was only slightly modified for mounting in the SU-152 by removing some handles for improved gunner comfort and was renamed ML-20S.
Although designed with no consideration for the anti-tank role, the SU-152 proved to have surprisingly good anti-tank capabilities due to the gun's extremely heavy HE projectiles. Standard doctrine for purpose-built AT guns of the period relied on small, dense, solid projectiles propelled to high velocities, optimised for punching through armour. Since the SU-152 was not designed with tank killing in mind, no armour-piercing projectiles were issued to crews and no initial tests against armour were conducted. However, tests performed on captured Tiger tanks in early 1943 showed that the SU-152 was capable of destroying them at any range with a fair degree of reliability (the only vehicle then in Russian service capable of doing so) by simply blowing the turret off the vehicle through sheer blast effect. This discovery spurred massive SU-152 production and the formation of self-propelled artillery units, which then functioned as specialist heavy tank destroyer battalions.
The design was only slightly modified during production, mainly to improve reliability. The SU-152 was the last member of the KV family of tanks to see mass production, and it was replaced by the ISU-152 on the ChKZ production lines in December 1943. The exact number of SU-152s produced differs even in Russian sources, with the most common figures being 670 or 704. The few SU-152s that survived World War 2 were handed to the Polish Army who used them until 1949.
Combat history
Although not designed for the role, the SU-152 proved to be a cheap and effective heavy tank killer, as well as highly successful in its original role against infantry and fortifications. In combat, it was used for two distinct purposes: long-range artillery fire support during assaults by suppressing infantry and destroying pillboxes and AT guns, and as a specialist heavy tank destroyer (usually in ambush). The SU-152 was produced in large numbers throughout 1943, with the first SU-152s being issued to new heavy mechanised gun regiments raised in May 1943. The first regiment arrived at Kursk with only twelve guns and was brought up to its full strength of twenty-one guns during the fighting.
Disadvantages of the vehicle included a low rate of fire due to the heavy ammunition, low ammunition storage (only 20 rounds) and a cramped and un-ergonomic crew compartment. Its armour protection was only adequate - the 65 mm of 30-degree sloped frontal armour was moderately greater than that of the T-34 tank, but still left it vulnerable frontally to the 88 mm KwK 36/43 guns of the Tiger and Elefant at long range and the 75 mm KwK 40 high-velocity gun of the Panzer IV and StuG III/IV at medium and short ranges (and from any range from the flanks or rear). The 152 mm gun, while having a maximum range far superior to the 88 mm, was still a corps-level heavy howitzer at heart and had a much shorter accurate range than either the 88 mm or the 75 mm gun while still being vulnerable to return fire at the same distance. This made it most effective for use in massed ambushes, where the German heavy tanks' advantages could be nullified and the SU-152's one-shot kill potential could be best used.
Since it was intended as a self-propelled artillery piece, the SU-152 was generally issued with standard HE rounds rather than armour-piercing projectiles. The 152 mm HE round produced a massive blast that did not rely on velocity for its effectiveness, making them effective against any German tank, including the Tiger and Elefant (although with a somewhat decreased level of kill reliability over penetrating projectiles). Numerous German AFVs were claimed as destroyed or damaged by SU-152 fire during the Battle of Kursk. For example, one Major Sankovskiy destroyed ten German tanks (of unknown type) in a single day with his crew and his SU-152, and was awarded the title of Hero of the Soviet Union. After Kursk, the 152 mm BR-540 solid-core AP round was produced in small numbers and issued to heavy tank destroyer battalions in an effort to introduce a penetrating projectile, but the gun's inherent low velocity made the AP round no more accurate and only moderately more effective than the standard HE round (which could also be used against infantry).
The SU-152 played a very important role in destroying German fortifications during the Operation Bagration offensive, this being the vehicle's original design goal. From the second half of 1943 to the end of World War 2, SU-152s were used on all Soviet fronts, from Finland to the Crimea. Due to combat losses and mass production ceasing in December 1943, the number of SU-152s in the Soviet Army decreased. Eventually, SU-152s were replaced by the more reliable and better-armoured ISU-152 that used the same armament and ammunition in the same dual-purpose role.
The Model
Upon opening the box the first thing that struck me was how few parts there were! I say this after reviewing numerous kits recently where the parts count is extraordinary. The only complicated thing about this kit appears to be the individual link tracks which have to be connected together with individual pins à la Model Kasten. On their recent M24 Chaffee series, the tracks simply clicked together, so this is a departure for Bronco.
You are presented with eleven cellophane bags containing nineteen sprues. Included in these are smaller bags in which are the pins for the individual track links, clear parts, a photo-etch fret (with polythene protection on both sides), one sheet of decals plus a small jig to help assembly of the tracks and finally, one bag with the hull tub and about half of the track links with copper wire for the tow cables. All of the sprues have identification letters and part numbers. The contents are:
Sprue A - track guards and supports, rear deck, driver's seat and controls, rear hull plate and hot air deflector.

Sprue B - a very nice slide-moulded barrel and slide-moulded slotted muzzle brake, parts for the gun assembly.

Sprues Ca and Cb which are joined together - engine parts and a pair of road wheels/swing arms/torsion bars.

Sprue Cb (5 off) - more road wheels/swing arms/torsion bars.
Sprue D and Da which are joined together - hatches, gun mantlet and mount, the main superstructure and small detail parts.

Sprue F - clear parts for periscopes and lights.

Sprues Ga/Gb/Ge which are joined together (2 off) - tow shackles, small detail parts, idlers, sprockets, fuel tanks.
Sprue L - track links with guide teeth.

Sprue M (not actually a sprue but marked as such in the instructions) - the hull tub.


Sprue R - track links without guide teeth.

Sprue Cd - track pins.
Unlabelled - track jig.

Photo-etch fret - engine intake mesh cover, tie downs, various small brackets.

Decals - one sheet for five vehicle options.

Two separate prints - one of the box top artwork and another advertising Neil Stokes' book KV Technical History & Variants.
Instructions
The instructions are presented as a 24-page, full colour, A4 stapled booklet. Each step is illustrated in a logical order with beautifully clear and large black and white line drawings. Colour CAD illustrations are included in some steps for clarity where necessary. There are 34 steps in the construction process and I can't imagine many problems being encountered.
There are only a few building options apart from the different colour scheme/decal options and the following:
Hatches can be modelled open or closed.
Engine hatch can be modelled open or closed. An engine is supplied.
Front element of the track guards can be deleted or included.
Alternative style tracks.
The gun breach lock can be modelled open or closed.
There are no crew figures supplied.
First Impressions
The overall quality of the parts is very, very good with excellent moulding including some items being slide-moulded. There is a virtual absence of ejector marks apart from on the floor of the hull tub and inside the engine hatch (which will show if modelled open). Flash is non-existent. There is no sign of warping and no sink marks at all. This is state-of-the-art moulding as with other recently-reviewed Bronco products.
The only disappointing aspect that immediately hits you is that the radiator intake mesh screens alongside the engine hatch are moulded solid - thought they do a nice mesh screen moulded in. These would have been nicer as etched brass. This concern also applies to the Trumpeter kits of the 152.
There is some very nice cast texturing on the mantlet and gun mount. The gun mount has casting numbers moulded on. Some modellers may want to improve on the texture by using Mr Surfacer or such-like to 'roughen it up' a little. There are some nice imperfections (purposely) moulded into the rolled armour side-plates of the superstructure. The top edges of the same plates have torch-cut marks moulded on, but these could be a lot rougher for added realism. Soviet production techniques were quite crude compared to their Western counterparts.


Interior detail is included with the driver's position fairly well dealt with and a nice representation of the main armament to fill most of the space. An engine is also provided for viewing under the rear deck hatch.
Concerns have been voiced on some sites that the angles of the superstructure should be cut away below the roof-top periscopes. These concerns seen to be based on just one photo in Neil Stokes' book (and also pointed out in his text) which says that the side plates were not bevelled to the same angle as the roof plate, therefore the roof plate is lower than the sides which were (very roughly) cut at right-angles. Hence the need to cut away the side plate below the periscopes for a clear view. If you look at the build on the Dishmodels and other websites (references given below), you will see that both versions were seen and the type depicted in the kit seems to be the most common. See here for one discussion: www.track-link.com/forums/modelling_kits/13565. The kit has the edges bevelled, i.e. level with the roof plate.
Bronco have now addressed this problem with their recently announced kit of an early SU-152. See the boxtop artwork above which clearly shows the cutaway sides beneath the periscopes.
The Bronco tracks are also the correct width. They scale out at an accurate 650 mm wide. This follows complaints that Trumpeter used KV-1 tracks which were wider than the KV-1S tracks on which the SU-152 is based. It is possible to build two types of track from the links provided. The earlier track was built with alternate two-piece split links with no guide teeth. However, these were prone to throwing, so all links had teeth on later types. The instructions don't show which colour scheme goes with which track type, and all of the colour profiles show the earlier type of track. The box top clearly shows the split links (with no guide teeth) alternated with one-piece links (with guide teeth).
Construction
Construction is broken down into 34 steps.
As with most AFV kits, we start at the bottom. Steps 1-3 take us through construction of the hull bottom. The hull tub is beautifully moulded as a floor complete with the vertical hull sides, negating any problems with getting the hull sides correctly angled. The sides are perfectly straight and at perfect right-angles. There was no warping at all on my example. It also has return roller and main suspension mounts moulded in place as well as delicate brackets for the main suspension shock absorbers. If you want to show an interior, this is the only place where ejector marks may cause a problem as there are about 20 that will need to be removed from the area of the fighting compartment floor.
The first steps have you building the rear hull plate onto which are added tow shackles, rear light and deflector before it is glued to the rear of the tub. Watch out here because the instructions have you adding the tow cable eyes (parts Ga14) to the shackles. Personally, I'd rather leave the details off and come back to them later. Anchors are then added inside the hull walls for the torsion bars along each side and a large floor plate complete with torsion bar mounts goes at the front.
In Step 4 the drive sprockets (five parts each) with their mud scrapers are added along with torsion bars for the main suspension. In Step 5 you attach the twelve sets of road wheels to their swing arms before the two idlers are built. With some careful gluing, the torsion bars can be made to work, if you so desire. In Step 6, the shock absorbers are added before attaching the idlers and road wheels to the hull. More torsion bar mounts have to be built for the idlers in Step 7 before adding them to the inside hull front in the next step. In Step 8, a seat can be added either folded up or down on the left hull wall. Return rollers and their mounts are added, too.

In Steps 9 and 10 we deal with the driver's position. First, steering levers and foot pedals are added to the floor before the seat and gearbox. In Step 11, two more seats can be added to the right hull side (either up or down as before) and tow shackles are added to the hull front. Here we have the same problem with the tow cable eyes as in Step 1. Leave them until the end.
The top part of a V-12 engine is provided and the build is detailed in Steps 12-14. Each 6-cylinder block of the engine is built separately complete with exhaust manifold. Rocker covers are added and the completed blocks can then be added to the centre part of the engine to make the 'V' which has a bar moulded in place which is part of the compressed air starter system (to help in starting the engine). A compressed air distributor, fuel pump and air filter are then added inside the 'V'. If you are feeling adventurous, you can add your own compressed air lines from the distributor bar to the into the sides of the rocker covers. Good luck ;D!! The completed engine then sits in a box, the walls of which would be the radiators but there is no grille detail included.
In Step 15 the engine is glued to the underside of the rear deck. The biggest complaint with this kit is the aforementioned intake grilles which are moulded solid. Eduard produce various brass sets for (Trumpeter's) KVs, and I'm sure that with some careful cutting away of the plastic grilles, that these could be utilised. Other than the tops of the radiators, there are two angled louvres under these screens. If you have any of the Trumpeter KV kits, you will know what I mean.

It's been pointed to me by Chris Lloyd-Staples that there is a further error on the engine deck. However, it is easily fixed. The sloping portion of the engine deck plate (the one with two round hatches) has welds at the front and back. These shouldn't be there, as the plate was separate and removable for servicing the transmission. If the welds are removed, two lines can be scribed across the deck and the problem is solved.
Chris has a review of the Trumpeter SU-152 here:
www.amps-armor.org/ampssite/reviews/showReview.aspx?ID=2406&Type=FB
In Step 15, sprung hinges are built for the two circular hatches at the rear of the deck, but with no transmission supplied to go underneath, these hatches are best modelled closed so the hinges can be left off. The engine hatch, if modelled open to show off the engine, has four ejector marks which will need filling in. The v-shaped handle on top was to help the crew open the heavy hatch and was also a support for the hatch when opened. There are two tiny rectangular stops moulded on the engine deck for this purpose. With careful gluing on the hinge, this could remain operable. In the next step, small lifting eyes are added to the main hatch and exhaust outlets with armoured covers attached. A photo-etch screen goes inside the hull rear which has to be curved. However, the shape of the curve is not clear in the instructions, nor how it fits. A little box (part A6) should be added to the right hull side, but I would leave this until the superstructure and track guards are in place.
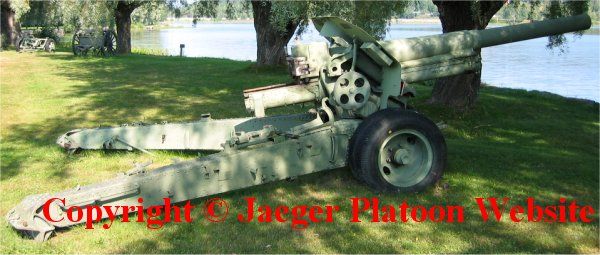
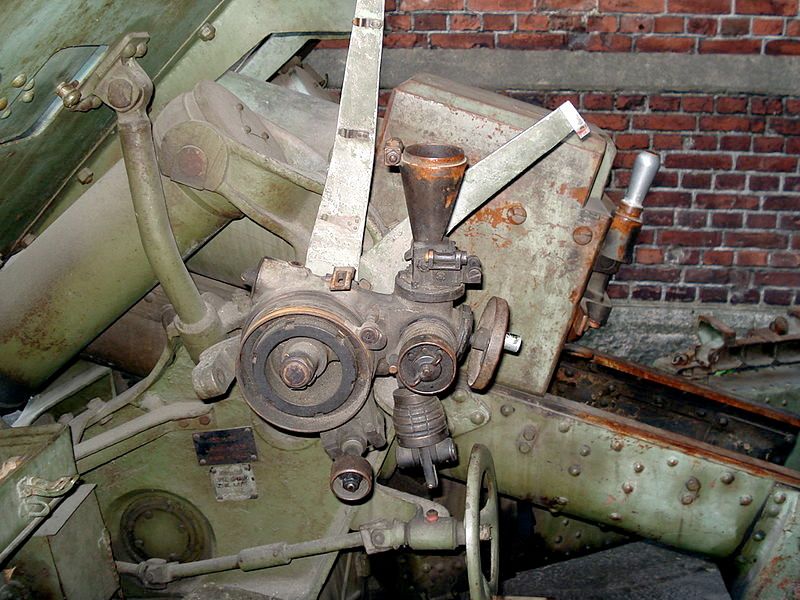
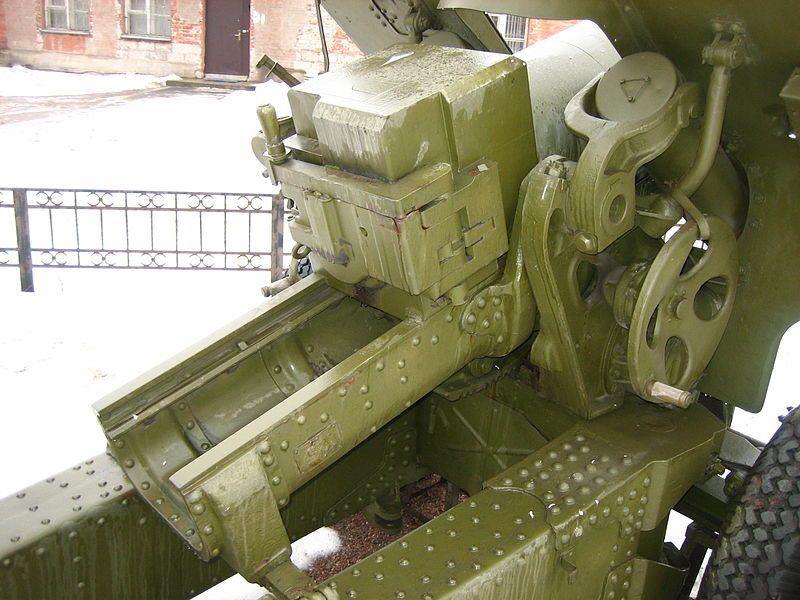
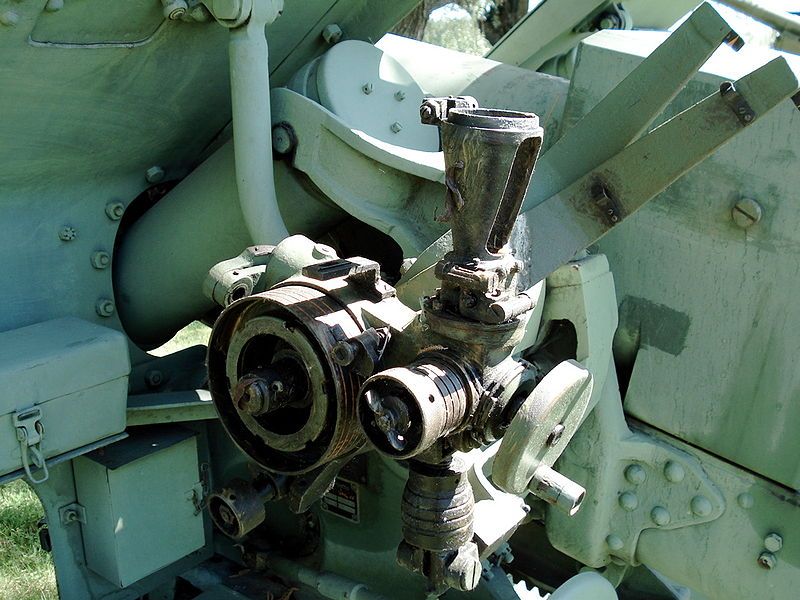
Next, we start to build the main armament. The slide-moulded barrel and muzzle brake as well as the breach are all constructed in Step 17. The breach lock can be modelled open or closed. In Step 18 the recoil carriage is built and the gun mounted to it before moving on to the gun mount itself in Step 19. In Step 20, the gun sight, traverse and elevation gear is added. Now we turn to the underside of the fighting compartment where four roof lights and three periscopes are added as well as the driver's dashboard in Step 21.


Moving to the roof of the fighting compartment, the three hatches, two ventilator covers and periscope covers are added in Steps 22 and 23. All hatches, can, of course, be shown open or closed. For those who want a more detailed interior, there is a build blog here: www.track-link.com/forums/site_blogs/14383 though some of the details are necessarily fictitious as information is scarce. I'm sure the kit provides enough to fill the space from what can be seen through the open hatches. However, I'm surprised Bronco didn't see fit to provide an engine bulkhead.

Tools, headlights and handrails are added in Steps 23 and 24 before Step 25 shows us how to add the driver's visor and the gun inside the superstructure. Lots of small etch tie downs are added during these steps as well as numerous small circular lifting rings on the roof. In Steps 26 and 27, the gun mount cover and mantlet shield are added.
In Step 28 the track guards are added by glueing them under the superstructure sides. A pair of track guard supports are added either side as well as some photo-etch strips with bolt detail and here we have the option of adding extensions to the front of the guards or not. All of the options in the colour schemes show them fitted so it's up to the modeler to decide. In Step 29 the hull top assembly is introduced to the hull bottom, so make sure you are happy with your interior before buttoning it up. Two rails are added to the sides of the engine deck and those small lifting rings - the same as on the superstructure roof - are added to the engine deck, too.
The choice between the two types of track must now be made. Step 30 details the earlier type as described above. These are made up from alternating parts L and R (with and without guide teeth). In Step 31, the later tracks - all with guide teeth, are assembled. All of the links use pins on each side to produce a fully working (with careful gluing) of length track with 88 links per side.
Final details are added in the last three steps - rear track guard supports, spare tracks with photo-etch mounts, a strip of armour across the hull front joint, fuel tanks on the rear fenders. This is where the pair of tow cables using copper wire are introduced to their plastic eyes (parts Ga14) which can then attached to the tow shackles front and rear.
Competition
Surprisingly, there are quite a few SU-152s out there in 1.35. I did actually find a website here: www.scalemates.com/products/reviews.php?scale=1:35&topic=SU-152 with details taking you to the various reviews of kits from Ark Models (appears to Eastern Express copy), Bronco, Eastern Express and Trumpeter on different websites. For a long time the Eastern Express kit seemed to be only game in town and it wasn't too bad. Now we have a choice of three more modern kits with one from Bronco and two from Trumpeter. The edge must go to Bronco because they have the correct width tracks whereas Trumpeter have used existing tracks from their earlier KV series which are too wide.
Conclusions
Bronco continue to impress with every model I review. It is a brave choice with so much competition and I now see that they are due to release a KV-85 from the same family of tanks. Nice one Bronco!
The only real concern are those engine deck radiator grilles. However, Bronco are very good at listening to modellers's. Look back at the Chaffee turret correction and the Bofors cradle. Maybe if enough of us voice our concerns, they will re-engineer the rear deck and supply some nice mesh. Perhaps they could also remove the welds and replace them with panel lines?
All I can say is that this is a very fine model indeed. It is not overly complicated and there aren't that many parts. It offers some of the best moulding you will see. The kit has open hatches, all of which have interior details. There is a choice of two types of track in the same box. A more detailed interior is something the after-market could supply, especially the transmission compartment. This kit does not come with any crew figures. It's a good-looking, purposeful beast and will build into an impressive model and it will make an interesting comparison and companion to Tamiya's ISU-152.
The review model was kindly supplied by Bronco Models.
References
Websites:
Superb and very detailed build article based on the old Eastern Express model (I think) but in Russian with many drawings and photos of the real thing and the model - dishmodels.ru/gshow.htm?p=7301. If you use Google Chrome, a (very) rough translation can be done into English - or the language of your choice.
www.precision-panzer.moonfruit.com/#/su-152/4545654584
ww2photo.se/tanks/su/spg/su152/su152.htm
tanquesyblindados.blogspot.co.uk/2012/03/su-152.html - beware, includes a video walk-around of an ISU-152!!
Books
KV Techical History and Variants by Neil Stokes. Published by AirConnection, Canada, ISBN 9780978109127.
SU-152, Tank Power Vol. XCI, Wydawnictwo Militaria No.332, ISBN 9788372193322.
SU-152 (KV-14) September 1943 Production

Catalogue No.: CB35109
Scale: 1.35
Reviewed by: Michael Shackleton
Review kit kindly supplied by Bronco Models www.bronco-model.com/en/index.php
Background
This comes as something of a surprise - at least to me - from Bronco Models. Trumpeter have been well-known for their releases of virtually the whole of the KV family of heavy Soviet tanks over the last few years. Trumpeter's kits have gained a good reputation for their choice of subject, ease of build, good price and accuracy. A very recent release was their own SU-152 – and with a second one due for release. Having a few KV's in my own collection, both unbuilt and partially-built, I can testify to what good kits they are.
Now Bronco have thrown their hat into the ring with yet another SU-152, very soon after the release of the equivalent Trumpeter kits. The biggest difference between the two is that Bronco's purports to be a mid-production vehicle whereas Trumpeter have two kits, one of which is labeled as a late version (TU05568) and the other simply as an SU-152 (TU01571). The most obvious difference between early and late versions is the addition of two roof vents on the later version, different tracks and armoured exhausts on the engine deck. I cannot find any reference to the TU01571 Trumpeter kit apart from the boxtop which doesn't give anything away, so I can't confirm the differences. I guess this is a future release.
Bronco label this kit as a vehicle produced in September 1943 which seems to tie in with drawings in Neil Stokes' excellent book KV Technical History & Variants from AirConnection.
Bronco have now announced an early production SU-152 without the roof ventilators and with un-armoured exhaust outlets clearly visible on the box-top artwork. They have also noted the unbevelled edges on the superstructure which has caused so much discussion - see below.

Introduction (adapted from Wikipedia article)
The SU-152 was a Soviet self-propelled heavy howitzer used during the Second World War. It mounted a 152 mm gun-howitzer on the chassis of a KV-1S heavy tank. It was replaced in production by the ISU-152 which used the IS tank chassis. Because of its adopted role of as an impromptu heavy tank destroyer, capable of knocking out the heaviest German armoured vehicles - Tiger and Panther tanks, and Elefant tank destroyers - it was nicknamed Zveroboy or 'beast killer'.
Development
In November 1942, the Soviet State Defence Committee ordered the development of a heavy self-propelled gun armed with the 152.4 mm ML-20 howitzer. The Red Army had already developed the large and largely unsuccessful KV-2 heavy tank armed with the 152.4 mm M-10 howitzer mounted in a huge turret. The design proved unsatisfactory for numerous reasons, including a lethally-high silhouette, a sluggish and barely-functional manual turret traverse, a slow reload rate, and a high centre of gravity. Production of KV-2s ceased in July 1941 and a few survived to November 1942. The replacement vehicle, initially known as KV-14, was designed with the same purpose in mind but with higher mobility, heavier armour, reduced cost and a more powerful and accurate gun. Mounting this gun in a turret was impossible due to its length and recoil, so it was decided that a fixed superstructure should be used.
After some discussion because various designs were in the frame, the project of Joseph Yakovlevich Kotin was chosen for mass production. This design successfully combined the ML-20 gun and the KV-1S chassis with minimal expense. Assembly of the first prototype (Object 236) began on 31 December 1942. It was completed after only 25 days! Plant trials of Object 236 began on 25 January 1943 and the prototype sailed through service trials. On 14 February 1943 the State Defence Committee accepted it for service and introduced it into mass production in March at the Chelyabinsk Kirov Plant (ChKZ). The designation of the series of self-propelled guns was changed from KV-14 to SU-152. The ML-20 gun was only slightly modified for mounting in the SU-152 by removing some handles for improved gunner comfort and was renamed ML-20S.
Although designed with no consideration for the anti-tank role, the SU-152 proved to have surprisingly good anti-tank capabilities due to the gun's extremely heavy HE projectiles. Standard doctrine for purpose-built AT guns of the period relied on small, dense, solid projectiles propelled to high velocities, optimised for punching through armour. Since the SU-152 was not designed with tank killing in mind, no armour-piercing projectiles were issued to crews and no initial tests against armour were conducted. However, tests performed on captured Tiger tanks in early 1943 showed that the SU-152 was capable of destroying them at any range with a fair degree of reliability (the only vehicle then in Russian service capable of doing so) by simply blowing the turret off the vehicle through sheer blast effect. This discovery spurred massive SU-152 production and the formation of self-propelled artillery units, which then functioned as specialist heavy tank destroyer battalions.
The design was only slightly modified during production, mainly to improve reliability. The SU-152 was the last member of the KV family of tanks to see mass production, and it was replaced by the ISU-152 on the ChKZ production lines in December 1943. The exact number of SU-152s produced differs even in Russian sources, with the most common figures being 670 or 704. The few SU-152s that survived World War 2 were handed to the Polish Army who used them until 1949.
Combat history
Although not designed for the role, the SU-152 proved to be a cheap and effective heavy tank killer, as well as highly successful in its original role against infantry and fortifications. In combat, it was used for two distinct purposes: long-range artillery fire support during assaults by suppressing infantry and destroying pillboxes and AT guns, and as a specialist heavy tank destroyer (usually in ambush). The SU-152 was produced in large numbers throughout 1943, with the first SU-152s being issued to new heavy mechanised gun regiments raised in May 1943. The first regiment arrived at Kursk with only twelve guns and was brought up to its full strength of twenty-one guns during the fighting.
Disadvantages of the vehicle included a low rate of fire due to the heavy ammunition, low ammunition storage (only 20 rounds) and a cramped and un-ergonomic crew compartment. Its armour protection was only adequate - the 65 mm of 30-degree sloped frontal armour was moderately greater than that of the T-34 tank, but still left it vulnerable frontally to the 88 mm KwK 36/43 guns of the Tiger and Elefant at long range and the 75 mm KwK 40 high-velocity gun of the Panzer IV and StuG III/IV at medium and short ranges (and from any range from the flanks or rear). The 152 mm gun, while having a maximum range far superior to the 88 mm, was still a corps-level heavy howitzer at heart and had a much shorter accurate range than either the 88 mm or the 75 mm gun while still being vulnerable to return fire at the same distance. This made it most effective for use in massed ambushes, where the German heavy tanks' advantages could be nullified and the SU-152's one-shot kill potential could be best used.
Since it was intended as a self-propelled artillery piece, the SU-152 was generally issued with standard HE rounds rather than armour-piercing projectiles. The 152 mm HE round produced a massive blast that did not rely on velocity for its effectiveness, making them effective against any German tank, including the Tiger and Elefant (although with a somewhat decreased level of kill reliability over penetrating projectiles). Numerous German AFVs were claimed as destroyed or damaged by SU-152 fire during the Battle of Kursk. For example, one Major Sankovskiy destroyed ten German tanks (of unknown type) in a single day with his crew and his SU-152, and was awarded the title of Hero of the Soviet Union. After Kursk, the 152 mm BR-540 solid-core AP round was produced in small numbers and issued to heavy tank destroyer battalions in an effort to introduce a penetrating projectile, but the gun's inherent low velocity made the AP round no more accurate and only moderately more effective than the standard HE round (which could also be used against infantry).
The SU-152 played a very important role in destroying German fortifications during the Operation Bagration offensive, this being the vehicle's original design goal. From the second half of 1943 to the end of World War 2, SU-152s were used on all Soviet fronts, from Finland to the Crimea. Due to combat losses and mass production ceasing in December 1943, the number of SU-152s in the Soviet Army decreased. Eventually, SU-152s were replaced by the more reliable and better-armoured ISU-152 that used the same armament and ammunition in the same dual-purpose role.
The Model
Upon opening the box the first thing that struck me was how few parts there were! I say this after reviewing numerous kits recently where the parts count is extraordinary. The only complicated thing about this kit appears to be the individual link tracks which have to be connected together with individual pins à la Model Kasten. On their recent M24 Chaffee series, the tracks simply clicked together, so this is a departure for Bronco.
You are presented with eleven cellophane bags containing nineteen sprues. Included in these are smaller bags in which are the pins for the individual track links, clear parts, a photo-etch fret (with polythene protection on both sides), one sheet of decals plus a small jig to help assembly of the tracks and finally, one bag with the hull tub and about half of the track links with copper wire for the tow cables. All of the sprues have identification letters and part numbers. The contents are:
Sprue A - track guards and supports, rear deck, driver's seat and controls, rear hull plate and hot air deflector.

Sprue B - a very nice slide-moulded barrel and slide-moulded slotted muzzle brake, parts for the gun assembly.

Sprues Ca and Cb which are joined together - engine parts and a pair of road wheels/swing arms/torsion bars.

Sprue Cb (5 off) - more road wheels/swing arms/torsion bars.
Sprue D and Da which are joined together - hatches, gun mantlet and mount, the main superstructure and small detail parts.

Sprue F - clear parts for periscopes and lights.

Sprues Ga/Gb/Ge which are joined together (2 off) - tow shackles, small detail parts, idlers, sprockets, fuel tanks.
Sprue L - track links with guide teeth.

Sprue M (not actually a sprue but marked as such in the instructions) - the hull tub.


Sprue R - track links without guide teeth.

Sprue Cd - track pins.
Unlabelled - track jig.

Photo-etch fret - engine intake mesh cover, tie downs, various small brackets.

Decals - one sheet for five vehicle options.

Two separate prints - one of the box top artwork and another advertising Neil Stokes' book KV Technical History & Variants.
Instructions
The instructions are presented as a 24-page, full colour, A4 stapled booklet. Each step is illustrated in a logical order with beautifully clear and large black and white line drawings. Colour CAD illustrations are included in some steps for clarity where necessary. There are 34 steps in the construction process and I can't imagine many problems being encountered.
There are only a few building options apart from the different colour scheme/decal options and the following:
Hatches can be modelled open or closed.
Engine hatch can be modelled open or closed. An engine is supplied.
Front element of the track guards can be deleted or included.
Alternative style tracks.
The gun breach lock can be modelled open or closed.
There are no crew figures supplied.
First Impressions
The overall quality of the parts is very, very good with excellent moulding including some items being slide-moulded. There is a virtual absence of ejector marks apart from on the floor of the hull tub and inside the engine hatch (which will show if modelled open). Flash is non-existent. There is no sign of warping and no sink marks at all. This is state-of-the-art moulding as with other recently-reviewed Bronco products.
The only disappointing aspect that immediately hits you is that the radiator intake mesh screens alongside the engine hatch are moulded solid - thought they do a nice mesh screen moulded in. These would have been nicer as etched brass. This concern also applies to the Trumpeter kits of the 152.
There is some very nice cast texturing on the mantlet and gun mount. The gun mount has casting numbers moulded on. Some modellers may want to improve on the texture by using Mr Surfacer or such-like to 'roughen it up' a little. There are some nice imperfections (purposely) moulded into the rolled armour side-plates of the superstructure. The top edges of the same plates have torch-cut marks moulded on, but these could be a lot rougher for added realism. Soviet production techniques were quite crude compared to their Western counterparts.


Interior detail is included with the driver's position fairly well dealt with and a nice representation of the main armament to fill most of the space. An engine is also provided for viewing under the rear deck hatch.
Concerns have been voiced on some sites that the angles of the superstructure should be cut away below the roof-top periscopes. These concerns seen to be based on just one photo in Neil Stokes' book (and also pointed out in his text) which says that the side plates were not bevelled to the same angle as the roof plate, therefore the roof plate is lower than the sides which were (very roughly) cut at right-angles. Hence the need to cut away the side plate below the periscopes for a clear view. If you look at the build on the Dishmodels and other websites (references given below), you will see that both versions were seen and the type depicted in the kit seems to be the most common. See here for one discussion: www.track-link.com/forums/modelling_kits/13565. The kit has the edges bevelled, i.e. level with the roof plate.
Bronco have now addressed this problem with their recently announced kit of an early SU-152. See the boxtop artwork above which clearly shows the cutaway sides beneath the periscopes.
The Bronco tracks are also the correct width. They scale out at an accurate 650 mm wide. This follows complaints that Trumpeter used KV-1 tracks which were wider than the KV-1S tracks on which the SU-152 is based. It is possible to build two types of track from the links provided. The earlier track was built with alternate two-piece split links with no guide teeth. However, these were prone to throwing, so all links had teeth on later types. The instructions don't show which colour scheme goes with which track type, and all of the colour profiles show the earlier type of track. The box top clearly shows the split links (with no guide teeth) alternated with one-piece links (with guide teeth).
Construction
Construction is broken down into 34 steps.
As with most AFV kits, we start at the bottom. Steps 1-3 take us through construction of the hull bottom. The hull tub is beautifully moulded as a floor complete with the vertical hull sides, negating any problems with getting the hull sides correctly angled. The sides are perfectly straight and at perfect right-angles. There was no warping at all on my example. It also has return roller and main suspension mounts moulded in place as well as delicate brackets for the main suspension shock absorbers. If you want to show an interior, this is the only place where ejector marks may cause a problem as there are about 20 that will need to be removed from the area of the fighting compartment floor.
The first steps have you building the rear hull plate onto which are added tow shackles, rear light and deflector before it is glued to the rear of the tub. Watch out here because the instructions have you adding the tow cable eyes (parts Ga14) to the shackles. Personally, I'd rather leave the details off and come back to them later. Anchors are then added inside the hull walls for the torsion bars along each side and a large floor plate complete with torsion bar mounts goes at the front.
In Step 4 the drive sprockets (five parts each) with their mud scrapers are added along with torsion bars for the main suspension. In Step 5 you attach the twelve sets of road wheels to their swing arms before the two idlers are built. With some careful gluing, the torsion bars can be made to work, if you so desire. In Step 6, the shock absorbers are added before attaching the idlers and road wheels to the hull. More torsion bar mounts have to be built for the idlers in Step 7 before adding them to the inside hull front in the next step. In Step 8, a seat can be added either folded up or down on the left hull wall. Return rollers and their mounts are added, too.

In Steps 9 and 10 we deal with the driver's position. First, steering levers and foot pedals are added to the floor before the seat and gearbox. In Step 11, two more seats can be added to the right hull side (either up or down as before) and tow shackles are added to the hull front. Here we have the same problem with the tow cable eyes as in Step 1. Leave them until the end.
The top part of a V-12 engine is provided and the build is detailed in Steps 12-14. Each 6-cylinder block of the engine is built separately complete with exhaust manifold. Rocker covers are added and the completed blocks can then be added to the centre part of the engine to make the 'V' which has a bar moulded in place which is part of the compressed air starter system (to help in starting the engine). A compressed air distributor, fuel pump and air filter are then added inside the 'V'. If you are feeling adventurous, you can add your own compressed air lines from the distributor bar to the into the sides of the rocker covers. Good luck ;D!! The completed engine then sits in a box, the walls of which would be the radiators but there is no grille detail included.
In Step 15 the engine is glued to the underside of the rear deck. The biggest complaint with this kit is the aforementioned intake grilles which are moulded solid. Eduard produce various brass sets for (Trumpeter's) KVs, and I'm sure that with some careful cutting away of the plastic grilles, that these could be utilised. Other than the tops of the radiators, there are two angled louvres under these screens. If you have any of the Trumpeter KV kits, you will know what I mean.

It's been pointed to me by Chris Lloyd-Staples that there is a further error on the engine deck. However, it is easily fixed. The sloping portion of the engine deck plate (the one with two round hatches) has welds at the front and back. These shouldn't be there, as the plate was separate and removable for servicing the transmission. If the welds are removed, two lines can be scribed across the deck and the problem is solved.
Chris has a review of the Trumpeter SU-152 here:
www.amps-armor.org/ampssite/reviews/showReview.aspx?ID=2406&Type=FB
In Step 15, sprung hinges are built for the two circular hatches at the rear of the deck, but with no transmission supplied to go underneath, these hatches are best modelled closed so the hinges can be left off. The engine hatch, if modelled open to show off the engine, has four ejector marks which will need filling in. The v-shaped handle on top was to help the crew open the heavy hatch and was also a support for the hatch when opened. There are two tiny rectangular stops moulded on the engine deck for this purpose. With careful gluing on the hinge, this could remain operable. In the next step, small lifting eyes are added to the main hatch and exhaust outlets with armoured covers attached. A photo-etch screen goes inside the hull rear which has to be curved. However, the shape of the curve is not clear in the instructions, nor how it fits. A little box (part A6) should be added to the right hull side, but I would leave this until the superstructure and track guards are in place.
Next, we start to build the main armament. The slide-moulded barrel and muzzle brake as well as the breach are all constructed in Step 17. The breach lock can be modelled open or closed. In Step 18 the recoil carriage is built and the gun mounted to it before moving on to the gun mount itself in Step 19. In Step 20, the gun sight, traverse and elevation gear is added. Now we turn to the underside of the fighting compartment where four roof lights and three periscopes are added as well as the driver's dashboard in Step 21.


Moving to the roof of the fighting compartment, the three hatches, two ventilator covers and periscope covers are added in Steps 22 and 23. All hatches, can, of course, be shown open or closed. For those who want a more detailed interior, there is a build blog here: www.track-link.com/forums/site_blogs/14383 though some of the details are necessarily fictitious as information is scarce. I'm sure the kit provides enough to fill the space from what can be seen through the open hatches. However, I'm surprised Bronco didn't see fit to provide an engine bulkhead.

Tools, headlights and handrails are added in Steps 23 and 24 before Step 25 shows us how to add the driver's visor and the gun inside the superstructure. Lots of small etch tie downs are added during these steps as well as numerous small circular lifting rings on the roof. In Steps 26 and 27, the gun mount cover and mantlet shield are added.
In Step 28 the track guards are added by glueing them under the superstructure sides. A pair of track guard supports are added either side as well as some photo-etch strips with bolt detail and here we have the option of adding extensions to the front of the guards or not. All of the options in the colour schemes show them fitted so it's up to the modeler to decide. In Step 29 the hull top assembly is introduced to the hull bottom, so make sure you are happy with your interior before buttoning it up. Two rails are added to the sides of the engine deck and those small lifting rings - the same as on the superstructure roof - are added to the engine deck, too.
The choice between the two types of track must now be made. Step 30 details the earlier type as described above. These are made up from alternating parts L and R (with and without guide teeth). In Step 31, the later tracks - all with guide teeth, are assembled. All of the links use pins on each side to produce a fully working (with careful gluing) of length track with 88 links per side.
Final details are added in the last three steps - rear track guard supports, spare tracks with photo-etch mounts, a strip of armour across the hull front joint, fuel tanks on the rear fenders. This is where the pair of tow cables using copper wire are introduced to their plastic eyes (parts Ga14) which can then attached to the tow shackles front and rear.
Competition
Surprisingly, there are quite a few SU-152s out there in 1.35. I did actually find a website here: www.scalemates.com/products/reviews.php?scale=1:35&topic=SU-152 with details taking you to the various reviews of kits from Ark Models (appears to Eastern Express copy), Bronco, Eastern Express and Trumpeter on different websites. For a long time the Eastern Express kit seemed to be only game in town and it wasn't too bad. Now we have a choice of three more modern kits with one from Bronco and two from Trumpeter. The edge must go to Bronco because they have the correct width tracks whereas Trumpeter have used existing tracks from their earlier KV series which are too wide.
Conclusions
Bronco continue to impress with every model I review. It is a brave choice with so much competition and I now see that they are due to release a KV-85 from the same family of tanks. Nice one Bronco!
The only real concern are those engine deck radiator grilles. However, Bronco are very good at listening to modellers's. Look back at the Chaffee turret correction and the Bofors cradle. Maybe if enough of us voice our concerns, they will re-engineer the rear deck and supply some nice mesh. Perhaps they could also remove the welds and replace them with panel lines?
All I can say is that this is a very fine model indeed. It is not overly complicated and there aren't that many parts. It offers some of the best moulding you will see. The kit has open hatches, all of which have interior details. There is a choice of two types of track in the same box. A more detailed interior is something the after-market could supply, especially the transmission compartment. This kit does not come with any crew figures. It's a good-looking, purposeful beast and will build into an impressive model and it will make an interesting comparison and companion to Tamiya's ISU-152.
The review model was kindly supplied by Bronco Models.
References
Websites:
Superb and very detailed build article based on the old Eastern Express model (I think) but in Russian with many drawings and photos of the real thing and the model - dishmodels.ru/gshow.htm?p=7301. If you use Google Chrome, a (very) rough translation can be done into English - or the language of your choice.
www.precision-panzer.moonfruit.com/#/su-152/4545654584
ww2photo.se/tanks/su/spg/su152/su152.htm
tanquesyblindados.blogspot.co.uk/2012/03/su-152.html - beware, includes a video walk-around of an ISU-152!!
Books
KV Techical History and Variants by Neil Stokes. Published by AirConnection, Canada, ISBN 9780978109127.
SU-152, Tank Power Vol. XCI, Wydawnictwo Militaria No.332, ISBN 9788372193322.


 :-*
:-*


 . It just adds that last bit of fidelity. I know I would.


