cploverby
Full Member

Member since: August 2012
Posts: 129
Aug 14, 2012 14:15:54 GMT -5
Aug 14, 2012 14:15:54 GMT -5
|
Post by cploverby on Sept 28, 2012 6:17:45 GMT -5
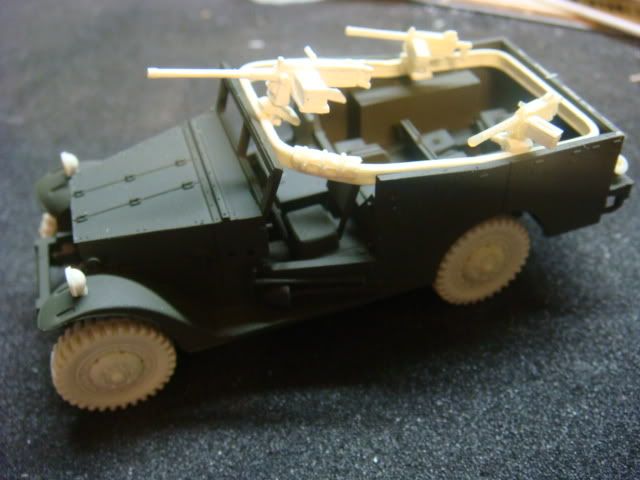
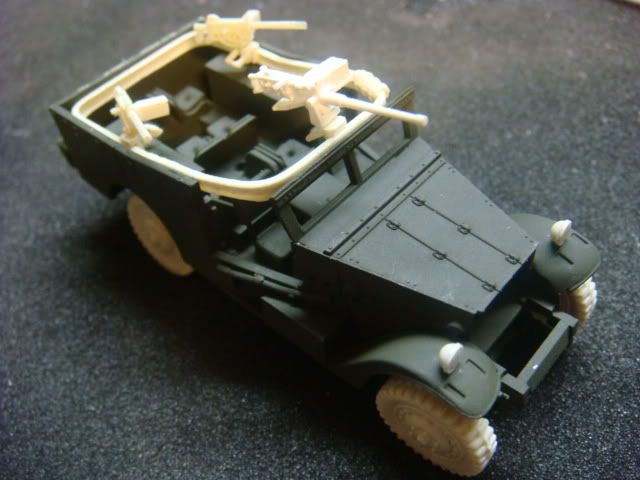
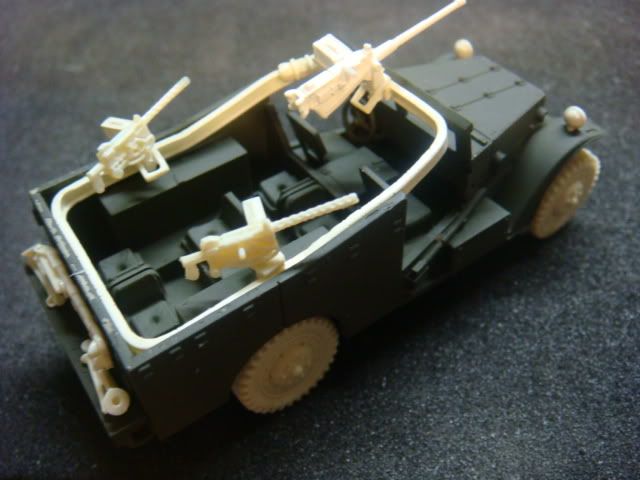
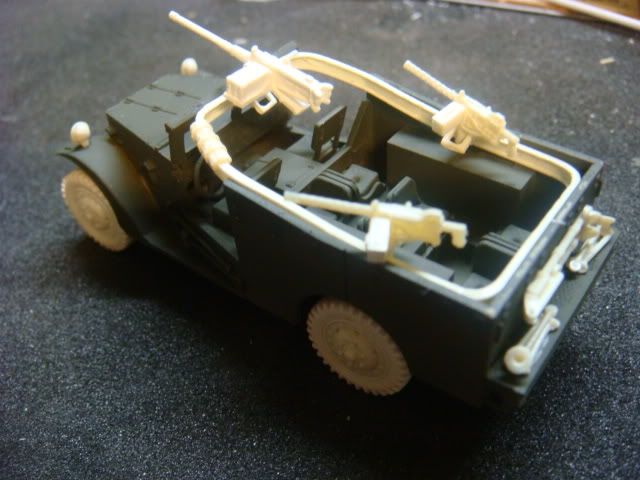
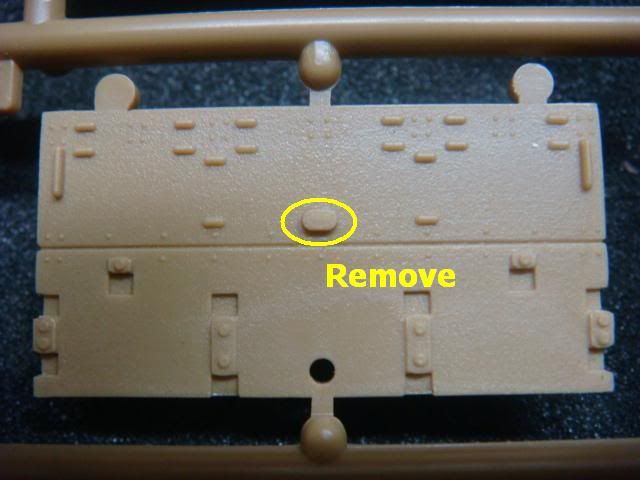
I have decided to embark on an old tride and true kit that we all know and love. As we all know this kit has a few short comings .... Such as Pin Marks on the "Visable" surfaces here and there. 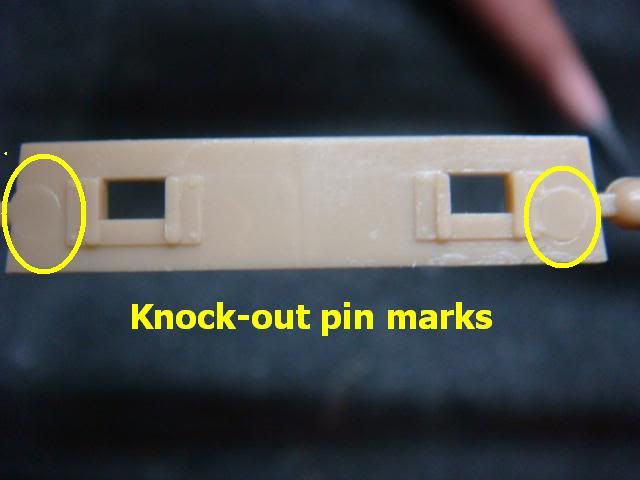 And parts that are just Horrific as far as deatail is concerned. 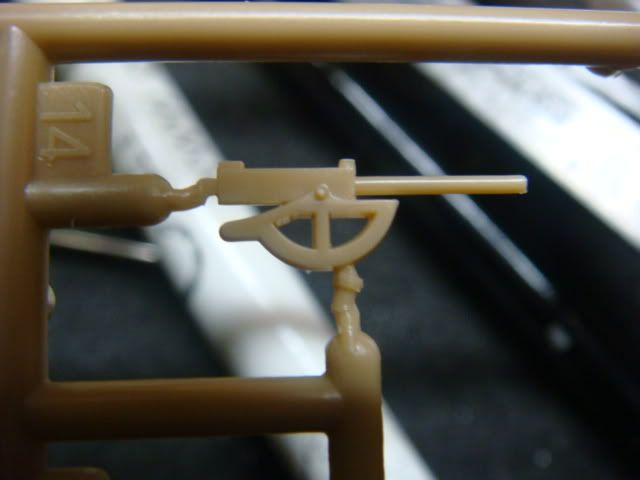 Aside from that, let's not dwell on the walls being too thick and things like that. Well I decided the the skate rail was all wrong and want a new one. Unfortunately I did not take a pic first before I butchered the one from the kit.... But...I did take these pic's of the walls. 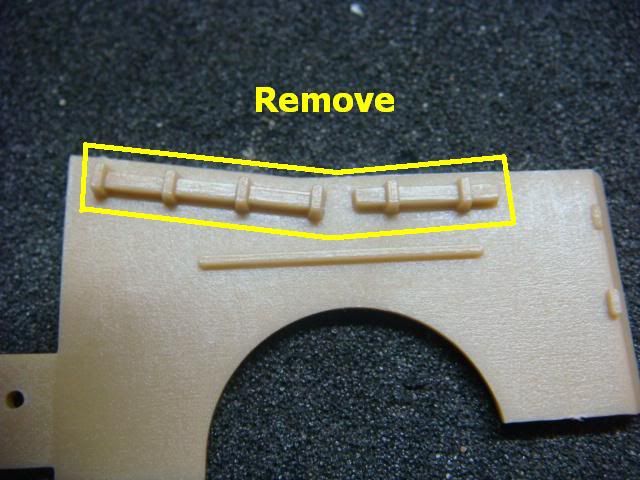 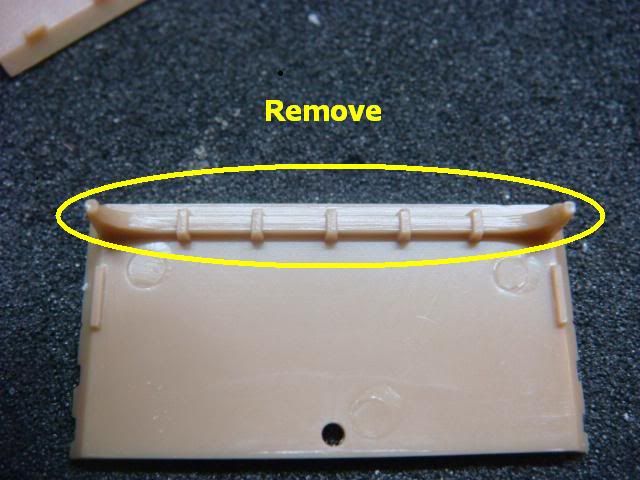 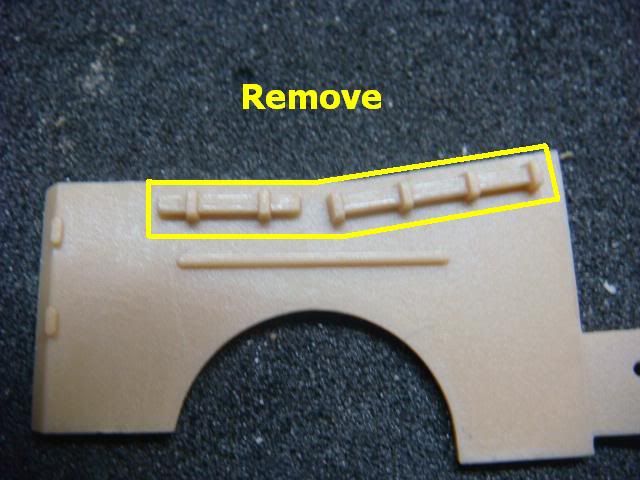 I then assembled the basic structure of the vehicle and started to make a new Skate rail from .080" (2mm) channel.  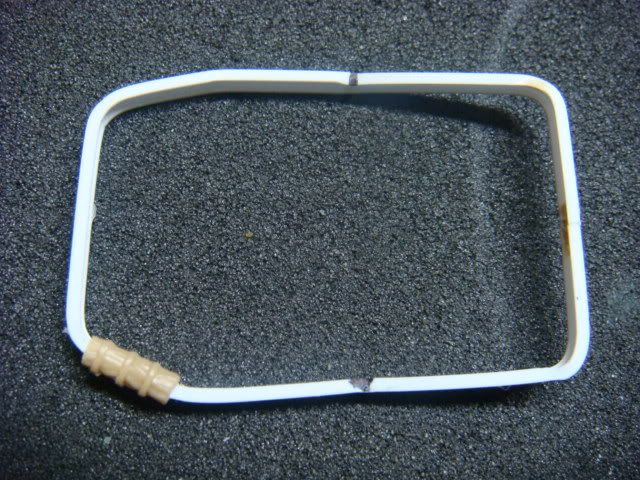 Now the gun mounts were molded "on to" the skate rail, so I cut them off and modified one for my purposes. 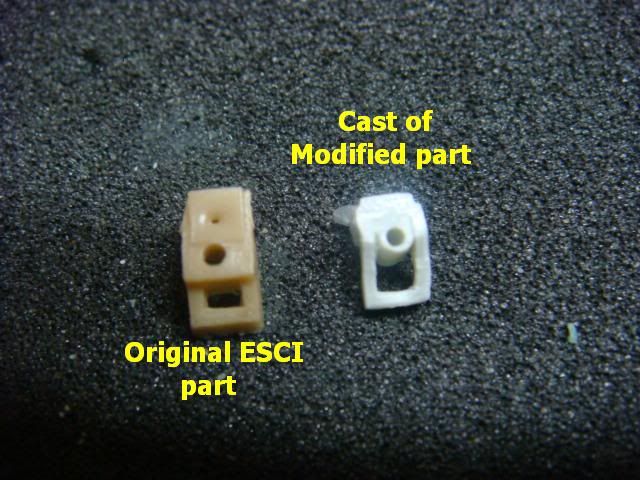 Well remember the horrific .30 cal I showed you above.... Well I sized up a Roco one and found it to be "in scale". So I modified it for my purposes. 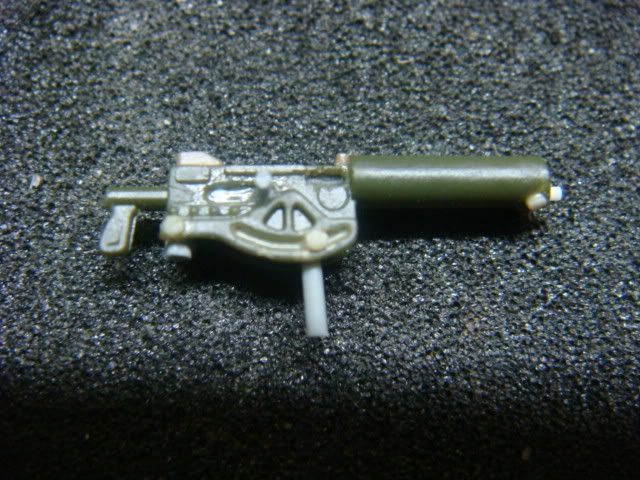 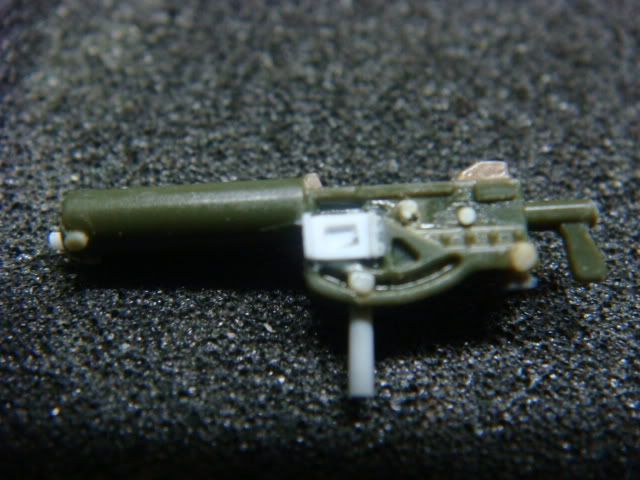 Now the .50 cal was void of detail on the rt. side so I added the detail as best as I could and removed a coule items as well. 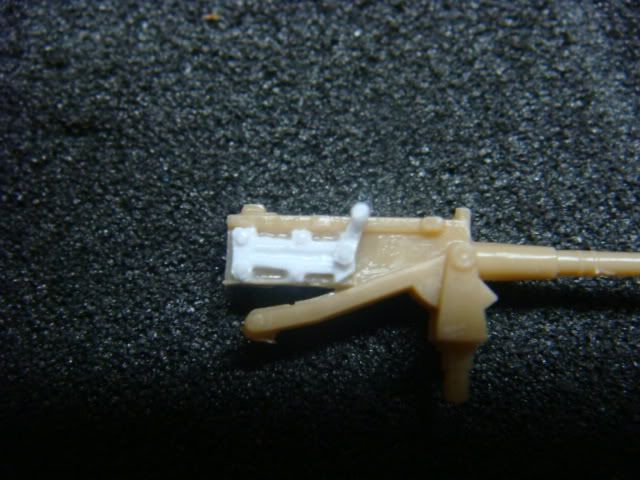 I will add a Dragon ammo can and spade grips. I have since molded the .30 cal and here are the results of that.  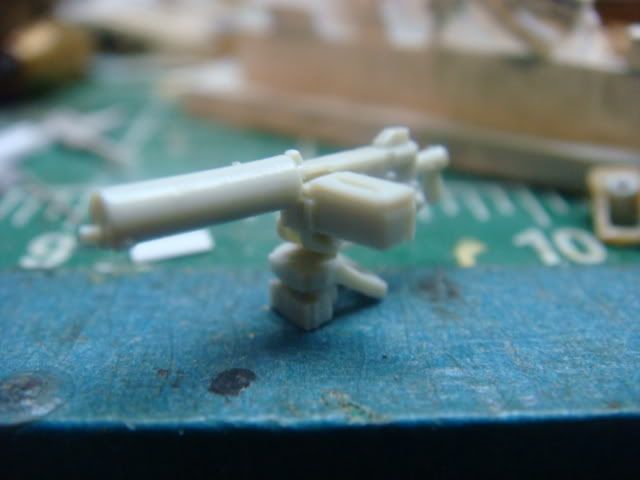 Now I have "test-fitted" the whole thing. 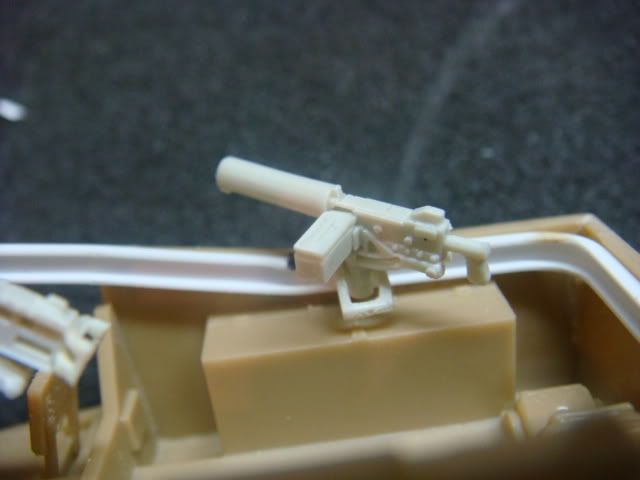 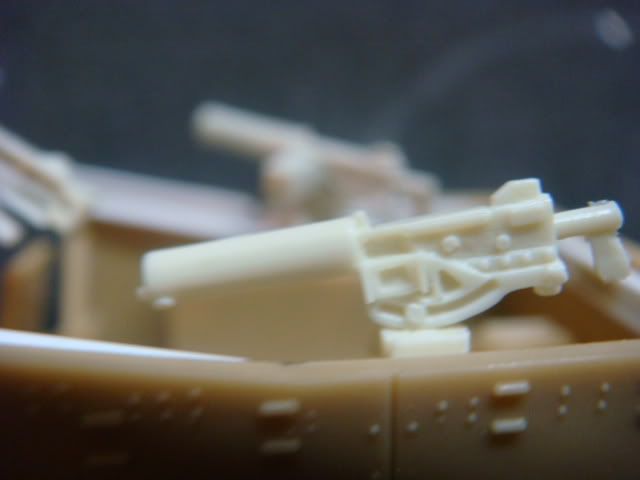 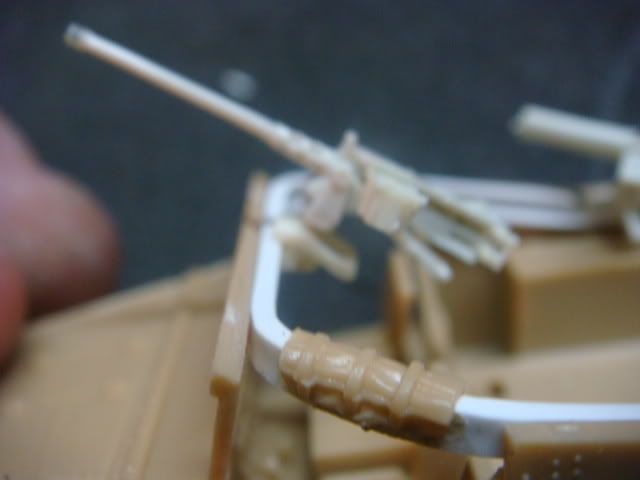  Well thats all for now....all this small work make me tired. Please tell me what you think. |
|
cploverby
Full Member
Member since: August 2012
Posts: 129
Aug 14, 2012 14:15:54 GMT -5
Aug 14, 2012 14:15:54 GMT -5
|
Post by cploverby on Sept 28, 2012 8:37:59 GMT -5
Here are a couple more things that I have done. No dought that everyone has noticed that the Head-lamps are just "bumps" on the fenders, yes? 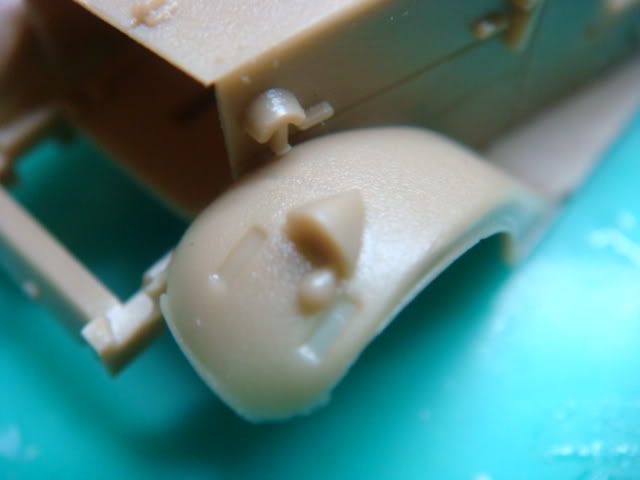 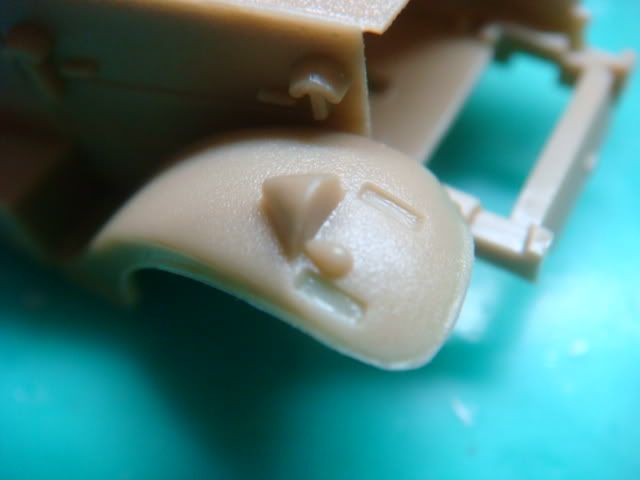 Well with a #15 scaple I have cured that. 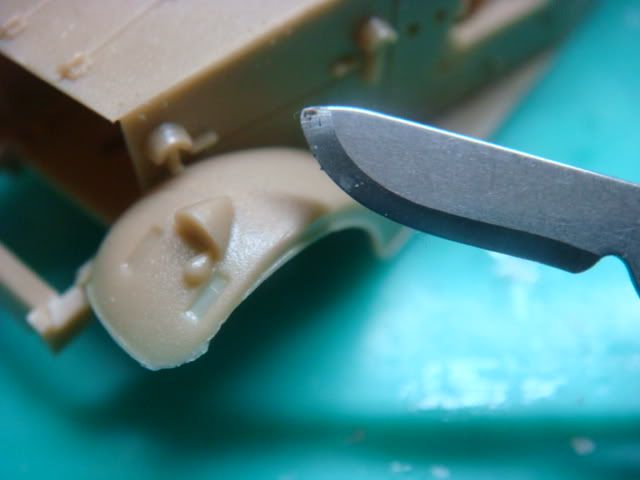 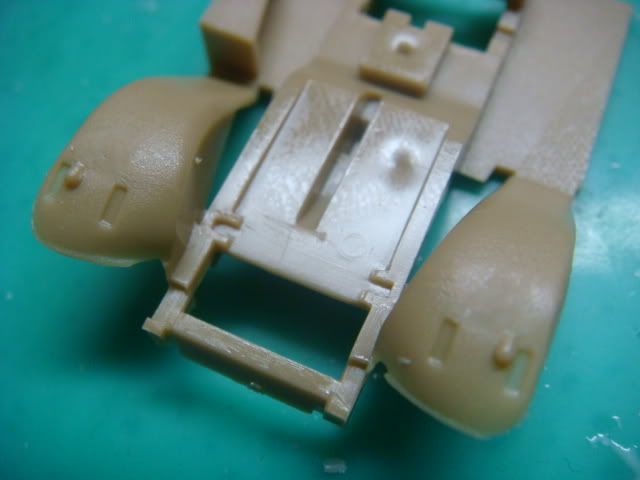 Then I drilled out the mounting holes for "My" head-lamps. 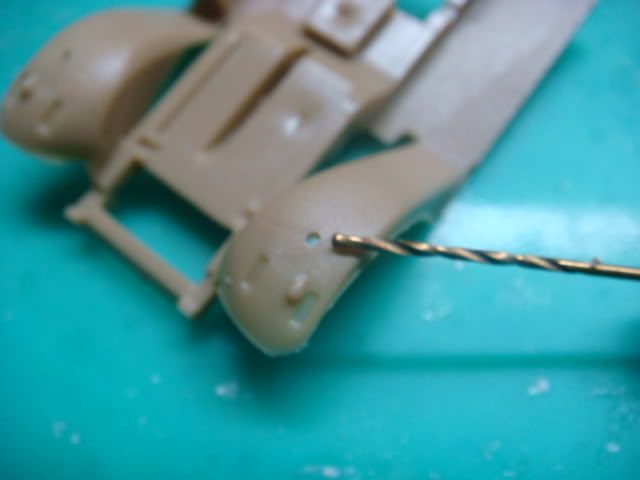 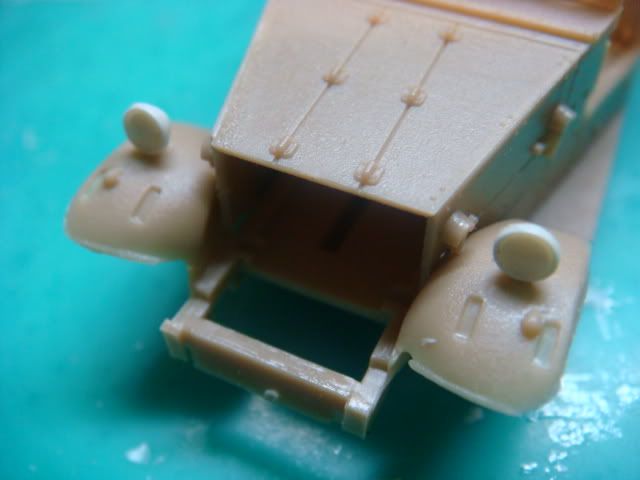 My next step was to equip this baby with radios. Thanks to Roco I have them. 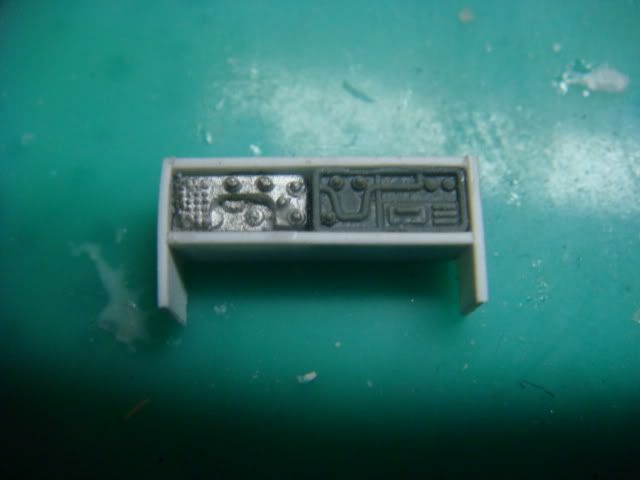 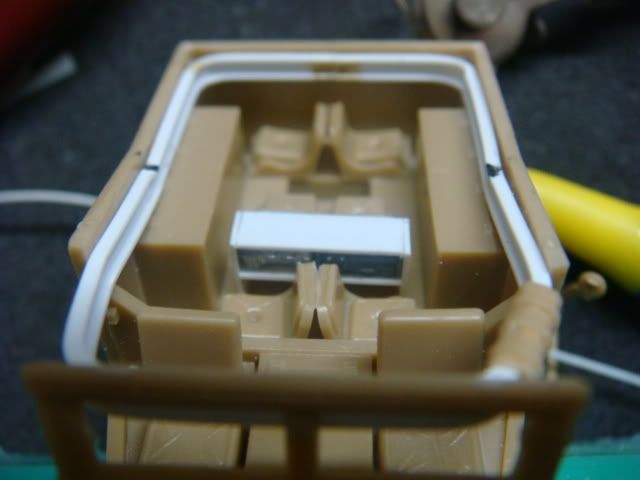 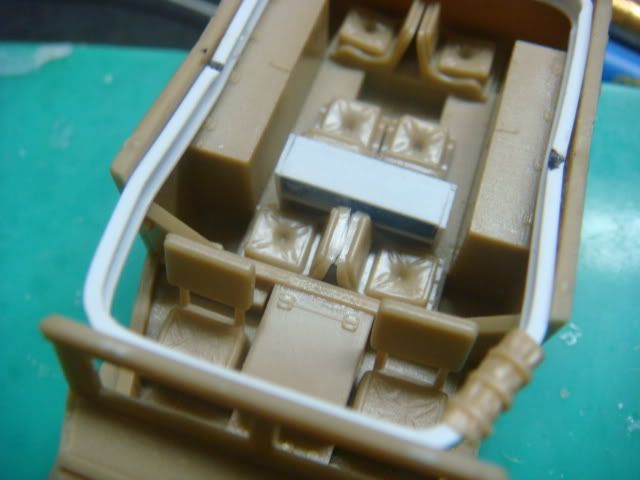 well I off to make other pieces now ....more later. :good: |
|
|
|
Post by deafpanzer on Sept 28, 2012 8:43:38 GMT -5
Knock out pins!?!? The horror! Looks like you have it under control... looking real good with all of modifications you are doing.
|
|
|
|
Post by robbo on Sept 28, 2012 13:20:08 GMT -5
Nice fixes mate, your certainly making the kit better
|
|
|
|
Post by wbill76 on Sept 28, 2012 16:08:02 GMT -5
Nice job updating an older kit...amazing how far the molding has come when you look at those MGs.  |
|
|
|
Post by bbd468 on Sept 28, 2012 22:37:40 GMT -5
WOW... nice work on that tiny thing. Looks great!  Gary |
|
cploverby
Full Member
Member since: August 2012
Posts: 129
Aug 14, 2012 14:15:54 GMT -5
Aug 14, 2012 14:15:54 GMT -5
|
Post by cploverby on Sept 30, 2012 6:09:24 GMT -5
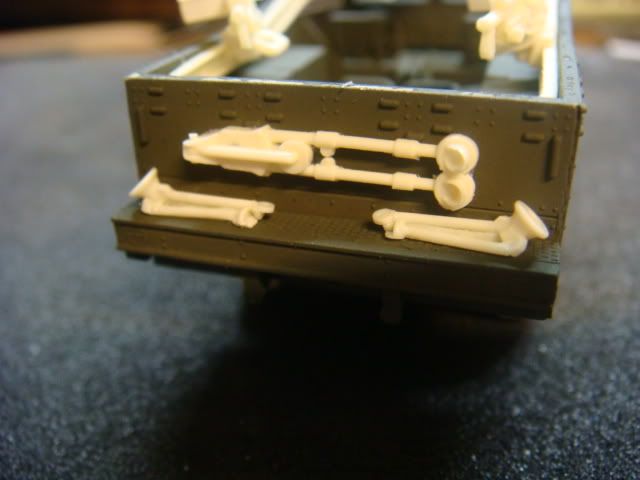
Don't know if I mentioned it, but the set will come with 2 sets of .30 cal this is what the second set will look like. 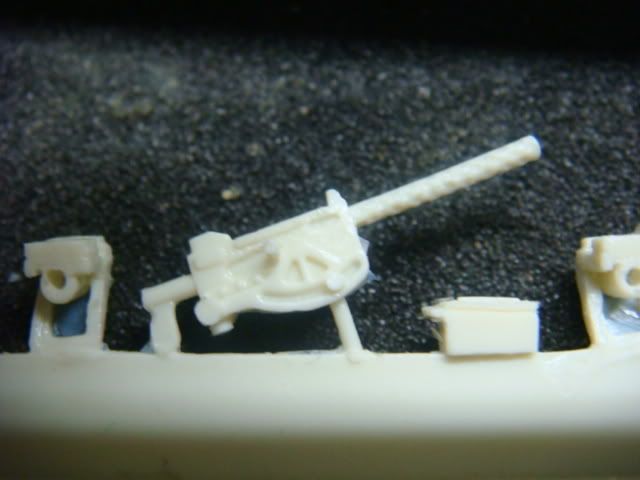 Now I had to to do some micro scratch building to make the "correct" tripod for the .30 cal. this is the "Proper" stowage for the tripods on the M3 scout Car. 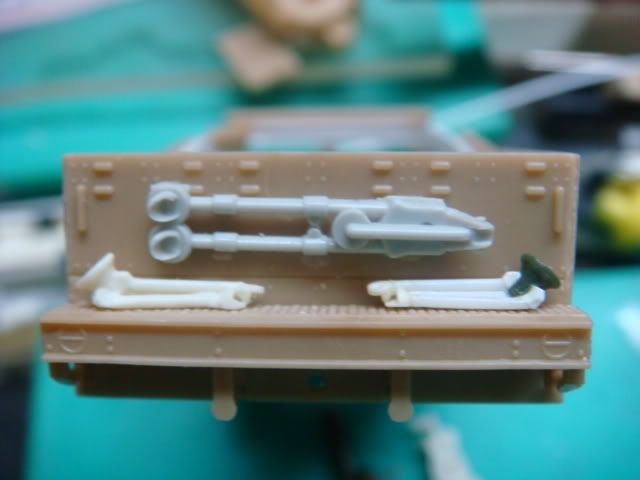 also I took my .50 cal and did some micro surgery and redid it as a new master. so here are some shots of it. 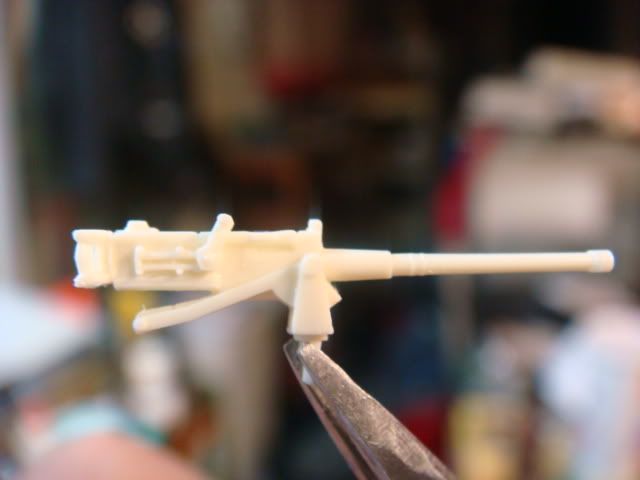 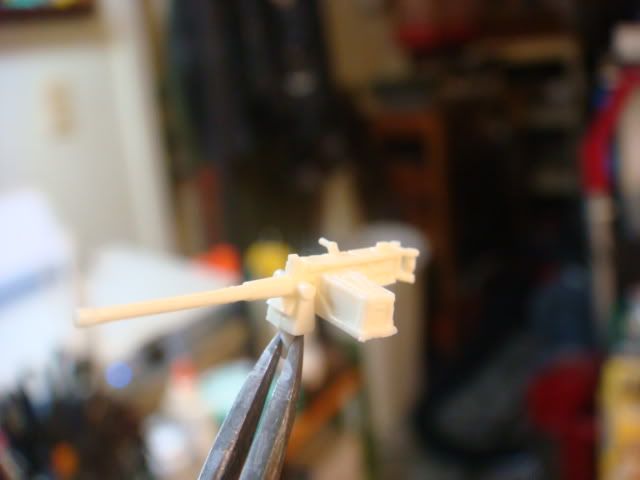 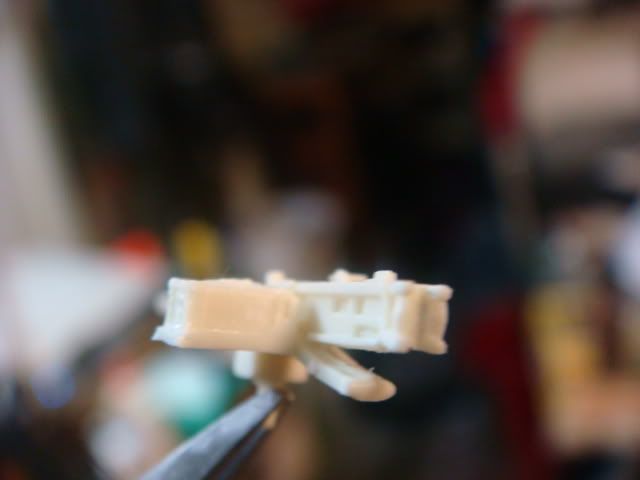 here it is with a little paint to help show the details. 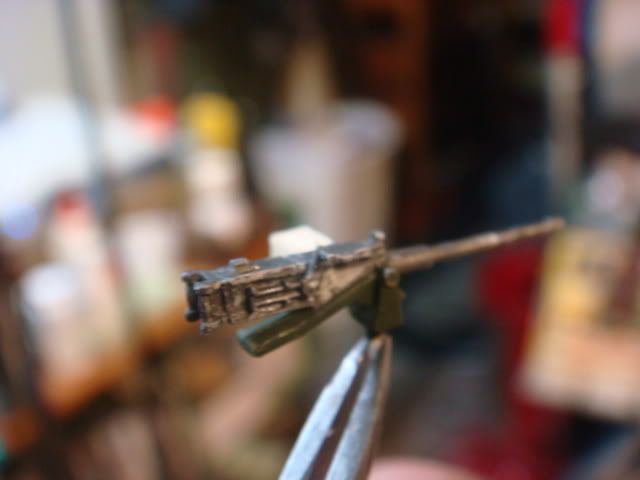 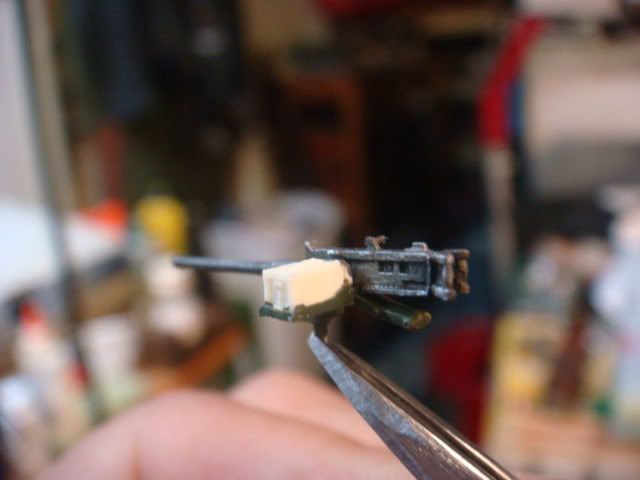 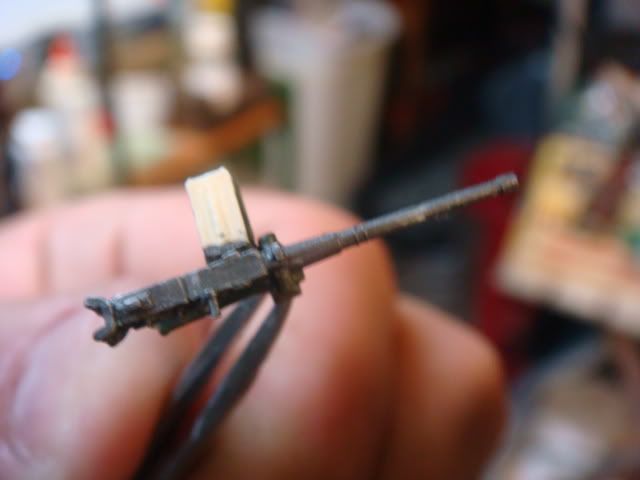 and here it is "side by side" with the first incarnation to show a small difference.  well that was want kept me busy since my last post. |
|
|
|
Post by TRM on Sept 30, 2012 8:29:36 GMT -5
Nice bit o' scratch work on this one! Big difference on the Mg's. You are making some nice progress...keep it going!!!
|
|
cploverby
Full Member
Member since: August 2012
Posts: 129
Aug 14, 2012 14:15:54 GMT -5
Aug 14, 2012 14:15:54 GMT -5
|
Post by cploverby on Oct 5, 2012 10:12:37 GMT -5
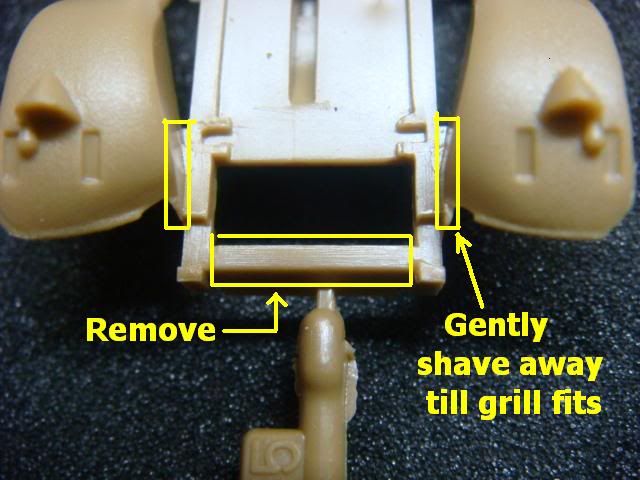
Oh God...it seems it's been days since I've been here...... Wait! It HAS been days..... I have been hard at work here, and it seems that I am burning out? I hope not! Lets "recap" (on a small part of this) One of the big bones of contention in this kit, is the "skate rail", for one thing, it is Not an "I" beam or a piece of "channel" as it should be. And, it only has two (2) gun mounts on it when it should have three (3). Yes I finally got a pic of one before modification (thanks Charlie). 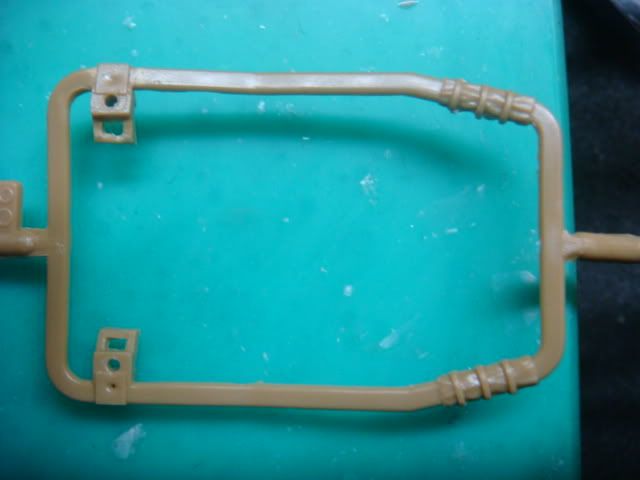 Here is the one I made. Here is the first cast of it in resin (yes I finally molded it) 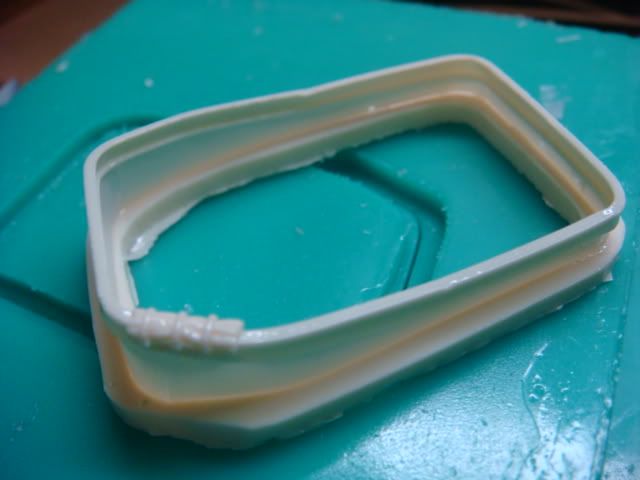 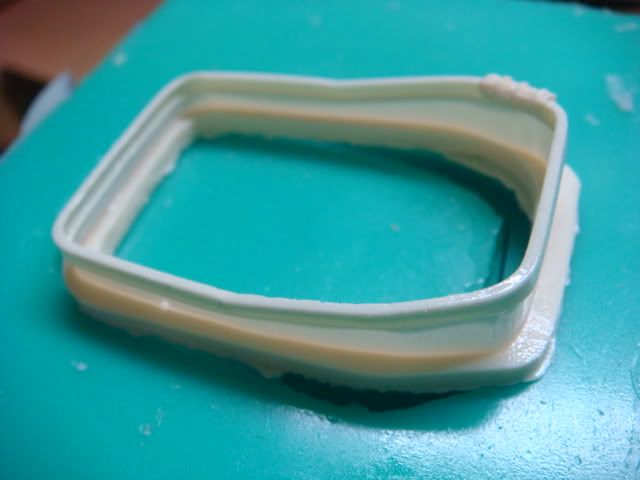 And here are two showing the casting mounted to the M3 (with guns) next to a fresh cast. 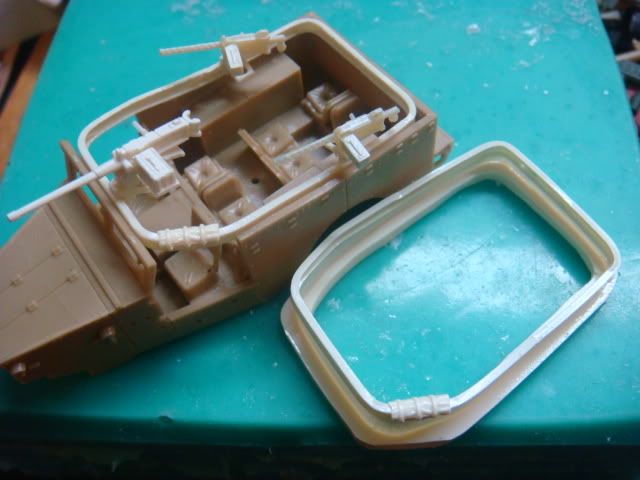 Another BIG short-coming is the level of deatil and quality of the Machine Guns offered with the kit. The .50 cal and .30 cal are just Horrible. 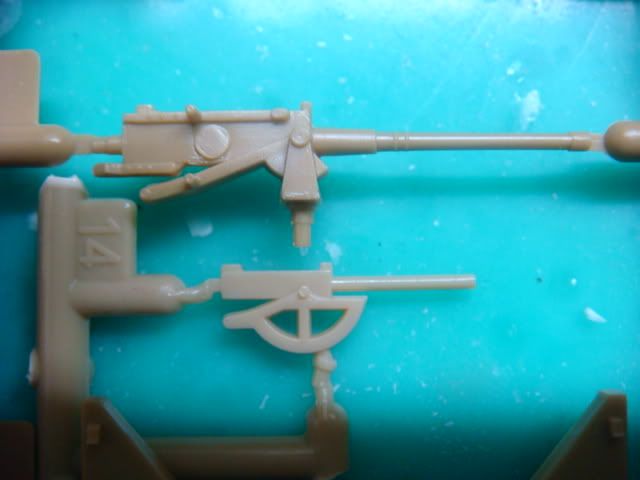 So I took what I had and made attempts at making the best MG's I could. 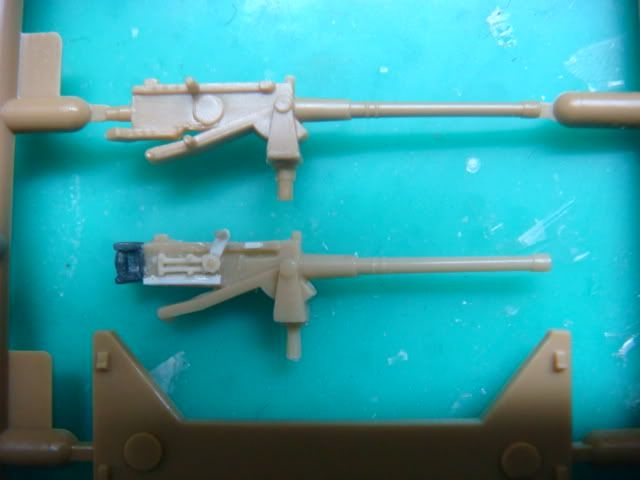 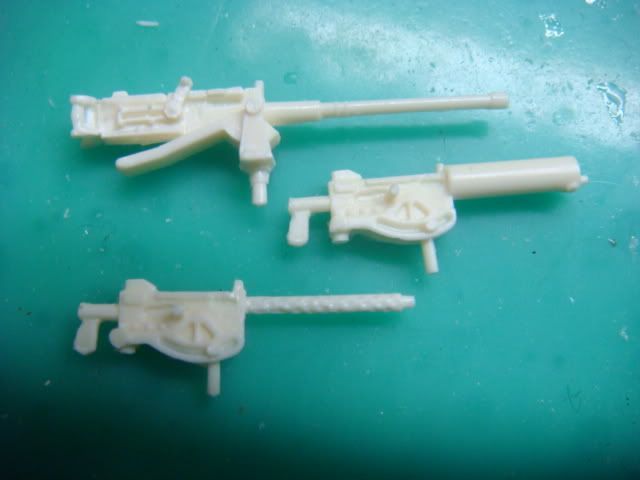 Now I an tackling the Gas Cans.  I did one, and then decide to Document the conversion of the second. 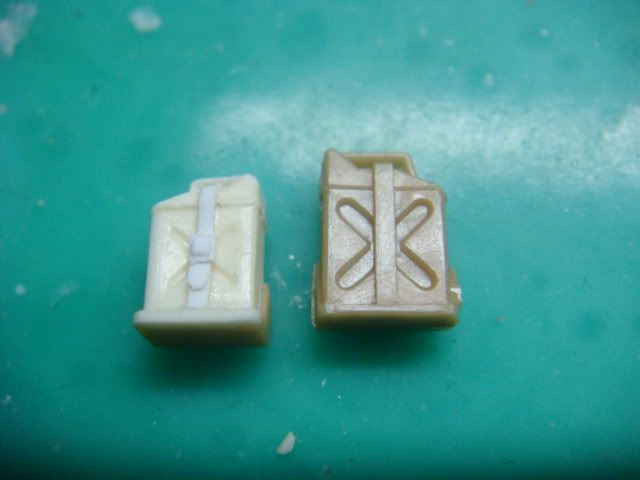 Here is where I cut away the "gas can" 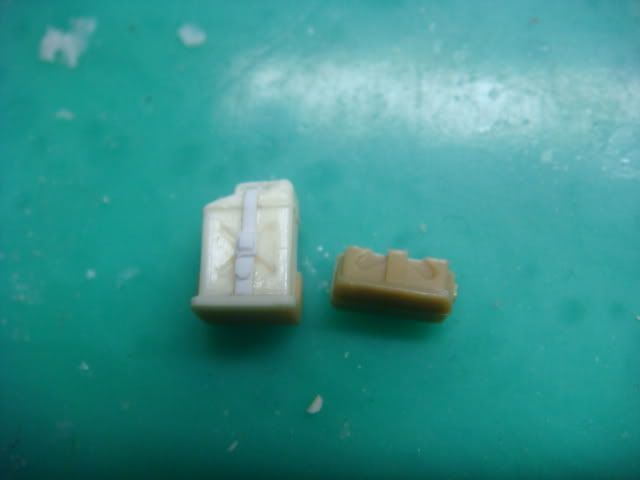 Then with a "denatal burr" I hollowed out the mount portion. 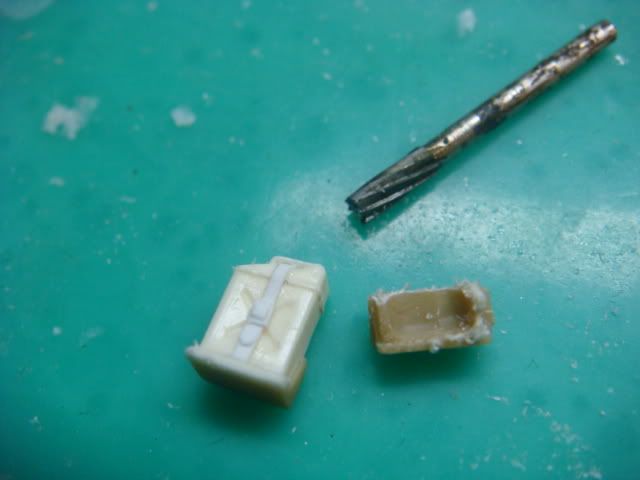 I then placed the "chosen" gas can with in it. I had to keep test fitting over and over again till it got where "I" wanted it 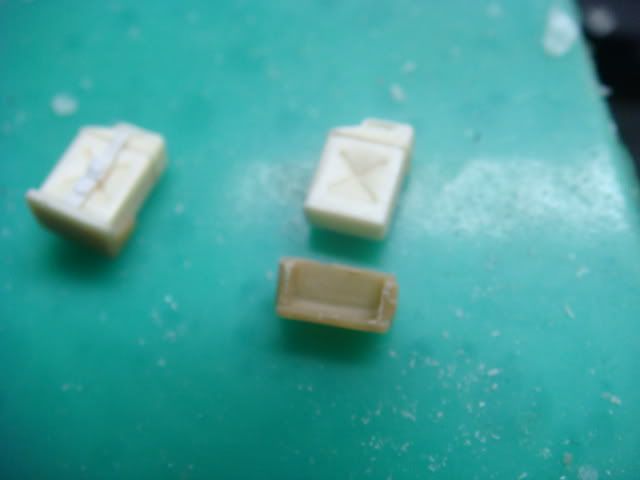 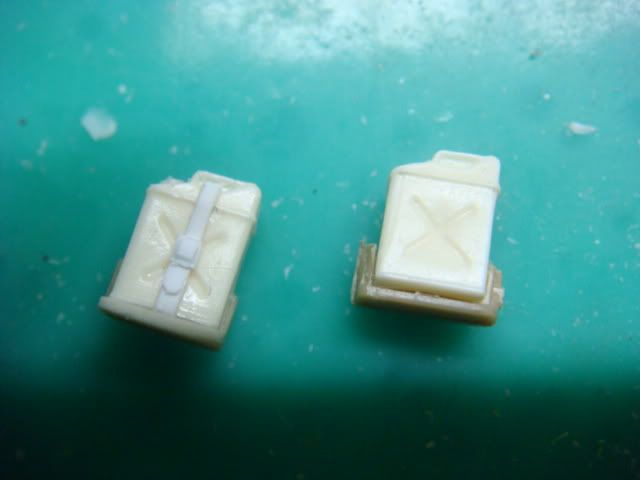 I thought I was almost done, then I remembered that many, many pic's show, that troops carried the cavas bucket strapped to one gas can.....so I tried my hand at that as well. 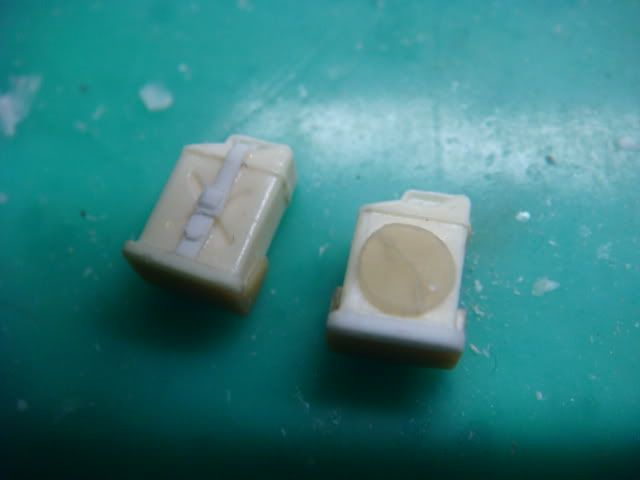 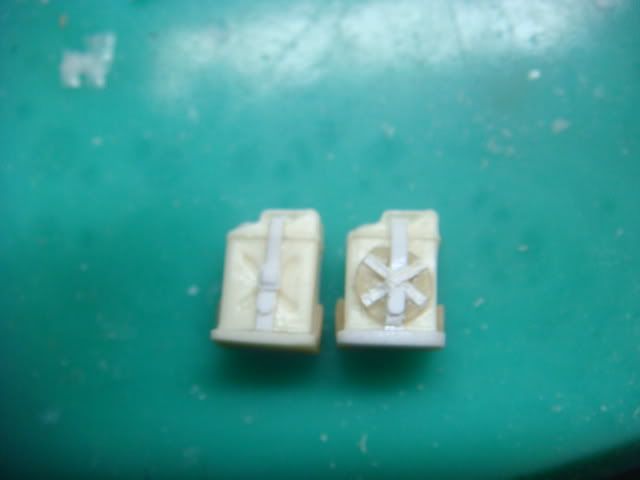 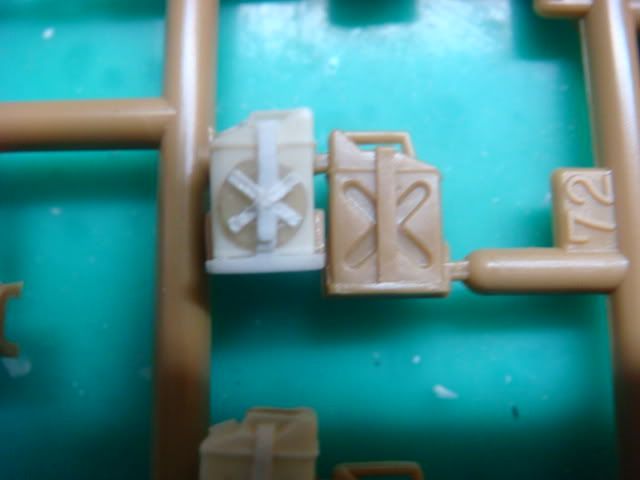 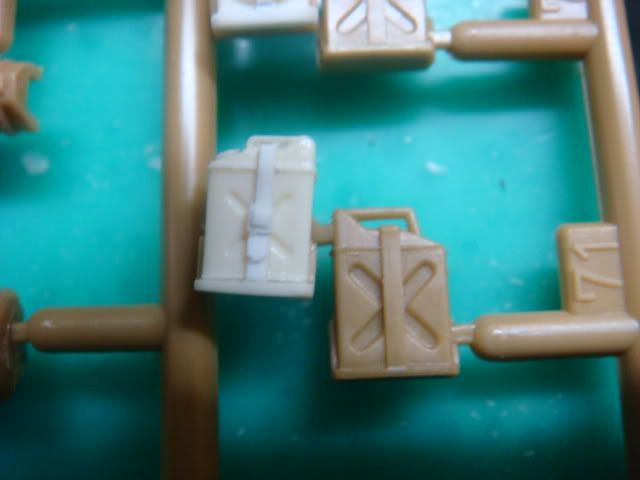 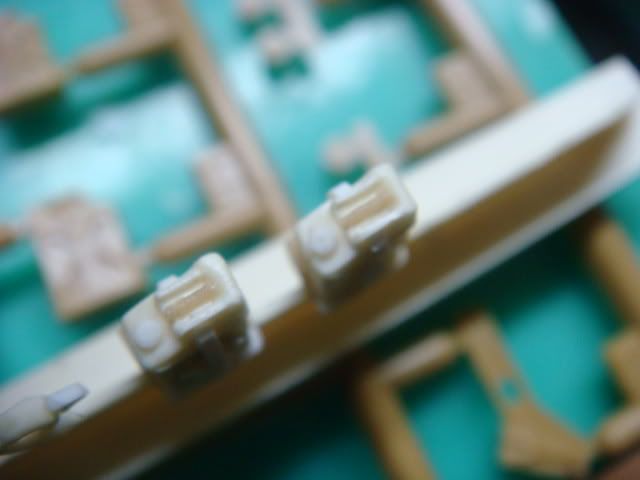 Now I am trying to tackle the "brush guards" for the head lamps..... We'll see how that goes. |
|
|
|
Post by wbill76 on Oct 5, 2012 14:26:26 GMT -5
Yep, like Dicky, I have to keep reminding myself that this is in 1/72! You're doing a great job overhauling this old kit and bringing up the detail standard.
|
|
cploverby
Full Member
Member since: August 2012
Posts: 129
Aug 14, 2012 14:15:54 GMT -5
Aug 14, 2012 14:15:54 GMT -5
|
Post by cploverby on Oct 5, 2012 18:14:01 GMT -5
Thank s for the compliments guys. I am now tackling the head-light brush guards...... what a PIA. This thing is so small and frail...... I don't think I can mold and cast it. I have to redo the wind shield armor...... after all the work I did on it...... it fell on the floor and (before I knew it) I stepped on it.  |
|
cploverby
Full Member
Member since: August 2012
Posts: 129
Aug 14, 2012 14:15:54 GMT -5
Aug 14, 2012 14:15:54 GMT -5
|
Post by cploverby on Oct 5, 2012 21:19:56 GMT -5
Man am I tired....gonna take a break. Tomorroow will be a day off from this. Today I got some major construction done..... First was this PIA that I will call the Brush Guard. First thing "I" noticed was that it was too short. So I made one...... but I am not sure if it's worth the effort. "I" think it's to fragile for molding. 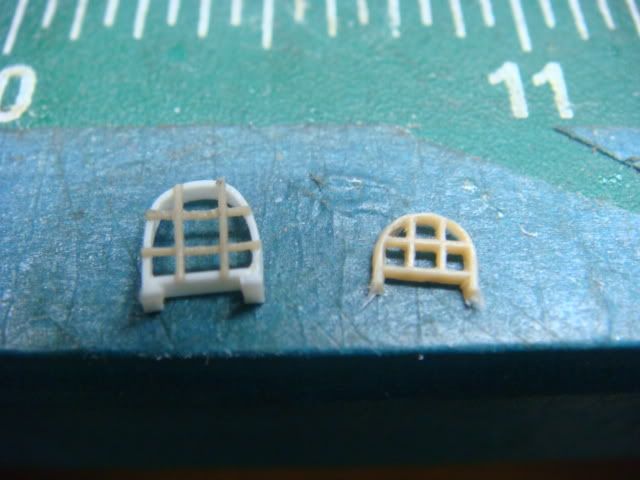 The next thing I did was to build the new windshiels armor. Those Knock out marks were just driving me crazy. Don't let the pic fool you....the new piece just "looks" bigger because it's closer to the camera. 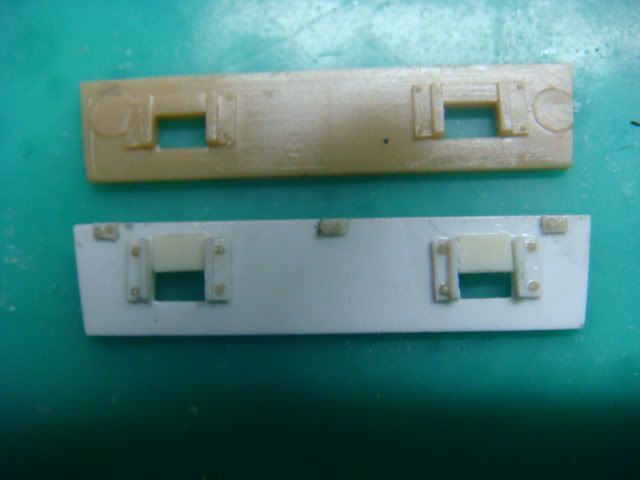 AS I said tomorrow will be a day off from working on this...... I have to help my Girlfriend rip the carpet out of her G'mas Bedroom. (joy) |
|
captfue
Full Member
Member since: October 2012
Posts: 311
Oct 1, 2012 22:25:19 GMT -5
Oct 1, 2012 22:25:19 GMT -5
|
Post by captfue on Oct 5, 2012 22:37:10 GMT -5
For 1/72that is great detail, almost revials 1/48 or 1/35. Great job
|
|
cploverby
Full Member
Member since: August 2012
Posts: 129
Aug 14, 2012 14:15:54 GMT -5
Aug 14, 2012 14:15:54 GMT -5
|
Post by cploverby on Oct 7, 2012 12:15:53 GMT -5
OK...now I am startin on the doors..... Here is the driver's door from the "Out-Side".  Here it is from the "In-Side". 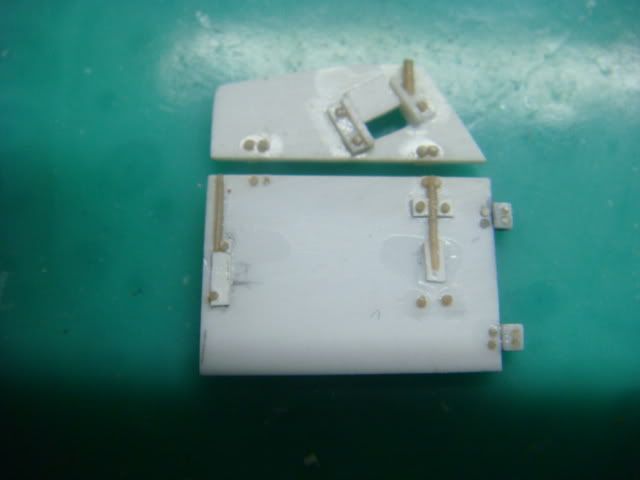 Here it is "in place" with the armor flap in the "up" possistion. 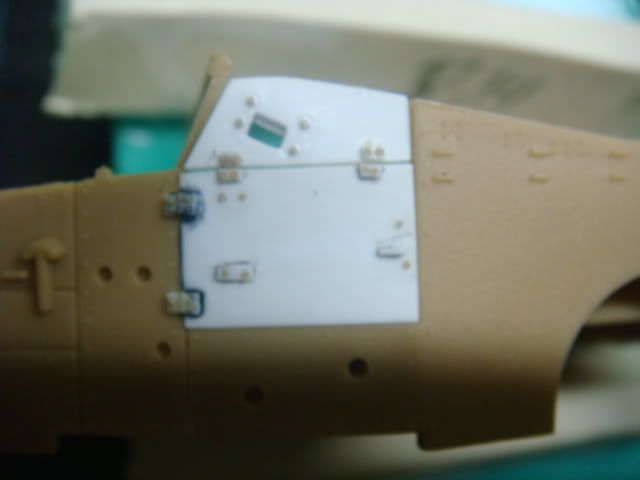 Here it is with the flap folded "down". 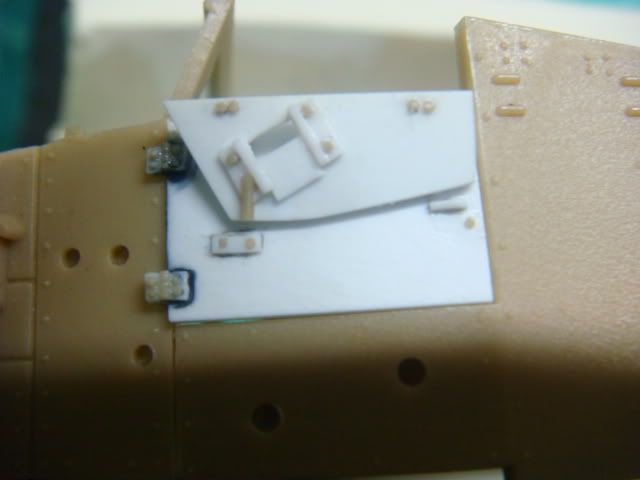 This was an "all day" project, so to morrow I'll tackle the other door. |
|
bigjohn
Reviews member 
Member since: December 2011
John Hale
Posts: 3,438
Dec 21, 2011 2:17:45 GMT -5
Dec 21, 2011 2:17:45 GMT -5
|
Post by bigjohn on Oct 7, 2012 12:25:50 GMT -5
The detail on such a small scale are amazing !!!!!!!!
|
|
|
|
Post by wbill76 on Oct 7, 2012 13:44:46 GMT -5
I can see why it would be an all-day effort for the one door...amazing level of detail for the scale, truly impressive.
|
|
threadbear
Full Member
Member since: December 2011
Recovering my modelling enthusiasm!!'
Posts: 138
Dec 18, 2011 8:31:37 GMT -5
Dec 18, 2011 8:31:37 GMT -5
|
Post by threadbear on Oct 7, 2012 18:11:03 GMT -5
Good stuff. I remember these kits when they were all the rage! But I certainly dont remember them being so bad! This is real modelling! Well done!
|
|
cploverby
Full Member
Member since: August 2012
Posts: 129
Aug 14, 2012 14:15:54 GMT -5
Aug 14, 2012 14:15:54 GMT -5
|
Post by cploverby on Oct 9, 2012 12:12:21 GMT -5
OK......I was s'posed to work on the other door..... but then something shinny distracted me..... and I chose to do this. The Tow Hooks are represented by just "bumps" on the plate.  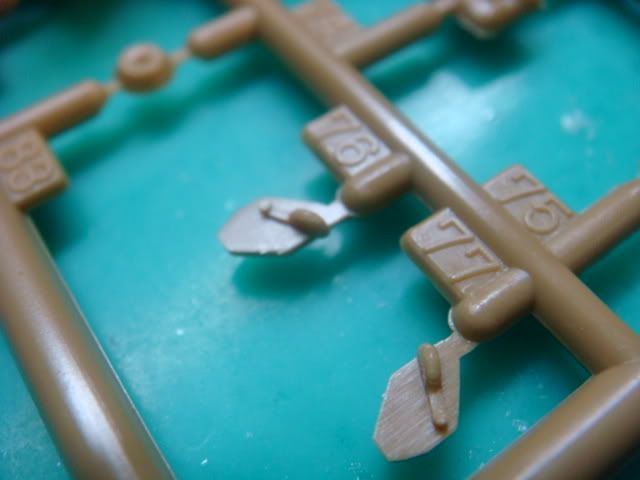 So I took tow hooks from Paul Heiser's 1/87 detail set and did this. 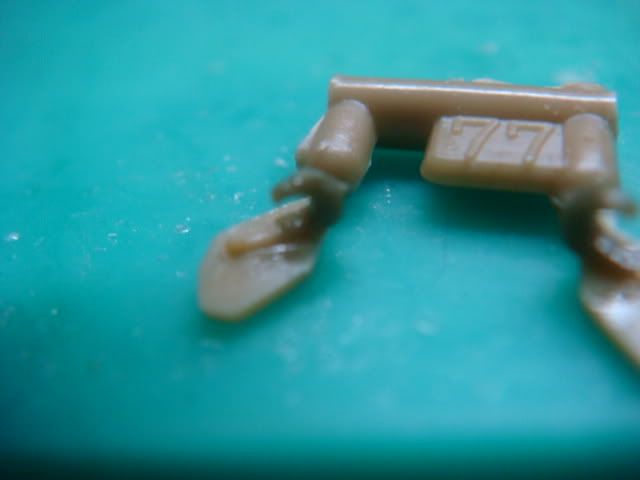 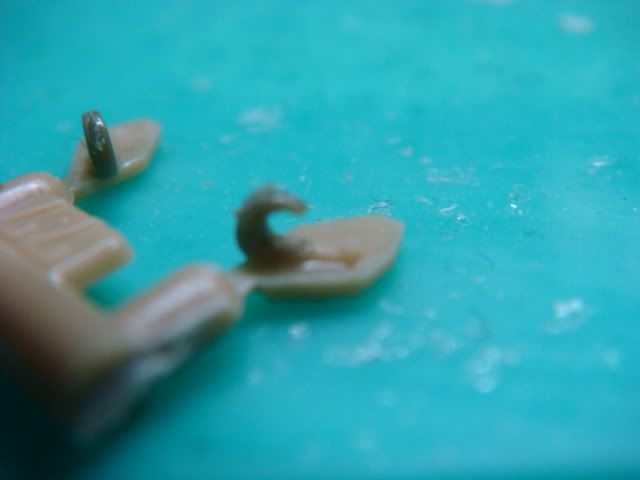 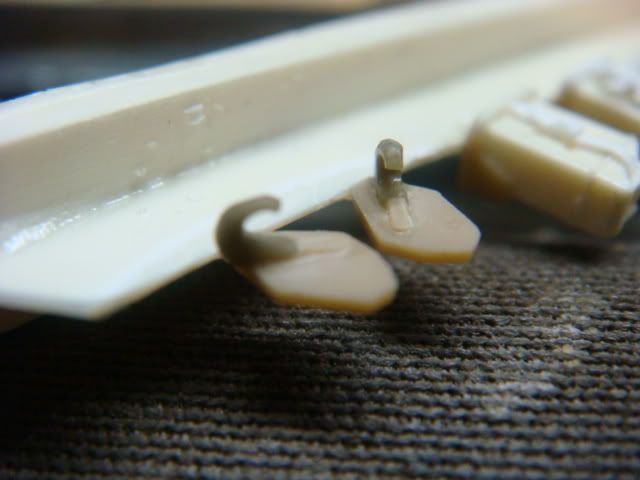 |
|
cploverby
Full Member
Member since: August 2012
Posts: 129
Aug 14, 2012 14:15:54 GMT -5
Aug 14, 2012 14:15:54 GMT -5
|
Post by cploverby on Oct 9, 2012 16:32:56 GMT -5
Alright......Today has been a busy one for me...... I tried and it worked the brush guards survived the molding proccess. 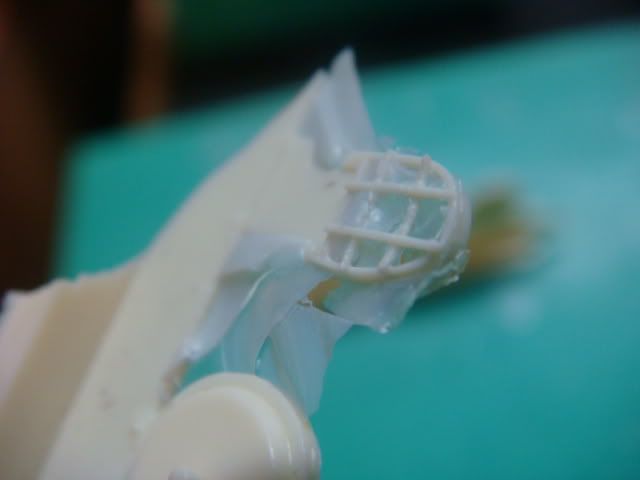 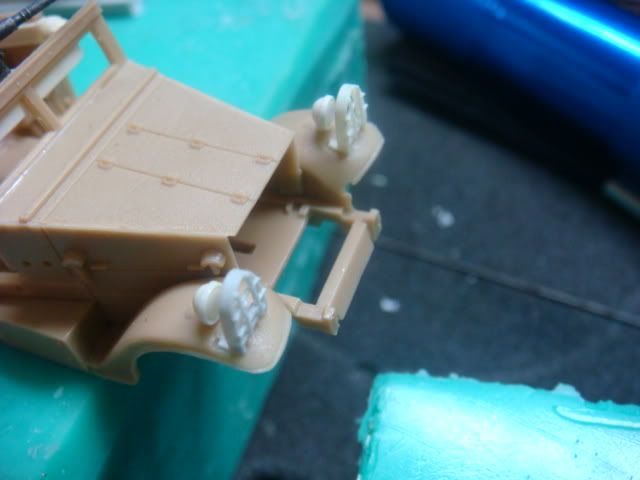 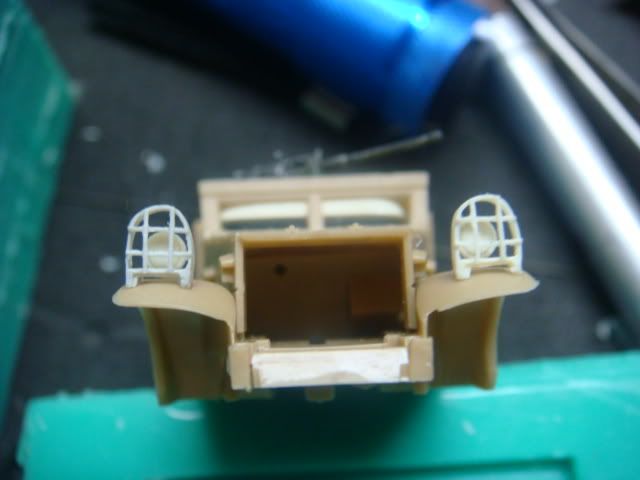 I even went as far as doing the "wooden" ammo box for the .30 cal 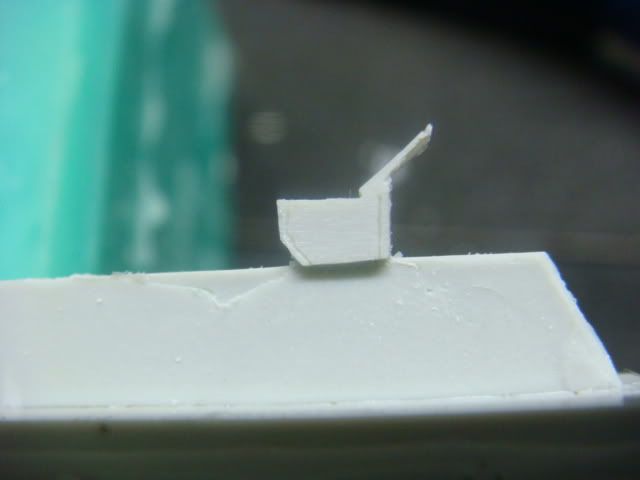 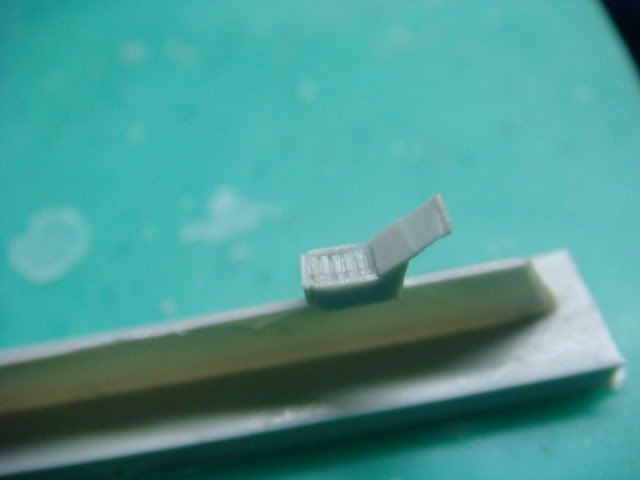 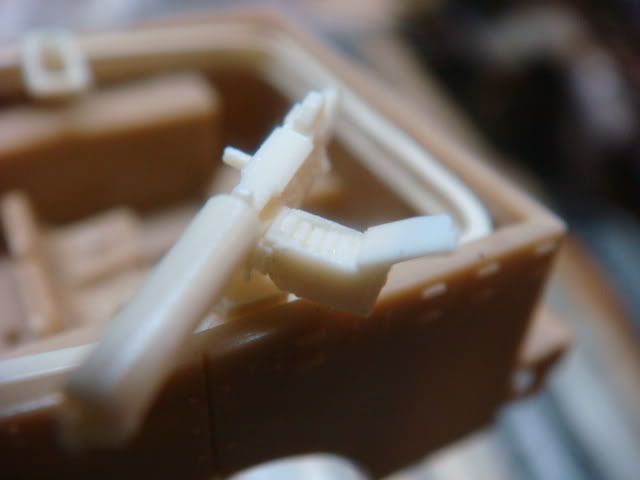 I am done for the day...... |
|
danb
Reviews member
March 2013 MoM Winner
Member since: November 2011
Posts: 2,808
Nov 17, 2011 9:22:52 GMT -5
Nov 17, 2011 9:22:52 GMT -5
|
Post by danb on Oct 9, 2012 17:04:20 GMT -5
That is impressive a high amount of detail for such a small scale hats off to ya fella top job
Dan B
|
|
|
|
Post by bbd468 on Oct 9, 2012 23:02:28 GMT -5
I agree!!! Great job on this little M3. Gary |
|
cploverby
Full Member
Member since: August 2012
Posts: 129
Aug 14, 2012 14:15:54 GMT -5
Aug 14, 2012 14:15:54 GMT -5
|
Post by cploverby on Oct 11, 2012 20:37:32 GMT -5
Hi All,
I want to say "Thank You" to those who are offering words of incouragement,
If I do not reply directly to you, and this hurts your feelings .... I apologise.
I suffer from an Attention Disorder, and I often go on thinking that I did something ,
when the case is that I did not.
So if anyone feels "slighted" agin ...I apologise.
Right now I am behind on this and am trying to get back on it.
I am trying to get back into the groove on this....
I stopped two days ago to work on other things, and dredd doing the other door.
I just have to pull myself up by my Boot Straps.....I just can't reach them...lol
|
|
cploverby
Full Member
Member since: August 2012
Posts: 129
Aug 14, 2012 14:15:54 GMT -5
Aug 14, 2012 14:15:54 GMT -5
|
Post by cploverby on Oct 18, 2012 6:08:05 GMT -5
|
|
captfue
Full Member
Member since: October 2012
Posts: 311
Oct 1, 2012 22:25:19 GMT -5
Oct 1, 2012 22:25:19 GMT -5
|
Post by captfue on Oct 18, 2012 9:00:49 GMT -5
Really great work
|
|
|
|
Post by robbo on Oct 18, 2012 9:27:50 GMT -5
Very neat build mate
|
|
|
|
Post by wing_nut on Oct 18, 2012 9:28:41 GMT -5
Damn that's nice work. But be prepared... all my future casting question will be directed to you.
|
|
cploverby
Full Member
Member since: August 2012
Posts: 129
Aug 14, 2012 14:15:54 GMT -5
Aug 14, 2012 14:15:54 GMT -5
|
Post by cploverby on Oct 20, 2012 21:53:18 GMT -5
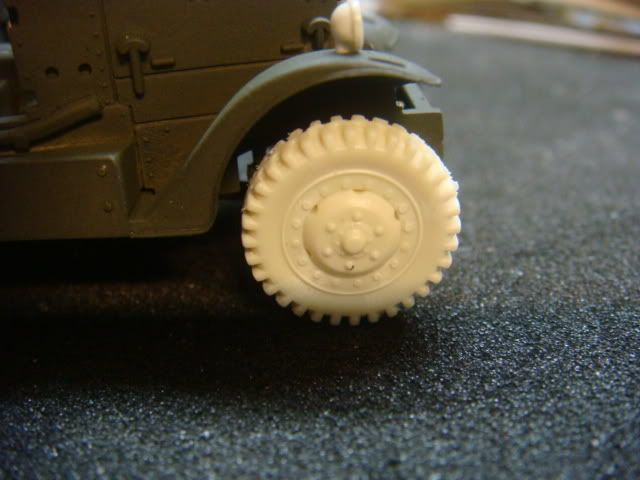
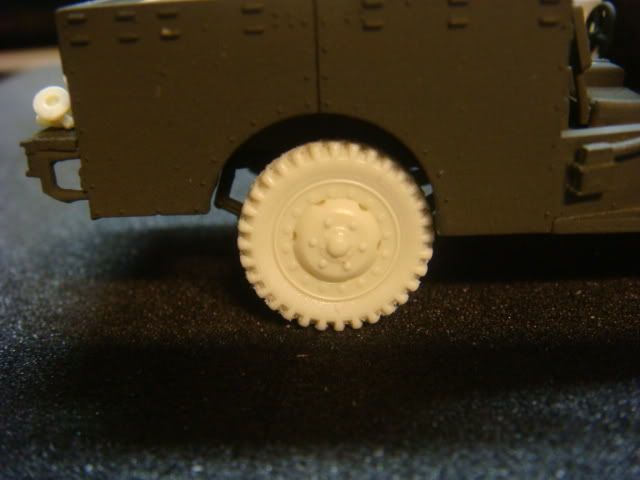
Ok...This Is DONE!!! Had a Major set back at first with the molding...... I had all the parts set up and ready to go.... I poured the rubber...... Then...it happened........ the mold fell off the table and landed face down on the carpet. :shock: I "thought" I grabbed it quick enough.... but there was no way of knowing the extent of the damage. :cry: Not...until this morning, when the rubber was all cured. I looked at it, two of the tires had broken free and floated to the surface before the rubber cured. "SIGH"....I started to look and see how many of the parts did the same thing........ almost all of them.... so I spent three hours doing exploratory surgery to find all the parts. then three more hours repairing the parts, resetting them for molding, and poring the rubber again. THEN.....THEN.....I had to force my self to leave the shop.....and take a long nap. Otherwise I'd have kept screwing with the molds before they cured, and if I ruined them again..... I'd just go and SHOOT myself. Well as you can see if you're reading this...... I didn't shoot myself, AND everything must be going right....because I am here to POST. :yahoo: Soooooooo......here we go Here first I am posting the Pre/Early War version. The main differences from the War Time version? Different Tires, different .30 cal(s), and the Black-Out Drive Lamp by the Driver's Side Headlight. 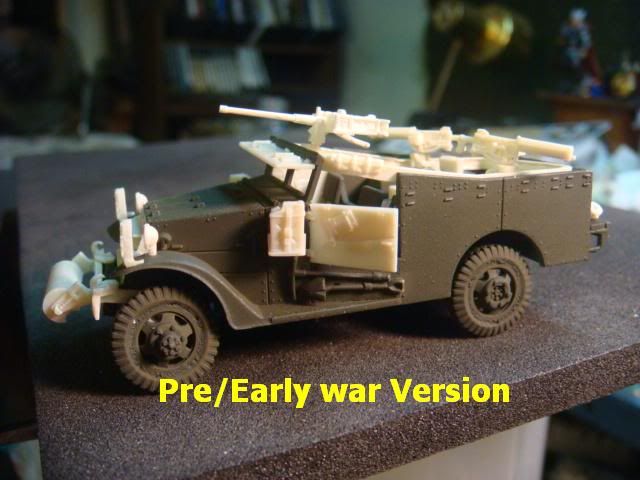 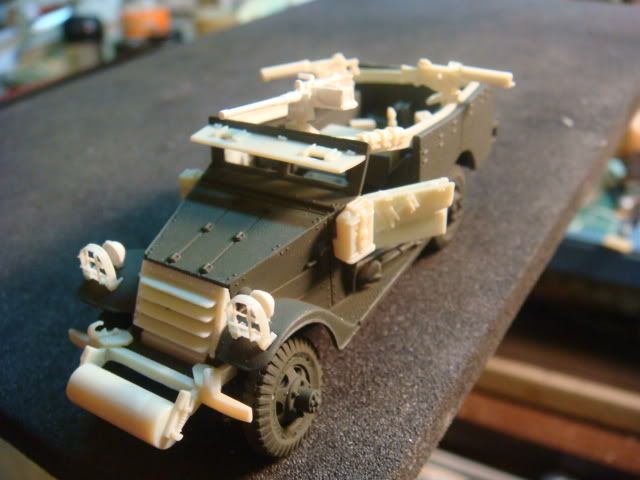 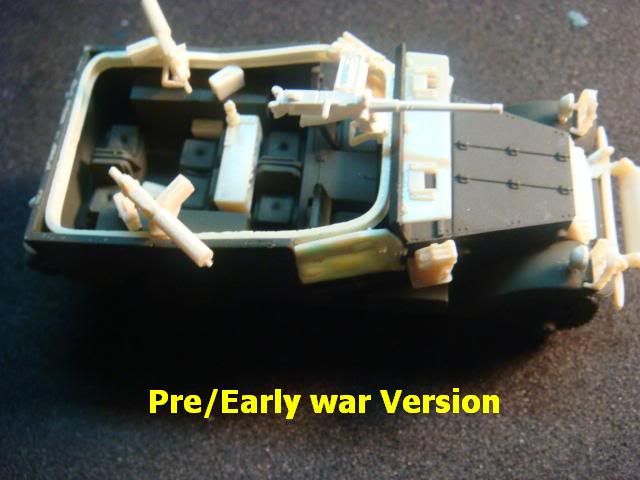 Now for the War Time Version. You will see that I have circled certain points of interest, some have strictly to do with the War Time Version, I.E. the Black Out Lamp, but the rest are just to Grab you attention.   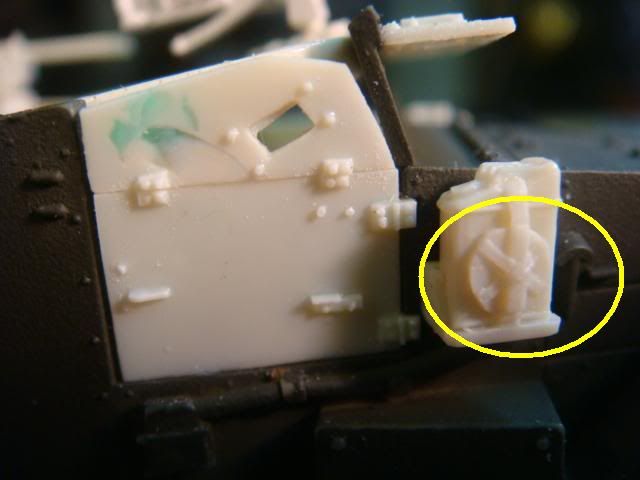 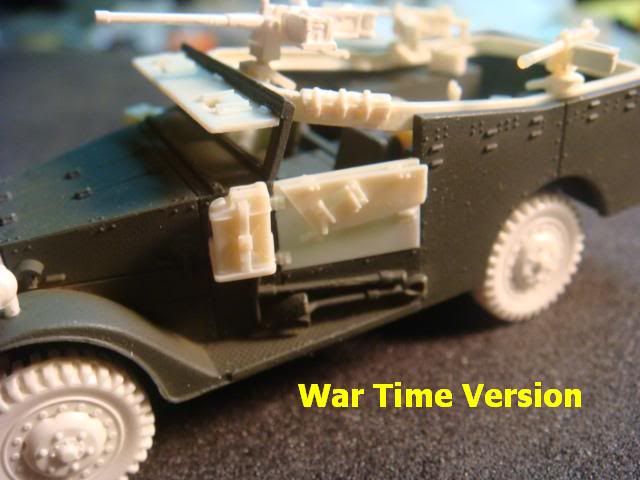 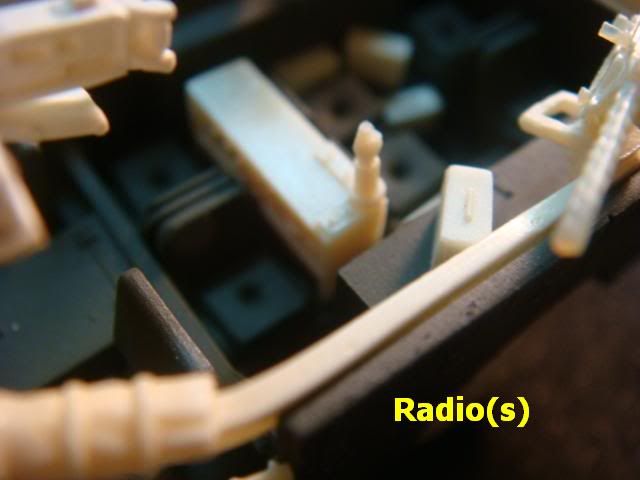 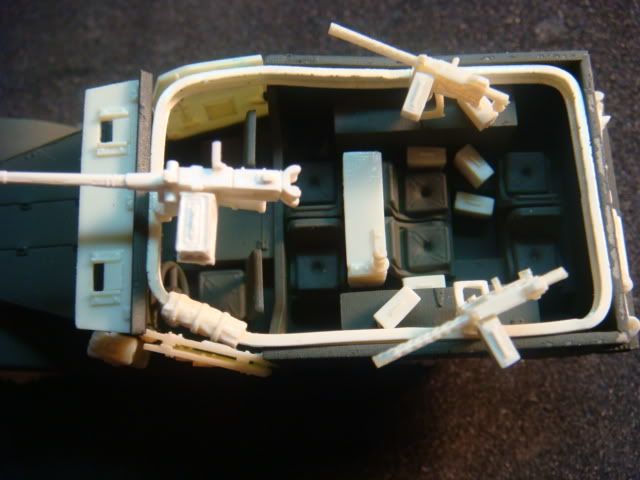 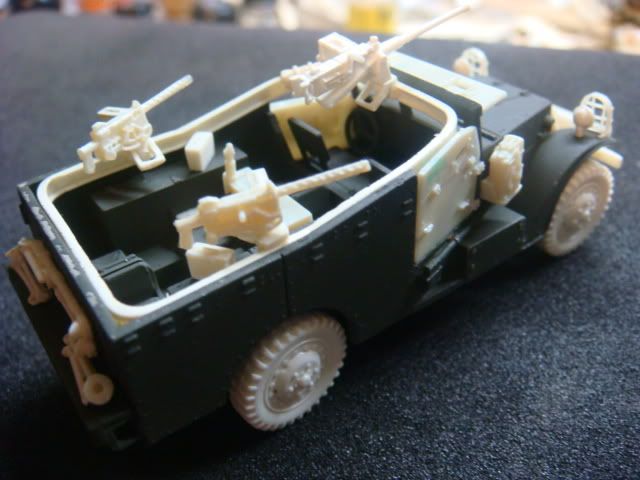  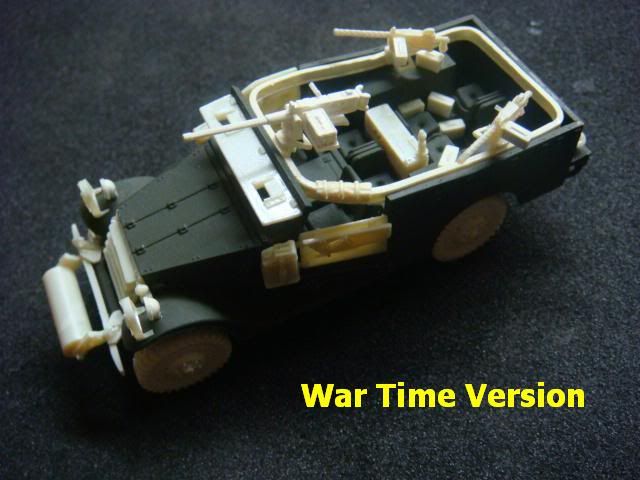 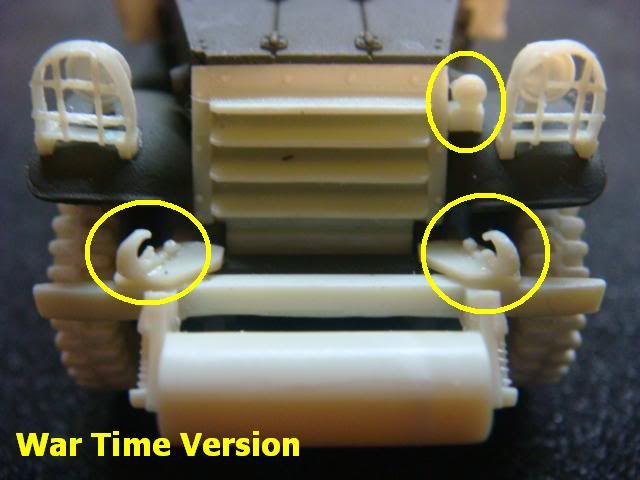 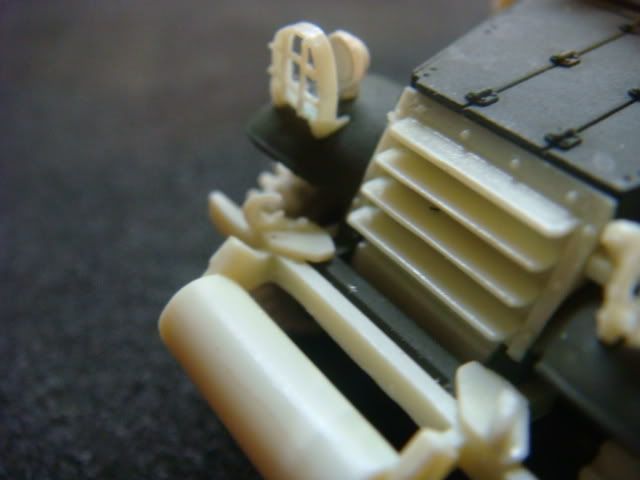 Now here are a few close ups of a few parts. 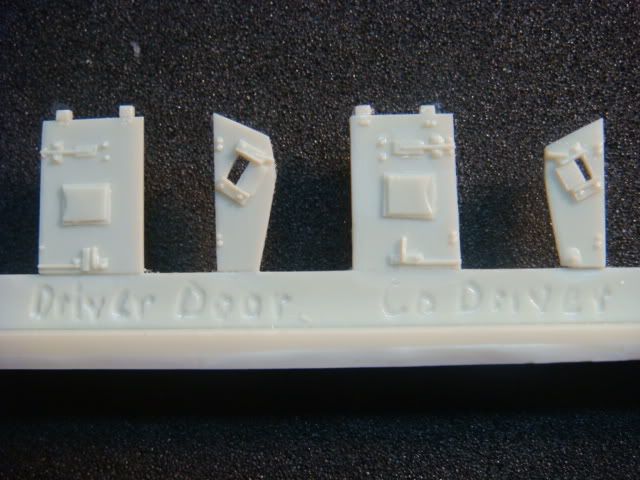 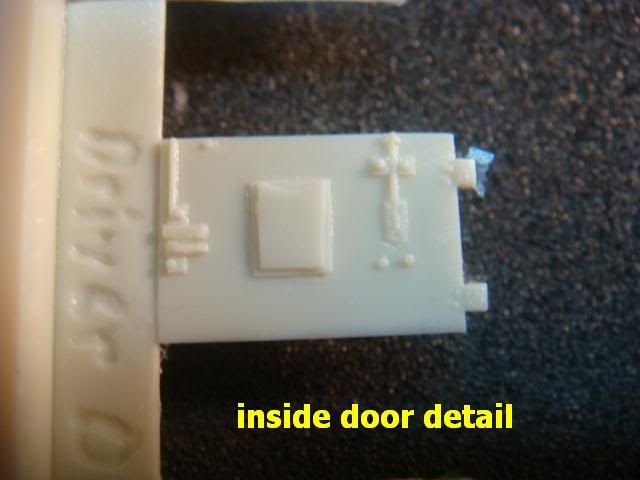 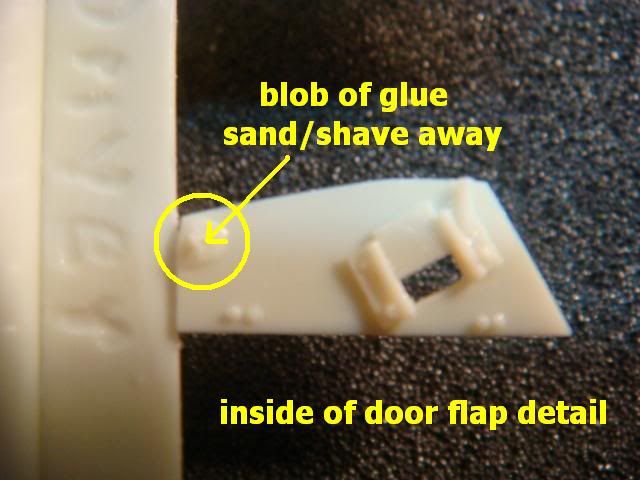  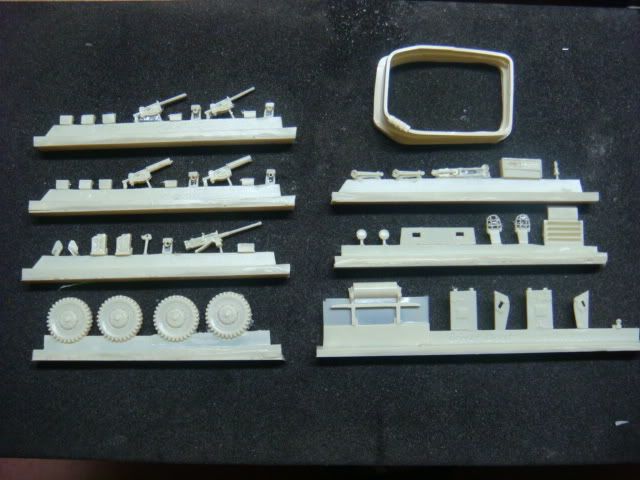 If you're interested Feel Free to contact me at: cpl_overby(at)yahoo.com |
|
cploverby
Full Member
Member since: August 2012
Posts: 129
Aug 14, 2012 14:15:54 GMT -5
Aug 14, 2012 14:15:54 GMT -5
|
Post by cploverby on Oct 21, 2012 5:55:32 GMT -5
|
|
|
|
Post by eastrock on Oct 21, 2012 9:14:47 GMT -5
looks great, Sir!!!
cheers!!
ER
|
|
|
|
Post by wbill76 on Oct 21, 2012 13:32:55 GMT -5
While I'm sure the mold scare was a close one, the second attempt turned out very well, always fun to follow along with these projects to see you work your braille-scale magic!
|
|