|
|
Post by TRM on May 18, 2012 4:42:24 GMT -5
Thinking you are just about getting there. IMHO, I would try and tone back the rust streaks and apply a thin rust wash, like a filter. Mix mostly thinner to the rust color and apply in layers. Patience comes into play. Layer...let dry, layer...dry. Building it up. After you get that to where you want it, then I would apply streaking of not only the rust colors, but darker versions of paint mixed with some dirt and/or gray tones. Keeping these light too, building up as you go.
|
|
snidervolley
Full Member

Member since: April 2012
Posts: 346
Apr 27, 2012 14:51:48 GMT -5
Apr 27, 2012 14:51:48 GMT -5
|
Post by snidervolley on May 18, 2012 12:50:00 GMT -5
TRM thank you for the outstanding advice right when ineeded it , i was truely thinking epic fail and gesso time sart over Pleh  i wiil back off the rust and try a real slowly .......patience .... for sure thanks again is there a place i can see the darker version with dirt being done??? i am a visual learner your advice is taken and appreciated |
|
|
|
Post by TRM on May 18, 2012 21:18:11 GMT -5
|
|
snidervolley
Full Member
Member since: April 2012
Posts: 346
Apr 27, 2012 14:51:48 GMT -5
Apr 27, 2012 14:51:48 GMT -5
|
Post by snidervolley on May 18, 2012 22:33:09 GMT -5
WOW!! MR T those where all awesome
i had been skipping all but the armor and it loks as if i was missing some excellent tutorials for sure i will print out these for ref .
my only dilema with some of these is cannot see myself using the hairspray technique on a live vehicle in the rain would be counter intuitive ,i need to think of some way of achieving this cooll effect.
maybe just maybe i could control the area of hairspray ?? and the salt is jhust to small ??
p.s. truck way cool it reminds me of a model T i and my brothers found in the middle of woods in eastern wash ,got a pic some where of all in it ,
caio
|
|
snidervolley
Full Member
Member since: April 2012
Posts: 346
Apr 27, 2012 14:51:48 GMT -5
Apr 27, 2012 14:51:48 GMT -5
|
Post by snidervolley on May 18, 2012 23:34:08 GMT -5
 turret with grenade screens installed |
|
|
|
Post by TRM on May 19, 2012 9:11:15 GMT -5
Hey!! Glad you like the links. Never stop looking. There are tons of great inspirational footage in all the genres not only here, but everywhere. Been thinking of how you would control the Hair spray, masking comes to ming....but I think you would need and immense amount. They might sell a cheap version for salons in larger containers. I also would like to know if you used clear or white silicone for liquid masking, if that would actually work. If the base works is sealed and "cured" it might work. Try painting a small flat pieces of steel with base colors, seal with a good satin clear coat and let cure a couple days or until fully cured. Apply the silicone where you think the chipping should show up. Make it thick enough so it can peel but not so thick it is a big clump. Once the silicone is dry, paint as usual and wait a short time till your paint has dried to the touch or a little longer....then peel the silicone. The silicone should not stick too well to the smooth surface and should come right up. As for the salt.......kitty litter? Different coarseness of sand? Light localized sanding should work (#1 choice). The salt sits on the hair spray and is chipped off with a brush at our scale...you may want to use a broom at yours but the concept is the same!!  |
|
snidervolley
Full Member
Member since: April 2012
Posts: 346
Apr 27, 2012 14:51:48 GMT -5
Apr 27, 2012 14:51:48 GMT -5
|
Post by snidervolley on May 19, 2012 9:56:37 GMT -5
T
ooooh oooh excellent ideas to try i had thought of vermeculite but i would have been picking it out of garden soil mix:P
hey i see all kinds of referances too "basic color modulation" its something i am supposed to have under my belt but i dont and i think this is the mottling effect i would like to try ? any ideas on that one ?
|
|
snidervolley
Full Member
Member since: April 2012
Posts: 346
Apr 27, 2012 14:51:48 GMT -5
Apr 27, 2012 14:51:48 GMT -5
|
Post by snidervolley on May 20, 2012 16:55:14 GMT -5
 this effect (color modulation?) bafels me............. |
|
snidervolley
Full Member
Member since: April 2012
Posts: 346
Apr 27, 2012 14:51:48 GMT -5
Apr 27, 2012 14:51:48 GMT -5
|
Post by snidervolley on May 20, 2012 16:57:20 GMT -5
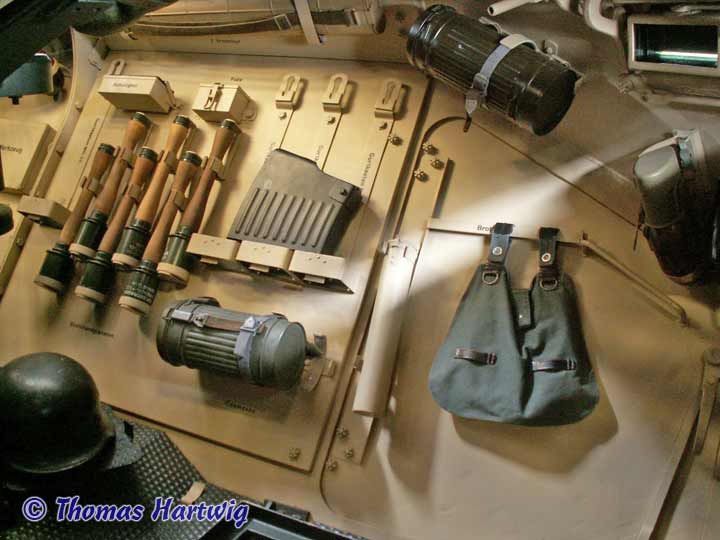
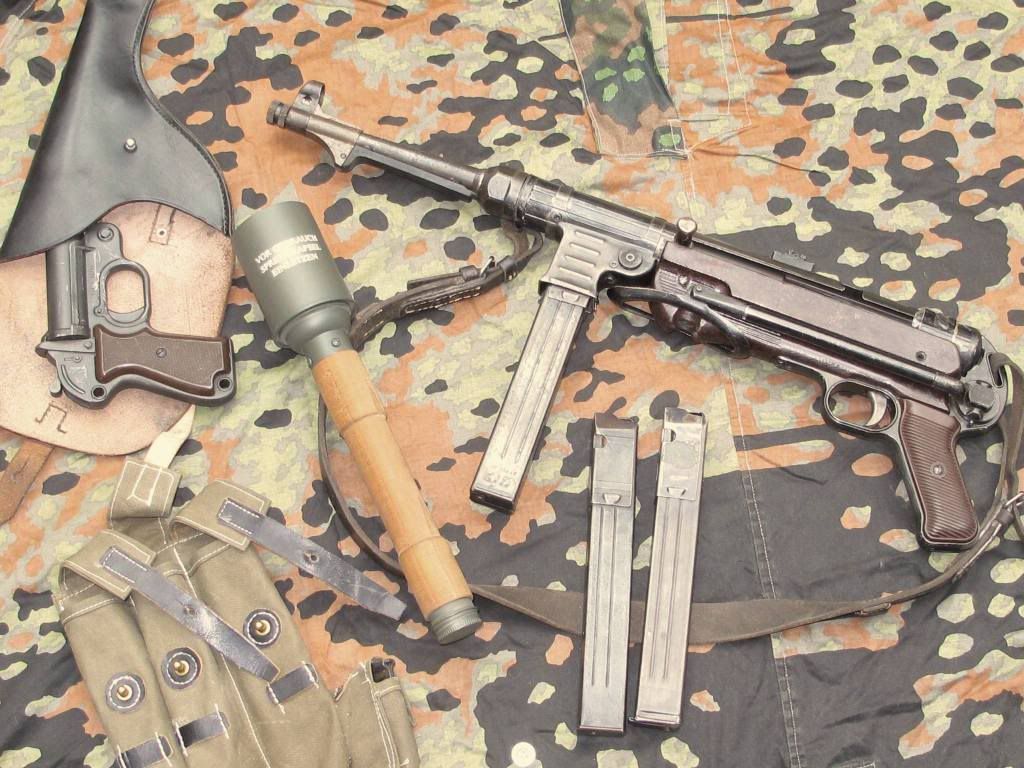 interior detail items ; mgc model mp40 ,flarepistol,mags and loader with camo zelt bahn |
|
snidervolley
Full Member
Member since: April 2012
Posts: 346
Apr 27, 2012 14:51:48 GMT -5
Apr 27, 2012 14:51:48 GMT -5
|
Post by snidervolley on May 21, 2012 10:30:57 GMT -5
 original interior shots 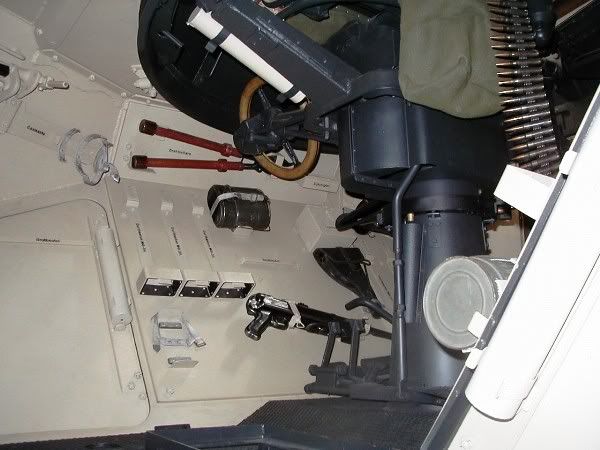 |
|
|
|
Post by spud on May 21, 2012 10:38:10 GMT -5
very nice
|
|
snidervolley
Full Member
Member since: April 2012
Posts: 346
Apr 27, 2012 14:51:48 GMT -5
Apr 27, 2012 14:51:48 GMT -5
|
Post by snidervolley on May 21, 2012 11:36:05 GMT -5
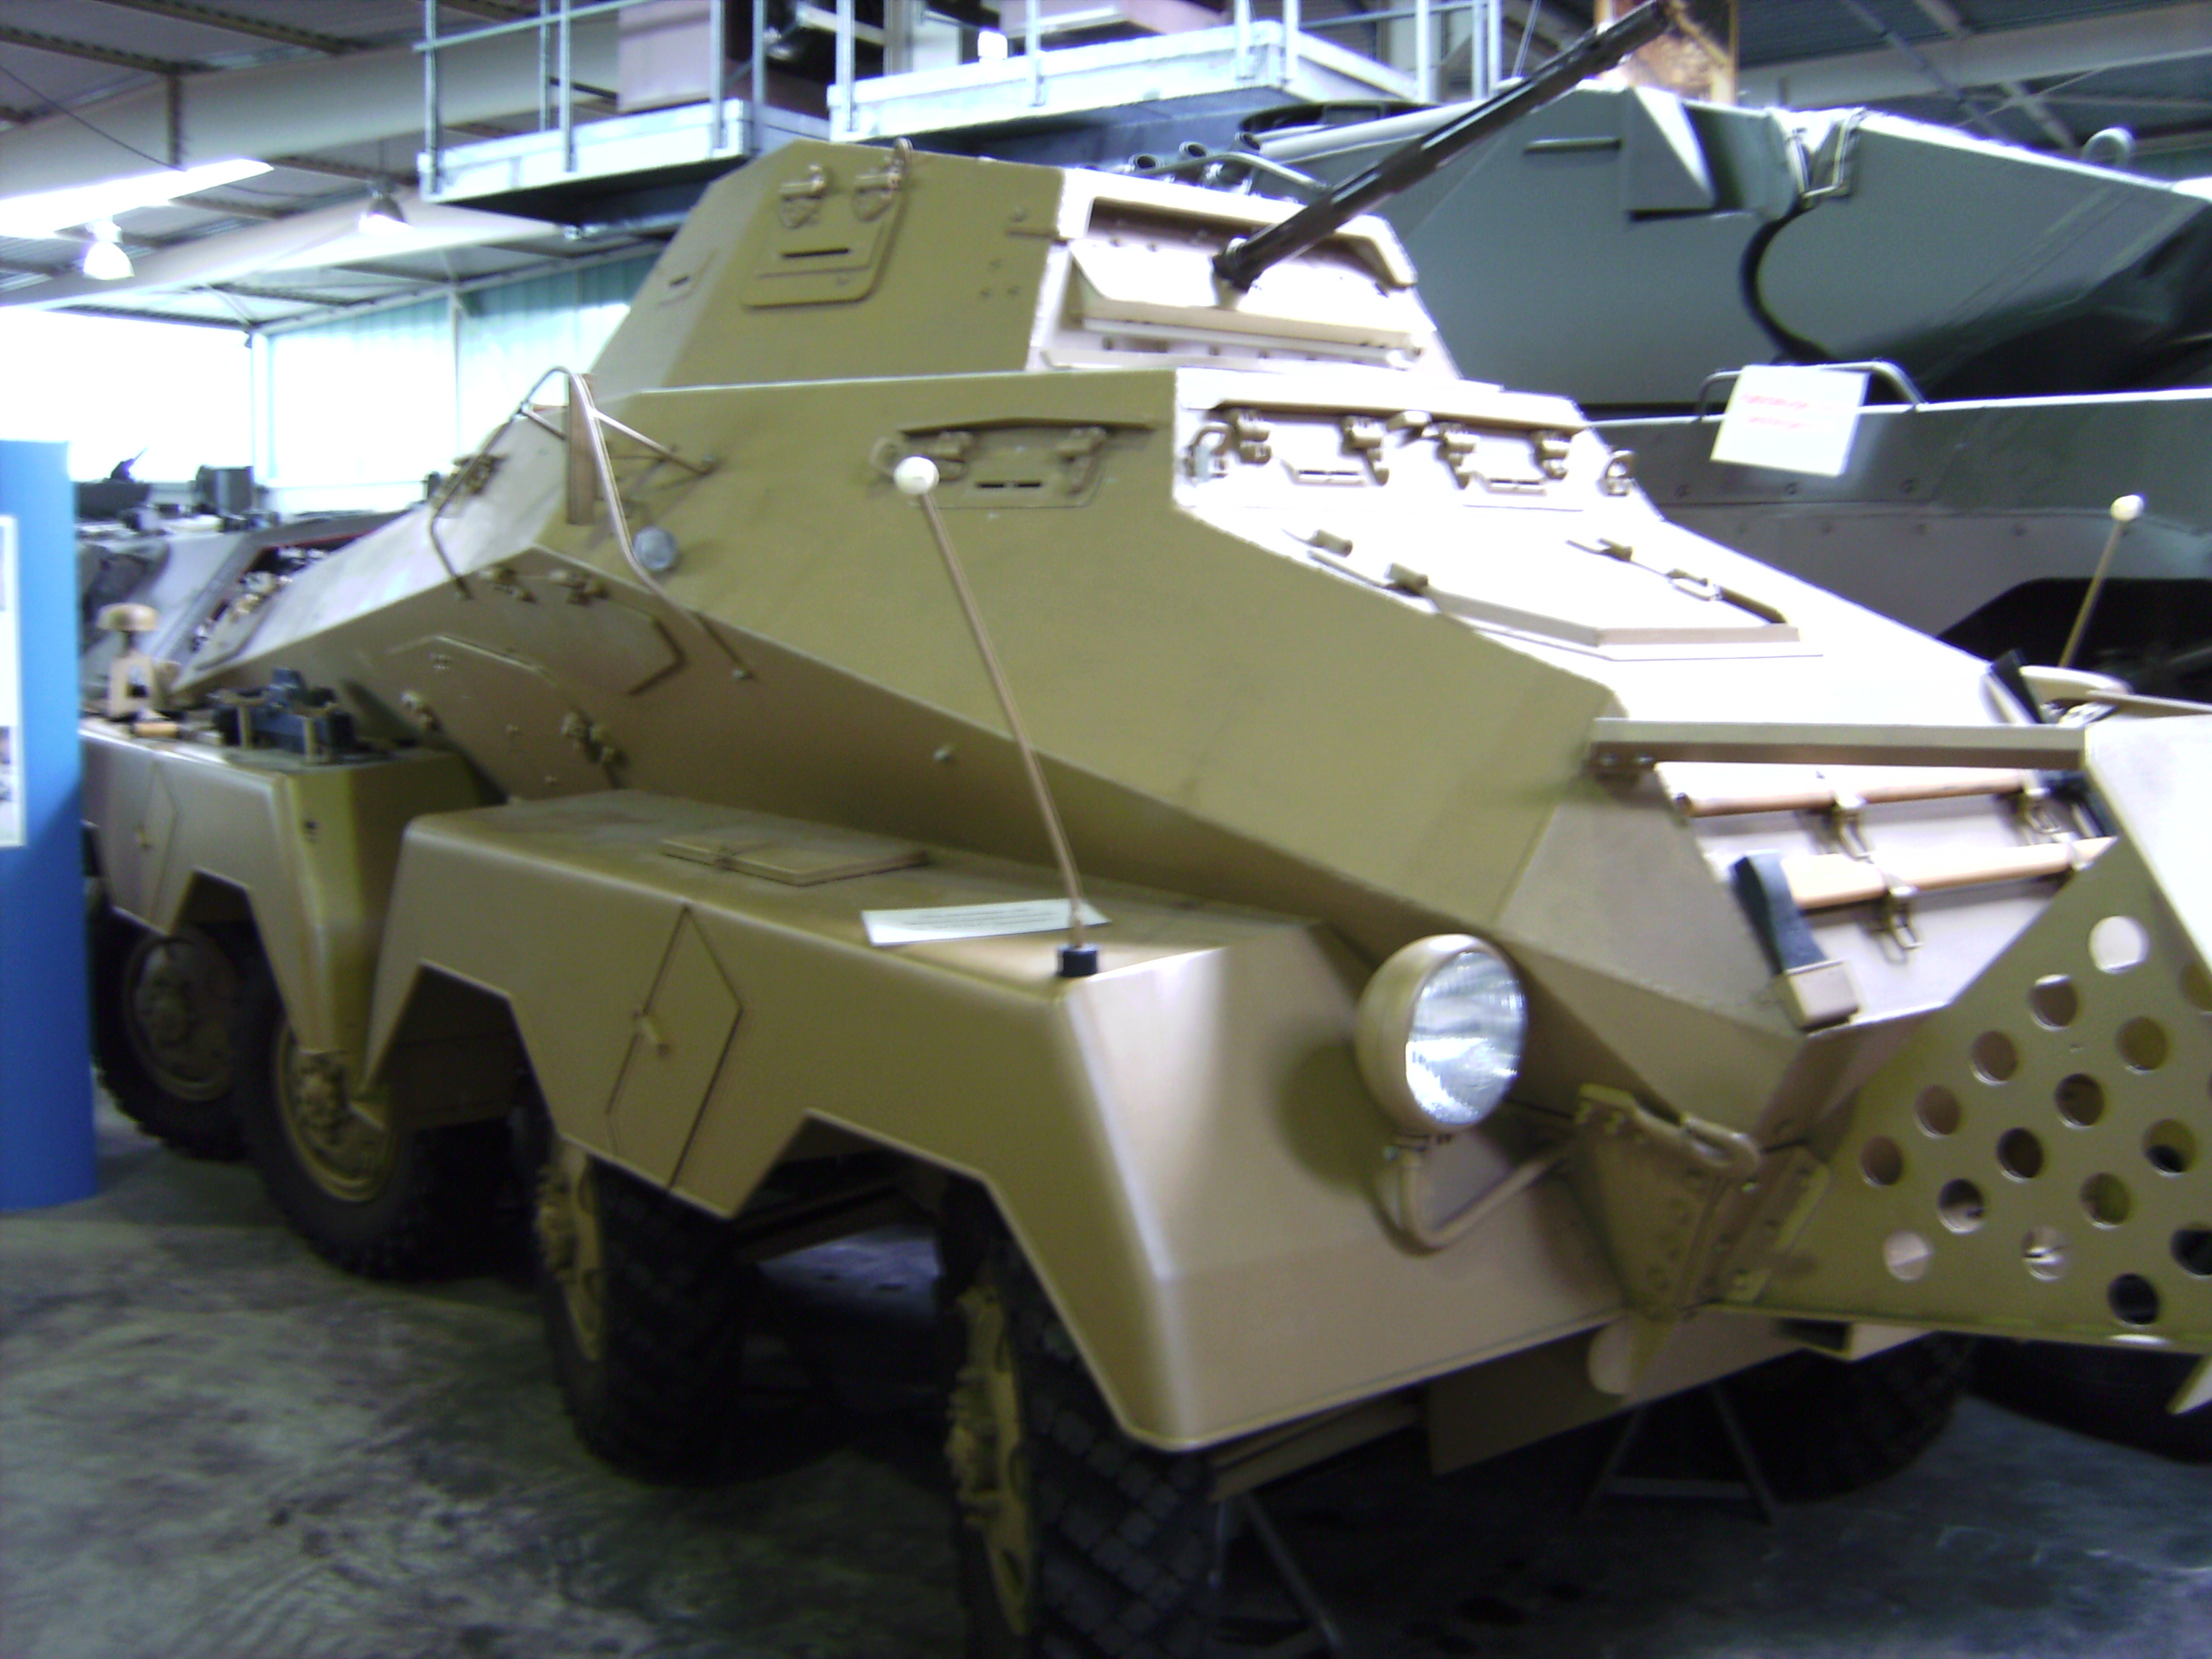
Spud ya these are pics from the littlefield original 222 after restoration .wished i could find pics of car before restoration .
they know its a car captured in 43 afrika and sent to england and later bought by jack littlefield ( there is a pic of it in afrika , you can spot it as it has welded side visors on turret and this is the only known example of this)
|
|
snidervolley
Full Member
Member since: April 2012
Posts: 346
Apr 27, 2012 14:51:48 GMT -5
Apr 27, 2012 14:51:48 GMT -5
|
Post by snidervolley on May 23, 2012 7:59:42 GMT -5
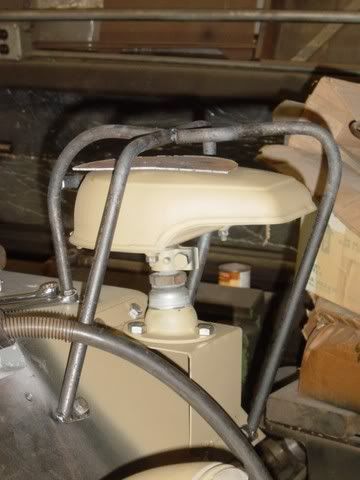 notek light and wire cage |
|
|
|
Post by spud on May 23, 2012 8:02:51 GMT -5
looks really good
|
|
snidervolley
Full Member
Member since: April 2012
Posts: 346
Apr 27, 2012 14:51:48 GMT -5
Apr 27, 2012 14:51:48 GMT -5
|
Post by snidervolley on May 23, 2012 8:06:54 GMT -5
damn your fast
|
|
|
|
Post by spud on May 23, 2012 9:35:34 GMT -5
lol yea they keep telling me that ;D
|
|
snidervolley
Full Member
Member since: April 2012
Posts: 346
Apr 27, 2012 14:51:48 GMT -5
Apr 27, 2012 14:51:48 GMT -5
|
Post by snidervolley on May 24, 2012 10:12:19 GMT -5
dirty rain water streak weathering ? any ideas
|
|
snidervolley
Full Member
Member since: April 2012
Posts: 346
Apr 27, 2012 14:51:48 GMT -5
Apr 27, 2012 14:51:48 GMT -5
|
Post by snidervolley on May 25, 2012 15:59:40 GMT -5
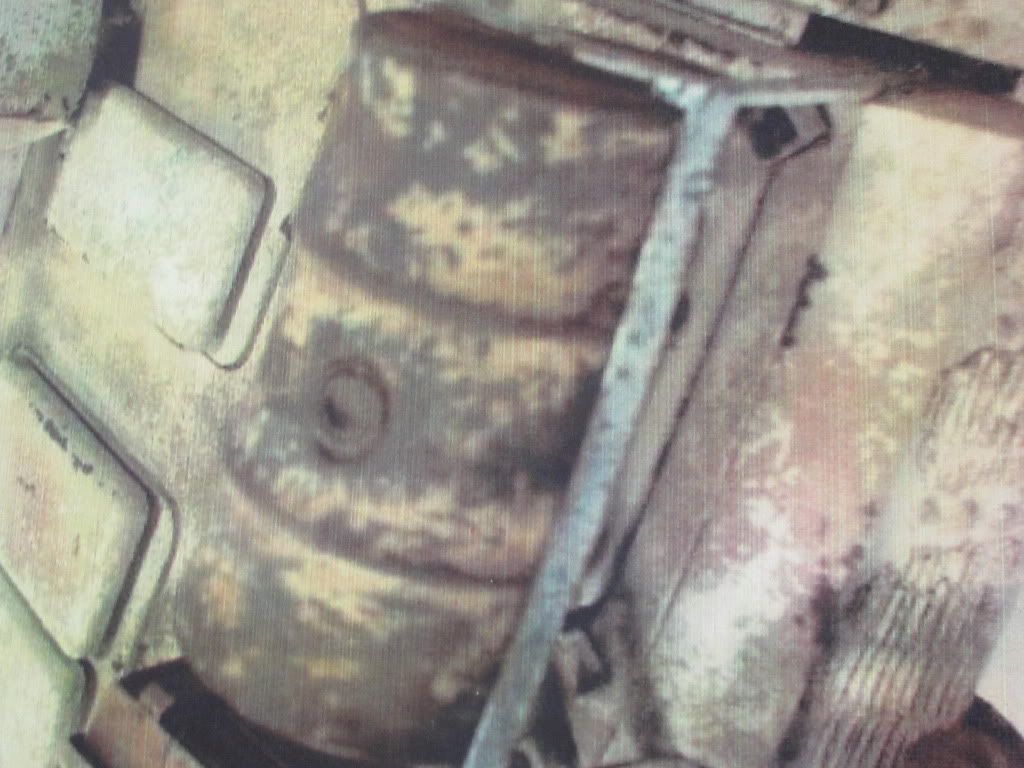
 nice close up in orig color of paint and how it could be applied it was supplied in paste form and has been applied here in a not so thinned state as can been seen on the upper hull . |
|
multicam
Senior Member

Member since: January 2012
Nate
Posts: 2,039
Jan 10, 2012 14:35:41 GMT -5
Jan 10, 2012 14:35:41 GMT -5
|
Post by multicam on May 26, 2012 10:39:03 GMT -5
Great work man! Everything is looking spot on:) I especially like the turret and grenade screens;)
|
|
bigjohn
Reviews member 
Member since: December 2011
John Hale
Posts: 3,438
Dec 21, 2011 2:17:45 GMT -5
Dec 21, 2011 2:17:45 GMT -5
|
Post by bigjohn on May 26, 2012 11:32:55 GMT -5
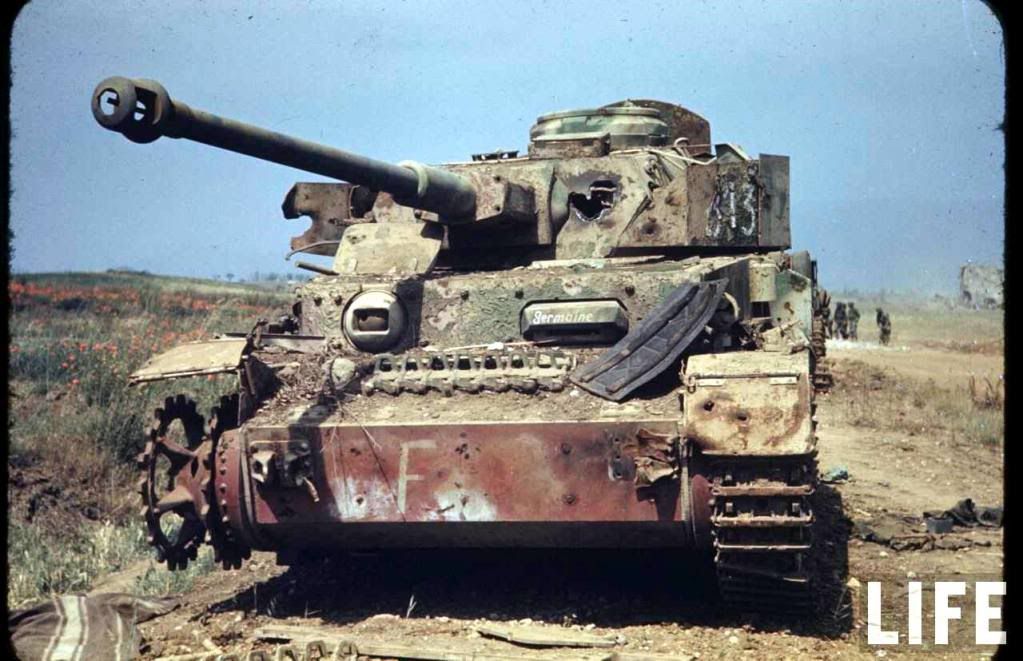
That’s an interesting picture of that Pz IV. It looks as if the lower hull is still in red primer. It’s a nice contradiction to the “No vehicles left the factory with primer showing” crowd.
|
|
bigjohn
Reviews member
Member since: December 2011
John Hale
Posts: 3,438
Dec 21, 2011 2:17:45 GMT -5
Dec 21, 2011 2:17:45 GMT -5
|
Post by bigjohn on May 26, 2012 12:14:18 GMT -5
Hi
I just finished up reading this thread and have some thoughts on weathering. These are only my thoughts and have not been proven, but is an idea of how it might be weathered.
Let’s look at the career of an original vehicle.
It left the factor in Panzer gray. It was painted at the factory under controlled conditions, so you base color should be well adhered on a clean surface.
Once in the field, the vehicle saw service life and collected dust and dirt along with oil and grease seepage.
When it came time to repaint the vehicle to Sand of Dark yellow. The vehicle may or may not have been thoroughly cleaned. Some dirt and oil contamination were more than likely left behind causing a poor bond for the new top coat of paint.
So in theory, put a good stable base coat of Panzer gray down, then get the vehicle dirty and oily. Wash the dirt and grime off leaving a little in the nooks and crannies. Let the paint cure a bit, then pressure was the vehicle. The paint should come off in areas that underlying dirt or oil are presant.
In my opinion, This might be the best way to get a realistic looking chipping effect on a 1:1 scale model.
Like I said, this is just some thoughts that popped into my head, so I thought I would share them.
|
|
|
|
Post by spud on May 26, 2012 13:47:41 GMT -5
bj thats some really good thinking there i had no idea how one would do it on 1:1 and i can see how it would work
|
|
snidervolley
Full Member
Member since: April 2012
Posts: 346
Apr 27, 2012 14:51:48 GMT -5
Apr 27, 2012 14:51:48 GMT -5
|
Post by snidervolley on May 26, 2012 17:24:58 GMT -5
Big Jon
Thanks that sounds like a great idea to try out on my project , thanks for the input it will be atrial. And error thing thru this whole thing
I was already onto of the solid base coat of grey and was going to try to use lesser quality paint and scrape and sand but your idea will be a much quicker more authentic approach .
Outstanding red team get you case of beer for that one
|
|
snidervolley
Full Member
Member since: April 2012
Posts: 346
Apr 27, 2012 14:51:48 GMT -5
Apr 27, 2012 14:51:48 GMT -5
|
Post by snidervolley on May 26, 2012 17:27:31 GMT -5
Multi cam
Ya look the drive sprockets are primer as well.
|
|
snidervolley
Full Member
Member since: April 2012
Posts: 346
Apr 27, 2012 14:51:48 GMT -5
Apr 27, 2012 14:51:48 GMT -5
|
Post by snidervolley on May 29, 2012 9:43:42 GMT -5
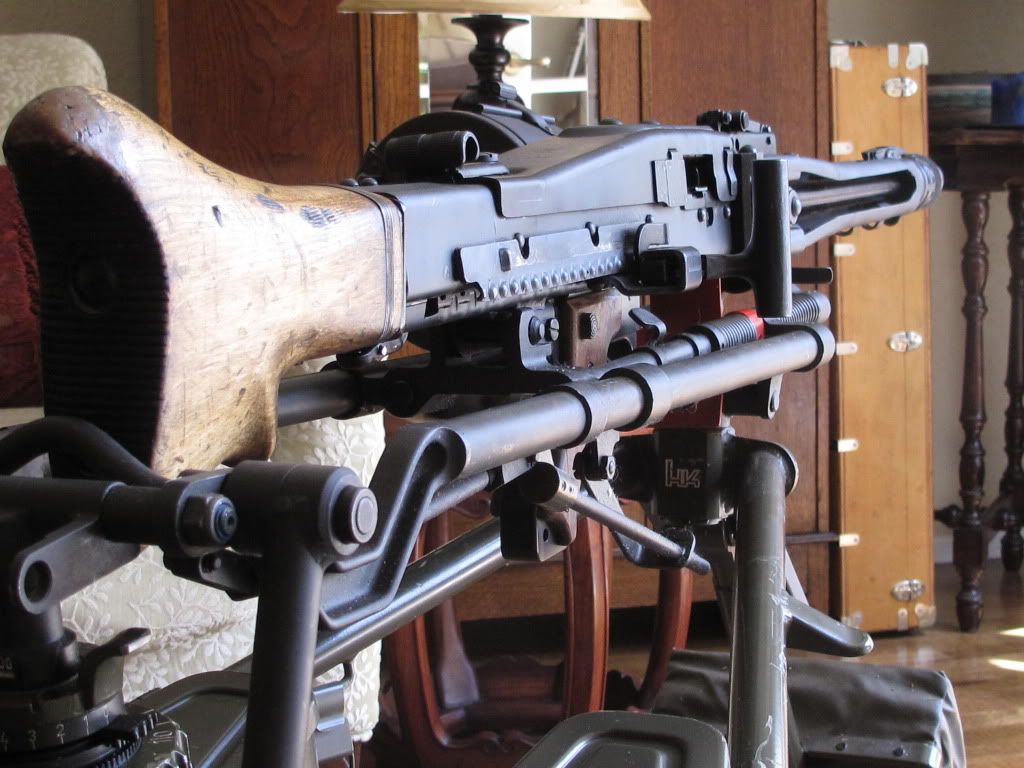 mg 42 |
|
|
|
Post by 406 Silverado on May 29, 2012 13:38:16 GMT -5
Very cool pics. Good advice from John as well.
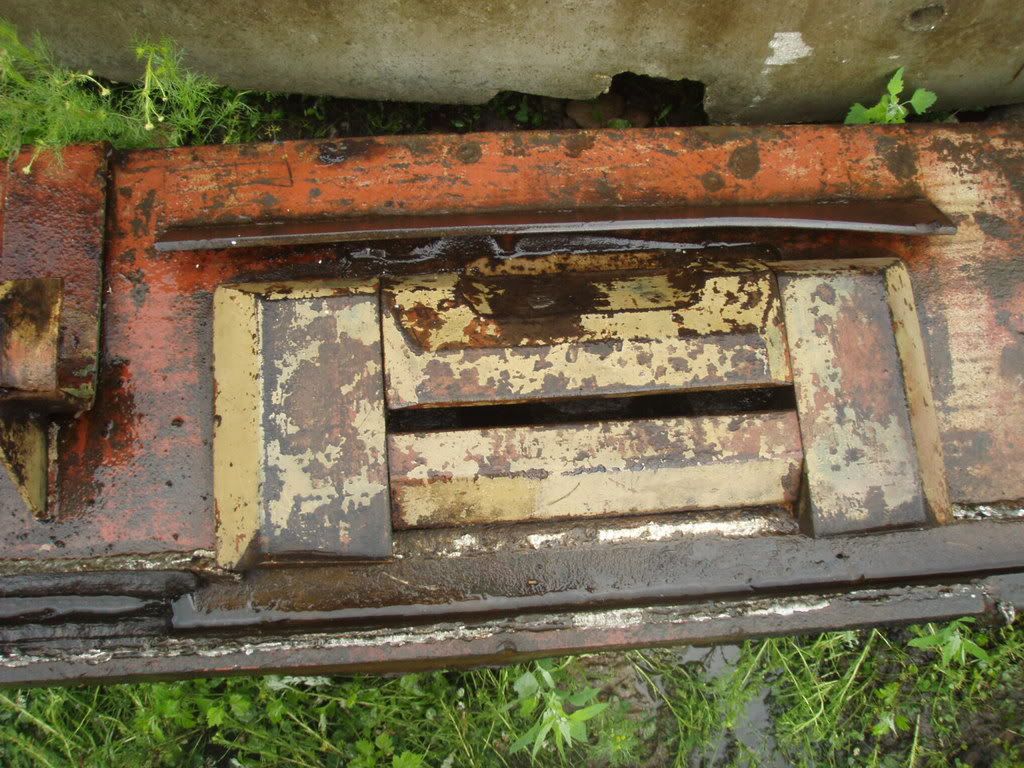
I do have to make a correction, or rather explain the red oxide front plate. It did not leave the factory in primer. This plate is missing the bolted on additional armor plate. PZ IV and III's had these bolted on to increase the armor thickness , before they went with one thick plate.
You can make out the snapped bolts in the pics.
|
|
snidervolley
Full Member
Member since: April 2012
Posts: 346
Apr 27, 2012 14:51:48 GMT -5
Apr 27, 2012 14:51:48 GMT -5
|
Post by snidervolley on May 29, 2012 15:52:05 GMT -5
you are so correct
|
|
snidervolley
Full Member
Member since: April 2012
Posts: 346
Apr 27, 2012 14:51:48 GMT -5
Apr 27, 2012 14:51:48 GMT -5
|
Post by snidervolley on May 29, 2012 19:51:12 GMT -5
Upon re looking , I question how the tow brackets are still there if frontal plate is blown off and there appears to be no eadace of frontal hit?are you sure that Wasn't track stowage ?
|
|
snidervolley
Full Member
Member since: April 2012
Posts: 346
Apr 27, 2012 14:51:48 GMT -5
Apr 27, 2012 14:51:48 GMT -5
|
Post by snidervolley on May 30, 2012 9:07:47 GMT -5
 front glacias with drivers visor |
|
|
|
Post by wbill76 on May 30, 2012 12:06:04 GMT -5
Upon re looking , I question how the tow brackets are still there if frontal plate is blown off and there appears to be no eadace of frontal hit?are you sure that Wasn't track stowage ? Look again...the vehicle's left hand bracket is completely gone...only the right bracket is in place and the extra armor plate that was common for this variant is clearly missing, exposing the red oxide of the hull underneath. This poor Pz IV took quite a beating. |
|