brembo--Rest In Peace
Full Member
  
Member since: September 2012
RIP--04 October 2019
Posts: 264
Sept 7, 2012 4:35:14 GMT -5
Sept 7, 2012 4:35:14 GMT -5
|
Post by brembo--Rest In Peace on Sept 18, 2012 7:09:25 GMT -5
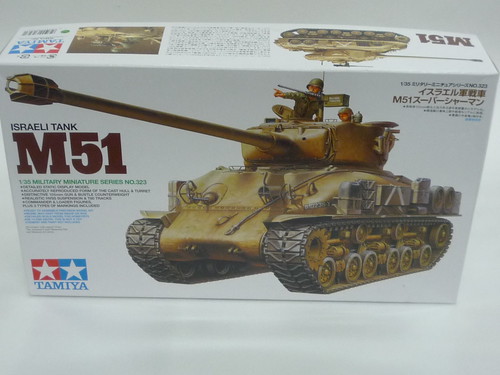 M51 box art M51 box art by Brembo2012, on Flickr I've been keen to start this kit ever since i started research for my recently completed tamiya M1 IDF Sherman. For some reason the M1 seems to have the name 'super sherman' attached to it also, but for me the M51 is the true Super Sherman....its wider, its bigger, its gun is enormous and it represents the ultimate extension of the Sherman lineage. 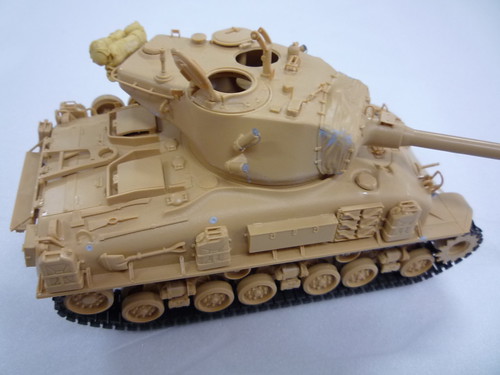 armour 006 armour 006 by Brembo2012, on Flickr So i had to be paitent and wait till the M1 was completed before i started this one! its a typical tamiya build....no fuss, good fit, clear instructions and there were no surprizes in the initial build up. There was some minor filling and sanding to be done around the mantlet canvas cover.  armour 004 armour 004 by Brembo2012, on Flickr i also added my own towcable from lead wire, fashioned an attachment point on the front hull trans cover, and also put in the front guard supports from plastic card ( these are always missing on Tamiya kits). Lastly i replaced the headlight cover with a lead foil replacement which is much thinner than the placky bit. in this pic i've also added a set of packs to the rear of the turret bustle. adding more stowage was the next step! 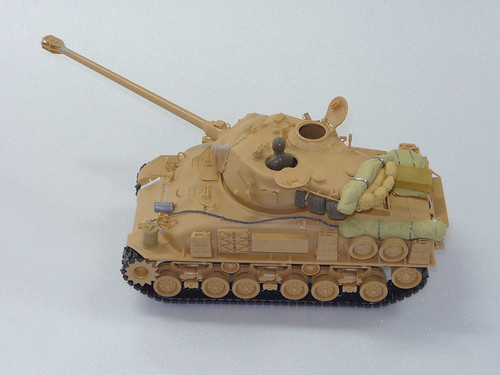 005 005 by Brembo2012, on Flickr from here i organised a number of items for the rear deck, as in service pics show these tings festooned with eqpt, and that was the feel i was looking for. So to the rear i've added rolled and covered canvas tarps (from milliput) ammo crates and extra packs around the turret rear. 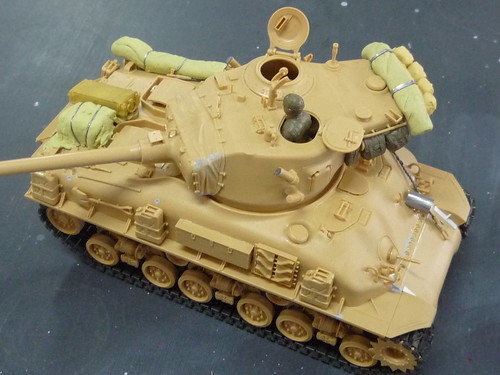 P1020560 P1020560 by Brembo2012, on Flickr im close to laying some paint down, so that will be the next step... |
|
DieselRocket.
Full Member
  
Member since: September 2012
Fuh-gedda-bowd-it!
Posts: 122
Sept 9, 2012 7:04:57 GMT -5
Sept 9, 2012 7:04:57 GMT -5
|
Post by DieselRocket. on Sept 18, 2012 8:17:44 GMT -5
I love this kit! Every time I surf Sprue Brothers I am tempted. Your photos tempt me more. But, I have the Dragon version in my stash... just can't get past the guilt I would feel buying another one!
|
|
|
|
Post by TRM on Sept 18, 2012 8:21:41 GMT -5
Buy 2, buy 2!!! ;D ;D Looking real nice so far...keep it going!!! Mmmmm....Paint!!!  |
|
|
|
Post by spud on Sept 18, 2012 8:30:25 GMT -5
very nice
|
|
Deleted
Member since: January 1970
Posts: 0
Nov 25, 2024 13:42:27 GMT -5
Nov 25, 2024 13:42:27 GMT -5
|
Post by Deleted on Sept 18, 2012 12:13:41 GMT -5
Yes indeed another fine build and probably a kit that will find it's way to the stash soon! Nice work so far
|
|
|
|
Post by wbill76 on Sept 18, 2012 17:43:12 GMT -5
The ultimate Sherman, looking forward to seeing what you do with this one!
|
|
bigjohn
Reviews member    
Member since: December 2011
John Hale
Posts: 3,438
Dec 21, 2011 2:17:45 GMT -5
Dec 21, 2011 2:17:45 GMT -5
|
Post by bigjohn on Sept 18, 2012 20:26:32 GMT -5
Nice kit, and nice progress!
Kyle, the guilt will go away, LOL
|
|
|
|
Post by bbd468 on Sept 18, 2012 21:19:15 GMT -5
Nice kit, and nice progress! Kyle, the guilt will go away, LOL John, ill talk him into buying it and sell Dragon kit to me cheap! ;D  Brembo, That is one sweet build bud! Im looking forward to see more.  |
|
brembo--Rest In Peace
Full Member
  
Member since: September 2012
RIP--04 October 2019
Posts: 264
Sept 7, 2012 4:35:14 GMT -5
Sept 7, 2012 4:35:14 GMT -5
|
Post by brembo--Rest In Peace on Sept 18, 2012 23:45:37 GMT -5
Well Nemo, I'd be keen to take your academy M51!.....if for no other reason than to compare it with the Tamiya build. But it is also the later version of the M51 and that in itself is interesting (to me). So place it in the matter transporter and key in ...N...Z...LOL.....and i will turn it into the tamiya one.
|
|
brembo--Rest In Peace
Full Member
  
Member since: September 2012
RIP--04 October 2019
Posts: 264
Sept 7, 2012 4:35:14 GMT -5
Sept 7, 2012 4:35:14 GMT -5
|
Post by brembo--Rest In Peace on Sept 18, 2012 23:52:18 GMT -5
latest progress....  P1020567 P1020567 by Brembo2012, on Flickr M51 gets its undercoat/basecoat in Tamiya flat black...I love the smell of acrylic in the morning...  P1020569 P1020569 by Brembo2012, on Flickr Hull is not quite done, getting into those nooks and crannies is quite an art.  I'll leave this coat to tack off and come back in the morning to seal up the missed areas and tackle the turret....  |
|
brembo--Rest In Peace
Full Member
  
Member since: September 2012
RIP--04 October 2019
Posts: 264
Sept 7, 2012 4:35:14 GMT -5
Sept 7, 2012 4:35:14 GMT -5
|
Post by brembo--Rest In Peace on Sept 23, 2012 0:17:52 GMT -5
|
|
|
|
Post by wbill76 on Sept 23, 2012 16:29:14 GMT -5
I agree with Dicky...looks awful mean in the straight black!  |
|
brembo--Rest In Peace
Full Member
  
Member since: September 2012
RIP--04 October 2019
Posts: 264
Sept 7, 2012 4:35:14 GMT -5
Sept 7, 2012 4:35:14 GMT -5
|
Post by brembo--Rest In Peace on Sept 29, 2012 19:47:06 GMT -5
Moving on.....started doing the base sand coats today  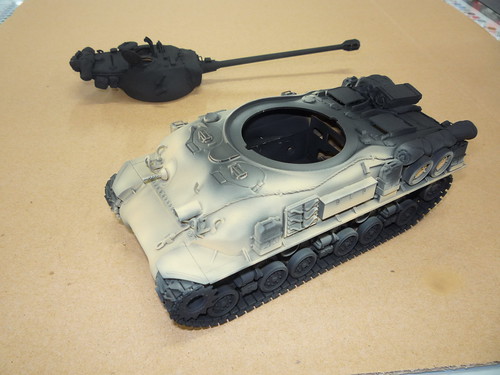 models 4 009 models 4 009 by Brembo2012, on Flickr The Tamiya instructions specify a spraycan colour TS 46 desert sand, i prefer to use acrylics, so at this stage the base is done using XF 58 Desert Yellow, thinned down to 50/50. This way i can build up the colour base in layers and still retain a pre-shade effect 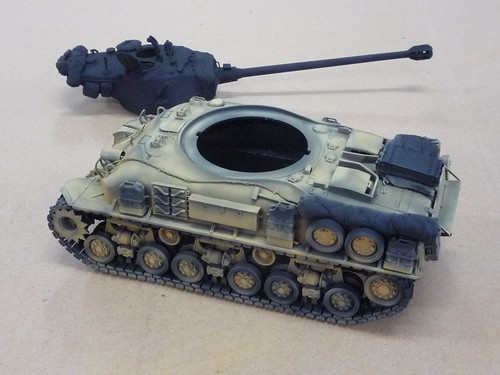 models 4 013 models 4 013 by Brembo2012, on Flickr In this pic the hull has had its initial shader coat, the turret is still to be done  models 4 012 models 4 012 by Brembo2012, on Flickr this overhead shows the preshade effect quite well. There are still plenty more layers to do, but best not obliterate it on the first go   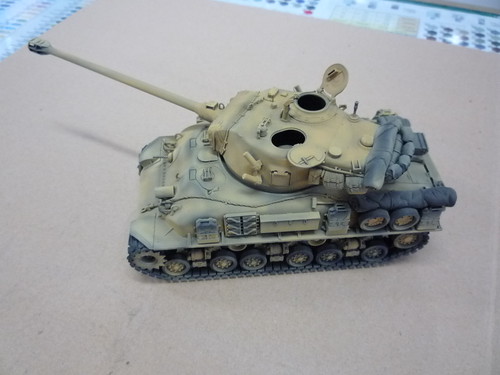 models 4 014 models 4 014 by Brembo2012, on Flickr this is the completed turret on the chassis, which is looking a little darker than the hull. I had to do a remix for the turret and there was some initial variation on the paint thickness. i'll even this out as i progress through with additional layers... |
|
bigjohn
Reviews member    
Member since: December 2011
John Hale
Posts: 3,438
Dec 21, 2011 2:17:45 GMT -5
Dec 21, 2011 2:17:45 GMT -5
|
Post by bigjohn on Sept 29, 2012 21:27:52 GMT -5
Looks sweet! I like how your building up the layers of color.
|
|
|
|
Post by bbd468 on Sept 30, 2012 22:43:42 GMT -5
Fine work there brembo! Love the paint job.  Gary |
|
|
|
Post by wbill76 on Oct 1, 2012 14:32:54 GMT -5
Nice job with the shading, coming along nicely!
|
|
brembo--Rest In Peace
Full Member
  
Member since: September 2012
RIP--04 October 2019
Posts: 264
Sept 7, 2012 4:35:14 GMT -5
Sept 7, 2012 4:35:14 GMT -5
|
Post by brembo--Rest In Peace on Oct 21, 2012 2:43:01 GMT -5
adding the Blend coat: 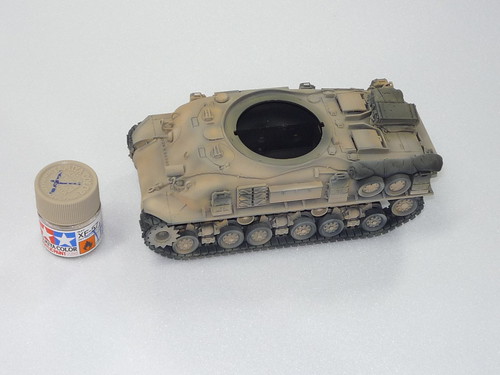 models 6 023 models 6 023 by Brembo2012, on Flickr the next colour used was Tamiya XF57 Buff, which is used both as a highlighter and as a blender to tie in the dark to light contrast. This helps give that modulated overhead light effect, as the top and upper surfaces receive a little more highlighting than the sides and lower chassis parts. There's no special secret to this technique, i do it by eye and by studying pictures of the real thing and looking at how the light effects differant surfaces (B&W pics are really useful for this). 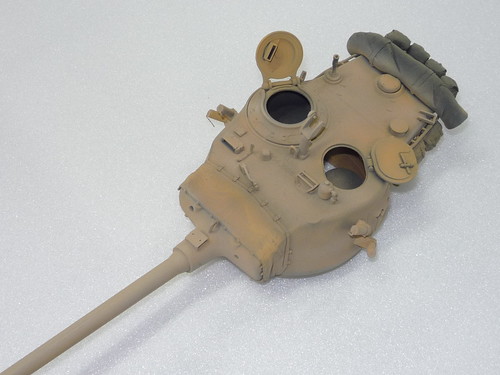 models 6 024 models 6 024 by Brembo2012, on Flickr This pic of the turret shows the difference in colour between the first base colour (as seen on the hatch inner surfaaces and the canvas mantlet cover) and lighter buff coat, quite well. 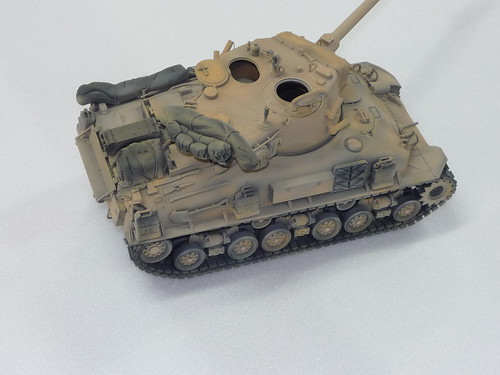 models 6 027 models 6 027 by Brembo2012, on Flickr The completed high light coat on the chassis!.....next step is to start blocking in all the detail painting on the tools, stowage, j-cans and spare track. after that i will prepare for markings....dry rubs first, then gloss coat prior to decals.....still plenty left to do!  but its starting to come to life  |
|
Deleted
Member since: January 1970
Posts: 0
Nov 25, 2024 13:42:27 GMT -5
Nov 25, 2024 13:42:27 GMT -5
|
Post by Deleted on Oct 21, 2012 2:59:08 GMT -5
really nice work I can see that the variations in colour will really help pop out the details
|
|
|
|
Post by wbill76 on Oct 21, 2012 13:29:21 GMT -5
Nice work with the color variations, really starting to come to life now.
|
|
|
|
Post by bbd468 on Oct 21, 2012 21:21:25 GMT -5
Love the color tones you have applied...looks fantastic!!!  Gary |
|
|
|
Post by wing_nut on Oct 24, 2012 23:08:39 GMT -5
Generally not a big Sherman fan. But I am becoming a Super Sherman fan. Looks great.
|
|
brembo--Rest In Peace
Full Member
  
Member since: September 2012
RIP--04 October 2019
Posts: 264
Sept 7, 2012 4:35:14 GMT -5
Sept 7, 2012 4:35:14 GMT -5
|
Post by brembo--Rest In Peace on Oct 25, 2012 0:18:35 GMT -5
managed to squeeze in the block painting on the stowage, tracks, j-cans etc...today  models 8 002 models 8 002 by Brembo2012, on Flickr i've been trying out these new Italeri paints on this task and so far so good. 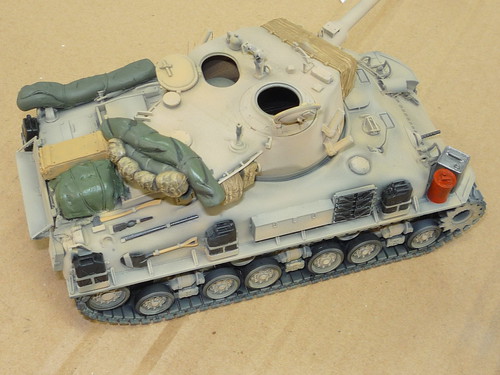 models 8 004 models 8 004 by Brembo2012, on Flickr at this stage im just getting the base colours in place, i'll attend to shading a little later on, after i get done with filters and washes. 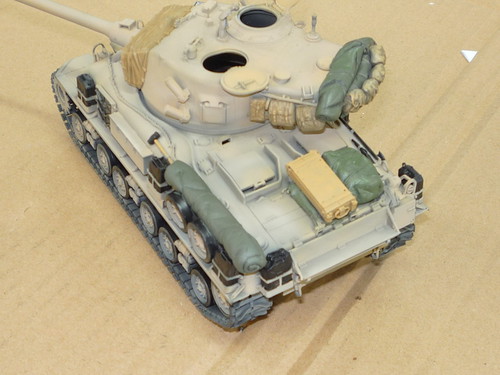 models 8 003 models 8 003 by Brembo2012, on Flickr Ive also added in the 2 oil cans on the front fender...a late addition to the vehicle stores but quite commonly seen in this posi on IDF shermans. another layer of detail added....the more i do the more i want to finish it! giddy up  ;D  |
|
|
|
Post by bullardino on Oct 25, 2012 2:56:57 GMT -5
Nice, I like it  Can't wait to see another update. |
|
bigjohn
Reviews member    
Member since: December 2011
John Hale
Posts: 3,438
Dec 21, 2011 2:17:45 GMT -5
Dec 21, 2011 2:17:45 GMT -5
|
Post by bigjohn on Oct 25, 2012 3:32:59 GMT -5
This is looking pretty sweet!
|
|
|
|
Post by wbill76 on Oct 25, 2012 12:22:58 GMT -5
Detail work is really adding some nice contrasts and bringing this one to life!
|
|
danb.
Reviews member     March 2013 MoM Winner
Member since: November 2011
Posts: 2,808
Nov 17, 2011 9:22:52 GMT -5
Nov 17, 2011 9:22:52 GMT -5
|
Post by danb. on Oct 25, 2012 12:48:23 GMT -5
You cant go wrong with a Tamiya kit this build is looking awesome a Super Sheman i like  keep up the good work Dan B |
|
brembo--Rest In Peace
Full Member
  
Member since: September 2012
RIP--04 October 2019
Posts: 264
Sept 7, 2012 4:35:14 GMT -5
Sept 7, 2012 4:35:14 GMT -5
|
Post by brembo--Rest In Peace on Oct 27, 2012 2:55:57 GMT -5
Todays Updates:  I finaly re-located my dry rub israeli markings which had been holding things up a little. so today the turret numbers were applied 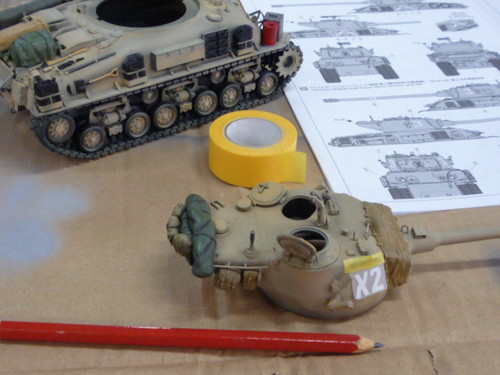 models 9 001 models 9 001 by Brembo2012, on Flickr these are the verlinden markings and were prettystraight forward to apply (i had used the same sheet on my M1) and i have to say that many years of doing those patterson blick dry rub picture books as a boy came in quite handy... ;D 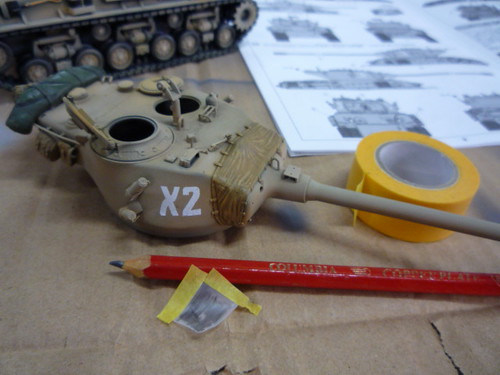 models 9 002 models 9 002 by Brembo2012, on Flickr i consulted my reference for the extra inspiration to move things forward, in this case the excellant article titled 'Sinai Warrior' in Tamiya model magazine. 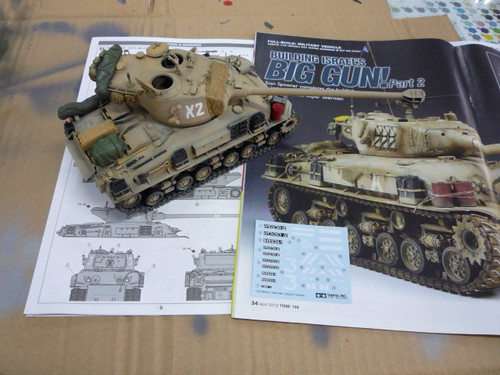 models 9 003 models 9 003 by Brembo2012, on Flickr after the dry rubs were settled in a coat of Tamiya acrylic gloss was applied liberally in prep for both the waterslide decals and the initial washes/filters. Shiny tanks are a bit of an aberation in my mind but a neccesary evil as part of the process... 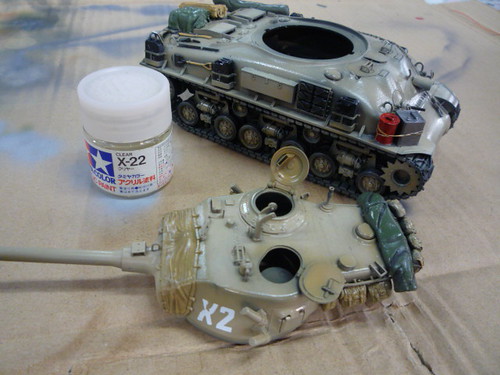 models 9 005 models 9 005 by Brembo2012, on Flickr this is now left overnite to dry off.....decals tomorrow  in the meantime a new bit turned up today to add to the tank  So, i was tempted by the new Tasca M2 50 cal kit for vehicle mounts. the kit 50 is ok but this one looks better! 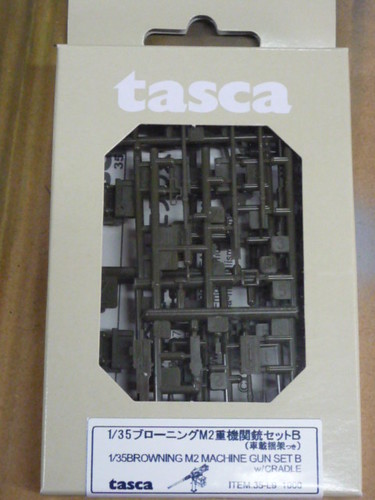 models 9 004 models 9 004 by Brembo2012, on Flickr also the crew got a shake out today, these are the Verlinden isreali crew and i will be using 2 of the 3 figures for this tank, havent decided which ones yet, so i'll play with the poses to see which ones look best.  models 7 012 models 7 012 by Brembo2012, on Flickr |
|
|
|
Post by `Boots` on Oct 27, 2012 16:16:43 GMT -5
Looking real sweet Rich............great work so far  |
|
brembo--Rest In Peace
Full Member
  
Member since: September 2012
RIP--04 October 2019
Posts: 264
Sept 7, 2012 4:35:14 GMT -5
Sept 7, 2012 4:35:14 GMT -5
|
Post by brembo--Rest In Peace on Oct 27, 2012 23:27:55 GMT -5
Decals on today..... 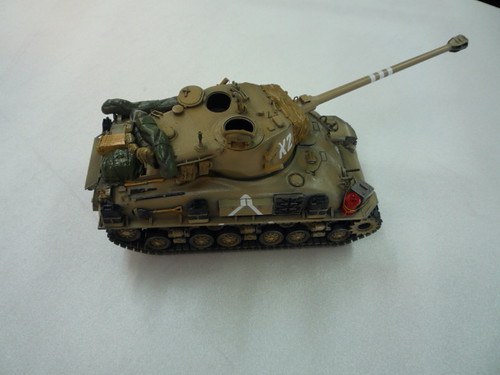 models 9 004 models 9 004 by Brembo2012, on Flickr putting thos white inverted 'V's on is a fun job  . hot tip start at the top an work down! 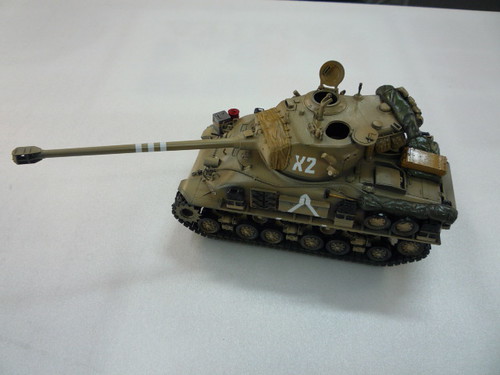 models 9 003 models 9 003 by Brembo2012, on Flickr the rest were a doodle..  So...........now it's time to start the weathering, let the games begin  |
|
|
|
Post by wbill76 on Oct 28, 2012 10:39:11 GMT -5
Markings look good! The Tasca .50 is one of if not the best available on the market in styrene. Looking forward to the weathering!
|
|