Whiterook
Full Member

Member since: March 2013
Posts: 837
Mar 13, 2013 15:29:19 GMT -5
Mar 13, 2013 15:29:19 GMT -5
|
Post by Whiterook on Mar 16, 2013 19:09:43 GMT -5
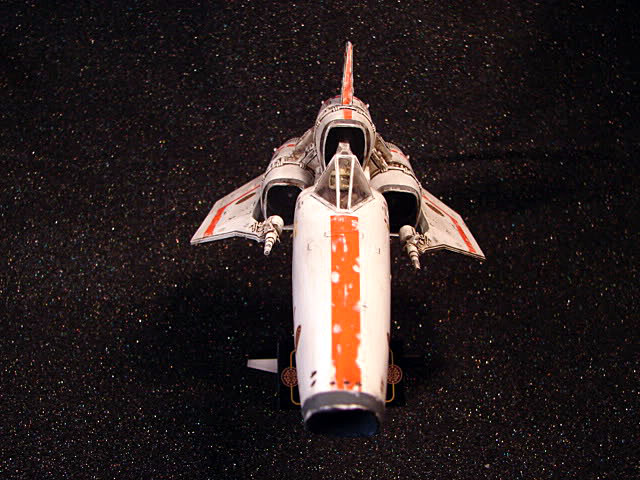
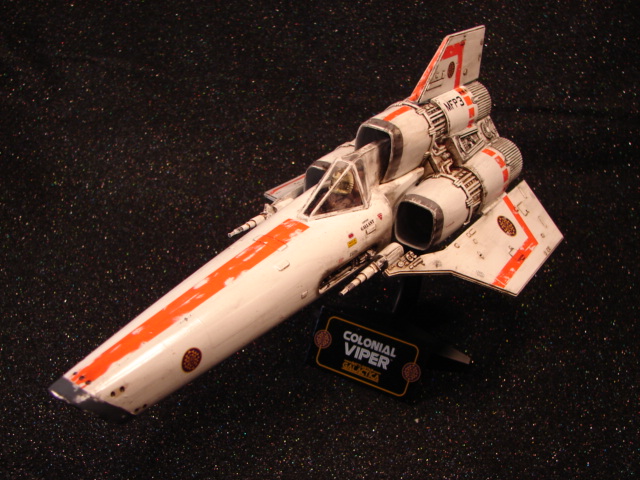
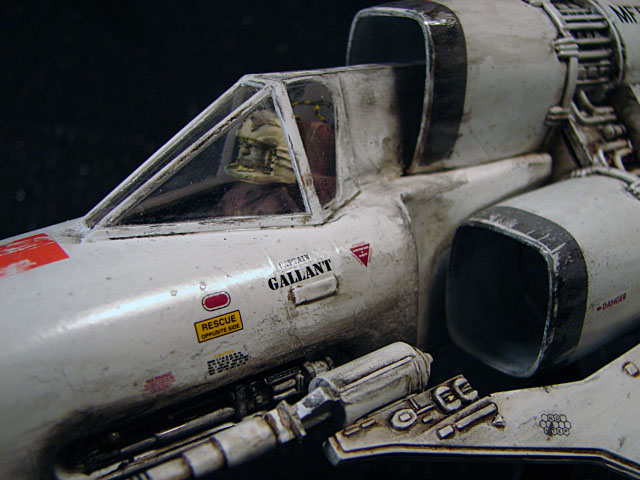
And finally, the point at which some of you have been waiting to see (including me at this stage!!!)....off with the canopy masks!!! But first, some reasoning behind some of the method to my madness: The early version Vipers as seen in the re-imagined series (I think these were the 'museum Vipers originally on display, for the transition of the soon-to-be decommissioned Galactica to a museum), and particularly in "The Plan", as well as the last year of the show... were pretty glossy; yet the original series seemed to be more satin. I chose a combination in the end. I really didn't like the look of the gloss, and especially where there is some heavy weathering on it. I sprayed a dullcoat on her....and....well....didn't like that either. So I brushed on a light gloss to areas and left others satin. I tried to go with the fact that aging would turn some areas satin, but in my view, not all. Ok, back to the build... This is the Recon Viper in all her glory. I'll post up some more fitting Finished pictures at the end, but for now, this is what the final product will look like before display: 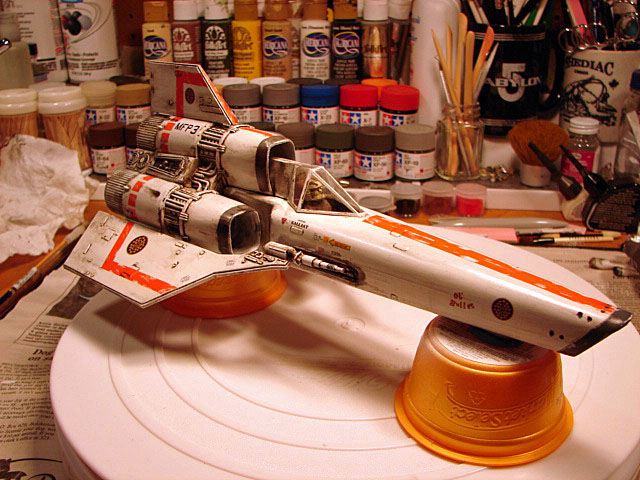 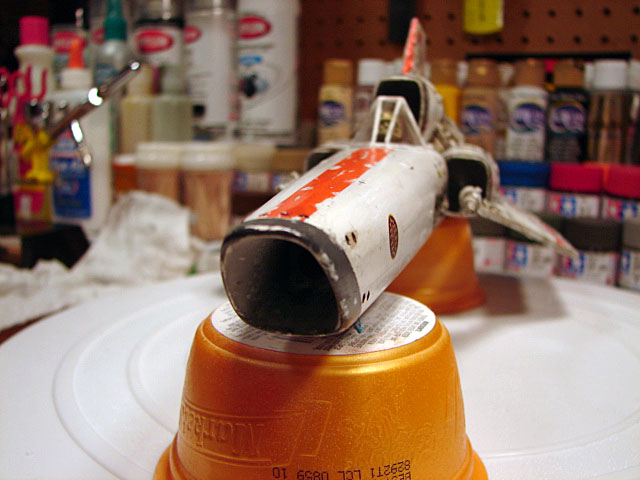 The canopy came out very good, compared to previous efforts of mine on other models. This was the first time I believe I used masks so extensively and successfully. Note that I have used real airbrushing masking material (the clear stuff, and very high end), but in the end, I guess I'm just into simple methods, and the Painter's tape worked a peach! And what a difference airbrushing the 'metal' fame of canopies makes!!! 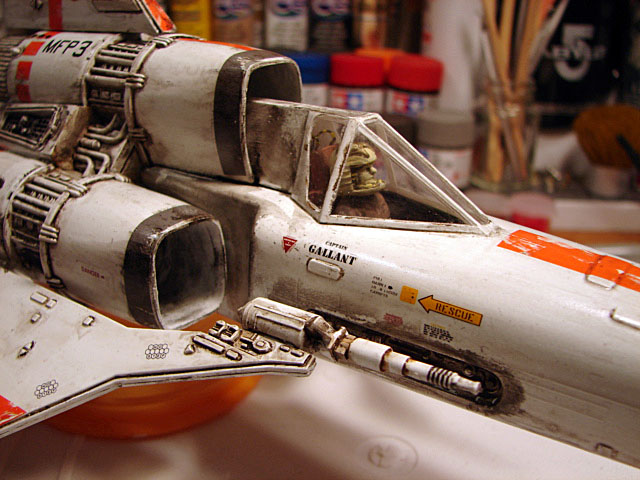 ...I tried to chip it lightly, and not go overboard. I also placed washes under the canopy to bring some depth and enhance the separation between canopy and fuselage. I also tried to indicate the chipping in the direction that space born particulate debris would have been sucked into the upper scoop; as well as the dirt and dustiness on the back canopy. 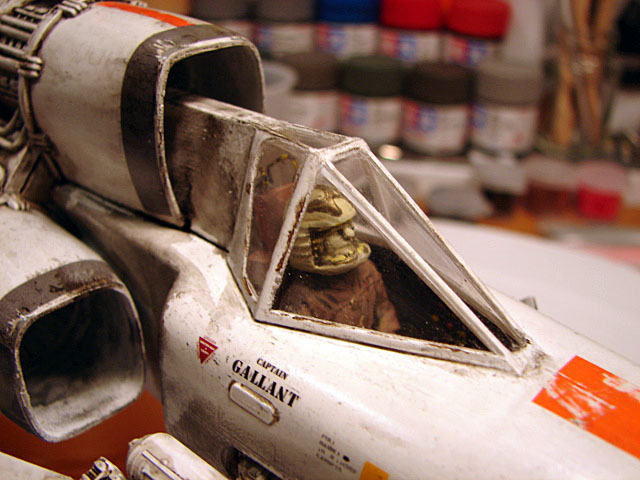 (Damn...even I have to admit that's beautiful, ROFLOL!!!!) The back edge of the fuselage would have had a bit of a dead-space whirlwind effect I believe, so I made it grimy. All in interpretation, I guess.) Personally, and all kidding aside, I really did like the way it came out. And also, it was really nice to finally see the Pilot again! |
|
Whiterook
Full Member
Member since: March 2013
Posts: 837
Mar 13, 2013 15:29:19 GMT -5
Mar 13, 2013 15:29:19 GMT -5
|
Post by Whiterook on Mar 16, 2013 19:11:21 GMT -5
WR you did a awesome job fella.I'm loving this.Great sbs also.  Thanks, my friend!!! I feel like I may be overwhelming the pics here but, believe it or not, there were more, ha haaaa! Many thanks!  |
|
thenylongag
Full Member
Sept2013 MoM Winner
Member since: June 2012
Yes, we have 'NO' bananas
Posts: 304
Jun 7, 2012 11:20:57 GMT -5
Jun 7, 2012 11:20:57 GMT -5
|
Post by thenylongag on Mar 16, 2013 19:11:54 GMT -5
This is great stuff Mr Rook-san
I have seen people put the oil paint on cardboard to draw out alot of the excess oil and unwanted liquid and leave pure pigment
But why would you listen to me you seem to be doing wonderfully all by your self
But can i ask a question, why didn't you put a layer of primer on first?
Gag
|
|
Whiterook
Full Member
Member since: March 2013
Posts: 837
Mar 13, 2013 15:29:19 GMT -5
Mar 13, 2013 15:29:19 GMT -5
|
Post by Whiterook on Mar 16, 2013 19:19:31 GMT -5
This is great stuff Mr Rook-san I have seen people put the oil paint on cardboard to draw out alot of the excess oil and unwanted liquid and leave pure pigment But why would you listen to me you seem to be doing wonderfully all by your self But can i ask a question, why didn't you put a layer of primer on first? Gag Thanks mate! I'm not sure I understand the question though...do you mean in the very beginning before I started spraying the white? |
|
Whiterook
Full Member
Member since: March 2013
Posts: 837
Mar 13, 2013 15:29:19 GMT -5
Mar 13, 2013 15:29:19 GMT -5
|
Post by Whiterook on Mar 16, 2013 19:31:33 GMT -5
|
|
Whiterook
Full Member
Member since: March 2013
Posts: 837
Mar 13, 2013 15:29:19 GMT -5
Mar 13, 2013 15:29:19 GMT -5
|
Post by Whiterook on Mar 16, 2013 19:51:44 GMT -5
Well folks, we're wrapping up build part of the Colonial Recon Viper! Up next was the base....and actually, it's a pretty solid base that is included with the kit. I assembled it and let set. Nothing to really photograph in progress as it was a pretty straightforward four pieces glued together. And of course, sanded down all the flash, mold lines and pin marks. The excitement though, was in the airbrushing! I found the magic mixture of Tamiya Acrylic to 91% Isopropyl; and decreased my psi down to 20 psi (I had the foolish thing on 40 psi!!!).....magic! Sprayed on with control and ease not hitherto experienced, my friends ....AWESOME! Felt like I actually knew what the hell I was doing! 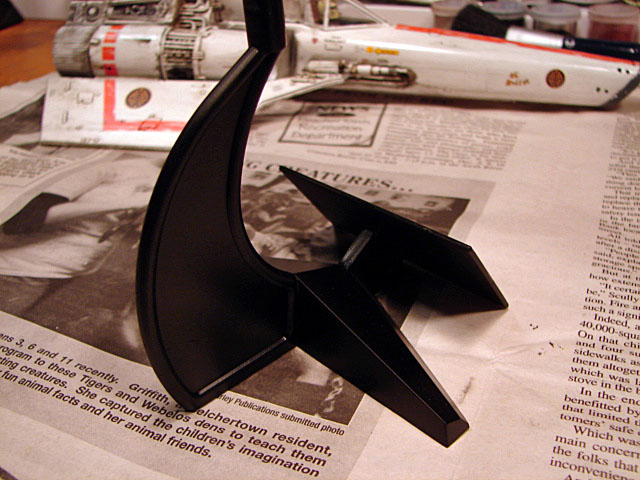 I always felt like I was rushing with the side-to-side swiping coats, and turns out it's because I was! The pressure was so frakkin' high that I had to haul a$$ or experience the dreaded runs (no, not that kind!). This was much more ease and please, so to speak. Used Tamiya Semi-gloss black. Next, some Future floor polish brushed on with a wide artist brush, on the name plate for a high gloss..... 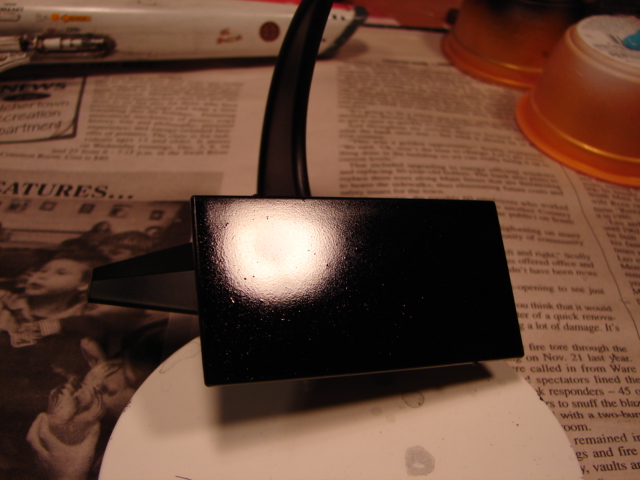 And then the decal.......  And yup...my famous cat food cups....a modeller's best friend! A final coat of Future went over the decal to seal it in and give it a good protective coat. The trick with the Future is to do only a single swipe of the art brush; two at most...and wet. Allowed to dry overnight, the Future floor acrylic coat levels all the brush lines..... 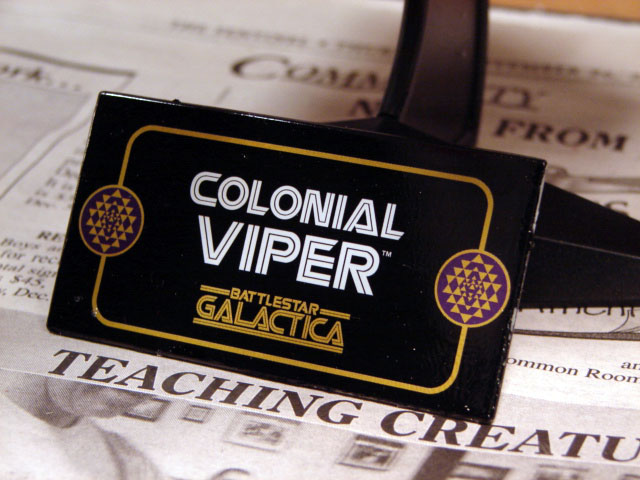 The base stand pops into the undercarriage of the Viper, and you can theoretically gimal the Viper to pose in different directions? I really don't know...it's a good friction fitting with a solid hold. 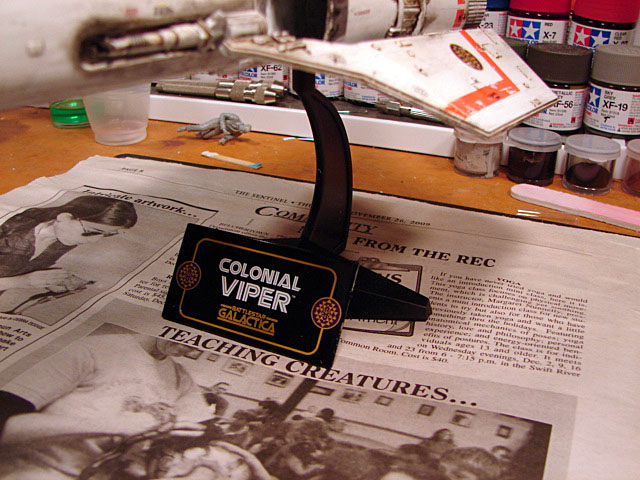 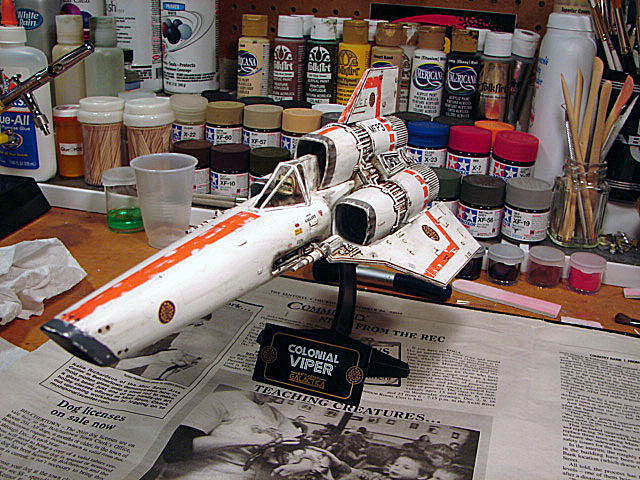 Conclusion on the building process: This was much more fun to build than I anticpated. What really got me was, the freedom to roll with it; to not be bound by trying to capture exact details, exact camo colors, etc. It could morph and become anything I wanted it to become. That energized my inspiration and turbocharged my experimentation and creativity. Everyone should step WAY out of the box every now and then; I am a firm believer in that now! I hope you enjoyed the ride as much as I did building her! And thanks for bearing with so many pics and posts in such a short time frame... AND DRUM ROLL PLEASE....... |
|
Whiterook
Full Member
Member since: March 2013
Posts: 837
Mar 13, 2013 15:29:19 GMT -5
Mar 13, 2013 15:29:19 GMT -5
|
Post by Whiterook on Mar 16, 2013 19:55:21 GMT -5
|
|
|
|
Post by Leon on Mar 16, 2013 20:01:27 GMT -5
WR that was an awesome ride,thanks.You nailed that,looks like it's ready for more action.  |
|
Whiterook
Full Member
Member since: March 2013
Posts: 837
Mar 13, 2013 15:29:19 GMT -5
Mar 13, 2013 15:29:19 GMT -5
|
Post by Whiterook on Mar 16, 2013 20:28:21 GMT -5
Many thanks!!! I just love that fighter, so it was awesome to not only build it finally, but to also customize it to play a small role in the lore. I remember watching the original series every week and it was s amazing to me. Of the builds I've done and will do, this will likely always be at the top 5 I'm most attached to.
|
|
|
|
Post by bbd468 on Mar 16, 2013 20:36:02 GMT -5
Fantastic Rook! Shes definitely a combat Veteran...you got the look just right IMO. Great thread too fella....Well done man! Gary |
|
|
|
Post by deafpanzer on Mar 16, 2013 22:17:32 GMT -5
Holy smokes!!! You are really rolling!!! It looks stunning already... can't wait to see next update!
|
|
venom1
Full Member
Member since: October 2012
Posts: 1,369
Oct 10, 2012 2:40:03 GMT -5
Oct 10, 2012 2:40:03 GMT -5
|
Post by venom1 on Mar 21, 2013 8:18:03 GMT -5
Fantastic work WR! As both a sci-fi and BSG fan, I say a hearty "Huzzah!!!!" Great work mate, she looks fantastically grubby! Just the way any decent self respecting space ship should look! Looking forward to your next exciting sci-fi modelling adventure..... Cheers, Sam  |
|
Whiterook
Full Member
Member since: March 2013
Posts: 837
Mar 13, 2013 15:29:19 GMT -5
Mar 13, 2013 15:29:19 GMT -5
|
Post by Whiterook on Mar 21, 2013 16:59:57 GMT -5
Thanks guys!!! My wife picked me up a Mk VII for Christmas. I've the old show original Cylon fighter, as well. Others on deck are: * A Babylon 5 Space Station * A Babylon 5 Space Station that I plan to scratch into one of the "lost" Babylon stations * A Babylon 5 Space Star Fury, likely to be made Psi-Corps or Ivanova's * A Klingon Battlecruiser |
|
|
|
Post by `Boots` on Mar 21, 2013 17:02:48 GMT -5
That turned out real sweeeet, just been thru this as i missed the start and a terrific job done indeed...........weathering looks spot on too me WR |
|
Whiterook
Full Member
Member since: March 2013
Posts: 837
Mar 13, 2013 15:29:19 GMT -5
Mar 13, 2013 15:29:19 GMT -5
|
Post by Whiterook on Mar 28, 2013 20:24:20 GMT -5
Thanks....I was very pleased to be stretching my use of weathering techniques on this kit. It was a fun build!
|
|
|
|
Post by 406 Silverado on Mar 29, 2013 13:25:58 GMT -5
Very cool WR and love the backdrop
|
|
Whiterook
Full Member
Member since: March 2013
Posts: 837
Mar 13, 2013 15:29:19 GMT -5
Mar 13, 2013 15:29:19 GMT -5
|
Post by Whiterook on Jan 26, 2019 21:09:22 GMT -5
Hi all! Been a very long time since I've been on the forum...apologies. I'm trying to get back to the bench to work on some kits. It's been a long time since I did any work on models, so hopefully 2019 will see a restart!!!
I came online for some inspiration, which I've already been finding. But while here, it dawned on me that the threads I did do back in the day had PhotoBucket links, which I don't use that service anymore so taking the lead from your Postimg.cc feature, went through this thread to get pictures back in (took me awhile to find the dang pics!!!). I'll try and find the pictures for my other builds and fix those in time.
Thanks!
|
|
buddho
Forum Moderator 
Member since: February 2019
Posts: 1,071 
MSC Staff
|
Post by buddho on Mar 29, 2019 15:32:31 GMT -5
Phantastic finish on an original Viper! This came out great.
|
|