totalize
Full Member
  
Member since: February 2013
Don't take yourself too seriously. It's just plastic.
Posts: 260 
|
Post by totalize on Apr 10, 2014 16:44:32 GMT -5
Hi Guys, I have been working on building the Hasegawa Ki-61 Hien and thought I would share my work here in case you haven't seen my build which is posted on another site. Here's the kit: 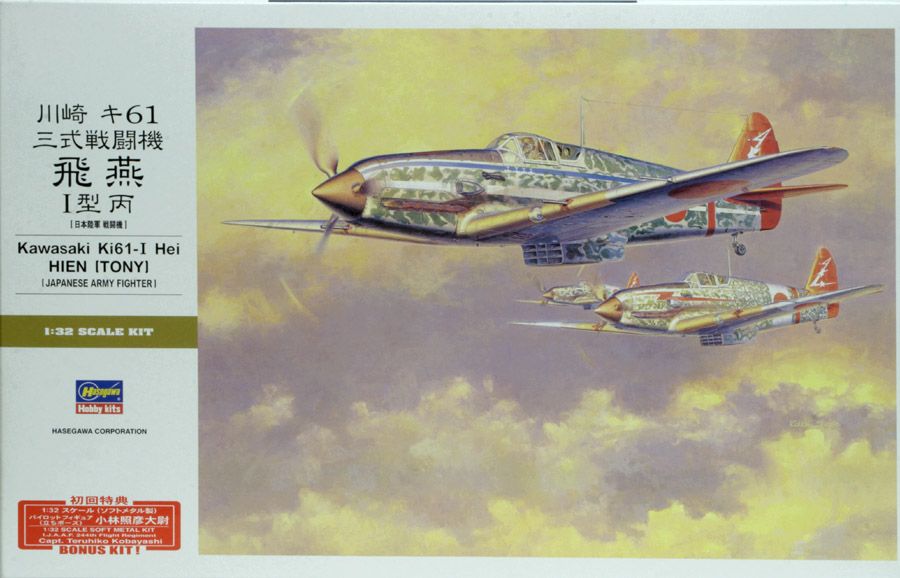 ![]() |
|
totalize
Full Member
  
Member since: February 2013
Don't take yourself too seriously. It's just plastic.
Posts: 260 
|
Post by totalize on Apr 10, 2014 17:07:53 GMT -5
I considered a number of a/c to do but settled on doing Major Teruhiko Kobayashi's Ki-61 from the 244th Sentai. This is the same plane on the box cover and had serial number 3295. Kobayashi used this a/c to ram a B-29 on January 27th, 1945 which resulted in the loss of the aircraft but caused the downing of the B-29. Kobayashi survived the incident. For this act of bravery he was awarded the Bukosho, the equivalent to the Victoria cross or Medal of Honor. At the time Kobayashi was the youngest Sentai leader in IJAAF. The young and disciplined Leader of the 244th Sentai in front of one of his Ki-61's. 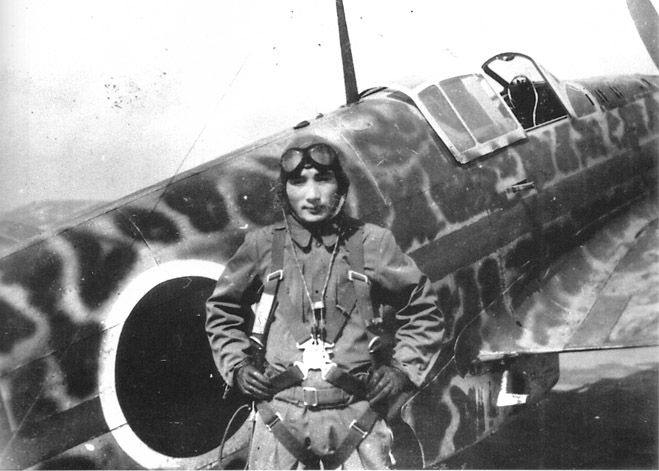 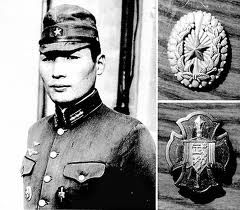 |
|
totalize
Full Member
  
Member since: February 2013
Don't take yourself too seriously. It's just plastic.
Posts: 260 
|
Post by totalize on Apr 10, 2014 17:21:34 GMT -5
As the leader of the 244th Sentai Kobayashi flew a number of Ki-61's' including the the Hei, Tei, and Ki-100. Here's a graphic of 3295. 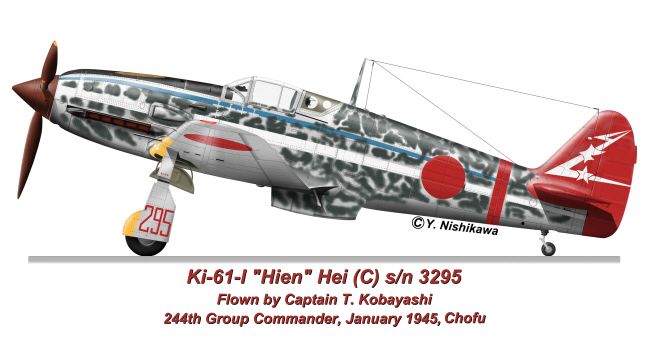 |
|
totalize
Full Member
  
Member since: February 2013
Don't take yourself too seriously. It's just plastic.
Posts: 260 
|
Post by totalize on Apr 10, 2014 17:34:15 GMT -5
There are not many photos of 3295 but here are some shots of the actual aircraft. Note the 12.7mm nose MG's in the second shot. These were apparently removed just before his ramming mission to lighten the aircraft. Indeed many 244 Sentai Ki-61's either had their Cannon (if so equipped) or their MG's removed to lighten the aircraft's weight in order for them to be able to reach the altitude the B-29's were flying at. Some however, had well performing engines and were able to keep both the MG's and Cannon armament. 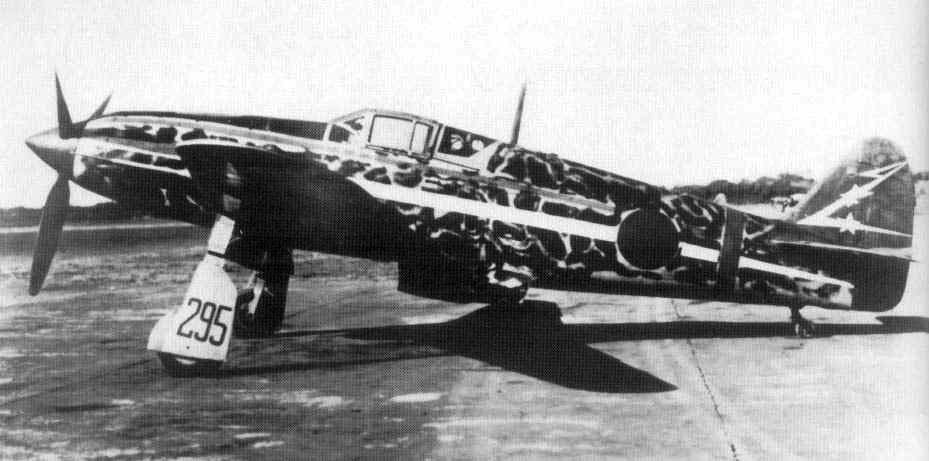 View of 3295 with Nose MG's in place. 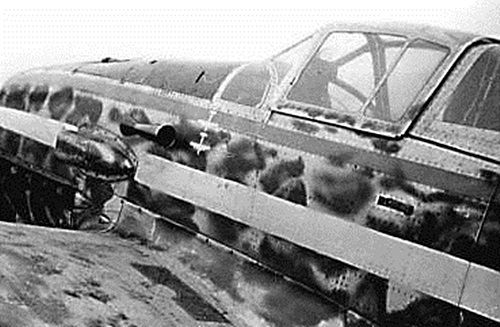 |
|
totalize
Full Member
  
Member since: February 2013
Don't take yourself too seriously. It's just plastic.
Posts: 260 
|
Post by totalize on Apr 10, 2014 17:49:05 GMT -5
Cockpit work. I don't have any pics of the pre-painted build but here are some shots of the left and right side of the cockpit. I scratch built the storage bag on the right side with apoxie sculpt and the oxygen regulator from apoxie sculpt and styrene. I first formed the bag and when satisfied I then made the flap for the bag and laid it over top. So it is actually two pieces. The oxygen hose was dipped in Mr. Surfacer 500 and wiped down to fill in some of the gaps in the winding as I wanted it to look more like a hose than a spring. I am also using the Eduard PE set for the Hasegawa kit. Lead wire in various thicknesses was used for the wiring. 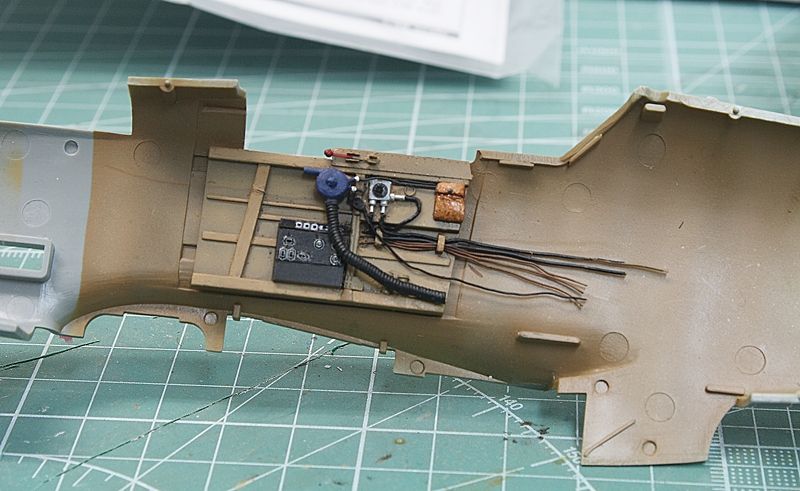 |
|
totalize
Full Member
  
Member since: February 2013
Don't take yourself too seriously. It's just plastic.
Posts: 260 
|
Post by totalize on Apr 10, 2014 17:54:09 GMT -5
For the right side. I cut off the levers on the hydraulic panel on the lower left side and re-positioned them a bit more accurately. For instance the right most lever was for the landing gear and of course this should be in the lowered position since the landing gear is down. I used the suggested Mr. Color RLM 79 for the cockpit colour. 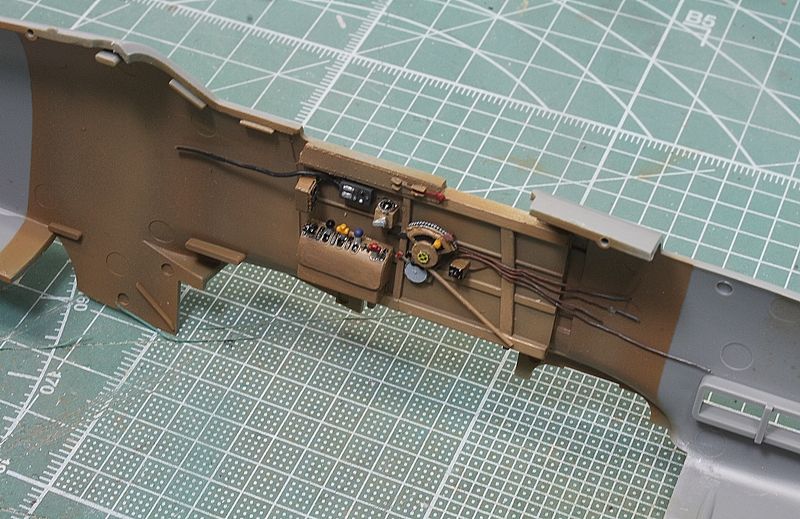 |
|
|
|
Post by bullardino on Apr 10, 2014 17:55:02 GMT -5
Really interesting build, I'm following along  |
|
totalize
Full Member
  
Member since: February 2013
Don't take yourself too seriously. It's just plastic.
Posts: 260 
|
Post by totalize on Apr 10, 2014 17:58:44 GMT -5
Thanks guys, much appreciated.
|
|
totalize
Full Member
  
Member since: February 2013
Don't take yourself too seriously. It's just plastic.
Posts: 260 
|
Post by totalize on Apr 10, 2014 18:00:07 GMT -5
|
|
totalize
Full Member
  
Member since: February 2013
Don't take yourself too seriously. It's just plastic.
Posts: 260 
|
Post by totalize on Apr 10, 2014 18:05:38 GMT -5
|
|
|
|
Post by deafpanzer on Apr 11, 2014 9:18:28 GMT -5
SUPERB work on the interior! I like it very much already...
|
|
|
|
Post by JimD on Apr 11, 2014 9:30:11 GMT -5
Wow. That's some stunning work. I really like the depth your achieved with the shading on the paint. Everything is perfect.
Don't see many Japanese subjects built on the forums for some reason...good to see. Can't wait for more.
|
|
|
|
Post by wbill76 on Apr 11, 2014 15:52:14 GMT -5
Very nice work on that pit, looking forward to more on this one!
|
|
totalize
Full Member
  
Member since: February 2013
Don't take yourself too seriously. It's just plastic.
Posts: 260 
|
Post by totalize on Apr 11, 2014 18:04:25 GMT -5
Deafpanzer, Jimmy, Bill,
Thanks for having a look at the build and posting your comments. Much appreciated.
|
|
Deleted
Member since: January 1970
Posts: 0
Nov 25, 2024 10:41:31 GMT -5
Nov 25, 2024 10:41:31 GMT -5
|
Post by Deleted on Apr 11, 2014 18:16:35 GMT -5
Awesome detail! Looks like a very fast plane, for it's time.
|
|
totalize
Full Member
  
Member since: February 2013
Don't take yourself too seriously. It's just plastic.
Posts: 260 
|
Post by totalize on Apr 11, 2014 18:18:32 GMT -5
Bruce, Dicky,
Thanks Gents. Glad you like it.
Dave.
|
|
totalize
Full Member
  
Member since: February 2013
Don't take yourself too seriously. It's just plastic.
Posts: 260 
|
Post by totalize on Apr 11, 2014 18:22:33 GMT -5
Gents, Here's a shot of the Firewall, instrument panel, rudder pedals, and 12.7mm MG's. The rudder pedals are from the Eduard PE set and the instruments are from MDC's individual Japanese instruments decal set. 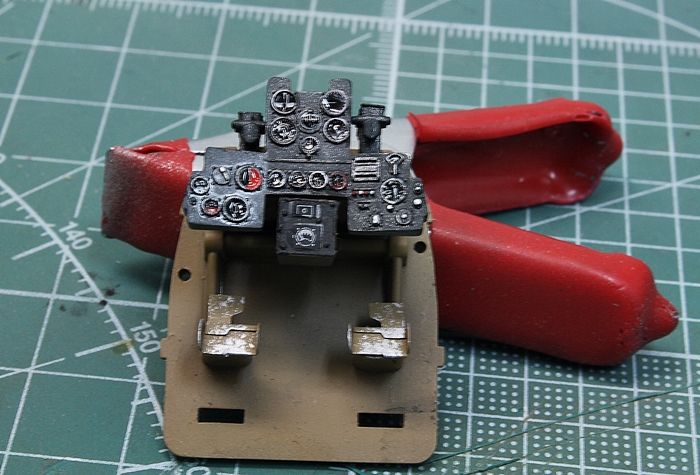 |
|
|
|
Post by fightnjoe on Apr 11, 2014 22:22:45 GMT -5
very sharp work. very nice.
joe
|
|
|
|
Post by bullardino on Apr 12, 2014 2:26:19 GMT -5
Another truly nice progress Totalize.
|
|
destrozas.
Full Member
  
Member since: August 2012
Posts: 240
Aug 28, 2012 8:30:14 GMT -5
Aug 28, 2012 8:30:14 GMT -5
|
Post by destrozas. on Apr 22, 2014 7:27:34 GMT -5
partner who is good work that you carry.
|
|
totalize
Full Member
  
Member since: February 2013
Don't take yourself too seriously. It's just plastic.
Posts: 260 
|
Post by totalize on Jul 13, 2014 9:18:35 GMT -5
Here are some pics of the cockpit before I close it up. Interior colours are RLM79 Sand Yellow from Mr. Color.The blue oxygen regulator was scratch built as was the cockpit storage bag. I used apoxie sculpt for both but also used styrene disks punched with my punch and die set. The bolt on the face of the oxygen regulator is from Masterclub. 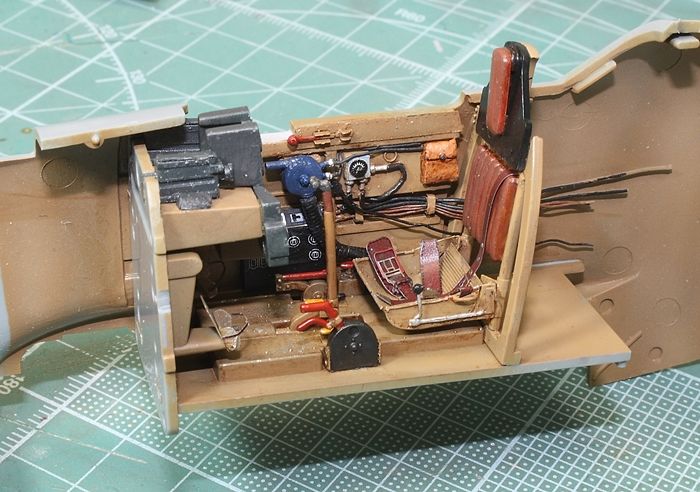 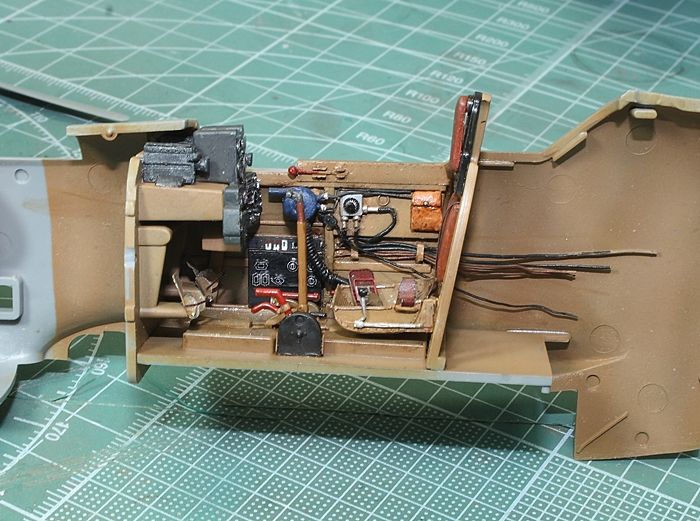 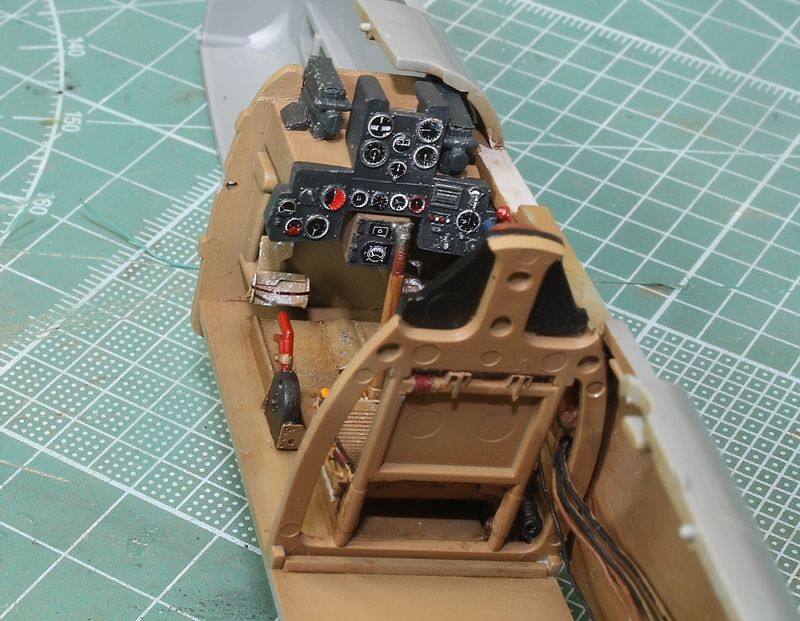 |
|
totalize
Full Member
  
Member since: February 2013
Don't take yourself too seriously. It's just plastic.
Posts: 260 
|
Post by totalize on Jul 13, 2014 9:33:23 GMT -5
|
|
totalize
Full Member
  
Member since: February 2013
Don't take yourself too seriously. It's just plastic.
Posts: 260 
|
Post by totalize on Jul 13, 2014 9:37:07 GMT -5
|
|
totalize
Full Member
  
Member since: February 2013
Don't take yourself too seriously. It's just plastic.
Posts: 260 
|
Post by totalize on Jul 13, 2014 9:39:10 GMT -5
Wings are on and gaps have been filled. Next up will be to put some primer on her. As you can see I broke off part of Venturi tube while handling it and had a near panic episode. I am sure you guys can imagine my horror as there I was working away on the kit, getting the wings done etc and suddenly I look down and part of the tube is missing. Of course i didn't even know I knocked it off and so I was like great now what the hell am I going to do. Scratch build another. Not easy to do with the way the tube is done. So I set off hunting around the the bench and floor for it. Looked for about half an hour then suddenly I spotted something out of the corner of my eye and there it was underneath the bench. I happily scooped it up and put it aside as I won't be attaching it now until the end of the build. One thing I like about the wings is the dihedral. The nice upward angle of the wings I think looks cool. 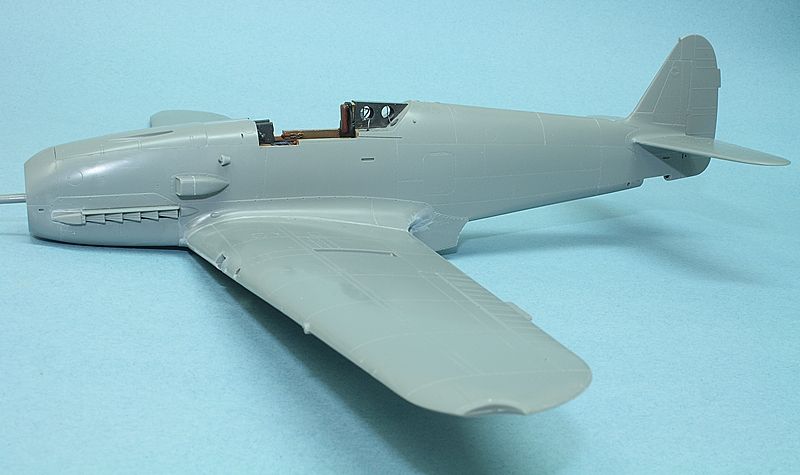 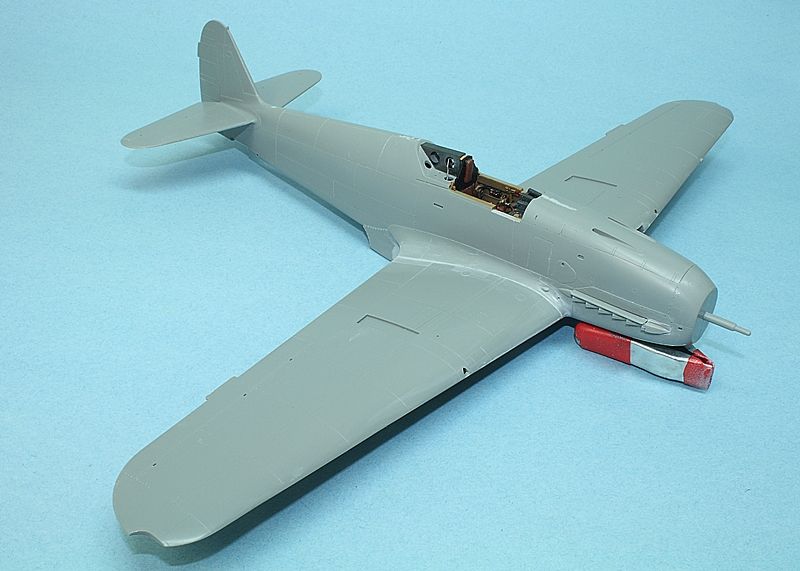 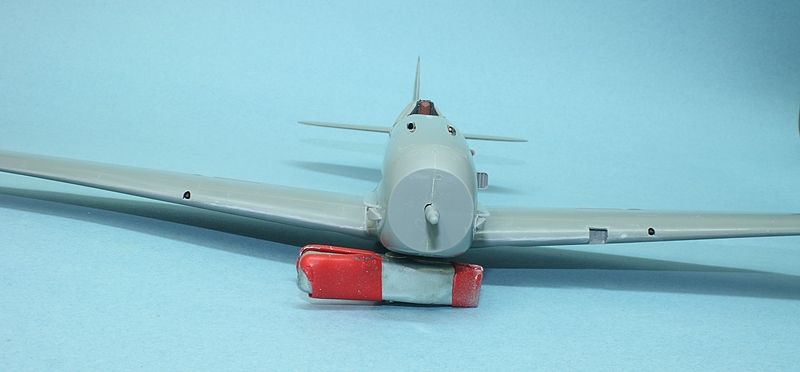 |
|
totalize
Full Member
  
Member since: February 2013
Don't take yourself too seriously. It's just plastic.
Posts: 260 
|
Post by totalize on Jul 13, 2014 9:42:10 GMT -5
|
|
totalize
Full Member
  
Member since: February 2013
Don't take yourself too seriously. It's just plastic.
Posts: 260 
|
Post by totalize on Jul 13, 2014 9:44:32 GMT -5
So, I started work on the landing gear and added some scratch built details. You will notice that the brake lines run down the aft portion of the landing gear strut. A number of Hien photos often show them running down the front of the strut. However, using my excellent Hien fighter book as a reference I saw that the brake lines were positioned both ways. As there are no landing gear references for the particular Hien I am doing (3295) I decided to have them run aft. The brake lines are lead wire. the break line strapping is lead foil. The tow lugs are taken from a 1/35 scale German armour U-clamp. Drilled out the holes in the upper and lower torque links using a few different sizes of drills with my pin vise. The brake line fittings are again taken from a 1/35 german panther and are the from the drivers hatch locking mechanism. These were often brass fittings but I might just paint them the same silver colour as the landing gear. Not sure at this point. Landing gear covers have been primed. 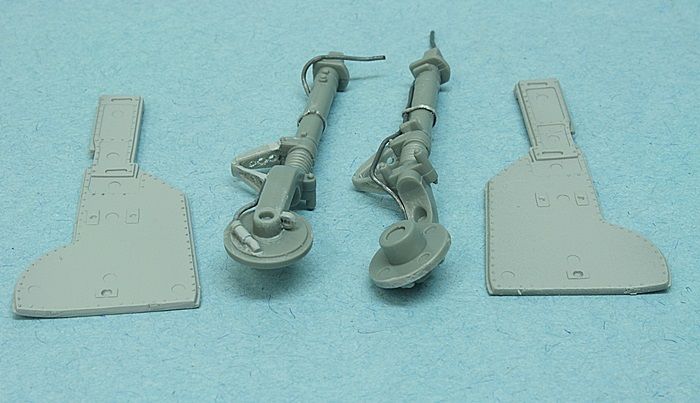 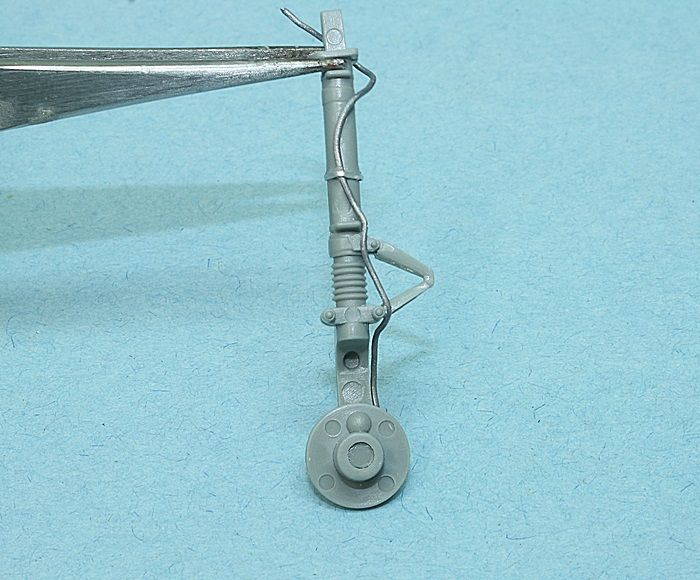 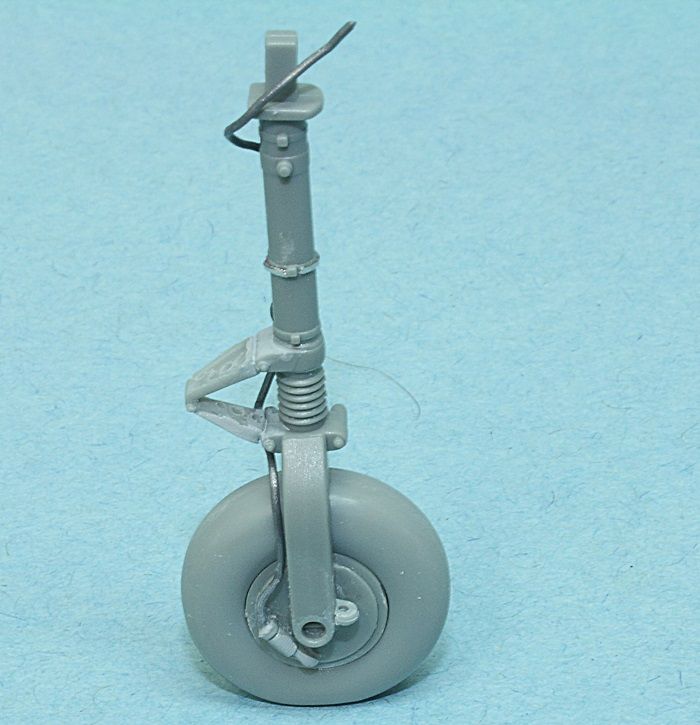 |
|
totalize
Full Member
  
Member since: February 2013
Don't take yourself too seriously. It's just plastic.
Posts: 260 
|
Post by totalize on Jul 13, 2014 9:47:37 GMT -5
|
|
totalize
Full Member
  
Member since: February 2013
Don't take yourself too seriously. It's just plastic.
Posts: 260 
|
Post by totalize on Jul 13, 2014 9:49:36 GMT -5
Here are some progress pics of the gunsight. It was done with Eduard PE and bits from the actual kit. 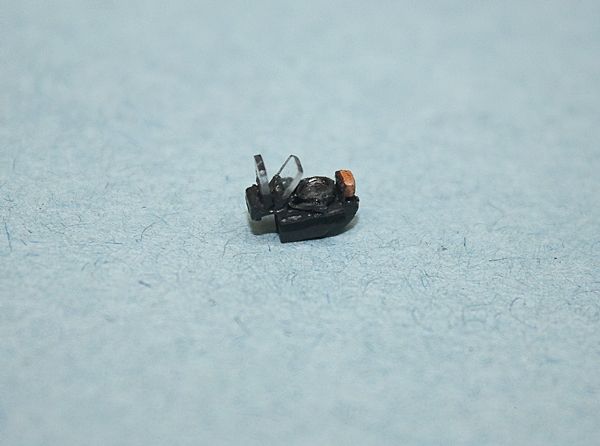 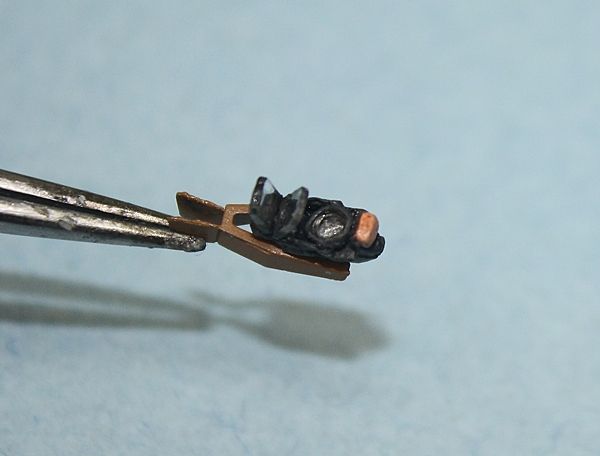 |
|
totalize
Full Member
  
Member since: February 2013
Don't take yourself too seriously. It's just plastic.
Posts: 260 
|
Post by totalize on Jul 13, 2014 9:52:19 GMT -5
|
|
totalize
Full Member
  
Member since: February 2013
Don't take yourself too seriously. It's just plastic.
Posts: 260 
|
Post by totalize on Jul 13, 2014 9:55:11 GMT -5
Some more progress. I got the left wing painted up. I used a mask for this job. Paint was Mr. Color Kawasaki green. I am also going to use a mask for the hinomarus as well. Cheers, Dave. 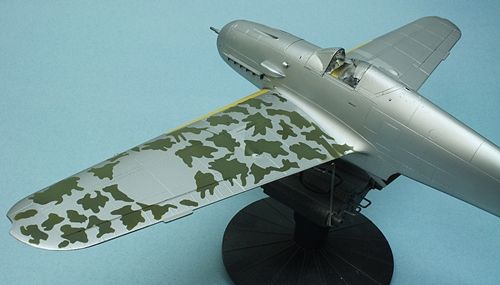 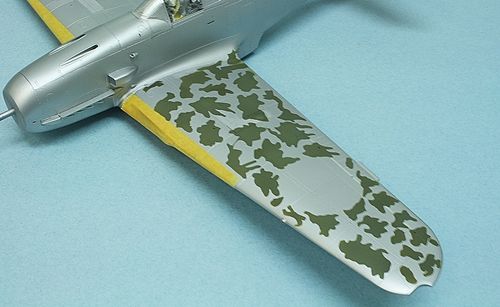 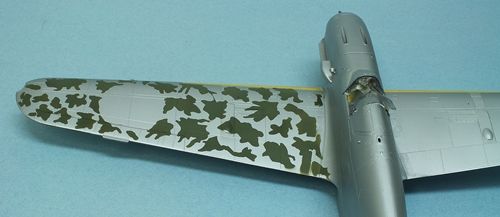 |
|