|
|
Post by wing_nut on Feb 5, 2015 11:10:14 GMT -5
With the big Corsair in the maintenance hanger I figured this may fit the bill for taking up the time while I wait for replacement parts from Tamiya. This go'round I'll be using the Vector resin update set, less the spinner. That will be the Eagle Parts spinner which comes with a drill guide base to get the holes. 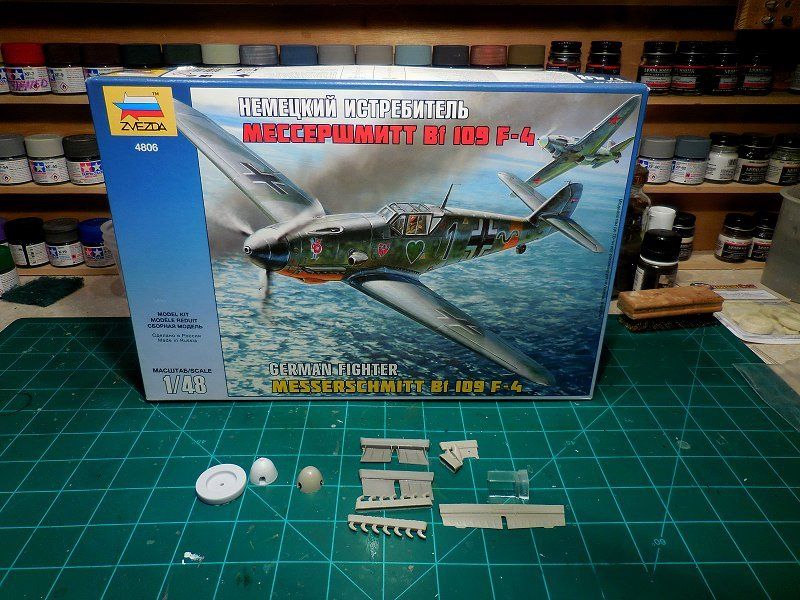 The spinners in order... Eagle Parts, Vector and the kit. The Vector and kit parts are a bit too bulbous and neither has the rivet detail the Eagle spinner has. i may just make the dimple a little more crisp. Also the F spinner has a tear drop shaped opening for the prop blades. Kit part-none, Vector-a bit too much and the Eagle part are just about right. Now all I need to do, besides actually building the thing  , is decide on another desert bird or one from "Operation Barbarossa" 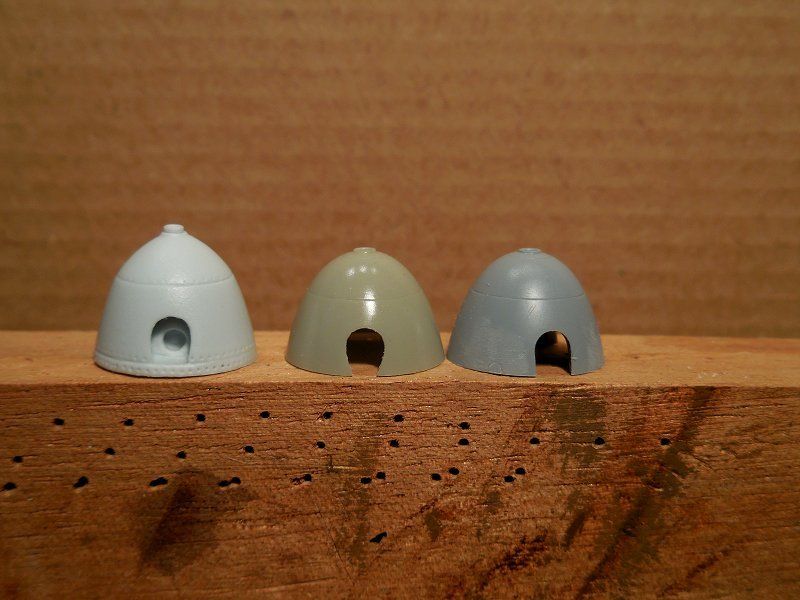 |
|
|
|
Post by Tojo72 on Feb 5, 2015 11:53:31 GMT -5
Looking forward.Always good to see a 109
I take you did okay with Tamiya usa
|
|
|
|
Post by TRM on Feb 5, 2015 12:19:26 GMT -5
Oh I'm in!! Nothing wrong with another 109 on the go!! Great comparison on the spinners! Big differences!
|
|
|
|
Post by dupes on Feb 5, 2015 13:13:13 GMT -5
Can't ever have enough 109s, right?  |
|
|
|
Post by deafpanzer on Feb 5, 2015 15:32:11 GMT -5
Think Marc got the 109 bug again? Maybe... count me in! I like the markings on that 109...
|
|
|
|
Post by wbill76 on Feb 5, 2015 16:06:25 GMT -5
Go for a Barbarossa bird...just for variety!  |
|
|
|
Post by wing_nut on Feb 5, 2015 16:08:14 GMT -5
Calling them now Anthony. Tm Marc, Nope never anything wrong with another 109 build. Andy, Yup I got the 109 monkey on my back again.  |
|
|
|
Post by Leon on Feb 5, 2015 17:59:00 GMT -5
Seams the 109 bug is going around!  Count me in Marc.  |
|
|
|
Post by JimD on Feb 5, 2015 18:14:12 GMT -5
I'm in...why not..this should be a fun one to watch as well. You can never have enough 109s  |
|
|
|
Post by wing_nut on Feb 5, 2015 19:48:51 GMT -5
Bill, sorry bro I think we posted at the same time. That was not there when i answered before LOL. I have a bunch of decals sheet from back in the day when I was a full time wing-nut and I'll see if there one that works cuz i am leaning that way. Leon, Jimmy... happy to have you aboard. Enough 109's? Would you really want to live in a world where it was widely accepted that there was finally enough 109's? Not me!  |
|
|
|
Post by wing_nut on Feb 7, 2015 11:05:27 GMT -5
Al little nit of progress to report. This will be closed canopy to just need to be able to see some rudimentary shapes inside. I scrounged through the drawer that collects all the stuff that doesn't get used up and found 1 set of Luftwaffe PE seat belts at the back of the drawer. The engine is there for no other purpose than to hold the exhaust in the correct position. I left one of the kit pipes in place for the pic to see the difference to the resin updated pipes. 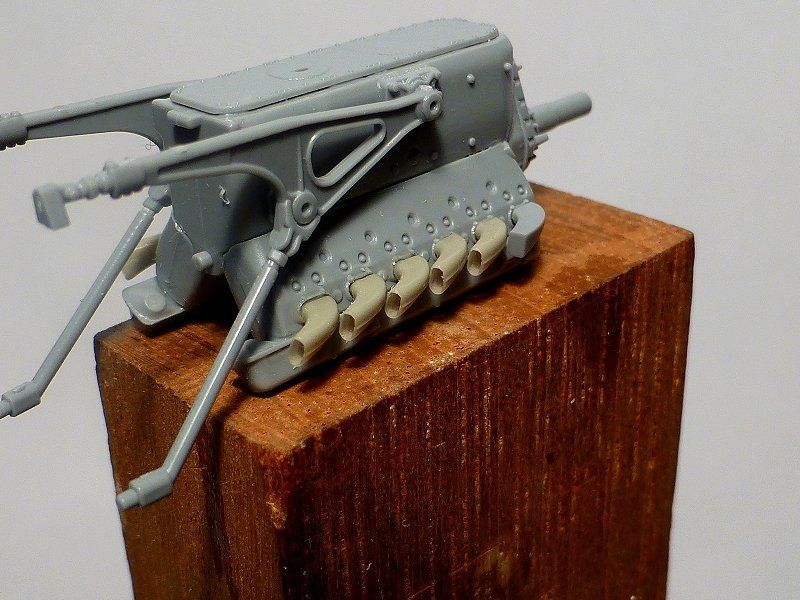 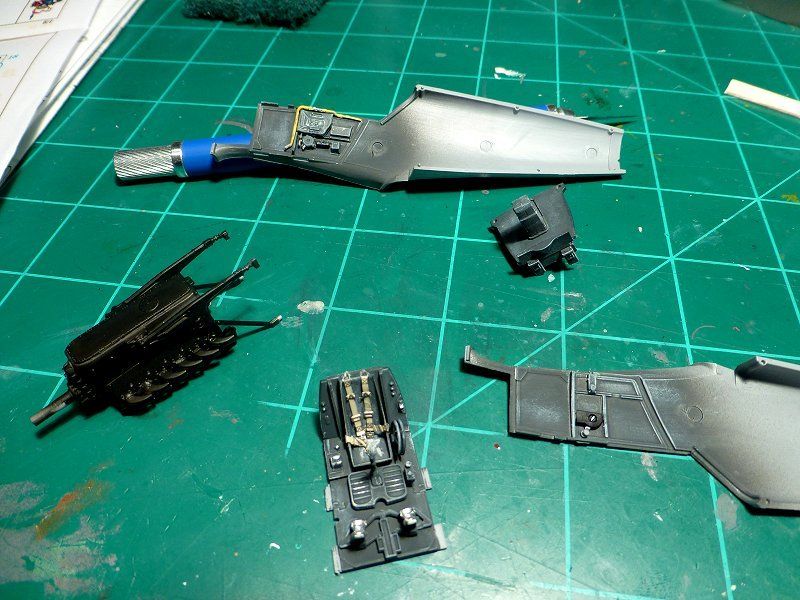 |
|
|
|
Post by wbill76 on Feb 7, 2015 18:33:31 GMT -5
I don't know Marc, I think you should've gone the other way and just replaced one of the kit's exhaust pipes for dramatic effect.  Nice progress and scrounging in the leftovers bin, never hurts to do that from time to time.  |
|
|
|
Post by Leon on Feb 7, 2015 18:40:21 GMT -5
Really coming along nicely Marc!
|
|
|
|
Post by wing_nut on Feb 7, 2015 21:57:17 GMT -5
You may be right Bill. But i would have had to remember that before they all glued in place. And I found all kinds of goodies in there  Thanks Leon. |
|
4bogreen
Full Member
  
Member since: January 2014
On the bench; Yak-1B, T-30, T-34 model 1940
Posts: 568 
|
Post by 4bogreen on Feb 9, 2015 20:17:19 GMT -5
Great work wing nut! I heard a lot of positive things about the Zvezda 109F series. I have the Eduard 109E-4, so i might give it a chance someday... I am to busy now for it.
Regards,
Remco
|
|
|
|
Post by dupes on Feb 10, 2015 16:59:11 GMT -5
So you're doing a Barbarossa 109F build two weeks before the massive Barbarossa GB kicks off? I see how you are.
|
|
|
|
Post by wing_nut on Feb 10, 2015 17:44:47 GMT -5
You are just harboring too much animosity towards me just now because we were spared the horrors of winter so far  Read on a bit and you'll see that my plan is to do an armor piece for the build. But i do have special dispensation Mr. T for the 109. |
|
|
|
Post by wing_nut on Feb 12, 2015 14:15:07 GMT -5
Finally done getting caught up on myself, fix the stuff I crapped up. Someone asked if the engine fit with the cowls down. Yes and no. Yes it should, no I was unable to succeed in that endeavor. One of the mistakes I made was not reading the sheet thoroughly. If you are going with closed cowls, you can use the engine mounts on the sides. These are left off and the engine is help in place by the crank shaft in front and 20 MM cannon in the rear where it connects to the fire wall. Of course I had the side must on and a no go. Then I ripped off the mounts and cut the banks of cylinders off to just glue to the inside of the fuselage so the exhausts stuck out. That was the result of not looking at the sheet. The MG barrels were cut off and glued to the underside of the cowl. For the next time I think he easiest thing to do is simply glue the exhaust to a strip of plates that just covers the space to blank it off and forget everything else. 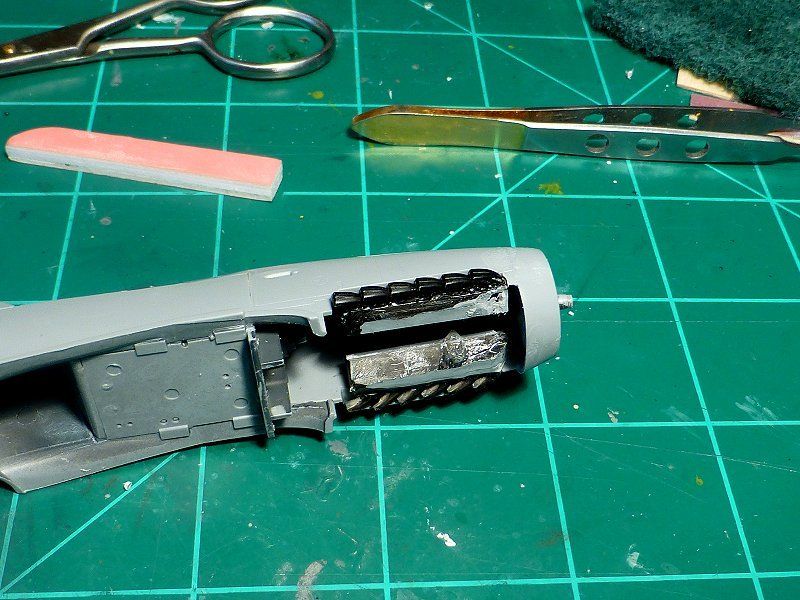 Then the cylinders had to be carved and carved and carved some more to get the front Part of the cowl on. And the Tenax ran WAY down to where I was holding it and left the kind of finger print that would make a detective breathe heavy. 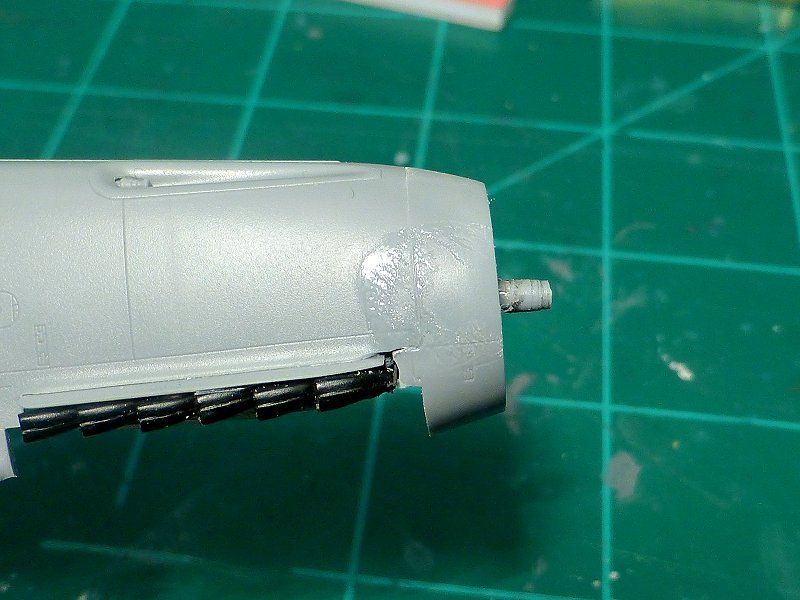 That got sanded and the ridges that were left filed with some Mr. Surfacer that I use for surface scratched. After the jar settled for awhile I poured of most of the solvent and use the now thick pigment as a filler. 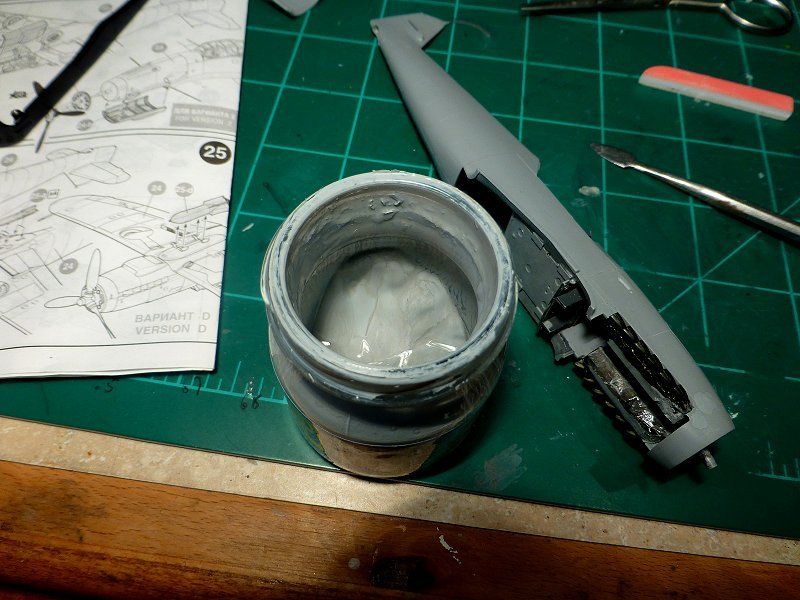 I got the bottom cowl on but there was a lot of trimming and fitting. So much... I just don't think I can talk about it right now. But here's where it is now. The pit is done ( freakin' amazing with all of the I didn't break of the gun sight reflectors  ) and the resin upgrades are all in place. the spinner is just tacked din place for the pic and to see the profile. Right choice for the spinner I think. 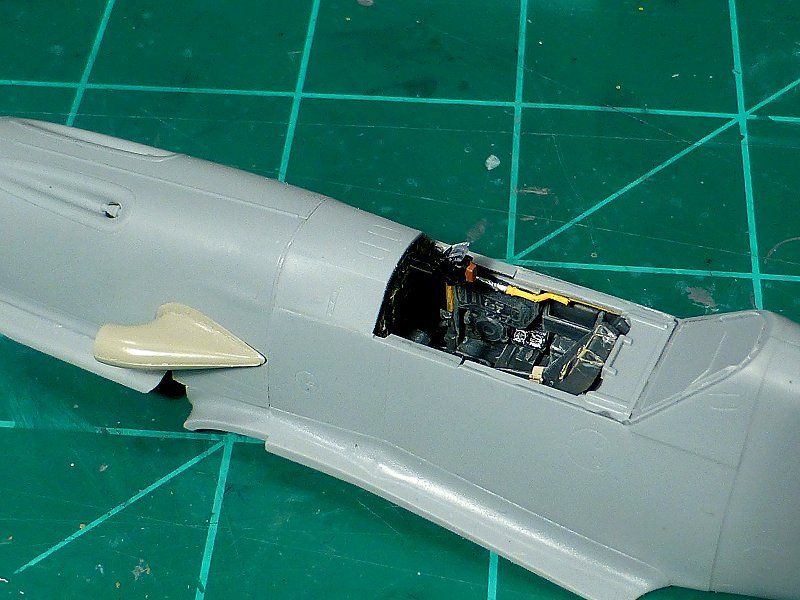 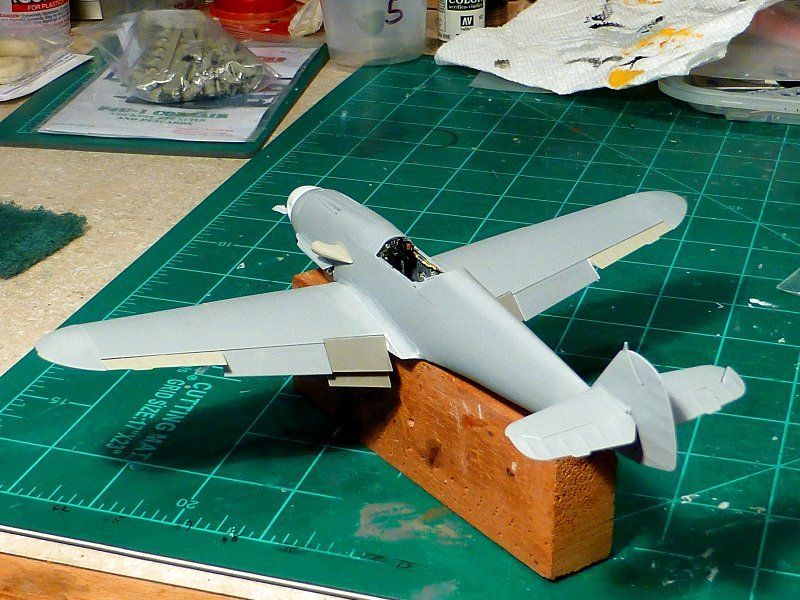 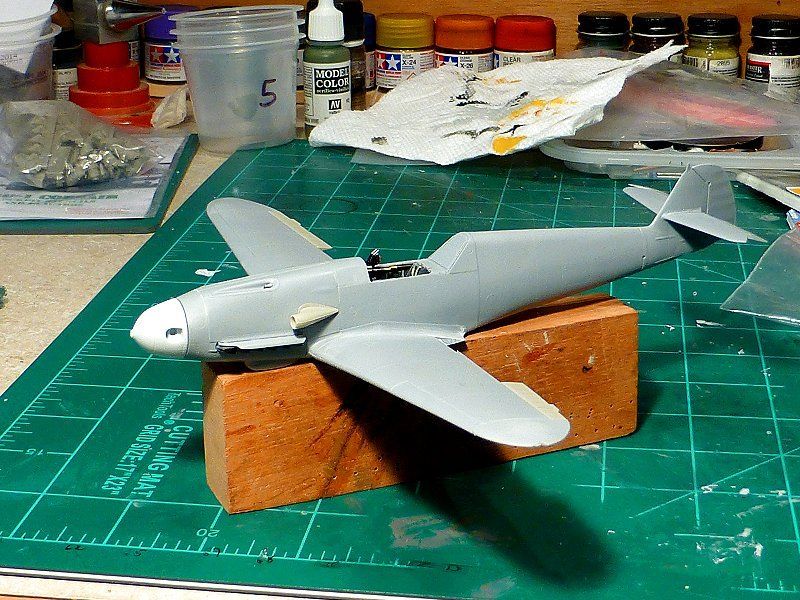 |
|
|
|
Post by wbill76 on Feb 12, 2015 14:30:12 GMT -5
While not fun, at least the end result allowed you to salvage it all and keep moving forward Marc! Won't even know it happened after the paint's on...poor detective will just have to find other CSI incriminating evidence to finger you on this one.  |
|
|
|
Post by deafpanzer on Feb 12, 2015 16:04:25 GMT -5
Fingerprint? Or is it battle damage? Anything is possible... you are way too fast but yet talented modeler!
|
|
|
|
Post by wing_nut on Feb 15, 2015 14:33:50 GMT -5
Some minor surgery was needed to the kit prop blades to fit since the spinner was designed for the Hasegawa kit (I think). The hole sin the spinner was drilled to 1/8" and the end of the blade modified to fit. 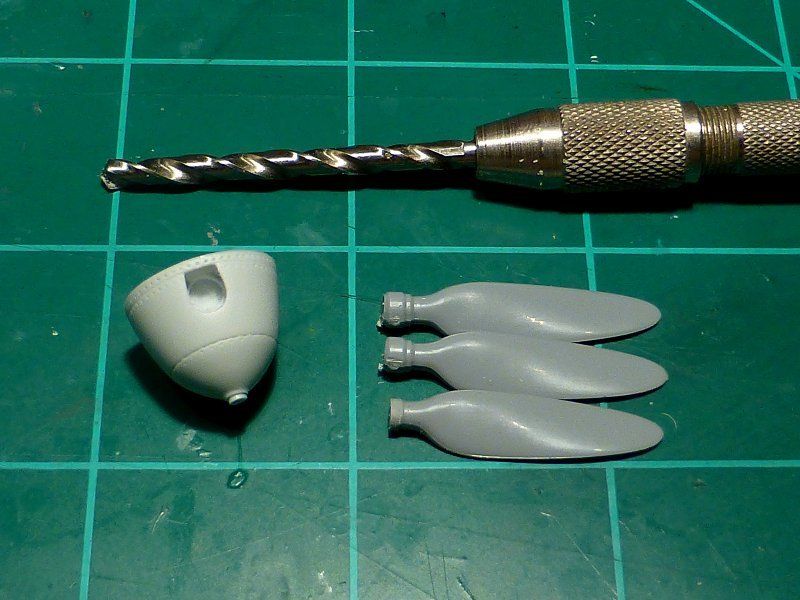 A final pre-paint mock up 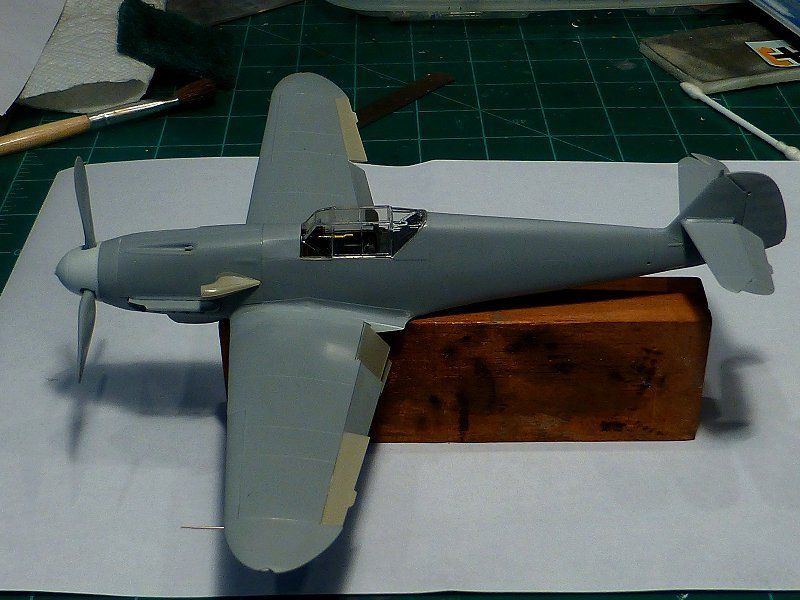 I put down some made up camo to have that under the white wash in case is pokes through during weathering. And yet one more "I'm not paying attention" thingy. I should sprayed the yellow of the fuselage band and masked that 1st. Now i have to mask off the fuselage to paint the band, them mask the band to paint the white. 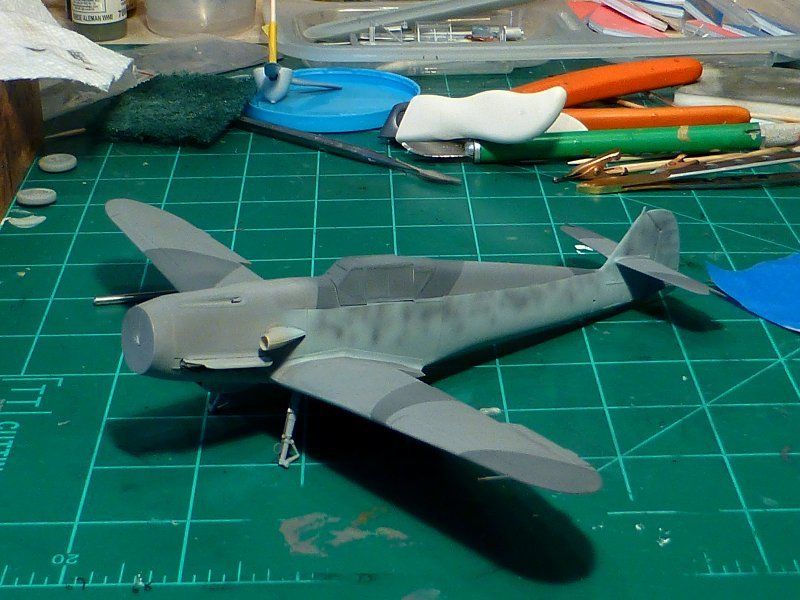 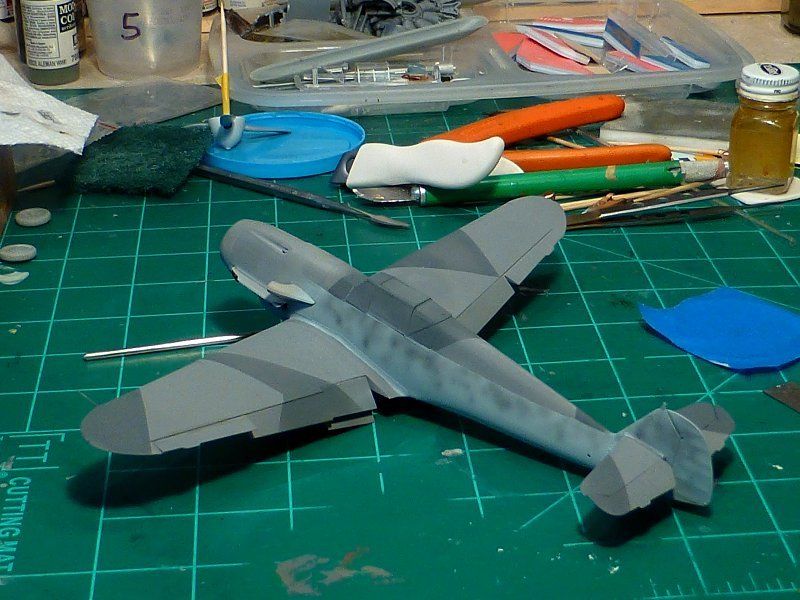 |
|
|
|
Post by Leon on Feb 15, 2015 16:17:27 GMT -5
Marc! With all the hiccups your having, your doing a fine job.  |
|
|
|
Post by wbill76 on Feb 15, 2015 21:11:09 GMT -5
Nice paint slinging!
|
|
|
|
Post by JimD on Feb 15, 2015 21:43:53 GMT -5
Nice stuff here my friend. I'm really looking forward to stealing your techniques for the whitewash.  |
|
|
|
Post by wing_nut on Feb 17, 2015 17:16:56 GMT -5
Seemed the right thing to be spraying white while it was snowing outside. Dunno if this has been done before or not as a technique but it popped into my head so I figured I'd give it a try. I sealed the camo with Testor's DullCote lacquer since I knew it wouldn't be affected by the next step which uses alcohol. I painted the air frame... not the bottom  ... with Tamiya white just getting enough down to cover the camo but still a bit splotchy. Then I used a cloth just damp with alcohol to wear away the paint. I actually did a bit more than what you see n the 1st photo. Then I went back over that whole thing with very thinned down white leaving the worn stuff showing through a bit. The overall effect doesn't show to well in the photos and is more discernible to the naked eye. 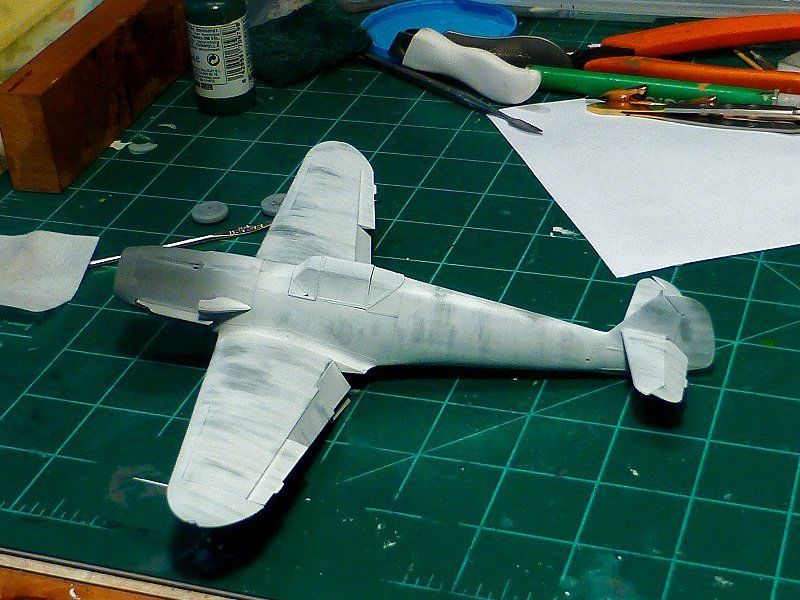 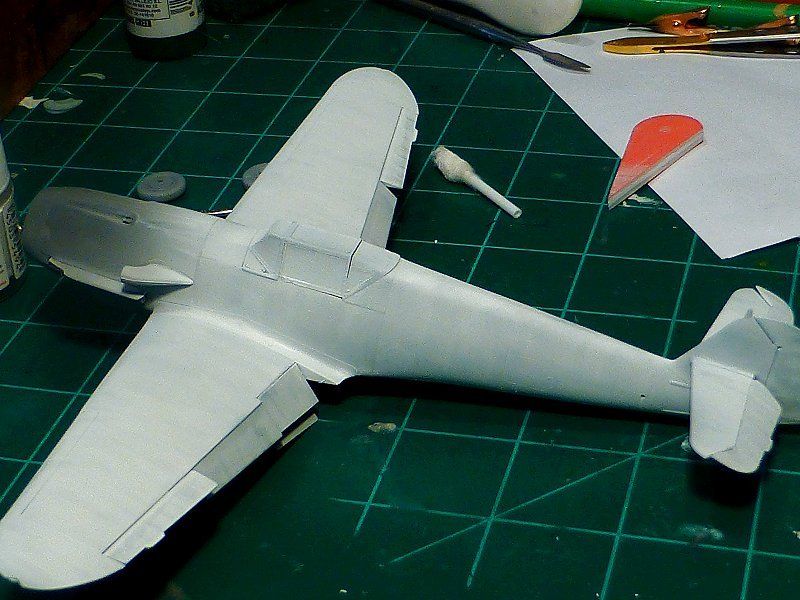 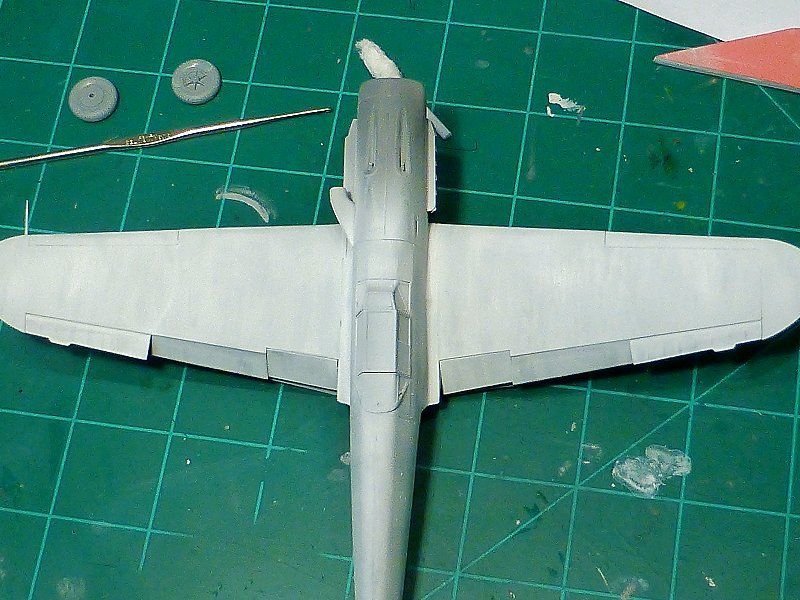 Next will be to mask for the yellow bits and try the same thing with that color. |
|
|
|
Post by Tojo72 on Feb 17, 2015 18:17:18 GMT -5
The effect looks pretty good.
|
|
|
|
Post by dupes on Feb 17, 2015 19:05:38 GMT -5
I think it looks great...but is it controllable?
|
|
|
|
Post by TRM on Feb 17, 2015 19:08:16 GMT -5
Very cool Marc!! Some great painting all around!!  Bring on the yellow!!  |
|
|
|
Post by deafpanzer on Feb 17, 2015 23:41:50 GMT -5
Looking real good Marc!
|
|
|
|
Post by wing_nut on Feb 18, 2015 11:43:41 GMT -5
Thanks for all the comments fellas. Marc, not quite sure what you mean is it controllable? Are you talking about the white removal? Yes it is. The darkest spots in the top photo are made with a pad that is so barely damp with alcohol it took a bit a scrubbing to that much off. One thing was that I didn't mention was the paint gets soft so it picked up some lint from he little pad I was suing. but that was taken care of with a light sanding with 4000 micro mesh. A couple of drops of red to Tamiya flat yellow and it was a perfect match to the yellow in the decal markings. Then I did the same as for the white. Sprayed the yellow, wiped some patches into it, then over sprayed with some lighted yellow. Then I did a dot fading with a pale yellow oil. Base yellow with lightened over spray. 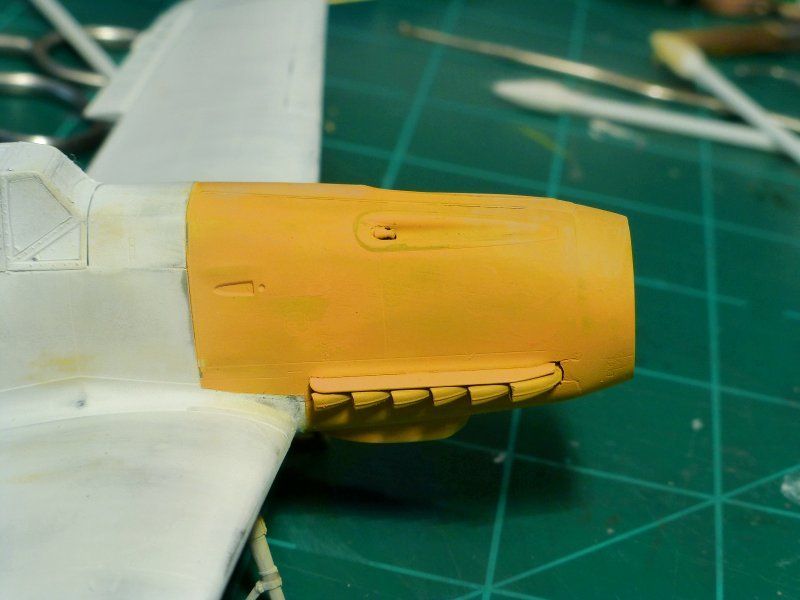 Dots applied and the blending. 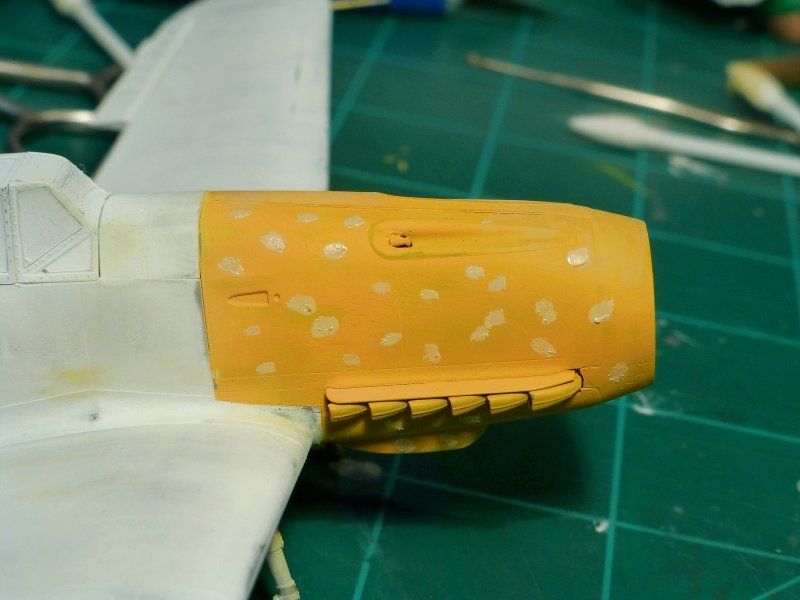 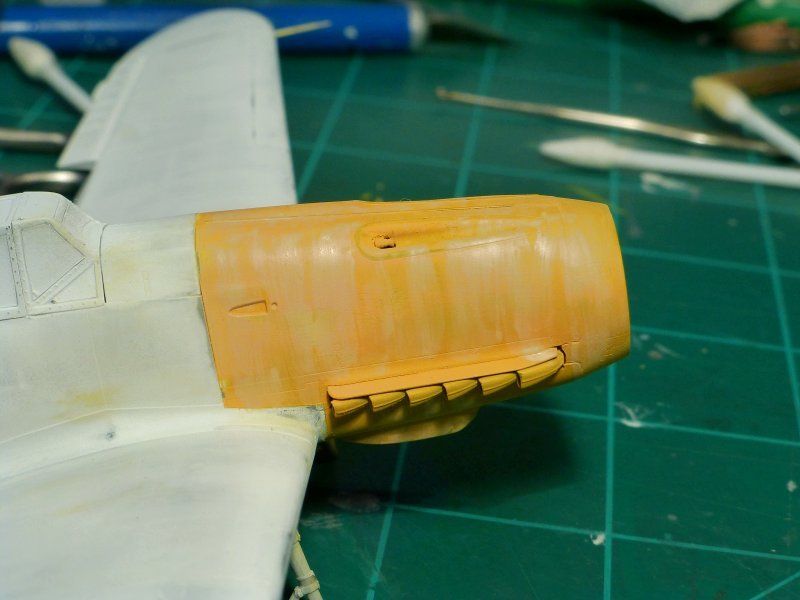 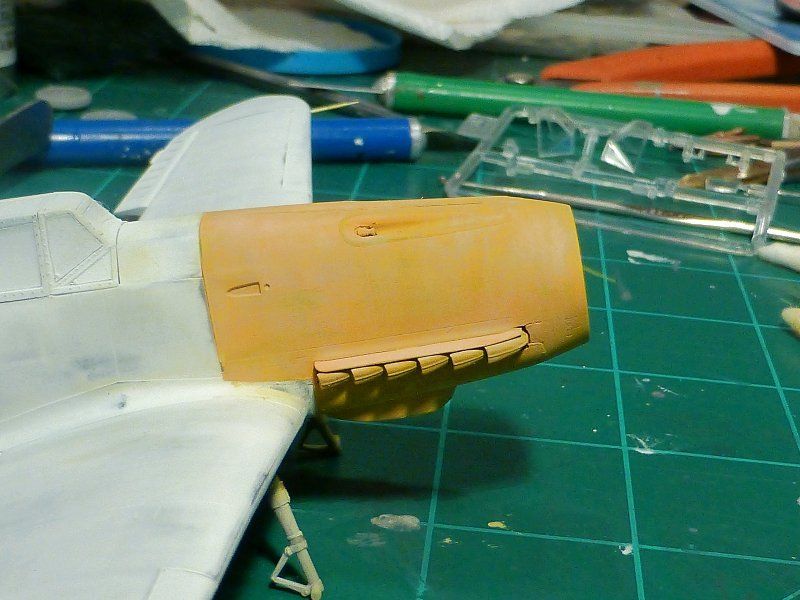 And a composite of the before and after. This will be done to the markings decals once applied. 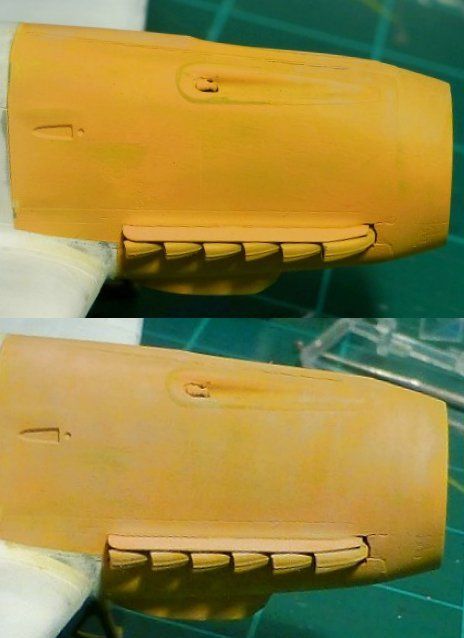 |
|