

BGB - Young Miniatures Fire Fighter
Feb 14, 2015 0:59:02 GMT -5
armorguy, bullardino, and 2 more like this
Post by TRM on Feb 14, 2015 0:59:02 GMT -5
Woo Hoo!! The time has come to get this build underway!! Well, not actually starting this second, but I certainly can get a thread started to have some fun!!! 
Here we go!!
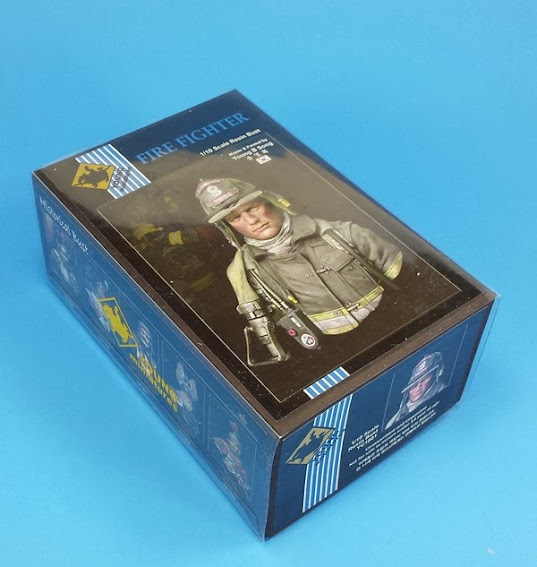
Ever since Myself Andy and Guy had our 3-way duel a while back, I was sold on the YM Busts. The price might seem high, typically between $50 and $75 US, but the old saying "you get what you pay for" does apply!! I picked this one up from our good friend Dave Youquist at Last Cavalry. Not even having it in stock, I still had it at the house within 2 weeks...that is service!!
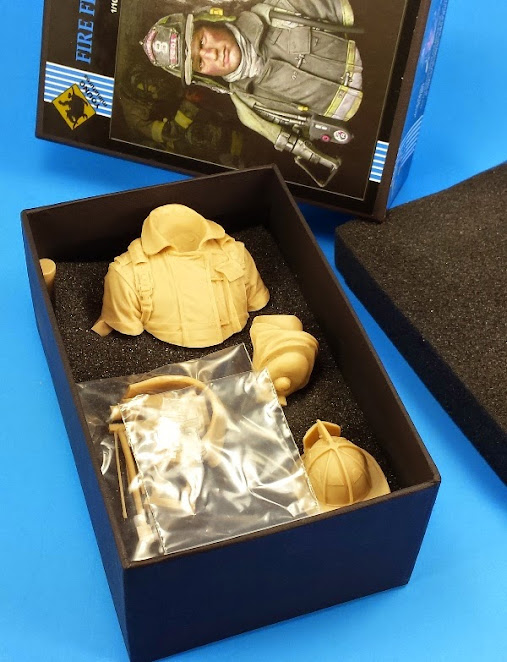
The bust comes in the standard thick cardboard slip-top box. All of the parts nicely nestled within protected with foam inserts. There are a decent amount of parts to allow a bit of enjoyment of construction and ease of painting all the while not bogging things down in mindless parts cleanup.
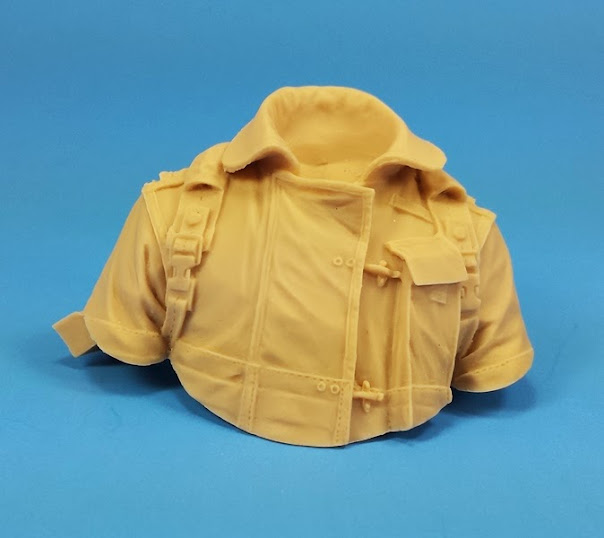
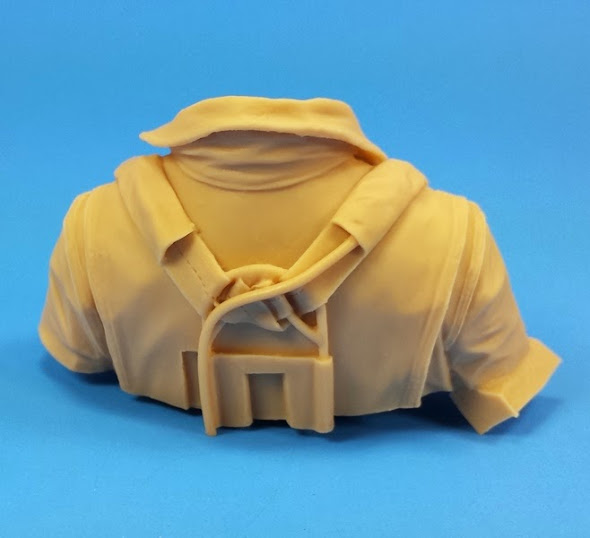
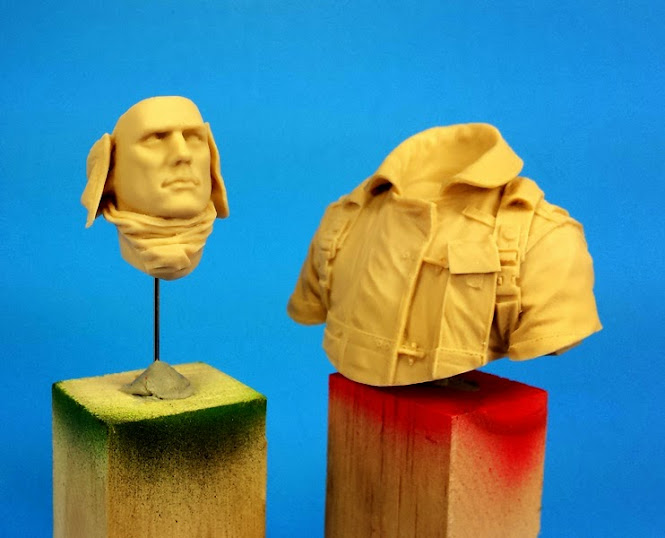
The largest piece in this kit is the torso section. The turnout gear has been beautifully sculpted.
The head is a separate piece which allows for easier painting as things progress. The keen eyed bust connoisseur will recognize this face from a couple of other busts from the line. It is not exactly the same but the basic features are real close. None the matter as it simply works and in the end, works for me!

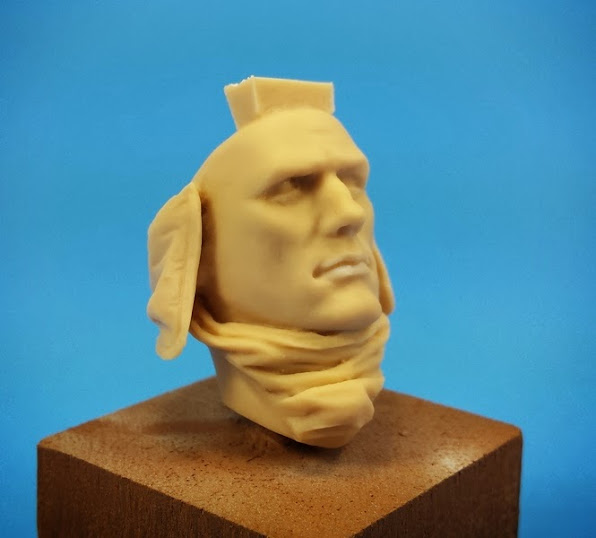
Having a little time to look this one up while waiting for the GB to start, I read a couple of blogs where the helmet was an issue of contention for some. Is the bring too shallow for the make of helmet? I read a bit further, not to mention looking up many different options of the gear, not to mention the personal knowledge of the equipment where I work...it is fine and will do the trick!


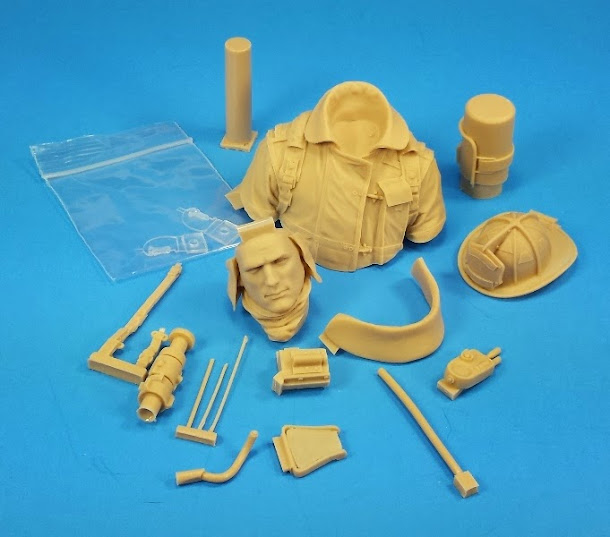
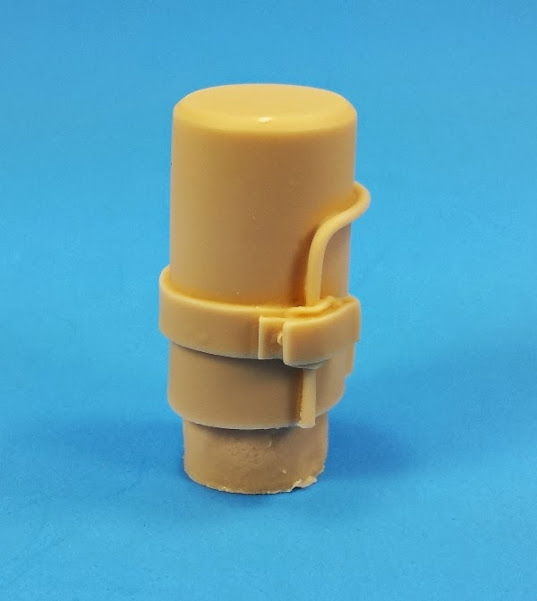
The first thing I noticed here was the casting block in place directly neck to the rear hanging loop. There should be some careful cutting to be done soon!
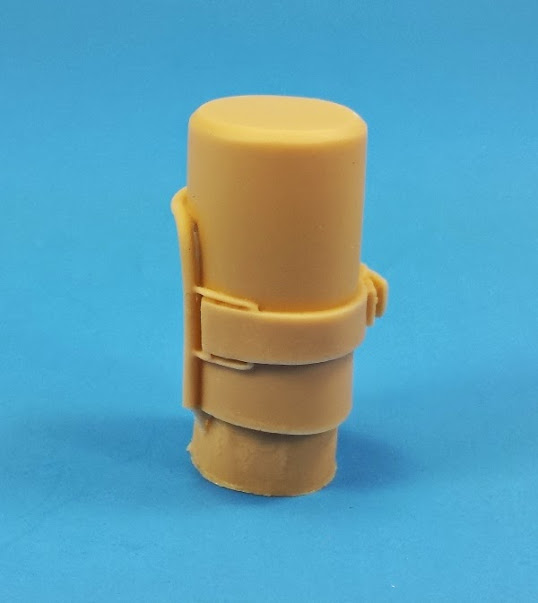
The SCBA (Self Contained Breathing Aperatus) or air tank will need a little work if you ask me. Seems this was one of those parts that was slapped together for the kit more or less. I would say just about all of the bottles (tanks) used for these units are rounded on the bottom...which is the section actually showing as the bottles are inverted in the rig when installed.
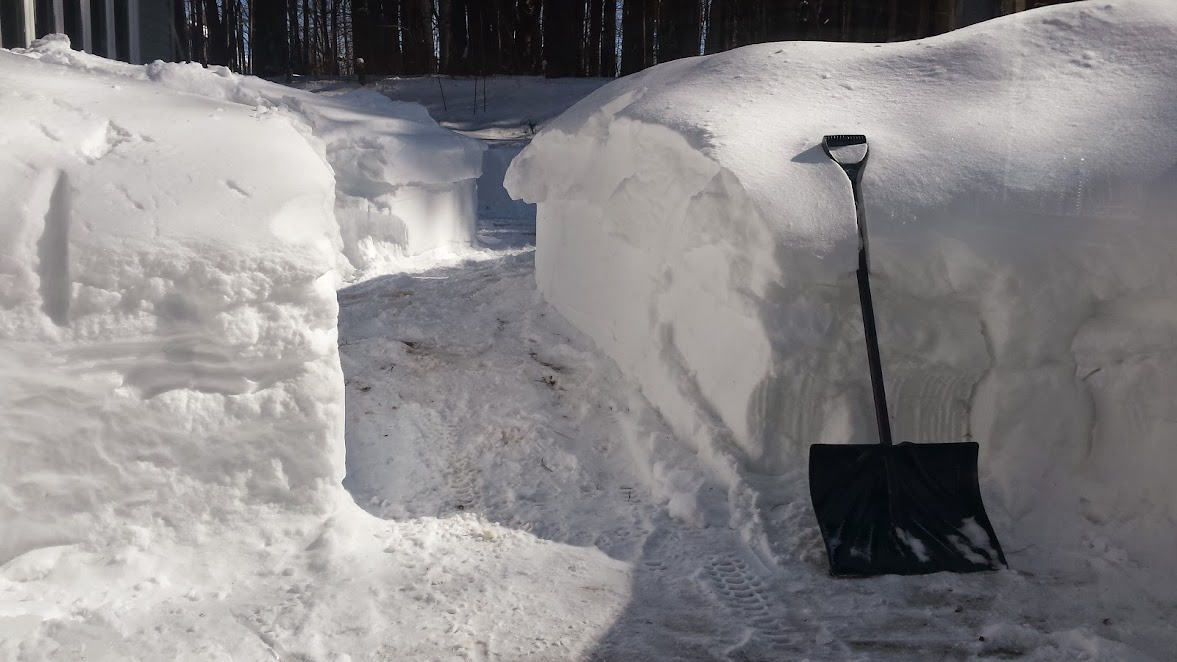
I suppose some of these alterations will be the first thing I need to deal with. Since this GB gets underway during a weekend, it makes for some great timing to get things done...add the fact we are starign down another big snow storm tomorrow into Sunday...much bench-time ahead!!!
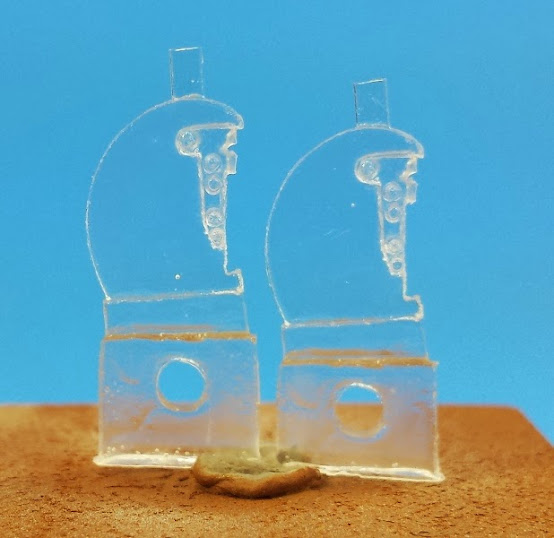
These are the two clear resin shields which are installed under the front lip of the helmet.
Here is a slew of the peripheral items which get installed to bring the bust to life.
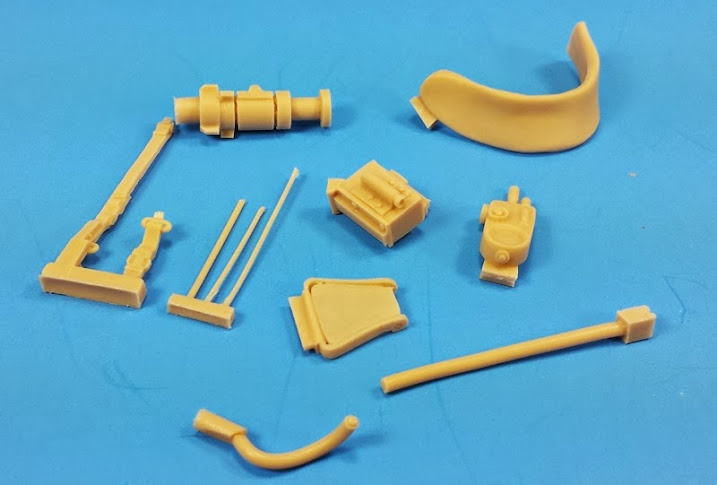
Straps for the helmet...

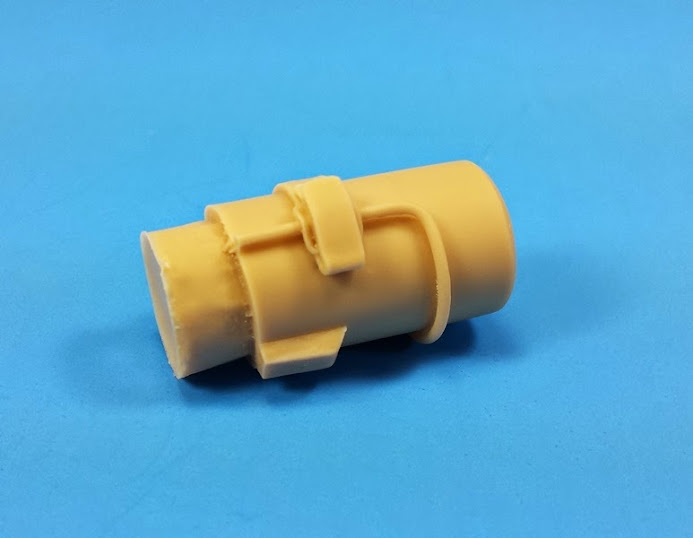
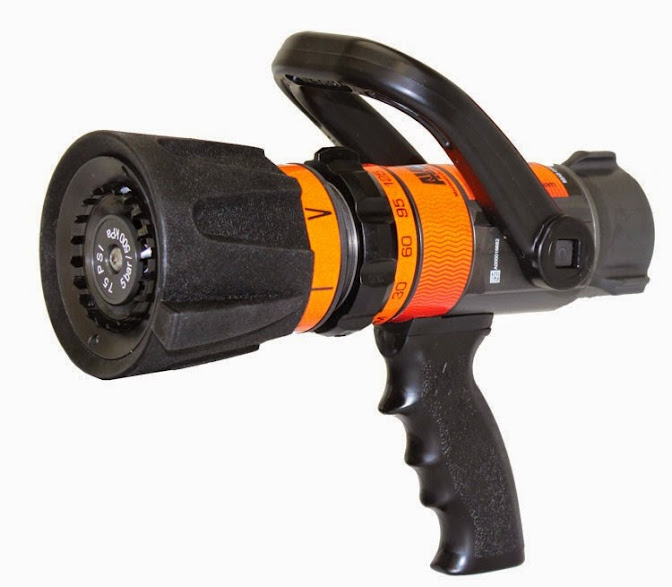
Nozzle for the hose. This, is another thing that needs a bit of working as well if you ask me. Typically nowadays, multi-purpose nozzles are used. These have a pistol style grip and an adjustable stream head.
SO I will need to make a handle and try to work the nozzle end to match something a bit newer.
This is the air pressure gauge. This is close enough to use I think, but some fancy paint work might be needed to get the gauges painted in.

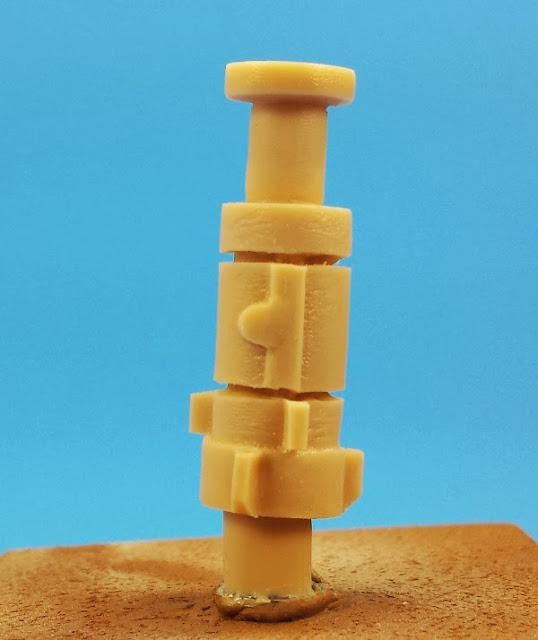
Everything is cast 99.5% perfect! No air bubbles that I can see, no flash except in the clips for the helmet straps and other than the casting blocks needing to be removed, which is typical for the most part, nothing need ant cleanup really.
So, there you have the bust I am working with for this group build!! All that is left to do is start the light cleanup, scratch a couple of small items and begin to paint it!! Again...Woo Hoo!!! Time to start build boys!!
Thanks for swinging by!!

Here we go!!
Ever since Myself Andy and Guy had our 3-way duel a while back, I was sold on the YM Busts. The price might seem high, typically between $50 and $75 US, but the old saying "you get what you pay for" does apply!! I picked this one up from our good friend Dave Youquist at Last Cavalry. Not even having it in stock, I still had it at the house within 2 weeks...that is service!!
The bust comes in the standard thick cardboard slip-top box. All of the parts nicely nestled within protected with foam inserts. There are a decent amount of parts to allow a bit of enjoyment of construction and ease of painting all the while not bogging things down in mindless parts cleanup.
The largest piece in this kit is the torso section. The turnout gear has been beautifully sculpted.
The head is a separate piece which allows for easier painting as things progress. The keen eyed bust connoisseur will recognize this face from a couple of other busts from the line. It is not exactly the same but the basic features are real close. None the matter as it simply works and in the end, works for me!
Having a little time to look this one up while waiting for the GB to start, I read a couple of blogs where the helmet was an issue of contention for some. Is the bring too shallow for the make of helmet? I read a bit further, not to mention looking up many different options of the gear, not to mention the personal knowledge of the equipment where I work...it is fine and will do the trick!
The first thing I noticed here was the casting block in place directly neck to the rear hanging loop. There should be some careful cutting to be done soon!
The SCBA (Self Contained Breathing Aperatus) or air tank will need a little work if you ask me. Seems this was one of those parts that was slapped together for the kit more or less. I would say just about all of the bottles (tanks) used for these units are rounded on the bottom...which is the section actually showing as the bottles are inverted in the rig when installed.
I suppose some of these alterations will be the first thing I need to deal with. Since this GB gets underway during a weekend, it makes for some great timing to get things done...add the fact we are starign down another big snow storm tomorrow into Sunday...much bench-time ahead!!!
These are the two clear resin shields which are installed under the front lip of the helmet.
Here is a slew of the peripheral items which get installed to bring the bust to life.
Straps for the helmet...
Nozzle for the hose. This, is another thing that needs a bit of working as well if you ask me. Typically nowadays, multi-purpose nozzles are used. These have a pistol style grip and an adjustable stream head.
SO I will need to make a handle and try to work the nozzle end to match something a bit newer.
This is the air pressure gauge. This is close enough to use I think, but some fancy paint work might be needed to get the gauges painted in.
Everything is cast 99.5% perfect! No air bubbles that I can see, no flash except in the clips for the helmet straps and other than the casting blocks needing to be removed, which is typical for the most part, nothing need ant cleanup really.
So, there you have the bust I am working with for this group build!! All that is left to do is start the light cleanup, scratch a couple of small items and begin to paint it!! Again...Woo Hoo!!! Time to start build boys!!
Thanks for swinging by!!


 Thanks for the confidence!


 Where are you putting it all?