kingpin141
Full Member

Member since: March 2013
Posts: 308 
|
Post by kingpin141 on May 26, 2015 17:54:49 GMT -5
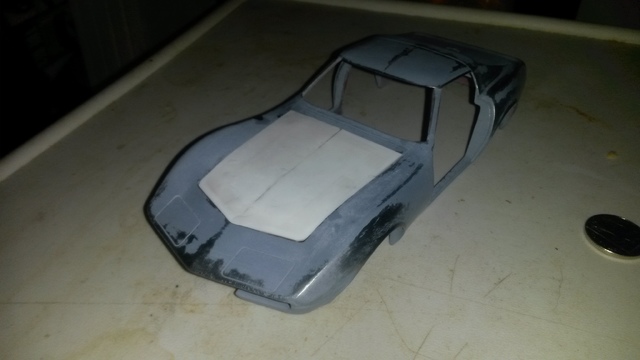
Evenin all. A story. My sons girlfriends Dad Is a huge Corvette fan and he's just got a real 1969 Corvette Stingray. For his B/Day his daughter wants to give him a model of his car.If you ever get to read this John, Happy Birthday. Naturally I accepted the challenge. Unfortunately I've only got a week to do it. This is the starting point I was given. 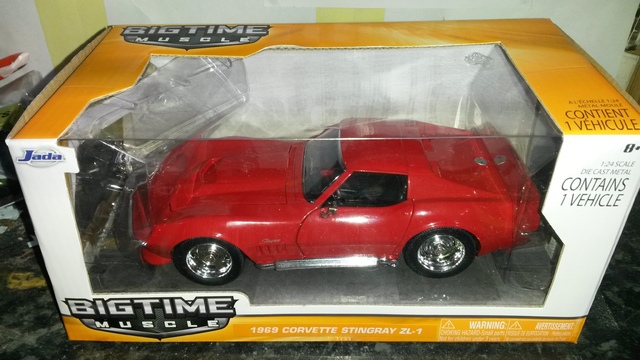 . As you can see it's a diecast replica rather than a model. Another challenge. I've never worked with metal his big or attempted a sand down and respray in white. As far as I can tell there's 3 major differences between the normal Stingray and the LZ1, which is what I have. The biggest single difference, and the one I don't have enough time to sort, is the bonnet. This is what I have. 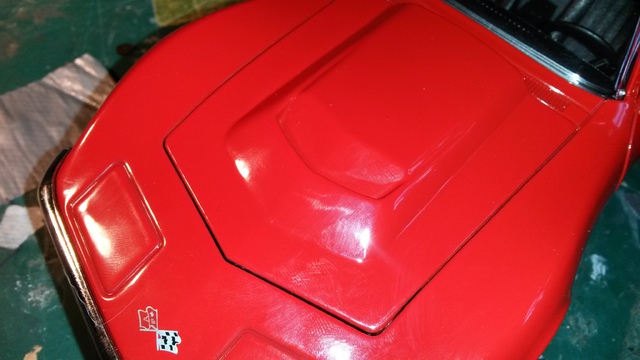 . And this is what it should look like. 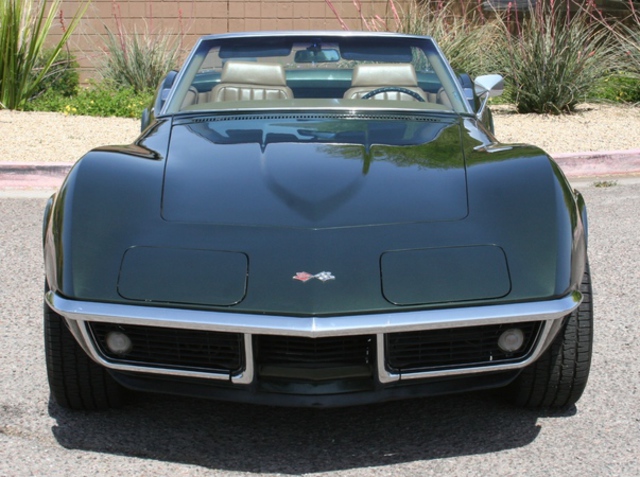 The only way I can do that is to make a replacement, which I don't have the time to do. Also the vent on the side need filling and a small pseudo vent making but again not sure if i have time. And finally i need to make a luggage bar thingy for the boot lid. and paint the interior red. Today has involved 3 hours with me Dremel. This is what the car has been through so far.      I'm chuffed to bits with how quick and relatively painless the paint removal was. Now to smoooooooth it. Bleeding fingertips Ahoy. I really I had this for longer. There's loads of scope for improving the interior too. I'm really hoping I'll get it back at some time so I can remake the bonnet and detail inside. |
|
|
|
Post by Leon on May 26, 2015 18:38:04 GMT -5
Going to make a great B Day present KP! Looking forward to seeing how you tackle this.  |
|
|
|
Post by deafpanzer on May 27, 2015 12:22:36 GMT -5
A week?!?!? WOW! You will just do fine... just skip meals and you will make it work! Good start there!
|
|
kingpin141
Full Member
Member since: March 2013
Posts: 308
|
Post by kingpin141 on May 27, 2015 16:02:13 GMT -5
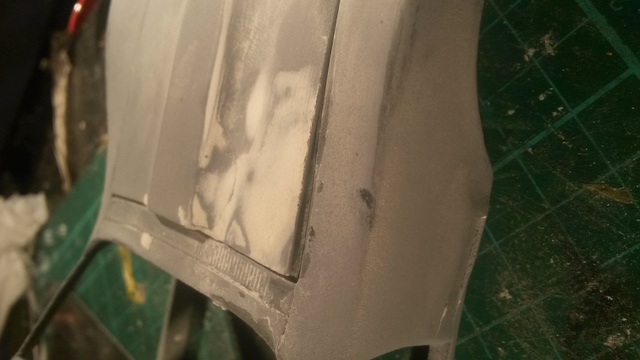
Today I have mostly been...polishing. Hours of it. I've been trying out the polishing heads on me trusty and rapidly overheating cheap Dremel rip off. Here where i've got to.  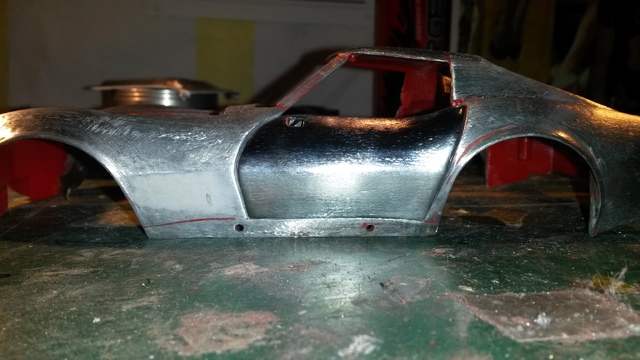 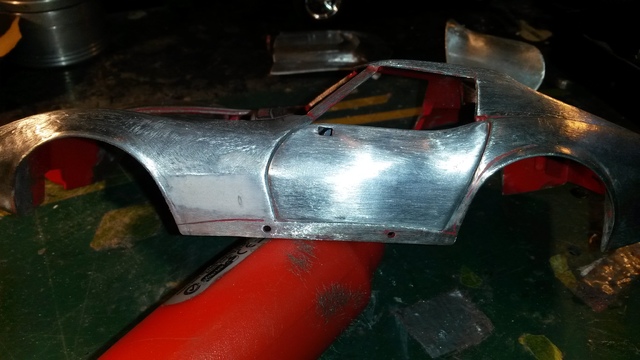 I have a question. How smooth do I have to make the surface. If I give it a totally smooth one, will the primer take. Here are a couple of shots of the bonnet smoothed and primered at different stages so I can see how far out I am. The second shot was taken after i'd polished it really lightly with some 1000 grade wet n dry. As you can see. The primer came straight off. Bum! I think I may have a plan to give me more time but i've got to wait and see on that one. I hope so, After seeing what Pascal is doing with his Ferrari I so want to do more. His work makes me look like a right numpty.   |
|
kingpin141
Full Member
Member since: March 2013
Posts: 308
|
Post by kingpin141 on May 29, 2015 15:26:17 GMT -5
Evenin all. Hours of sanding and polishing and only two pics to show for it.   A quick blast of primer to check on the finish and it turns out i've made a much better job than I initially thought. Yay. 90% of the remaining smoothing is around the flare of the wheel arches. Also I've got longer to build this too. Instead of getting the car on his birthday, John is being presented with this blog. Which means I can go and see the actual car and he can make sure all the little details on his make it into the final model. Welcome John.
|
|
|
|
Post by deafpanzer on May 29, 2015 18:39:55 GMT -5
Looking great primed... so ready to be painted!
|
|
kingpin141
Full Member
Member since: March 2013
Posts: 308
|
Post by kingpin141 on Jun 4, 2015 15:26:54 GMT -5
|
|
|
|
Post by Leon on Jun 4, 2015 15:31:14 GMT -5
Nice work on the new bonnet KP.
|
|
kingpin141
Full Member
Member since: March 2013
Posts: 308
|
Post by kingpin141 on Jun 7, 2015 3:47:56 GMT -5
I've sat staring at the new bonnet and i'm not happy. This is the best pic of why.  . PLus I heated the bonnet to try and get it to sit properly. This is the result.  You can hardly see it but there's now a dent in it. Bummer So here is the beginnings of bonnet MK2.  Still, I never expected to get it right first time. |
|
Deleted
Member since: January 1970
Posts: 0
Apr 27, 2024 15:21:43 GMT -5
Apr 27, 2024 15:21:43 GMT -5
|
Post by Deleted on Jun 7, 2015 15:46:38 GMT -5
<font face="comic sans ms">Hi, Please let me introduce myself. I am John, Elizabeths father and future recipient of the Corvette which you are putting so much painstaking work into. As planned, I was presented with a printed version of your blog at my birthday meal. It came as no surprise to me that Fay and Lib had put so much thought into my birthday gift, enlisting your help to create exactly what they knew I wanted rather than being satisfied with a close alternative. I am truly blessed to have such considerate children. I have been looking forward to meeting you both for some time and Lib and I have discussed possible days when this can happen. I will take this opportunity to thank you now for all your hard work so far but will be much happier when I can thank you in person. Hope to see you soon. John.</font>
|
|
kingpin141
Full Member
Member since: March 2013
Posts: 308
|
Post by kingpin141 on Jun 8, 2015 18:17:33 GMT -5
Hi John, I'm seriously relieved you're happy with everything so far. Happy Birthday. Now that we're actually speaking Can I ask a big favour. Can you take Lots of pics of your car and email them to me please. I'll get my addy to you. In the meantime I've been working on the bonnet. The first one sat slightly proud due to it's thickness, but any thinner and it'll be too thin and weak. So my next attempt was this.   On top is a really thin piece of plasticard the exact shape of the bonnet. Underneath a thicker piece to reinforce it but cut to sit in the hole. One minor snag so far. Shower not hot enough to bend it. Then I had me brainwave. I've overcome my Scrooge attitude and ordered 5 sheets of much needed plasticard. All the others are from off cuts. With a full sheet I can use my vac former and vac form the first bonnet after iv'e filled the dent. This has the added advantage of meaning i won't have to spend forever trying to smooth the filler around the bonnet bulge. Yay... |
|
johnt
Full Member
Feb 2012 MoM and 2012 Model of the Year Winner
Member since: November 2011
Posts: 1,174
Nov 15, 2011 5:38:32 GMT -5
Nov 15, 2011 5:38:32 GMT -5
|
Post by johnt on Jun 9, 2015 9:07:48 GMT -5
Making a model as a gift is a great idea, very personal and quite special. Best of luck mate!  Cheers JT |
|
kingpin141
Full Member
Member since: March 2013
Posts: 308
|
Post by kingpin141 on Jun 10, 2015 17:24:36 GMT -5
Well the thin and thick plasticard experiment was a failure. couldn't get it hot enough the bend without warping or blistering it. So I had a go at vac forming. That didn't go well either. Here be the results.   Here are the seven bonnets i've made so far  And this is bonnet number eight.  Not perfect but getting mighty close now |
|
kingpin141
Full Member
Member since: March 2013
Posts: 308
|
Post by kingpin141 on Jun 16, 2015 8:45:17 GMT -5
Yay. I've got some pics of the car i'm copying. Unfortunately as soon as I saw the pics I noticed a snag. Here is the car itself And here is the back end of the one i've got  I not sure what, if anything, that I can do about the bonnet lip spoiler as I have neither the tools or the talent to do the necessary metal work required. Bugger. Also this is the front end  And this is what I've got  Major butchery of the front end to follow
|
|
|
|
Post by Leon on Jun 16, 2015 12:57:10 GMT -5
Good luck with the surgery KP! Slow and easy and you'll get it. |
|
kingpin141
Full Member
Member since: March 2013
Posts: 308
|
Post by kingpin141 on Jun 23, 2015 7:18:48 GMT -5
I've finally been up and seen the car so i've lots of reference pics to work from now. I drove it too. To quote Mr May the sound gives you quite a tingle. Anyways, back to the plot. This is the front end  And this is the model.  Notice the real thing doesn't have any chrome work or a bumper. The nose is extended. I can't extend the nose on the model ( lack of talent) so instead the compromise i've come up with is this. The chrome was removed, the bumper cut off and then I sanded it all to sit flush with the body work.  To end up with this. Then I made a larger number plate and I've started on the sticky out bumper thingies.    Not perfect but much closer than it was. Also I've had a chat with John and the lip spoiler is staying. Phew. |
|
kingpin141
Full Member
Member since: March 2013
Posts: 308
|
Post by kingpin141 on Jun 25, 2015 15:38:33 GMT -5
Tonight I've been working on the interior. Converting it from manual to auto and fitting a stereo. This is the real thing  And this is where i've got to so far.  First up a new cover the the gearstick etc. I've scored in the ashtray etc. then penciled them so they can be seen in the pics. Then i made up a basic stereo. 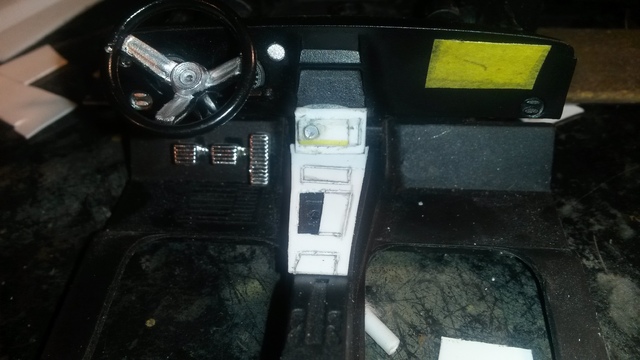 And finally removing the clutch and brake pedals and replacing with one big brake  
|
|
|
|
Post by Leon on Jun 25, 2015 20:40:48 GMT -5
Awesome scratch work on the interior KP.
|
|
kingpin141
Full Member
Member since: March 2013
Posts: 308
|
Post by kingpin141 on Jul 20, 2015 15:53:56 GMT -5
|
|
|
|
Post by Leon on Jul 20, 2015 16:15:17 GMT -5
Good to see this come back around KP! Your doing a fine job despite the bonnet issue. |
|
kingpin141
Full Member
Member since: March 2013
Posts: 308
|
Post by kingpin141 on Jul 22, 2015 17:23:59 GMT -5
Over the last few days I've got the door handles inside and out and the lock done. I used spare photo etch for the parts. Here is the exterior   The handle is 1/72 seat harness and the lock is a tie down. 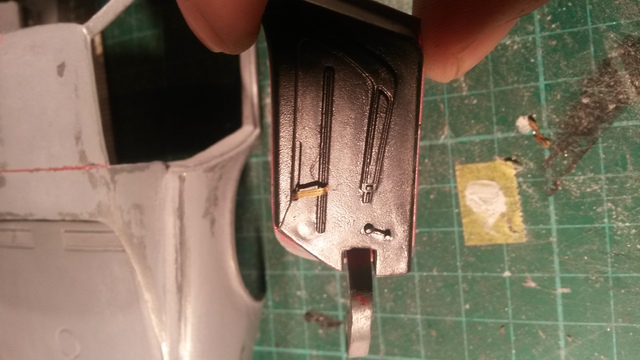  The interior handle is also seat harness At the front I've super glued the intake grill in and started to fill it so it sits smoothly in place. Lots of work left to do on it yet 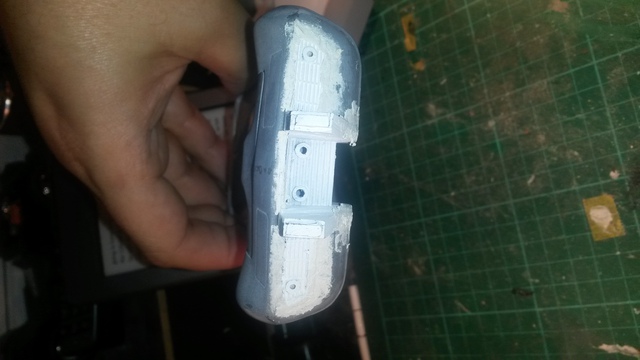 |
|
kingpin141
Full Member
Member since: March 2013
Posts: 308
|
Post by kingpin141 on Jul 24, 2015 4:38:23 GMT -5
After spending bloody ages working on the body with very little to show for it I decided to have a crack at the interior. One evening later I've got to this stage    Happy happy happy |
|
|
|
Post by deafpanzer on Jul 27, 2015 14:43:40 GMT -5
Interior looking sharp!
|
|