Post by joeydee on Jul 24, 2015 4:44:41 GMT -5
One of my current WIP projects:
Ian McQue's "The Last Airborne", one of his famous hovering ships. He painted it back in 2010.

Thumbnail taken from Ian's blog at mcqueconcept.blogspot.de/2010/10/last-airborne.html (visit for a larger view).
My Intention: not an exact rebuild, but a free interpretation of the concept. Trying to catch the basic forms, some remarkable parts and the allover composed and rusty look. There are similar ships in the background of this artwork with slight variations and different numbers, so mine could be another one of the series.
Currently, the build is almost done, paintjob just started, but still lots to do. I'll try to bring you up to date, sorry for the long post.
This is how it started:
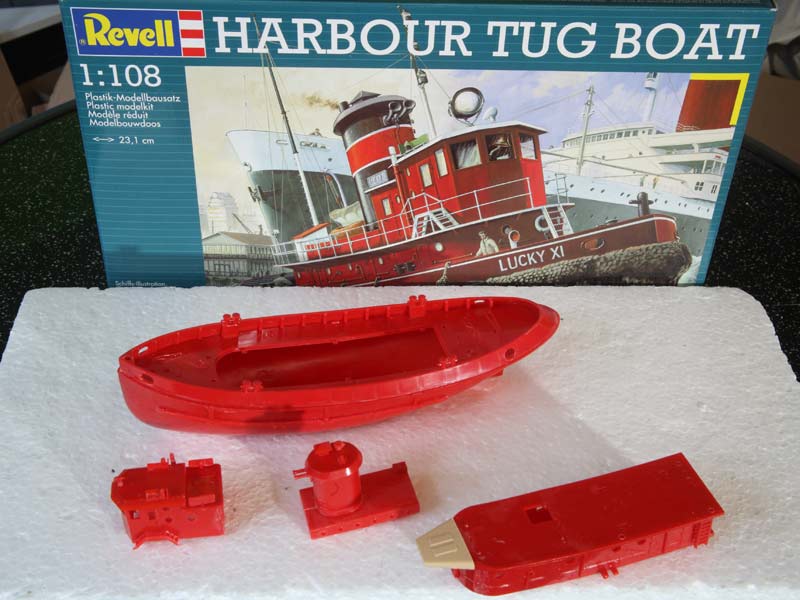
The base kit is a very cheap one. According to scalemates, the molds are from 1956. At least the sprues look like that…
I needed it for a solid ship-looking base and because of the typical details like doors and bull's eyes on the walls. So I didn't have to scratch these parts.
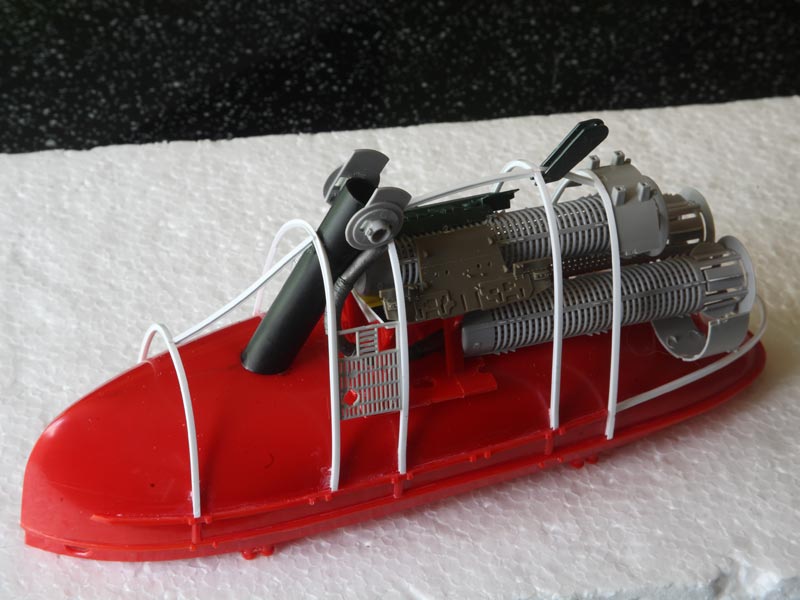
Adding the engine. There will be some holes in the hull, so some greebles have to be added inside.
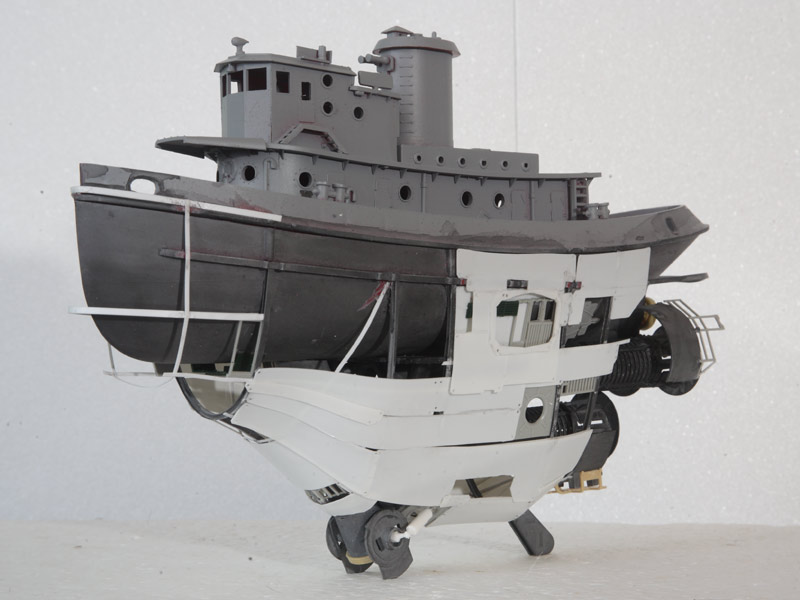
McQue's ships often seem to be composed of large metal sheets taken from various older vehicles. So I covered the hull with single overlapping plastic sheets instead of carving into larger ones.
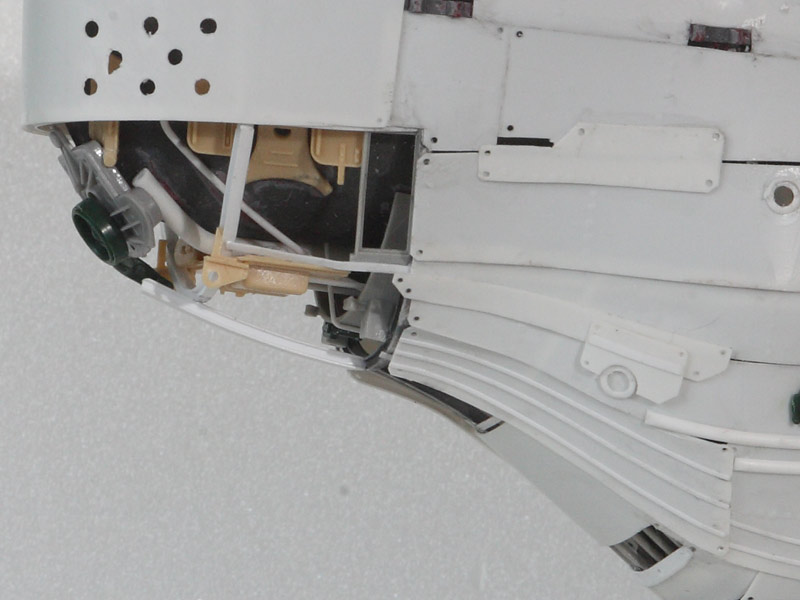
Adding more detail to the open front. Some antennas and wires can't be added until the paint job is done. This project really requires proper planning…

There are three crossbars (do you say so?) on deck, important for the "feathered" look.
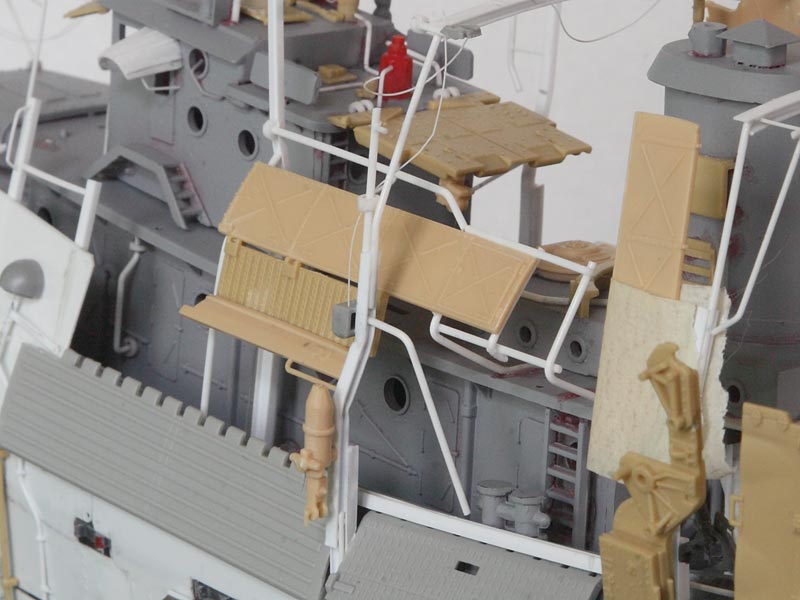
"Flying" sheets on thin frames, that's what I see in the artwork.
And details never seem to be enough
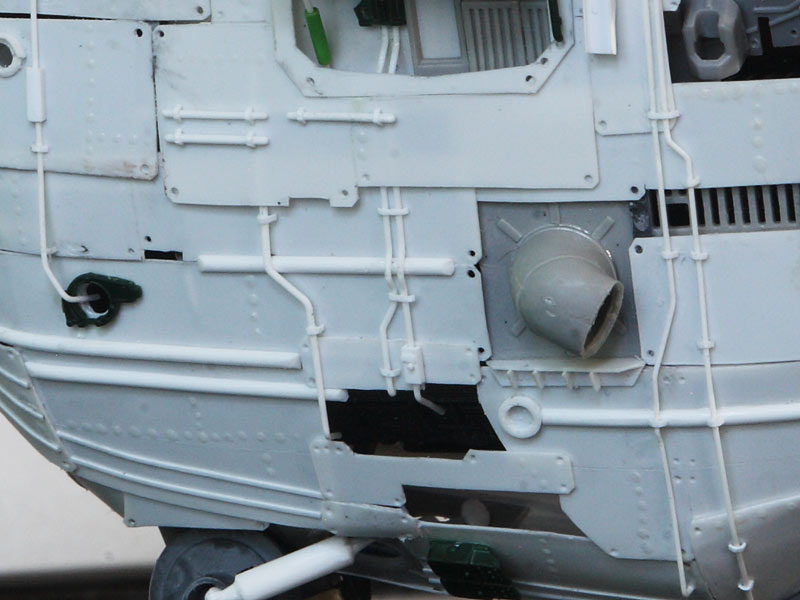
Some pipework. White means scratched from sheet and profiles.
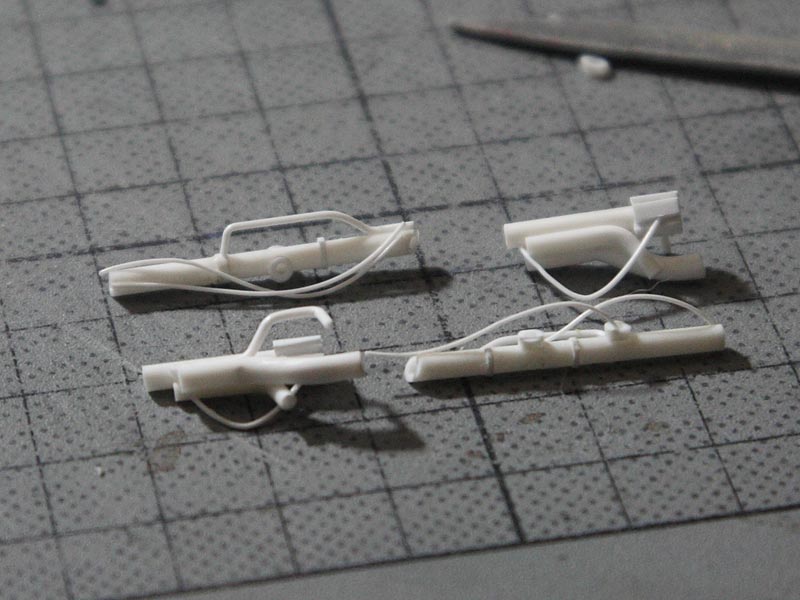
More scratched pipes'n'wires for some of the holes in the hull.
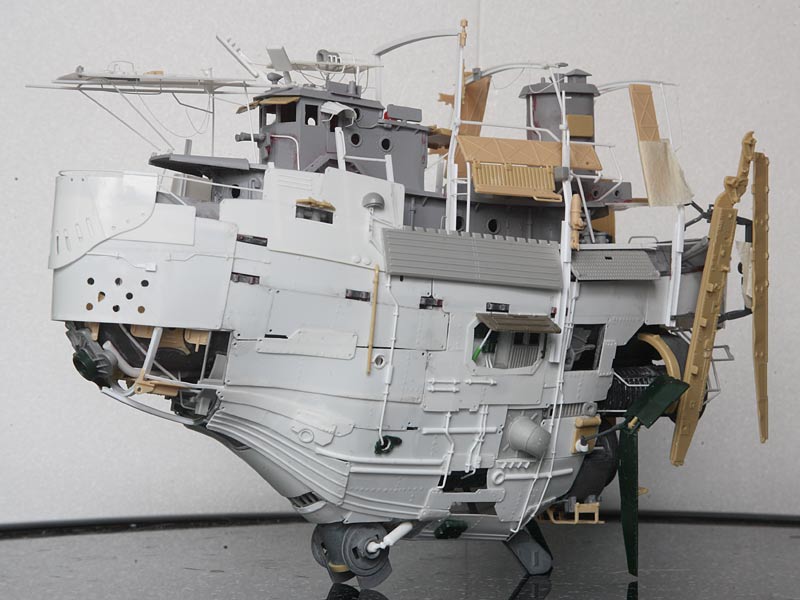
Nearly all parts done. Many parts are kept separately for painting. It's always a challenge to mount/unmount them without accident for testing and photos
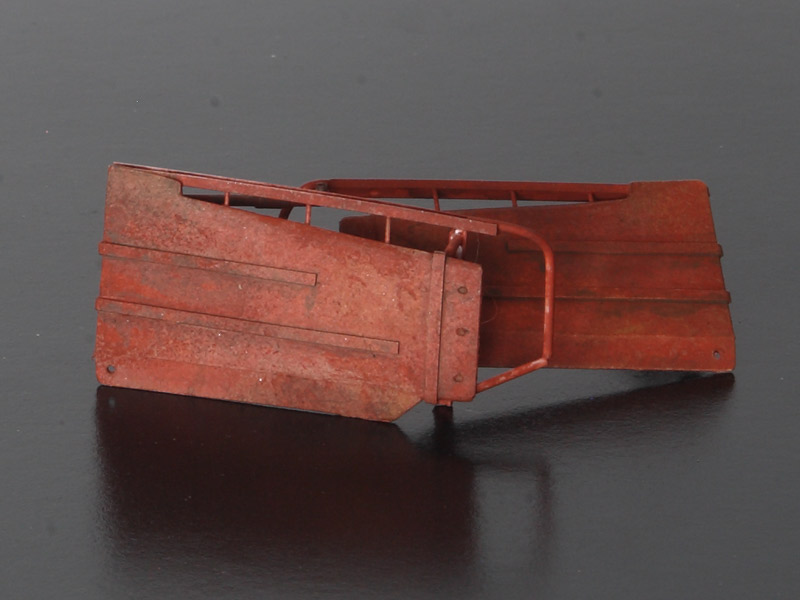
Now for the color.
I first need a rather bright rust layer as a chipping base. It will automatically get weathered and darkened later in the process.
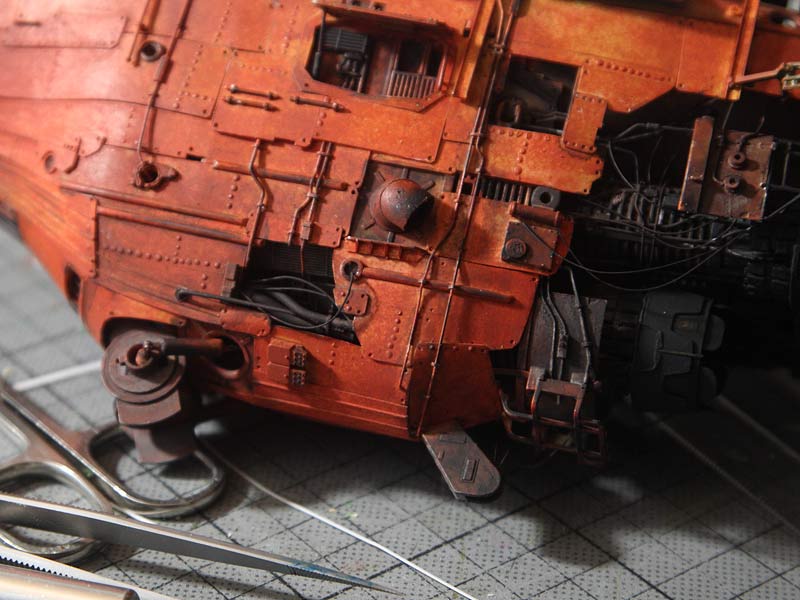
Red/black would also be a nice color scheme, but I will go on to the original
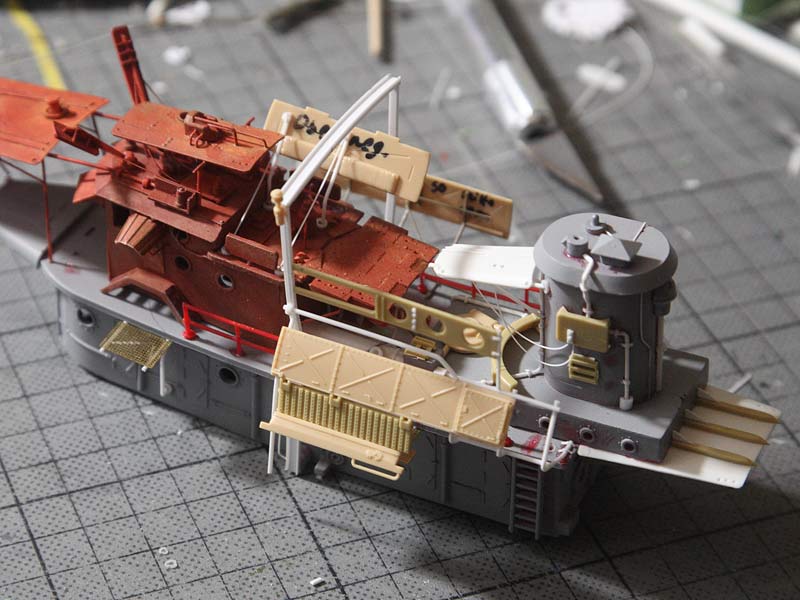
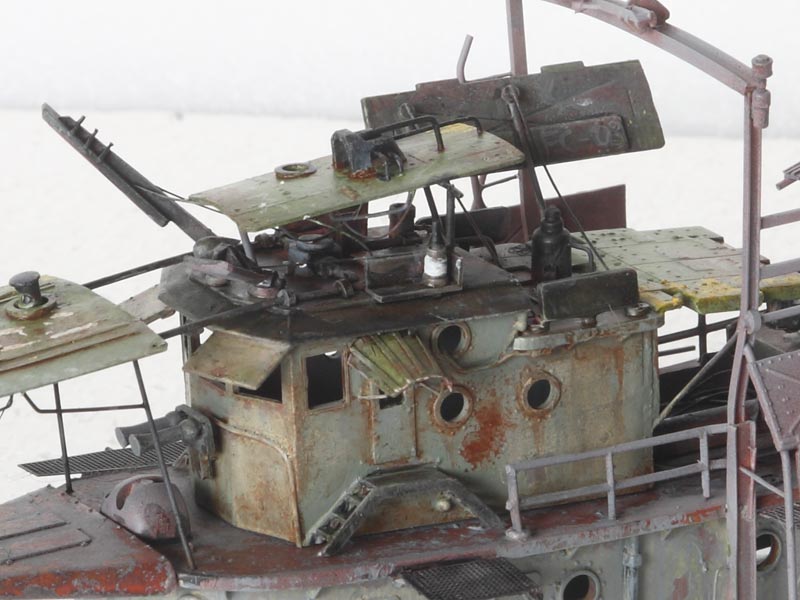
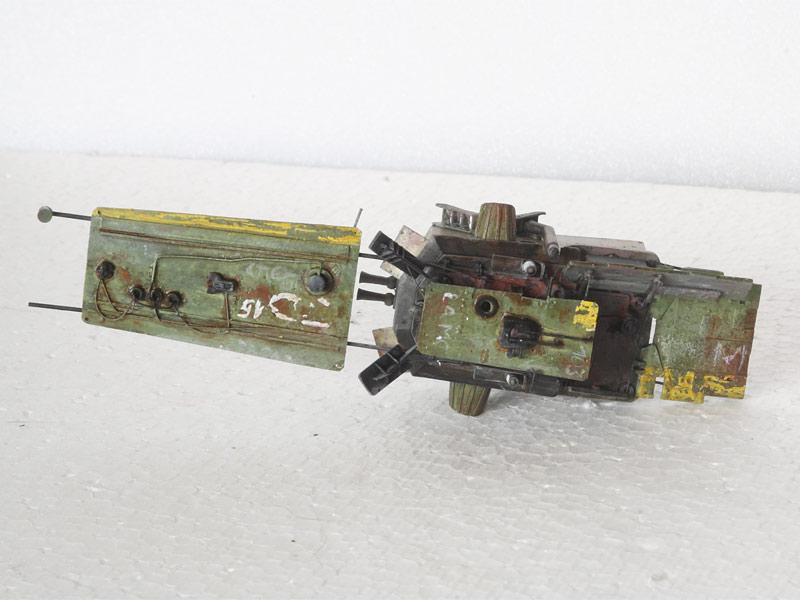
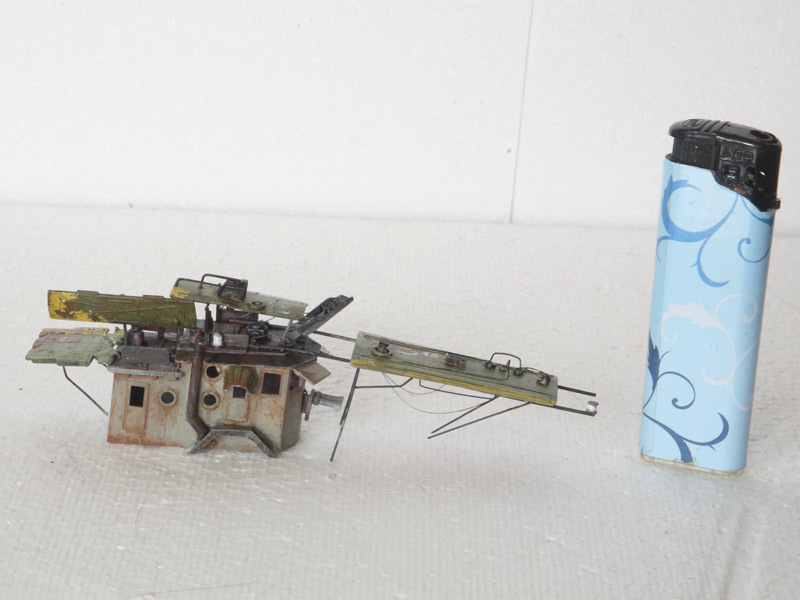
These superstructure parts are kept in three pieces, one of them already rusted in the photo.
Glued together it would be impossible to paint and weather all those details.
Current state:
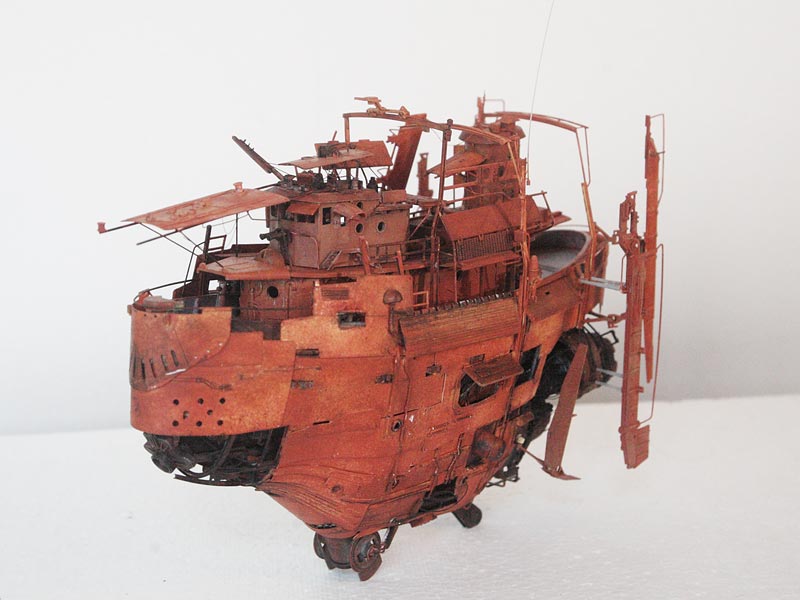
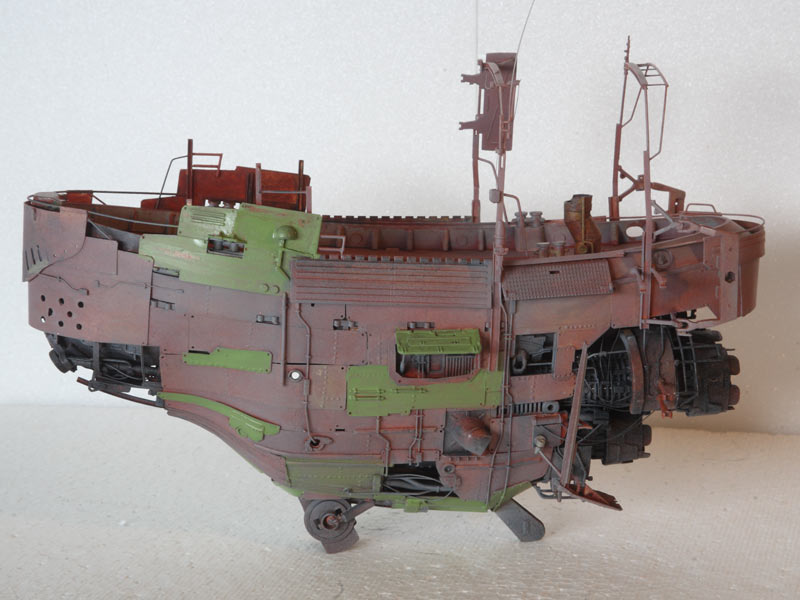
Rust layer is complete.
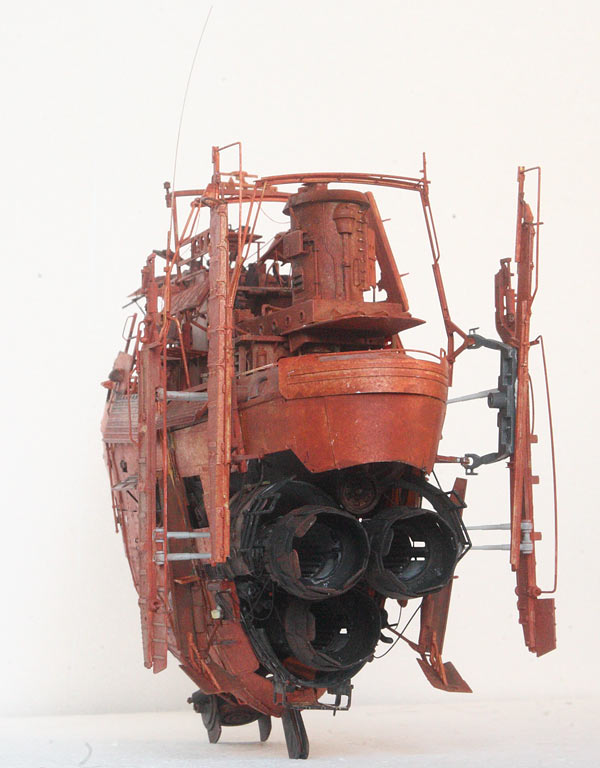
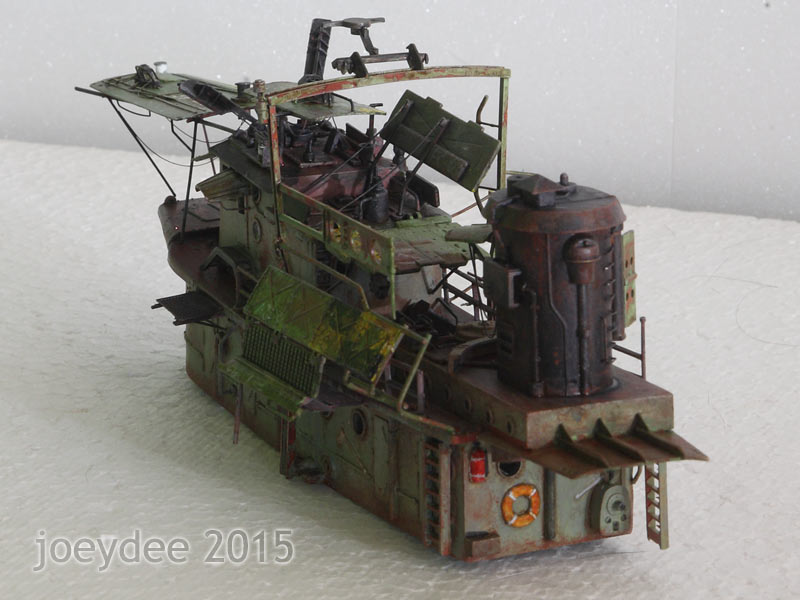
Back view, with engine nozzles.
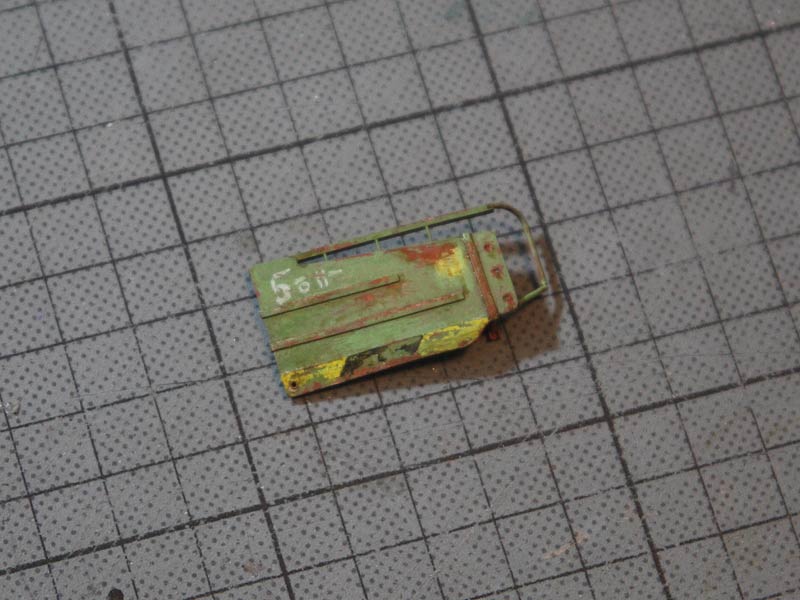
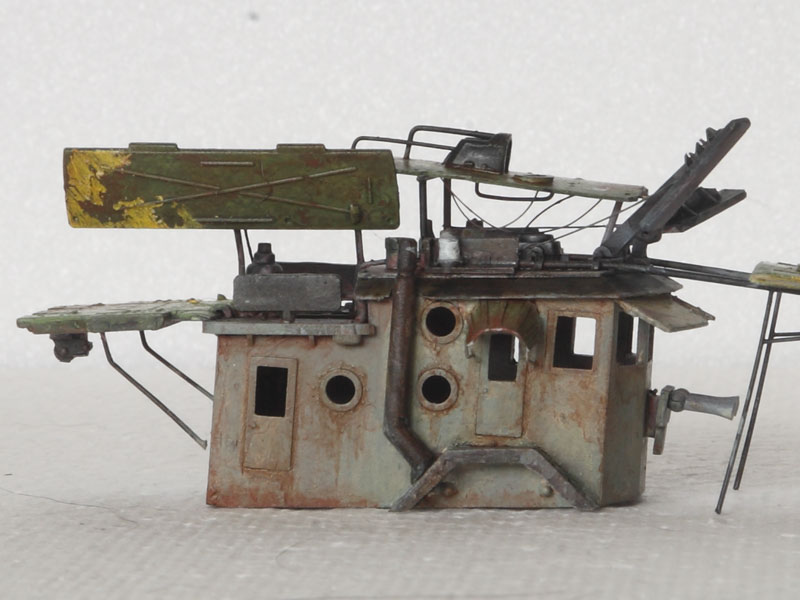
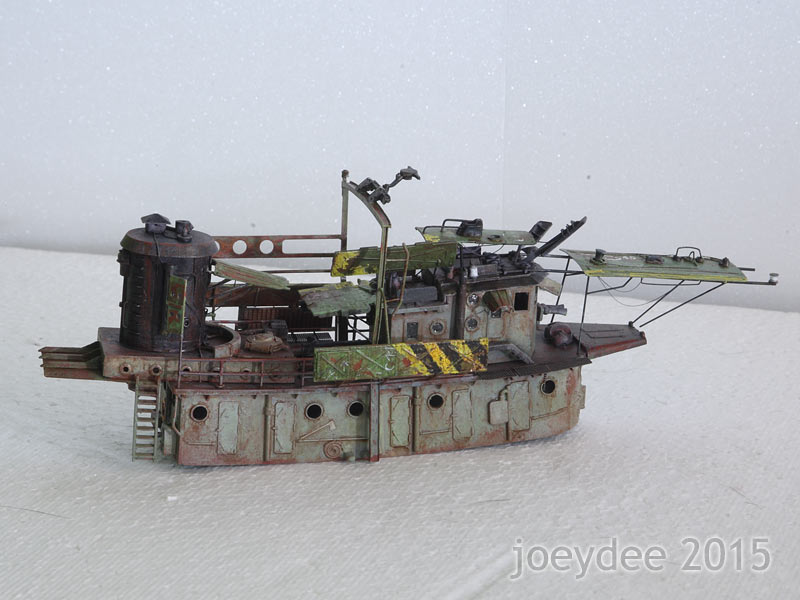
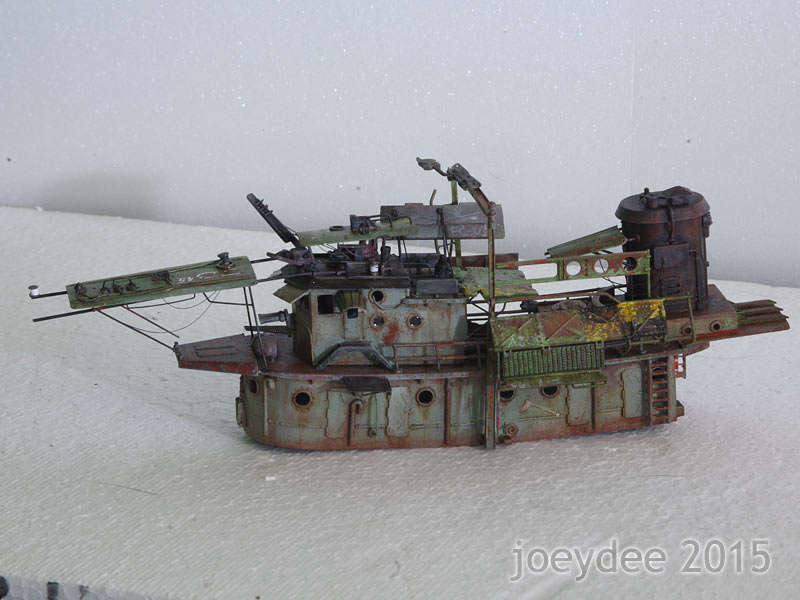
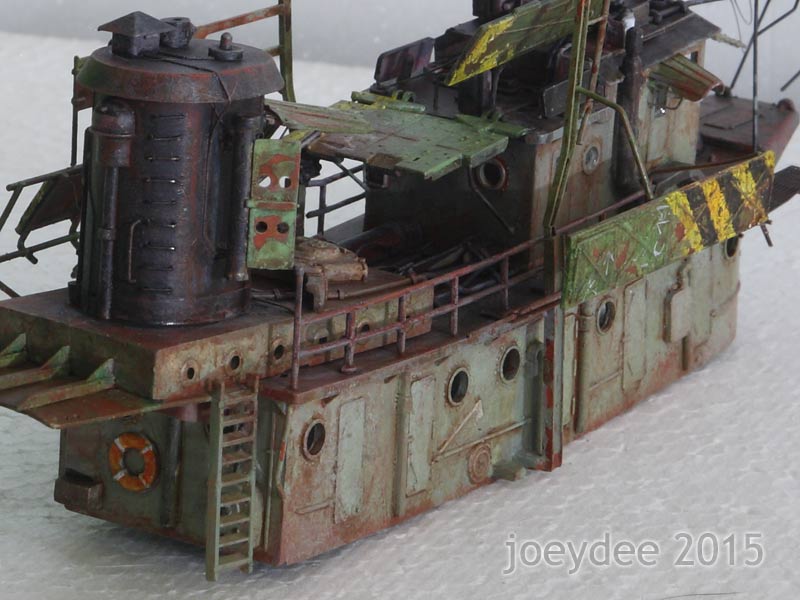
Testing the final color scheme: pale greens in contrast to reddish rust spots, yellow marks, a few black and white ones and dark technic parts. Compared to the original artwork, this seems to be ok.
Hope you like it (and hope I'll still like it after paintjob)
Ian McQue's "The Last Airborne", one of his famous hovering ships. He painted it back in 2010.

Thumbnail taken from Ian's blog at mcqueconcept.blogspot.de/2010/10/last-airborne.html (visit for a larger view).
My Intention: not an exact rebuild, but a free interpretation of the concept. Trying to catch the basic forms, some remarkable parts and the allover composed and rusty look. There are similar ships in the background of this artwork with slight variations and different numbers, so mine could be another one of the series.
Currently, the build is almost done, paintjob just started, but still lots to do. I'll try to bring you up to date, sorry for the long post.
This is how it started:

The base kit is a very cheap one. According to scalemates, the molds are from 1956. At least the sprues look like that…
I needed it for a solid ship-looking base and because of the typical details like doors and bull's eyes on the walls. So I didn't have to scratch these parts.

Adding the engine. There will be some holes in the hull, so some greebles have to be added inside.

McQue's ships often seem to be composed of large metal sheets taken from various older vehicles. So I covered the hull with single overlapping plastic sheets instead of carving into larger ones.

Adding more detail to the open front. Some antennas and wires can't be added until the paint job is done. This project really requires proper planning…

There are three crossbars (do you say so?) on deck, important for the "feathered" look.

"Flying" sheets on thin frames, that's what I see in the artwork.
And details never seem to be enough


Some pipework. White means scratched from sheet and profiles.

More scratched pipes'n'wires for some of the holes in the hull.

Nearly all parts done. Many parts are kept separately for painting. It's always a challenge to mount/unmount them without accident for testing and photos


Now for the color.
I first need a rather bright rust layer as a chipping base. It will automatically get weathered and darkened later in the process.

Red/black would also be a nice color scheme, but I will go on to the original


These superstructure parts are kept in three pieces, one of them already rusted in the photo.
Glued together it would be impossible to paint and weather all those details.
Current state:

Rust layer is complete.

Back view, with engine nozzles.

Testing the final color scheme: pale greens in contrast to reddish rust spots, yellow marks, a few black and white ones and dark technic parts. Compared to the original artwork, this seems to be ok.
Hope you like it
 (and hope I'll still like it after paintjob)


