adt70hk
Forum Moderator      November '24 Showcased Model Awarded
Member since: November 2015
Currently attempting to build something decent!!! ;)
Posts: 2,835 
MSC Staff
|
Post by adt70hk on Nov 26, 2015 8:55:55 GMT -5
Good afternoon all..... Below are some pics of the first batch of German AFVs I've built since returning to the hobby. As with my British submission these are all quick build kits. As you will see these are average at best and if I'm honest not as 'good' as my British vehicles. So I'm not putting these up to say look aren't these great - because they're clearly not - but so you can point out the where I've gone wrong and how to improve things..... I'm already aware of a few issues: - my German camo technique needs a lot of work....
- the weathering on the Pz IVs and Stugs is very dodgy. Sean (aka vinidicareassasin) has already pointed out where I went wrong on the BritModeller site - no flow aid/washing up liquid. (Sean - thanks again).
- I need to get an airbrush, although there may some news on that shortly!!

I will now don my flak jacket and helmet, retreat to my steel re-enforced concrete bunker and await the deluge of hopefully constructive criticism....... I'll give it a week to give the bombardment time to die down before I stick my head above the proverbial parapet to review the responses....  Seriously though I really would appreciate any observations, comments and constructive criticisms - it's the only way to get better!!!  Enjoy!! Andrew ------------------------------------------------------------------------------------ Plastic Soldier Company SdKfz 251 - 4 variants
This was the second kit I bought when starting up again and for me it was a great buy. I'm never going to be building vast quantities so the opportunity to build several different versions was appealing. The kit comes with 4 models and you can build 4 x 251/1 halftracks or 4x 251/10 37mm AT gun, or one each of 251/8 Mortar Carrier, 251/9 Stummel, 251 /16 Flamm and 251/7 Pioneer - or a combination thereof. It also comes with 37 crew and a huge amount of spare equipment and stowage. With having absolutely no stowage to start with this was a big bonus and some of it is generic enough to work on Allied vehicles. I ended up mounting the mortar and crew on a very impromptu plastic base rather than mount on one of the vehicles. I also now realise that their uniform tops/smock are should probably be the camo variety but being naive I was following the box art. 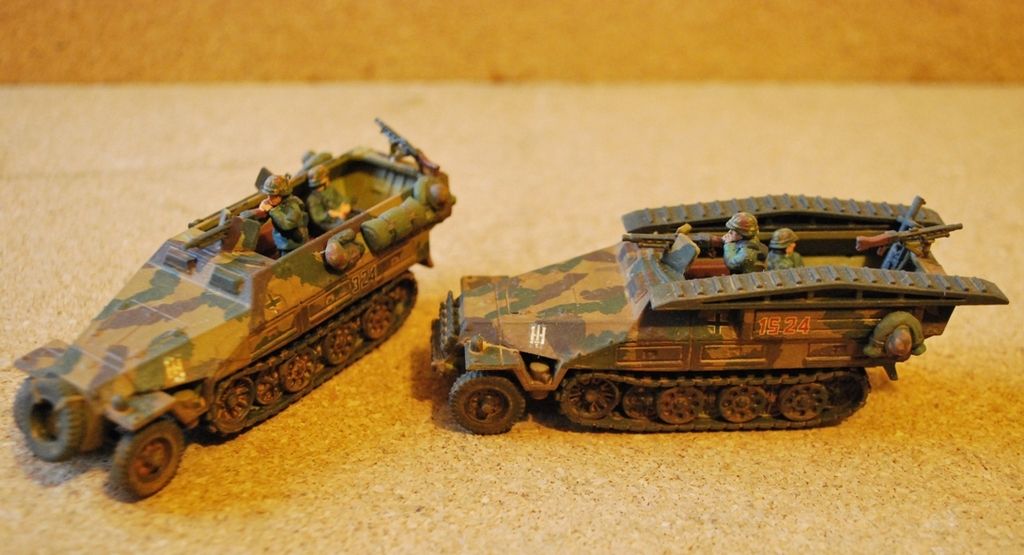 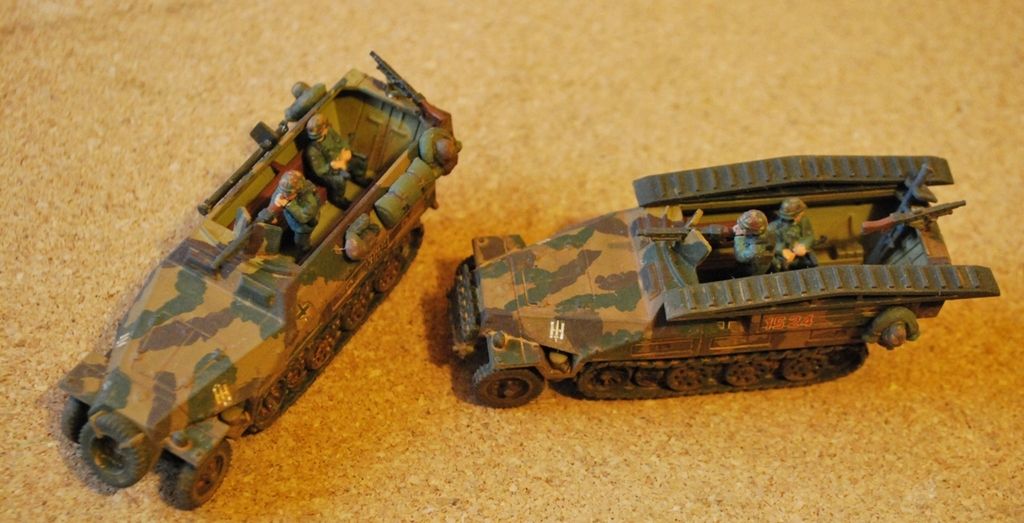 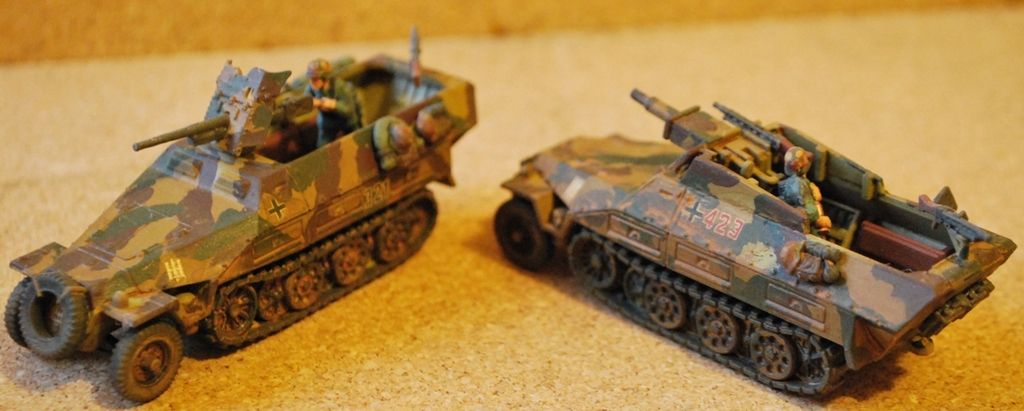 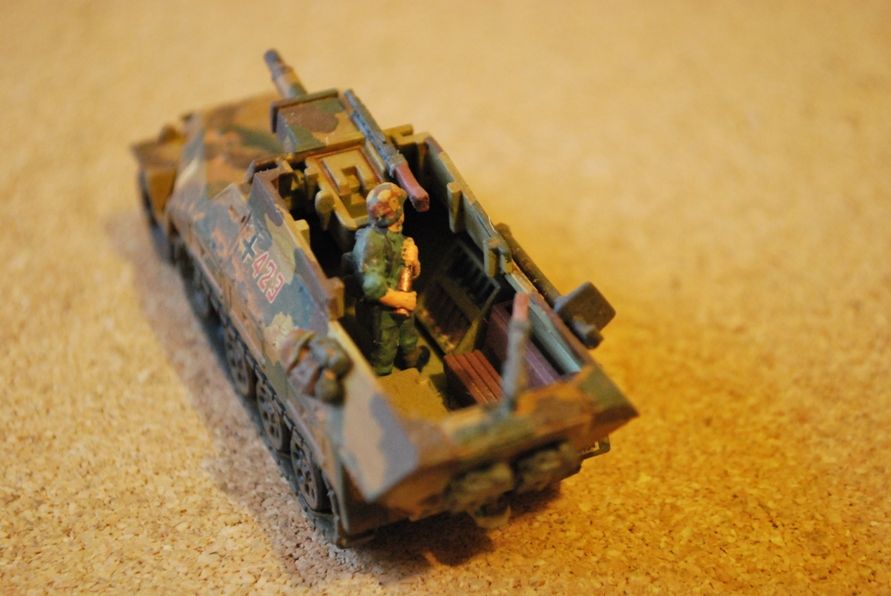 Amourfast Pz IV G Amourfast Pz IV GBelow is a pic of one of two I have built. As I've already mentioned above the weathering didn't quite work as I was hoping but I at least know where I went wrong. This one has some stowage from S and S Models on it. 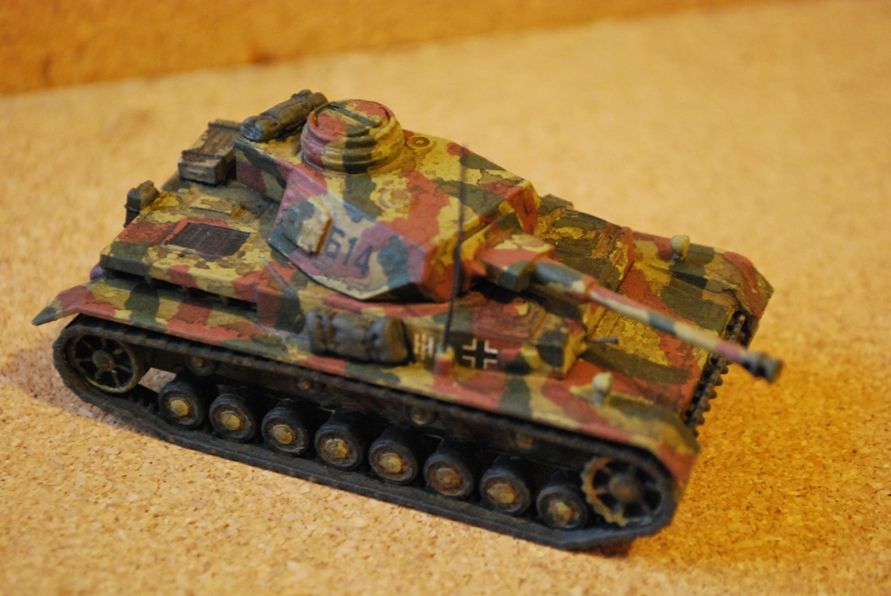 Armourfast Stug III Armourfast Stug III
This is one of the two I have. Again the weathering was less than perfect and for some reason I didn't put any stowage on, so they look a bit bare.... DOH!!! 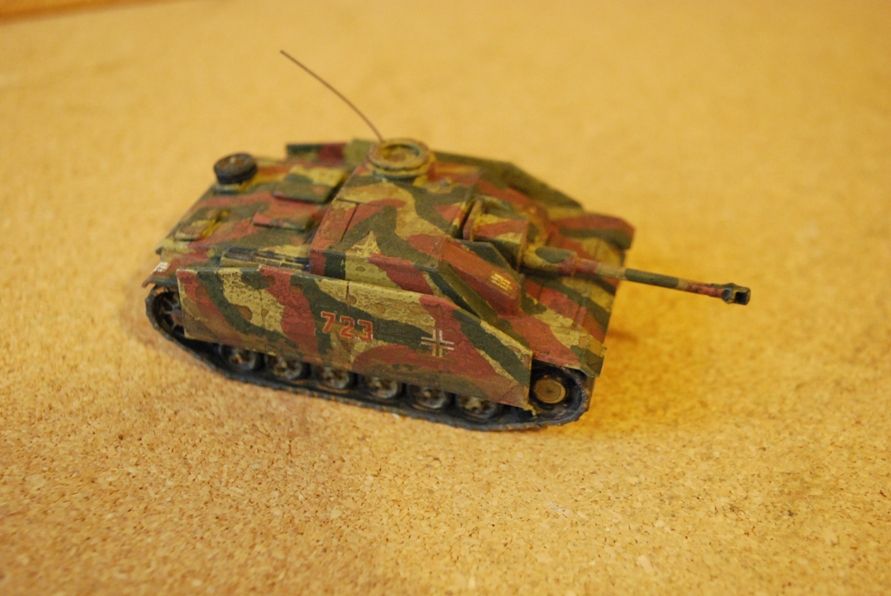 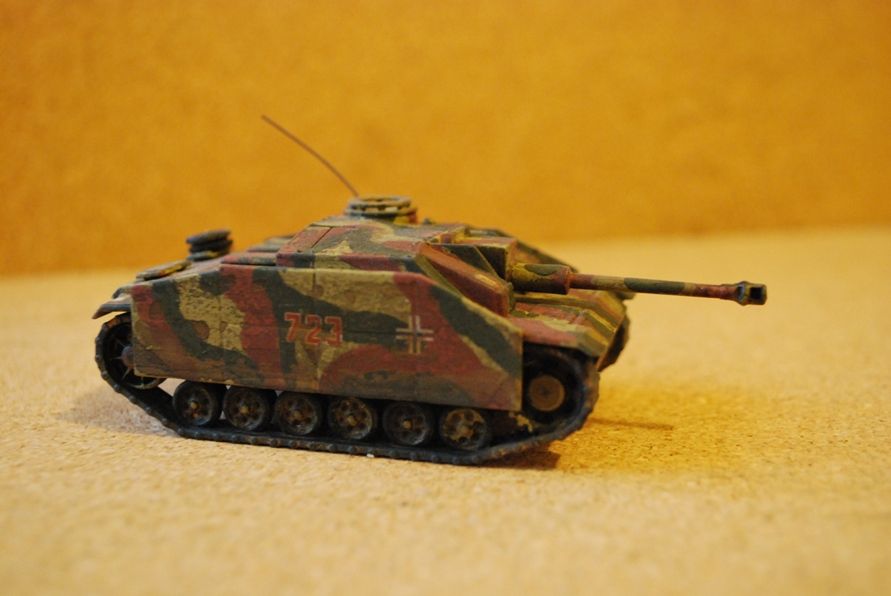 Armourfast Panthers x2 Armourfast Panthers x2
These were actually entirely built by my young daughter. She also did the tarpaulin on the back made from tissue paper, painted with PVA glue, covering sprue off-cuts. I then did the paint job to my usual standard...... You'll also notice the lack of weathering and additional stowage. They are sort of her's (although I'm still waiting for payment!!) and she didn't want them looking all cluttered and dirty!! She is a girl after all!!  The figures are taken from PSC's German figure and stowage pack. If there are any newbies out there like me with minimal stowage and tank crew then this kit isn't a bad buy, if a little bit expensive. If you already have lots of stuff then don't waste your money. The cupola mounted MGs were spares from Armourfast's German MG Team pack. The brackets to mount them were made two of my plastic 'aerials' glued together to make them stronger, sanded down to make them smooth, cut to length and bent slightly. Although I need to take a side on picture so that you can see it properly...... 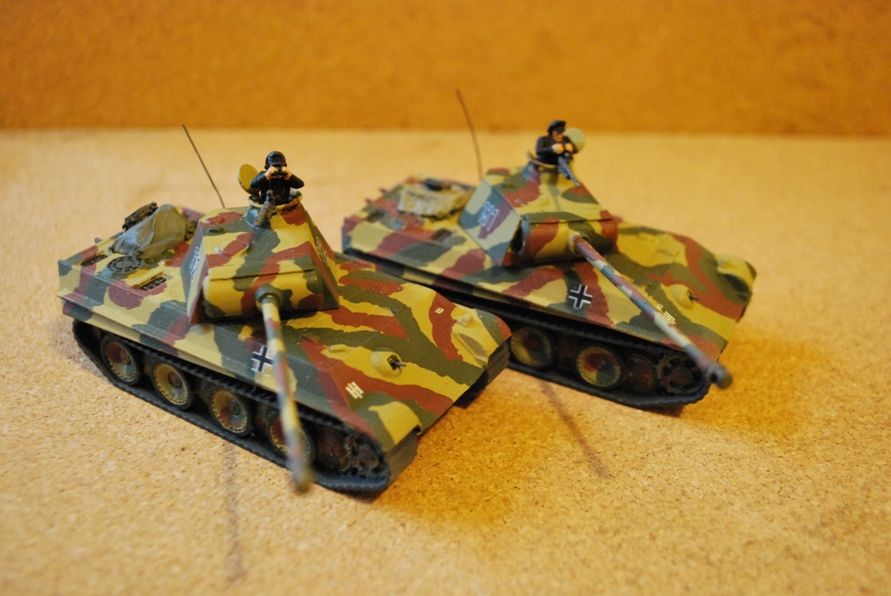 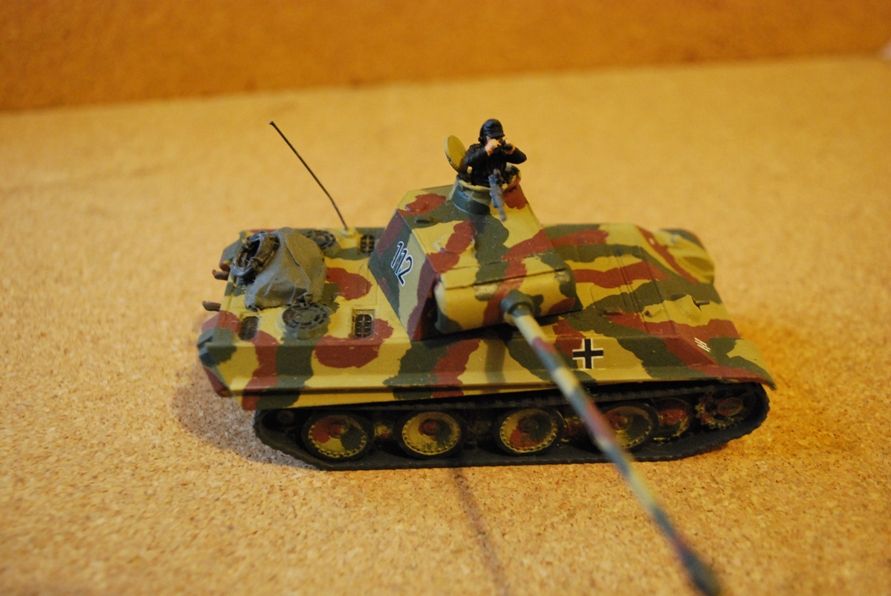 |
|
vindicareassassin
Full Member
  
Member since: May 2015
Posts: 569 
|
Post by vindicareassassin on Nov 26, 2015 10:58:01 GMT -5
Still looking for a box mate, did you speak and ok it with the wife, or you doing the typical man thing and secretly slipping it under the radar?
You just reminded me I need to buy that PSC hanomag set, I may ask for it for Xmas of someone.
As you say, I've seen these before so I'll let the others have a go first before I jump in.
|
|
|
|
Post by wbill76 on Nov 26, 2015 12:37:13 GMT -5
I think you're already aware of the big things that will go a long way towards improving your finishes and the look of the work. Airbrushing in this scale is a more balanced effort vs. in larger scales for obvious reasons but also helps preserve more of the detail. Overall washes are a good start for weathering but if you look into adding other techniques like pin washing to bring out details, pigment weathering for the tracks and running gear to add some more realism there, and more advanced techniques like dot fading/weathering, you can up the level of your finishes without feeling overwhelmed in the process of trying to add/learn too much all in one go. The order and stages at which you apply these is important in determining the end result but should offer you a good start to expand your horizons.  HTH! |
|
adt70hk
Forum Moderator      November '24 Showcased Model Awarded
Member since: November 2015
Currently attempting to build something decent!!! ;)
Posts: 2,835 
MSC Staff
|
Post by adt70hk on Nov 26, 2015 17:58:36 GMT -5
Still looking for a box mate, did you speak and ok it with the wife, or you doing the typical man thing and secretly slipping it under the radar? You just reminded me I need to buy that PSC hanomag set, I may ask for it for Xmas of someone. As you say, I've seen these before so I'll let the others have a go first before I jump in. I did briefly mention this about a week ago and have just raised it again and whilst it wasn't an outright no....there will need to be some sensitive negotiation.....so in short yes I'm still interested!! In her defence though I hadn't looked at a model in the first 11 years of marriage but now the bug has bitten, it has been a bit of a shock. She is though actually very accommodating when it comes to partially made and painted models taking up a corner of the dining room table for days on end....even as we speak my 'field-works' are sitting there after I did a bit of painting on them last night.... |
|
adt70hk
Forum Moderator      November '24 Showcased Model Awarded
Member since: November 2015
Currently attempting to build something decent!!! ;)
Posts: 2,835 
MSC Staff
|
Post by adt70hk on Nov 30, 2015 8:20:00 GMT -5
I think you're already aware of the big things that will go a long way towards improving your finishes and the look of the work. Airbrushing in this scale is a more balanced effort vs. in larger scales for obvious reasons but also helps preserve more of the detail. Overall washes are a good start for weathering but if you look into adding other techniques like pin washing to bring out details, pigment weathering for the tracks and running gear to add some more realism there, and more advanced techniques like dot fading/weathering, you can up the level of your finishes without feeling overwhelmed in the process of trying to add/learn too much all in one go. The order and stages at which you apply these is important in determining the end result but should offer you a good start to expand your horizons.  HTH! Bill Thank you very much for taking the time to comment on my very average submissions and for the advice!! In terms of pigment I've seen several mentions of 'MIG' pigments on various modelling sites and online shops (e.g. here) are they the sort of thing you were talking about and are they any good? As you say I'll definitely be taking it one step at at a time, there is no point trying run before I can walk and ruining a perfectly good model in the process! Thank you once again and it certainly does help!! Kind regards Andrew |
|
|
|
Post by wbill76 on Nov 30, 2015 12:46:45 GMT -5
My pleasure Andrew! MIG pigments are one brand/type, there are also others out there such as AK Interactive, Ammo by MIG (it's a long story about those brands!), True Earth, etc. Lots of different options to look into but they are all by and large the same thing. A little bit of them can go a very long way...I still have some of the containers of MIG pigment that I bought several years ago for example.  Look around and see what people use, compare it to what you have available at a decent price, and then you can decide which ones you want to try out. HTH!  |
|
adt70hk
Forum Moderator      November '24 Showcased Model Awarded
Member since: November 2015
Currently attempting to build something decent!!! ;)
Posts: 2,835 
MSC Staff
|
Post by adt70hk on Nov 30, 2015 16:07:11 GMT -5
My pleasure Andrew! MIG pigments are one brand/type, there are also others out there such as AK Interactive, Ammo by MIG (it's a long story about those brands!), True Earth, etc. Lots of different options to look into but they are all by and large the same thing. A little bit of them can go a very long way...I still have some of the containers of MIG pigment that I bought several years ago for example.  Look around and see what people use, compare it to what you have available at a decent price, and then you can decide which ones you want to try out. HTH!  Bill I was was wondering about MIG Pigments and Ammo by MIG and what on earth was going on but couldn't quite work it out.  I've just spent 15 minutes wandering around your site and was very impressed with the amour but then I had a look at your model of HMS Dreadnought - rigging and all - and it is quite simply stunning.  I dread to think how many build hours that must have taken. So thank you yet again for taing time out to help a newbie like me out, it is very much appreciated!! Regards Andrew |
|
|
|
Post by wbill76 on Nov 30, 2015 18:03:28 GMT -5
Bill I was was wondering about MIG Pigments and Ammo by MIG and what on earth was going on but couldn't quite work it out.  I've just spent 15 minutes wandering around your site and was very impressed with the armour but then I had a look at your model of HMS Dreadnought - rigging and all - and it is quite simply stunning.  I dread to think how many build hours that must have taken. So thank you yet again for taking time out to help a newbie like me out, it is very much appreciated!! Regards Andrew Thanks Andrew! Glad you like the HMS Dreadnought, from start to finish that particular project took about 150 man hours. The rigging was a complex job but a fun one, I learned something new when I did as I hadn't ever attempted rigging a ship before that. Fortunately, I found some helpful tips from other builders who had used a similar technique and I was able to work it out. That's what the hobby is all about in terms of sharing knowledge and what does (or doesn't!) work when it comes to tackling something.  |
|
vindicareassassin
Full Member
  
Member since: May 2015
Posts: 569 
|
Post by vindicareassassin on Nov 30, 2015 18:22:57 GMT -5
Hi Andrew,
I've never used any of the ready made pigment powders for dust effects
I use the dust off sanded artists pastels, make sure they aren't the oil pastels, they are more like crayons,
I get them from places like The Range and Hobbycraft.
I just buy the stick colours I want and rub them on some 180grade sand paper, catching the dust on a saucer or plate.
I then either use them dry on a soft flat brush or make-up sponge or I use Tamiya X-20 thinners and mix them together to represent collected dust in corners etc.
You can also mix them together to alter shades aswell, I use a dark cream colour mixed with a white to give a pale dust/rain streaks.
As an alternative Humbrol also do a small range of powders too, I do have their 'mud' powder but I feel its to dark for dry mud dust.... Dead handy to mix with some pva glue and make thick mud deposits though.
ATB
Sean
|
|
vindicareassassin
Full Member
  
Member since: May 2015
Posts: 569 
|
Post by vindicareassassin on Nov 30, 2015 18:33:38 GMT -5
Just had a look and the pastels I use are made by Faber-Castel, so if you decide to try before you spend big money on recognised names you know what you are looking for, good thing is you can buy them as individual sticks so can pick and choose the colours you want... They do a very nice burnt umber and raw sienna, ideal for rusty exhaust stacks...
|
|
|
|
Post by TRM on Nov 30, 2015 21:02:41 GMT -5
Hey Andrew! Actually a fine collection of braille offering there! I personally like the kits form PSC. Not every aspect always, but I feel the same just about everything. A little love and anything will build up nicely! What little girls doesn't like a pair of kittens? You daughter did a great job!! I think the look fantastic un-weathered...and that is coming from someone who would add rust to his toast in the morning if I could!  I agree with Bill here, obviously the use of an airbrush would tighten some thing s up, but not everyone has the means nor the desire to jump into that pond right away. Depending on what you are using for paints, and I will mention Vallejo only because there are a couple sets designed for PSC...thinning the paint a little for brush application will smooth the finish. Thinking in terms of figure painting, thinning is your friend. You would just have a little better flow. As for the washes on the Pz.IV and Stug that you were curious about...I would ask what you might have used for a wash. The spotting can come form separation in the wash itself as well as too heavy of and application. As with pigments, there are many options to choose from...enamel washes (AK, AMMO, Mig,)Acrylic washes (Vallejo and even PSC brand) as well as making them from all types of paints...oh, I forgot to mention oils...LOL!! So if can get confusing on what to get and what to use them on. Personally, I would say if you can swing grabbing anything to start with, I would grab a light and dark earth type pigment and and something like Streaking Grime or similar. The pigments will last you basically forever honestly and save some time on grinding your own. They mix with oil based thinners, alcohol, water, acrylic, enamel and oils paint or can be applied dry. The Streaking Grime, or comparable, thins with spirits and can be made into a filter...translucent wash if you will, used as a wash for pin washes as well as for making streaking marks. From there you can branch off into any direction. I have and use just about any and everything out there as no single product is the be all end all to any application. It comes down to what you are looking for, what you're comfortable with and availability. So after all the blah blah....with the wash, apply it as even as you can, and not too heavy. Another reason why filters are good to use. If you want more, add it! It is easier to add more than to take off something that has dried!  The filter will blend the surface tying the paint job together and tone down contrasts...another reason why we paint to the lighter side and the effects darken them. The add pin washes to panel lines and around surface features. The enamel based products are more forgiving than acrylic washes and dry a lot faster than oils. Makes for a decent balance. You can manipulate them up to a couple days with a brush humid or damp with thinner. Okay...basically done!  Remember..."Layers". Work in layers...less is more. you can always add more!! Have fun and keep up the great work!! |
|
adt70hk
Forum Moderator      November '24 Showcased Model Awarded
Member since: November 2015
Currently attempting to build something decent!!! ;)
Posts: 2,835 
MSC Staff
|
Post by adt70hk on Dec 1, 2015 8:15:52 GMT -5
..thinning the paint a little for brush application will smooth the finish. Thinking in terms of figure painting, thinning is your friend. You would just have a little better flow. As for the washes on the Pz.IV and Stug that you were curious about...I would ask what you might have used for a wash. The spotting can come form separation in the wash itself as well as too heavy of and application. ....I would grab a light and dark earth type pigment and and something like Streaking Grime or similar......From there you can branch off into any direction. I have and use just about any and everything out there as no single product is the be all end all to any application. It comes down to what you are looking for, what you're comfortable with and availability. So after all the blah blah....with the wash, apply it as even as you can, and not too heavy. Another reason why filters are good to use. If you want more, add it! It is easier to add more than to take off something that has dried!  The filter will blend the surface tying the paint job together and tone down contrasts...another reason why we paint to the lighter side and the effects darken them. The add pin washes to panel lines and around surface features. The enamel based products are more forgiving than acrylic washes and dry a lot faster than oils. Makes for a decent balance. You can manipulate them up to a couple days with a brush humid or damp with thinner. Okay...basically done!  Remember..."Layers". Work in layers...less is more. you can always add more!! Have fun and keep up the great work!! As I said to Bill yesterday, thank you very much for taking the time to comment on my very average submissions and for all of the advice. Airbrush - as I said in my original post, watch this space..... In terms of the wash on the Stugs and Pz.IVs is just black acrylic heavily diluted with water. Sean has already suggested on the BM site where I first posted these pics that I should have use some sort of flow aid (or failing that washing up liquid). And please feel free to "blah blah" as much as you want, be it wash/weathering/rust/dust/mud related or otherwise. I am one of those very sad people in life who wants to know ad nauseam how things work and ways to improve what I do - be it model making/painting related or otherwise. Fortunately though I should have some more kits to practice my 'layering' on very soon, as it's my birthday at the end of the week and I only asked for models!!  .... AND last night I found some cardboard boxes in my wife's wardrobe**, the smaller of which is clearly from PSC!!!    (and NO I did not open them!), and of course Christmas is not far off - happy days!!!!!!!      Seriously though, thank you again for the input - all I need to do now is actually apply it to my kits.....  Kind regards Andrew ** English/US translation - I believe you call 'wardrobes' 'closets' in the US - very odd!!  Sean SeanThank you yet again for the advice and recommendations. I'll definitely bear them in mind (and sorry for boring you yet again with my pics). Andrew |
|
|
|
Post by deafpanzer on Dec 2, 2015 10:45:50 GMT -5
Sorry for being slow... had visitors and being sick so I have been busy catching up here. Nice work on those little beasts!
|
|
adt70hk
Forum Moderator      November '24 Showcased Model Awarded
Member since: November 2015
Currently attempting to build something decent!!! ;)
Posts: 2,835 
MSC Staff
|
Post by adt70hk on Dec 3, 2015 8:50:23 GMT -5
Sorry for being slow... had visitors and being sick so I have been busy catching up here. Nice work on those little beasts! No problem at all! Thank you for taking the time to have a look and then comment - although I do think your eyes need testing  !! |
|
|
|
Post by TRM on Dec 3, 2015 9:14:16 GMT -5
There are no "average submissions", only contributions. All we can do is have fun building and painting! Each model should be a learning experience. Keep trying something new each time you set out to glue the plastic. When you get the mechanics of one technique, move onto another. There is always room for improvement for all of us.
Applying washes can be tricky at first. This is why thinking in terms of layers is a good thing. Slowly build up effects and the contrasts between the edges of the weathering and the model will soften and blend together. Step back and looks at the model after each layer and have a look at what you did and assess what you want to achieve.
I am not plugging any agenda here, but I have a 5 min or so video where I show applying some washes. These are acrylics and the application needs to be a little more controlled due to the drying nature of the acrylics themselves, but the premise is basically the same.
Paying close attention to cleanup after the application will reduce the blotches. This is nothing more than a clean flat brush barely damp with the thinning medium of choice for what you are using. In the case of oil based products like the enamel effect and oil paint, paint thinner, mineral spirits or white spirits would be used. The term "humid" is used to describe how damp the brush should be. With acrylic washes, water is used in replacement of the mineral spirits. You can use acrylic thinners but you need to make sure, as with and painted surface, that you have a protected clear coat finish. This will keep you form damaging what you have done up until that point.
Enjoy the process! It's a fun ride and very rewarding once things all come together!!
|
|
adt70hk
Forum Moderator      November '24 Showcased Model Awarded
Member since: November 2015
Currently attempting to build something decent!!! ;)
Posts: 2,835 
MSC Staff
|
Post by adt70hk on Dec 4, 2015 9:13:06 GMT -5
There are no "average submissions", only contributions. All we can do is have fun building and painting! Each model should be a learning experience. Keep trying something new each time you set out to glue the plastic. When you get the mechanics of one technique, move onto another. There is always room for improvement for all of us.................................................................. Enjoy the process! It's a fun ride and very rewarding once things all come together!! TRM Thank you very much yet agaon for more advice and the video link, I'll have a look at it when I have 5 mnutes to myself. I have to admit it has been fun so far and I've suprised myself at how much I've been enjoying it since coming back. In many ways I've found the problem solving and the experimentation the best bit - especially when it works!!  Thanks again. Andrew |
|
adt70hk
Forum Moderator      November '24 Showcased Model Awarded
Member since: November 2015
Currently attempting to build something decent!!! ;)
Posts: 2,835 
MSC Staff
|
Post by adt70hk on Dec 5, 2015 0:17:11 GMT -5
I am not plugging any agenda here, but I have a 5 min or so video where I show applying some washes. These are acrylics and the application needs to be a little more controlled due to the drying nature of the acrylics themselves, but the premise is basically the same. T Thank you so much for the video - having woken at 3 this morning and being unable to get back to sleep  I decided to have a look at it. It really is very good. I've read descriptions of the techniques shown but I'm one of these people who, when it comes to learning new things, likes to see it demonstrated and the vid does it brilliantly!! Do you have any other vids like this available?? Thanks once again Andrew |
|
|
|
Post by TRM on Dec 5, 2015 5:49:09 GMT -5
Seeing something being done can be a lot easy to follow...I am kind of the same way. I do have a couple more videos on my channel ( www.youtube.com/user/5150TRM/videos ) regarding painting applications. These are acrylic based paints for Vallejo, but the concept can be applied to just about any of the paint mediums. I have been trying to do a video geared more to maybe chipping, streaking and pigment application. With any luck it will come about soon rather than later!  |
|
adt70hk
Forum Moderator      November '24 Showcased Model Awarded
Member since: November 2015
Currently attempting to build something decent!!! ;)
Posts: 2,835 
MSC Staff
|
Post by adt70hk on Dec 5, 2015 17:44:54 GMT -5
Seeing something being done can be a lot easy to follow...I am kind of the same way. I do have a couple more videos on my channel ( www.youtube.com/user/5150TRM/videos ) regarding painting applications. These are acrylic based paints for Vallejo, but the concept can be applied to just about any of the paint mediums. I have been trying to do a video geared more to maybe chipping, streaking and pigment application. With any luck it will come about soon rather than later!  Todd Thanks for the link. I've had a look a the aiirbrush cleaning one and found it very informative. I'll make sure I watch the rest. Andrew |
|


 HTH!
HTH! 
 Look around and see what people use, compare it to what you have available at a decent price, and then you can decide which ones you want to try out. HTH!
 I dread to think how many build hours that must have taken.


 I decided to have a look at it.