|
|
Post by JimD on Dec 8, 2015 9:16:36 GMT -5
Well you're really not messing around here. Quick progress. Looks great.
|
|
|
|
Post by wbill76 on Dec 8, 2015 11:12:44 GMT -5
Thanks Jimmy! MENG did an excellent job with the engineering on this one. It builds up nice and easy!
|
|
|
|
Post by dierk on Dec 8, 2015 11:29:15 GMT -5
Sorry I'm late - standing room only  I'll pop by now and again. |
|
|
|
Post by wbill76 on Dec 8, 2015 11:52:10 GMT -5
Sorry I'm late - standing room only  I'll pop by now and again. Just in time for the good parts Dierk!  |
|
|
|
Post by wing_nut on Dec 8, 2015 13:34:21 GMT -5
Don't ya love it when it finally looks like an airplane? Those clips are the poo. Got the same ones, just not as clean  , and use 'em constantly. |
|
|
|
Post by wbill76 on Dec 8, 2015 18:14:36 GMT -5
Don't ya love it when it finally looks like an airplane? Those clips are the poo. Got the same ones, just not as clean  , and use 'em constantly. No kidding Marc! Love those little copper clips...they've come in handy numerous times on different projects. I picked up a couple bags of them back when Radio Shack was still in business around here for use in soldering, but they've gotten far more use as ordinary clips/clamps for sure! |
|
|
|
Post by wing_nut on Dec 10, 2015 13:05:36 GMT -5
|
|
|
|
Post by wbill76 on Dec 10, 2015 13:07:50 GMT -5
Nice! 1/48 and Monogram, he did a great job. |
|
|
|
Post by wing_nut on Dec 10, 2015 15:04:29 GMT -5
At 1st I thought is odd you pointed out 1/48. Didn't realize yours is 1/72 'til just now.
|
|
|
|
Post by wbill76 on Dec 10, 2015 20:10:53 GMT -5
Today's efforts focused on getting the major paint work out of the way. I used some small amounts of flexible foam to stuff up the landing gear bays and masked off the tail pipe and weapons bay areas with blue painter's tape. Airbrush got quite the workout in applying the Aircraft Gray where needed to get the base coat on. The front air intakes were painted separately so they would match but have yet to be installed since it's much easier to paint them off the airframe first. 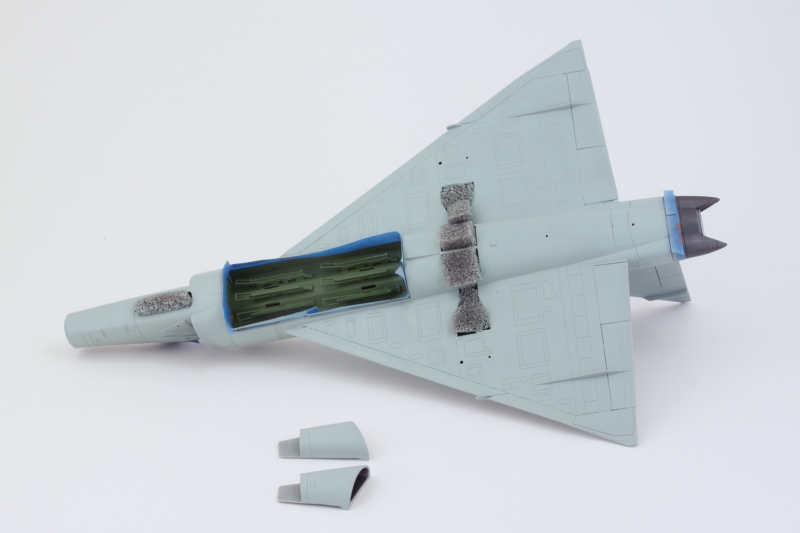 I deliberately allowed some overspray of the Aircraft Gray onto the Flat Black areas for the anti-glare panel so that it would be easier to firm up the lines instead of trying to mask the Black perfectly. I knew I was going to need to spray Flat Black for the landing gear wheels anyhow so I took care of two birds with one stone. The wheels were airbrushed with ordinary Testors enamel Silver in the little square bottle for their hubs as were the bare metal portions of the air intakes. 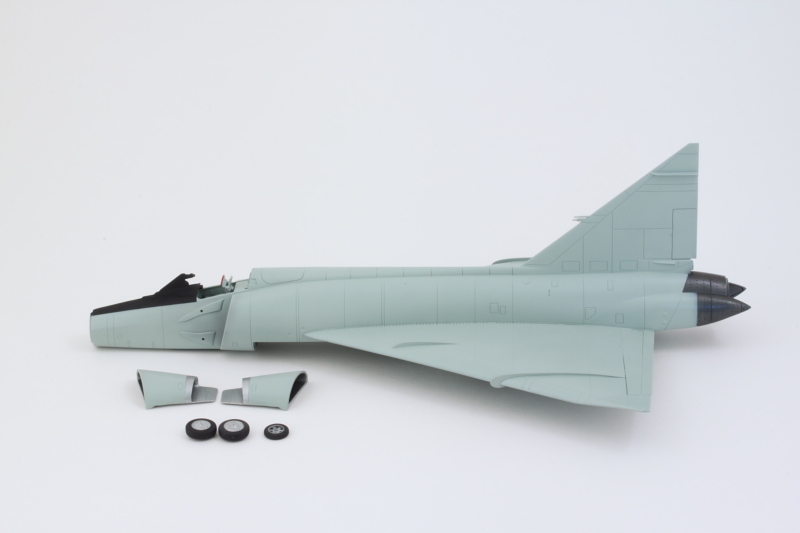 That will all get a chance to dry thoroughly overnight and then it will be time to add the intakes and start working on getting the weapons bay populated. |
|
|
|
Post by wbill76 on Dec 11, 2015 19:20:47 GMT -5
All of today's effort was taken up in the details department. First order of business was getting the air intakes installed. Once they were set, I airbrushed some of the Aircraft Gray over the join as I had deliberately left that area unpainted previously so I wouldn't have to fight it for gluing purposes. I also spent some time on the canopy parts. The clear parts were given a coat of Future applied with a regular brush on both the inside and outside surfaces and left to dry. Some quality time with the masking tape followed and it then got some Aircraft Gray treatment as well. 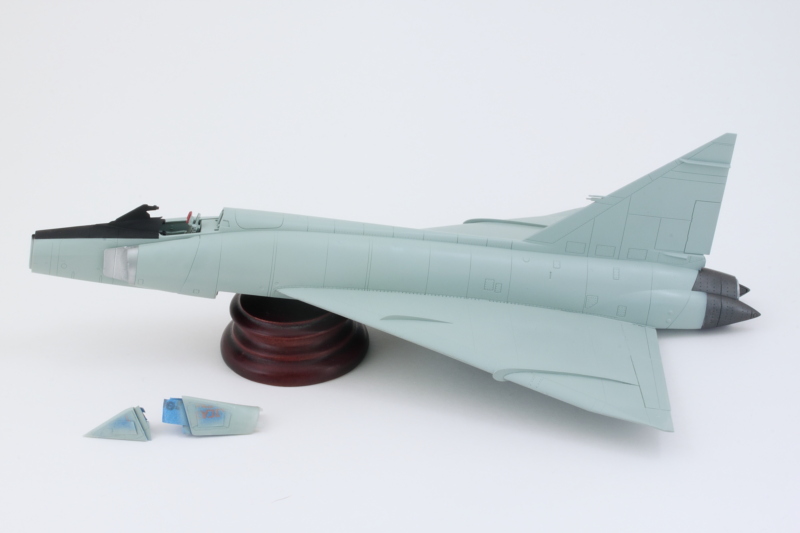 Next up were all the stores. I assembled the fuel tanks and sanded down their join then added the pylons so I could paint them together as a single unit. For the 6 AIM-4D Falcon missiles for the weapons bay, I first airbrushed some MM enamel Light Gray, masked that off, then airbrushed some Insignia Red to complete their two-tone appearance. The speed brake had been feeling neglected for a while so it got its turn as well with the Aircraft Gray to complete the day's efforts. 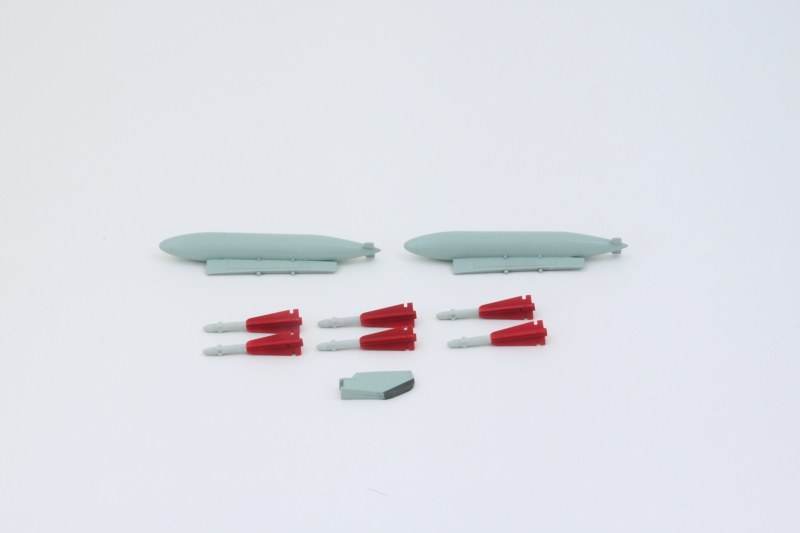 Next up will be getting this bird up on her legs and then stocking all the goodies on the underside. |
|
|
|
Post by Leon on Dec 11, 2015 19:49:18 GMT -5
Nice progress Bill! This is going to be one sharp looking bird.  |
|
|
|
Post by wbill76 on Dec 11, 2015 20:14:45 GMT -5
Thanks Leon. Doing my best to not screw it up too badly.  |
|
|
|
Post by wbill76 on Dec 12, 2015 19:07:48 GMT -5
After letting the canopy set overnight, I masked off the small rectangular yellow rescue portions for the sides and airbrushed some MM enamel RLM 04 Gelb that I had handy. 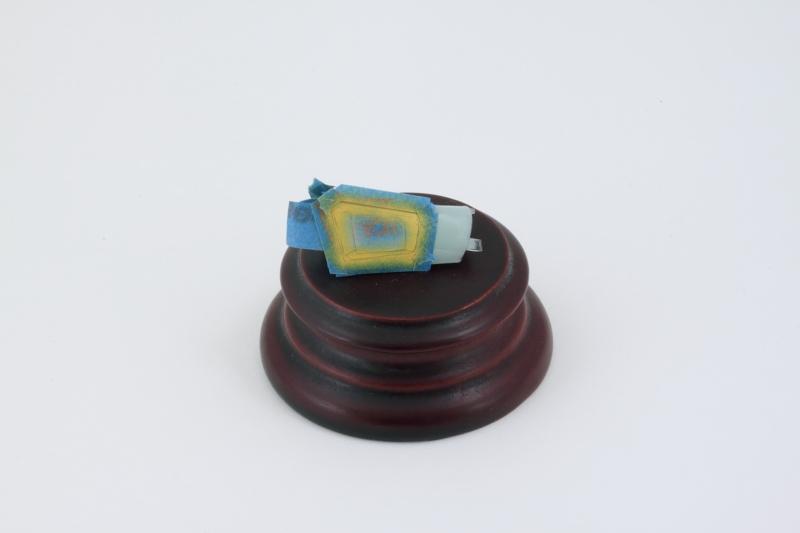 Some slight trimming was needed on the rear tabs of the main canopy to ensure it would fit properly, but everything behaved nicely other than that. Both canopy elements were permanently installed and a couple of touch-ups here and there to complete the process.  Now the real fun began with getting the landing gear installed. For the main struts, I had assembled them previously and had them waiting for paint and install until now. A quick dose of non-buffing Metalizer Steel and they were ready to go. The tricky part is getting the main doors and the two different braces to work together with the strut, but with a little patience it all comes together.  With that out of the way, I added the weapons bay doors and the AIM-4s to populate the undersides. I deliberately am leaving off the wing tanks in order to give myself more room to work with the decals and will add them later after the markings are on. 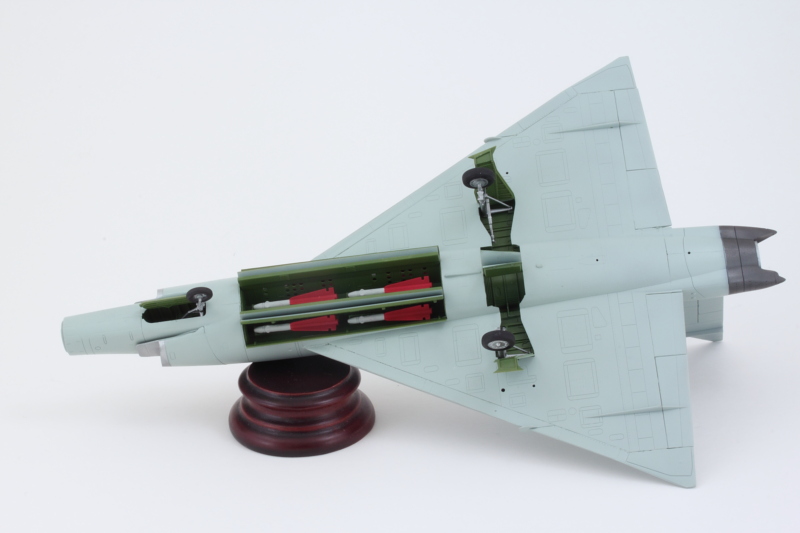 Last but not least, I did a quick test with the landing gear to be sure it wouldn't tail sit and then added the nose cone to round out the day's efforts. 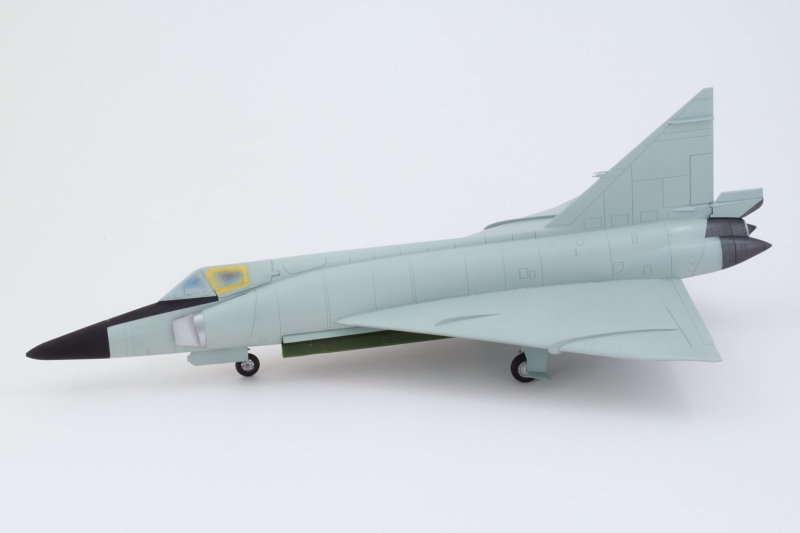 Next up will be starting in on the substantial number of decals that this baby calls for.  |
|
|
|
Post by Leon on Dec 12, 2015 20:19:35 GMT -5
Sitting really pretty Bill! Have fun with the markings.   |
|
|
|
Post by wbill76 on Dec 12, 2015 20:43:49 GMT -5
Thanks Leon, fortunately there aren't a ton of them...but there are several that are very large that will be interesting to deal with.  |
|
|
|
Post by armorguy on Dec 13, 2015 10:58:42 GMT -5
Nice one Bill, the decal tapistry will top it off !
|
|
|
|
Post by wbill76 on Dec 13, 2015 11:29:40 GMT -5
Nice one Bill, the decal tapistry will top it off ! Thanks AG! The squadrons that operated these birds sure had some interesting schemes.  |
|
|
|
Post by wbill76 on Dec 13, 2015 19:57:11 GMT -5
After studying the markings and their placement on the aircraft, it occurred to me that quite a few of them pass over and around major panel lines. Since these aircraft were constantly maintained as alert interceptors, they typically stayed fairly clean while in service, so weathering was always going to be kept to a minimum on the finish. That, combined with the markings revelation, led me to apply the pin wash to all the panel lines before adding the markings. After applying an airbrushed coat of Future, I spend the full day's session picking out all the lines and details with a Burnt Umber enamel pin wash treatment. 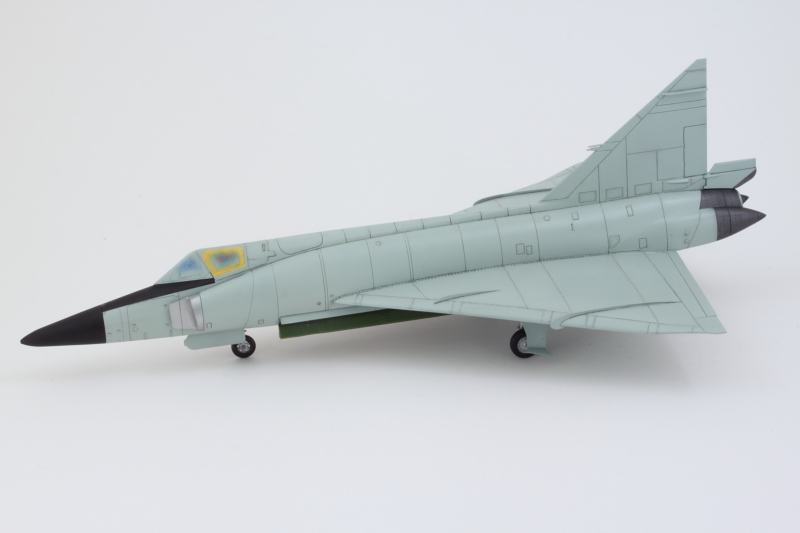 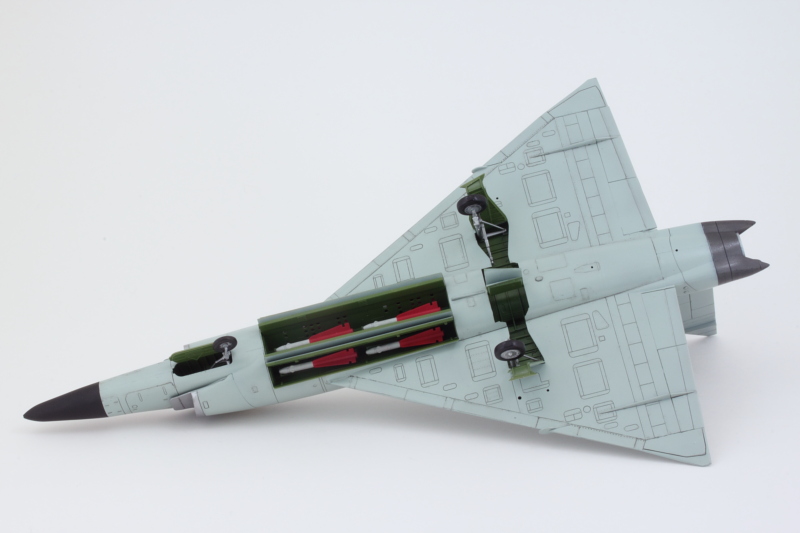 It's a tedious process of working with the wash and then following up with clean thinner to remove excess and tighten things up in places but produces a nice result in the end. Now it's time for all those decals!  |
|
|
|
Post by Leon on Dec 13, 2015 20:47:21 GMT -5
Excellent results is more like it Bill!  Panel lines look fantastic.  |
|
|
|
Post by wbill76 on Dec 13, 2015 23:12:01 GMT -5
Thanks Leon! Downside is the time spent with the breather mask.   |
|
|
|
Post by armorguy on Dec 14, 2015 7:30:31 GMT -5
Panelline day pays off Bill, bloody well done fella !
|
|
|
|
Post by wbill76 on Dec 14, 2015 11:10:03 GMT -5
Thanks AG! It's always neat to get the details to pop out in this stage. MENG did a nice job in the molding here for sure.  |
|
|
|
Post by wbill76 on Dec 14, 2015 22:23:39 GMT -5
Day of Decal Destiny...no way to escape it when it comes to an aircraft build!  The kit-supplied decals are pretty good quality. The only ones I had some minor issues with were the large tail fin flashes. These were oversized so I had to apply them one side at a time, wait for them to dry, then trim off the excess at the rear of the fin before I could do the other side. I also had cut off the small spade extensions that go over the speed brake so I could line them up and apply them as separate decals since they also had a large amount of clear film around the edges that needed to be trimmed away first. Fortunately, I had saved the tail markings to the very end since I needed the tail fin to stay clean as a hand hold while I applied all of the other markings. Lots of Solvaset employed to make sure all the markings snugged down tight to the fuselage. There's only one case where I had to apply decals over other decals and that involved the red-white-blue-yellow band, so it was applied as the first decal and given plenty of time to thoroughly dry before I added the US Air Force markings over them. Then it was just a matter of skipping around applying different items as others dried to make the most of the bench time and get them all in place. 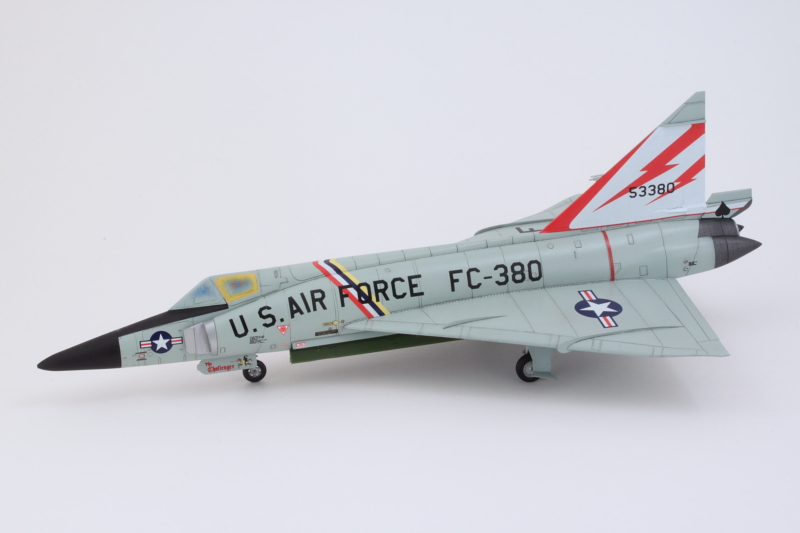 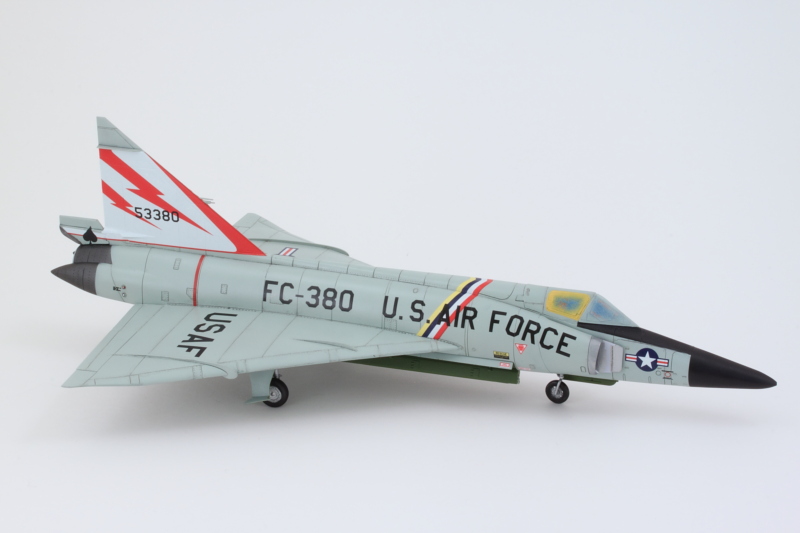 After I had applied the underside markings, I hand painted the white-black banded antenna that I had left off until now. It would've been virtually impossible to correctly apply the red band that goes underneath it if I had installed it before the decals were added. 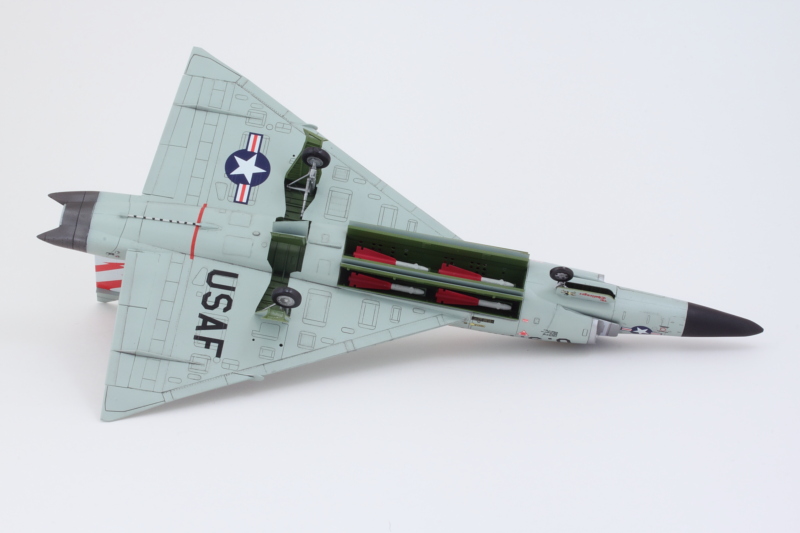 These will get a chance to completely set overnight before I apply another coat of Future to protect them further and tie everything in before heading into the final couple of steps to finish this one. |
|
|
|
Post by wbill76 on Dec 15, 2015 16:55:33 GMT -5
|
|
|
|
Post by dupes on Dec 15, 2015 17:08:02 GMT -5
Oh yes...great finish!  |
|
|
|
Post by wbill76 on Dec 15, 2015 17:18:08 GMT -5
Thanks Dupes! I enjoyed working on this little Meng aircraft. Makes me wonder why they decided not to pursue more subjects in this genre...I guess the allure of armor kits was just too much!  |
|
|
|
Post by Leon on Dec 15, 2015 17:46:57 GMT -5
Beautiful finish Bill!  |
|
|
|
Post by wbill76 on Dec 15, 2015 18:12:31 GMT -5
Thanks Leon! It will be delivered to my good friend tomorrow just in time for Christmas so he can share it with his two kids to honor their grandfather's service.  |
|
|
|
Post by dierk on Dec 16, 2015 6:40:36 GMT -5
Excellent finish Bill (and quick too  ) What a thoughtful X-mas gift - I'm sure your friend will be well-impressed. |
|