|
|
Post by fightnjoe on Feb 6, 2016 0:03:59 GMT -5
Well it happened yet again. Wing work volume 2. The ammo chute is redone, two frames are redone, and the stringers are now redone. Seems every step forward is followed by two or ten steps back. First was to strip out the offending parts. 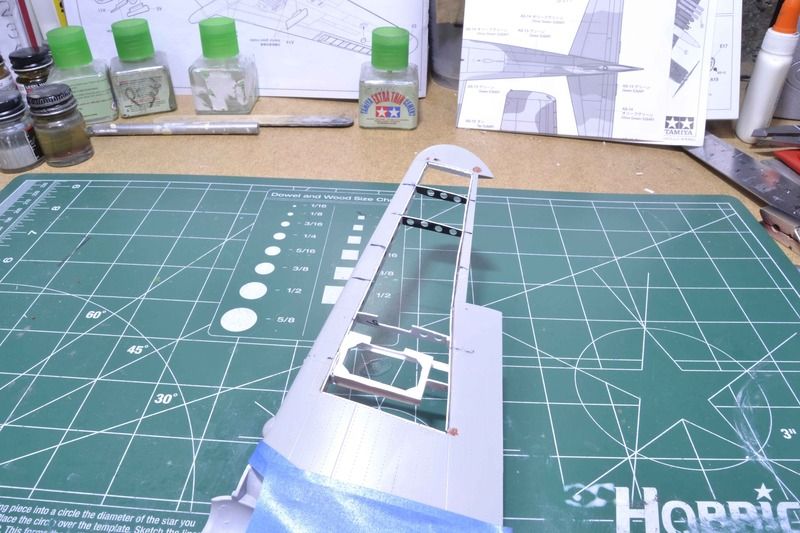 Than with everything replaced. 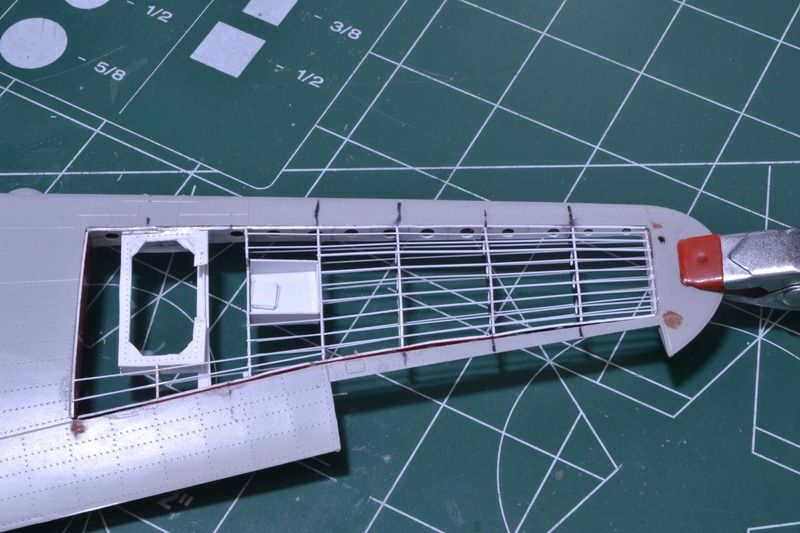 I also had worked some on the flap interiors. 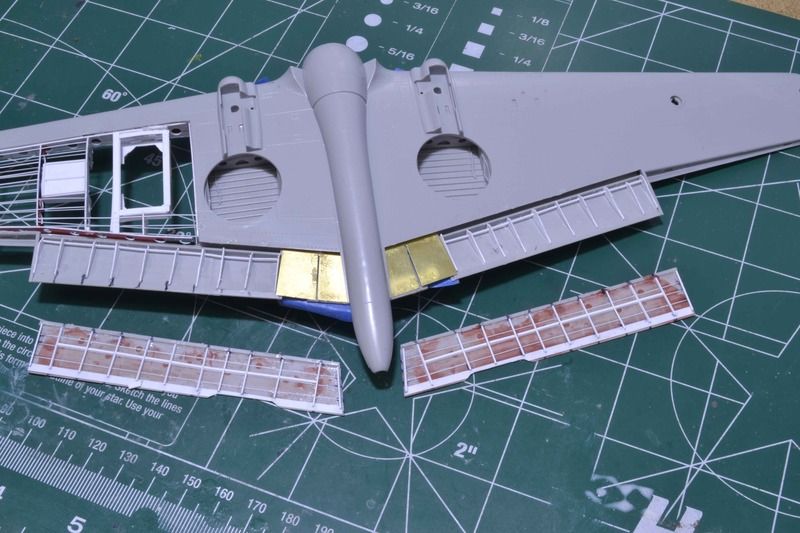 Now to move forward. All comments, critiques, and criticism are encouraged. Joe |
|
adt70hk
Forum Moderator     
Member since: November 2015
Currently attempting to build something decent!!! ;)
Posts: 2,831 
MSC Staff
|
Post by adt70hk on Feb 6, 2016 2:47:21 GMT -5
Fantastic work joe! This will look brilliant once it's finished!!
Andrew
|
|
|
|
Post by wbill76 on Feb 6, 2016 12:49:41 GMT -5
Knowing how much details matter on a project like this, I'm sure you are happy to have it fixed so you can sleep again! Well worth the effort the 2nd time around Joe.
|
|
|
|
Post by fightnjoe on Feb 6, 2016 16:42:38 GMT -5
Many many thanks. Now.... Bonus material time.... As I started out today I thought why not show what I was doing. Just a small assembly but it is worth the time. Today I began by cleaning up the bulkheads. Remember those.... 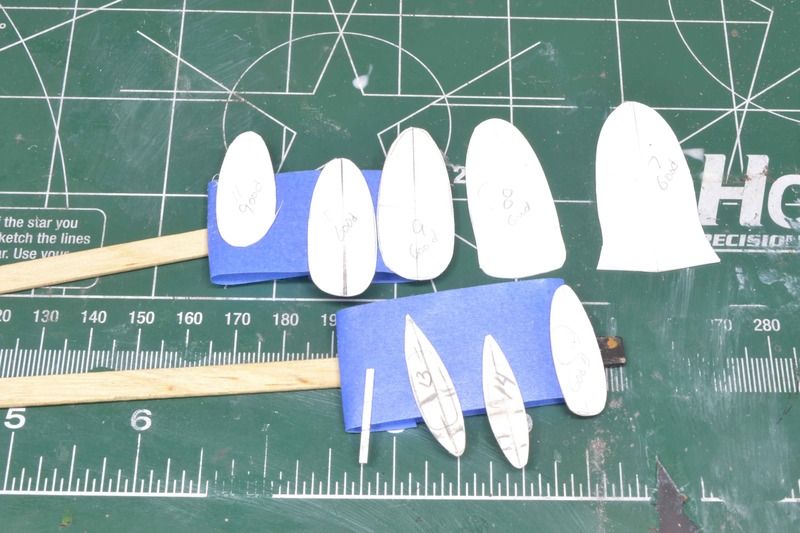 Well I began with punching out a hole, the largest my punch set has, and then using the dremel I worked the bulkheads out to where they looked more like they do in my drawings. I then went in with 320 sandpaper and cleaned them up. 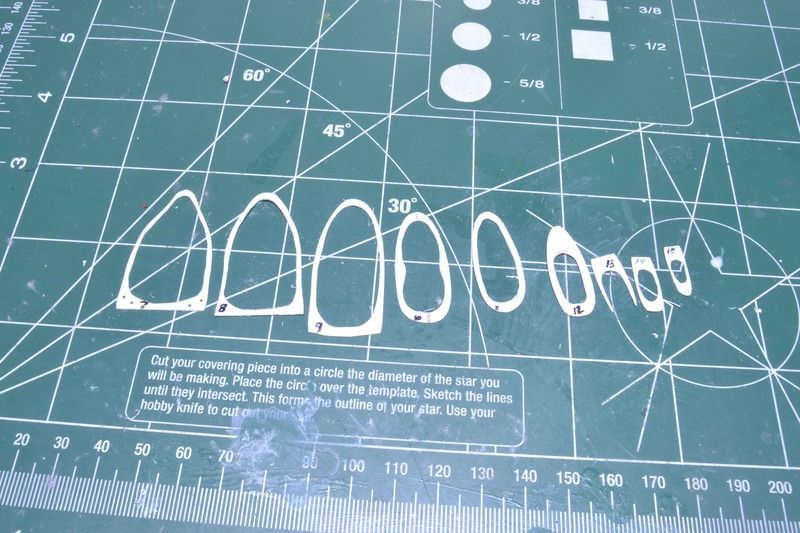 Once that was done I was able to start on the fuel cell. Using bulkhead #7 as a reference I sketched out the form, that was cut out, cleaned up, and then used as a master to form 3 pieces of sheet styrene. I then cut two pieces of tube styrene, size isnt important as long as it fits. I glued the tube to the sheet and then put them all together. 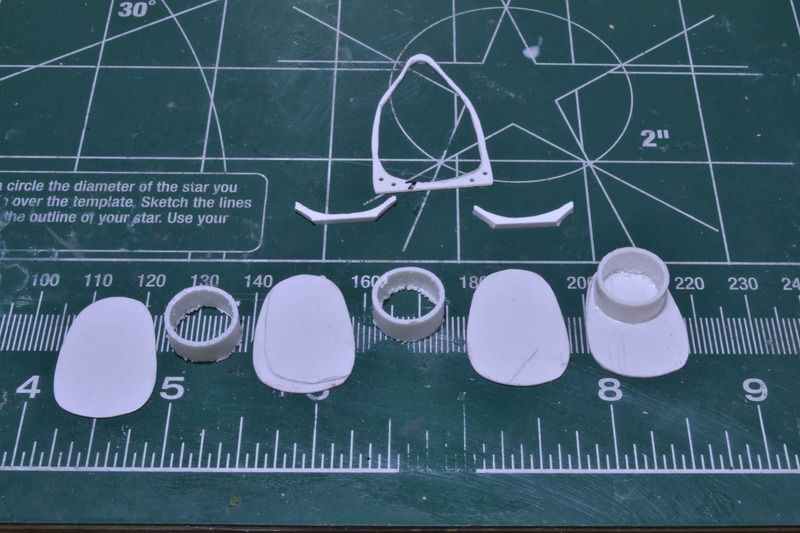 I then used .010 sheet styrene and skinned the framework. Also using the same bulkhead I fashioned a stand to keep the fuel cell in place. 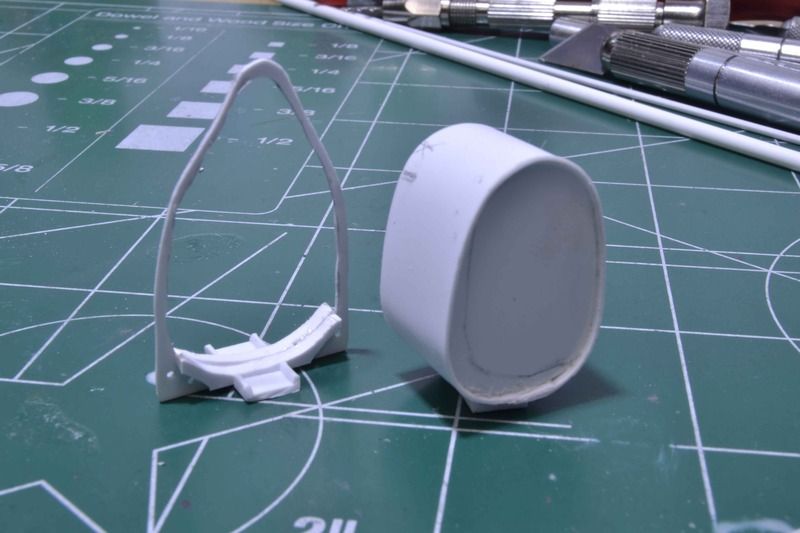 Just that simple. Ok next will be to continue to work the interior, most likely starting with the tail and moving forward. I do need to add detail to most of the bulkheads as well as the fuel cell. I hope you enjoyed the bonus. All comments, critiques, and criticism are encouraged. Joe |
|
|
|
Post by Leon on Feb 6, 2016 17:00:08 GMT -5
Nice redo on the wing Joe! The bonus on the fuel cell looks great.   Karma to you for having the patience to redo the wing.  |
|
|
|
Post by fightnjoe on Feb 6, 2016 17:18:14 GMT -5
Not sure patience is the right word Leon. It is done though and even looks decent in my opinion. The fuel cell was actually a pretty simple bit of construction.
Joe
|
|
|
|
Post by TRM on Feb 7, 2016 20:52:29 GMT -5
Well done Joe!! Fantastic scratch on the cell and framing!! Turing into another fine piece of eye candy!!  |
|
|
|
Post by fightnjoe on Feb 9, 2016 20:41:56 GMT -5
Many many thanks T.
Joe
|
|
|
|
Post by fightnjoe on Feb 10, 2016 0:45:09 GMT -5
Wow. It really is amazing what can happen when we move past a stumbling block. Just a bit of an update: Work has commenced on the interior begining with the tail wheel assembly. This does not represent 100% accuracy as I needed to make sure there was stability and strength as well. 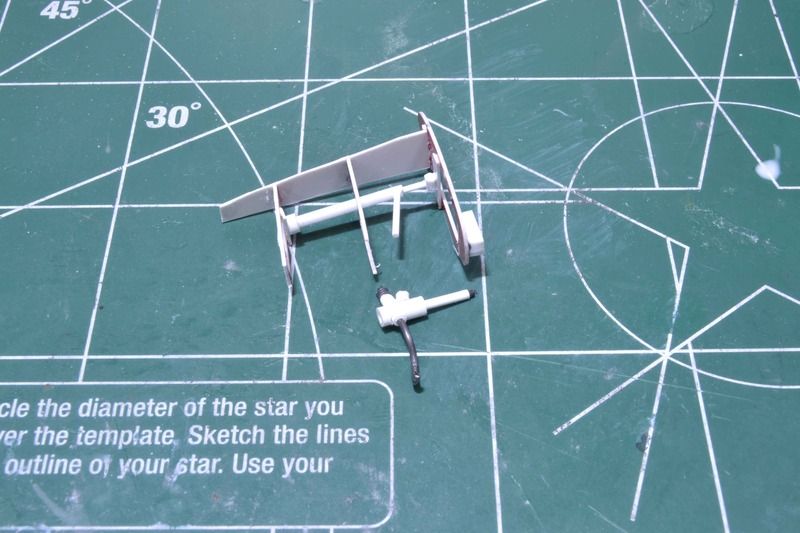 Before I go too far I really need to open up the access door on the fuselage. For that first a template is made out of aluminium foil which is taped to an aluminium can, cut out, and cleaned up a bit. 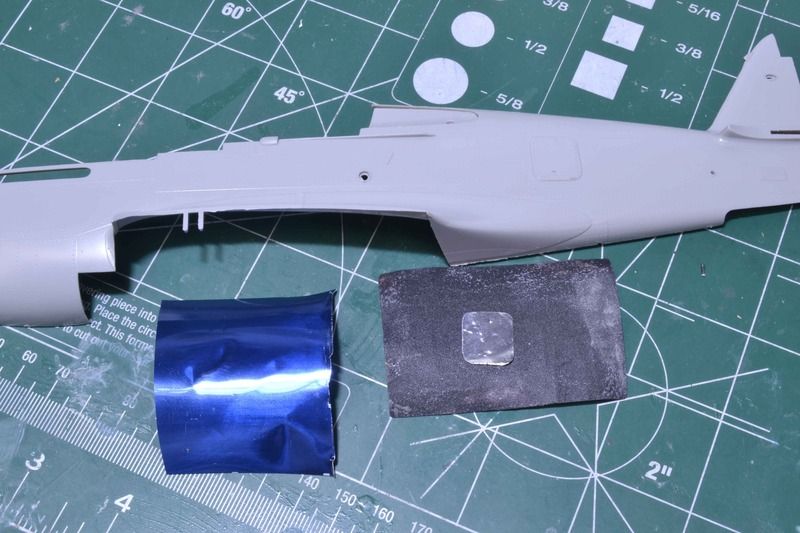 Next is to drill out the door. Let the drilling begin. 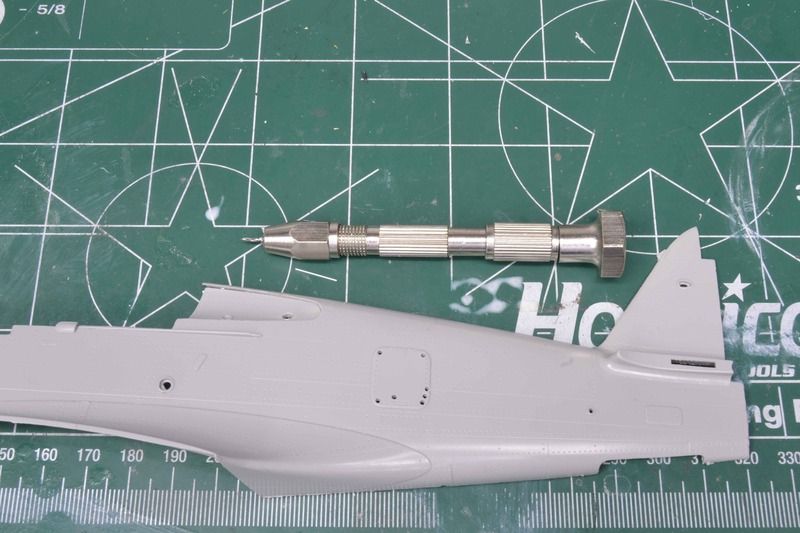 And drilled out. 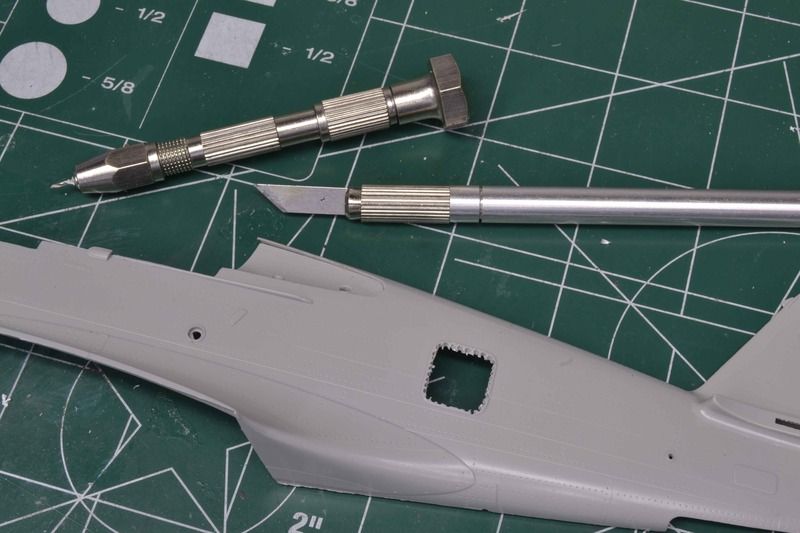 Next will be to clean up the cut and then I can put in stringers and back plates. All comments, critiques, and criticism are encouraged. Joe |
|
|
|
Post by fightnjoe on Feb 16, 2016 0:02:29 GMT -5
Moving right along with the interior work. First up was to clean up the access door and then attach a backing plate. 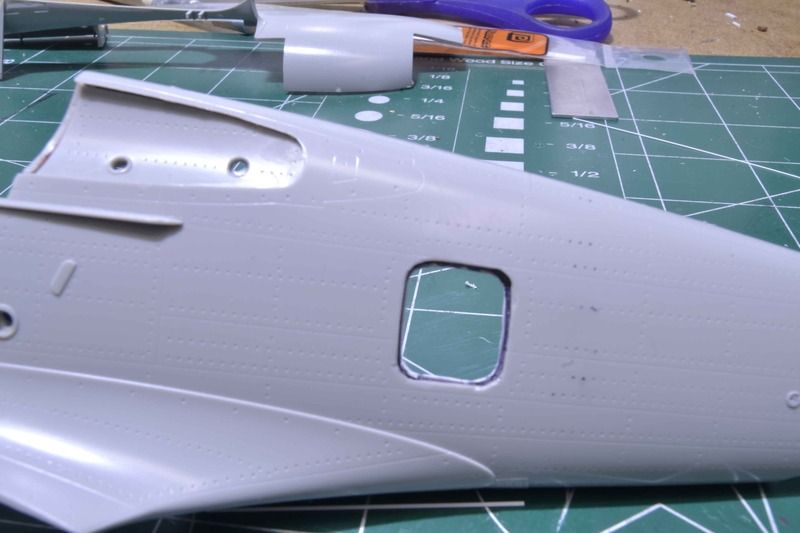 Once that was completed I moved on to putting the stringers in place. These are .020 hex rod. 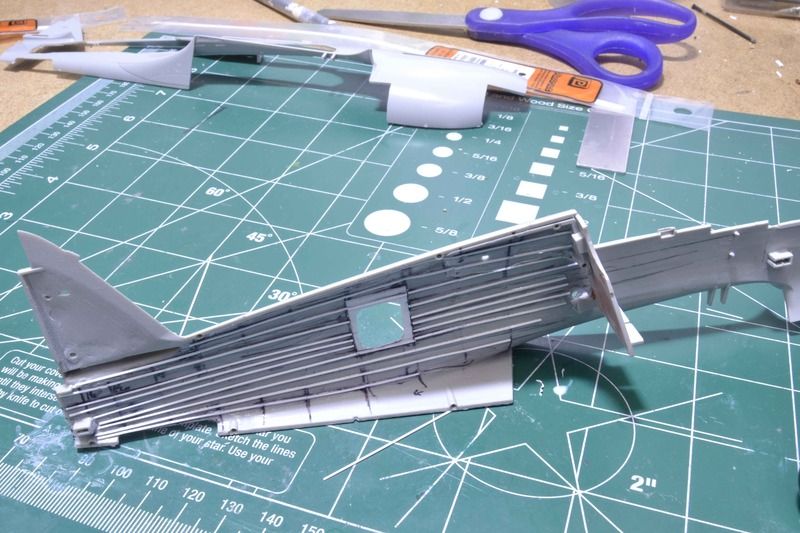 With that done the part of the builds that I truly enjoy could begin. The interior work. First up was to prep bulkheads 8 and 9 for radio equipment. I took some time and set up the racks to mimic what I have seen in pictures. 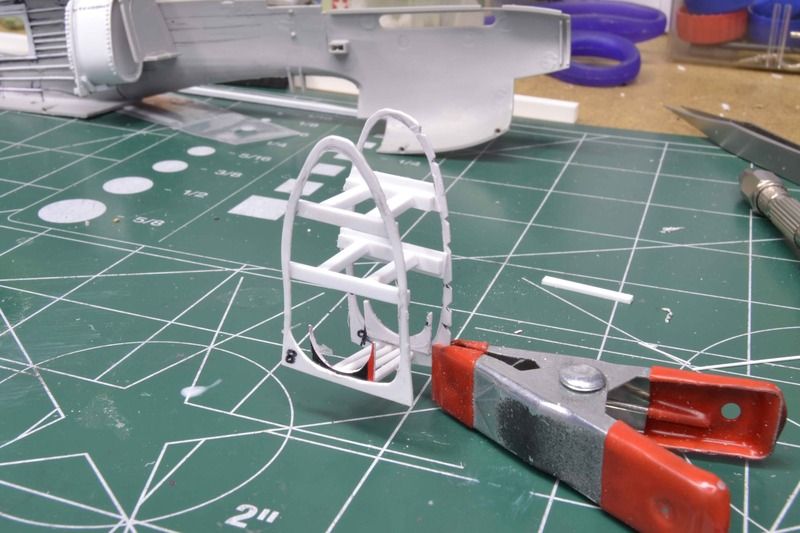 The next step of course was to actually build up the radio equipment. Now indulge me on this. From left to right. Radio boxes both recieving and transmitting, dynamotor and antenna switch box, junction box, and the reciever and transmitter. 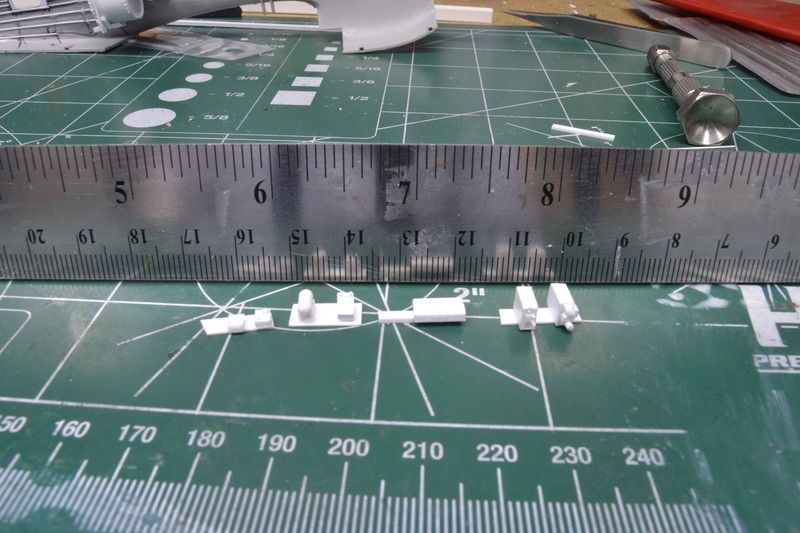 Now with that ready, before I can add the wiring, I am going to need to do some painting I think. I may just move on and continue the construction of interior assemblies. Thinking on this. All comments, critiques, and criticism are encouraged. Joe |
|
John Everett
Full Member
  
Member since: January 2012
July, 2016 MoM Winner
Posts: 1,278
Jan 17, 2012 0:53:48 GMT -5
Jan 17, 2012 0:53:48 GMT -5
|
Post by John Everett on Feb 16, 2016 2:21:29 GMT -5
I love this delicate scratchwork.
|
|
|
|
Post by deafpanzer on Feb 16, 2016 10:42:31 GMT -5
Two things... 1. Impressive work!!! 2. We have exactly same ruler! LOL
|
|
|
|
Post by Leon on Feb 16, 2016 12:21:19 GMT -5
Very impressive work Joe!
|
|
|
|
Post by fightnjoe on Feb 16, 2016 19:26:16 GMT -5
You are very kind. Many thanks.
Joe
|
|
|
|
Post by fightnjoe on Feb 18, 2016 23:36:56 GMT -5
Just a quick update. Spent some time getting some of the internal details constructed. Again they are not 100% but they will work for what I need. The hydraulic pump. 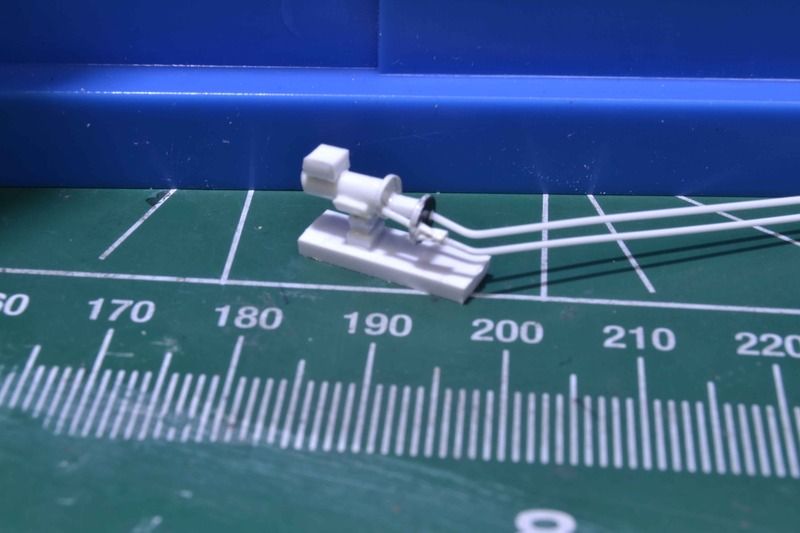 And the landing gear/flap unit 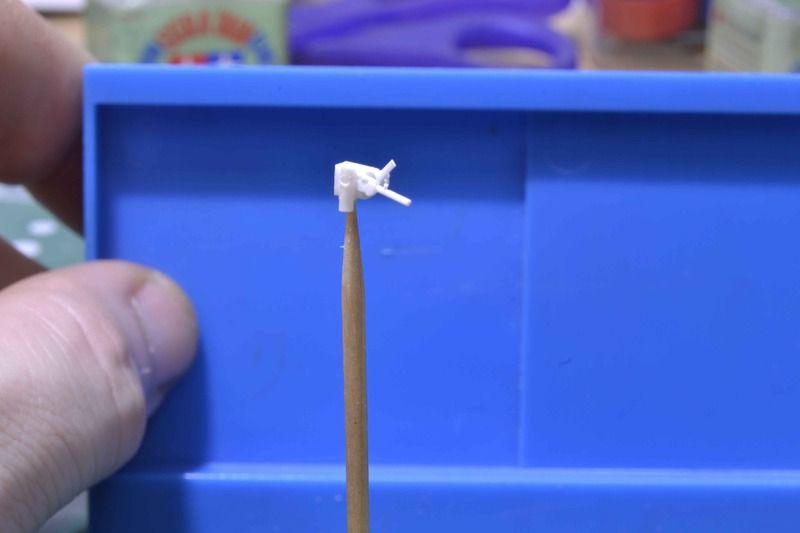 I have also begun to frame in the cockpit. 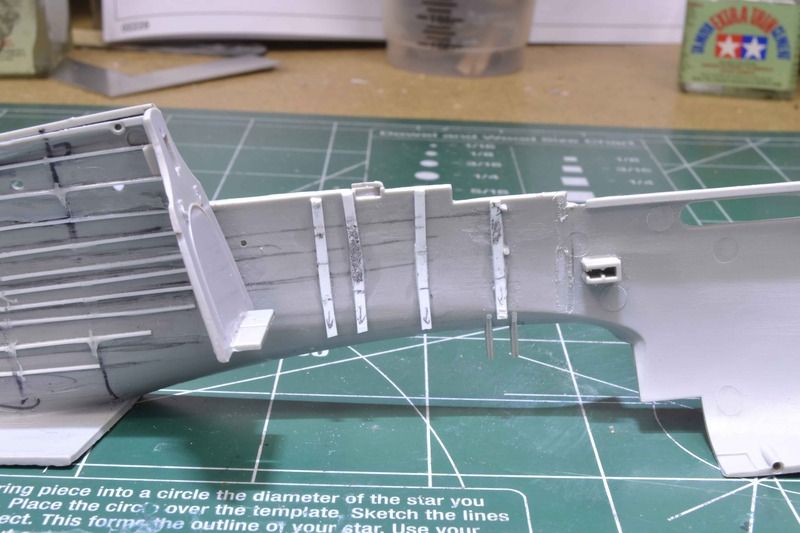 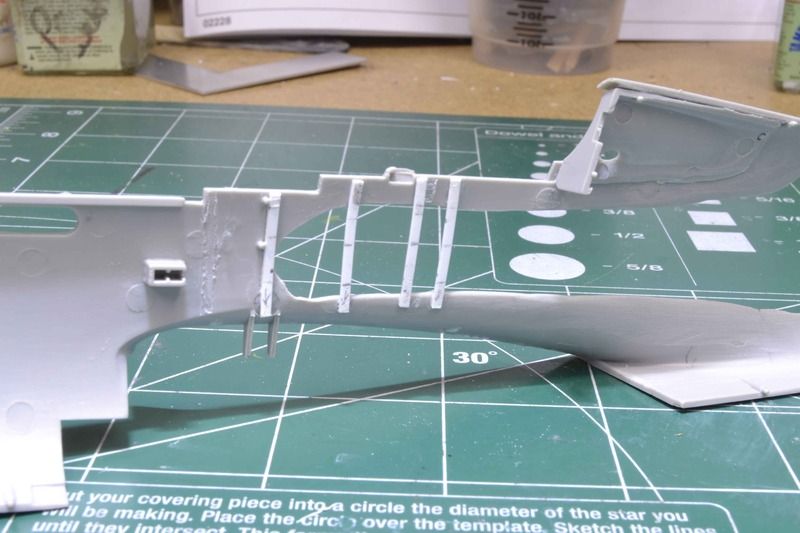 I will be doing some crossmembers for the stringers. These will only be there to make sure the detail has a place to anchor. All comments, critiques, and criticism are encouraged. Joe |
|
|
|
Post by Leon on Feb 19, 2016 5:11:55 GMT -5
Some fine looking detail work there Joe!  |
|
|
|
Post by fightnjoe on Feb 20, 2016 11:55:26 GMT -5
Many many thanks.
Joe
|
|
|
|
Post by fightnjoe on Feb 21, 2016 19:10:17 GMT -5
The next major construction stage is to work on the cockpit. This begins with framing in the pit. Bulheads and frames. After putting in the bulkheads each stringer was cut to fit. I used .020 by .040 strip for the bulkhead. I used .020 square strip for the stringers. 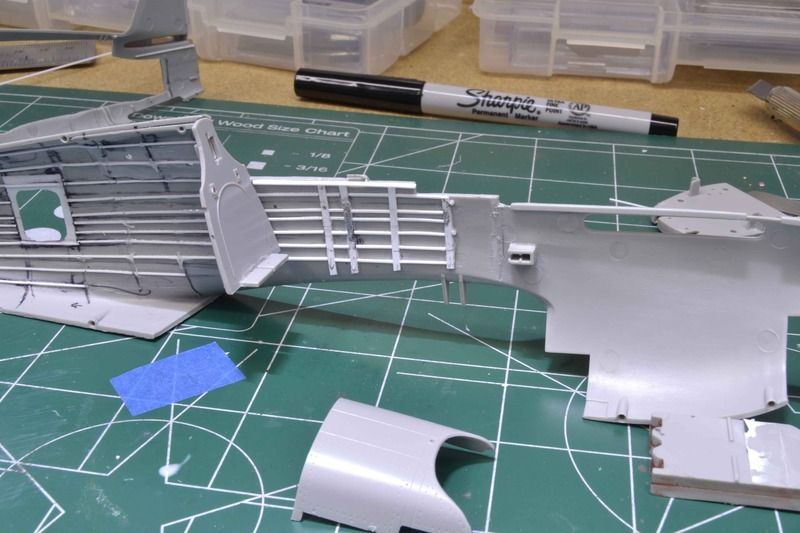 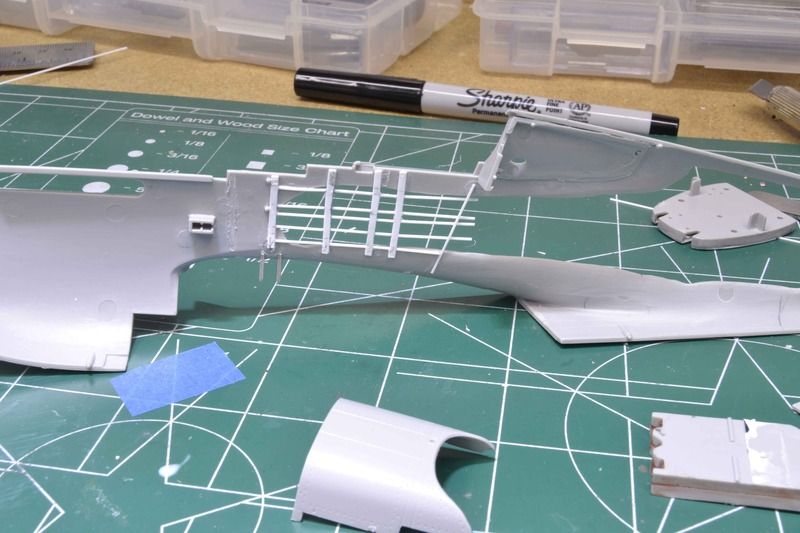 And how it looks all together. Taped of course. 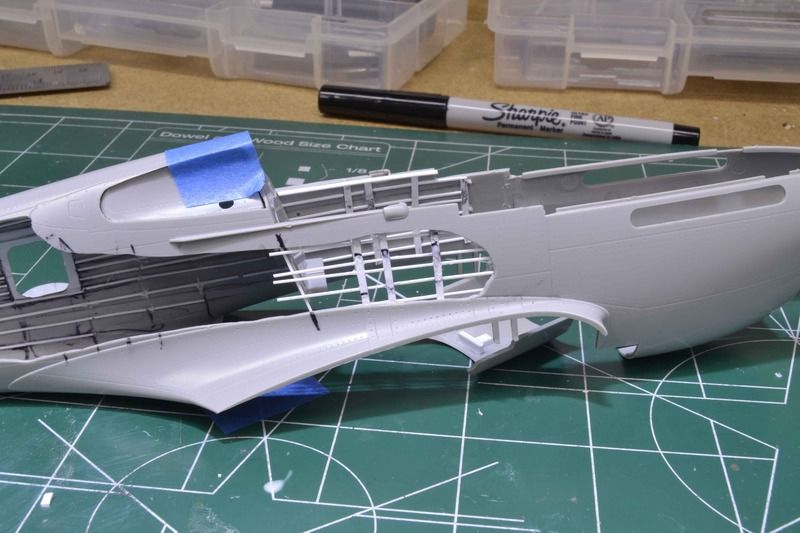 Now there are a couple of major flaws in the pictures. One I have fixed the other I will live with. Moving right along and actually kind of quick with this part so far. All comments, critiques, and criticism are encouraged. Joe |
|
Rick
Full Member
  
Member since: March 2013
what to build, what to build . . . Ok THAT one!
Posts: 854 
|
Post by Rick on Feb 21, 2016 19:54:00 GMT -5
Looking great as always Joe. Just a question ... When was the last time you built a model straight out of the box and resisted the urge to cut big holes in it?  ? Rick |
|
Deleted
Member since: January 1970
Posts: 0
Nov 22, 2024 18:47:04 GMT -5
Nov 22, 2024 18:47:04 GMT -5
|
Post by Deleted on Feb 22, 2016 10:35:14 GMT -5
Amazing work! 
|
|
|
|
Post by fightnjoe on Feb 22, 2016 10:36:57 GMT -5
Many many thanks.
Rick actually working on a 1/48 Skyraider that is OOB and going to be starting a 1/48 Kingfisher also OOB soon.
Joe
|
|
|
|
Post by fightnjoe on Mar 26, 2016 22:24:02 GMT -5
It is time to come back to this.
Joe
|
|
|
|
Post by fightnjoe on Mar 29, 2016 21:54:38 GMT -5
How about a long overdue, a month since the last one, update?  When last we saw our hero the framing for the cockpit had been readied and installed. We had prepared to begin to start detailing. This update is all about the seat frame and the port side. Working off of several pictures work began with the electrical panels and the throttle control. Using strip, rod, tube, and scrap plastic the panels were fashioned. After they were ready some little odds and ends on the port side were fashioned to match the pictures. The port side. 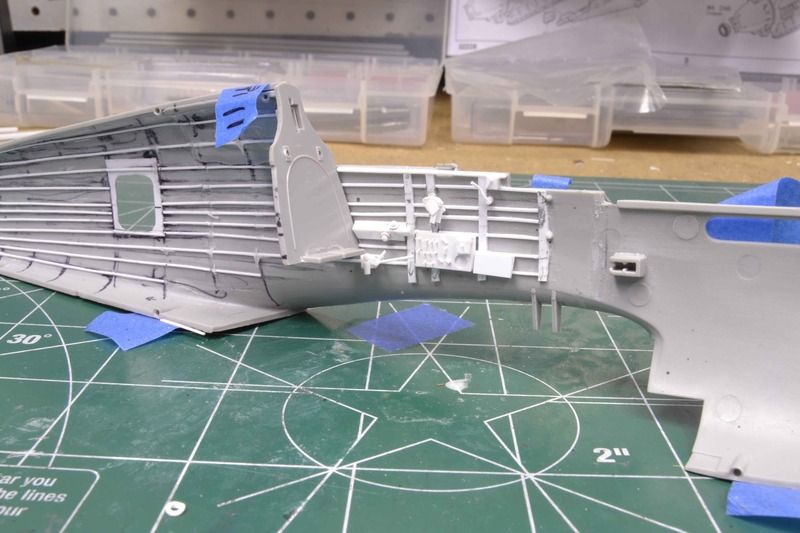 I also worked on the seat framing. This is not 100% accurate but needed to have a bit more strength than what I could see for a plastic frame. I canibalized a seat from the parts box and have it in place temp. 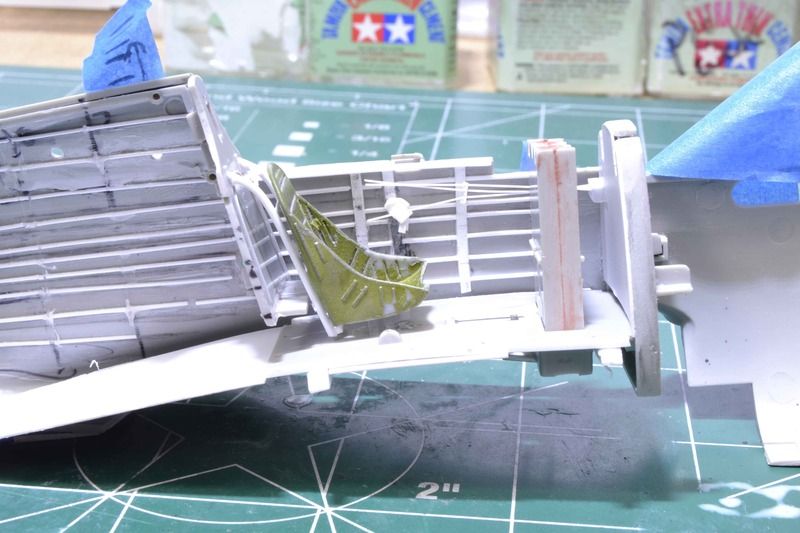 And finally just a glimpse of what this looks like, minus the port detail, with the fuselage together. 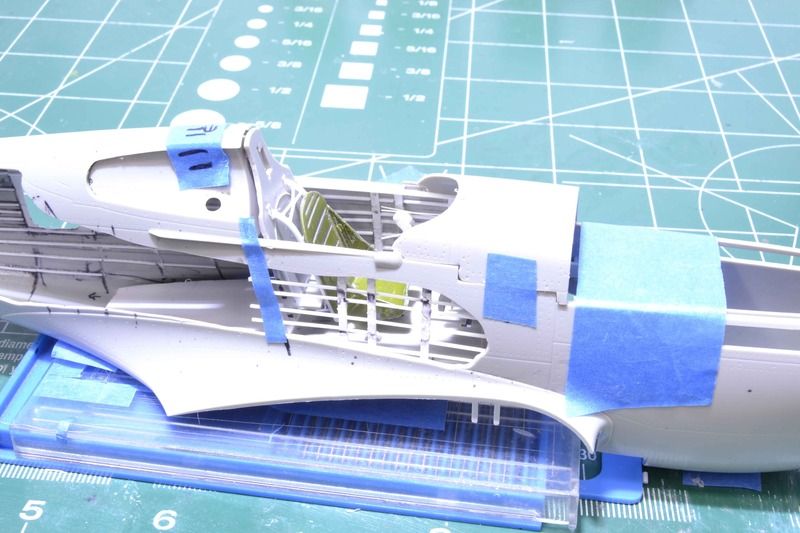 That is about all the detail seen in my pictures for the Port side. Next up will be to work on the Starboard side. All comments, critiques, and criticism are encouraged. Joe |
|
Deleted
Member since: January 1970
Posts: 0
Nov 22, 2024 18:47:04 GMT -5
Nov 22, 2024 18:47:04 GMT -5
|
Post by Deleted on Mar 30, 2016 8:31:54 GMT -5
|
|
|
|
Post by Leon on Mar 30, 2016 8:33:33 GMT -5
That is some awesome detail work Joe!
|
|
|
|
Post by mustang1989 on Mar 30, 2016 9:23:10 GMT -5
Lookin' good so far. If I may ask, what references are you using? |
|
|
|
Post by fightnjoe on Mar 31, 2016 9:56:00 GMT -5
Many many thanks.
Stang I have a couple of books as well as a number of photos from google and some very very kind individuals. All told I have like five ebooks and three or four hundred pictures.
Joe
|
|
|
|
Post by mustang1989 on Mar 31, 2016 10:07:05 GMT -5
I was wonderin'. It would take some good references to pinpoint the detail here.
|
|
|
|
Post by deafpanzer on Mar 31, 2016 10:46:28 GMT -5
Your work never cease to amaze me... I am always grateful to have you posting your builds here so we can enjoy!
|
|
|
|
Post by fightnjoe on Mar 31, 2016 12:55:35 GMT -5
You are very kind. Thank you.
Joe
|
|