|
|
Post by fightnjoe on May 3, 2016 22:37:56 GMT -5
Finishing up the interior work. Everything I will show in this post is now installed. The port side 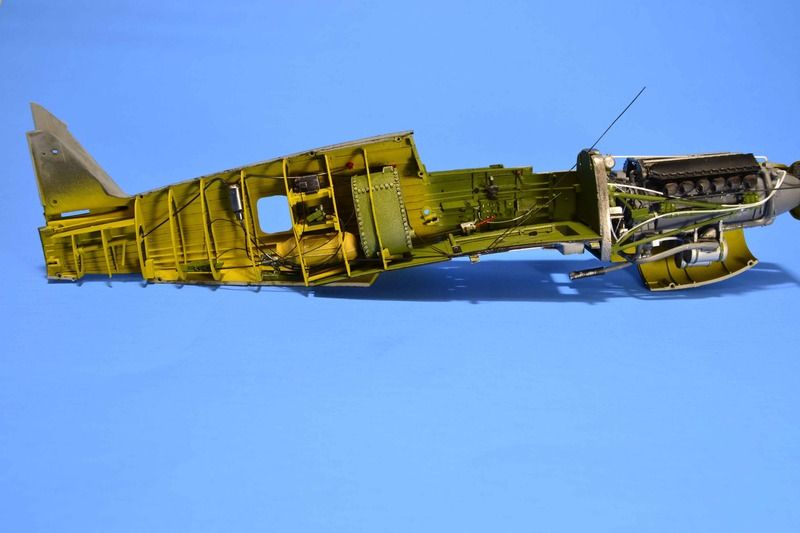 And the little bit on the starboard side. 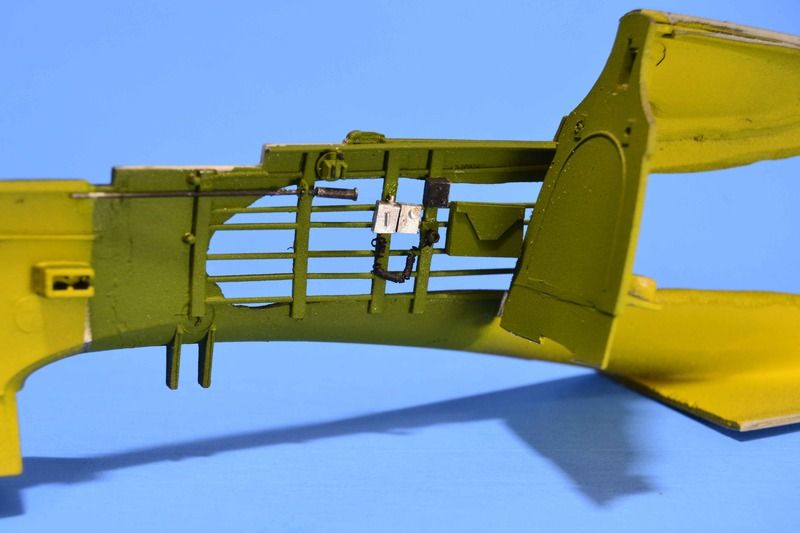 What is left on the interior is the seat, the lower section of the tail wheel assembly, and finishing off the plumbing of the starboard side of the cockpit. Oh so close to closing up the fuselage. Oh so close. All comments, critiques, and criticism are encouraged. Joe |
|
|
|
Post by Leon on May 4, 2016 4:50:07 GMT -5
WOW....The interior looks awesome Joe!  |
|
|
|
Post by wing_nut on May 4, 2016 6:30:41 GMT -5
Hey Joe, rely making progress here. Looks really nice.
|
|
|
|
Post by Tojo72 on May 4, 2016 8:16:20 GMT -5
Great work Joe
|
|
jsteinman
Full Member
  
Member since: March 2013
Posts: 735
Mar 24, 2013 9:29:10 GMT -5
Mar 24, 2013 9:29:10 GMT -5
|
Post by jsteinman on May 4, 2016 8:35:54 GMT -5
|
|
jpc1968
Full Member
  
Member since: May 2015
May '17 Co-Mom Winner, October '17 MoM Winner
Posts: 504 
|
Post by jpc1968 on May 4, 2016 9:12:03 GMT -5
after looking at this thread, it is official.........I quit!
|
|
|
|
Post by fightnjoe on May 4, 2016 23:08:47 GMT -5
You are all very very kind. Thank you for all the encouragement.
Joe
|
|
|
|
Post by fightnjoe on May 17, 2016 22:38:41 GMT -5
And yet another update. This one is just a bit of the small stuff and then a big step forward. First the small stuff. The IP. 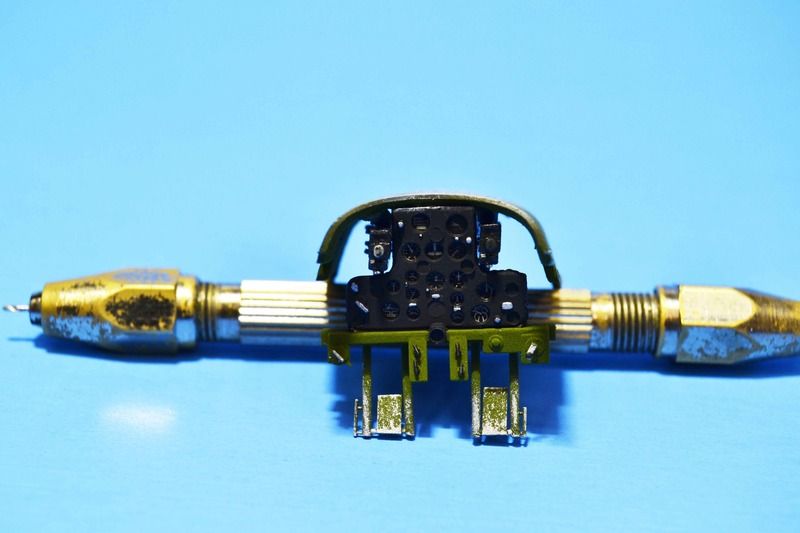 The tail wheel assembly. 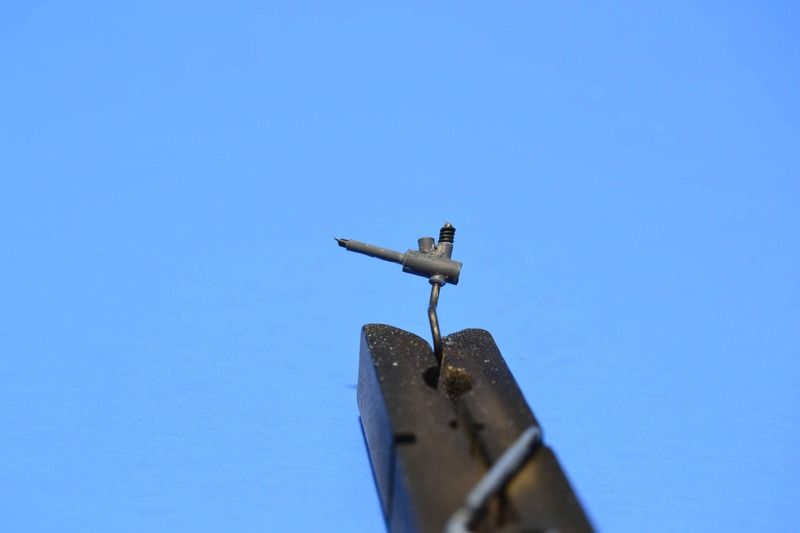 And the seat. 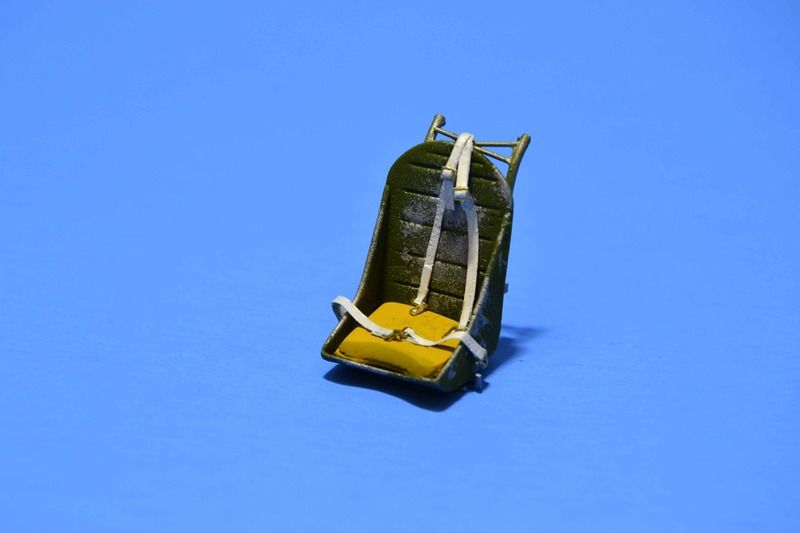 Well then came a big step. Closure of the fuselage. 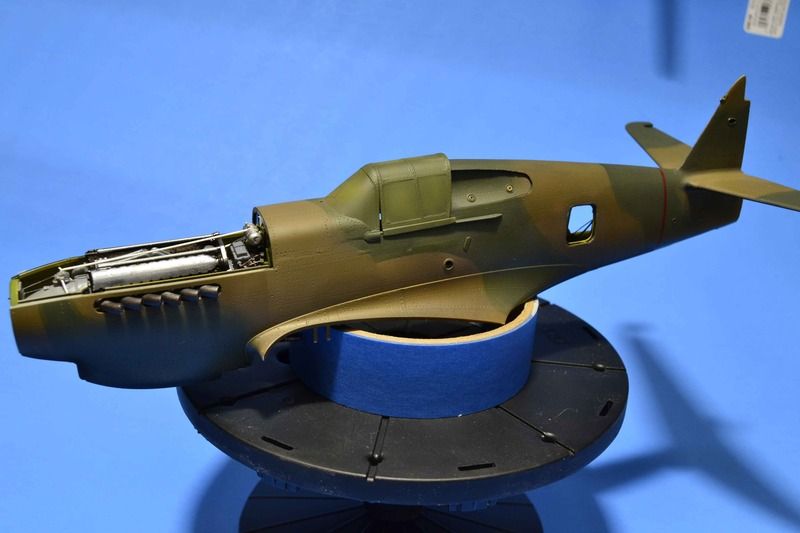 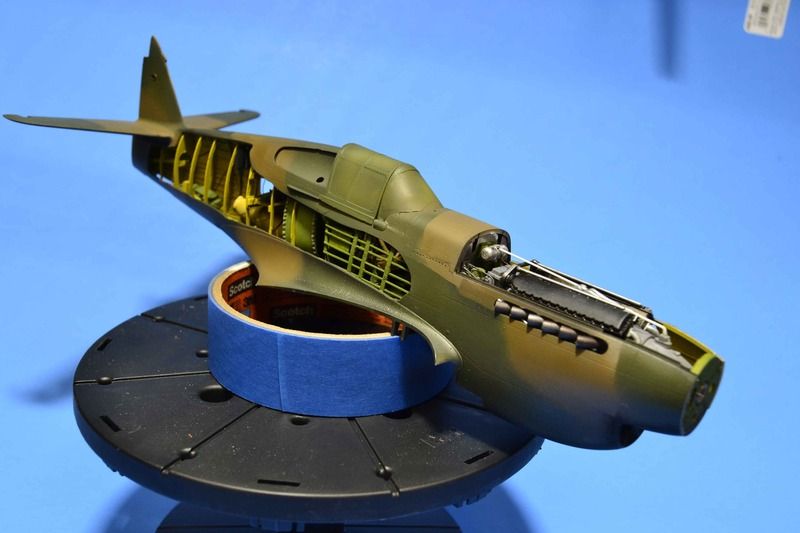 Next up is to go back and work on the wing some. I have some fixes to make and some little things to install. Moving along but oh so slowly. All comments, critiques, and criticism are encouraged. Joe |
|
|
|
Post by Leon on May 18, 2016 4:47:17 GMT -5
Looks fantastic Joe! No need to rush on this bird.  |
|
|
|
Post by wbill76 on May 18, 2016 14:57:28 GMT -5
Always a good sign when the fuselage goes together like it should Joe.  |
|
|
|
Post by fightnjoe on May 19, 2016 10:45:03 GMT -5
Many many thanks.
Bill that is the truth. This was by far the best fit I have had yet with my cut away builds.
Joe
|
|
|
|
Post by deafpanzer on May 23, 2016 9:06:11 GMT -5
Everything looks great especially the camo job!
|
|
|
|
Post by mustang1989 on May 23, 2016 15:54:54 GMT -5
You know I always hated buttoning up the fuselage because it hid half of the detail inside.  Looks like you don't have that problem. Looks like you don't have that problem.  The detail looks good Joe. |
|
|
|
Post by fightnjoe on May 28, 2016 22:59:34 GMT -5
You are very kind.
Thank you.
Joe
|
|
|
|
Post by fightnjoe on May 29, 2016 20:36:41 GMT -5
Well folks back again. Just a brief one this time. The wings are on and the fuselage is now completely painted. 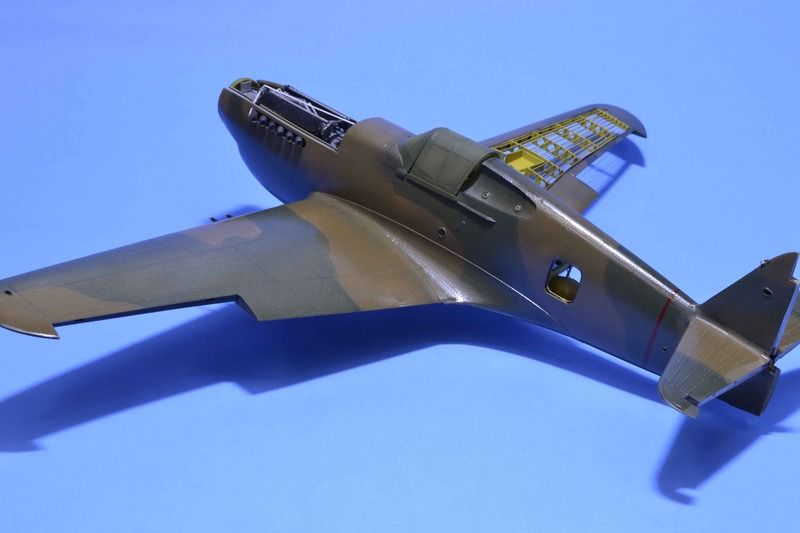 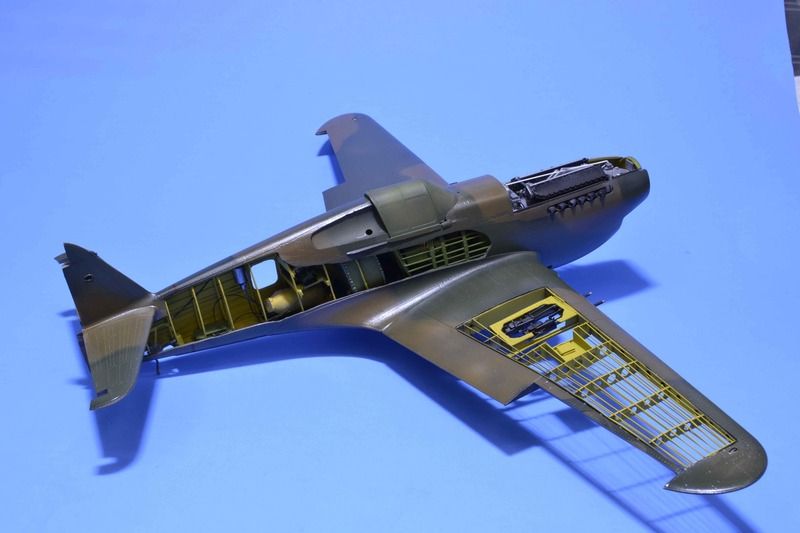 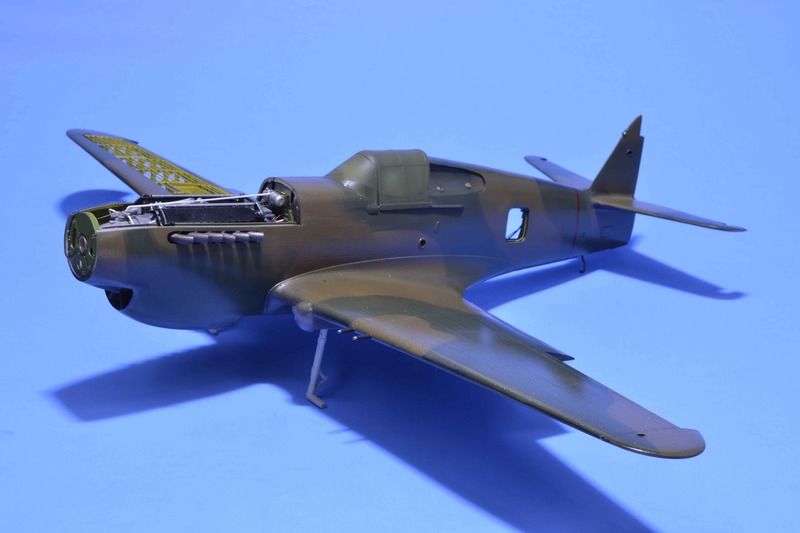 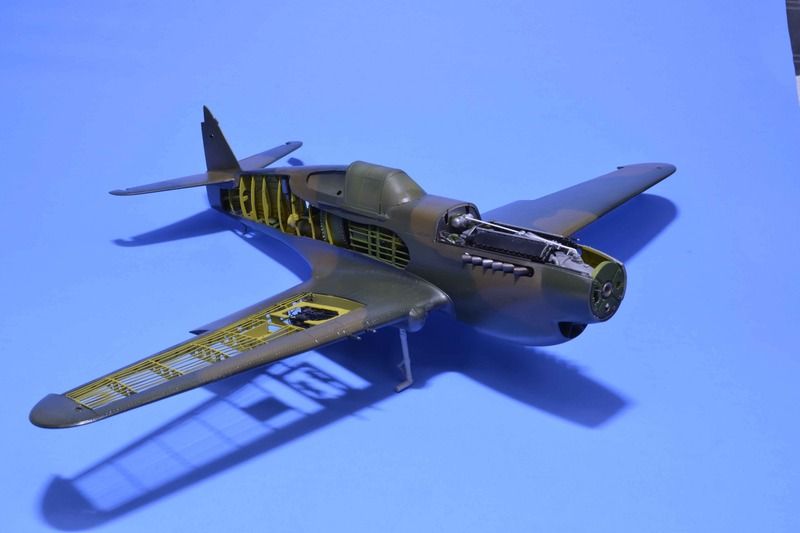 Decals are on and setting at the moment. There will be pictures soon. All comments, critiques, and criticism are encouraged. Joe |
|
|
|
Post by Leon on May 29, 2016 20:54:11 GMT -5
Joe, that looks fantastic! I really like your cut away work.  |
|
|
|
Post by fightnjoe on May 31, 2016 22:18:05 GMT -5
Many many thanks buddy.
Joe
|
|
|
|
Post by fightnjoe on May 31, 2016 23:20:27 GMT -5
Well folks work continues on the P-40B. The decals are in place. I have glossed them over to prepare for the weathering stage. They went down a dream this time. The subject is "White 68". 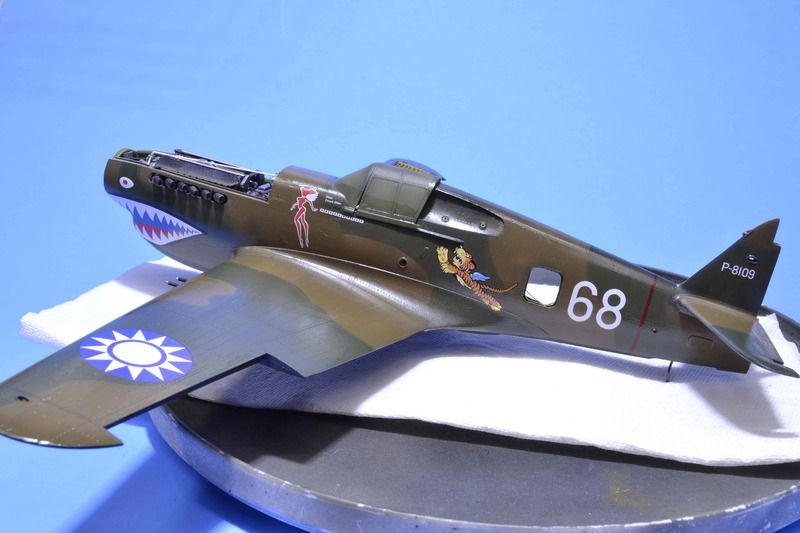 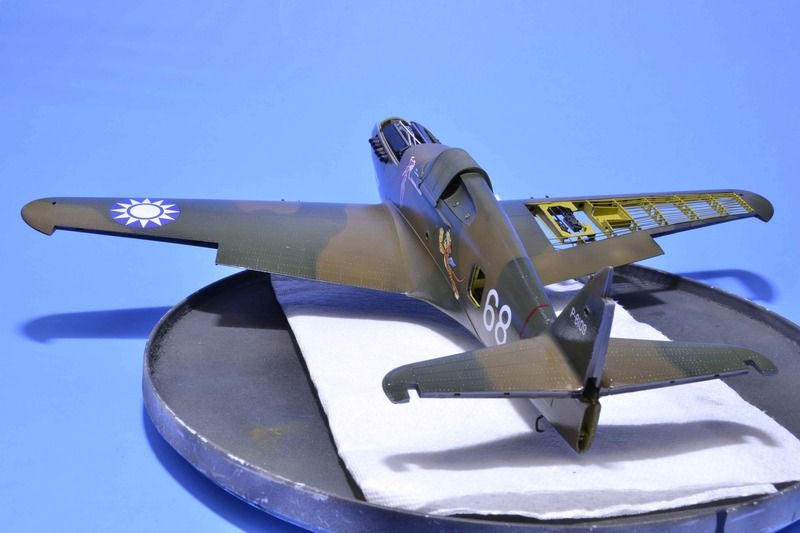 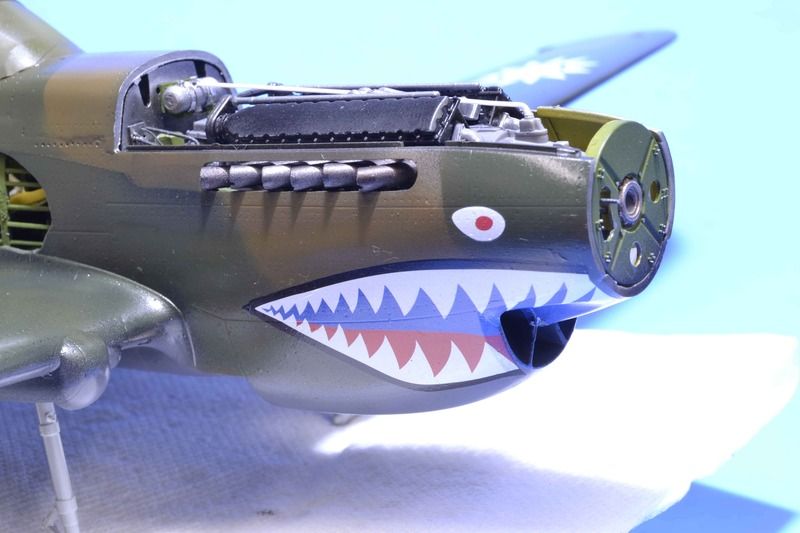 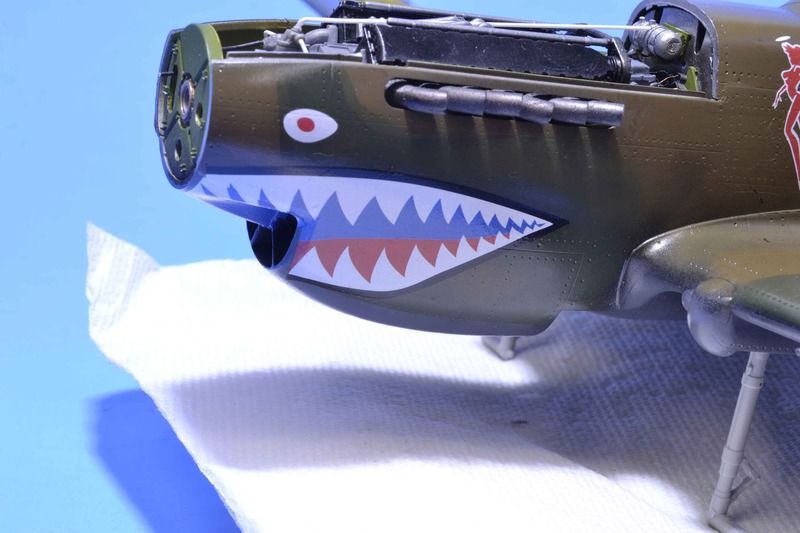 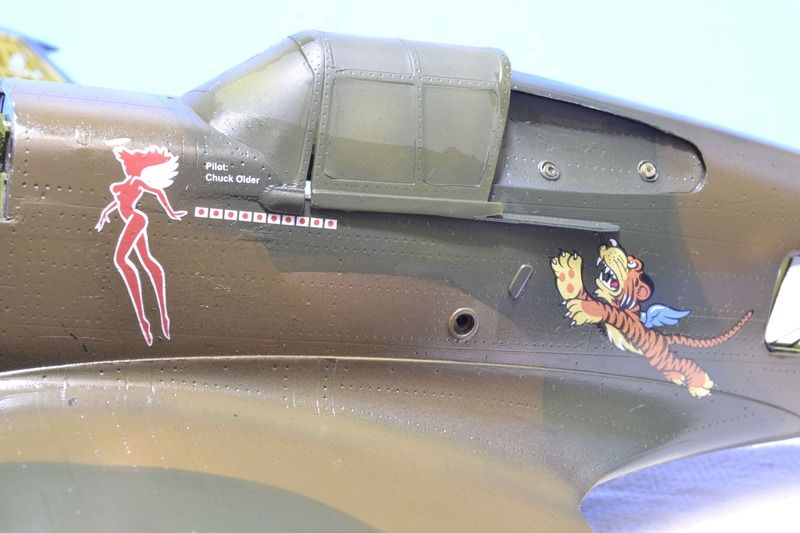 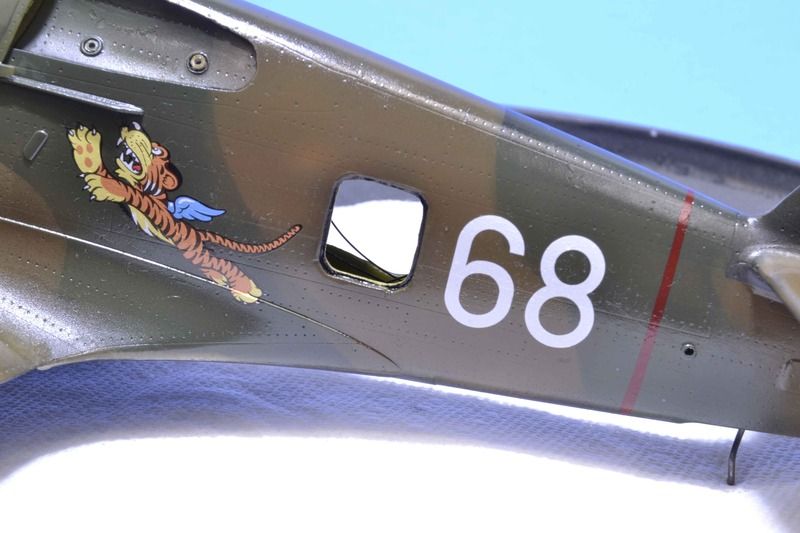 Next will be to start the weathering. All comments, critiques, and criticism are encouraged. Joe |
|
|
|
Post by Leon on Jun 1, 2016 6:00:27 GMT -5
Decals look really good Joe!
|
|
|
|
Post by armorguy on Jun 1, 2016 10:22:58 GMT -5
I like what I see Joe, decals look the part indeed !
|
|
|
|
Post by wbill76 on Jun 1, 2016 10:31:33 GMT -5
AVG markings on a P40, can't go wrong there! Nice work Joe.
|
|
|
|
Post by Tojo72 on Jun 2, 2016 7:27:04 GMT -5
Very nice,shark mouth looks flawless.
|
|
martslay
Full Member
  
Member since: February 2016
Posts: 1,113 
|
Post by martslay on Jun 2, 2016 13:47:22 GMT -5
Very beautifully looks!
|
|
|
|
Post by fightnjoe on Jun 2, 2016 18:19:49 GMT -5
You are all very kind. Thank you.
Joe
|
|
|
|
Post by fightnjoe on Jun 5, 2016 23:06:29 GMT -5
The fun begins. The process to bring the showroom aircraft to a well used aircraft has started. Using artist oils the process begins with a simple dot filter. Once the filter was blended I used mineral spirits to show some staining. This was in a very random pattern. I added some additional oils in places where I felt and had seen photos of the staining being heavier. 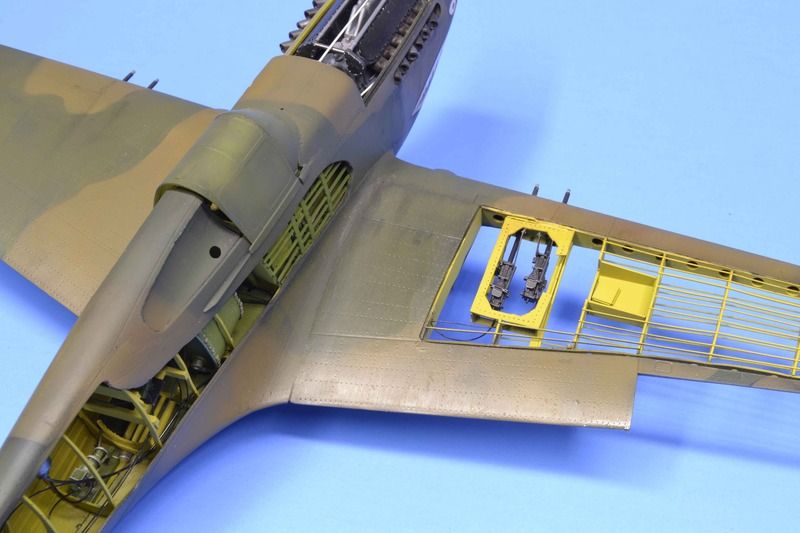 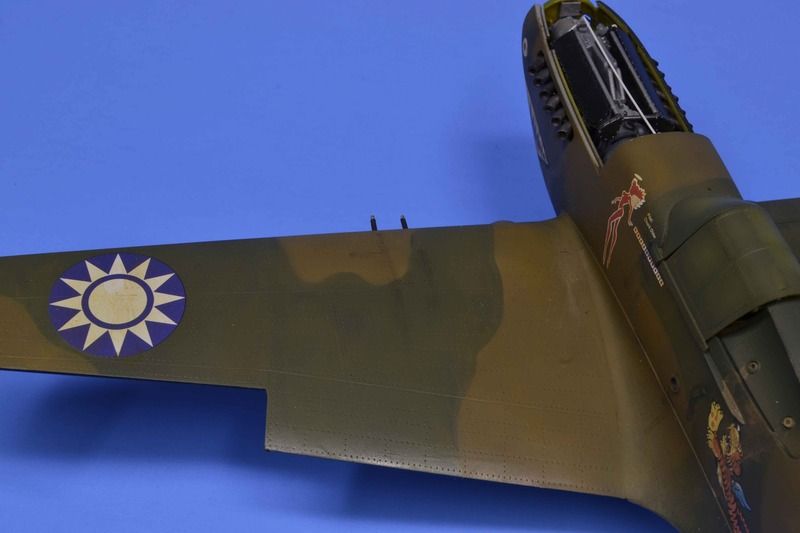 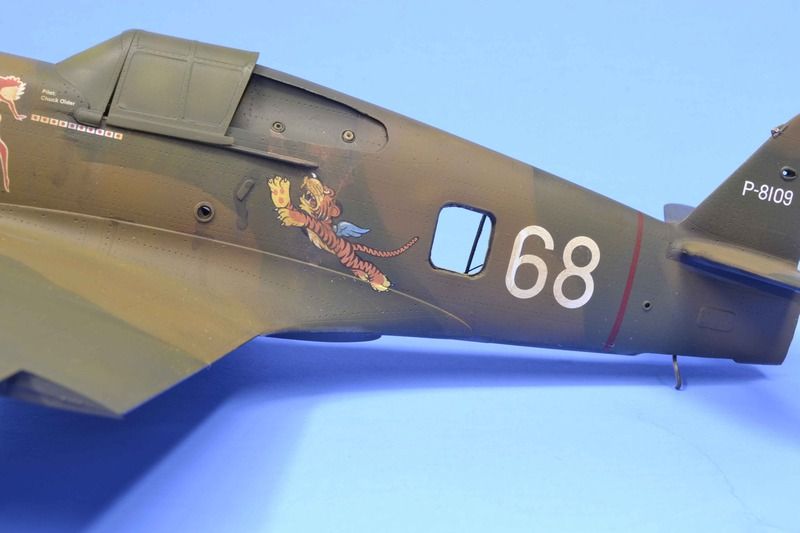 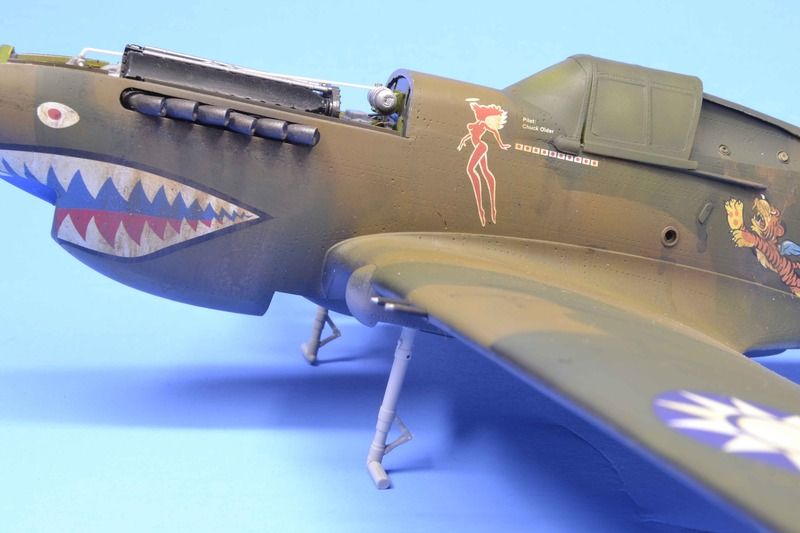 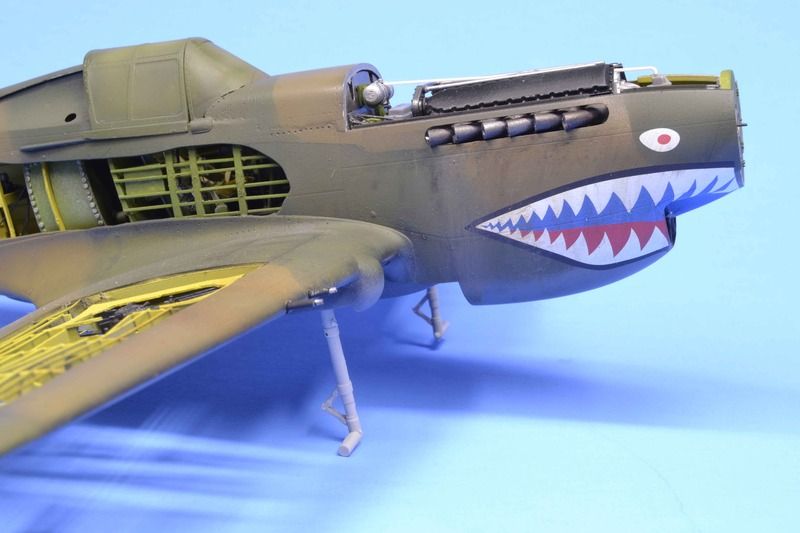 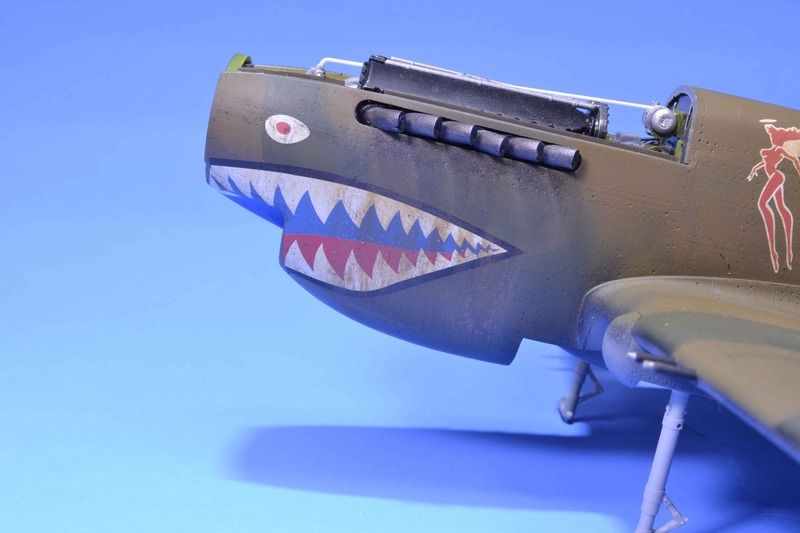 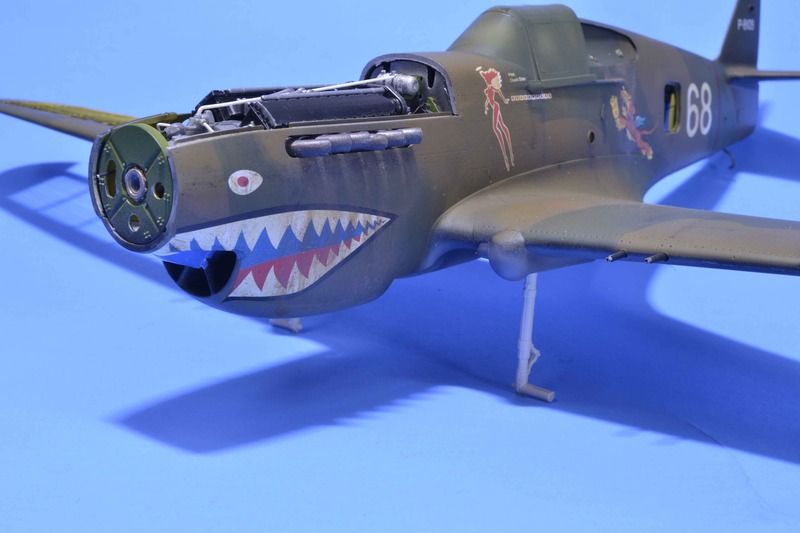 Phase one finished. Next will be phase two, chipping and additional weathering and staining. All comments, critiques, and criticism are encouraged. Joe |
|
|
|
Post by Leon on Jun 6, 2016 4:44:32 GMT -5
Nice start on the weathering Joe! Keeps looking better and better.  |
|
|
|
Post by fightnjoe on Jun 6, 2016 9:20:03 GMT -5
Many thanks buddy.
Joe
|
|
|
|
Post by fightnjoe on Jun 6, 2016 9:20:37 GMT -5
Phase two. For this part of the process I went back through with some oils and also with an Acrylic pin wash to pic out specific spots. I did this after shooting a Flat Clear over the aircraft. I also dry brushed Flat Aluminium in areas that I had seen in photos were subject to wear and tear. I used several brushes from a fine point to a rather large soft brush. 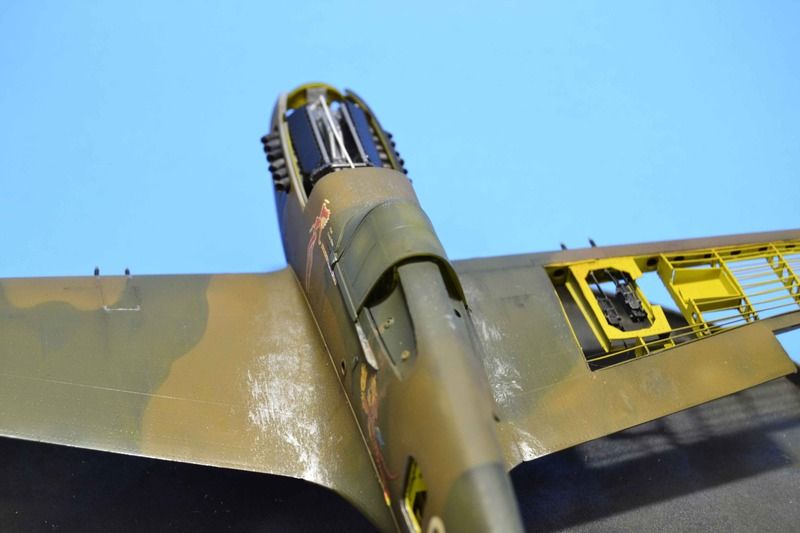 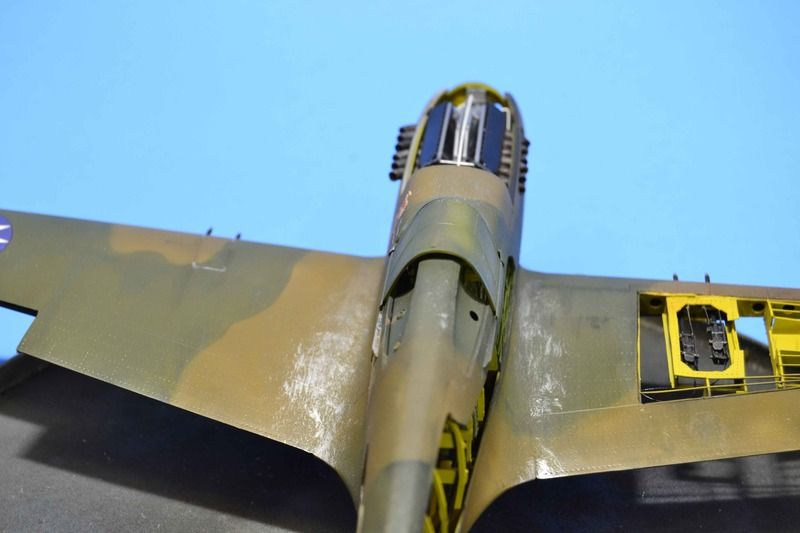 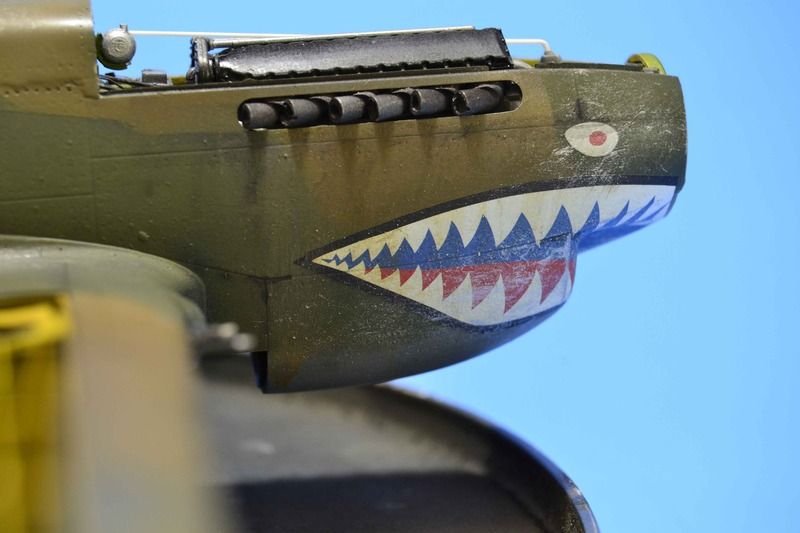 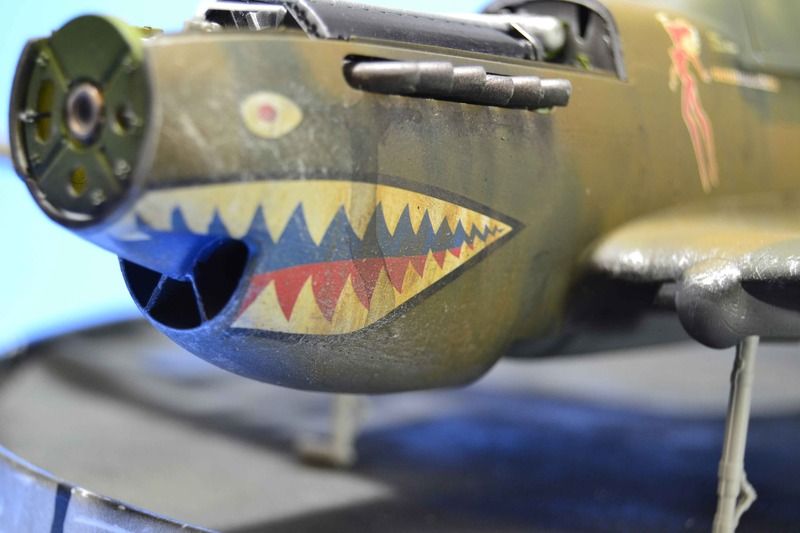 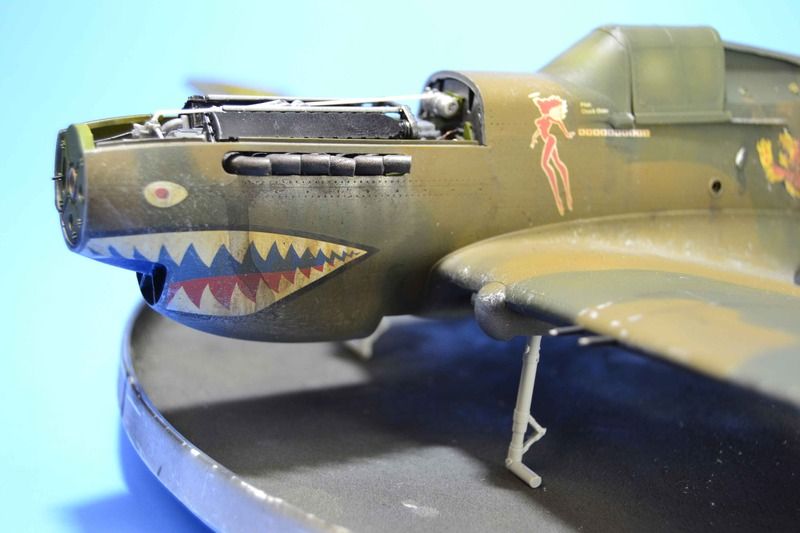 The next stage will be the small detail work in the landing gear and such. All comments,critiques, and criticism are encouraged. Joe |
|
|
|
Post by Leon on Jun 6, 2016 11:19:54 GMT -5
Great work on the wear and tear Joe !
|
|
|
|
Post by wbill76 on Jun 6, 2016 23:55:51 GMT -5
Starting to look like it's seen some time out on those Chinese airstrips Joe.  |
|