|
|
Post by dierk on May 14, 2016 3:52:06 GMT -5
Pretty good quality for such an old dear - just goes to show that you don't need the latest whizz-bang kit for a decent result.
|
|
|
|
Post by Leon on May 14, 2016 5:36:26 GMT -5
Nice work on the hull details Bill!  |
|
|
|
Post by wbill76 on May 14, 2016 11:01:20 GMT -5
Martin, Dierk, I'm fairly impressed so far. No real major show-stoppers yet...fit is good, just the usual flash, large attachment points, and occasional sink areas that have to be filled in. Leon, thanks buddy, cruising right along! 
|
|
|
|
Post by wbill76 on May 14, 2016 20:50:19 GMT -5
More progress on the hull details. Today's session focused on the 6-pounder anti-torpedo boat guns. These snap into the sponsons but their fit once in place is a little wobbly. The PE shutters for the exterior are two part and there's very little contact surface for them, so after annealing and shaping them with a mandrel one at a time, I worked one gun at a time to get everything in place. The instructions try to tell you that you need to use different parts depending on whether you're working on the fore or aft guns on either side but they used the same part numbers for both types...so I just had to figure it out on my own.  Seeing all those guns sticking out at various angles just adds to the 'old school' look of this design IMHO! 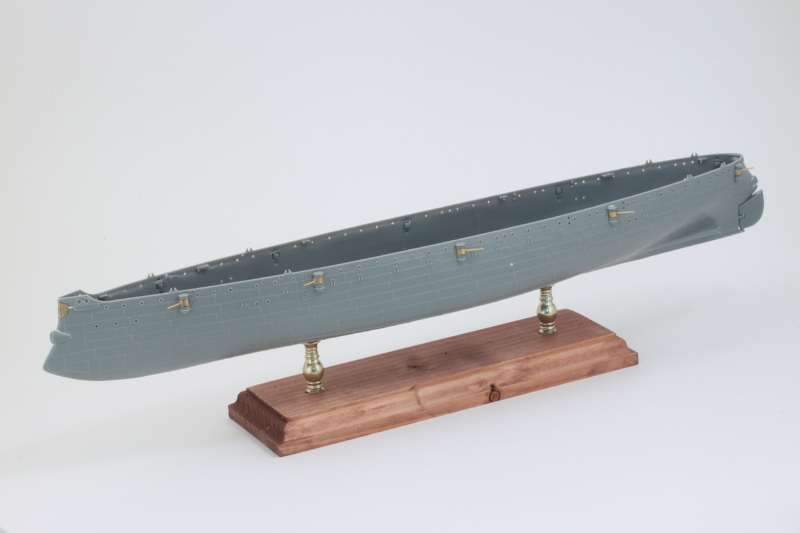 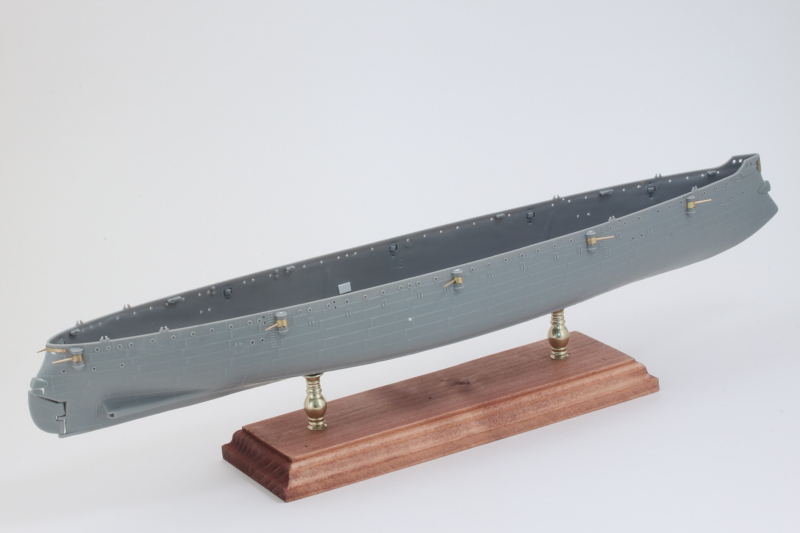 Getting closer to time for paint! |
|
|
|
Post by wbill76 on May 15, 2016 16:06:39 GMT -5
Got the rest of the hull PE details done today. The stern life-ring holders are all one piece which makes for some delicate folding to get them into the correct shape. A PE bending tool is a must, don't think I could've pulled it off with just pliers and tweezers. Two holders per side, the life-rings (actually large circular rafts, in the reference pics they look the size of large tires) themselves will get added later once the hull is painted. 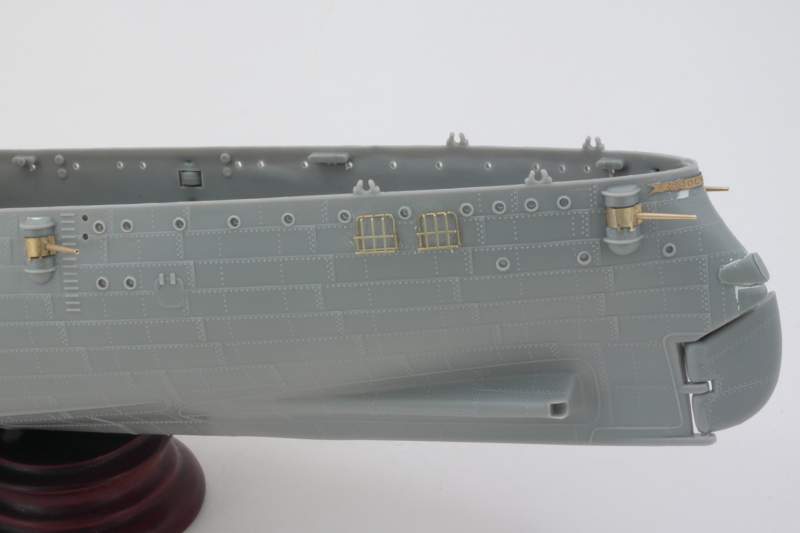 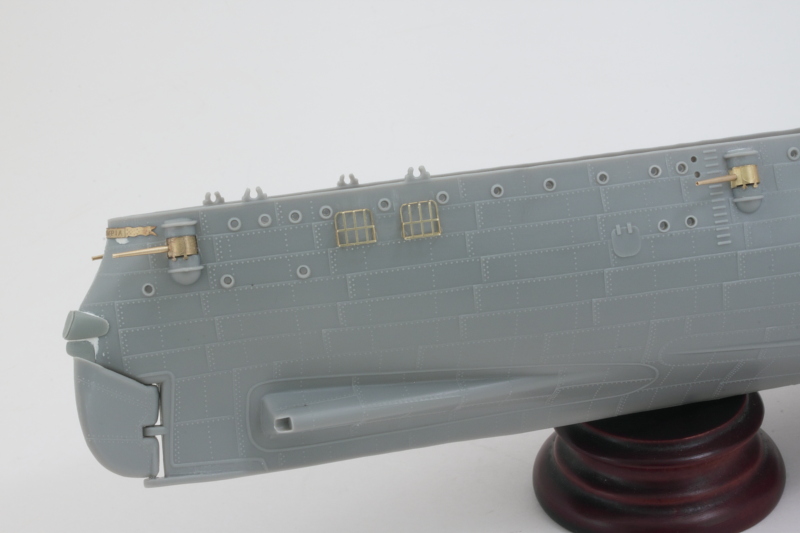 Bilge keels were next, these are long pieces of PE on the fret so getting them off and avoiding them flexing or bending requires a little care. The starboard side keel matched up perfectly while the port side needed a little help in one spot to match up with the molded on keel on the hull. I used some small diameter styrene rod added behind the PE keel to fill in a slight gap that existed roughly in the middle of the keel since putty alone wouldn't have done the job. 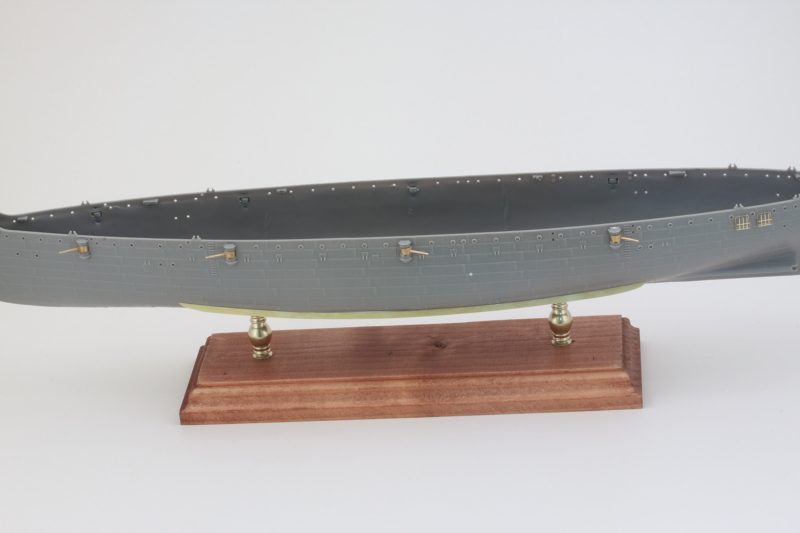 Next up will be priming the hull and getting ready to do the major paintwork there. |
|
|
|
Post by Leon on May 15, 2016 16:30:08 GMT -5
Nice work on the PE details Bill!  |
|
|
|
Post by wbill76 on May 15, 2016 16:58:50 GMT -5
Thanks Leon, plugging away one piece at a time!  |
|
|
|
Post by dierk on May 16, 2016 0:20:35 GMT -5
Anthother great update Bill!
|
|
|
|
Post by wouter on May 16, 2016 0:56:01 GMT -5
Ooh, very nice to see the 6 pdrs and the etch fitted to the hull. Quite impressive scary stuff  Cheers |
|
|
|
Post by wbill76 on May 16, 2016 10:09:36 GMT -5
Thanks Dierk! Ooh, very nice to see the 6 pdrs and the etch fitted to the hull. Quite impressive scary stuff  Cheers Thanks Wouts! I'm just glad it's the larger scale.  |
|
|
|
Post by wbill76 on May 16, 2016 20:10:18 GMT -5
Started in on the main hull paintwork, the first order of business was a pre-shade/primer coat of MM enamel Flat Black. 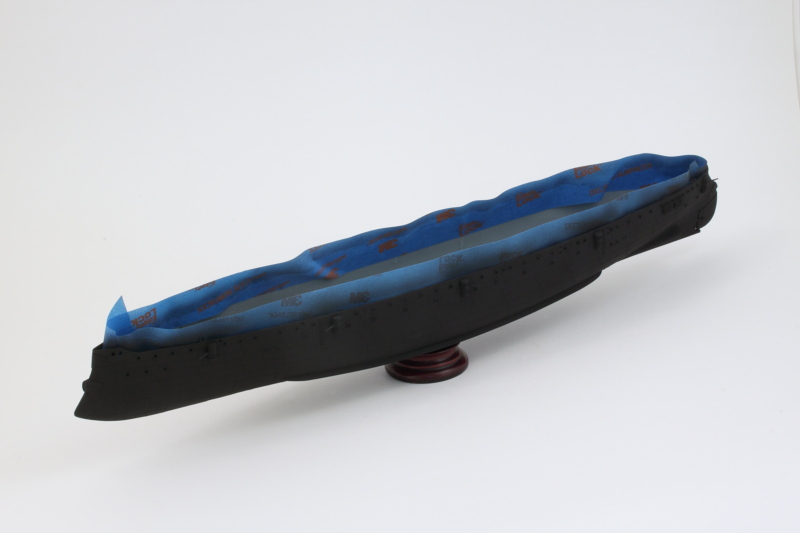 I masked off the demarcation for the anti-fouling red and airbrushed MM enamel Insignia Red in thin coats to build it up slowly over the pre-shade and then went in close and worked on all the overlapping plates to bring out the rivet detail as much as possible. My trigger finger got quite a workout on the double-action for this stage but it's worth it given all that beautiful plate detail that was molded into the hull.  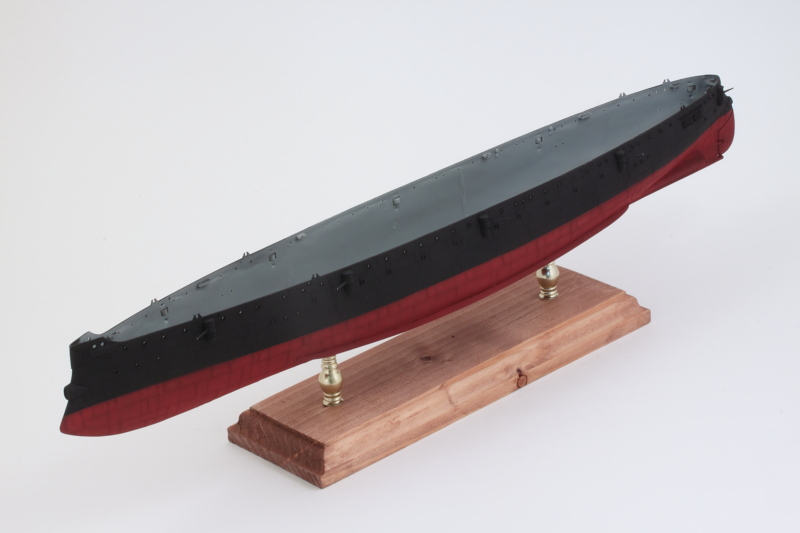 I'll let that set up overnight and then will mask it off so I can add the dark gray upper portion in a similar process. Olympia didn't have a boot stripe, so that will make life a little simpler as a result. |
|
|
|
Post by wouter on May 17, 2016 3:02:53 GMT -5
And we have paint! Love the shades Bill...and you are catching me quickly  Cheers |
|
|
|
Post by wbill76 on May 17, 2016 10:04:07 GMT -5
Thanks Wouts! This is all still just Step 1 in the instructions.  |
|
|
|
Post by dierk on May 17, 2016 11:11:41 GMT -5
Lovely!
|
|
|
|
Post by wbill76 on May 17, 2016 11:33:27 GMT -5
Thanks Dierk! More fun to come today for the 2nd half.  |
|
|
|
Post by deafpanzer on May 17, 2016 15:00:30 GMT -5
WOW! You are definitely rolling. Where did you find the time while selling all of your stuff?!?! The hull is looking real good... not too monotoned especially the red.
|
|
|
|
Post by wbill76 on May 17, 2016 17:24:12 GMT -5
WOW! You are definitely rolling. Where did you find the time while selling all of your stuff?!?! The hull is looking real good... not too monotoned especially the red. Glad you like it Andy! Been making the most of the available bench time these days, I don't start back teaching classes until after the 4th of July so have some spare time as a result.  |
|
|
|
Post by wbill76 on May 17, 2016 17:24:31 GMT -5
More progress in the hull department, this time it was the upper hull that got attention. The instructions include a color chip for the 'standard Navy Gray' that was used and recommends FS 36081, which in the MM enamel line is called European 1 Gray. This is pretty dark on its own, so I opted instead for the FS 36118 Gunship Gray as a lighter option over the Flat Black pre-shade coat. Masking tape protected the previous anti-fouling red work and I used the same process of thin coats to build up a uniform base color, then went in close with the airbrush and worked panel by panel to fill them in. 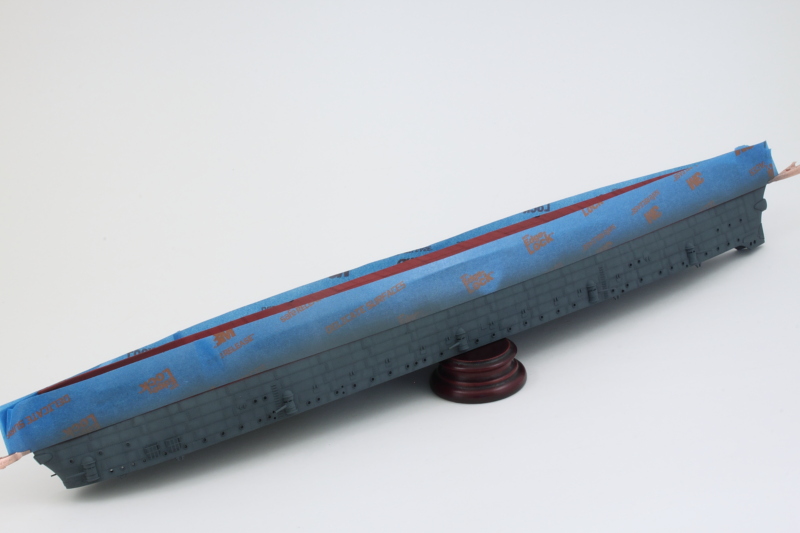 Masking tape came off and everything looks like it should!  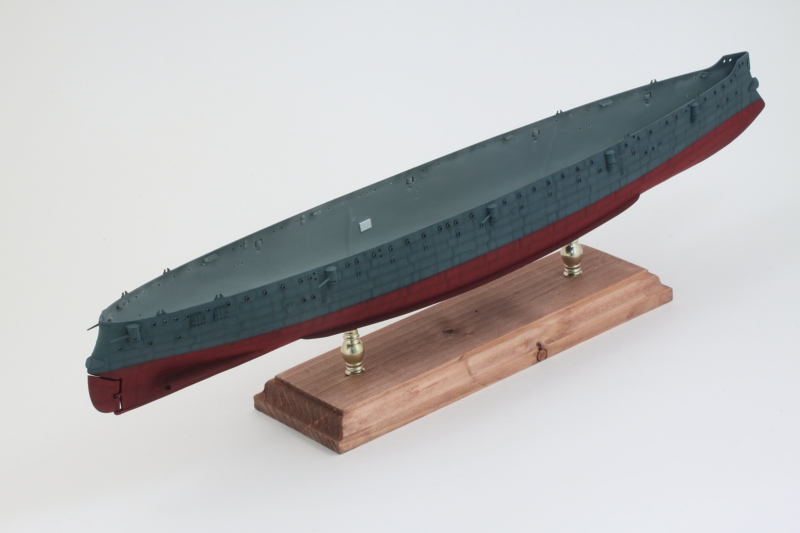 Next up will be working on the remaining details for the hull like the props, picking out the name and federal shield crests, etc. Believe it or not, I'm still on Step 1 of the instructions!  |
|
|
|
Post by Leon on May 17, 2016 18:26:49 GMT -5
WOW....Painting looks great Bill!  Love how the panels pop right out.Looks like your trigger finger can use a rest after that session.  |
|
|
|
Post by Tojo72 on May 17, 2016 18:36:42 GMT -5
Look away a couple of days and see what happens.Great looking painting so far.
|
|
|
|
Post by wbill76 on May 17, 2016 18:55:35 GMT -5
Thanks Leon! Trigger finger definitely needs a break after 2 straight days of workout.  Anthony Anthony, thanks as well, got to stay on top of the work gang around here or they start slacking off.  |
|
martslay
Full Member
  
Member since: February 2016
Posts: 1,113 
|
Post by martslay on May 18, 2016 2:03:15 GMT -5
Very cool, Bill! Looks good.
|
|
|
|
Post by wouter on May 18, 2016 2:05:09 GMT -5
Yummie!
Cheers
|
|
|
|
Post by dierk on May 18, 2016 3:29:54 GMT -5
Still only at step one?  Hope your trigger finger recovers soon, so you can pull it out 
|
|
|
|
Post by wbill76 on May 18, 2016 9:59:19 GMT -5
Thanks Martin and Wouts ! Moving along!  Still only at step one?  Hope your trigger finger recovers soon, so you can pull it out  No kidding Dierk, but the good news is that there's hardly any superstructure to this one, so it will move faster once the hull is done.  |
|
|
|
Post by wbill76 on May 18, 2016 19:57:51 GMT -5
If the devil's in the details, then I spent the day dancing with him for sure!  Optivisor got quite the workout today as I picked out both the bow and stern crests, applied Flat Black to the 6-pounder guns, installed the propellers, and added the life rings to their cages. For the stern badge, I used Light Gray (instead of White), Flat Sea Blue, and Insignia Red in accordance with the instructions color guide in Step 17, the final step. Why they wait until then for the color call-outs is curious but I suppose they assume you wouldn't paint until everything was done on the construction. 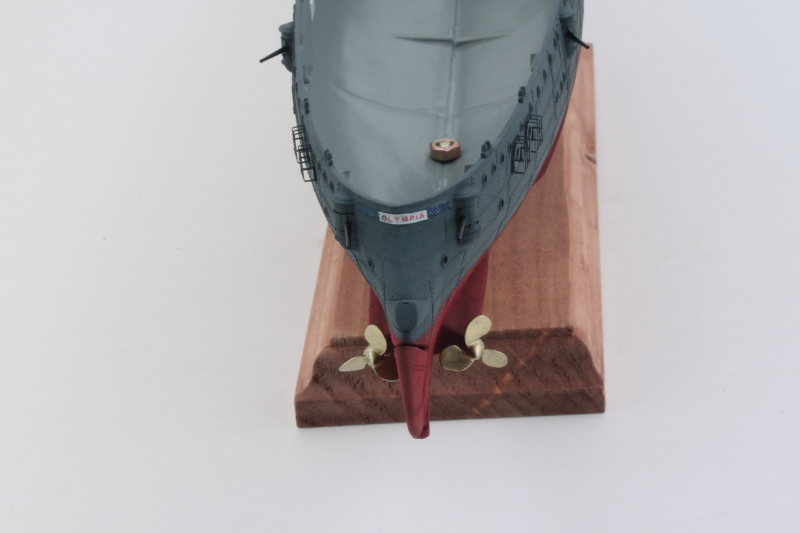 The propellers are resin replacements and had a lot of flash to clean up, but were still an improvement over the kit parts. They are handed so I had to be sure to avoid mixing them up while working on them. MM non-buffing Metalizer Brass did the trick for them. The left side propeller's shaft was cast short so I had to add some styrene rod to make the full shaft to match the opening in the hull sponson. 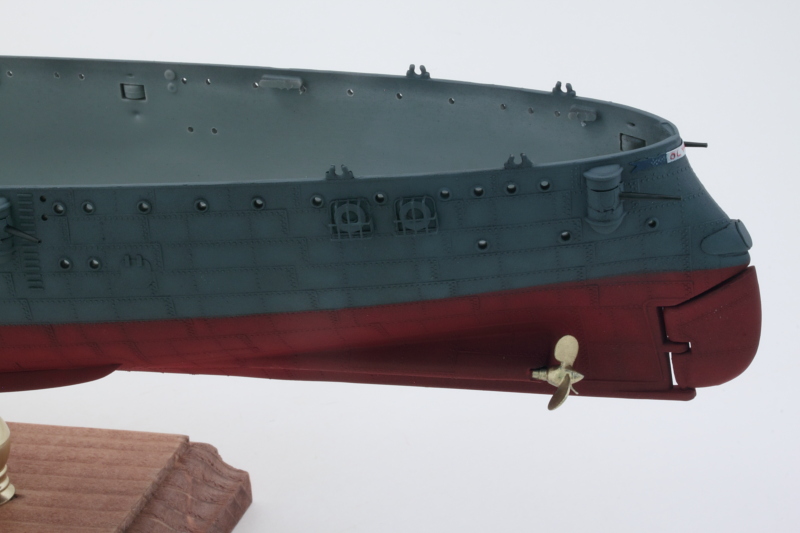 On the bow, the Federal shield took the most time to get it to look right. Toughest part was the demarcations between the red and white stripes. The PE helped but the edges between the sections were very fine, so lots of back and forth with careful touch-ups using an 18/0 pointed brush were called for. Definitely worth the effort as a decal here just wouldn't have the same 3-D look to it that the PE provides. 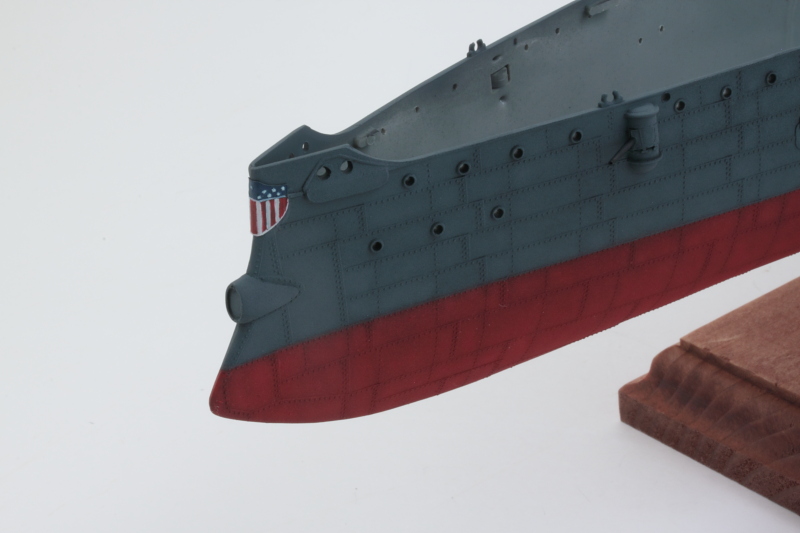 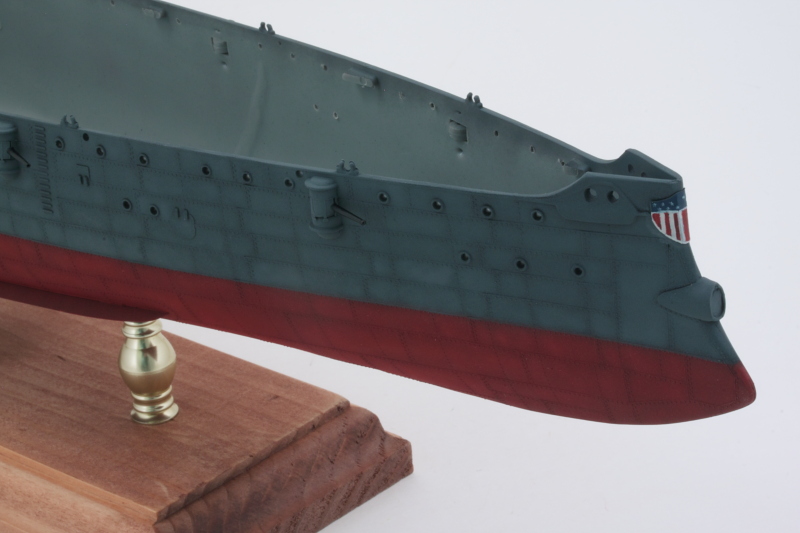 I can now say that I'm finally done with Step 1!  I still need to seal up the hull and do some additional weathering to it before I can permanently attach it to the stand and move on to Step 2. |
|
|
|
Post by Leon on May 18, 2016 20:10:21 GMT -5
Nice work on the details Bill!  Glad you have a steady hand.  |
|
|
|
Post by TRM on May 18, 2016 21:02:21 GMT -5
Love the looks of this hull!! Top notch work so far Bill!! The details are just popping on this....and you don't even have the weather deck down!  |
|
|
|
Post by wbill76 on May 18, 2016 22:24:04 GMT -5
Nice work on the details Bill!  Glad you have a steady hand.  No kidding, definitely a no caffeine day.  |
|
|
|
Post by wbill76 on May 18, 2016 22:24:42 GMT -5
Love the looks of this hull!! Top notch work so far Bill!! The details are just popping on this....and you don't even have the weather deck down!  Thanks Todd. Still plenty to do on it for sure!  |
|