|
|
Post by wbill76 on May 30, 2016 18:30:03 GMT -5
Thanks Todd! I would love to be a fly on the wall in the ship architect's office...I'm sure they had plenty of arguments over how many and where to stick the guns of different types, Olympia fairly bristles with them!  |
|
|
|
Post by wbill76 on May 31, 2016 17:32:28 GMT -5
I spent the day's effort working on getting the superstructure sides cleaned up and prepped for install. Turned out to be more work than I anticipated and managed to get one of the two sides done. I removed all the molded-on railing stanchions with sprue cutters and cleaned up their nubs. Some large ejector pin/mold stubs on the backside were also removed so that it would fit cleanly into the cutouts on the main deck. There were also some sunken spots that needed putty and I looked ahead in the instructions to see which mount holes were needed and which needed filling. For the two large holes meant to take a ladder that will be replaced with PE, I filled those using styrene rod and liquid glue instead of putty. The hatches received the set's PE details and I drilled out all the portholes. The instructions are a little vague on which hatches to use, the set provides both solid doors and ones with portholes included...but not enough of the porthole type to do all the hatches. I opted to use two with portholes in the spots where there were other portholes already for a little variety. One side down, one to go! 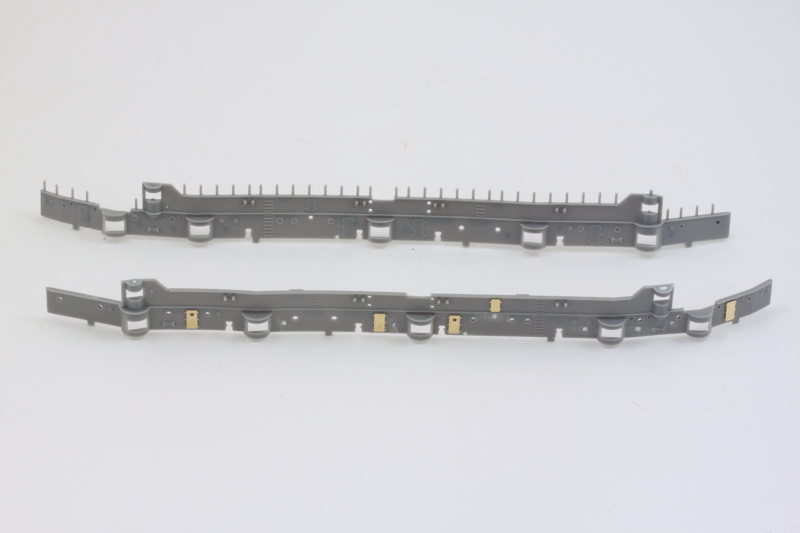 |
|
|
|
Post by TRM on May 31, 2016 17:52:14 GMT -5
Clean work as usual Bill! The hatches make a nice improvement!  |
|
|
|
Post by wbill76 on May 31, 2016 18:21:11 GMT -5
Thanks Todd, well worth the effort for sure.  |
|
|
|
Post by dierk on Jun 1, 2016 3:43:47 GMT -5
Nice bit of detailing Bill!
|
|
|
|
Post by Leon on Jun 1, 2016 4:59:02 GMT -5
Nice work on the hatch details Bill! They look really good.  |
|
|
|
Post by wbill76 on Jun 1, 2016 8:38:09 GMT -5
Thanks Dierk and Leon, plugging away at it.  |
|
|
|
Post by armorguy on Jun 1, 2016 10:11:37 GMT -5
These parts make the difference Bill, well done, big improvement !
|
|
|
|
Post by wbill76 on Jun 1, 2016 10:16:16 GMT -5
These parts make the difference Bill, well done, big improvement ! Thanks AG! They must have had extra space on the fret, there's almost twice as many as needed, just not the right types consistently.  |
|
|
|
Post by wbill76 on Jun 2, 2016 19:18:17 GMT -5
Managed to get the other side of the superstructure done and installed the 4 boat davits per side. The davits snap into the openings in the side and I left them unglued until after installation to the main deck so I could be sure they would all line up properly. 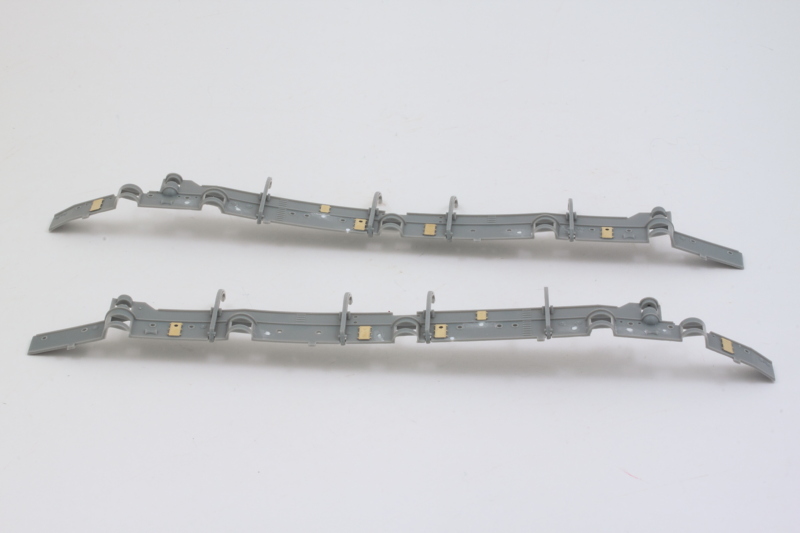 As you can see in the previous photo, the sides have some flex/bowing action going on, so getting them to line up properly with the superstructure sides took some coaxing. I started at the bow and used liquid glue and finger pressure and worked my way down one side at a time. All of the surfaces are too thin/flexible for clamps, so there was no other real way to do it except the old fashioned way!  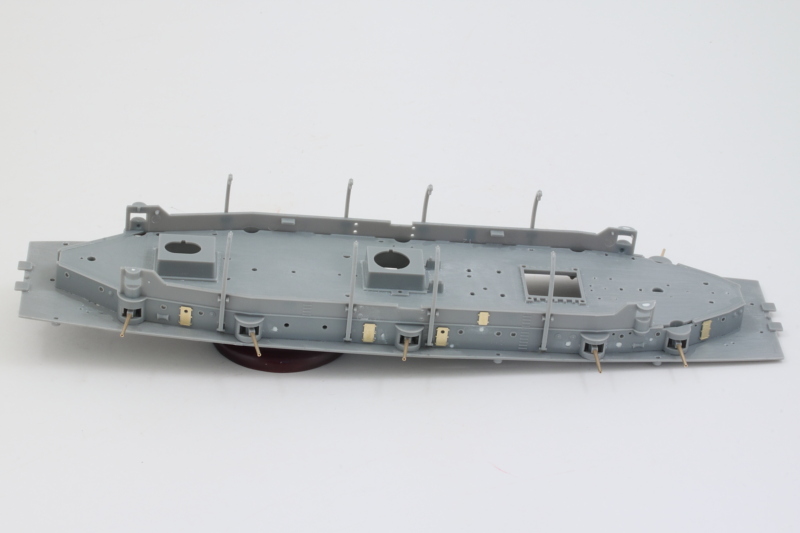 The 5-inch guns remain movable inside their casemates and that will make painting them easier as well. Boat davits were squared up and glued into permanent position After the glue has fully set, I'll need to do a little bit of putty work in a couple of small spots but not a ton. A quick test fit into the hull shows everything is still lining up as it should. Due to the way the wood decks are designed, those have to go on before the hammock frames can go in on either side but I did a test fit with them already to be sure that wasn't going to pose a problem later on. 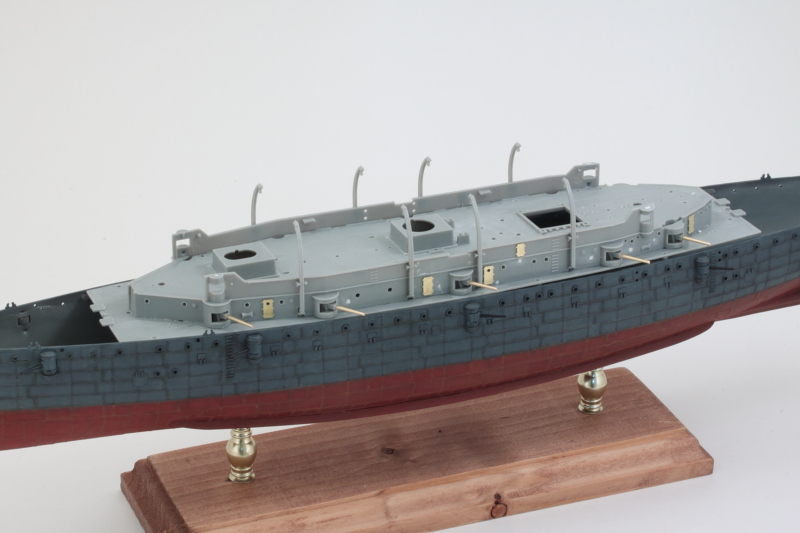 Upper works are starting to take shape! |
|
|
|
Post by Leon on Jun 2, 2016 19:30:29 GMT -5
Nice progress Bill! Shaping up nicely.  |
|
|
|
Post by wbill76 on Jun 2, 2016 19:51:20 GMT -5
Thanks Leon, definitely one of those cases where fat fingers are a good thing!  |
|
|
|
Post by dierk on Jun 3, 2016 1:58:22 GMT -5
I think I'll have to have my full English breakfast with a sideorder of dictionary - running out of original comments again. Boatilicious?  |
|
martslay
Full Member
  
Member since: February 2016
Posts: 1,113 
|
Post by martslay on Jun 3, 2016 5:12:37 GMT -5
Very cool, Bill!
|
|
|
|
Post by wing_nut on Jun 3, 2016 5:55:16 GMT -5
Appropriately named. That structure is super.
|
|
|
|
Post by armorguy on Jun 3, 2016 9:21:47 GMT -5
Looks super flawless buddy !
|
|
|
|
Post by wbill76 on Jun 3, 2016 10:53:59 GMT -5
Martin , Marc, and AG, appreciate it gents!  I think I'll have to have my full English breakfast with a sideorder of dictionary - running out of original comments again. Boatilicious?  Better than Boaty McBoatface! 
|
|
|
|
Post by dierk on Jun 3, 2016 12:25:28 GMT -5
 Shippy McShipface?  Really need to watch your Ps and Qs Ts on that one 
|
|
modelfreak72
Full Member
  
Member since: January 2012
Why worry, each of us is wearing an unlicensed nuclear accelerator on his back.
Posts: 1,479
Jan 28, 2012 23:21:46 GMT -5
Jan 28, 2012 23:21:46 GMT -5
|
Post by modelfreak72 on Jun 4, 2016 17:10:02 GMT -5
Coming along nicely Bill!
|
|
|
|
Post by wbill76 on Jun 4, 2016 18:59:34 GMT -5
Thanks Pete, cruising right along!  I always like to make the most of airbrush painting sessions so I decided to work on some of the superstructure elements that will go in after the wood decks are applied. There's a set of hammock frames that runs around the outer edge of the boat deck and these are also topped with a walkway that leads up to the bridge deck. The walkways had their raised planking sanded down as did the bridge deck. The PE bridge itself was assembled with some carefully applied CA on the inside joints since it's an origami-like 6-sided structure that starts out as a single flat piece vs. the kit's square box panelled structure. The top of the bridge is it's own separate PE piece that had a slight curve to it once removed from the fret, so I annealed it and carefully flattened it so it would sit level. The PE bridge is removable to support painting and won't be permanently installed until after the wood deck is applied. Last but not least, the conning tower part was cleaned up and prepped along with the back support for the bridge deck. 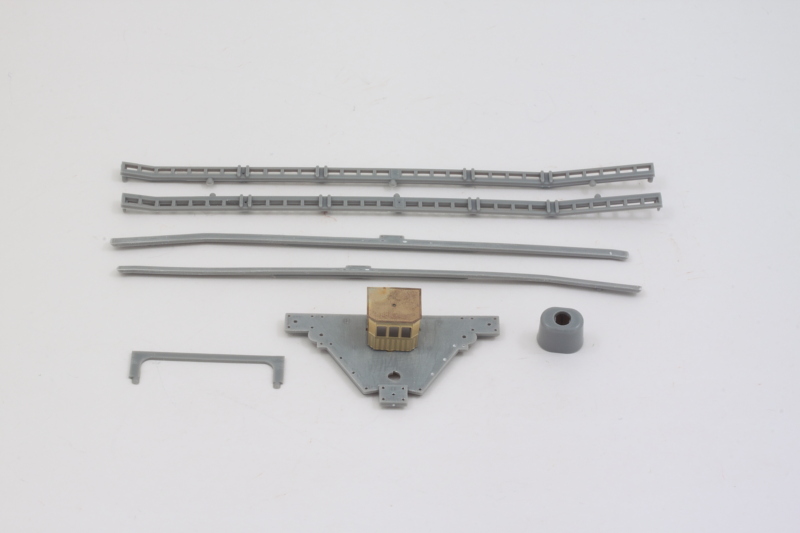 The two 8-inch turrets were cleaned up and prepped as well. The tops of the turrets are secured to the bases with a pin-and-cap arrangement and are meant to be able to rotate, so that will happen after painting to make life easier since the gun barrels are a separate color from the turret. The tops of the turrets had a couple of sunken spots that needed to be filled with putty and sanded down. The guns themselves were cut down and the bases drilled out to accept the brass barrel replacements. I used an old trick of darkening the ends with a black Sharpie so I could be sure I had the drill bit centered as there's very little margin for error due to the size of the pins. Some CA and voila! both pairs of 8-inch guns were done. 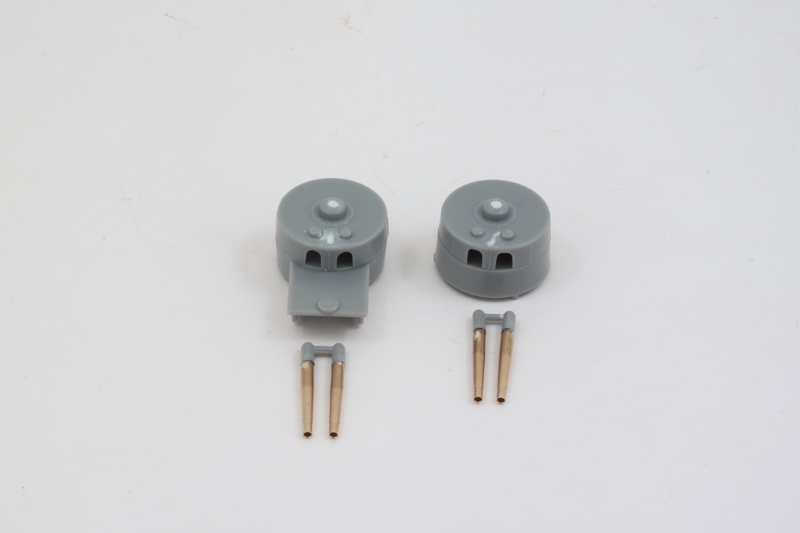 Next up will be airbrushing all the main deck components so I can get them installed and add the wood decks. |
|
|
|
Post by Leon on Jun 4, 2016 19:11:10 GMT -5
A nice days progress Bill! Looking forward to seeing some primer and paint fly.  |
|
|
|
Post by wbill76 on Jun 4, 2016 19:50:04 GMT -5
A nice days progress Bill! Looking forward to seeing some primer and paint fly.  Thanks Leon! I've entered the 'skip around the instructions' phase now in order to make it manageable. There will be more than one airbrush session between now and the end that's for sure!  |
|
|
|
Post by wouter on Jun 5, 2016 1:35:31 GMT -5
My my, very cool last couple of updates there Bill. The weathering sure gave the hull tons of character, really like what you are doing with her. Quite inspiring too! Good to see the upper deck appear  Cheers |
|
|
|
Post by kaytermarram on Jun 5, 2016 7:08:52 GMT -5
Remember the old Revell OLYMPIA from way back the 70ties. Was one of my fave ships these years and now I am hooked again. Its great to see it treated with such profession and your pics bring back part time dreams (because there were not add on set for kits!). I will stay here with the biggest possible interest
Frank
|
|
|
|
Post by wbill76 on Jun 5, 2016 11:29:04 GMT -5
Thanks Wouts! She's starting to look like a ship, but now it's details time!  Remember the old Revell OLYMPIA from way back the 70ties. Was one of my fave ships these years and now I am hooked again. Its great to see it treated with such profession and your pics bring back part time dreams (because there were not add on set for kits!). I will stay here with the biggest possible interest Frank Glad to have revived some memories Frank! I have similar memories of their Hornet and other box scale kits that they kept reissuing in the 80s. This Encore kit has everything you need in the box to dress it up thankfully!  |
|
|
|
Post by wbill76 on Jun 5, 2016 18:36:39 GMT -5
I did a quick check through the instructions to see if I needed to plug or adjust anything more on the main deck and sure enough, I found a couple of things I'd overlooked. One was the top caps for the two rear-most 5-inch guns called out in Step 3 so those were added and sanded down flush to the rest of the deck. The other was the four post holes in the large engine access hatch that is mentioned in Step 8. Those holes were filled with styrene rod and liquid glue since they were a little too deep for just putty. 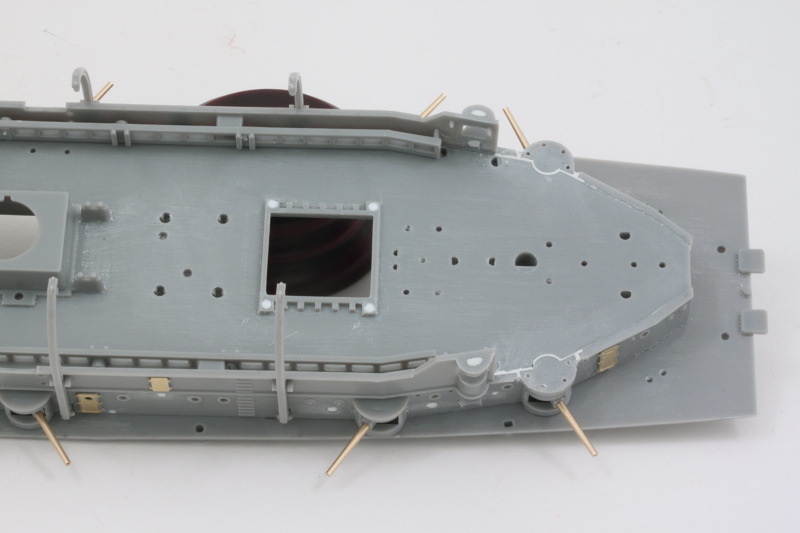 With that out of the way, I airbrushed a primer coat of MM enamel Flat Black where needed. For the decks, I only sprayed where there might be a little bit peeking out around the various fittings as a precaution. The wood decks seem to be a pretty tight fit to the kit parts but always better to be safe than sorry. 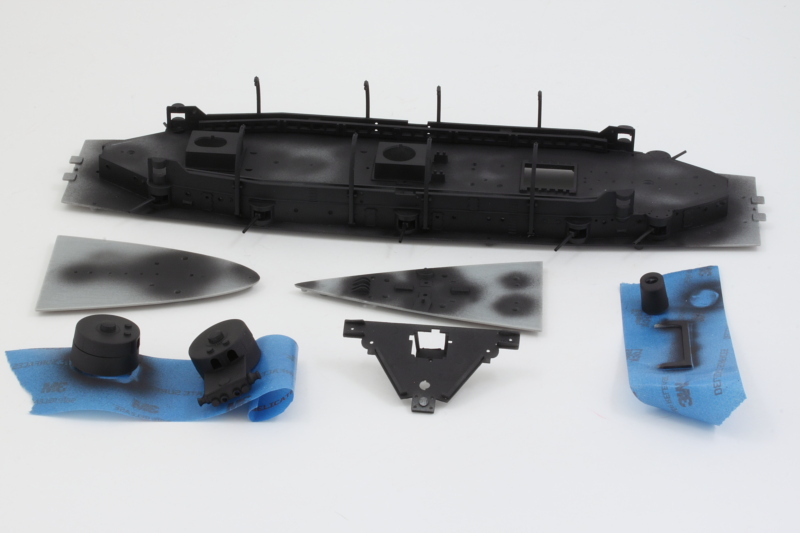 2nd round of airbrushing added the MM enamel Gunship Gray base coat. Once that's had a chance to cure overnight a bit, I'll need to go back over the 5-inch guns and touch them up a bit but overall, they retained their Flat Black treatment for the most part as intended. 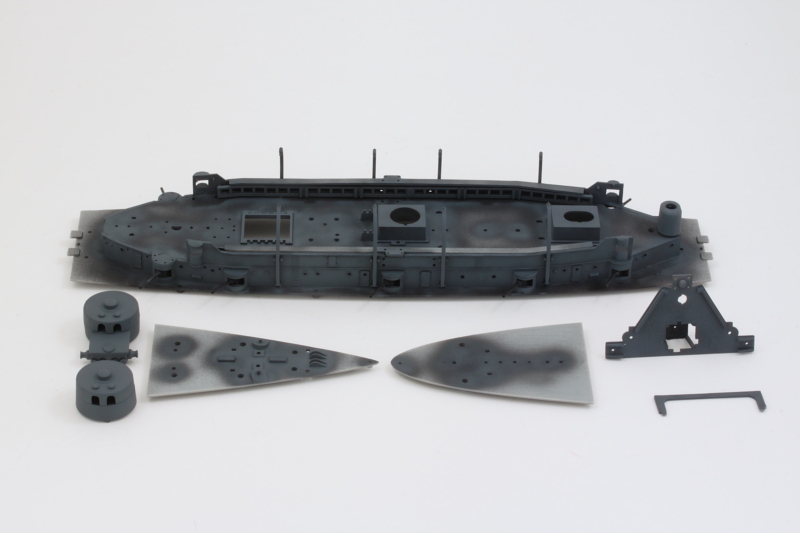 I'm going to add the boat deck wood deck portion while the whole deck is still separate from the hull as that should make life a little easier both in adding the deck and allowing me to add the crew hammock racks and walkways. That way if I need to do any touchups afterwards, I can do that without risking the rest of the hull's finish in the process. |
|
|
|
Post by Leon on Jun 5, 2016 19:06:35 GMT -5
Looks like you had a great AB session Bill!  |
|
|
|
Post by wbill76 on Jun 5, 2016 19:48:41 GMT -5
Thanks Leon! Can't let the trigger finger get too rusty.  |
|
|
|
Post by dierk on Jun 6, 2016 1:43:42 GMT -5
Good show old bean  |
|
|
|
Post by wbill76 on Jun 6, 2016 9:08:12 GMT -5
Good show old brean  Thanks Dierk, starting to use that alternate dictionary I see!  |
|