mnrun.
Junior Member
 
Member since: May 2016
Posts: 75 
|
Post by mnrun. on Jul 25, 2016 13:17:18 GMT -5
After finishing up the F-100C last week, I took a few days off, then got started with Kinetic's SuperE. I bought some Eduard photoetch to gussy it up a little bit, as well. So here's what the weekend yielded: Got the cockpit mostly done, which I'm also mostly happy with. I still have to build the HUD, but that's going to have to wait as it's fairly fragile PE. There's a little PE handle that floats about the throttle quadrant (glued to a sidewall) that makes it look like there's a handle for the throttle...it looks better than it sounds  It's mostly flat black, with some dry brushing and a wash. I've got some color PE seatbelts, but as usual, they're not great. So I need to figure out what I'm going to do about those. 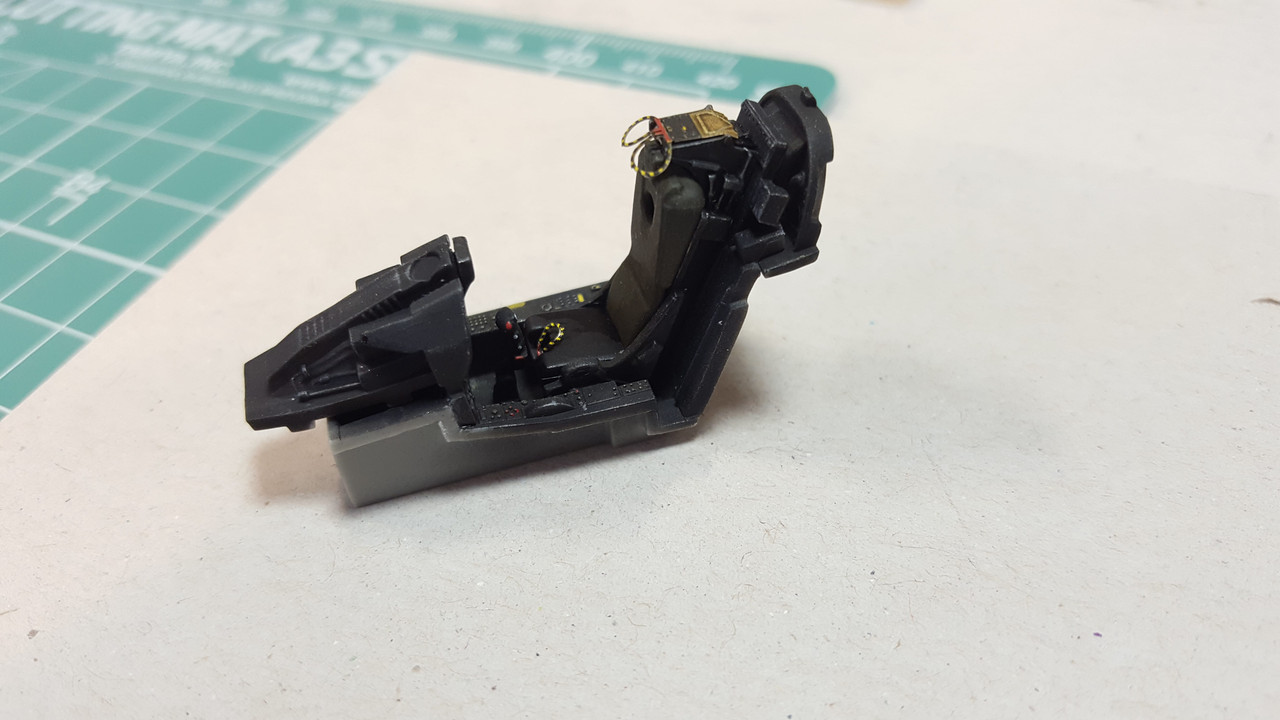 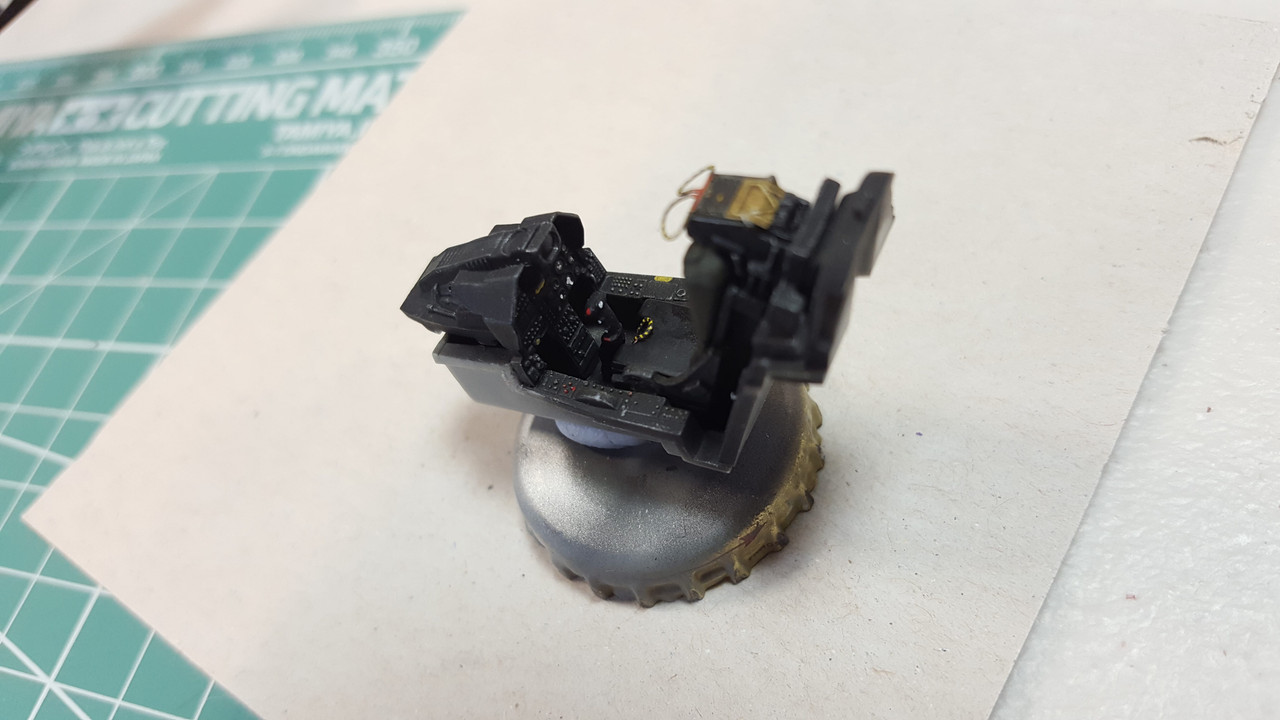 The nose gear well. Thanks for the ejector pin marks, Kinetic! 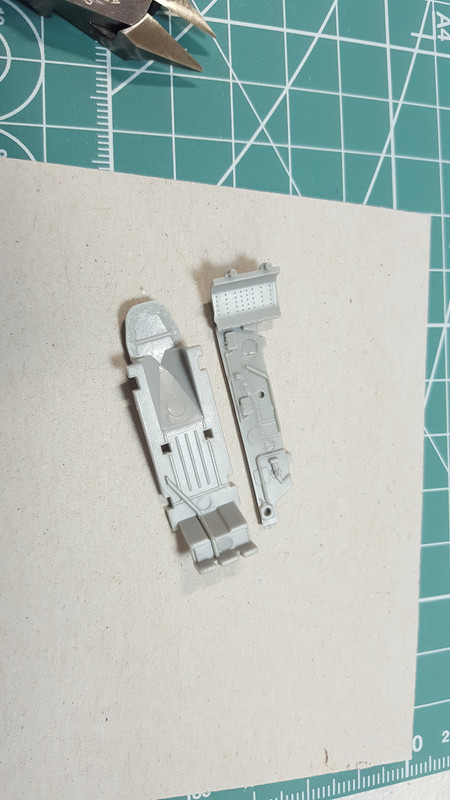 Doing some test fitting and getting PE bent properly. 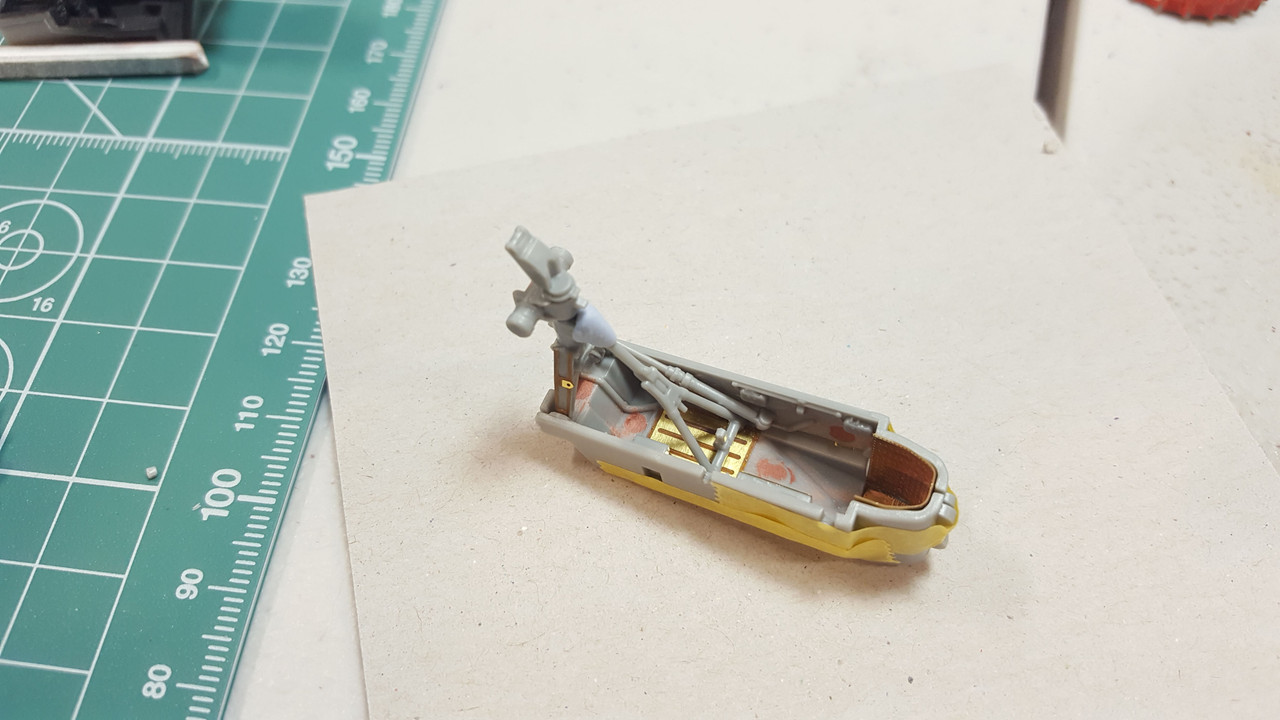  The main gear well, with the paneling replaced with PE. Looks pretty good, I think. 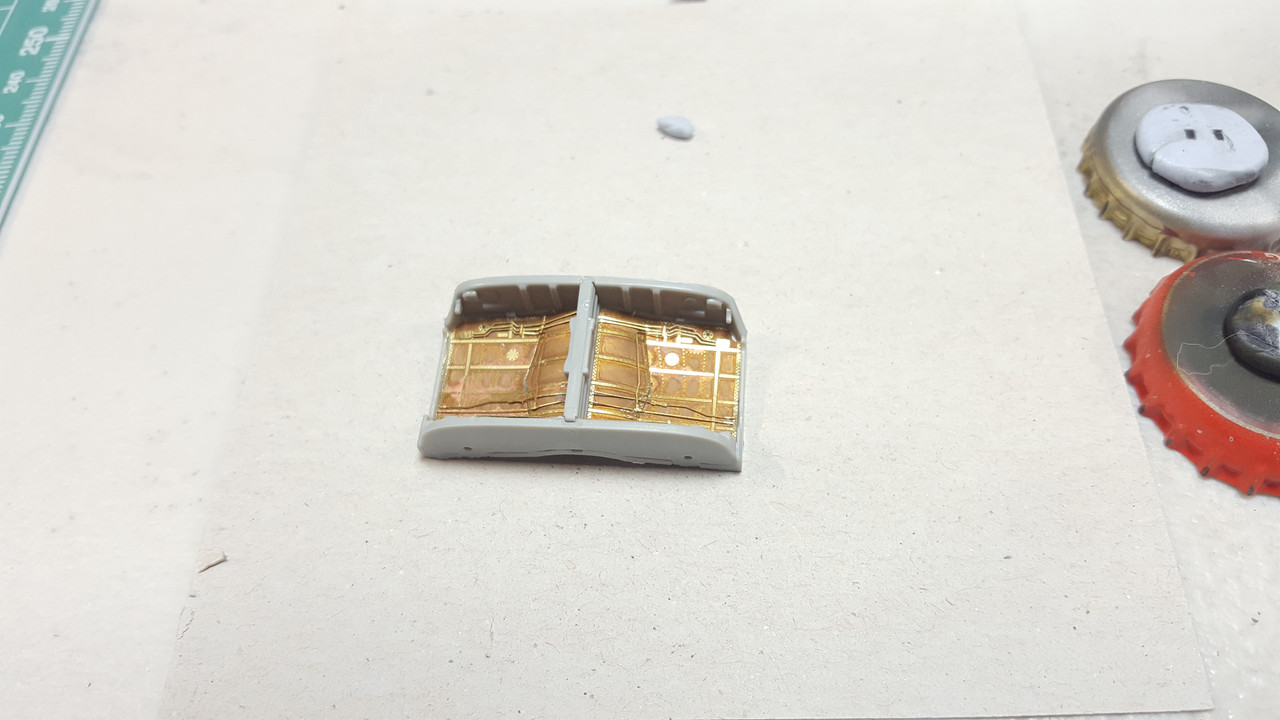 I had a bit of a screwup getting the main gear well test fit into the fuselage. When I first tried it, it seemed like there was no way it was going to fit...As in, not even close. So out came the Dremel to do a little surgery...but then when I was test fitting the intake trunking I found out that the (very) tight fit helps to deform the fuselage halves enough to get the gear well into place, more or less perfectly. At least, it would be perfect if I hadn't already removed ~1/8" of material to make it fit in the unstressed state. Oops! No pics of that, because I was aggravated. |
|
|
|
Post by TRM on Jul 25, 2016 13:37:21 GMT -5
Love the looks of that office...well done so far! As it the PE work in the well...keep up the great work!
|
|
|
|
Post by Leon on Jul 25, 2016 16:29:46 GMT -5
The office is looking good!
|
|
nicely11b
Full Member
  
Member since: January 2016
Posts: 128 
|
Post by nicely11b on Jul 26, 2016 18:48:38 GMT -5
Like these other guys said, I really like the look of that cockpit. Wheel wells look to be coming along nicely as well.
|
|
mnrun.
Junior Member
 
Member since: May 2016
Posts: 75 
|
Post by mnrun. on Jul 27, 2016 8:41:44 GMT -5
Thanks folks! I haven't had a chance to get any work done on it in the meantime; hopefully this weekend.
|
|
|
|
Post by wbill76 on Jul 28, 2016 19:27:23 GMT -5
Sometimes the kit designers are too clever and we find a 'problem' before we find the 'fix'!  Sounds like you've got it under control either way, looking good. |
|
shawngehling
Reviews member     review staff
Member since: March 2012
Posts: 339
Mar 1, 2012 20:08:28 GMT -5
Mar 1, 2012 20:08:28 GMT -5
|
Post by shawngehling on Aug 1, 2016 14:18:13 GMT -5
WOW, That's a kit within itself...
Nice job.
|
|
thug626
Senior Member
   
Member since: January 2013
Posts: 2,035
Jan 15, 2013 13:05:28 GMT -5
Jan 15, 2013 13:05:28 GMT -5
|
Post by thug626 on Aug 2, 2016 13:18:08 GMT -5
Now that's the way to beat EP marks in to submission. That nose well is going to look slick when it's done!
|
|
mnrun.
Junior Member
 
Member since: May 2016
Posts: 75 
|
Post by mnrun. on Aug 6, 2016 18:09:23 GMT -5
Well it's been a while since I updated this, mostly because I haven't had a ton of time to work in the last couple of weeks. But I figured I'll give an update on what's been going on with the SuperE. I got the fuselage closed up, which involved a fair amount of swearing, but it all went together OK in the end. The filling and sanding you see below is in a more advanced state now and is mostly done. I did drill out the holes in the airbrakes; the kit parts were OK but were missing that detail. Eduard's PE set had some beauties to build up for these, but since I've never seen a pic of a SuE parked on the tarmac with the airbrakes extended, it would have been way too much work. 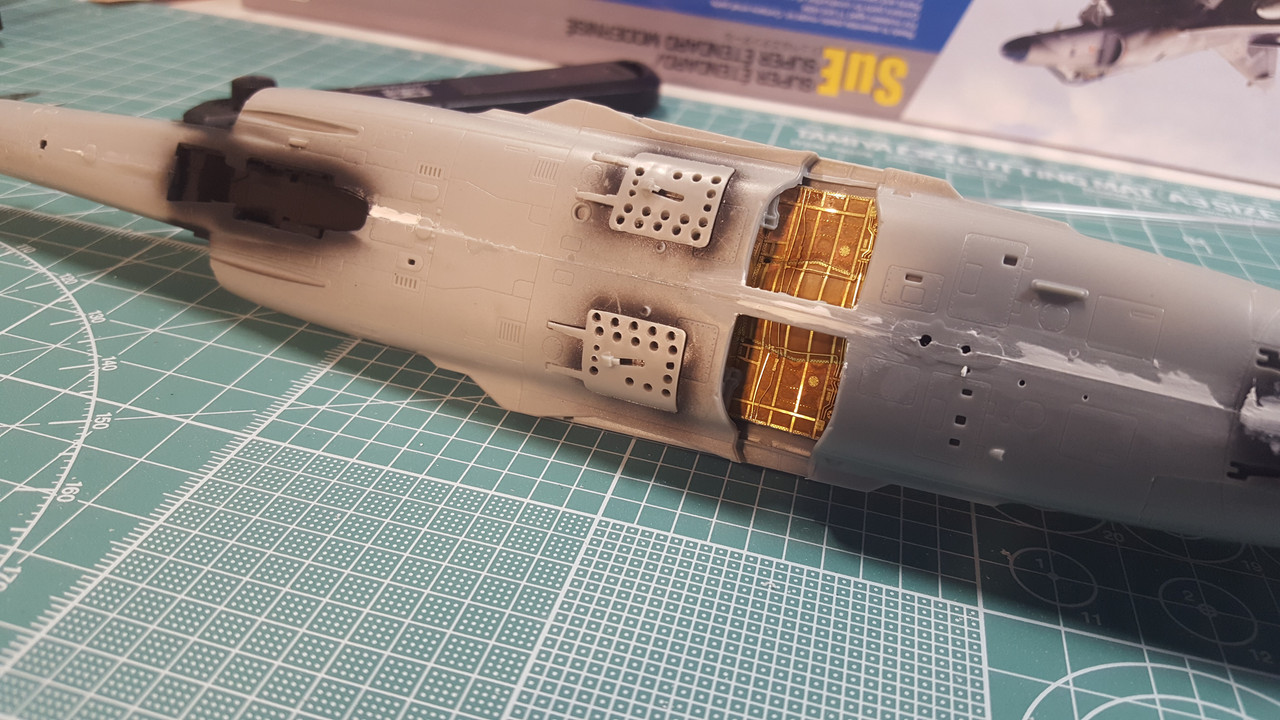 The wings are pretty much finshed; here I've got a PE spoiler in place for some test fitting and I was worried about the leading edge seam, hence the primer. 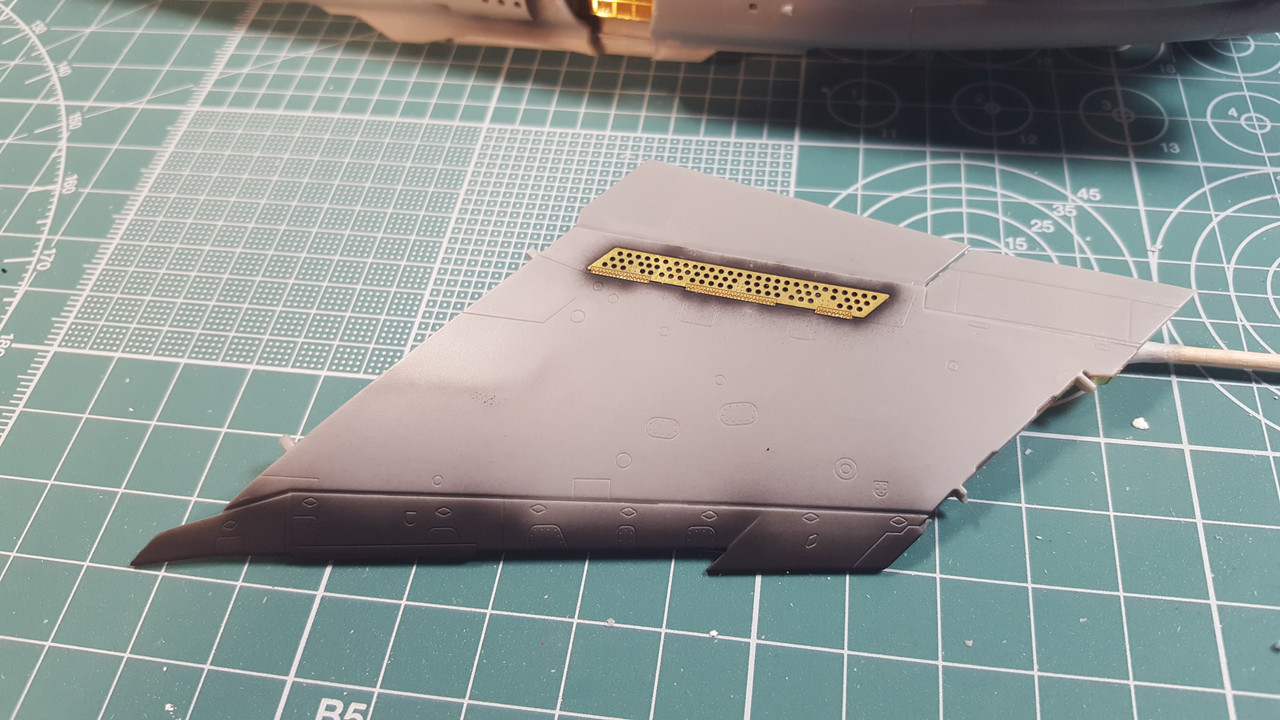 I'm planning on building it with the wingtips folded up. The kit parts just had barren plastic on the exposed surfaces; luckily Eduard's PE set saved the day. 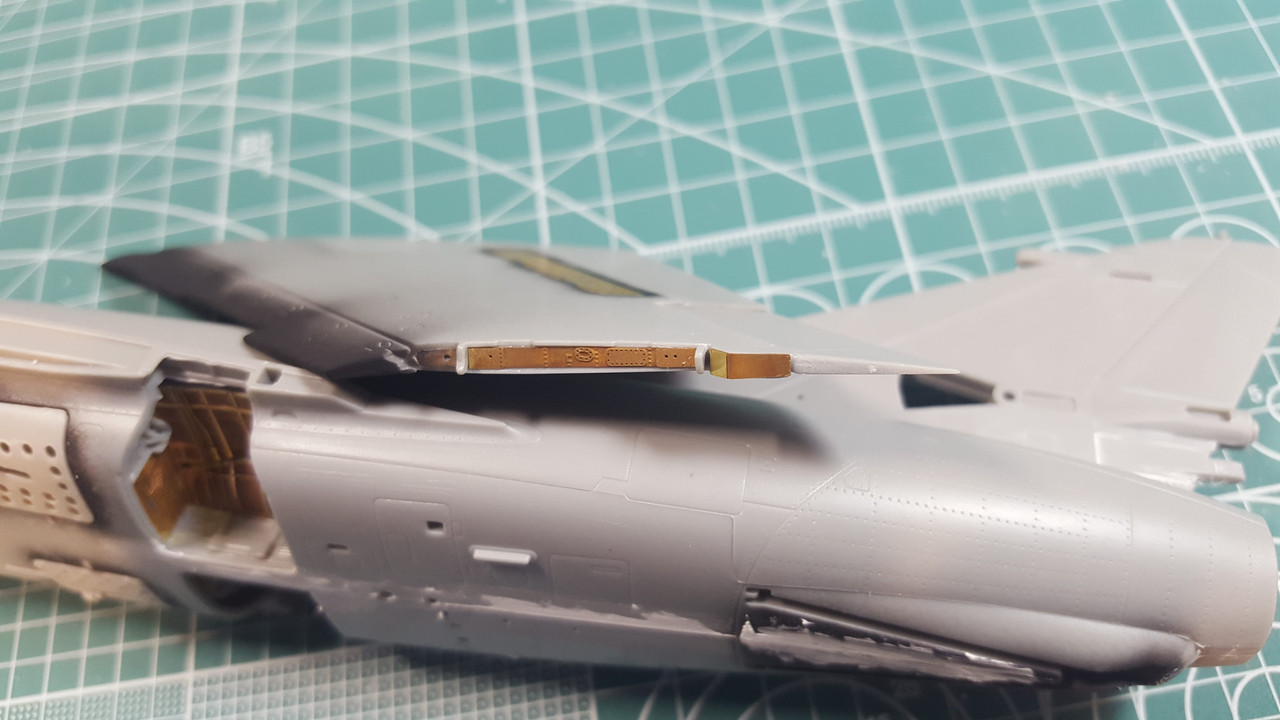 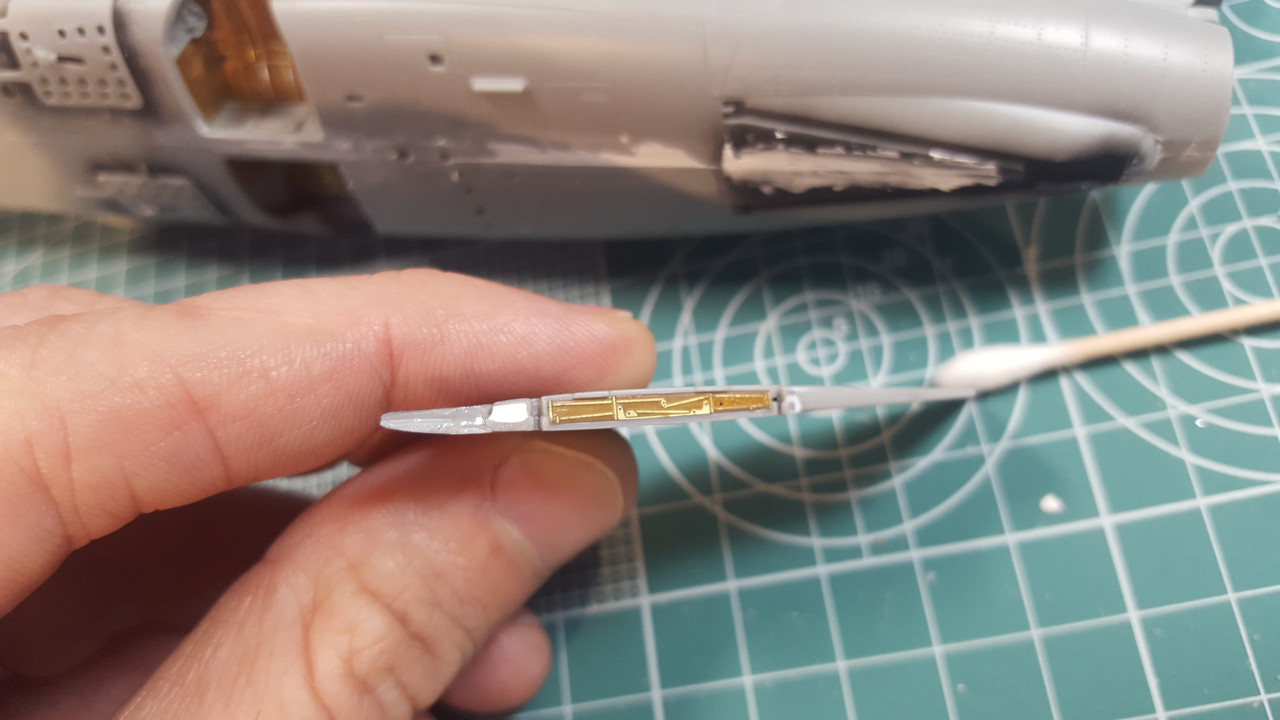 The main gear. Ugh; those PE wiring looms. Well, brake lines, I guess, not wiring. Still. 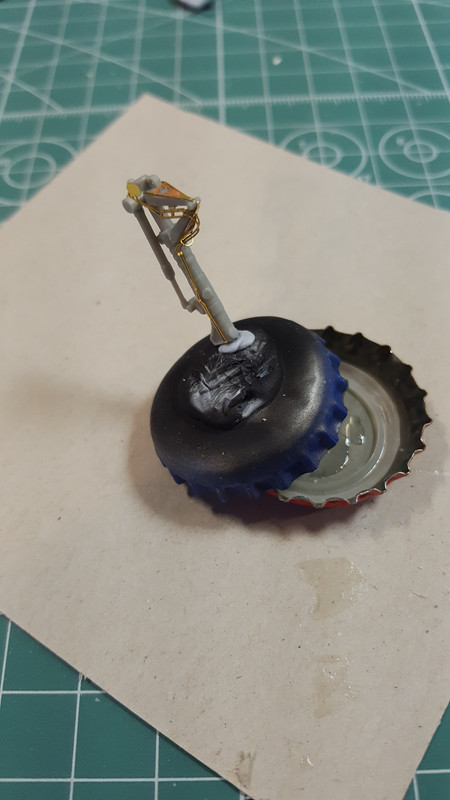 Nose gear. It looked pretty good out of the box, but the PE helps. 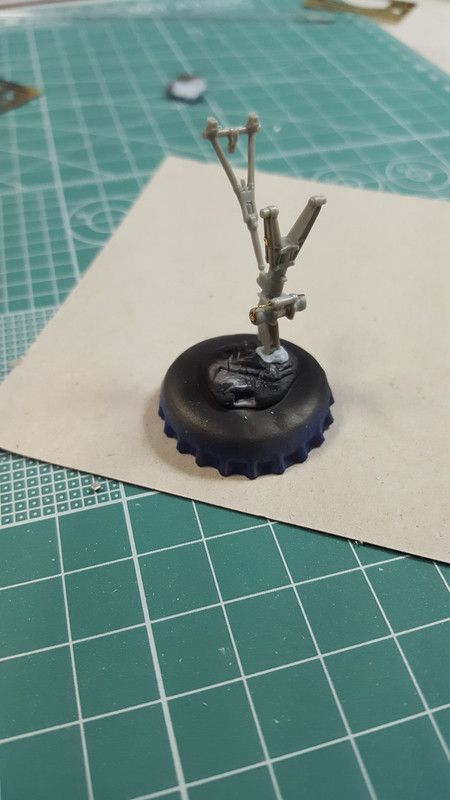 OK Kinetic, you can admit it. You phoned it in here.  OK here's what I don't understand, in the age of CAD: the HUD and front canopy, as designed out of the box, occupy the same space. If it were the Kinetic canopy and, I don't know, an Aires HUD replacement, I could understand. But this is just stock parts. How do you not catch things like this, Kinetic? Anyway, chiseled away about 3/32" to make it all fit. No big deal. 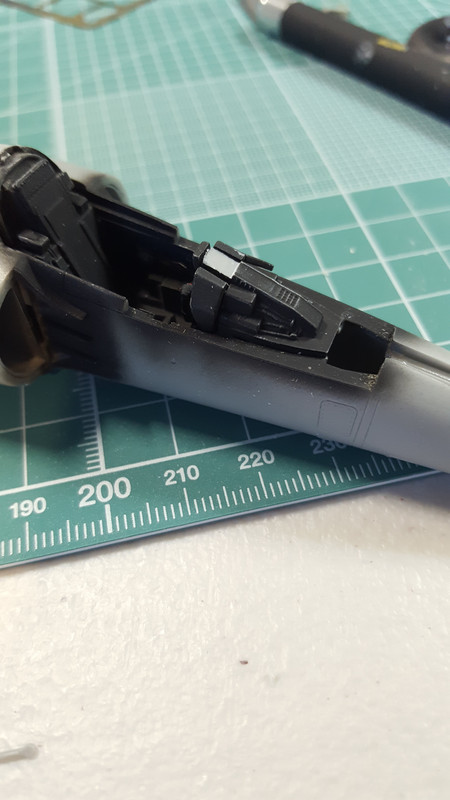
Also the front canopy and the fuselage don't exactly mate well. Sigh. First world problems, I guess. Getting pretty close to having this guy ready to paint, which I'm looking forward to. |
|
|
|
Post by Leon on Aug 6, 2016 20:01:14 GMT -5
Nice progress and PE work!
|
|
thug626
Senior Member
   
Member since: January 2013
Posts: 2,035
Jan 15, 2013 13:05:28 GMT -5
Jan 15, 2013 13:05:28 GMT -5
|
Post by thug626 on Aug 7, 2016 10:50:01 GMT -5
Though while not a "shake-n-bake" build you certainly seem to be taming the styrene beast. Keep up the solid work.
|
|
mnrun.
Junior Member
 
Member since: May 2016
Posts: 75 
|
Post by mnrun. on Aug 8, 2016 8:34:17 GMT -5
I got quite a bit done yesterday but only took a couple of pics: Started painting the landing gear...here's the first coat of aluminum on the gear and gear doors. Exciting! 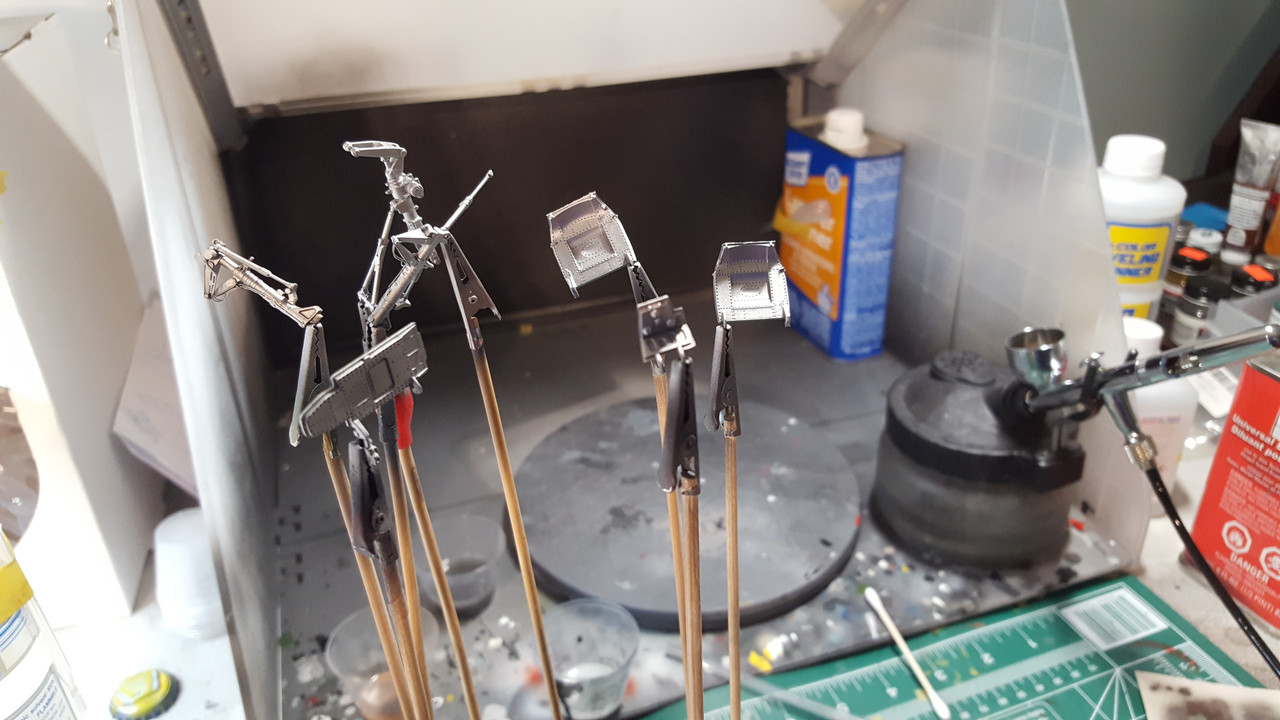 The fit of the front windscreen to the fuselage is really bad. 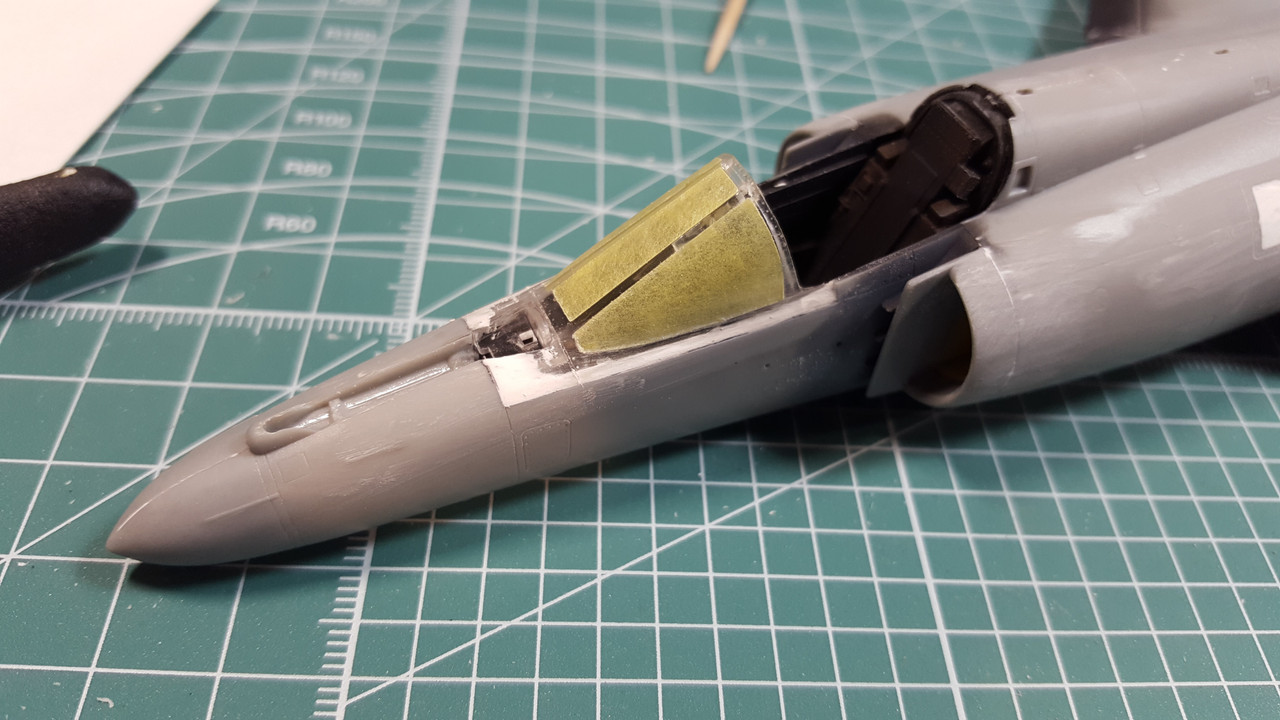
I've decided to go closed canopy, and since I never found a good replacement for the color PE seatbelts, on they went. After a wash and a matte varnish, they look OK. I'll get a pic of the seat later. Other than that, this thing's pretty close to getting paint. Just need to polish down some seams, etc, and it'll be off to priming! |
|
|
|
Post by wbill76 on Aug 8, 2016 9:03:03 GMT -5
Looks like you're whipping this one into shape slowly but surely, bring on the paint!
|
|
mnrun.
Junior Member
 
Member since: May 2016
Posts: 75 
|
Post by mnrun. on Aug 9, 2016 14:58:39 GMT -5
Small update... As I mentioned, I ended up going with the color PE seatbelts. I think they look pretty good, all things considered. They'll always look a little stiff, but it's better than nothing. 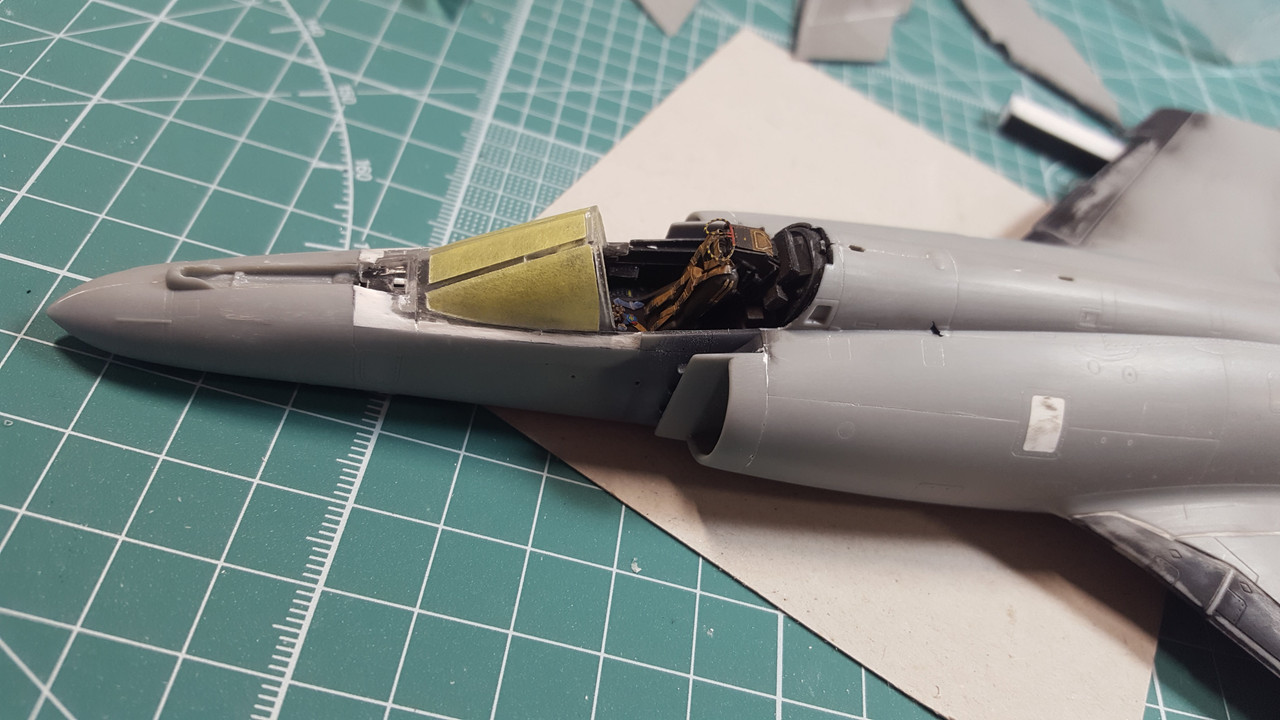
Here's a shot of it all dressed up in black! Going out of town in a couple of days; we'll see what I can get accomplished before then. 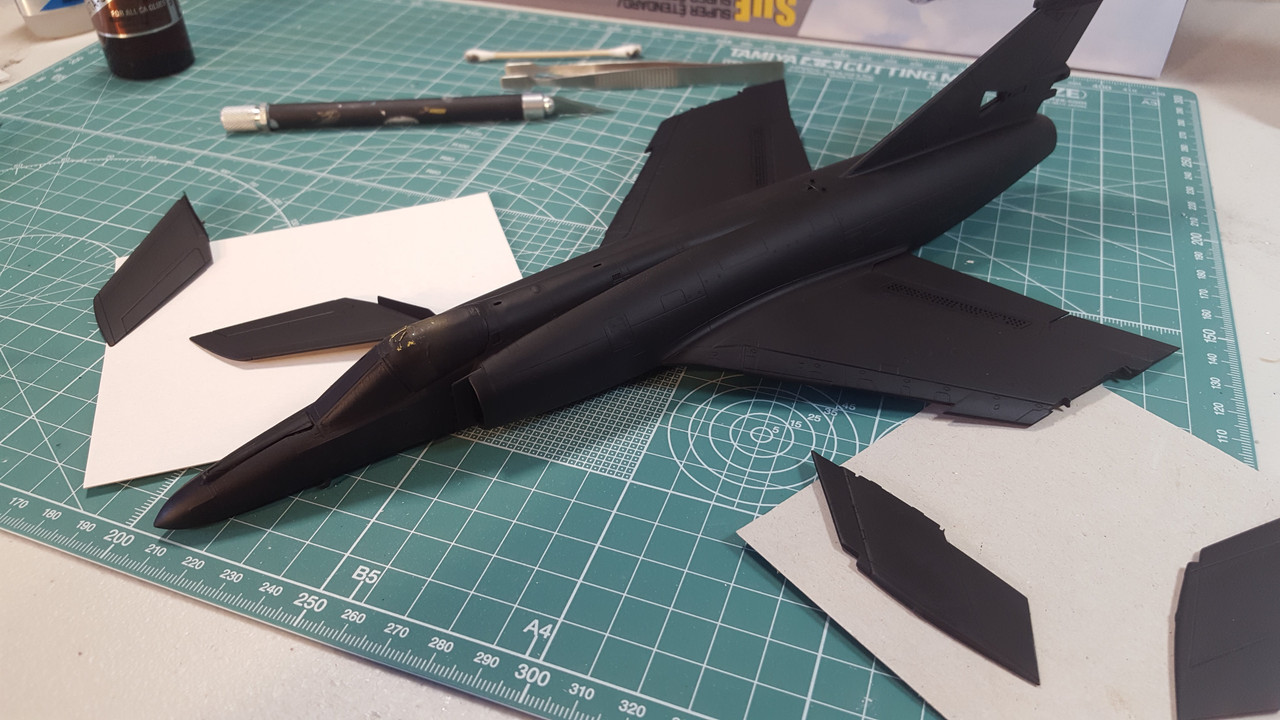 |
|
mnrun.
Junior Member
 
Member since: May 2016
Posts: 75 
|
Post by mnrun. on Aug 16, 2016 15:45:13 GMT -5
The last week hasn't seen a ton of progress since I've been out of town, but in the last couple of days I've managed to get most of the painting done. Now I'm getting the gloss coat down in preparation for the decals: 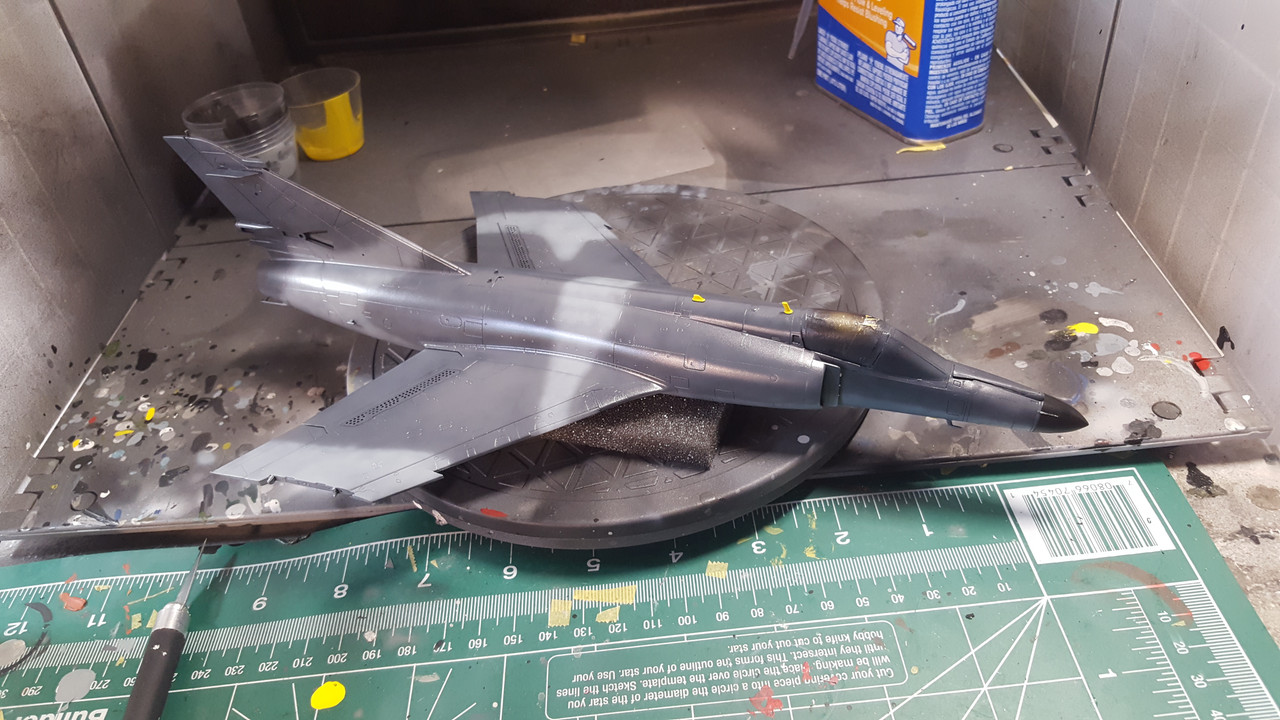 Tonight I'll finish up the gloss and let it cure overnight...then tomorrow I'll venture back into decal hell. |
|
|
|
Post by Leon on Aug 16, 2016 17:13:43 GMT -5
Paint is looking good!
|
|
nicely11b
Full Member
  
Member since: January 2016
Posts: 128 
|
Post by nicely11b on Aug 16, 2016 19:35:07 GMT -5
Paint looks like it's going down well. You'll have this one wrapped up before too long.
|
|
thug626
Senior Member
   
Member since: January 2013
Posts: 2,035
Jan 15, 2013 13:05:28 GMT -5
Jan 15, 2013 13:05:28 GMT -5
|
Post by thug626 on Aug 21, 2016 13:44:33 GMT -5
White plastic to make the windshield to fuselage join work? That must have been horrid looking before you tamed it. Well played.  The colors you have laid down look great! |
|
mnrun.
Junior Member
 
Member since: May 2016
Posts: 75 
|
Post by mnrun. on Aug 25, 2016 10:50:43 GMT -5
|
|
|
|
Post by Leon on Aug 25, 2016 11:09:26 GMT -5
Great finish!
|
|
jpc1968
Full Member
  
Member since: May 2015
May '17 Co-Mom Winner, October '17 MoM Winner
Posts: 504 
|
Post by jpc1968 on Aug 25, 2016 14:30:00 GMT -5
Great job
|
|
thug626
Senior Member
   
Member since: January 2013
Posts: 2,035
Jan 15, 2013 13:05:28 GMT -5
Jan 15, 2013 13:05:28 GMT -5
|
Post by thug626 on Aug 25, 2016 20:06:41 GMT -5
Beautiful finish my good man
|
|
|
|
Post by wing_nut on Aug 25, 2016 20:08:14 GMT -5
Holy craplakistan that's just pretty
|
|
mnrun.
Junior Member
 
Member since: May 2016
Posts: 75 
|
Post by mnrun. on Aug 26, 2016 7:49:43 GMT -5
Thanks for the kind words guys!
|
|
S e r z h--Rest In Peace
Full Member
  
Member since: November 2014
RIP- December 2023
Posts: 650 
|
Post by S e r z h--Rest In Peace on Aug 27, 2016 0:08:25 GMT -5
Very good model! I enjoyed and building and painting!
|
|
|
|
Post by deafpanzer on Sept 16, 2016 13:04:45 GMT -5
STUNNING!!!
|
|
mnrun.
Junior Member
 
Member since: May 2016
Posts: 75 
|
Post by mnrun. on Sept 24, 2016 12:43:38 GMT -5
Thanks folks!
|
|
|
|
Post by dupes on Sept 27, 2016 19:30:09 GMT -5
Not fair, man - you can't go from "WIP" to "awesomely weathered" without a description anywhere in between!!
|
|