|
|
Post by dierk on Oct 19, 2016 4:33:55 GMT -5
The thread location is a bit of a give-away, and those able to read Russian may have an inkling where this is headed  the rest of you I'll be keeping in suspenders for a while  |
|
|
|
Post by Leon on Oct 19, 2016 4:42:06 GMT -5
I'll be waiting patiently Dierk!  |
|
|
|
Post by dierk on Oct 19, 2016 4:44:36 GMT -5
Patience is a virgin  |
|
|
|
Post by dierk on Oct 20, 2016 4:04:25 GMT -5
Hmm, looks like I have to be less subtle: 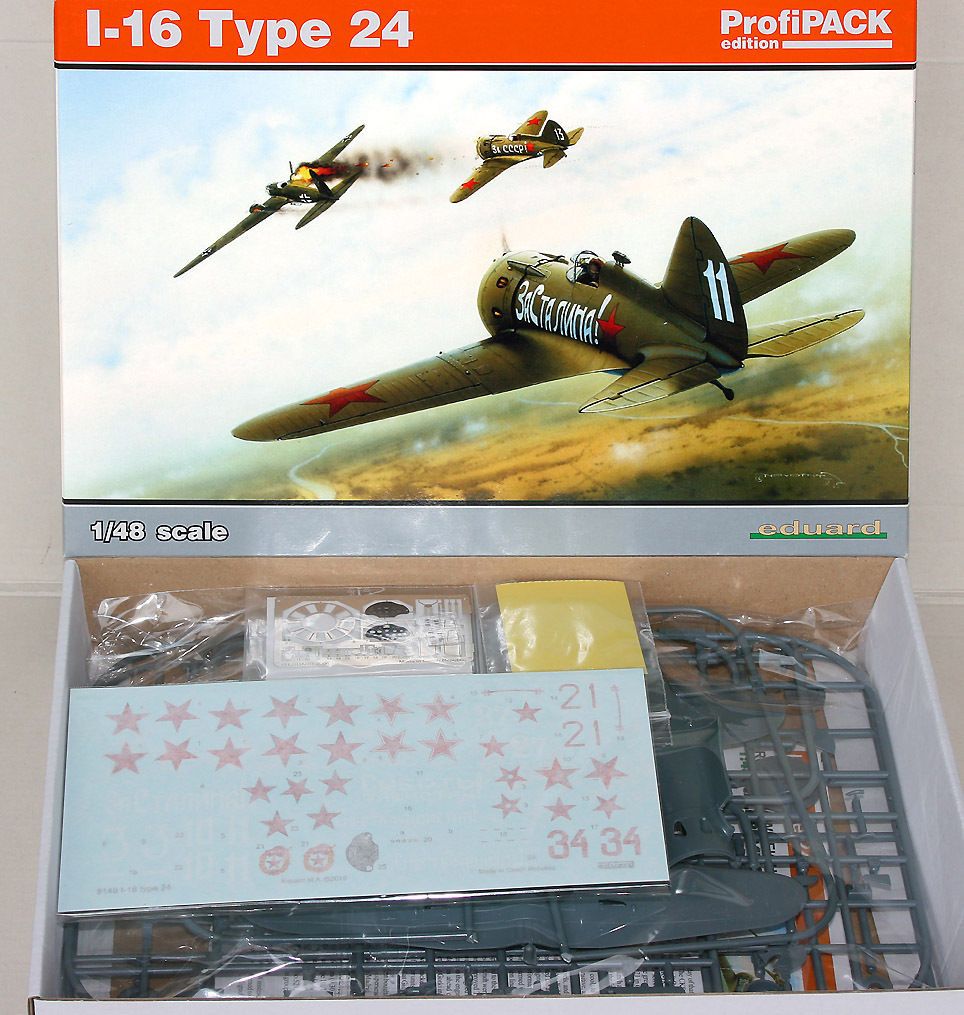 Ишак = donkey: nickname given to the I-16 by its pilots. |
|
|
|
Post by Tojo72 on Oct 20, 2016 11:37:21 GMT -5
Should be a nice little build
|
|
|
|
Post by dupes on Oct 20, 2016 12:02:38 GMT -5
I've got one of these awaiting first paint...kit goes together like butter! Added all of the etch detail to the cockpit, and you can barely see a lick of it despite the lack of a full canopy.  |
|
|
|
Post by dierk on Oct 20, 2016 12:23:40 GMT -5
I've got one of these awaiting first paint...kit goes together like butter! Added all of the etch detail to the cockpit, and you can barely see a lick of it despite the lack of a full canopy.  Cheers mate, yeah I noticed that too - I'm in the middle of doing the cockpit stuff at the moment, and dry-fitting has revealed that not much of it will be revealed. Don't think I'll be fitting the PE switches to the dashboard, or the PE bits to the foot controls. The mating of fuselage to wings looks a bit tricky (but hey, I'm a wingy virgin) To make the knobs on the various levers less flat I dipped them in some Bondic. I've ordered some elf wheels to replace the kit parts Pics soon. |
|
|
|
Post by dupes on Oct 20, 2016 17:27:22 GMT -5
Those are EXACTLY the parts I'm talking about. Bunch of PE work that you can't see without a flashlight and a reaaaaally small mirror! Too bad.
|
|
|
|
Post by dierk on Oct 22, 2016 6:19:09 GMT -5
Shame indeed - some really nice detail, never to be seen again once the fuselage is closed up... Finally some pics (Guy might even come out from under his stone, now  ) 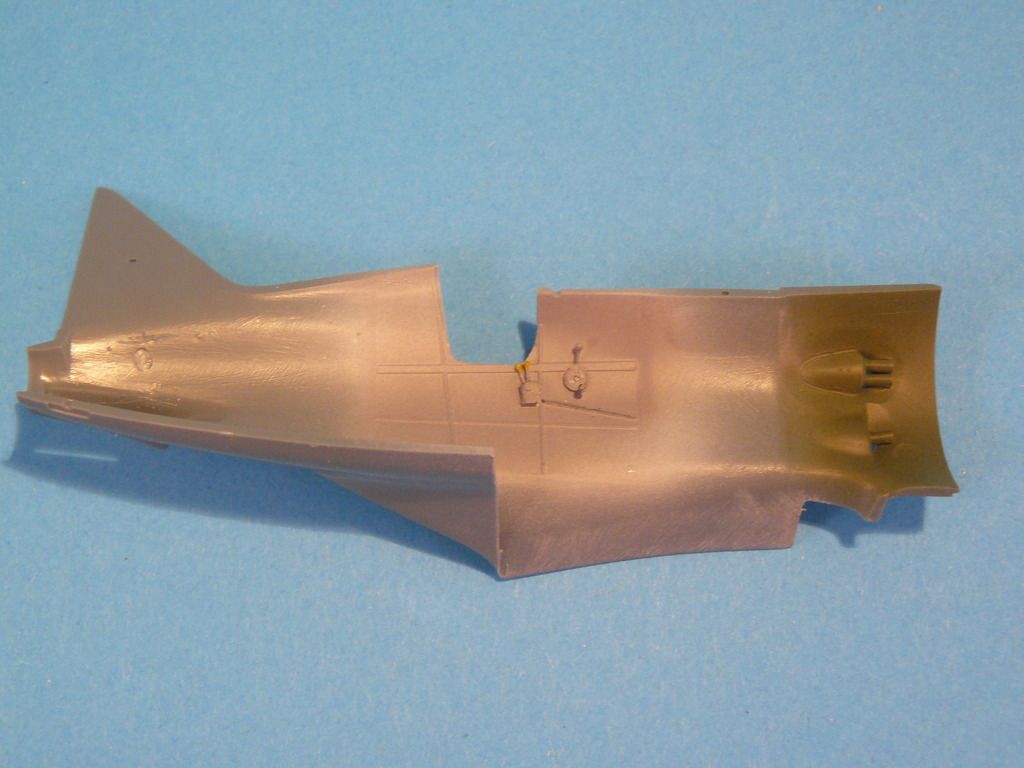 I'll give the knobs a quick coat of paint, for what it's worth: 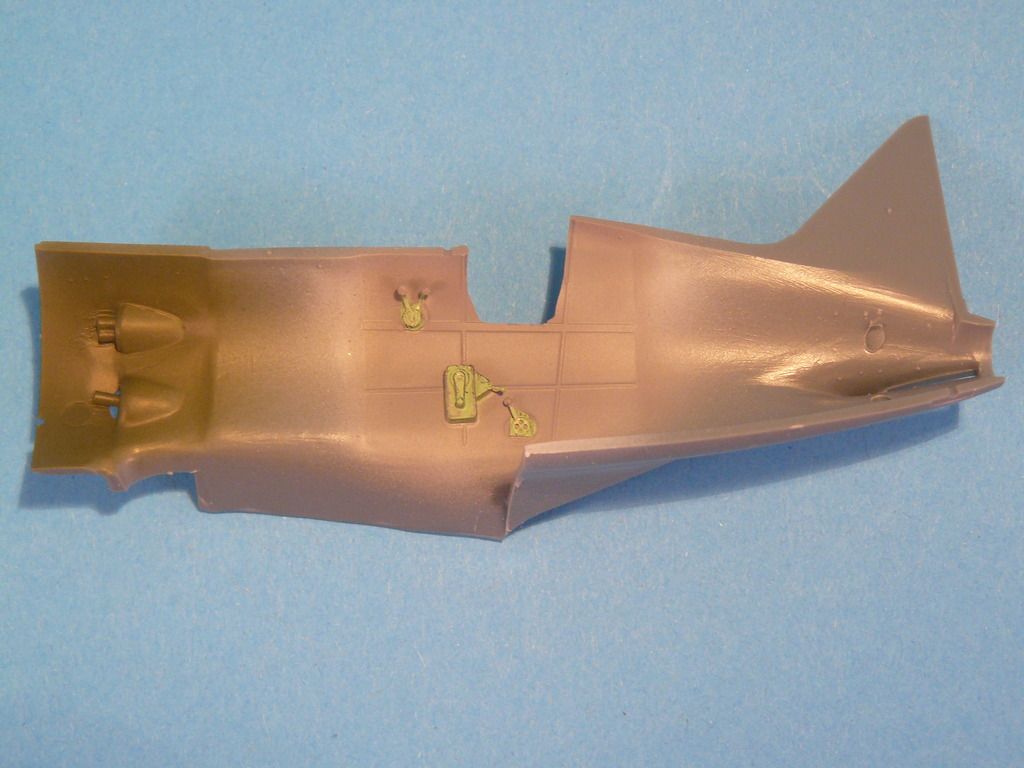 I was briefly considering giving everything a wash and dry-brush - but really there's no point: once the fuselage is closed most of this will be 'invisible insane', sorry 'out of sight out of mind' Really nice, but totally invisible later - so I didn't bother adding the little switches: 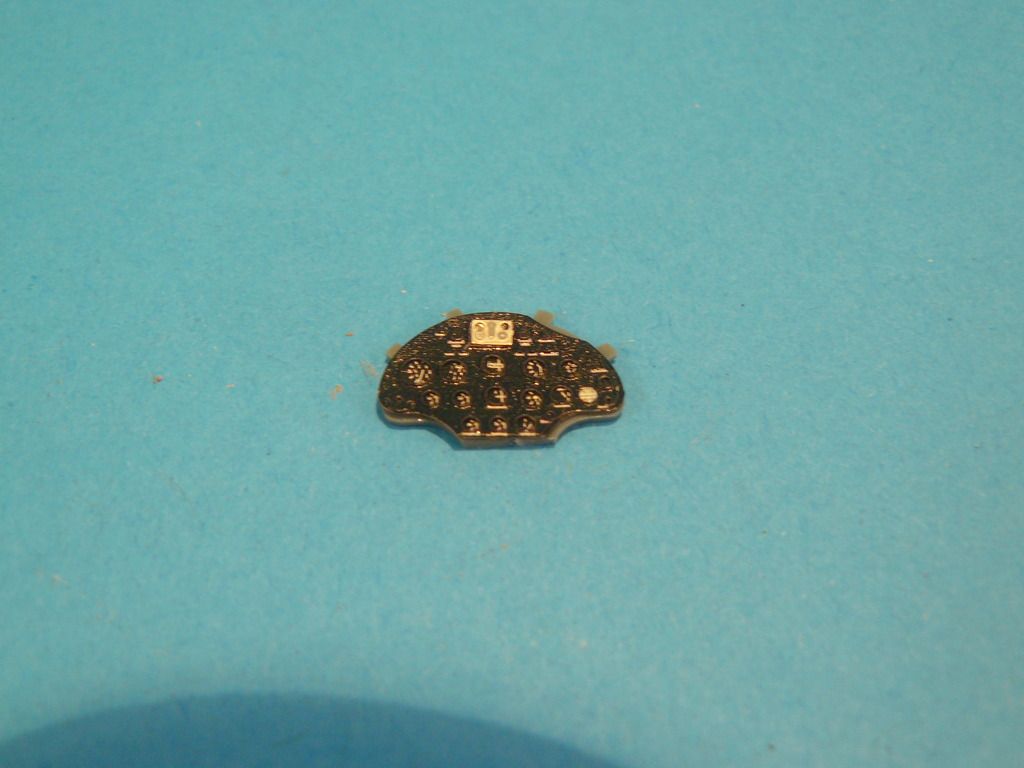 You may actually see some of this later: 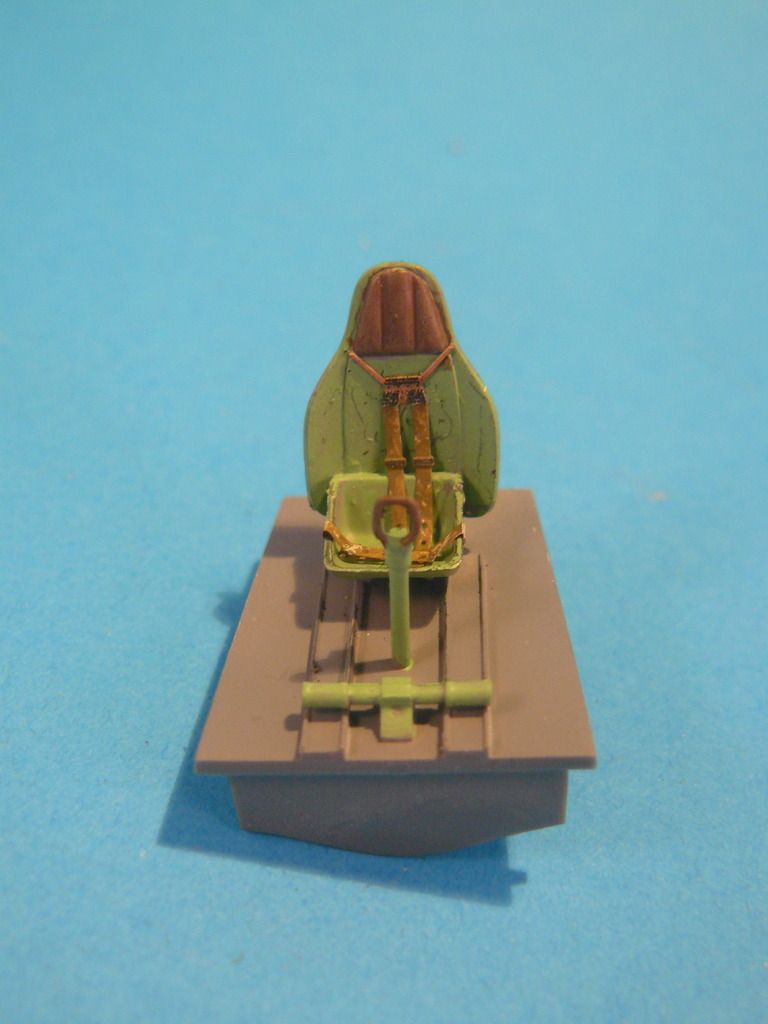 Closing up the fuselage next. Thanks for popping by and ACW |
|
|
|
Post by Leon on Oct 22, 2016 7:36:16 GMT -5
Looking good Dierk!  |
|
|
|
Post by dierk on Oct 23, 2016 7:35:41 GMT -5
Cheers Leon! After closing up the fuselage, I noticed a rather noticeable seam between the mating surfaces on the top. So, stuck on a bead of Vallejo putty, left it over-night, only for it to come off when I tried to sand it  Plan B was to apply some Deluxe Materials Rocket Plastic Glue. Once dry it can be sanded really nicely. In the picture below I haven't sanded it yet. Getting the fuselage to mate with the wings is taking some serious clampage: 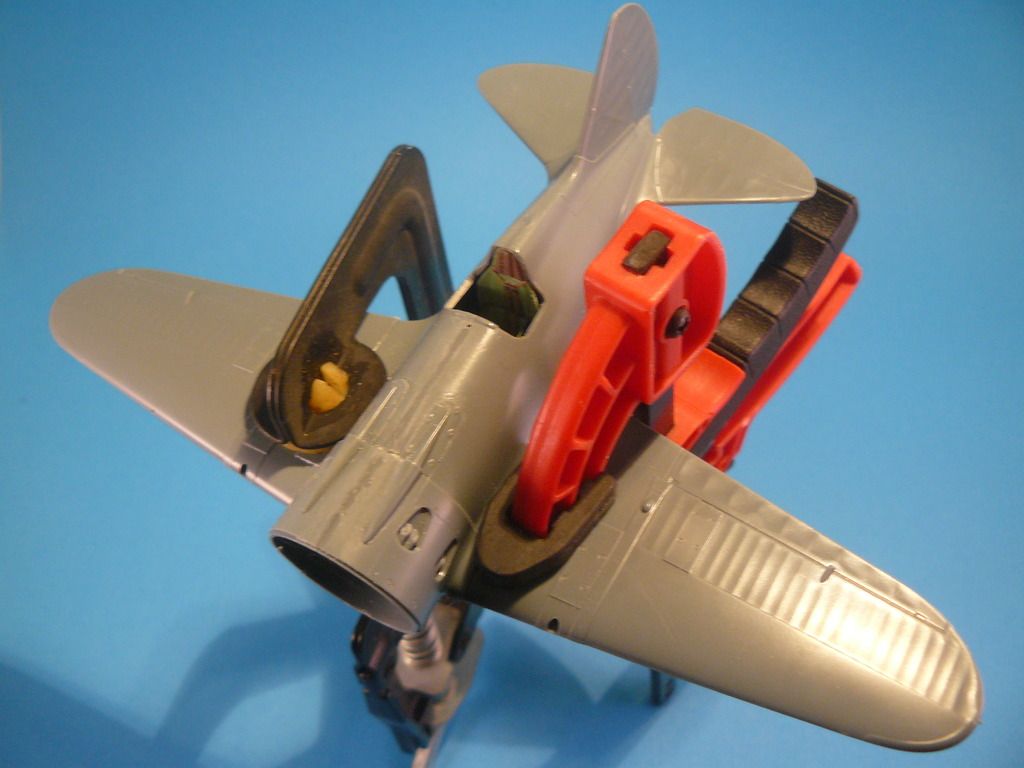 That's all that is visible of the really nice cockpit: 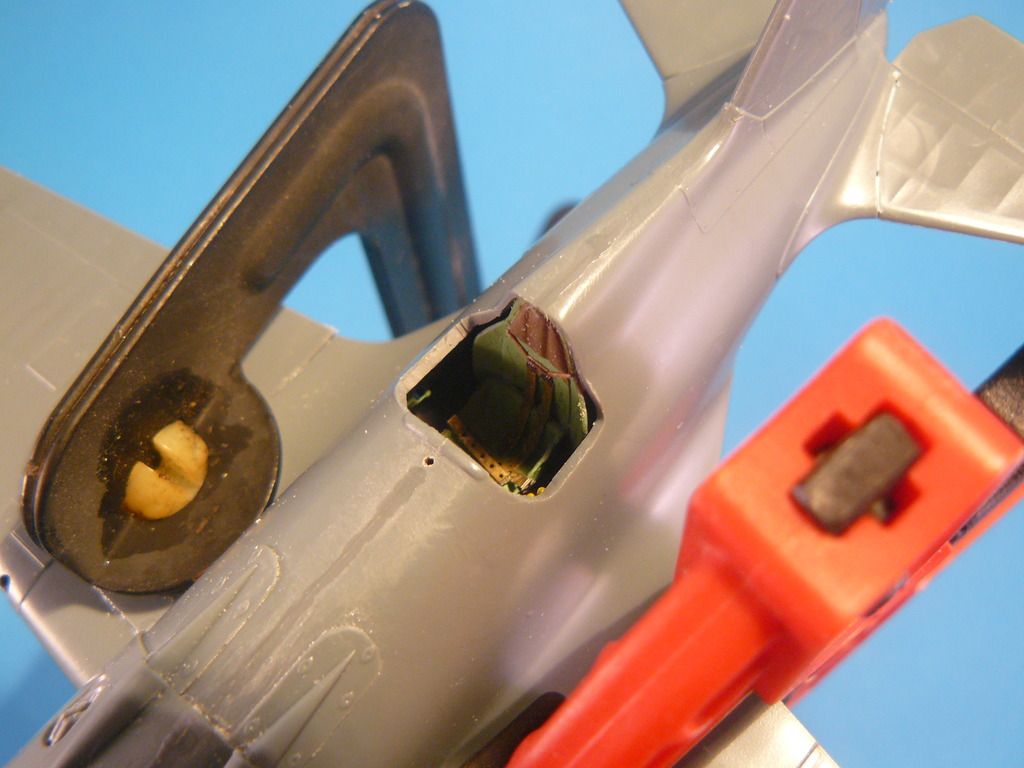 Other than that I've drilled out the zorsts. I'm really enjoying putting my first wingy in over 30 years together - don't think I'll be making a habit of it, but the occasional one may find its way onto my bench. |
|
|
|
Post by Leon on Oct 23, 2016 12:25:16 GMT -5
Nice progress Dierk!  Shame about not seeing much off the pit.  |
|
|
|
Post by dierk on Oct 23, 2016 12:26:40 GMT -5
When the clamps came off there was still quite a bit of sanding, and a little bit of filling, to be done  . Added some of the smaller bits to the fuselage, dilled out and fitted the wing-mounted MGs (BTW, on the real thing they liked to jam as they had to be fitted upside-down due to lack of space  )Of course, I managed to drop one of the MGs into the wing during dry-fitting  Sorry Leon, missed you there - I was typing while you posted. Yeah, it really is a shame - could've just bought the weekend edition as the only PE that is really useful are the belts for the harness and the cockpit doors. |
|
|
|
Post by armorguy on Oct 23, 2016 13:35:29 GMT -5
I missed this one completely Dierk, sorry my friend. I hope you saved the MG in the wing ?
|
|
|
|
Post by dierk on Oct 24, 2016 3:12:53 GMT -5
I missed this one completely Dierk, sorry my friend. I hope you saved the MG in the wing ? Yep - thankfully there were some gaps left to shake it out...did get a sweat on for a minute though  |
|
|
|
Post by dierk on Oct 30, 2016 4:52:27 GMT -5
Quick update - pictures later: Elf wheels arrived yesterday - three part hubs with separate rubber wheels, gotta be better than the one piece affairs in the kit (and so they bloody well should be at about 50% of the cost of the kit  ) The hole for the axle-stubs need to be opened up a bit to fit, other than that they are a straight replacement for the kit wheels. There's even a little rubber wheel to replace the kit part for the tail, but that would involve scratching a new mounting for the wheel. It wouldn't be a vast difference lookswise, but with potential of looking worse than the kit part, so: meh, partsbin. |
|
|
|
Post by dierk on Nov 3, 2016 12:59:51 GMT -5
So, went to put some primer on. Assembled AB (Neo) and put a bit of cleaner in to spray, the way I always do...nothing, just bubbling in the cup. OK, strip it down, clean it, incuding several baths in a sonic cleaner. did that about 4 or 5 times (I can now strip and reassemble the thing blind-folded). eventually it would spray but only with the trigger pulled all the way back (max paint-flow), but also splatters  Insert meme of unhappy bunny... |
|
|
|
Post by TRM on Nov 3, 2016 15:19:31 GMT -5
The wingy looks great my friend! A shame most of the detail disappears when it's all done....but you know it's there!  As for the brush....might it be possible there is some S*it stuck in the tip? I have this happen when I don't clean the brushes fully...A tiny spot builds up and dries making a bigger problem later on. I soak the tip and then use a tip cleaning tool, old needle or those dental swabs John Everett mentioned a while back. Had this issue with a couple brushes when the brass tip was cracked (for some reason).  |
|
|
|
Post by dierk on Nov 4, 2016 4:08:13 GMT -5
Cheers Todd. I cleaned the bejeezus out of the AB (including the tip), and yes, quite a lot of crap came out - but no luck: see above  I'm assuming something's worn out. While I'm trying to find out what exactly is the matter I've ordered a cheap replacement. |
|
|
|
Post by dierk on Nov 6, 2016 10:47:14 GMT -5
Replacement AB arrived in ultra-quick time - still learing to drive it, so this isn't going to be my best paintjob ever. The kit pitot tube was was just a piece of rod, so I replaced it with a hypodemic nurdle. After a slight altercation with gravity that broke the tail-wheel, paint got chucked at the plane, followed by a coat of gloss in preparation of decals. The markings I chose are those of Boris F. Safonov's plane. He was the first pilot serving with the soviet Navy to be awarded the Gold Star of the Hero of the Soviet Union (Sept. 16th 1941) Apparently there's some debate going on about what markings the plane had on the right hand side of the fuselage. I went with Eduards best guess and applied a single red star. Pics were taken while the decal softener was drying, so the makings still look a bit weird: 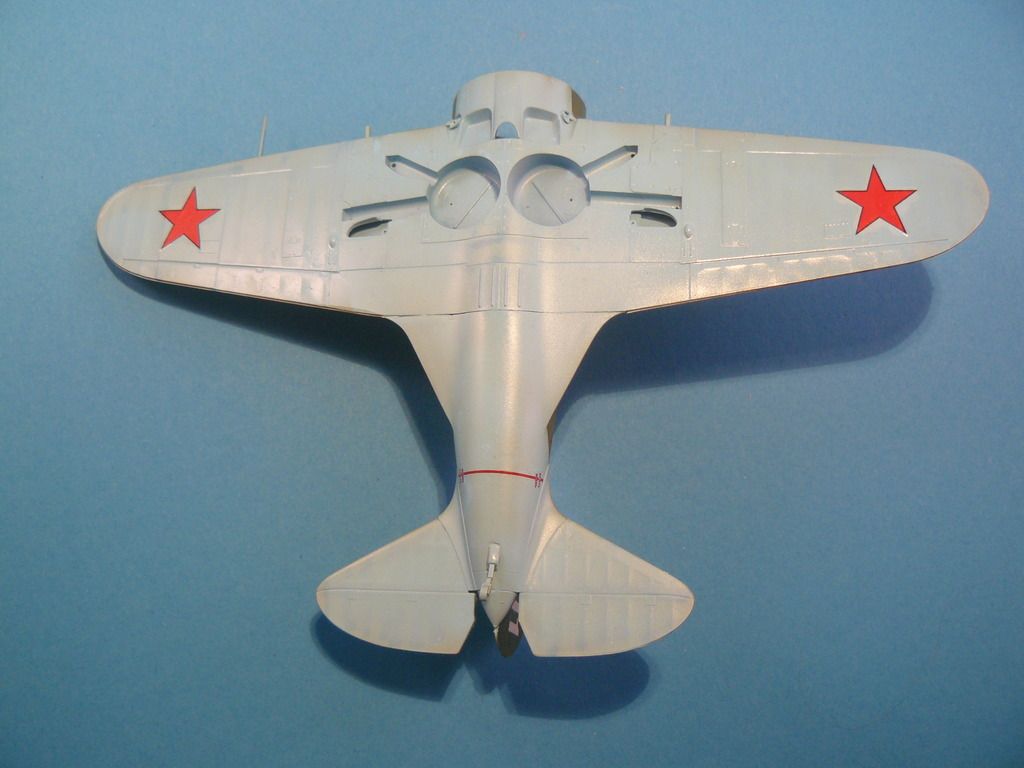 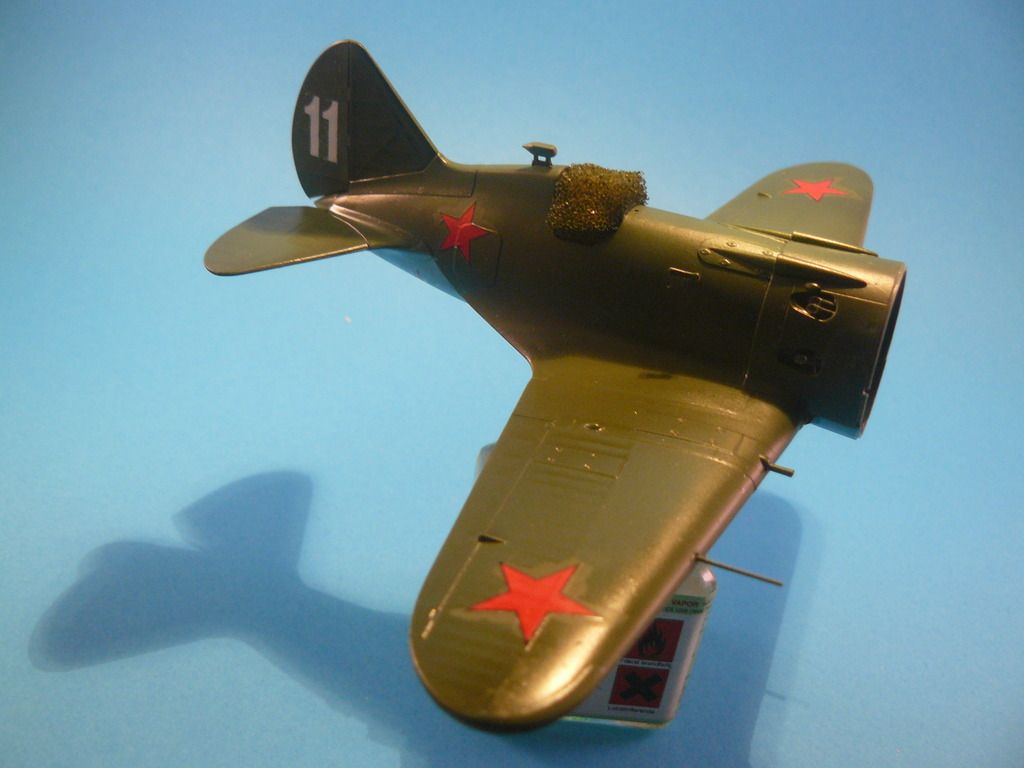 Here's hoping the slogan (the old soviet favourite 'for Stalin') settles down... 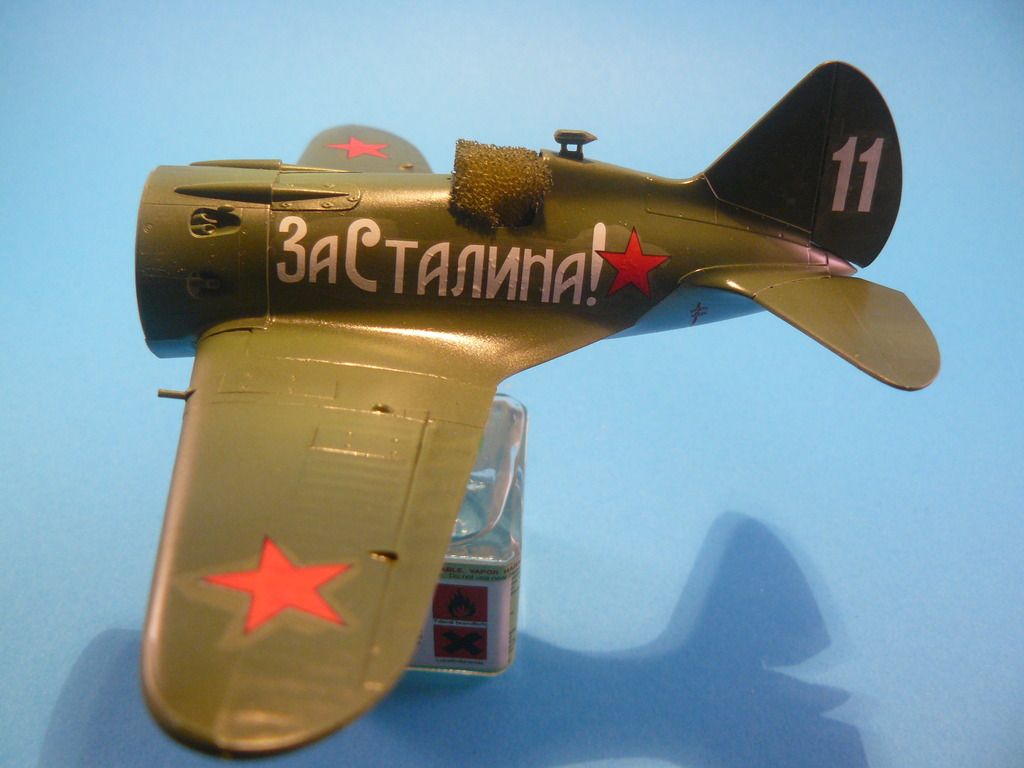 |
|
|
|
Post by Leon on Nov 6, 2016 11:25:29 GMT -5
Looking good Dierk! Looks like the replacement AB did it's job.  |
|
|
|
Post by wbill76 on Nov 12, 2016 21:24:22 GMT -5
Always loved the stubby look of this particular design...good to see you stretching your wings there Dierk!  |
|
|
|
Post by armorguy on Nov 13, 2016 4:15:26 GMT -5
That's a cute little bugger ! You make me want one now !
|
|
|
|
Post by deafpanzer on Nov 14, 2016 17:03:06 GMT -5
AHHH! One of most funniest looking fighters... looking real good but still funny!!!
|
|
|
|
Post by dierk on Nov 15, 2016 7:57:39 GMT -5
Cheers gents! Still feels a bit strange actually doing a wingy, and in 1/48...it's not going to be my best work ever, but the next victim is already ordered: Zvezda's PE-2 with some Metallic Detail PE. That's a cute little bugger ! You make me want one now ! You should - they're quite cheap. Think mine was about 13-14€. AHHH! One of most funniest looking fighters... looking real good but still funny!!! Yep, it's a strange looking thing already, but apparently quite revolutionary at the time: first low-mounted wing fighter, retractable landing gear (using a hand-crank!) and if it got into a spin it was self-righting - all you had to do was let go of the stick. Being tail-heavy it was also easy to land. Flight controls were very easy, but the trigger for the cable-operated MGs needed some force. Apparently they gave German Luftwaffe planes some nasty surprises - even ME-109s struggled if they got drawn into a horizontal dog-fight, as the I-16 was much more manoeverable. The only chance they had was to exploit their higher operating ceiling and do a 'death from above' |
|
|
|
Post by Deano on Nov 15, 2016 11:35:05 GMT -5
Looked at this kit quite a few times , really like the stocky look of the bird . Excellent work and progress bro !!!!!
|
|
|
|
Post by dierk on Nov 26, 2016 6:38:59 GMT -5
Cheers Deano! Well, there's more I could do to it, but I won't - some bits I'm really not happy with, and I sort of lost interest. Some, but not all the things that didn't go to plan were that the hinges on the PE cockpit doors broke in the attempt to give them a curve  . The cables for the retractable landing gear are made of stretched sprue (each one snapped off once at the wheel...) In the process of reattaching them various bits of the landing gear broke off and the landing gear struts also detached. And due to being a knob I couldn't quite get rid off the central seam from the engine to the cockpit. So before even being properly finished the model got relegated to the role of testbed for oil paints  Anyhoo, here's some pics that were taken in such a way to hide some of the worst of the blunders  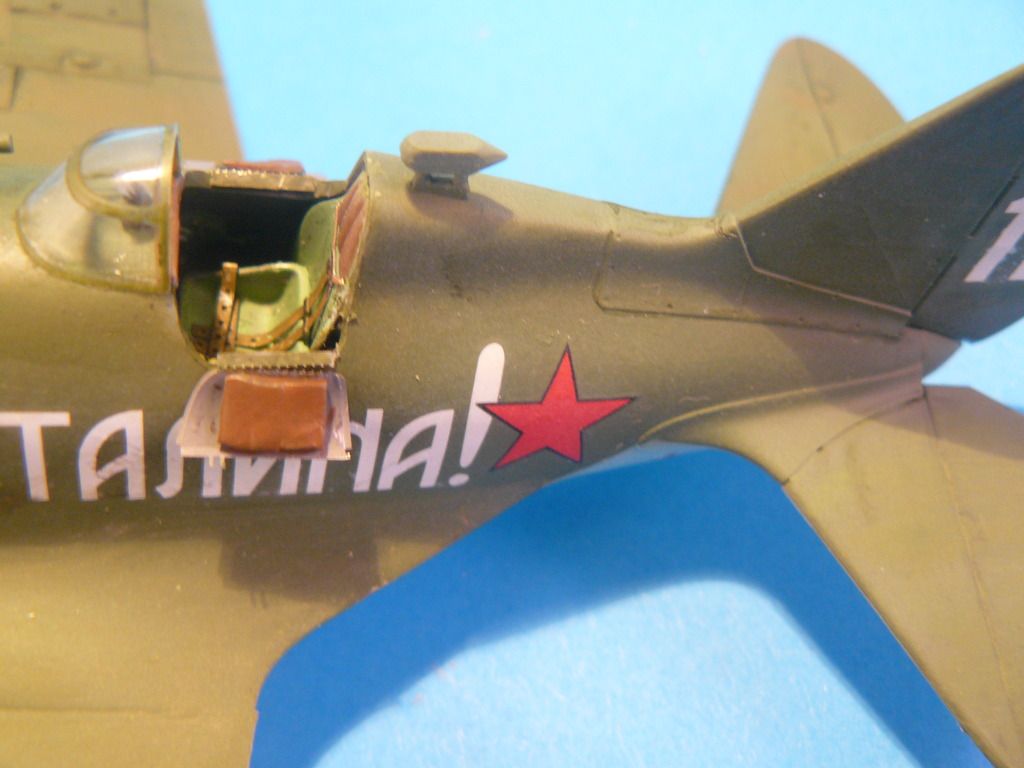 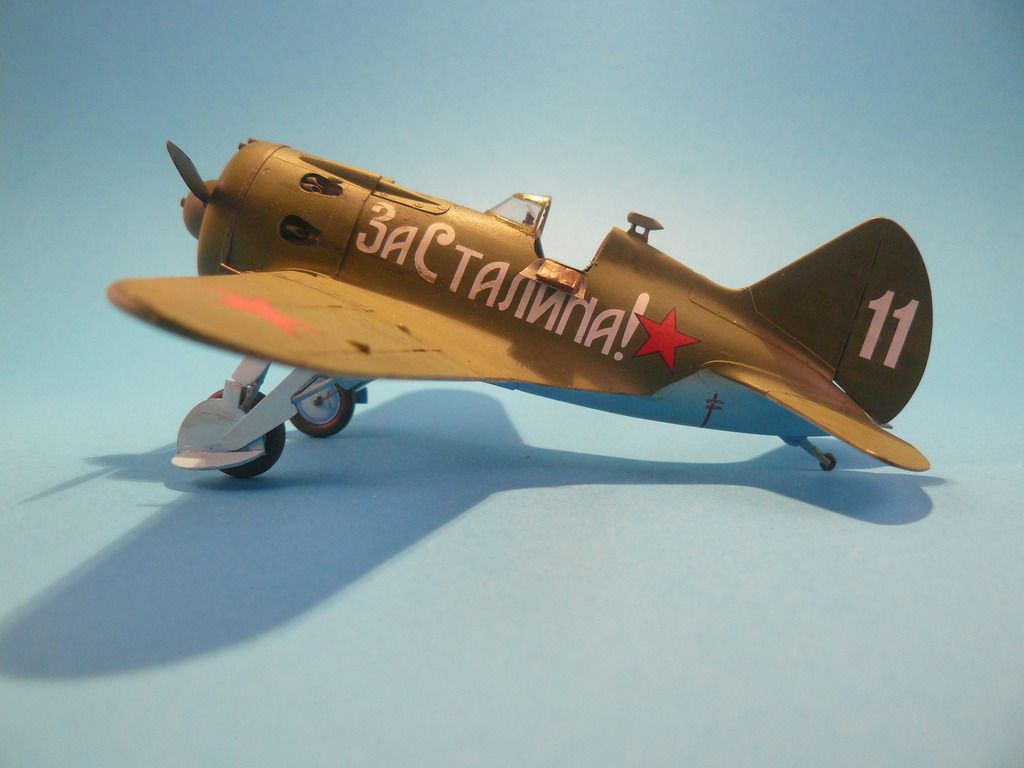 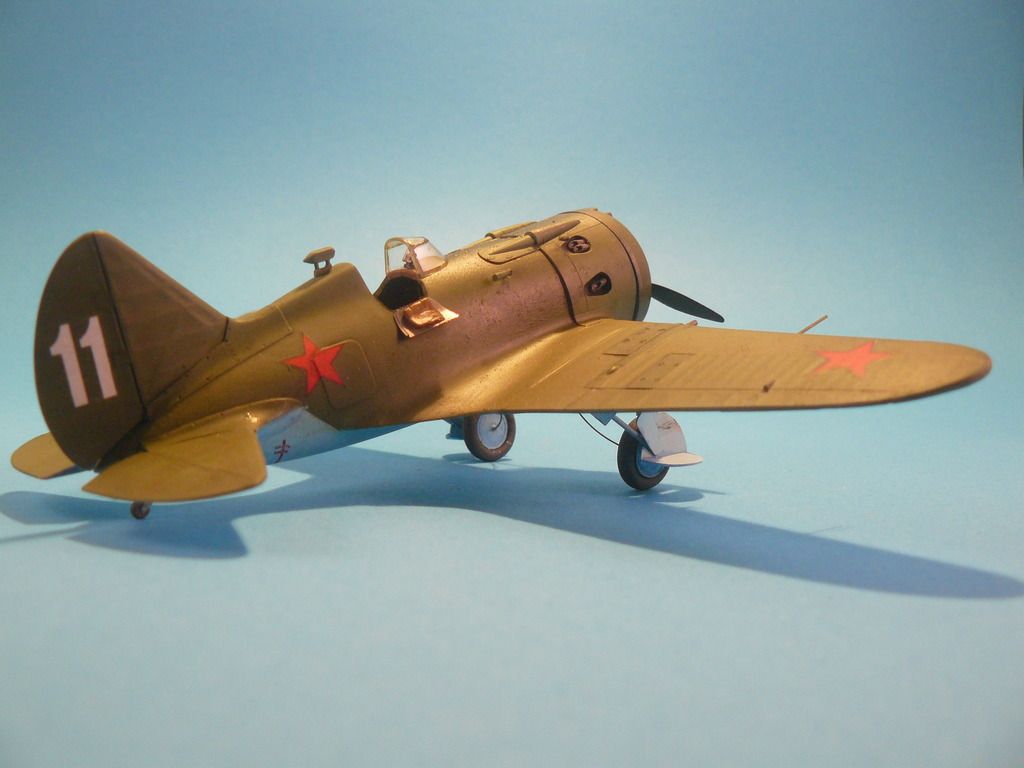 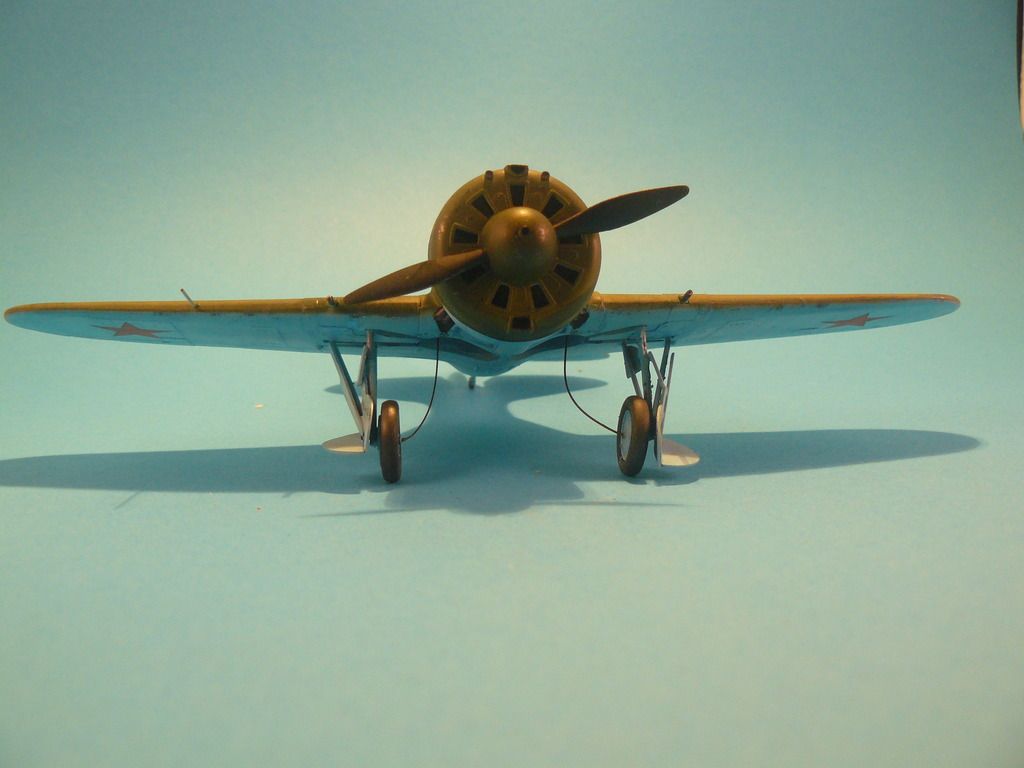 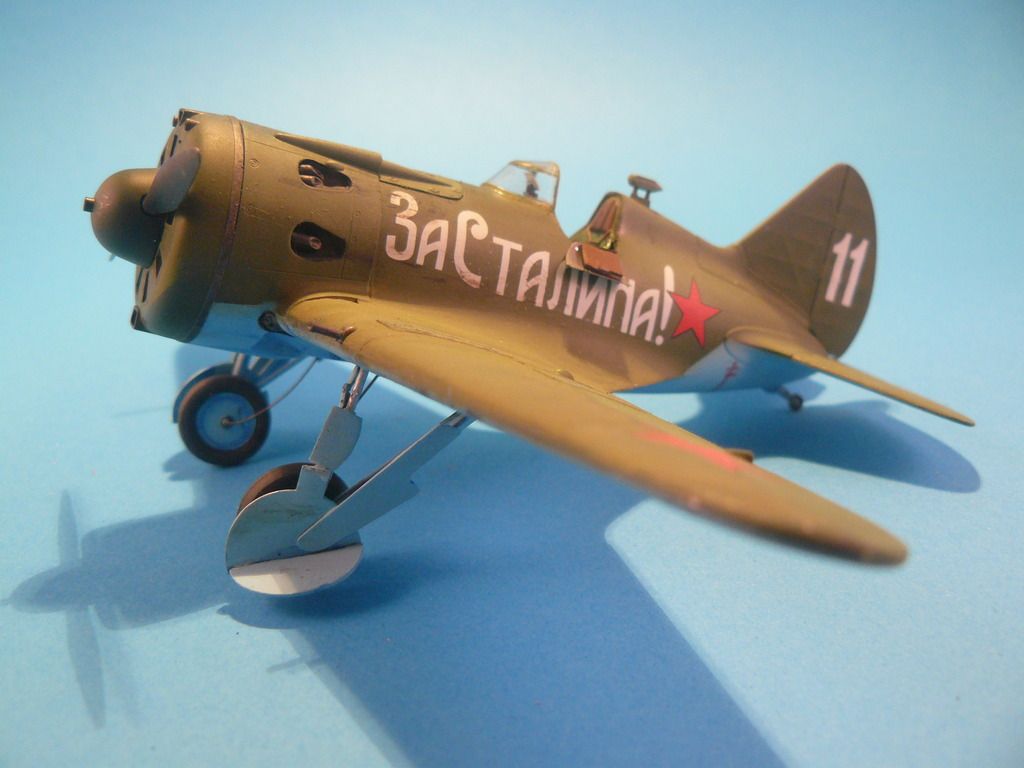 Still, I call it a learning experience and hope to achieve a better result with the Zvezda PE-2 that's on order. Thanks for taking the time to have a look and all constructive criticisms welcome. |
|
|
|
Post by Leon on Nov 26, 2016 8:44:22 GMT -5
Dierk, that looks pretty damn good considering the mishaps the occurred!  |
|
|
|
Post by dierk on Nov 26, 2016 10:06:19 GMT -5
Cheers Leon! I was very careful not to show the horrible bits when I took the pics - so much for 'pictures don't lie'  |
|
|
|
Post by wbill76 on Nov 26, 2016 11:24:25 GMT -5
Cheers Leon! I was very careful not to show the horrible bits when I took the pics - so much for 'pictures don't lie'  They aren't lying, you just haven't asked the right questions!  Very Soviet approach to the build's finish and presentation IMHO, I like it.  Despite the challenges, it's all in one piece and looks like an I-16, so it couldn't have been all that bad, right?  |
|