mrversatile
Full Member
   July '23 Showcased Build Awarded
Member since: January 2013
Posts: 682
Jan 20, 2013 10:52:24 GMT -5
Jan 20, 2013 10:52:24 GMT -5
|
Post by mrversatile on Dec 7, 2016 0:23:57 GMT -5
In keeping with the "Soviet Kick" I have been on lately, I have decided to take on a genre I haven't embarked on in a while....aircraft, and particularly jet aircraft, thus the Mig-29 SMT. I like this variant the most because of its humped dorsal area and camo, and since I have seen nothing but good things about this kit, I decided to treat myself after some overly labor intensive projects with some "not so easily constructed" kits. I will be using AKAN paints for the first time bc of their color accuracy and purported ease of use. I haven't seen any significant aftermarket for these kits, and unless someone who is familiar with these kits can point me in the direction of a needed upgrade, I will proceed with a build of the OOB variety. 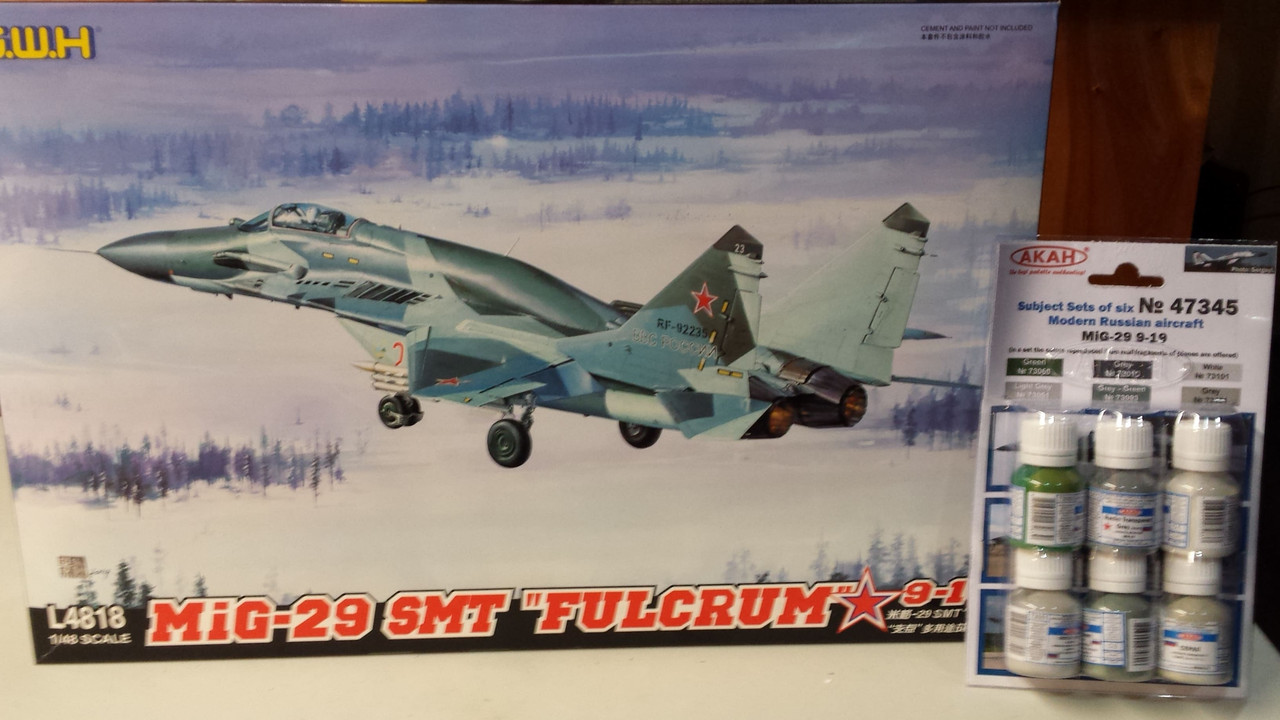 |
|
|
|
Post by Leon on Dec 7, 2016 5:47:36 GMT -5
Looks like a good project Gil! I'll be following along.
|
|
|
|
Post by wing_nut on Dec 7, 2016 7:46:41 GMT -5
|
|
|
|
Post by Tojo72 on Dec 7, 2016 8:20:02 GMT -5
Those GWH Migs are fantastic kits,did one a few years ago,one of my favorite builds.
|
|
mrversatile
Full Member
   July '23 Showcased Build Awarded
Member since: January 2013
Posts: 682
Jan 20, 2013 10:52:24 GMT -5
Jan 20, 2013 10:52:24 GMT -5
|
Post by mrversatile on Dec 7, 2016 13:38:58 GMT -5
Thanks Wing Nut, it is just what I was looking for. The Big Ed set may be worth it...or not. I will have to look more closely at what the kit has first, but if I remember, the kit is pretty complete. Usually it is a good sign if the AM sets are pretty limited.
Tony, did you add anything to your build?
|
|
|
|
Post by deafpanzer on Dec 7, 2016 13:40:38 GMT -5
Good choice... count me in too!
|
|
|
|
Post by dupes on Dec 7, 2016 14:14:36 GMT -5
Oooooh, nice. Definitely want to hear about the AKAN paints - they're one of the few places that make direct Fulcrum/Flanker matches.
|
|
|
|
Post by TRM on Dec 7, 2016 15:14:33 GMT -5
Nice one Gil...count me in!  |
|
mrversatile
Full Member
   July '23 Showcased Build Awarded
Member since: January 2013
Posts: 682
Jan 20, 2013 10:52:24 GMT -5
Jan 20, 2013 10:52:24 GMT -5
|
Post by mrversatile on Dec 29, 2016 13:00:59 GMT -5
|
|
|
|
Post by Tojo72 on Dec 29, 2016 14:33:06 GMT -5
Off to a good start
|
|
|
|
Post by wbill76 on Jan 1, 2017 9:46:32 GMT -5
Nice work on the office!
|
|
|
|
Post by deafpanzer on Jan 2, 2017 12:13:03 GMT -5
Great start on the cockpit!
|
|
mrversatile
Full Member
   July '23 Showcased Build Awarded
Member since: January 2013
Posts: 682
Jan 20, 2013 10:52:24 GMT -5
Jan 20, 2013 10:52:24 GMT -5
|
Post by mrversatile on Jan 5, 2017 16:52:16 GMT -5
A quick update of my progress is in order. The cockpit is installed as well as the HUD and windscreen. As my usual method, I like to dip my canopies in Future and mask with liquid masking film. I then simply trim with a blade and paint/install. Later the liquid mask just peels off. I did add a couple of small details which seemed prominent from my research pics: An electrical conduit coming from the circuit breaker box to the cockpit and a yellow fuel transfer line (I think that is what it is), in the port main landing gear bay. I do also plan to add a metal pitot tube as the kit example is lacking. Other than that I am really impressed and satisfied with the level of fit and detail in this kit. I am building the incredible engines and it even has a mounting cart if one wants to display one outside of the aircraft, however, I wish they would have included one more engine so it can be detailed and displayed without deleting one from the actual model. Otherwise, the detail is wasted. One thing worth mentioning is the inaccuracy of the instructions. There are more than a few errors or omissions. As a side note, I would like to use the main fuel tank mounted between the intakes as seen on most SMT variants. Although included in the kit, (presumably from earlier releases), they are meant to be unused in this kit. I still intend to install it but I need to see the actual assembly and mounting position. So, if anyone has one of the earlier kits can you send me a picture of this from the instructions? Thanks for looking, now on with the pics. 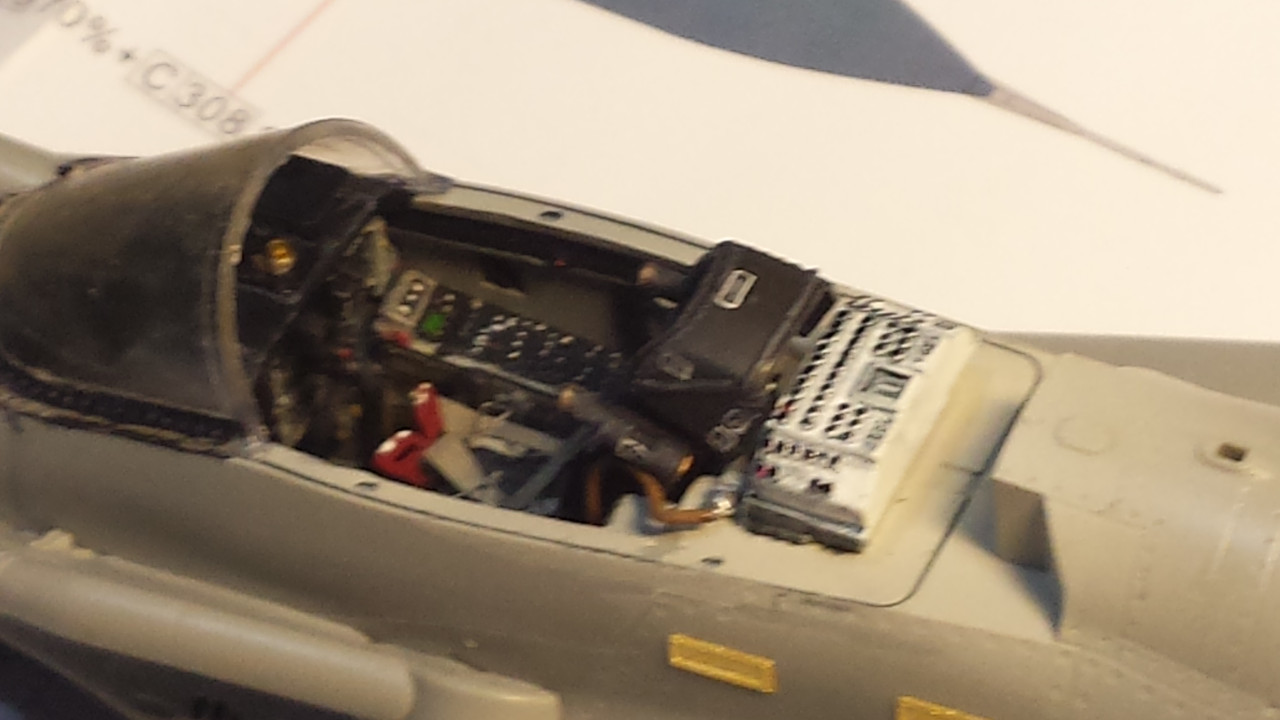 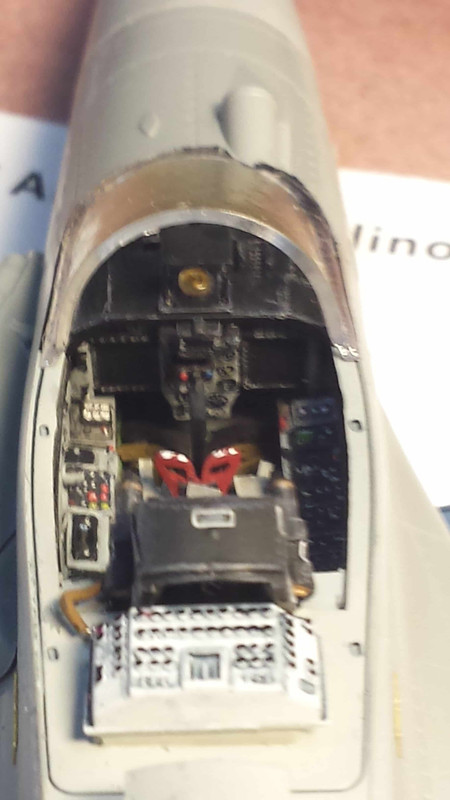 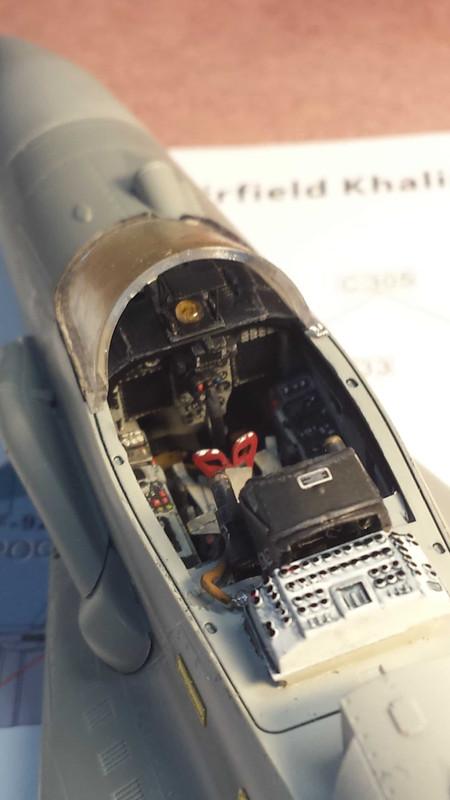 The gear bays: 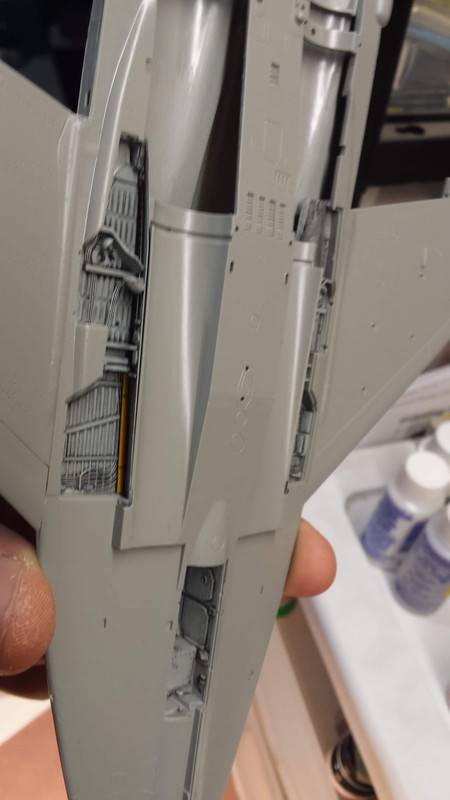 Here is the build progress. I added some weight to the nose before I closed it up just in case; Starting to look like a jet! 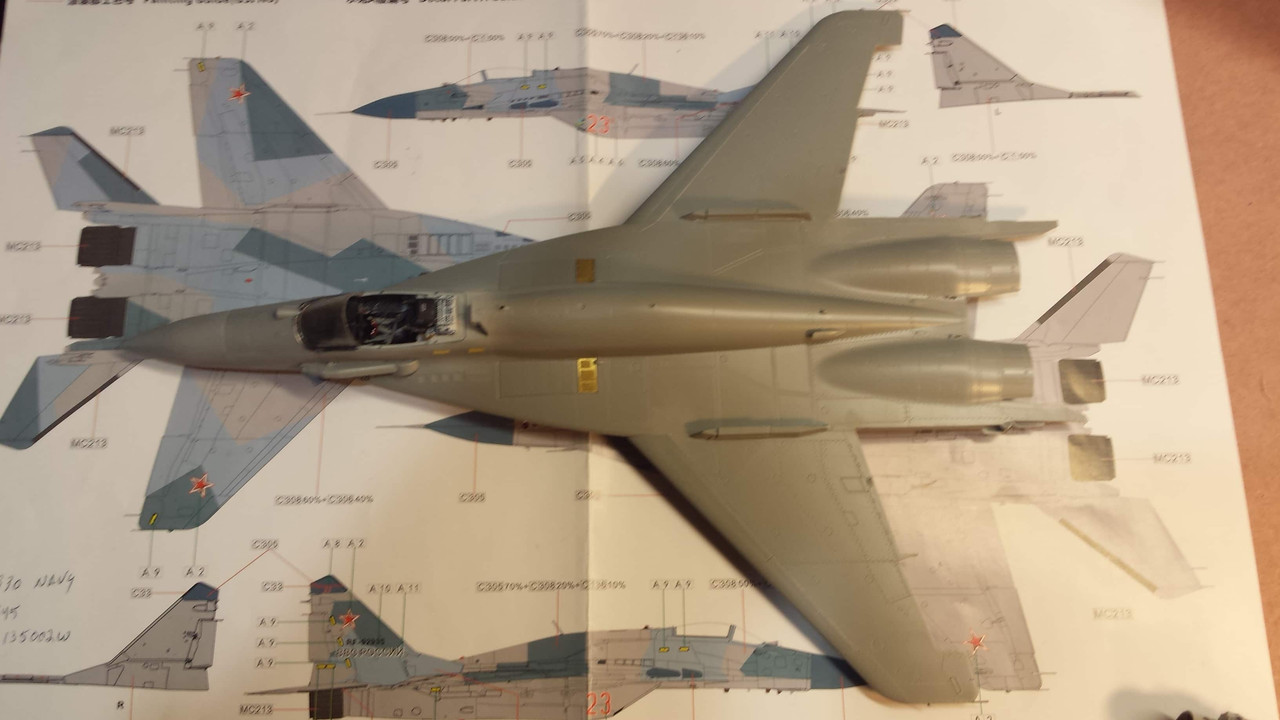 |
|
|
|
Post by Tojo72 on Jan 5, 2017 17:24:31 GMT -5
Nice work on the office,how are you liking the engineering,I really thought it was well designed.
|
|
thug626
Senior Member
   
Member since: January 2013
Posts: 2,035
Jan 15, 2013 13:05:28 GMT -5
Jan 15, 2013 13:05:28 GMT -5
|
Post by thug626 on Jan 8, 2017 14:55:17 GMT -5
If you don't mind, I'll take a few notes here. I've got this kit lurking in the stash. You're off to a splendid start here.
|
|
mrversatile
Full Member
   July '23 Showcased Build Awarded
Member since: January 2013
Posts: 682
Jan 20, 2013 10:52:24 GMT -5
Jan 20, 2013 10:52:24 GMT -5
|
Post by mrversatile on Jan 10, 2017 3:19:53 GMT -5
Thanks Tony, and regarding your question about the engineering....I am glad that I waited to answer this question as the engineering rating has gone precipitously downward. All was well until after I installed the engines, which fit fabulously. The intakes and engine covers are another matter. The intakes are two parts which are mated together and require the sanding of the mating seam. Not unusual, but the engine covers are one piece, and are installed adjacent and aft of the intakes. This resulted in uneven height between both, and when both were installed in their engineered spots,there was close to a 1/16 gap between both. This is after the port intake would not seat flush against the lower fuselage. I noticed after test fitting and attempting to install that the locating tabs were too long for the depth of their respective holes. I corrected this on the starboard intake by trimming half the tabs off before installing. The result of the whole assembly is disappointing and the only solution is to fill the gaps to make it presentable. Pics to follow soon.
Thug, I hope you are taking notes, you will avoid many pains if you do.
|
|
mrversatile
Full Member
   July '23 Showcased Build Awarded
Member since: January 2013
Posts: 682
Jan 20, 2013 10:52:24 GMT -5
Jan 20, 2013 10:52:24 GMT -5
|
Post by mrversatile on Jan 11, 2017 18:48:00 GMT -5
Next update is the engines finished and installed as well as all the control surfaces, intakes, and engine covers. It is getting closer to primer. Take note of the white filler around the covers and intakes. This is white spackle that I apply with a brush and then smooth out with a damp q-tip. It works for mating surfaces that don't require strength. Alcad and Metalizers 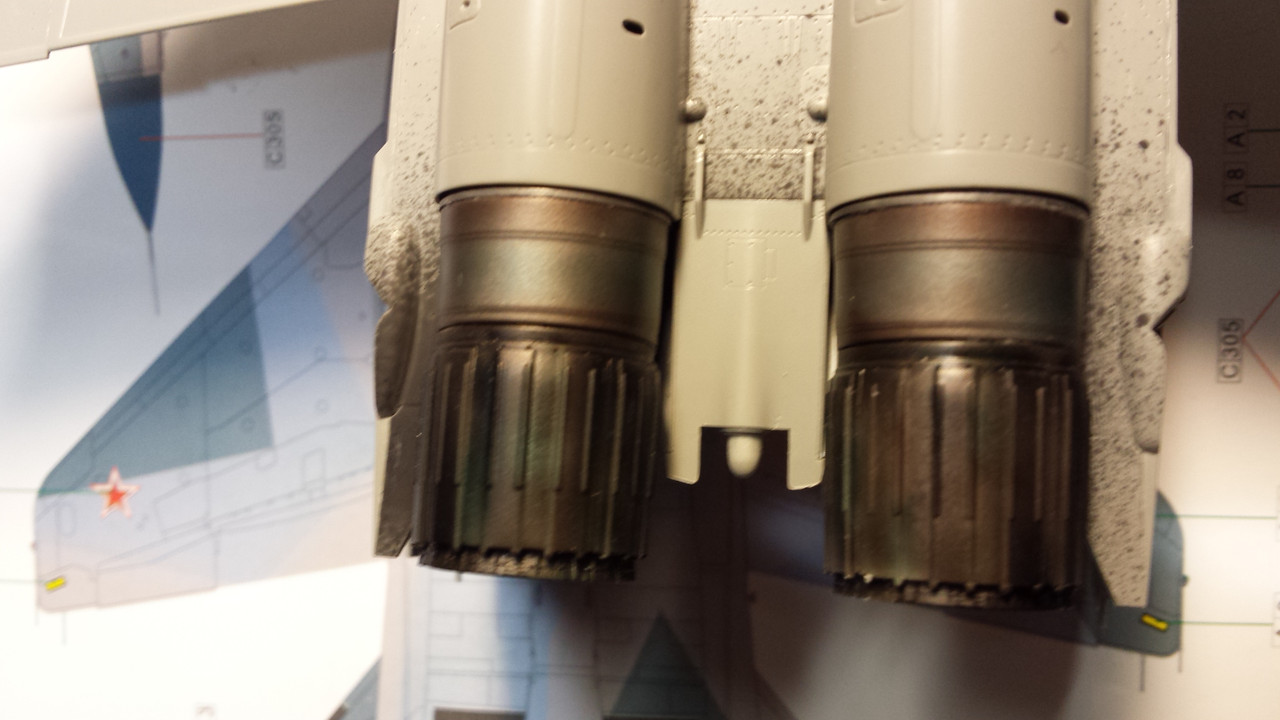 Green wash on fins as seen in reference photos 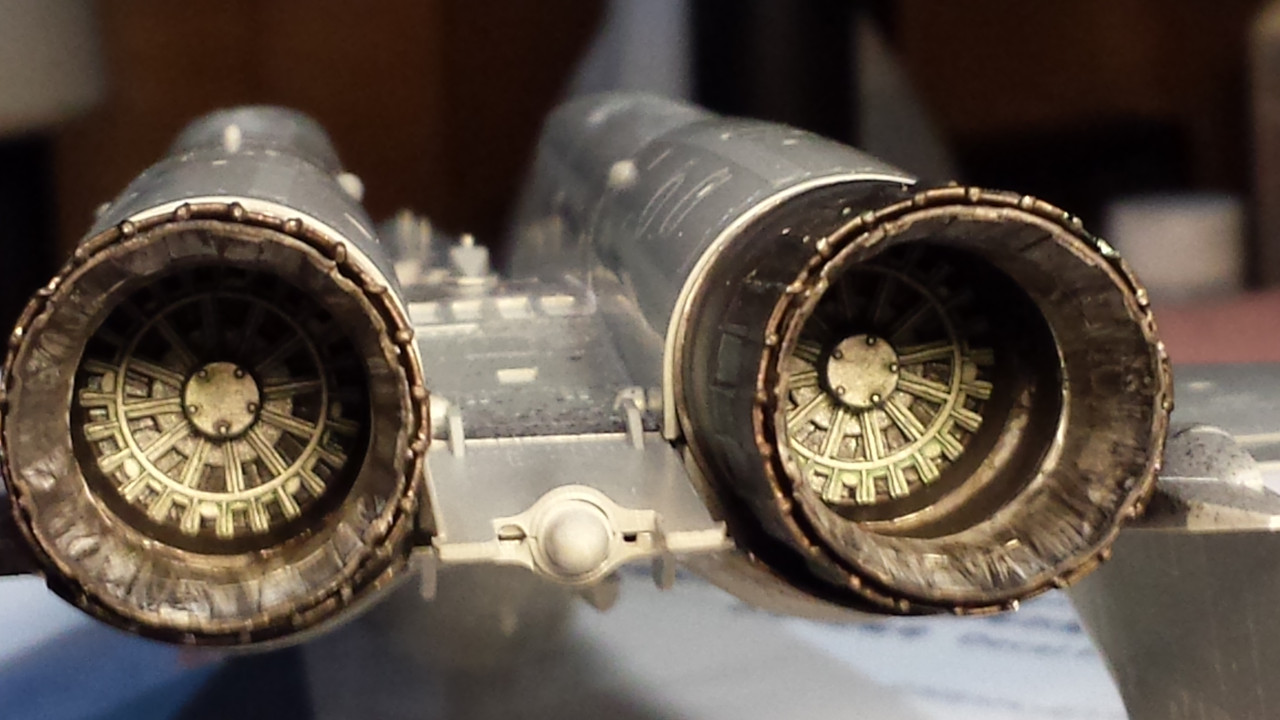 Notice white filler 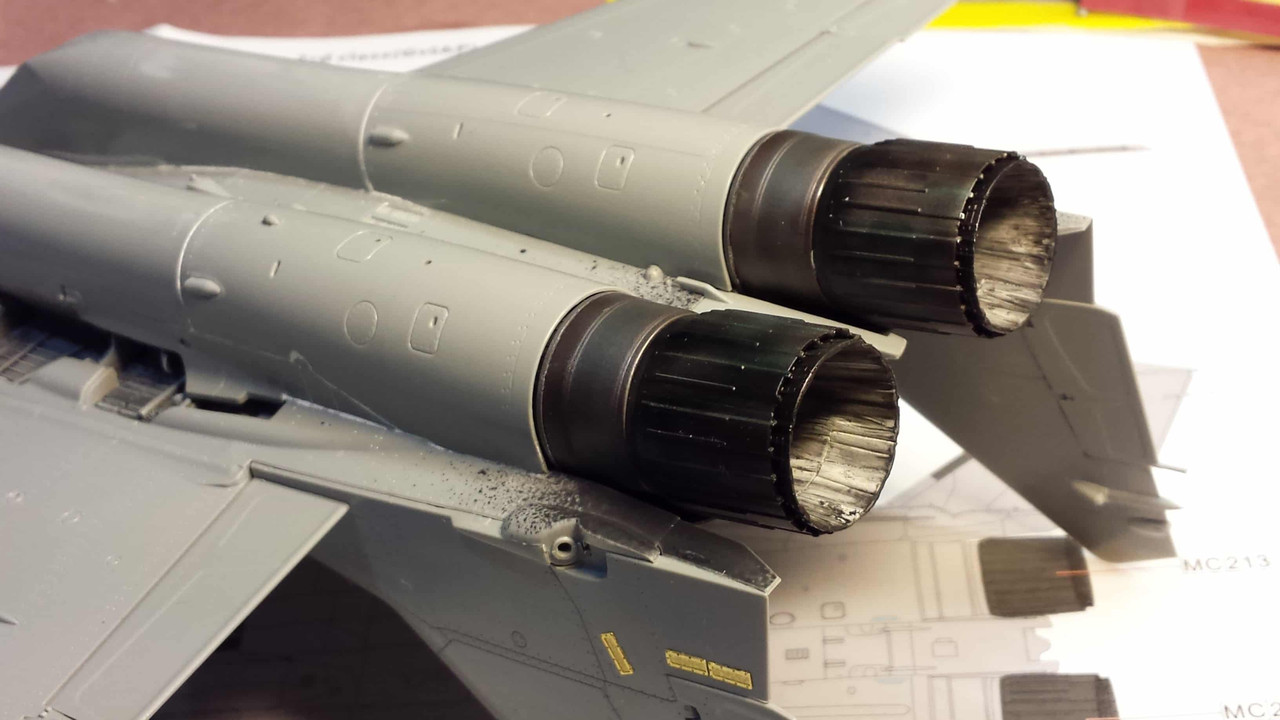 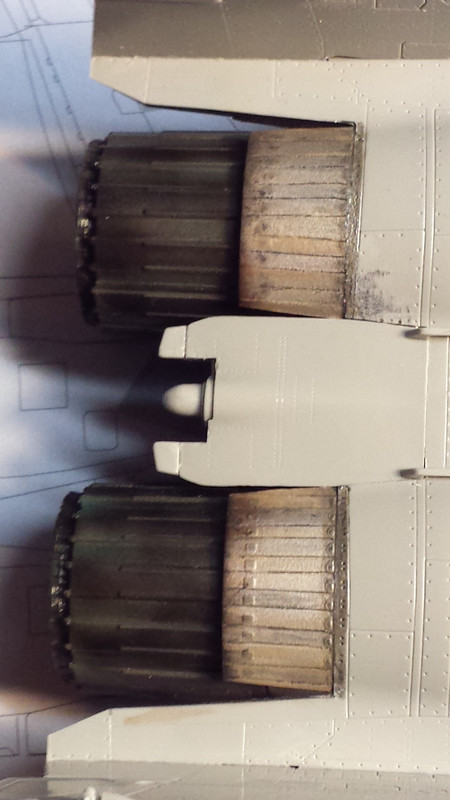 Almost ready for primer. Masking the cockpit is going to be a bear bc the HUD extends in front of the windscreen. 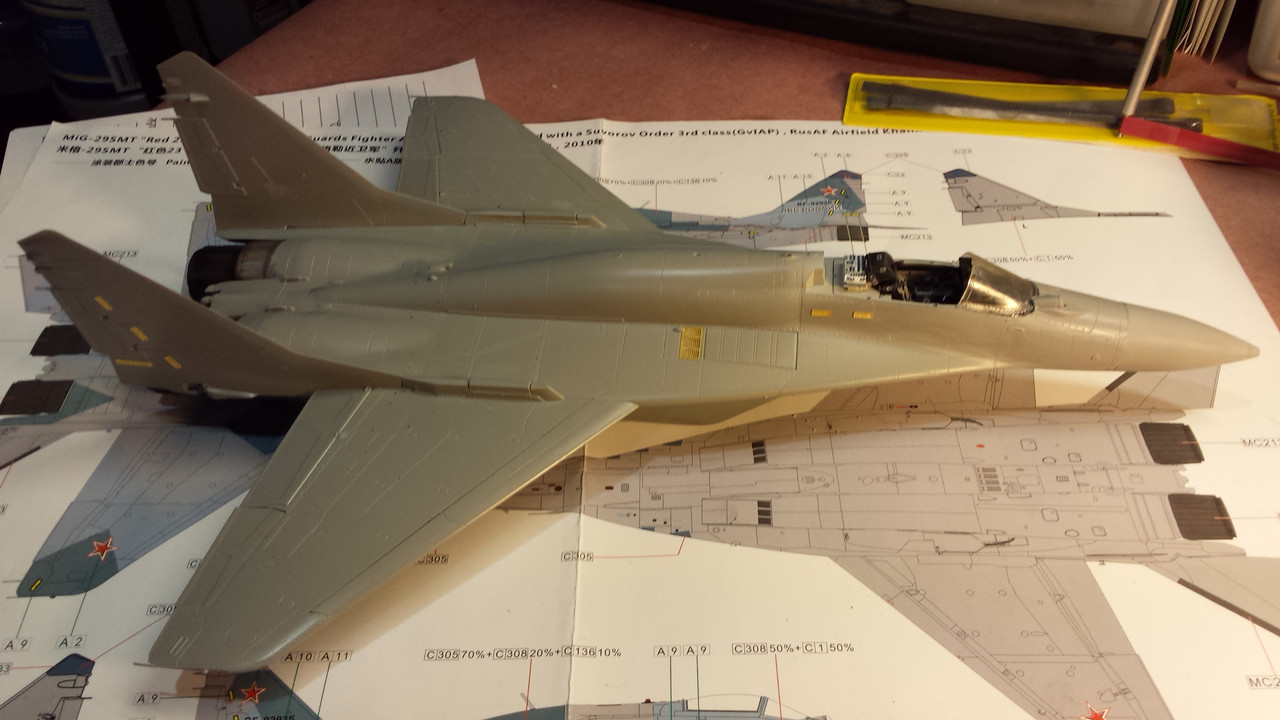 |
|
|
|
Post by Tojo72 on Jan 11, 2017 19:42:56 GMT -5
Very nice,metal looks great
|
|
|
|
Post by Leon on Jan 11, 2017 19:54:21 GMT -5
Looking really good Gil!  |
|
mrversatile
Full Member
   July '23 Showcased Build Awarded
Member since: January 2013
Posts: 682
Jan 20, 2013 10:52:24 GMT -5
Jan 20, 2013 10:52:24 GMT -5
|
Post by mrversatile on Jan 19, 2017 18:10:37 GMT -5
|
|
|
|
Post by Leon on Jan 19, 2017 18:22:31 GMT -5
Pre-shading looks good Gil!
|
|
joelsmith
Full Member
  
Member since: July 2012
There no winners in war, only survivors.
Posts: 1,404
Jul 5, 2012 22:33:58 GMT -5
Jul 5, 2012 22:33:58 GMT -5
|
Post by joelsmith on Jan 19, 2017 21:34:06 GMT -5
Kickin' it Gil.
|
|
mrversatile
Full Member
   July '23 Showcased Build Awarded
Member since: January 2013
Posts: 682
Jan 20, 2013 10:52:24 GMT -5
Jan 20, 2013 10:52:24 GMT -5
|
Post by mrversatile on Jan 26, 2017 23:43:18 GMT -5
Well most of the color is done. A little about the AKAN paints: Nice coverage, brush painting is satisfactory with two or more coats, spraying is frustrating with paint drying on the tip very quickly requiring frequent cleaning of the tip. I first used just distilled water to thin but then used my own mix which includes a retarder to no avail. I could never get sustained or consistent flow. Also, the topside "gray" looks more like a gray/tan similar to a MIG-31 although it is claimed to be matched to the real planes. I don't know, it looks too tan to me but I will have to live with it. Next step will be a coat of Future in preparation for decals. Speaking of decals, the painting and Decal placement guide interestingly doesn't direct one to where the small stencil decals go, only the large decals. I am finding that GWH should take a bit more time with their instructions. It reminds me of Dragon instructions, a common theme it seems, with Chinese manufacturers. 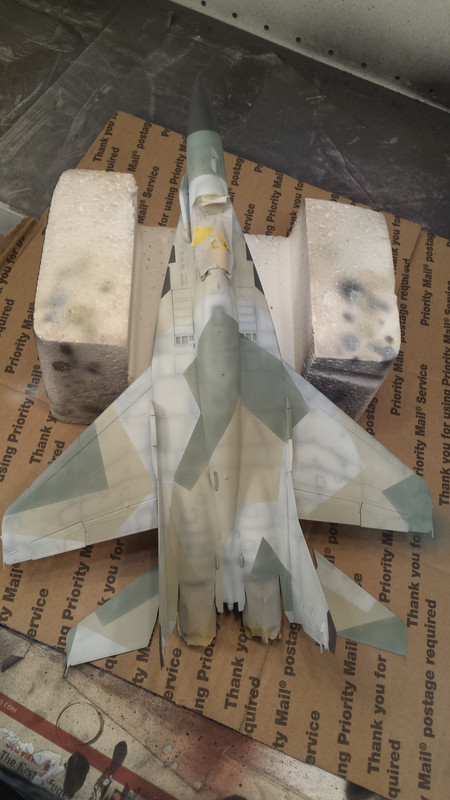 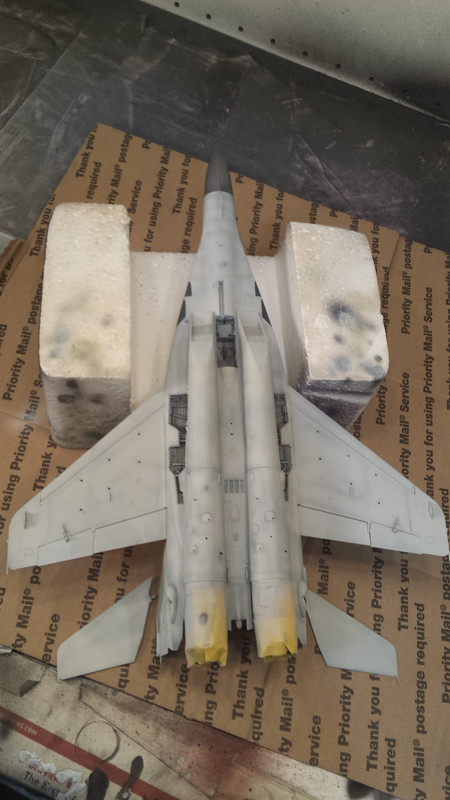 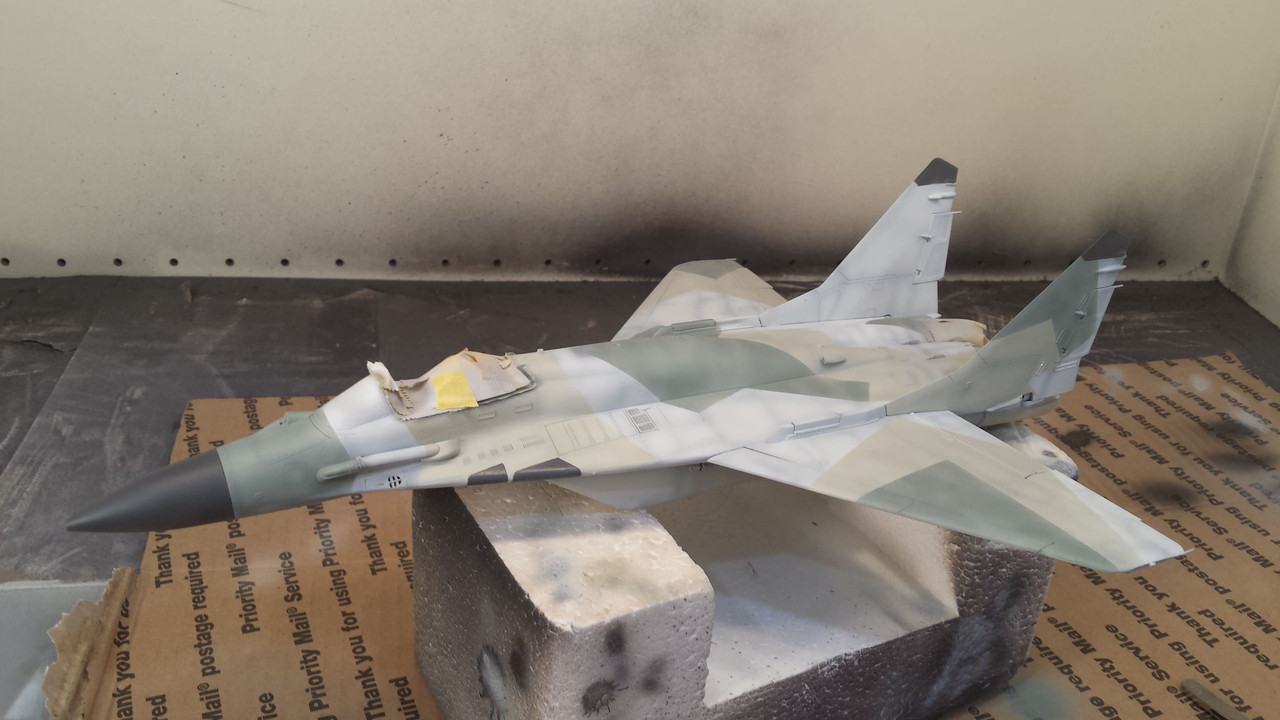 |
|
|
|
Post by Tojo72 on Jan 27, 2017 0:27:24 GMT -5
Camo came out nice,I stuck with Model Master Enamels as they had specific Fulcrum colors.
|
|
|
|
Post by Leon on Jan 27, 2017 5:49:12 GMT -5
Camo looks really good Gil!
|
|
|
|
Post by deafpanzer on Jan 27, 2017 10:38:11 GMT -5
Amazing paint job there!
|
|
mrversatile
Full Member
   July '23 Showcased Build Awarded
Member since: January 2013
Posts: 682
Jan 20, 2013 10:52:24 GMT -5
Jan 20, 2013 10:52:24 GMT -5
|
Post by mrversatile on Jan 27, 2017 15:56:42 GMT -5
Thanks all, and Tony, I went with the AKAN paints bc they are manufactured in Russia and supposedly are matched to the actual aircraft colors and other types are just an estimation, (this set is specific to the SMT fulcrum). Before I actually applied these I checked with folks at Linden Hill Imports, who is the US distributor bc by eye it didn't look right. He told me that he agreed and thought that another color was closer, but that was only his opinion while reiterating the the aforementioned fact regarding their matching process. Oh well, I like it nevertheless.
|
|
thug626
Senior Member
   
Member since: January 2013
Posts: 2,035
Jan 15, 2013 13:05:28 GMT -5
Jan 15, 2013 13:05:28 GMT -5
|
Post by thug626 on Jan 29, 2017 19:05:18 GMT -5
The colors look the part. Well done.
|
|
mrversatile
Full Member
   July '23 Showcased Build Awarded
Member since: January 2013
Posts: 682
Jan 20, 2013 10:52:24 GMT -5
Jan 20, 2013 10:52:24 GMT -5
|
Post by mrversatile on Feb 6, 2017 18:24:23 GMT -5
Another update for those who are watching. Progress includes the application of all air frame decals. Luckily I was able to locate some great walkaround pictures showing where to place the stencil decals, (as mentioned earlier, instructions weren't included). I then applied a pin wash for the panels on the underside, and on the topside, I further faded the paint as seen in the previously posted pics by using oil paint to create blotches of translucent light gray. It worked beautifully I think. I then coated with Testors Dullcoat and followed that with another coat of Future to prepare for the topside pin wash. It was necessary to do it this way as I don't think Future will coat oils very well. 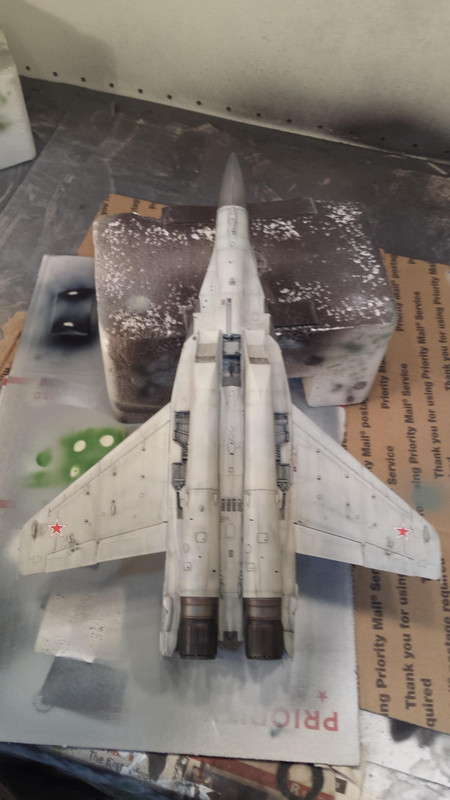 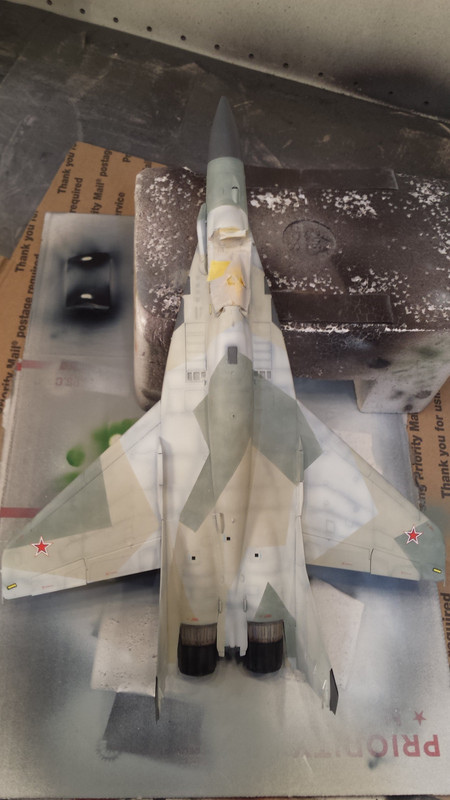 Oil rendering for faded paint 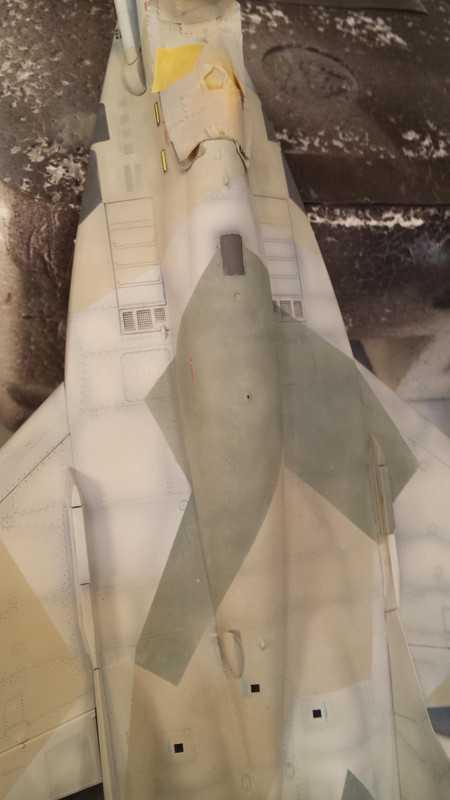 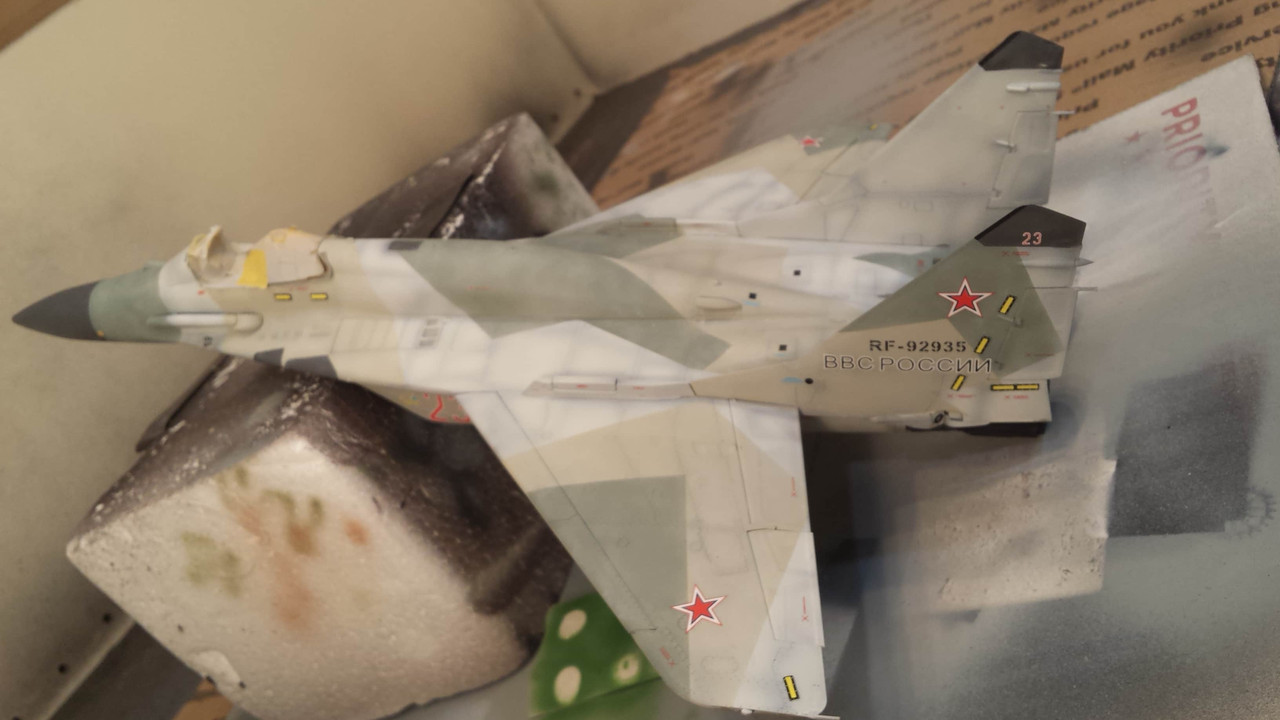 |
|
|
|
Post by Leon on Feb 6, 2017 18:57:53 GMT -5
Nice progress Gil! This is looking good.  |
|