fhvn4d
Full Member
  
Member since: October 2012
Posts: 439
Oct 1, 2012 6:30:09 GMT -5
Oct 1, 2012 6:30:09 GMT -5
|
Post by fhvn4d on Dec 29, 2016 22:06:06 GMT -5
|
|
|
|
Post by Tojo72 on Dec 30, 2016 5:18:03 GMT -5
Looks like a great project,but that tiny PE is just too much for me.
|
|
|
|
Post by Leon on Dec 30, 2016 5:27:33 GMT -5
Nice start Brian! Your PE work looks good.
|
|
joelsmith
Full Member
  
Member since: July 2012
There no winners in war, only survivors.
Posts: 1,404
Jul 5, 2012 22:33:58 GMT -5
Jul 5, 2012 22:33:58 GMT -5
|
Post by joelsmith on Dec 30, 2016 6:47:27 GMT -5
Looks like your "learning experience" is turning out very well!
|
|
|
|
Post by Tobi on Dec 30, 2016 7:49:56 GMT -5
Once you got addicted to you will hardly want to live without PE! If you're concerned about realism, my advice for you regarding this kit is to turn it into a M3A1, because for a M3 the interior provided by Academy is utterly wrong!  The Osprey book by Steve Zaloga about the M3 offers a good overview about version differences. |
|
|
|
Post by dierk on Dec 30, 2016 7:54:35 GMT -5
Nice start mate! The other thing to be aware of is that, even with all the hatches wide open, most of the interior will vanish, never to be seen again.
|
|
fhvn4d
Full Member
  
Member since: October 2012
Posts: 439
Oct 1, 2012 6:30:09 GMT -5
Oct 1, 2012 6:30:09 GMT -5
|
Post by fhvn4d on Dec 30, 2016 8:41:44 GMT -5
Tobi, while looking through reference pictures, and two books on the M-3 series, I totally agree with you about the interior being mediocre at best.... after installing the boxes in the turret ring I cant even find them in referenec pictures but im not taking them out now... worked too hard to get them in.... I am thinkin of scratch building my own ammo racks for the fighting compartment because they just look too unrealistic, and the oil cooler will also likely be scratched out... the exterior...... probably just gonna put the PE bits on and call it a day.... Im also probably going to blank off the left and right 30 cals, they are in place and one of them is in the way of the radio, as well as the one reference picture i have of "painintheass" which is what i am going for, shows the cheek guns not mounted...... any other thoughts would be very welcome... or if you have some reference sites or photos pack em up here!
|
|
|
|
Post by deafpanzer on Dec 30, 2016 12:17:14 GMT -5
Count me in... bringing beer for everybody!
|
|
|
|
Post by Tobi on Dec 30, 2016 13:40:25 GMT -5
Not much more to contribute from my side, I'm afraid. I haven't built the kit myself yet, but always had a British Stuart Honey in Caunter scheme on my wishlist. When I found out about the flaws I decided to purchase a TMD interior set for a USMC M3 machine and leave out the sponson MG's. Fellow modeler fightnjoe did an interior from scratch on this forum, but the pictures are no longer in the thread. Maybe you can PM him for references. A walkaround found at Primeportal.com |
|
fhvn4d
Full Member
  
Member since: October 2012
Posts: 439
Oct 1, 2012 6:30:09 GMT -5
Oct 1, 2012 6:30:09 GMT -5
|
Post by fhvn4d on Dec 31, 2016 13:58:59 GMT -5
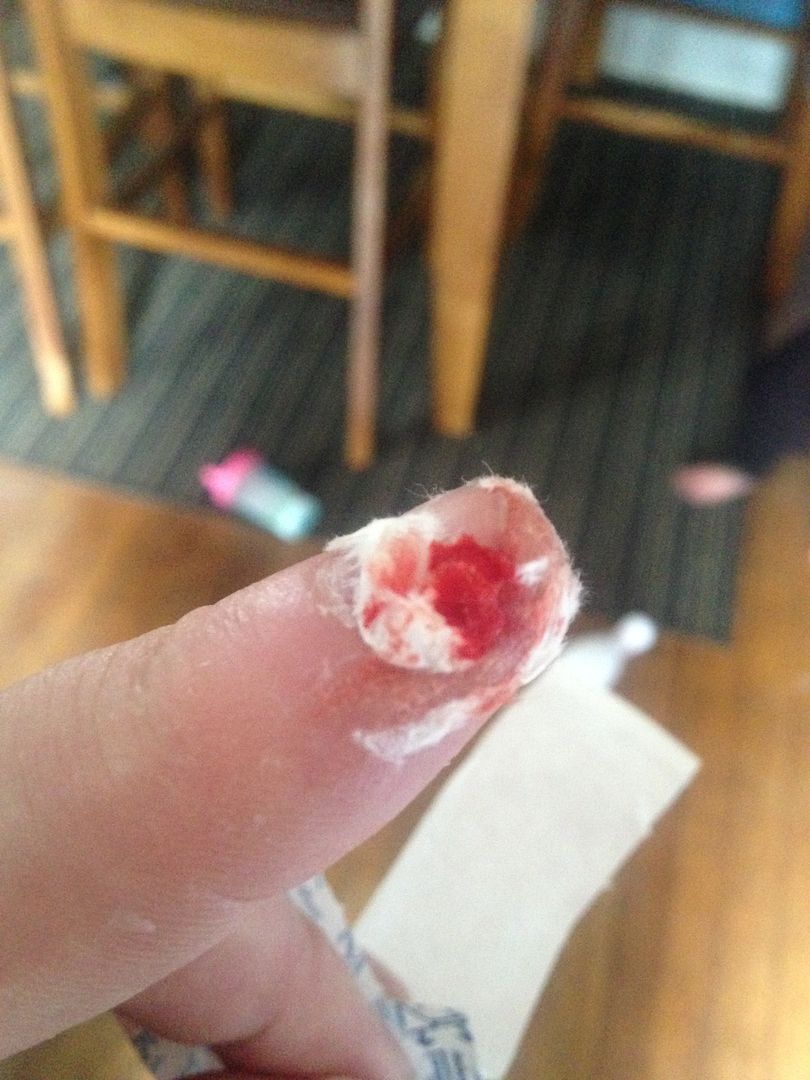
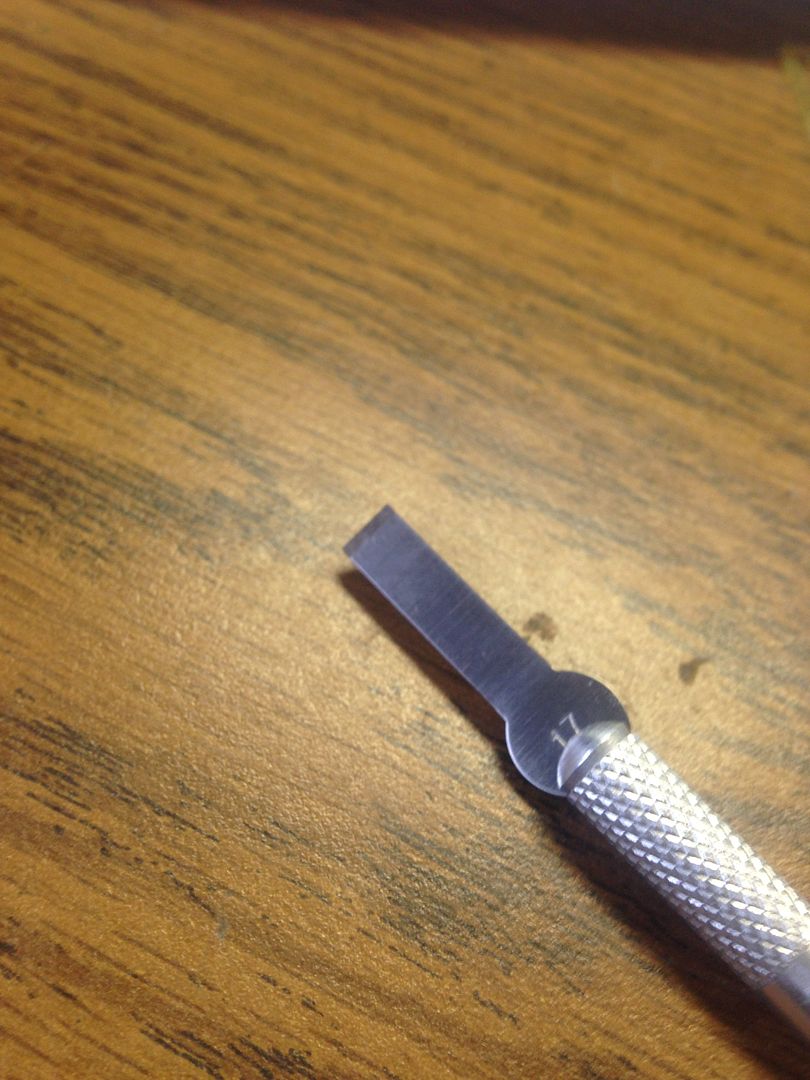
You know when you start doing something intricate, with a sharp brand new blade, and you think to yourself, "this is probably going to go badly"...... and then it does?  Thank god for thin superglue and tissue paper... Ran this blade through the side of my finger and up under my nail...... shoulda come up with some other way to remove the details I was trying to remove......   |
|
|
|
Post by Leon on Dec 31, 2016 14:07:04 GMT -5
OUCH!!!!! Been there done that.  Hope your doing ok Brian.  |
|
fhvn4d
Full Member
  
Member since: October 2012
Posts: 439
Oct 1, 2012 6:30:09 GMT -5
Oct 1, 2012 6:30:09 GMT -5
|
Post by fhvn4d on Dec 31, 2016 18:51:26 GMT -5
|
|
|
|
Post by Leon on Dec 31, 2016 18:59:59 GMT -5
Paint looks good Brian!
|
|
M1Carbine
Senior Member
    November '23 Showcased Model Awarded
Member since: November 2012
Posts: 1,730
Nov 16, 2012 2:49:11 GMT -5
Nov 16, 2012 2:49:11 GMT -5
|
Post by M1Carbine on Dec 31, 2016 19:02:09 GMT -5
Watching this one Brian and dont cut your finger again......lol
Bob
|
|
|
|
Post by chromdome35 on Dec 31, 2016 19:29:48 GMT -5
You know when you start doing something intricate, with a sharp brand new blade, and you think to yourself, "this is probably going to go badly"...... and then it does?  Thank god for thin superglue and tissue paper... Ran this blade through the side of my finger and up under my nail...... shoulda come up with some other way to remove the details I was trying to remove......   owwwww, be safe out there!!! |
|
|
|
Post by TRM on Dec 31, 2016 20:15:32 GMT -5
Nice job getting a base on the interior Brian! Nice fix on the finger too! Guessing you will keep your fingers out of the way next time?  |
|
|
|
Post by deafpanzer on Jan 2, 2017 11:58:31 GMT -5
How your thumb? Interior looking good!
|
|
fhvn4d
Full Member
  
Member since: October 2012
Posts: 439
Oct 1, 2012 6:30:09 GMT -5
Oct 1, 2012 6:30:09 GMT -5
|
Post by fhvn4d on Jan 2, 2017 12:05:02 GMT -5
|
|
fhvn4d
Full Member
  
Member since: October 2012
Posts: 439
Oct 1, 2012 6:30:09 GMT -5
Oct 1, 2012 6:30:09 GMT -5
|
Post by fhvn4d on Feb 9, 2017 13:56:47 GMT -5
|
|
joelsmith
Full Member
  
Member since: July 2012
There no winners in war, only survivors.
Posts: 1,404
Jul 5, 2012 22:33:58 GMT -5
Jul 5, 2012 22:33:58 GMT -5
|
Post by joelsmith on Feb 9, 2017 14:06:15 GMT -5
Nicely done Sir! Keep up the good work, looks like you finger is healing nicely also.
|
|
|
|
Post by deafpanzer on Feb 14, 2017 12:38:18 GMT -5
Looking real good!!! Take a good care of your finger too!
|
|
Wes
Full Member
  
Member since: November 2011
Posts: 686
Nov 16, 2011 9:34:50 GMT -5
Nov 16, 2011 9:34:50 GMT -5
|
Post by Wes on Feb 15, 2017 5:30:57 GMT -5
I like where this is going. The model that is, not your finger. HAHA
|
|
jpc1968
Full Member
  
Member since: May 2015
May '17 Co-Mom Winner, October '17 MoM Winner
Posts: 504 
|
Post by jpc1968 on Feb 16, 2017 8:31:45 GMT -5
Nice work. Try wearing a thimble?
|
|
fhvn4d
Full Member
  
Member since: October 2012
Posts: 439
Oct 1, 2012 6:30:09 GMT -5
Oct 1, 2012 6:30:09 GMT -5
|
Post by fhvn4d on Feb 17, 2017 10:31:08 GMT -5
|
|
|
|
Post by deafpanzer on Feb 20, 2017 15:06:00 GMT -5
Looking real good!!! How's your finger now? LOL
|
|
fhvn4d
Full Member
  
Member since: October 2012
Posts: 439
Oct 1, 2012 6:30:09 GMT -5
Oct 1, 2012 6:30:09 GMT -5
|
Post by fhvn4d on Feb 20, 2017 16:03:02 GMT -5
Looking real good!!! How's your finger now? LOL Didja know that you can cut yourself very well with those really neat thin razor saw thingys?  yeah... same finger.... Someone suggested a thimble and I am starting to think it might be worthwhile.... LOL... BTW.. you will be happy to hear I have been sidelining with a 7.5CM Pak 40 (the kit is older than I am). |
|
fhvn4d
Full Member
  
Member since: October 2012
Posts: 439
Oct 1, 2012 6:30:09 GMT -5
Oct 1, 2012 6:30:09 GMT -5
|
Post by fhvn4d on Mar 20, 2017 14:05:32 GMT -5
|
|
jpc1968
Full Member
  
Member since: May 2015
May '17 Co-Mom Winner, October '17 MoM Winner
Posts: 504 
|
Post by jpc1968 on Mar 20, 2017 15:14:42 GMT -5
I see the thimble is working. LOL
|
|
|
|
Post by deafpanzer on Mar 24, 2017 10:49:08 GMT -5
Lovely work on the PE!
|
|
fhvn4d
Full Member
  
Member since: October 2012
Posts: 439
Oct 1, 2012 6:30:09 GMT -5
Oct 1, 2012 6:30:09 GMT -5
|
Post by fhvn4d on Mar 24, 2017 16:55:22 GMT -5
Andy with the exception of those tie downs on the back deck its been fun... Those things are just TOO SMALL. As you can see the top row is not at all lined up, but I have set them down with 5 minute epoxy because I want to TRY and actually wrap some cargo ropes around em... so we shall see... plus, lots of glue Shmutz in a few places close to the fronts... but ... we shall see... hoping judicious paint weathering and other methods will hide the imperfections Thank you! |
|