Scratchbuild commission Austin K6 in 1/72 scale
Feb 10, 2017 17:49:31 GMT -5
dierk and deafpanzer like this
Post by vindicareassassin on Feb 10, 2017 17:49:31 GMT -5
This is a special commission build for Ian at Wee Friends Models, It will be a complete rolling chassis and cab for which there will be a variety of back bodies made available in kit form.
The request was for a brand new scratch built master of an Austin K6 in 1/72 scale, using original chassis drawings I prepared a GS length chassis, there will also be different chassis lengths made to accommodate some of the back bodies....
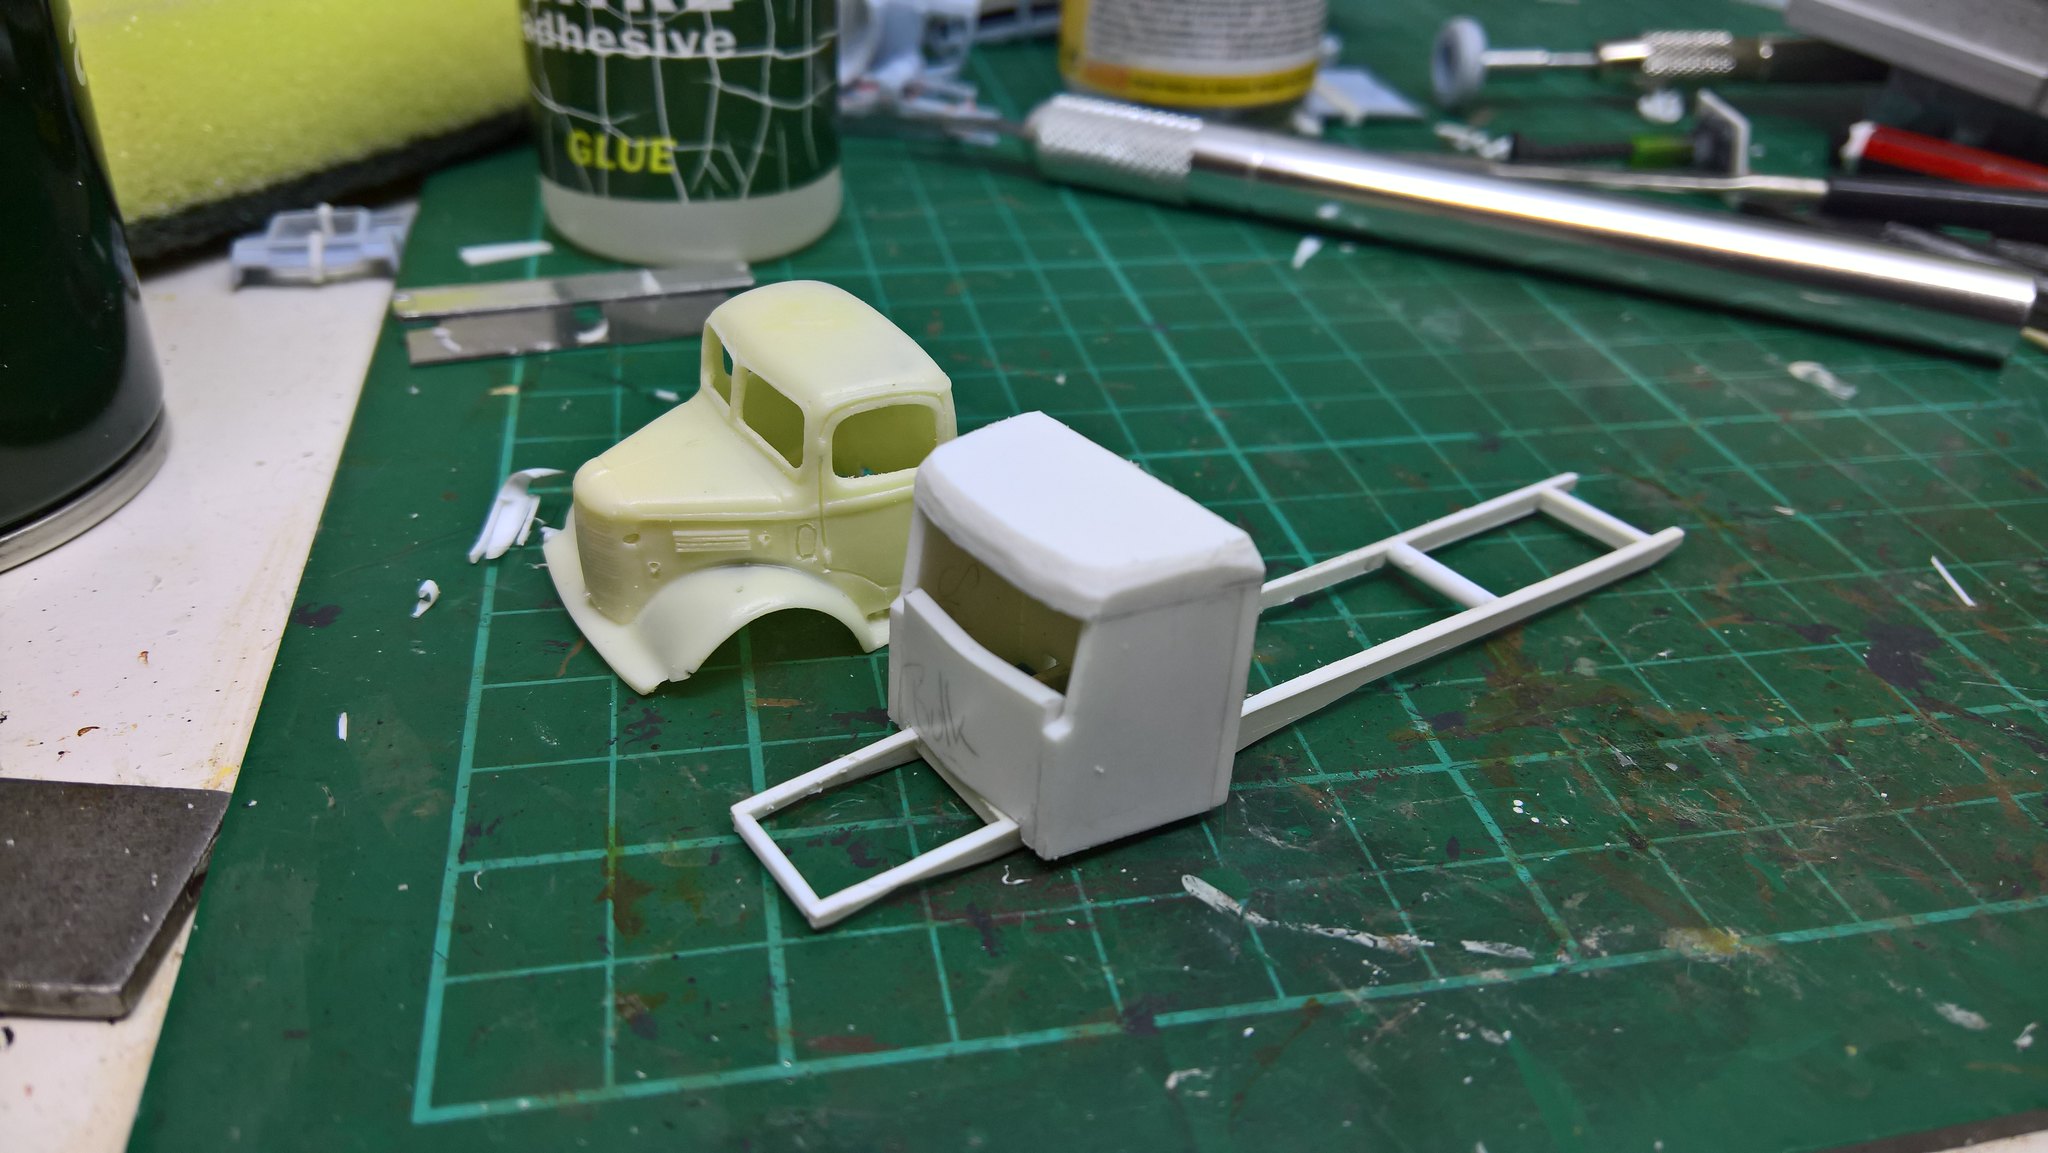
Once that was done it was on to the hard bit.... The cab... this is my first ever attempt at anything quite so ambitious so I was a little daunted at the prospect of having to scratch-build one of the hardest cab shapes.... This was my first attempt at it..... The yellow resin cab behind is a Road Transport Images Austin K3 cab in 1/76 that sports the same crew cab as a K6 and is what I started to use as a reference for cab roof shaping.....

And with a part built Airfix Austin K6 cab from their Rescue set also used as a shaping reference....

It was while I was looking at this image that I had a "Eureka " moment..... To make the cab easier and faster to make why not use the Airfix cab as a Vac-Form mould??.... With it being 1/76th scale and my requirement was for 1/72 it made sense to use the smaller as a former to make the bigger..... And so.....
I set about making a Vac-form machine out of my mould making Vacuum chamber and pump.....

I then converted the Airfix cab into a mould block, and got forming, to get the thickness of plastic and also build up the scale I had to laminate repeated layers of plasticard on top of one another, after my third attempt at it I came out with this.....


A bit of shaping went on using a file, sanding sticks and needle files to get this.....

And with its first test shot of primer to show up pits, blemishes and faults.....

during this project I also invested in some new machinery to make like a little easier, not knowing how much actual use it would get I bought the cheap copy of the Unimat1 6in1 tool, so far its been a god send, although the 3 jaw lathe chuck was total poop straight out the box, literally seizing solid on me the first time I used it, no big drama as I now use a Dremel arbor to hold wheels,...... here I have it set up as a milling machine to face up the windscreen angles......

Yet more shaping and sanding.....

Things moved on quite quickly after that, here it sits in its second test shot of grey primer to show up the blemishes, and now also windows are cut in and shaped, the engine and radiator are fitted and in the last few pics the start of the interior base plate that will also locate the cab to the chassis.....


Stay tuned for more, which will include the radiator grill and engine covers, and then the chassis and suspension.....
ATB
Sean


