|
|
Post by TRM on Jul 20, 2017 21:11:52 GMT -5
Hey guys! I've been out straight with work and other crap, so when I get the time to hit the bench, I try and make a full court press of an effort...good, bad or otherwise. On the heels of the last little wet floaty, I wanted to have another go at the water base. Basically to keep working things out. As you know, none of this stuff happens all at once! Anyway, I am off and running on this one. I still have to write a review of the kit soon!  The kit - L'Arsenal 173 foot Minesweeper. This is a 1/350 scale version of one type of US Minesweeper from WWII. You would think at 1/350th, it would be a decent size to work with...LOL These were small yachts...which makes for a small model! It comes in around 3.5 inches. 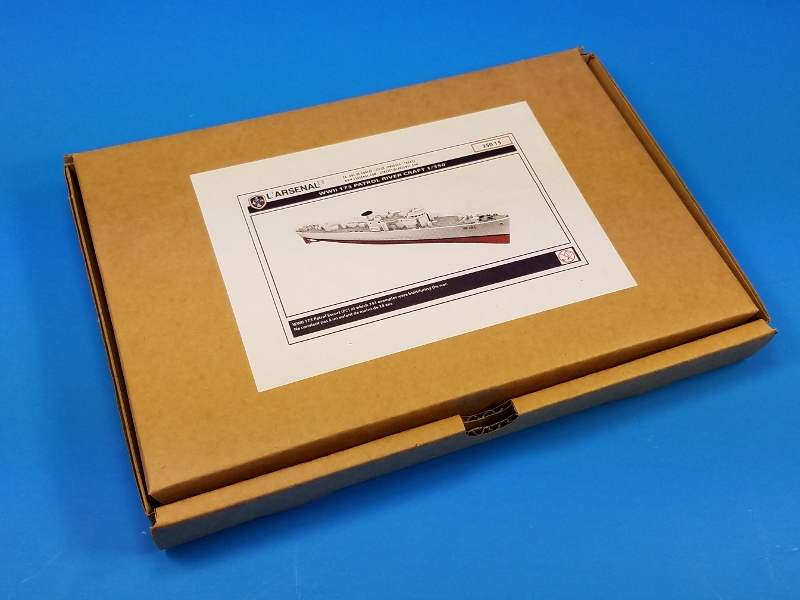 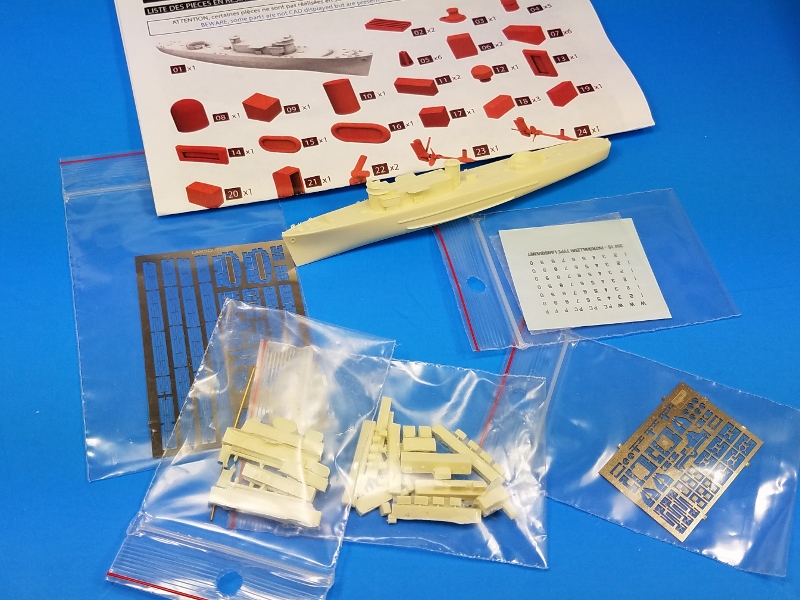 As you can see, the kit is resin and photo etch. Actually pretty hefty on details considering the size! 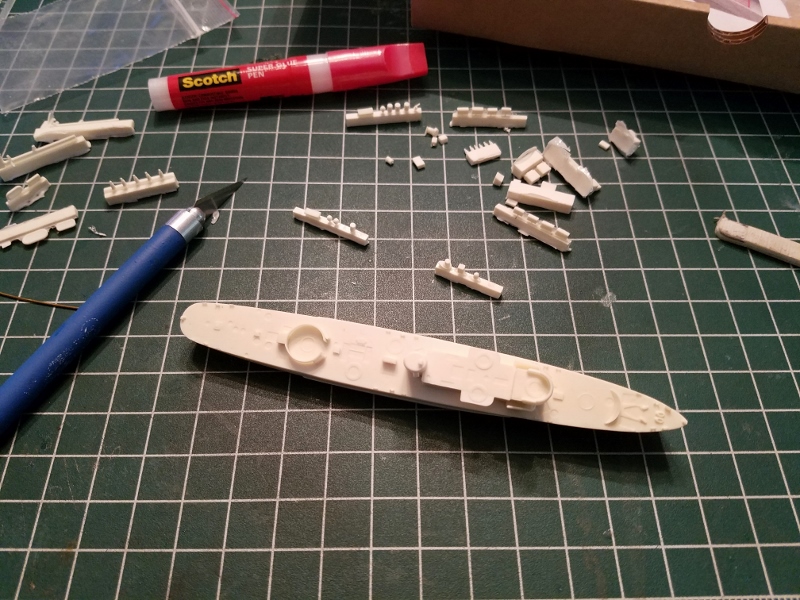 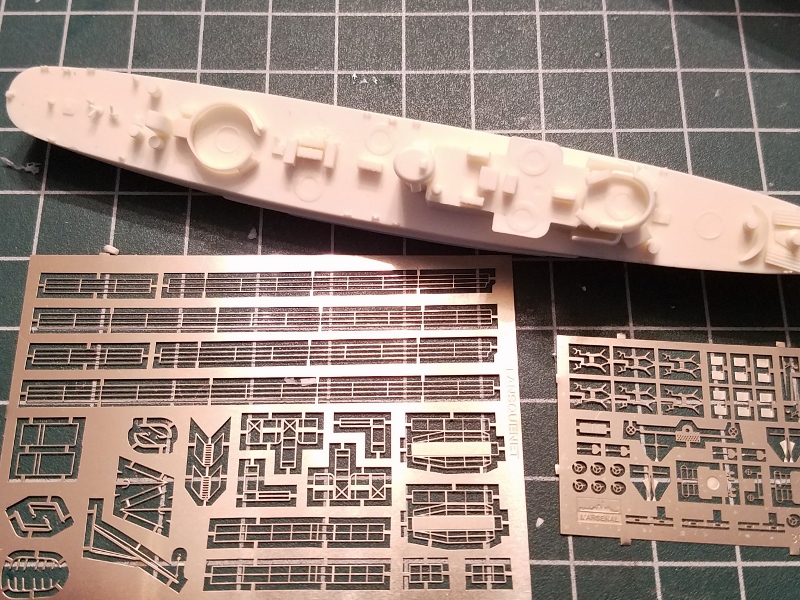 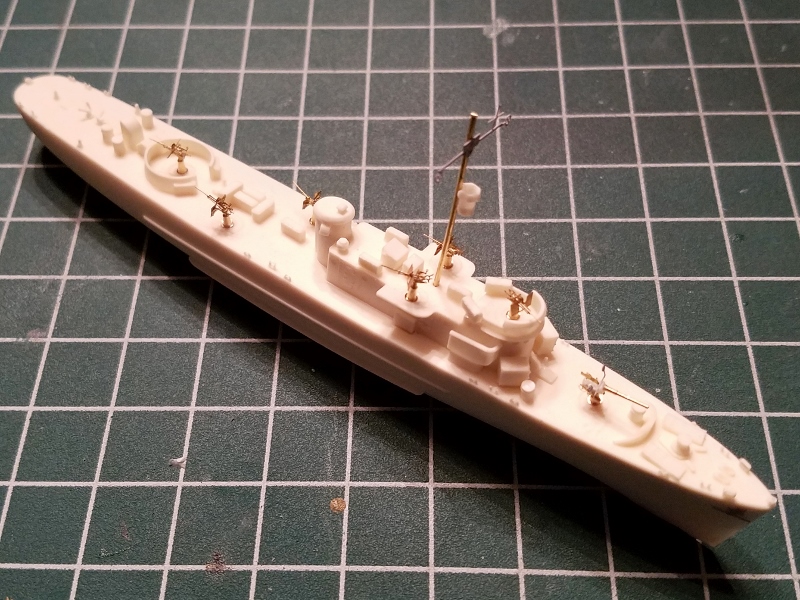 The kit does supply a full compliment of guns. However, the 20mm's are all photo etch and the 3"/50 is suppose to be resin and photo etch. I suppose too, but being a review sample, sometimes not everything makes it into the box! LOL I spoke with L'Arsenal already. I know they are flawless with packing and shipping...why I laughed more than cringed when the gun went missing. Simple fix on both counts. Master makes outstanding 20mm as you can see. I took one of the brass pedestals from the 20mm guns and then did a little scratch work and stole a 4" barrel from another set and chopped it down. I think it will work!  Like I said, the time is there and I have to take advantage of it! Construction should be done soon and then I can get to making the base! |
|
thechaos
Full Member
   June '24 Showcased Model Awarded
Member since: May 2015
Posts: 1,172 
|
Post by thechaos on Jul 21, 2017 0:55:44 GMT -5
Cool. looks like a fun build.
|
|
|
|
Post by Leon on Jul 21, 2017 4:06:23 GMT -5
Off to a good start Todd! Nice fix on the missing gun.  |
|
|
|
Post by dierk on Jul 21, 2017 4:21:11 GMT -5
Three and a half inches?  Phew - bet you don't say that to any of the girls  I'd need an electron microscope for something like that. The detail is amazing - as is the build! |
|
fhvn4d
Full Member
  
Member since: October 2012
Posts: 439
Oct 1, 2012 6:30:09 GMT -5
Oct 1, 2012 6:30:09 GMT -5
|
Post by fhvn4d on Jul 21, 2017 8:33:37 GMT -5
PE looks exquisite!!!!! Small.....bring on the LARGE optivisor and stay away from the coffee!
|
|
|
|
Post by robbo on Jul 21, 2017 12:24:11 GMT -5
What a great looking little kit
|
|
|
|
Post by panzerjager2 on Jul 21, 2017 16:51:35 GMT -5
For something that dang small, it really looks awesome 
PJ2
|
|
|
|
Post by TRM on Jul 21, 2017 21:26:38 GMT -5
Thanks fellas! I appreciate you hanging about on this! Trying to fill some gaps in between packing and whatnot. Managed to bang out some more PE... 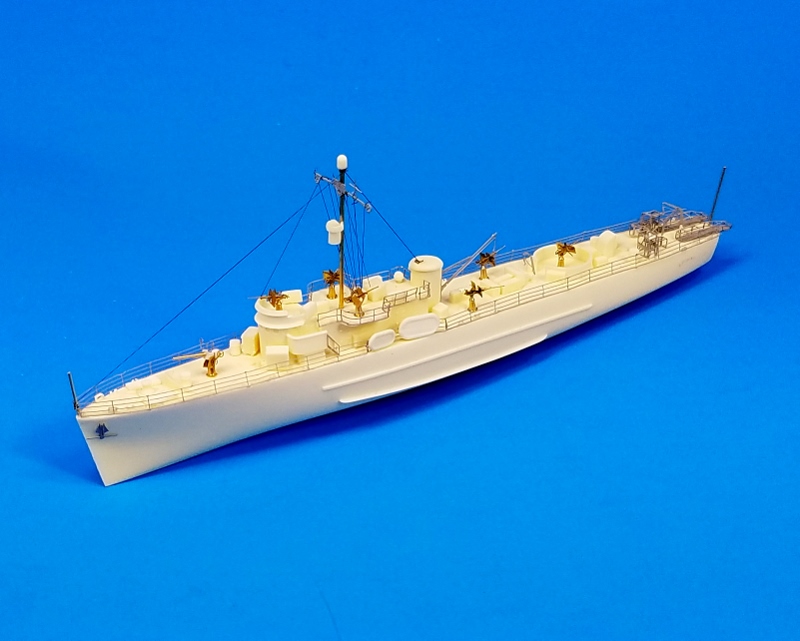 I have some clean up to do, but she is almost ready for color. Took some time to rummage through the cave for something to use as a base. Nothing wrong with a little EPS to have some fun! Looks like the next stop will be either base work or painting the ship. 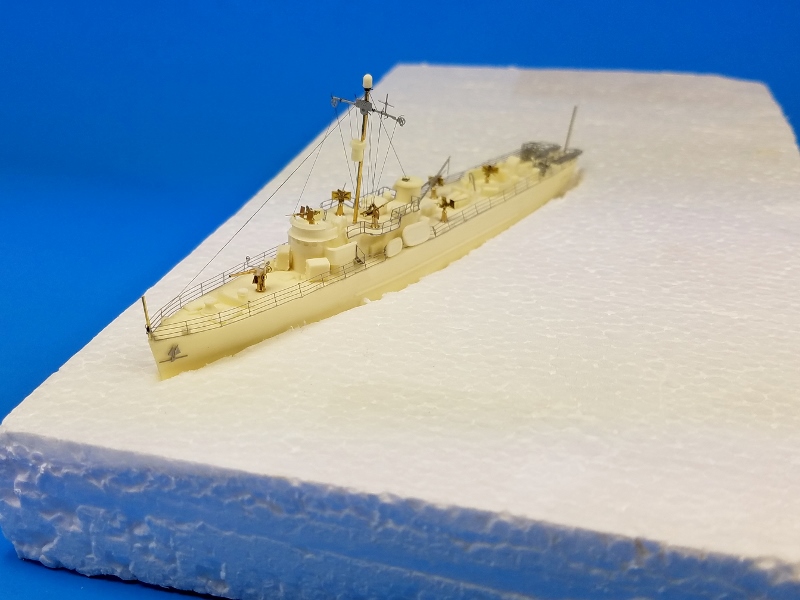 |
|
|
|
Post by tobias5555 on Jul 22, 2017 4:12:13 GMT -5
Nice and clean build, looking Forward to see the water.
|
|
|
|
Post by Leon on Jul 22, 2017 5:23:04 GMT -5
Nice work on the PE Todd! Bring on the painting and base work.  |
|
bbrowniii
Full Member
  
Member since: March 2012
If you are not part of the solution, you are part of the precipitate.
Posts: 1,239
Mar 25, 2012 22:08:04 GMT -5
Mar 25, 2012 22:08:04 GMT -5
|
Post by bbrowniii on Jul 22, 2017 8:53:25 GMT -5
I love it Todd!
I'm looking forward to the next update!
|
|
|
|
Post by TRM on Jul 22, 2017 9:02:24 GMT -5
Thanks Tobias, Leon and Boyd!  Not letting too much moss grown on this on, it is off to the races... As I had mentioned (one f my other threads), the process I am using is inspired by two fantastic shipwrights...Chris Flodburg and Kostas Katsea...both have a unique way of producing water effect. Chris had put together some step by step stuff a while back, so my approach is similar to his in some respect. I think as I do each new base, there is always room for tweaking, possible improvements and of course adding a little of one's tyle into doing it. Fist off, I chose ESP (extruded polystyrene) or more commonly known as Styrofoam....which is a trademark name btw. Anyway, EPS comes in a wide variety of density from soft and squishy to coarse and hard. There are a million different ways to approach doing water...so I will never say there is one clear cut way to attack it...whatever works best for you...go for it! Aside form the fact I chose EPS, XPS (Extruded Polystyrene) is the smoother and less porous cousin to EPS. This is the blue or pick construction foam you might see on foundations and insulation projects. This would work equally as well as the EPS does....just different approaches to getting the initial waves going is all. With all that crap out of the way...as you can see in the last picture of my previous post, a simple rectangular piece of EPS was used. After cutting a space for the boat to sit, it was time to get some wave action going. This can be done by simply sanding peaks and troughs into the surface of the foam, but it is a Godawful mess...LOL I chose to use a little heat to help constrict the surface to create the initial waves. Now a note....because it will be brought up again I am sure. I used a lighter to create the wave effects in the surface of the EPS. While I am not burning the EPS and for the most part constricting the open cell configuration of the EPS, there is still heat transfer and this can produce fumes at time...you know, the burnt plastic/Styrofoam smell. It i best to do this in a well ventilated area...like outside, and if at all possible, where some sort of respirator to prevent inhalation of the fumes. With that disclaimer out of the way...I held the EPS above shoulder height and applied heat to the surface which is facing down. As you would figure, it is easier to get the heat transfer to go up versus down. I tried to keep the wave size down and regular as seen in many deep ocean picture online. 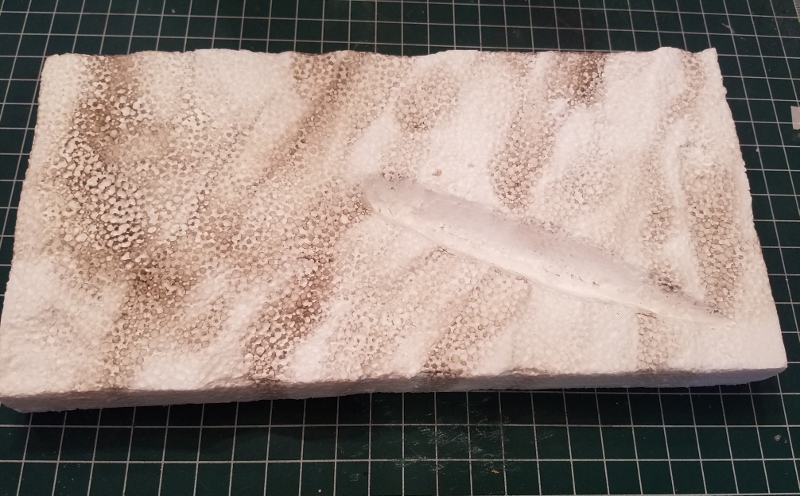 The black is more form the lighter exhaust than charring to the surface. But you can see how the subtle waves are created.  The first step I took was to seal the surface. I used Vallejo's Water Texture Gloss Gel but there are plenty of acrylic gloss gels sold out there. Using a wide brush, I liberally applied the gel gloss to the surface. There is not special application other than to lay a quick smooth coat. 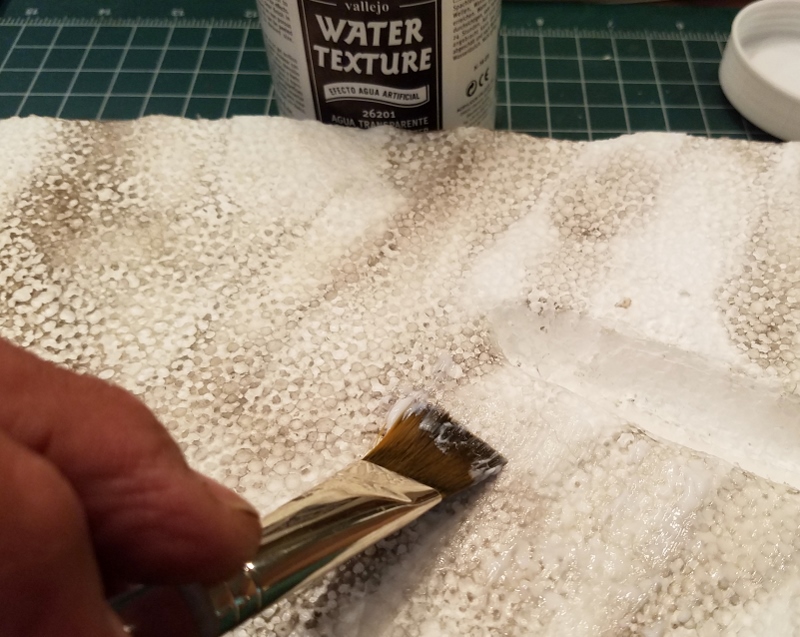 While the Gloss Gel is still wet, I used an adaptation of Chris Flodburg's paper method. This involves ripping irregularly shaped pieces of standard white office paper and sticking them to the surface slightly overlapping the edge to cover the base. In this picture of my first attempt at this technique, I used the paper... 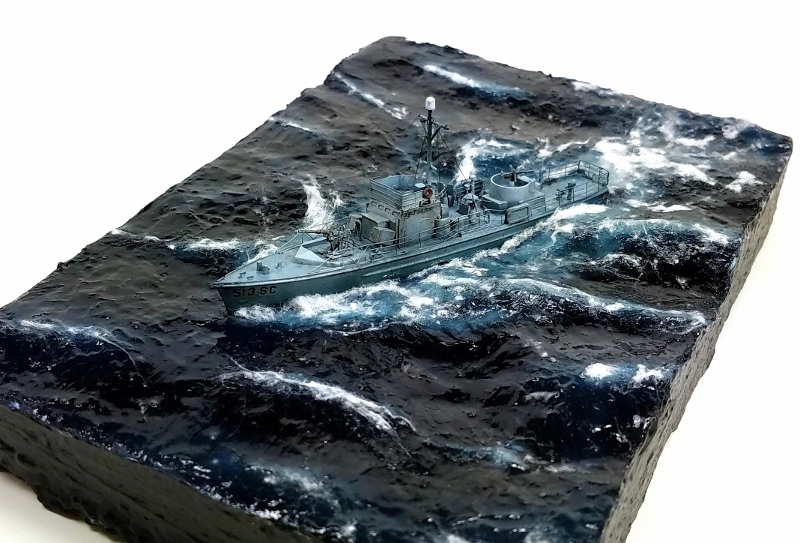 This time, I wanted to try some commercial grade dry wipes I had...these are similar to basically thick tissue paper. I ripped the small piece and stuck them into the surface. 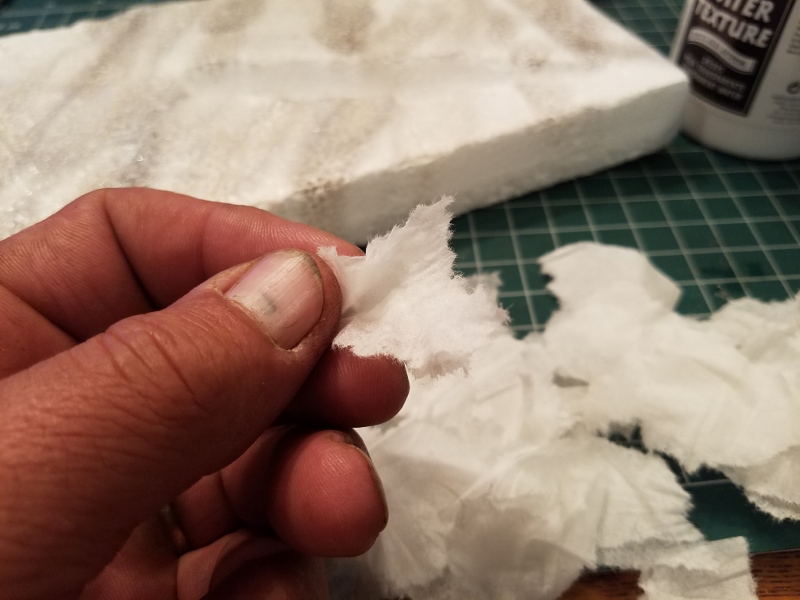 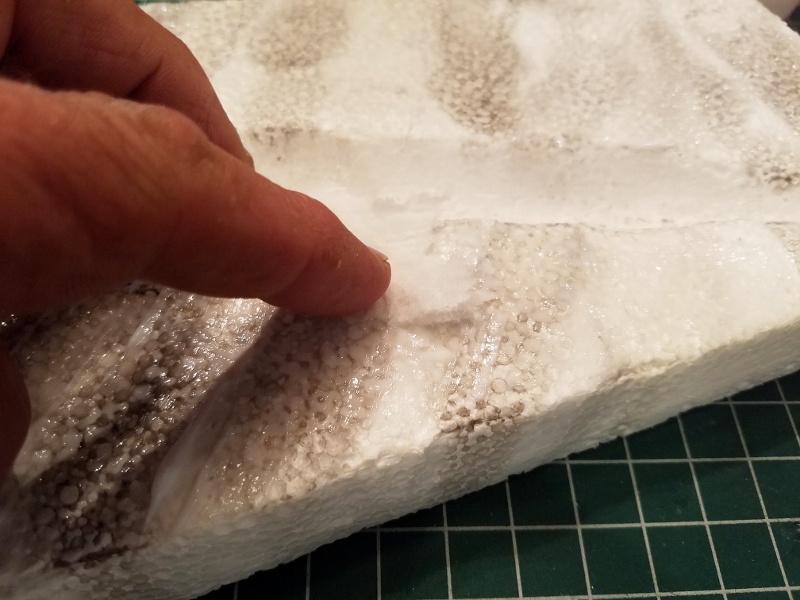 Once I was done covering the entire surface, I layered on another coat of Gloss Gel to Seal in the paper. This round, I allowed the Gel to fully dry before moving on. Typically this takes an hour, depending on how thick of a coat you put on and the environmental conditions in which you apply it.  |
|
|
|
Post by TRM on Jul 22, 2017 9:05:24 GMT -5
Yes, I split this up into two posts...LOL Onward... Some pic of the ready for paint base: 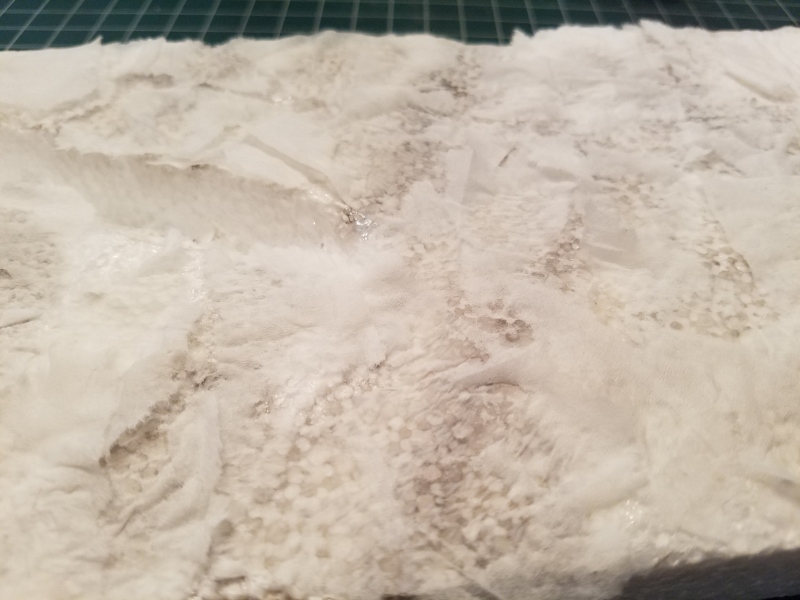 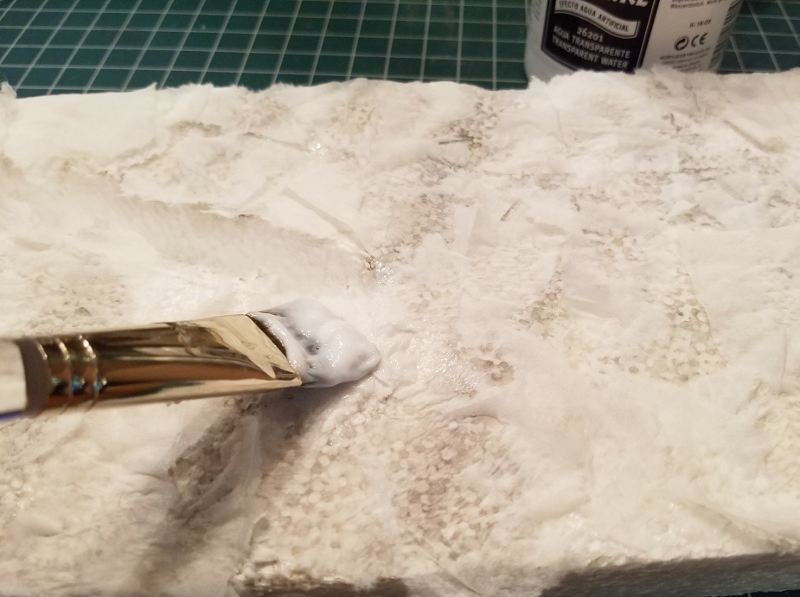 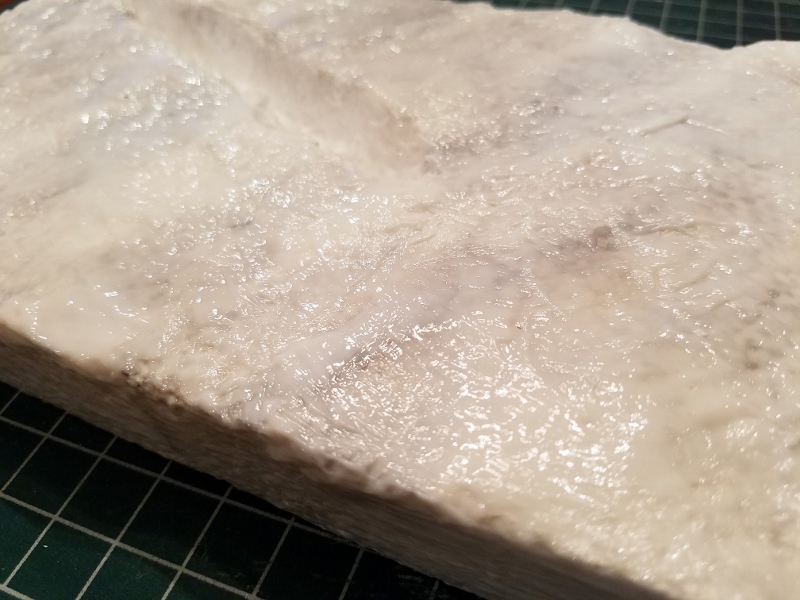 In my first trial of water, After the Gel had dried, I hand painted a mixture of Black, Dark Blue and a drop or so of white craft paint (you know....that cheap crap you buy from the craft stores) directly onto the surface. This took a couple applications as I did not use any primers. This time I will be shooting Black Primer using and airbrush to see if I can speed things up a bit. *Please note - The use of solvent based paints on EPS and XPS is not recommended unless fully sealed with the gel or an acrylic primer. Solvent will cause and exothermic reaction which will melt the EPS and XPS and it will give of harmful fumes which you really don't want to breath in. I would suggest sticking with acrylic for this stuff. It does not have to be any particular brand. In fact, as I mentioned, my first attempt was with craft paints that sold in large tubes at the craft store for about 15 bottles for $5 US. I will be back shortly after I spank this piece around with the primer and possibly some paint! |
|
|
|
Post by dierk on Jul 22, 2017 9:37:49 GMT -5
Looking good Todd! Admit it: you split it into two post to collect twice the number of 'likes'  Any more stunts like that and karma will have to be deducted   |
|
|
|
Post by TRM on Jul 22, 2017 9:41:38 GMT -5
LOL...duly noted my friend!  I tried to give myself some bad karma...it wouldn't let me!  So I guess I will wait to post the primer shots until I have some color down? Okay then!  |
|
|
|
Post by Leon on Jul 22, 2017 10:05:13 GMT -5
Nice start on the base Todd! I like the paper technique.  BTW....I corrected your miesweeper to minesweeper!   |
|
|
|
Post by TRM on Jul 22, 2017 10:11:39 GMT -5
Thank Leon! As for the name....But it is "mei" boat! LOL!!! Cheers brotha'!  |
|
|
|
Post by wbill76 on Jul 22, 2017 10:29:21 GMT -5
Now this one's coming together pretty fast! Looking good on all fronts there Todd.  |
|
|
|
Post by Leon on Jul 22, 2017 11:27:19 GMT -5
OPS..... me bad!!!!!!  |
|
|
|
Post by TRM on Jul 22, 2017 17:17:55 GMT -5
Thanks Bill! I am more into working the water...not that the kit isn't nice by all means. It's not too hard to get together...not as many ins and outs like lets say....a Graf Spee.  Okay...despite some thinking the multiple posts a day are for likes...well, maybe that number s a bit high since it is one person...DIERK! I decided to keep forging on here! In my earlier post I threatened to start laying some paint as soon as the acrylic gel dried.....that has happened...and I did!  First round was a little primer this time; black of course! 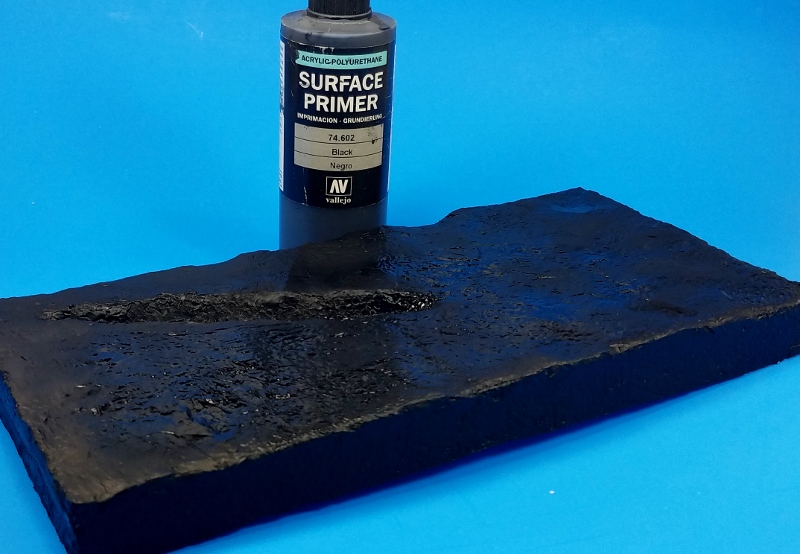 Although the black was wet in the picture, not too long after it went down, I grabs some colors to lay down the deep sea blue coloring. I mixed the black primer with a little Steel Blue and popped Blue (which really doesn't look like a blue...but I rolled with it anyway! ) Let's try a little white background to see if the color shows up! 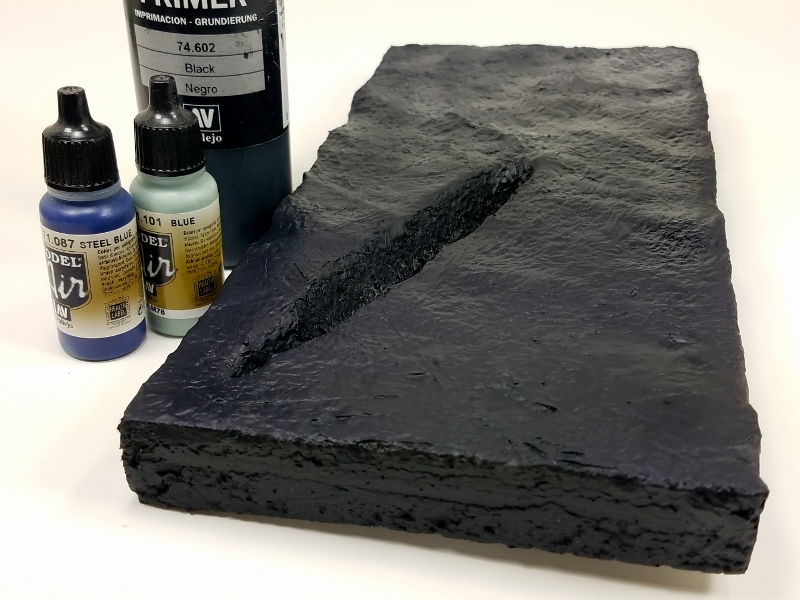 By using acrylics, I am able to steam forward quickly as there is very little dry time with the paints. Next stop...a quick coat of Gloss Gel ....again! This time, I added high points showing waves from the boat. 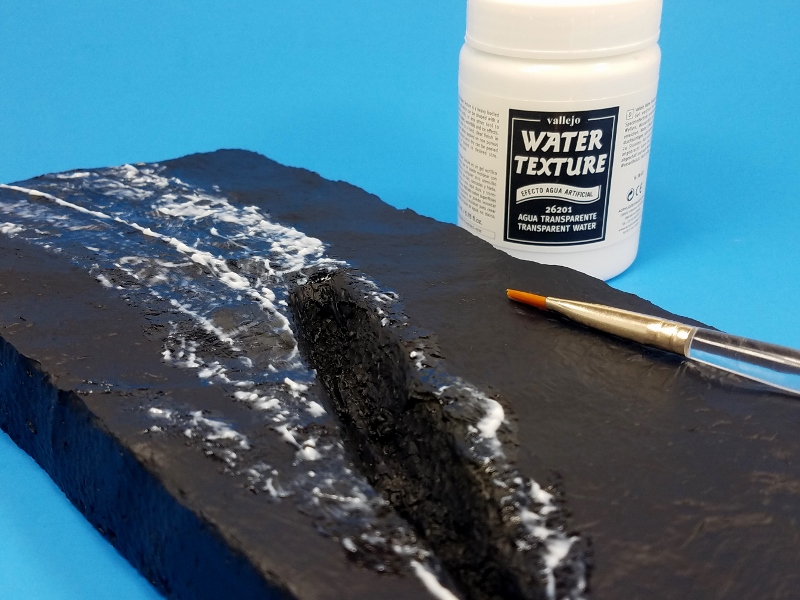 This took about a half hour to dry as it was no too think of and application. My next stop was the booth again. This time adding different blues, aquamarine...green blues or whatever you want to call them! LOL I do not have any specific set of colors to work with on this. I kind of grab what think looks the part and go with it. 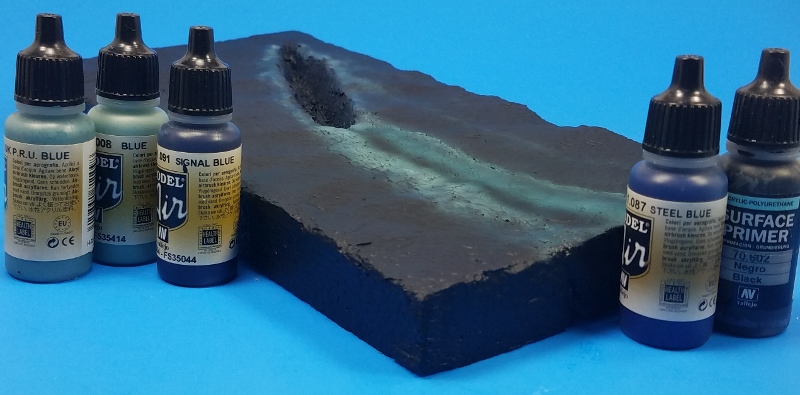 I think I am a little heavy on the color to start with, but I am determined to see how it will come out as is. So basically I used all of these colors either by themselves or mixing to get different tone. Again, most of this stuff I do by eye rather than specifics. These thin applications dry extremely quick allowing me to move on to one more stage before I have to stop and find something else to keep me occupied for a bit. So I am off to do that step and will be back shortly once it is done. Thanks for stopping by! |
|
|
|
Post by Leon on Jul 22, 2017 17:48:07 GMT -5
WOW...That is looking fantastic Todd! I like the effects your getting.  |
|
|
|
Post by Tojo72 on Jul 22, 2017 21:41:17 GMT -5
One medium I never worked with Todd,resin.Looks nice and the water is looking good also.
|
|
|
|
Post by dierk on Jul 23, 2017 4:15:25 GMT -5
Okay...despite some thinking the multiple posts a day are for likes...well, maybe that number s a bit high since it is one person...DIERK! I decided to keep forging on here! The others were just too polite to say anything and just quietly agreed with me  Water's looking good! |
|
|
|
Post by wbill76 on Jul 23, 2017 9:07:04 GMT -5
I can't say anything about Dierk's post and still remain in the 'quietly agreed' category, the ultimate catch-22!  I like the fact that you've chosen a curved wake Todd, adds a subtle dynamic to the whole scene. |
|
k1w1
Full Member
  
Member since: February 2015
Posts: 873
Feb 18, 2015 8:07:41 GMT -5
Feb 18, 2015 8:07:41 GMT -5
|
Post by k1w1 on Jul 23, 2017 9:22:55 GMT -5
That ripped paper appears to work really well. This is looking good. Replicating water is very interesting.
|
|
|
|
Post by TRM on Jul 23, 2017 12:13:43 GMT -5
Thanks Leon! Having fun with this. Each time I learn a little more...but I am happy with the results so far!  Thanks Anthony! Resin is a wildcard with me a well. These little ships are cool in that there are not a lot of part and the details a decent! Thanks again Dierk! LOL...I would expect nothing less form you my friend!  Thanks Bill! LOL..I agree too...just don't want to let Dierk know it...you know how those things go to his head.  I thought is might give me more opportunity for color. Plus I am working my way to more calmness in the water while wanting to rip into some big waves!  Thanks Shay! Water was one of those untapped techniques before now. Something I kept putting off. Now it seems to be something I want to just keep doing...LOL Okay...I think this might be the last installment with this! After running some of the lighter water colors in, it was time to start thinking about the white capped frothy stuff churned up in the wake. This started off with an application of Gloss Gel, again, but staying close to the areas I wanted to add the white. I did not need the thickness of the Gloss Gel so I cut it with water to make something thinner to work with. 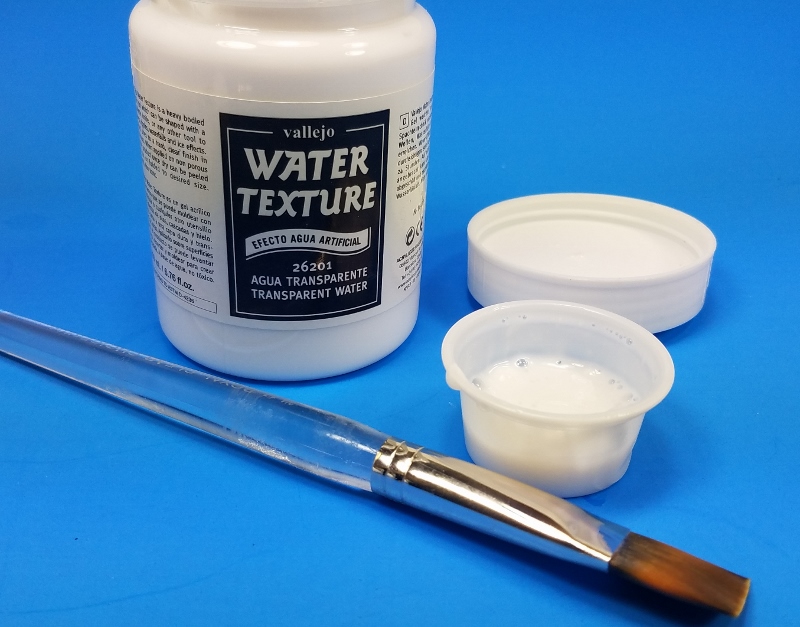 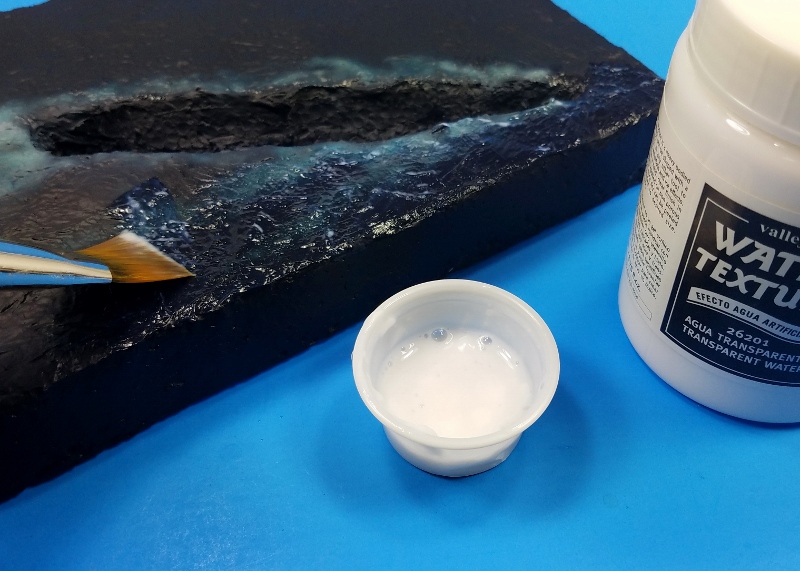 Next was to add the cotton. For this I am using a more synthetic cotton. Natural cotton ball tend to clump but the rayon versions pull apart nicely allowing just about any thickness. Just to not, I am still using the same cotton ball I used on the last project. Not too much is used to get the effect....depending on the look that you are going for. 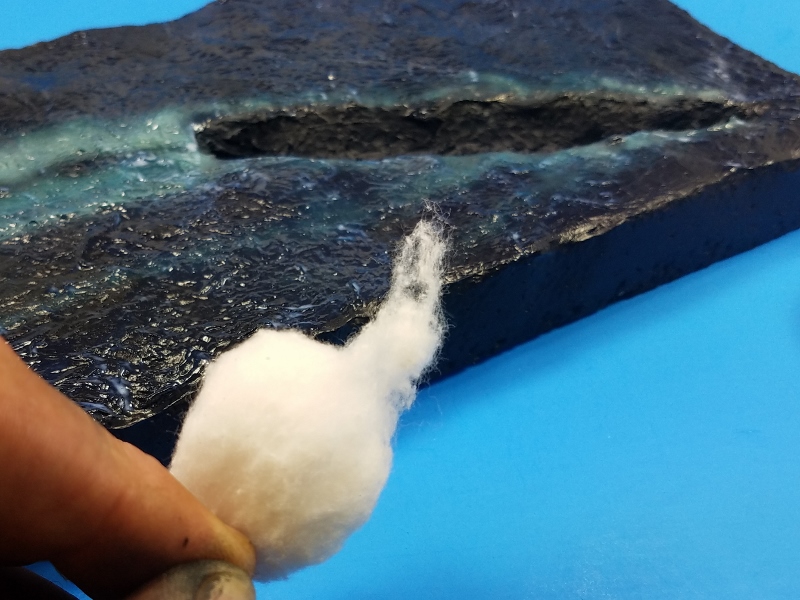 The cotton was placed into the wet thinned Gloss Gel. If it dries before you get to a particular area...simply put more on. The application is rough at first, but after you get a large enough area that you are comfortable working with done, go back with the same thinned Gel and lightly stipple and brush it down. Be aware of the fuzzies! If you miss any, tap it down with the brush and move on. 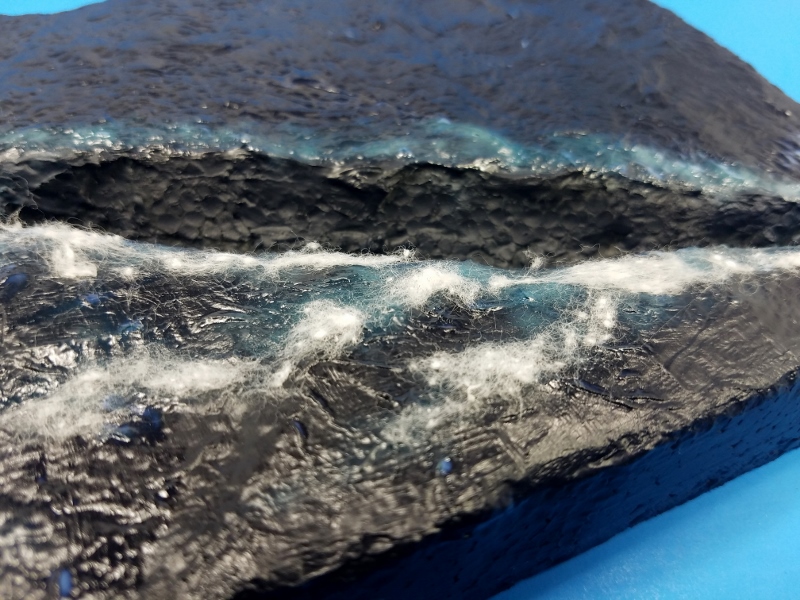 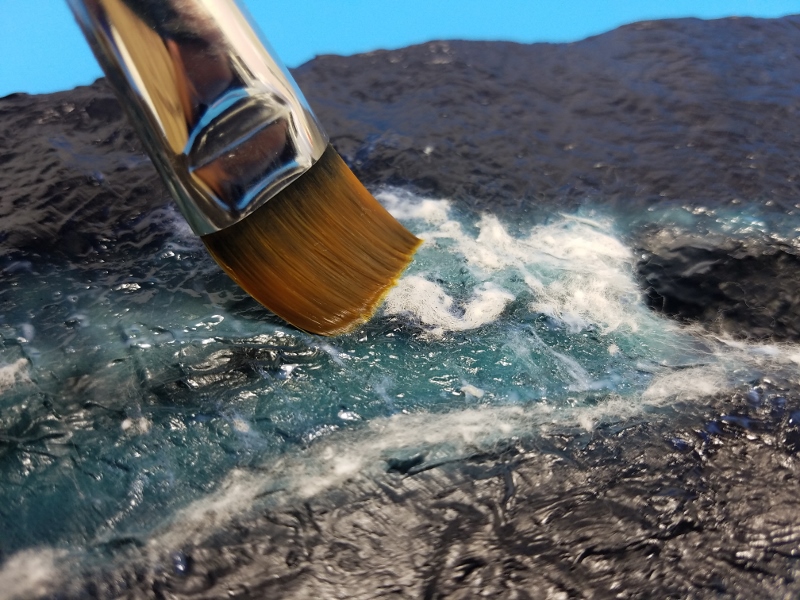 I tend to be one of those modelers that move right along quickly I guess. But I did comfortably sit and make the placement of the cotton without rushing and it probably took me about a half hour to 45 minutes. If you miss spots or just want to add more, dampen the areas and pop some cotton on. 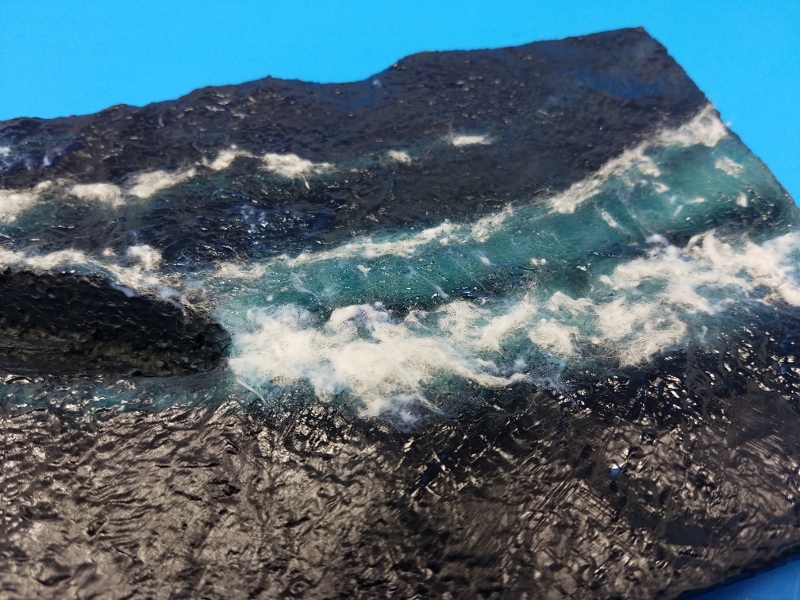 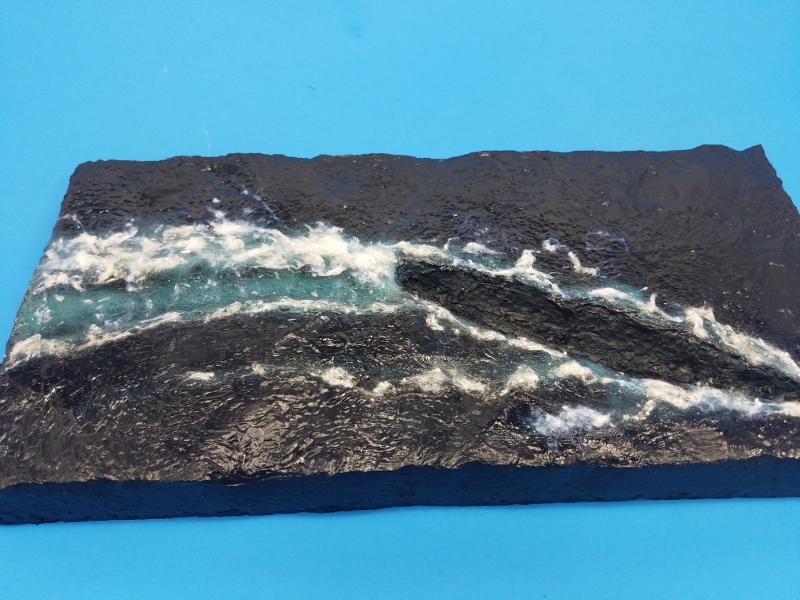 Before this next step, I did tone down some of the colors. This was done with a thinned version of the dark blue mix. I lightly airbrushed it over some sections to darken the contrast somewhat. For the final step, the high gloss finish. I chose to use Vallejo's Still Water effect. I dries quick and adds a super high gloss look to whatever it goes on. I used a wide brush and simply coated the entire surface. I did stay away from the white sections to start with. I went back closer into the colored areas with the Still water after.  That's pretty much it! I didn't go into painting of the ship. There is nothing weathered on it and it was only primed black with some lighter grey colors used to top it off. I did however go back after setting the boat and dampened the small openings around the hole and placed more cotton to filling the space and give a sense of the waves crashing along side the vessel. I will pop up some of the final pics in another post. (go ahead Dierk...say it!  ) |
|
|
|
Post by TRM on Jul 23, 2017 12:19:55 GMT -5
|
|
|
|
Post by Leon on Jul 23, 2017 18:48:00 GMT -5
Excellent finish Todd!
|
|
|
|
Post by TRM on Jul 23, 2017 20:36:18 GMT -5
Thanks Leon! I am pretty much hooked on these things now!  |
|
|
|
Post by wbill76 on Jul 23, 2017 20:47:27 GMT -5
I can see why you would be hooked, you've got a nice recipe that delivers an impressive result!  |
|