pt109
Full Member
  
Member since: April 2013
Stop staring at me! heheheh
Posts: 491 
|
Post by pt109 on Oct 11, 2017 17:36:00 GMT -5
|
|
|
|
Post by panzerjager2 on Oct 11, 2017 17:43:13 GMT -5
Pretty darn cool........ is it 1/35th or 1/16th         ? ? 
PJ2
|
|
|
|
Post by deafpanzer on Oct 11, 2017 17:56:59 GMT -5
Looking real good!!!
|
|
|
|
Post by TRM on Oct 11, 2017 17:58:07 GMT -5
Clean work...always good to see a T-34 on the bench!  |
|
pt109
Full Member
  
Member since: April 2013
Stop staring at me! heheheh
Posts: 491 
|
Post by pt109 on Oct 11, 2017 18:13:21 GMT -5
Hi PJ2, it's 1/35th, an old but goodie Dragon kit. Gonna add a small base for a simple dio with some figgies.
Thanks for the interest....
Paul
|
|
pt109
Full Member
  
Member since: April 2013
Stop staring at me! heheheh
Posts: 491 
|
Post by pt109 on Oct 11, 2017 18:16:38 GMT -5
Thanks everybody else for the comments much appreciated.
Mostly OOB, with some PE for the engine grill and some brass hand holds, and wait for it.......the kit gun barrel heheh, and some plastic driver periscopes.
Paul
|
|
|
|
Post by Leon on Oct 11, 2017 18:31:14 GMT -5
Off to a nice start Paul! Your cast work on the turret looks good.  |
|
pt109
Full Member
  
Member since: April 2013
Stop staring at me! heheheh
Posts: 491 
|
Post by pt109 on Oct 11, 2017 18:36:52 GMT -5
Thanks Leon, much appreciated...
|
|
|
|
Post by Tojo72 on Oct 12, 2017 7:17:34 GMT -5
Looks really good so far
|
|
|
|
Post by dierk on Oct 12, 2017 9:37:32 GMT -5
Can't say no to a nice T-34!
Looking good Paul, although you may want to consider using thinner wire for the grab handles next time?
|
|
|
|
Post by Tobi on Oct 12, 2017 10:42:56 GMT -5
Very clean and tidy build so far, I like the cast structure of the turret.
The weld beads are looking probably a tad too regularly and perfectly shaped for a Russian tank...
Also think of the removed feeder heads!
|
|
pt109
Full Member
  
Member since: April 2013
Stop staring at me! heheheh
Posts: 491 
|
Post by pt109 on Oct 12, 2017 16:56:07 GMT -5
Dierk,
Yea I thought they might be a tad too thick, it's all I had at the time, but looking at photos sometimes I see different thicknesses....thanks for the feedback, next time will be better heheh.
|
|
pt109
Full Member
  
Member since: April 2013
Stop staring at me! heheheh
Posts: 491 
|
Post by pt109 on Oct 12, 2017 16:58:41 GMT -5
Tobi, I decided to leave the fenders on for a vehicle not in combat too long? Always something to consider though as these tanks got pretty beat up.
About the welds, I made them with solder, a little harder to work with I guess, oh well maybe the welder was top of his class!
Just kidding, and you're right.
Thanks, Paul
|
|
|
|
Post by Tobi on Oct 13, 2017 0:17:53 GMT -5
Misunderstanding Paul. I wasn't talking about the fenders, I meant the marks on the turret from the foundry dressing shop, where left over material was cut after the casting process. Maybe I used the wrong term? In German it's called "Anguss" and "Speiser" and the removal work is done in the "Putzerei". Take a look at the lower right of the turret in the picture, though these marks are less prominent than on the IS-series of tanks.. 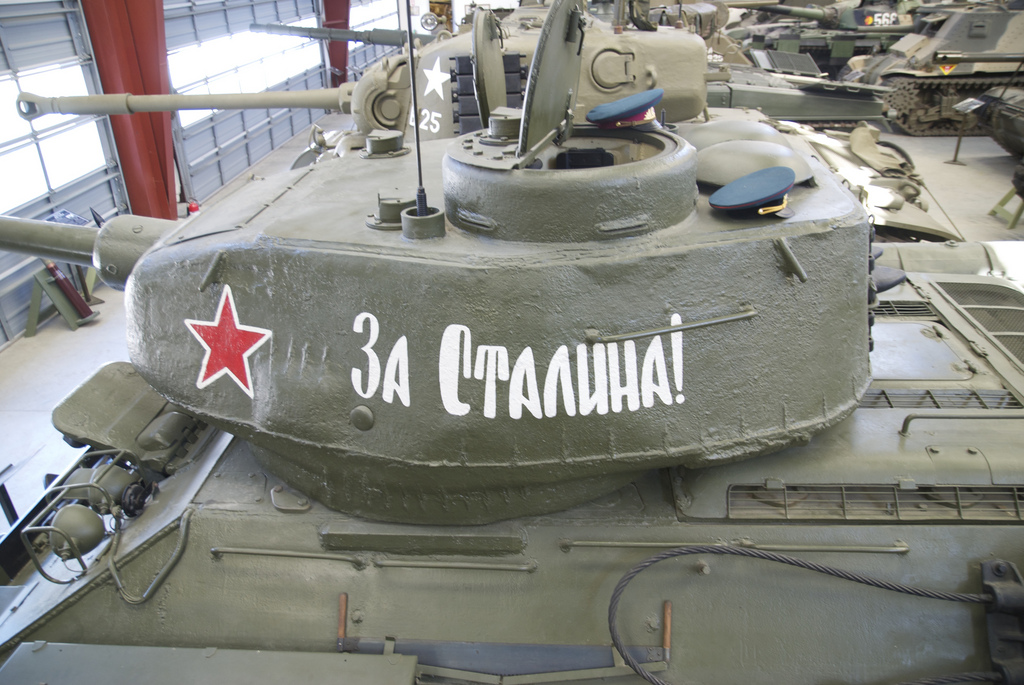 I remember some years ago standing on the Eurosatory military fair in Paris in front of an Ukrainian T-80U. The quality of the welding was, phew, meager compared to any western standard. I have seen better welded excavator buckets in southern Europe... |
|
pt109
Full Member
  
Member since: April 2013
Stop staring at me! heheheh
Posts: 491 
|
Post by pt109 on Oct 13, 2017 5:46:30 GMT -5
Thanks for the clarification Tobi, my bad.
Pau;
|
|
pt109
Full Member
  
Member since: April 2013
Stop staring at me! heheheh
Posts: 491 
|
Post by pt109 on Oct 16, 2017 18:26:08 GMT -5
Small update.... Fuel cans not glued on yet, a little interference between the two. Road wheel hubs glued on one side so far....nicely detailed kit. 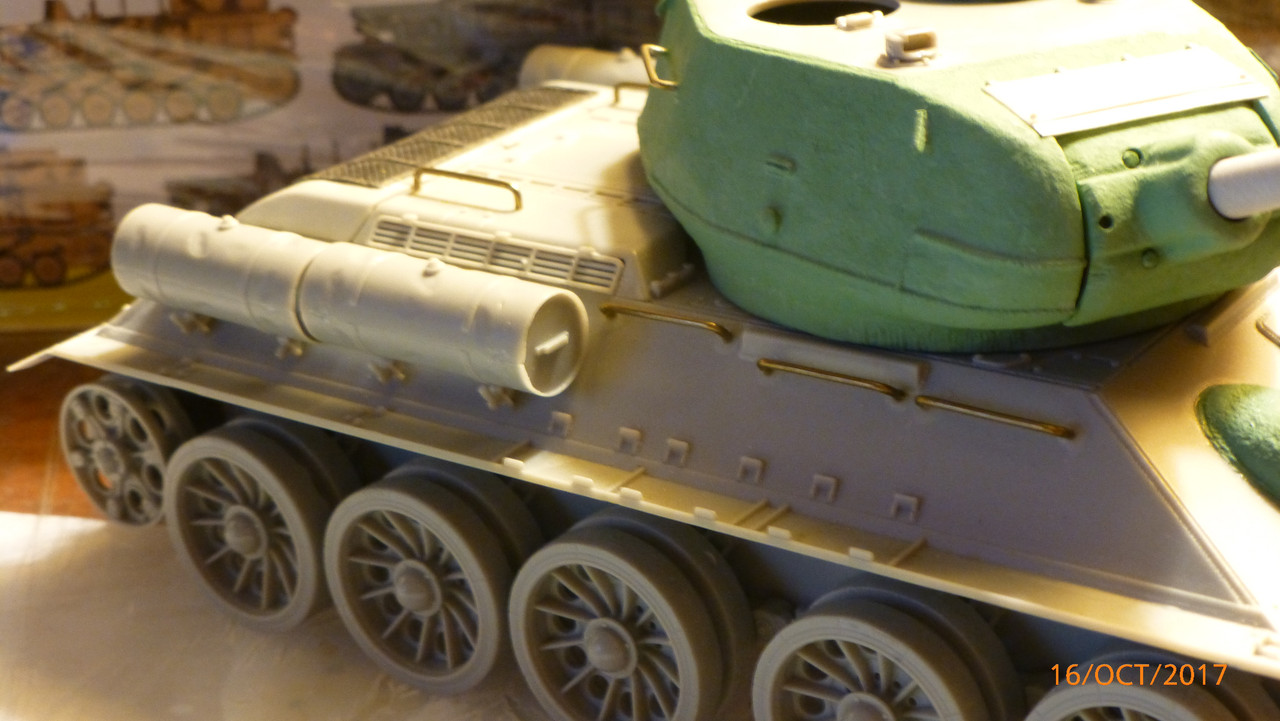 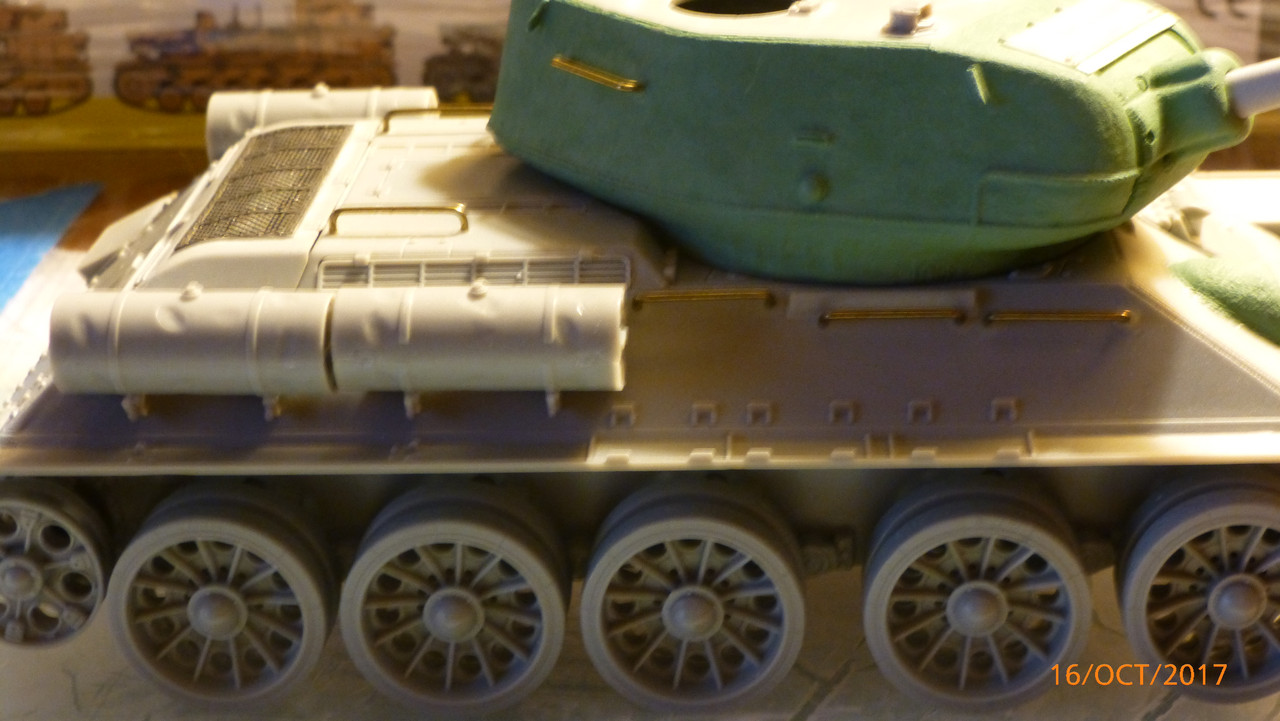 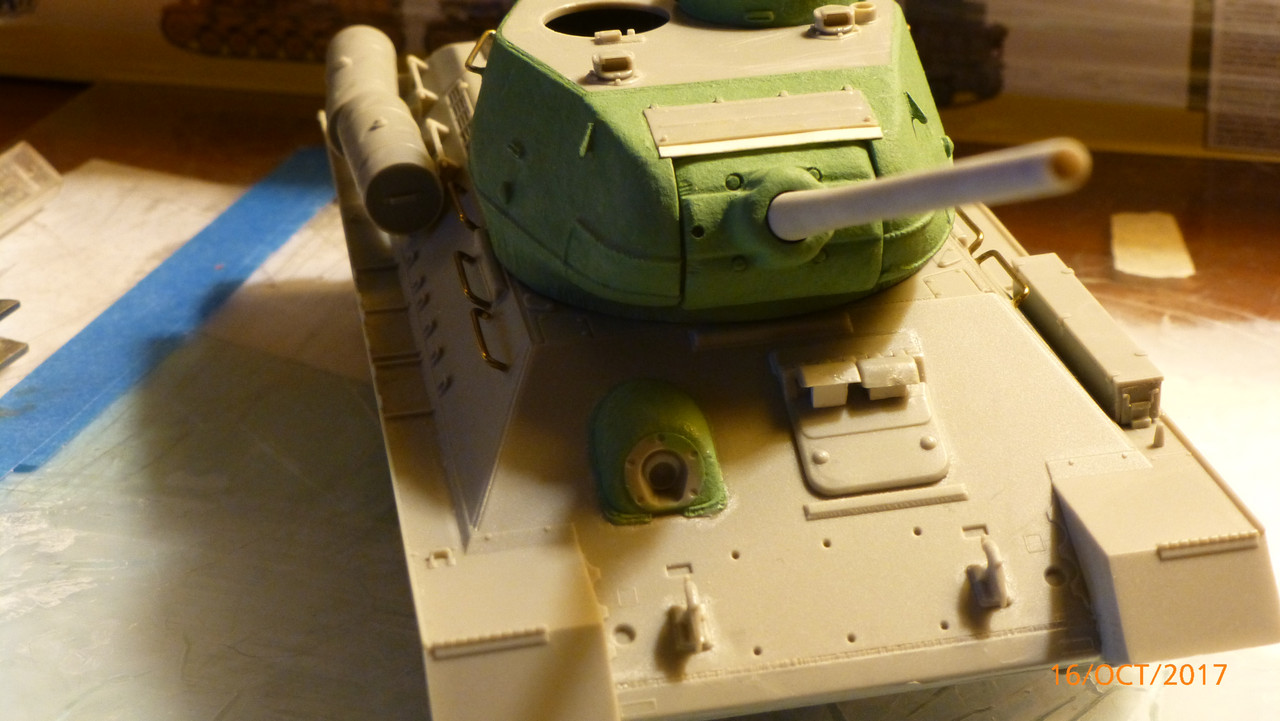 |
|
|
|
Post by dierk on Oct 17, 2017 3:45:36 GMT -5
Try and turn the front fuel cell around - I think it might fit then.
If you want to be really anal, add a weld bead in the 2 o'clock position on the cells (as seen from the front)
|
|
|
|
Post by Leon on Oct 17, 2017 4:41:40 GMT -5
Nice progress Paul!
|
|
|
|
Post by TRM on Oct 17, 2017 5:35:15 GMT -5
One step at a time1! Looking good...keep it going!
|
|
pt109
Full Member
  
Member since: April 2013
Stop staring at me! heheheh
Posts: 491 
|
Post by pt109 on Oct 17, 2017 16:04:25 GMT -5
Hey Dierk, That one's on me. just noticed it's backwards....duh on my part. I thought the weld faced outward? Or maybe just me? I am anal by the way heheh. Thanks Leon...... TRM, thanks boss.... Still gotta add some putty to the supports for the fuel cans since they don't completely cover the holes. Much appreciated guys, Paul PS Wait till you see my next project....woo hoo for now it will remain a mystery, basically just starting.   Hint: It's not green....   |
|
|
|
Post by dierk on Oct 18, 2017 4:16:51 GMT -5
Hey Dierk, That one's on me. just noticed it's backwards....duh on my part. I thought the weld faced outward? Or maybe just me? I am anal by the way heheh. If fitted properly the weld should be on the inside - that's not to say they weren't sometimes mounted on the 'wrong' side. You have no idea how many pics I had to look through until I found this (for discussion purposes only. Source 'Mythical Weapon') 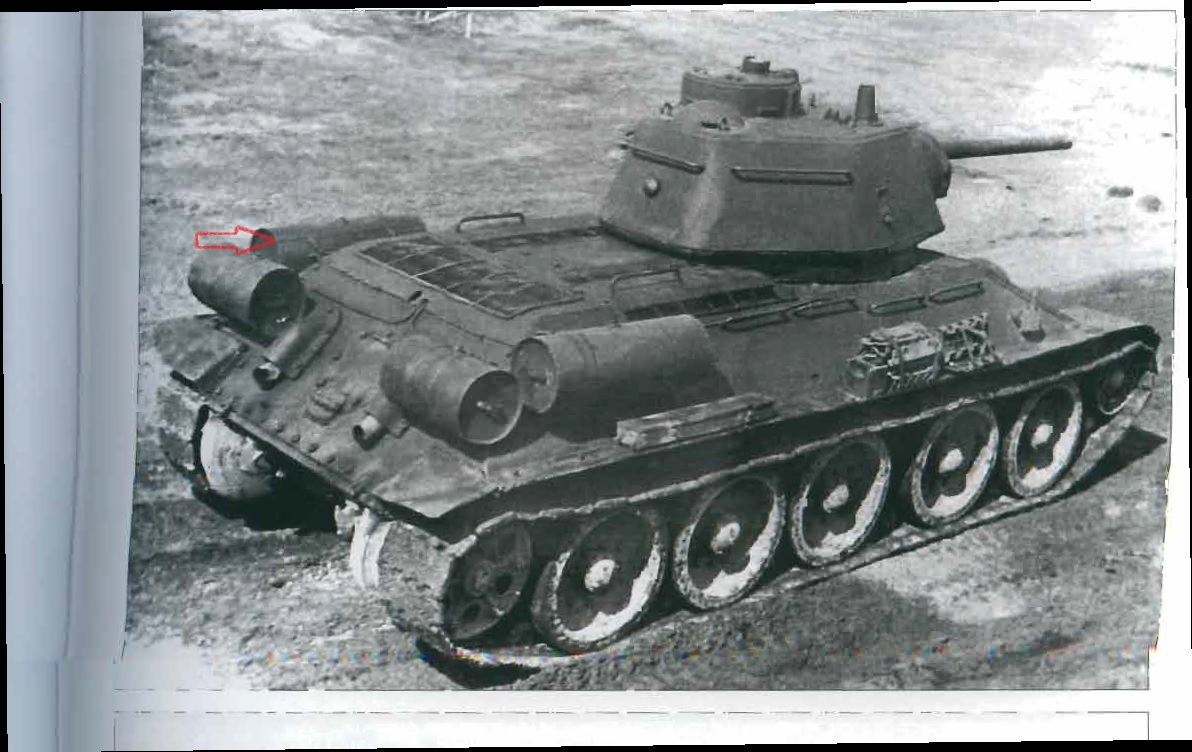 |
|
pt109
Full Member
  
Member since: April 2013
Stop staring at me! heheheh
Posts: 491 
|
Post by pt109 on Oct 24, 2017 20:11:17 GMT -5
Hi Guys, I'm trying to finish up, just making small progress so far. Another small update....good shot of fuel cans, they all are the same, so I added a little putty to fill in the symmetrical dents. Still needs more obviously. 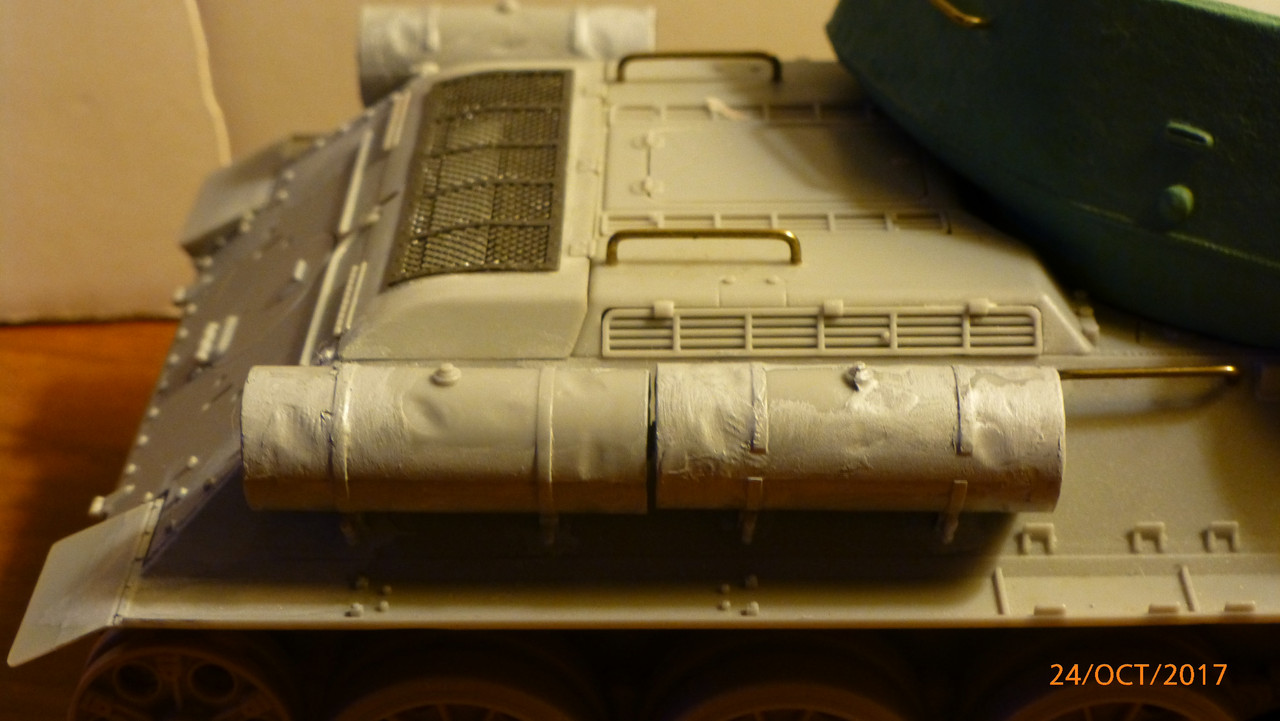 Overall shot of rear plate and not sitting low enough on the ends, maybe I can add some putty....? Seems a common issue with these Dragon kits. 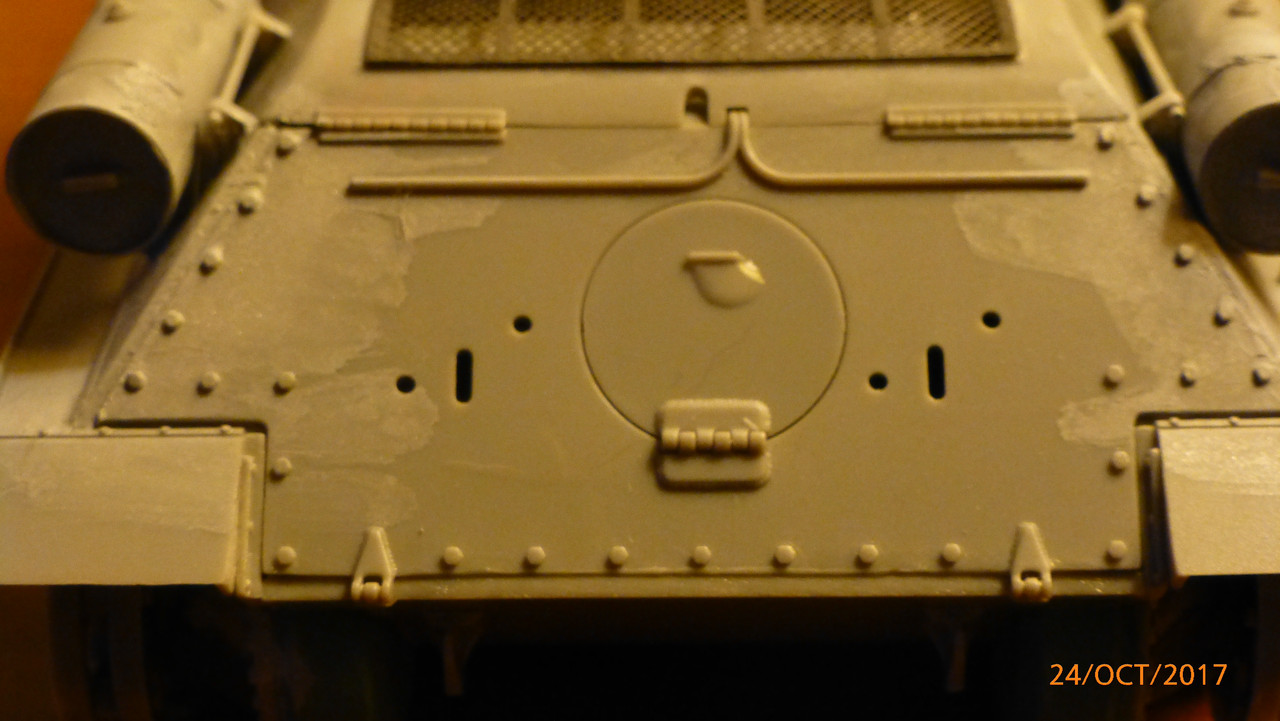 Some hairs showed up from the Q-tip.....I will thin that stuff out with liquor thinner. A little issue with the rear plate edge. Noticed a drop of water on the rear hatch. 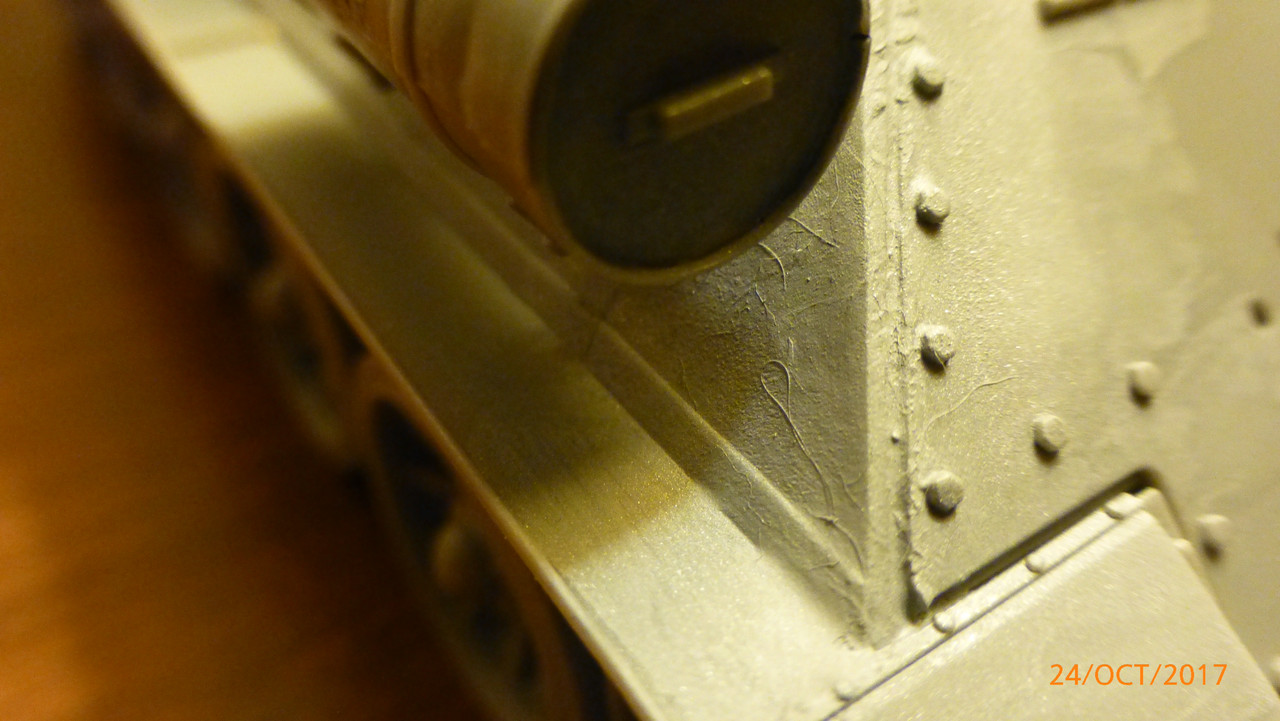 Bottom photo shows the brackets for the fuel cans, I broke one of the small pins on the bottom, which I can replace with styrene rod. There was a nasty sink mark running up the rear side plates, so I had to add quite a lot of putty to fill these in.... 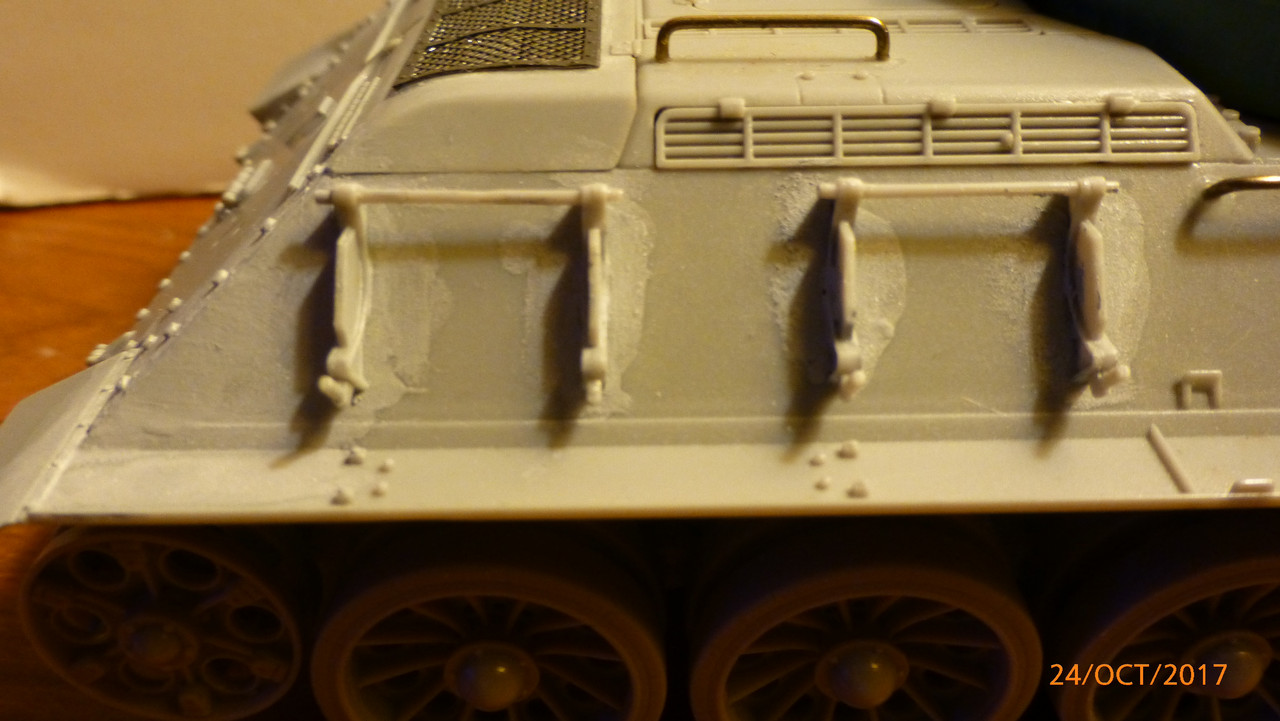 Thanks for looking! All comments welcome...Paul |
|
|
|
Post by rbaer on Nov 2, 2017 9:05:22 GMT -5
I was gonna throw in, the rear plate bolted in, so a small but uniform gap would seem appropriate.
Fine detail work, well done so far.
|
|
pt109
Full Member
  
Member since: April 2013
Stop staring at me! heheheh
Posts: 491 
|
Post by pt109 on Mar 28, 2018 21:14:05 GMT -5
Hi Guys, I can finally post some photos, small update....got about 6 projects going on so this one is almost there.... 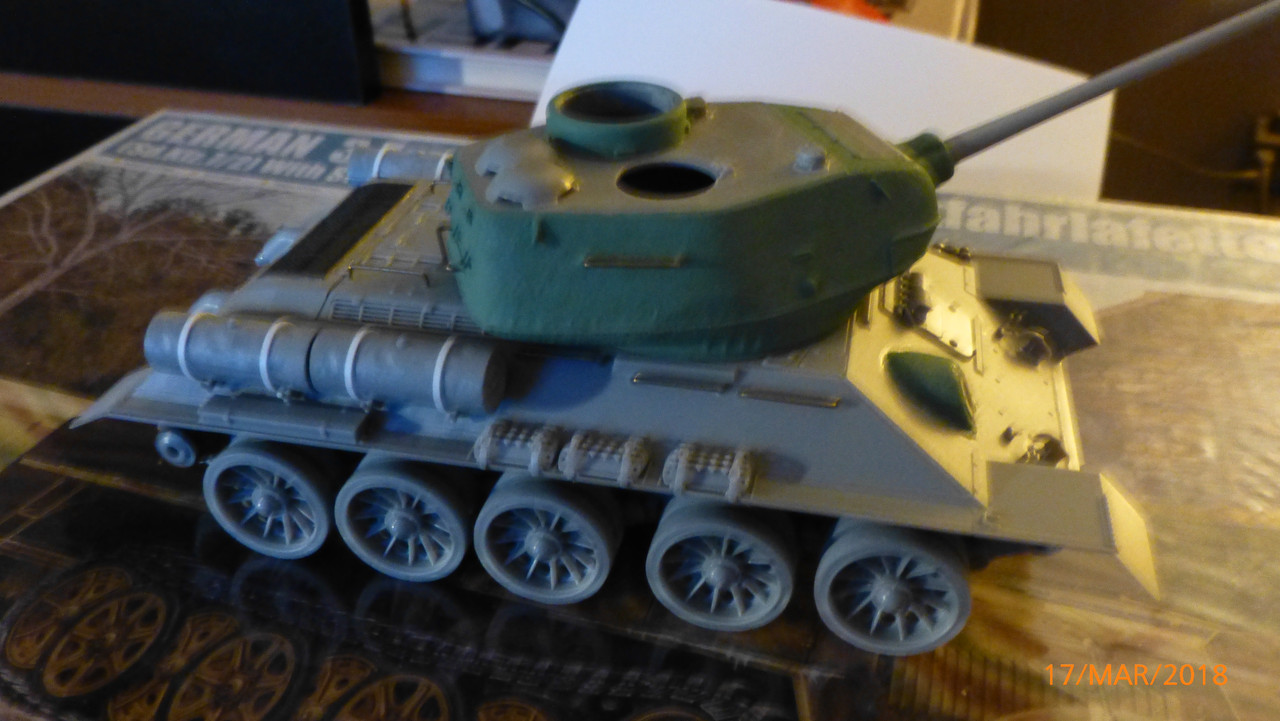 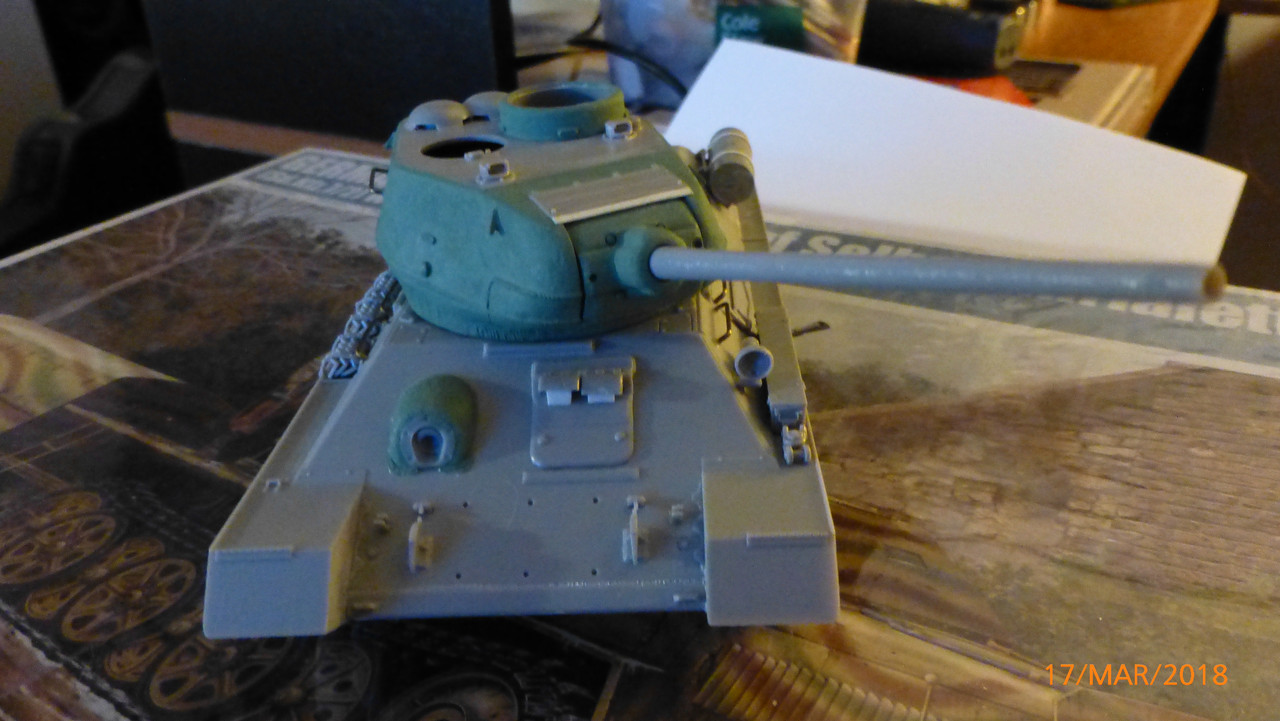 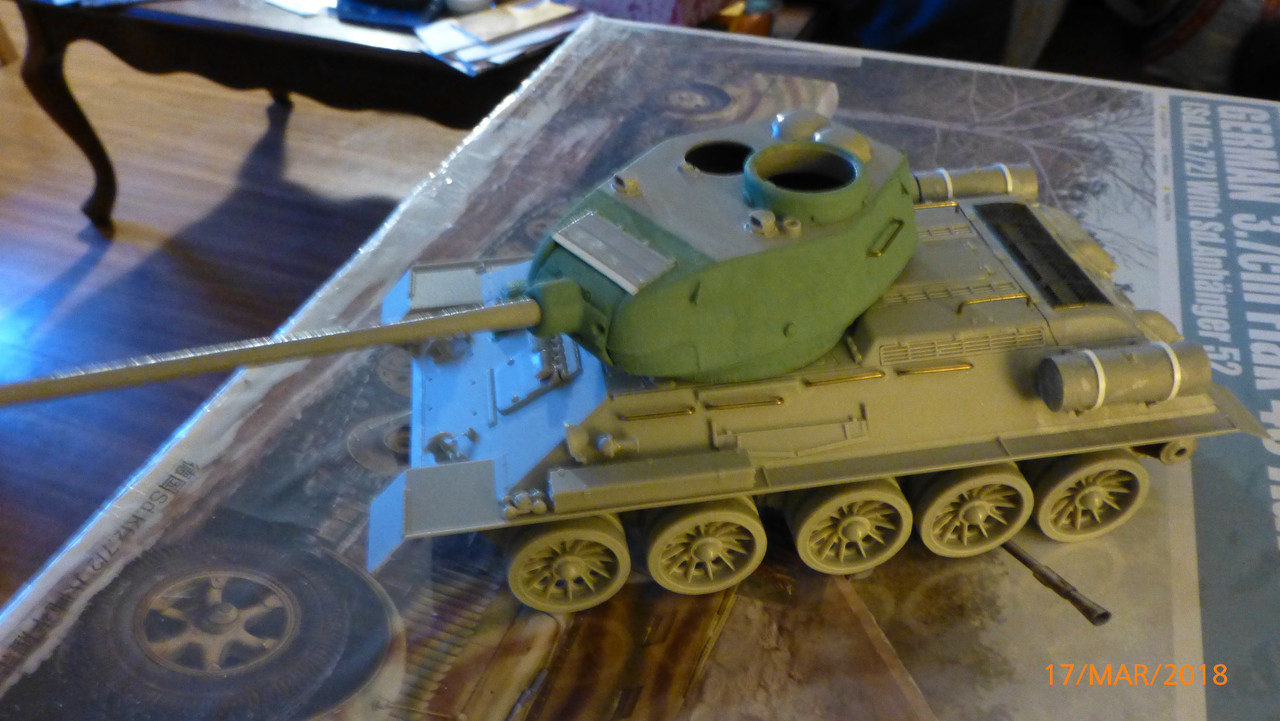 Sorry first photo is a little blurry, last three are more recent and better. Still got to finish the tracks and I think tow cable, I left the MG off till after painting...sorry it took so long! 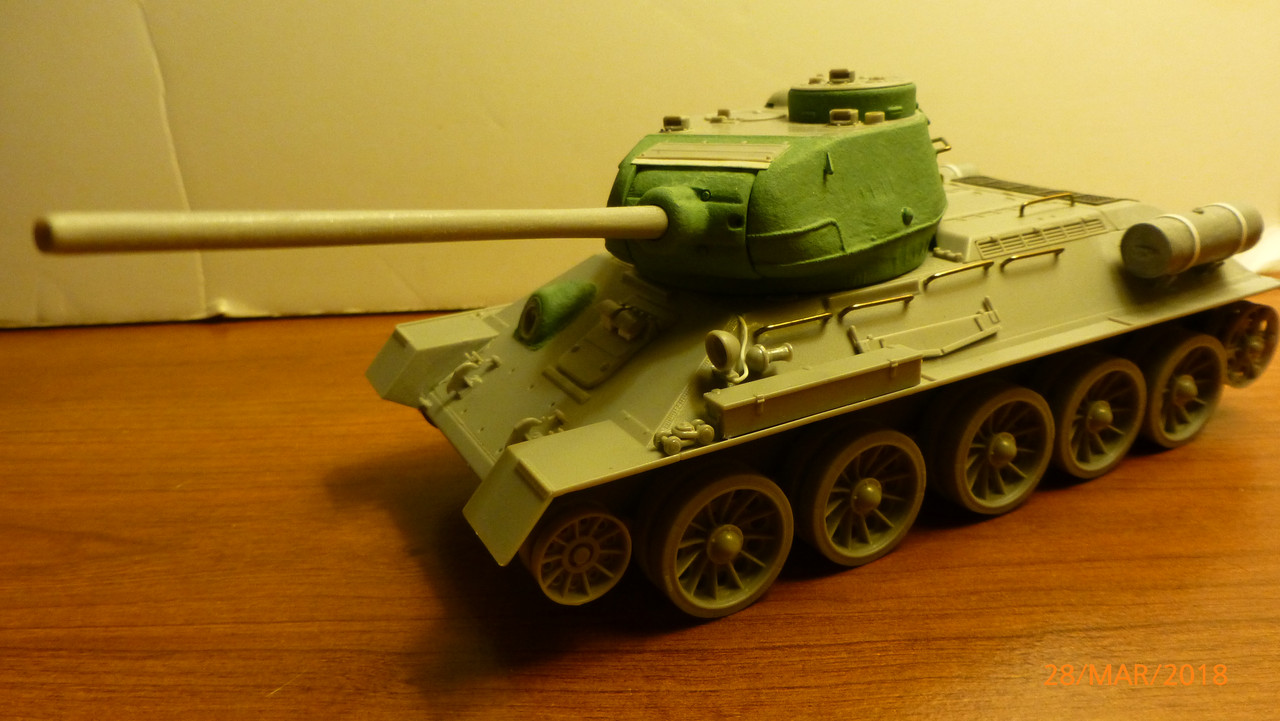 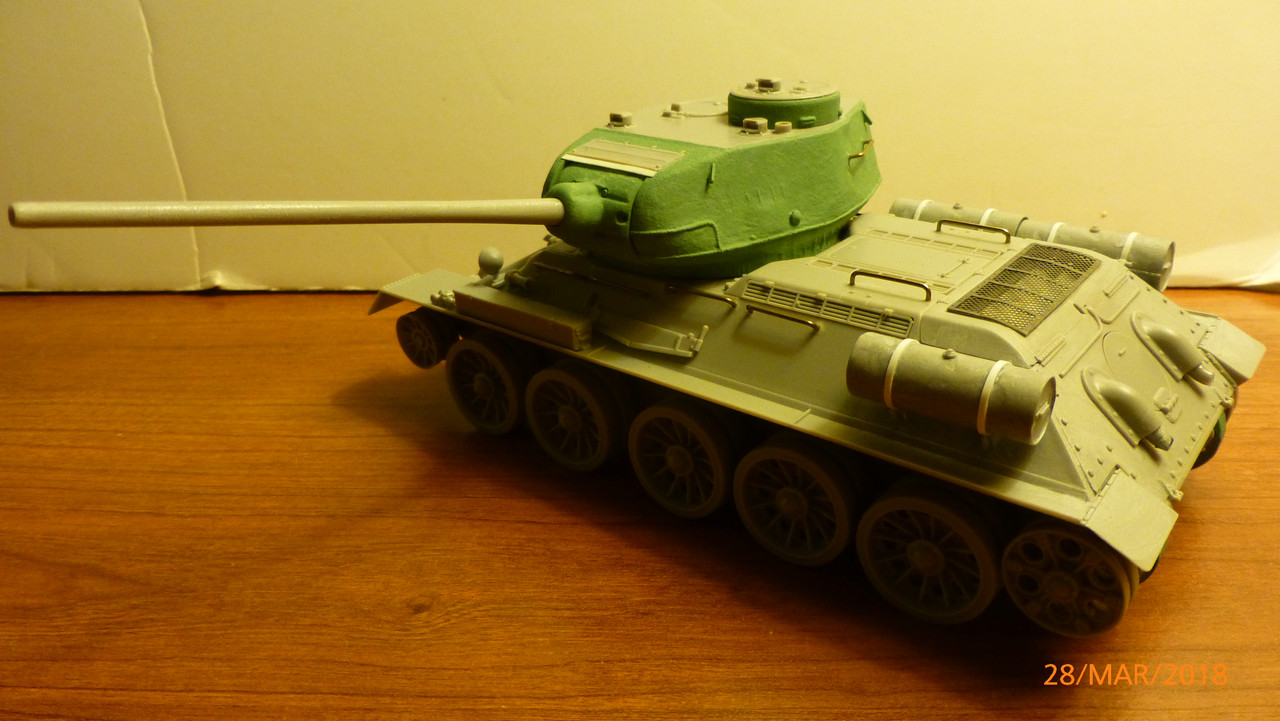 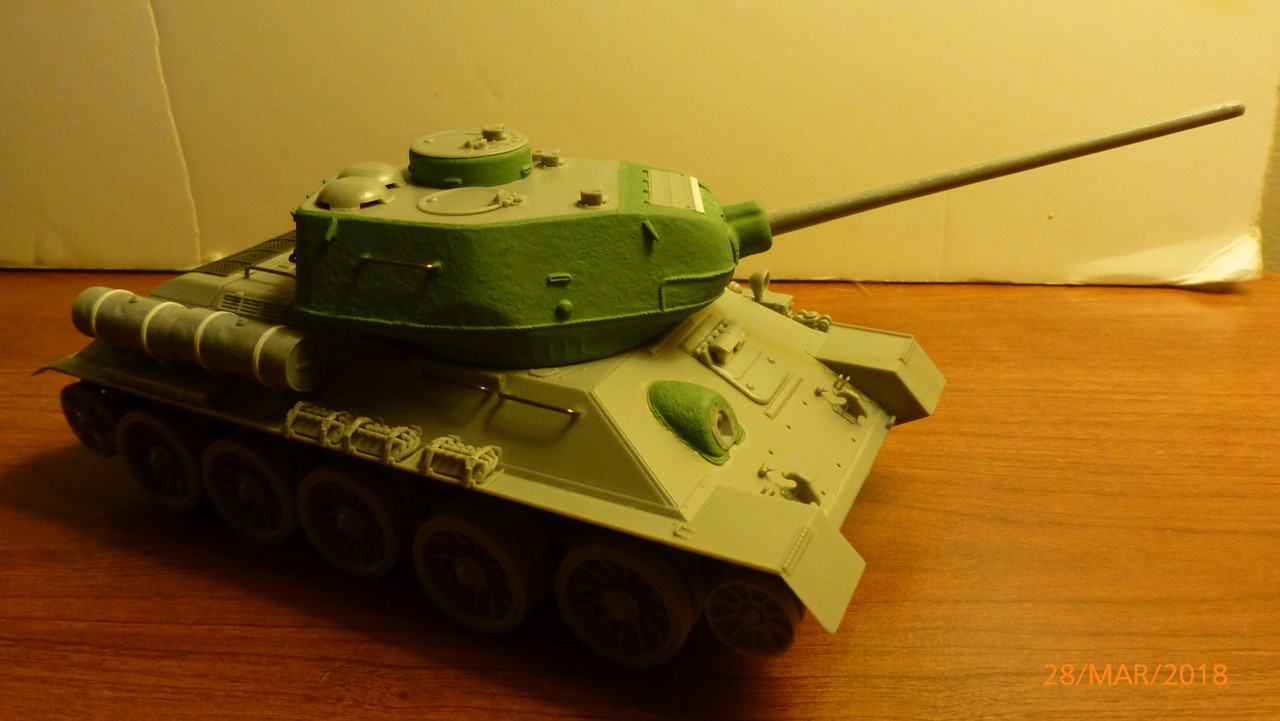 Hope you likie! Cheers, Paul |
|
pt109
Full Member
  
Member since: April 2013
Stop staring at me! heheheh
Posts: 491 
|
Post by pt109 on Mar 28, 2018 21:36:29 GMT -5
A little insight as to how I got to this point in the build......
For some dumb reason, I glued 2 incorrect halves together for one fuel can, so I decided to add some plastic strip to cover my boo boo and I just think they look better with the added straps, you can see the mistake in an earlier photo.
Will add the headlight after painting as well. Gun barrel is straight from the box. Lost the headlight wire so added that from plastic rod.
Overall a nice kit, went together very good, only major change was adding the turret/MG housing/final drive cast effect from Mr.Surfacer mixed with weathering power.
Thanks for the interest!
Paul
|
|
|
|
Post by Leon on Mar 29, 2018 3:49:43 GMT -5
Nice progress Paul!
|
|