paulh.
Senior Member
   
Member since: November 2011
build, fail, learn, succeed - ENJOY
Posts: 2,389
Nov 15, 2011 15:54:51 GMT -5
Nov 15, 2011 15:54:51 GMT -5
|
Post by paulh. on May 22, 2012 15:38:44 GMT -5
Hi folks, A couple of weeks ago I sat in on a demo by a David Wright of Dovedale models when he demonstrated the techniques he uses to build some absoloutely cracking model buildings. Inspired, I decided to try out some of the techniques he used. The core of this buildis 5mm foam board, which I've covered in a coating of ready mixed polyfilla- though Dave used DAS Pronto air-drying clay. I've tried it but just find it a bit too fiddley. The cut-out is sized for the 1/35 Minimart Garage/Barn door from the buidling accesories set. Once dried I ran it over with some wet and dry to even things out and then got stuck in with a doulbe ended scribber. The first things to complete were the door frame and arch. Once I was happy with those I just worked on filling in the spaces. I've gone for a simple stone type finish. Still have to complete the two sides but have to say I''m happy with how this is turning out so far.  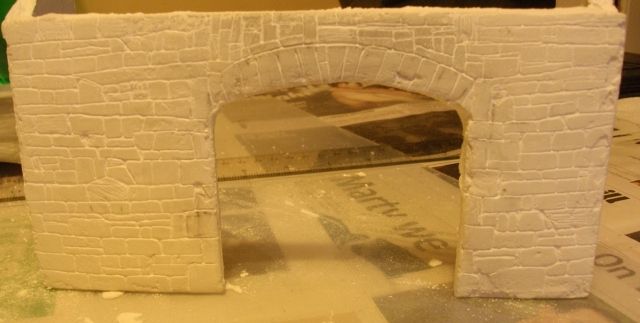 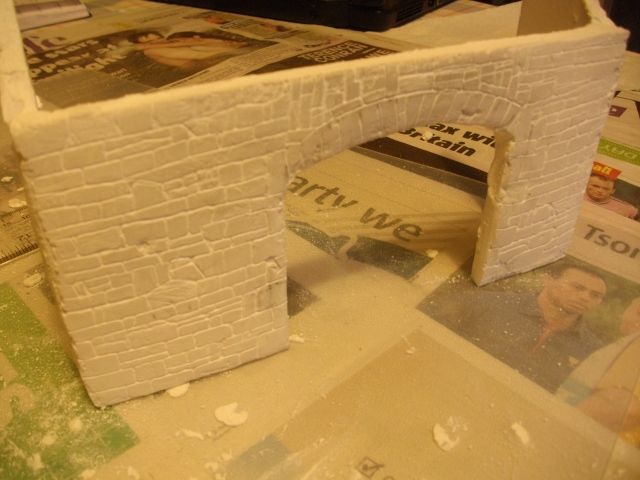 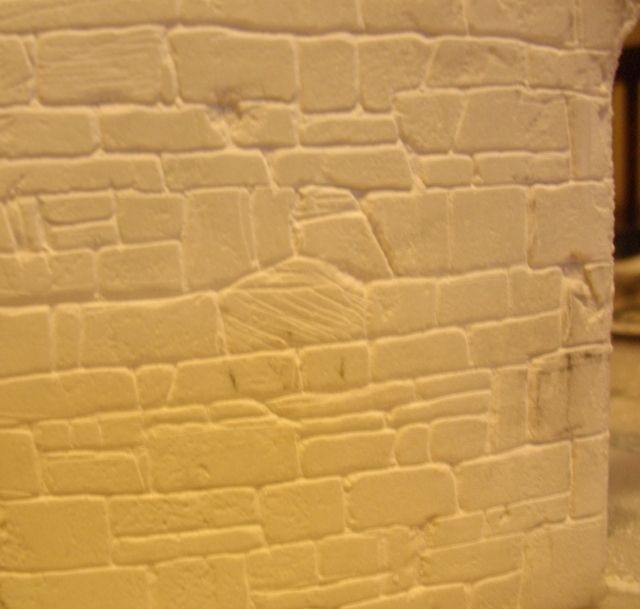 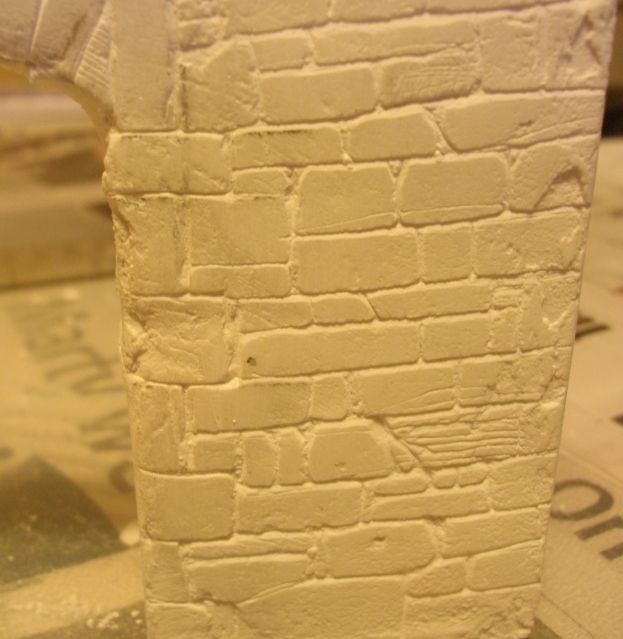 Any and all comments graciuosly wlecomed Paul |
|
chris0423
Full Member
   Aug 2014 MoM Winner
Member since: February 2012
Posts: 528
Feb 23, 2012 17:08:25 GMT -5
Feb 23, 2012 17:08:25 GMT -5
|
Post by chris0423 on May 22, 2012 15:51:41 GMT -5
Paul,
This looks superb, simple things are the best !.
Looking forward to see how you paint and weather it.
Chris,
|
|
paulh.
Senior Member
   
Member since: November 2011
build, fail, learn, succeed - ENJOY
Posts: 2,389
Nov 15, 2011 15:54:51 GMT -5
Nov 15, 2011 15:54:51 GMT -5
|
Post by paulh. on May 22, 2012 15:57:17 GMT -5
No firm plans just yet jackwagon, just trying something new out to be honest. I'm sure it'll end up as part of some scene dressing at some point.
Boo, Chris - thanks guys.
|
|
|
|
Post by spud on May 22, 2012 16:00:34 GMT -5
very nice paul that was my next thing to try with foam board
|
|
paulh.
Senior Member
   
Member since: November 2011
build, fail, learn, succeed - ENJOY
Posts: 2,389
Nov 15, 2011 15:54:51 GMT -5
Nov 15, 2011 15:54:51 GMT -5
|
Post by paulh. on May 23, 2012 15:39:48 GMT -5
Cheers Spud- give it a lash- its dead easy. Wel i know this looks like S**te but I've given it a heavy wash of lampblack oil and wipped the surface over with some kitchen towel to leave the majority of the colour in the mortar lines. 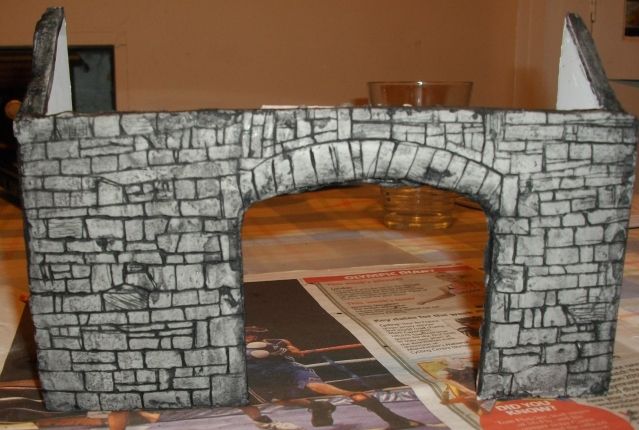 Once this dries it'll be a case of picking out the indiidual stones with various Vallejo greys and browns. I promise it will start to look better soon...  p |
|
|
|
Post by spud on May 23, 2012 16:16:28 GMT -5
hehe well it looks good to me paul it is only the start  |
|
paulh.
Senior Member
   
Member since: November 2011
build, fail, learn, succeed - ENJOY
Posts: 2,389
Nov 15, 2011 15:54:51 GMT -5
Nov 15, 2011 15:54:51 GMT -5
|
Post by paulh. on May 24, 2012 15:47:22 GMT -5
A few different Vallejo Grey shades followed by a liberal application of Vallejo pigment and this is what it now looks like: 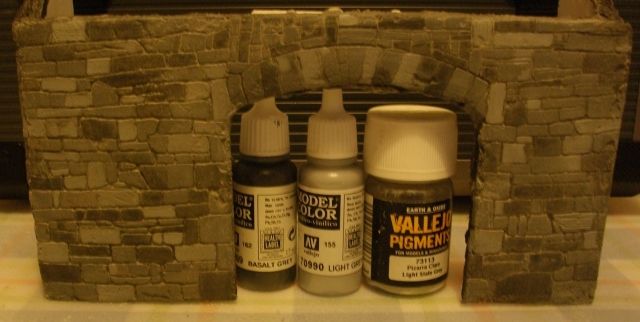 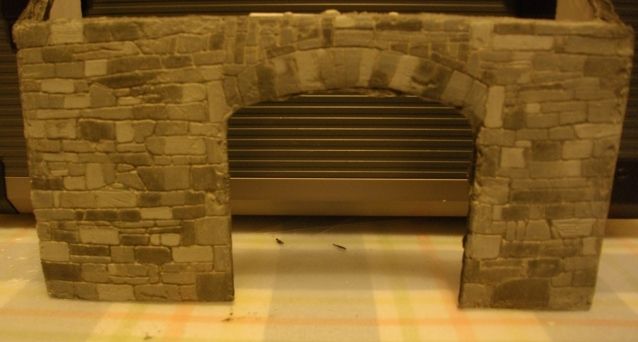 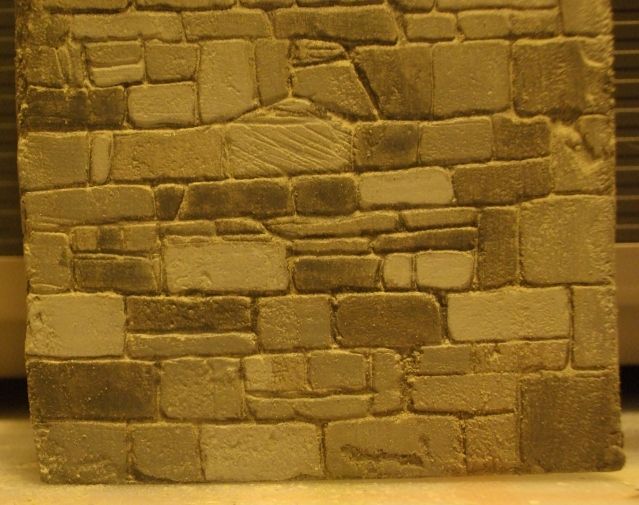 Still needs a roof and doors to sort out and then some sort of base thingy ... ACW P |
|
paulh.
Senior Member
   
Member since: November 2011
build, fail, learn, succeed - ENJOY
Posts: 2,389
Nov 15, 2011 15:54:51 GMT -5
Nov 15, 2011 15:54:51 GMT -5
|
Post by paulh. on May 24, 2012 16:23:05 GMT -5
Cheers jackwagon . Just need to figure out what to actually do with it once finished!
|
|
|
|
Post by spud on May 24, 2012 16:25:22 GMT -5
fantastic paul,
|
|
multicam
Senior Member
   
Member since: January 2012
Nate
Posts: 2,039
Jan 10, 2012 14:35:41 GMT -5
Jan 10, 2012 14:35:41 GMT -5
|
Post by multicam on May 24, 2012 16:34:04 GMT -5
This looks really good Paul! Nice work. The details and variation of the stones look superb. Color's great too;)
|
|
Paul P.
Senior Member
    May 2012 MoM Winner
Member since: November 2011
Posts: 1,686
Nov 15, 2011 17:14:40 GMT -5
Nov 15, 2011 17:14:40 GMT -5
|
Post by Paul P. on May 24, 2012 17:21:07 GMT -5
Really nice work there Paul, worth a few figures in there make a great scene
Paul
|
|
|
|
Post by tonylee-Rest In Peace on May 24, 2012 19:48:12 GMT -5
V E R Y G O O D  Tony |
|
paulh.
Senior Member
   
Member since: November 2011
build, fail, learn, succeed - ENJOY
Posts: 2,389
Nov 15, 2011 15:54:51 GMT -5
Nov 15, 2011 15:54:51 GMT -5
|
Post by paulh. on May 25, 2012 1:45:29 GMT -5
Gents, I'm truely stunned by all your very positive comments   The roof was causing me a headache so thank you very much for the info Chris- never thought of the heavy craft paper  -and good call on the craft paint thing too! Overnight the germ of an idea of what to do with this once finished started to sprout.....   we'll all have to wait and see  P |
|
paulh.
Senior Member
   
Member since: November 2011
build, fail, learn, succeed - ENJOY
Posts: 2,389
Nov 15, 2011 15:54:51 GMT -5
Nov 15, 2011 15:54:51 GMT -5
|
Post by paulh. on May 25, 2012 1:57:03 GMT -5
Richard- thank you very much indeed!
Highly recommend giving it a go -it is so easy.
I do like the randomness of stone work but
I am going to give brick/block work a try as well- that'll be a bit more fiddley with straight lines and correct alignments, but I think it could be fun!
P
|
|
|
|
Post by spud on May 25, 2012 5:51:25 GMT -5
brick is easy if you peal off the paper paul, have a look at my NFG - 3.5 buld i done a small sbs in theer for Luigi on how i did mne 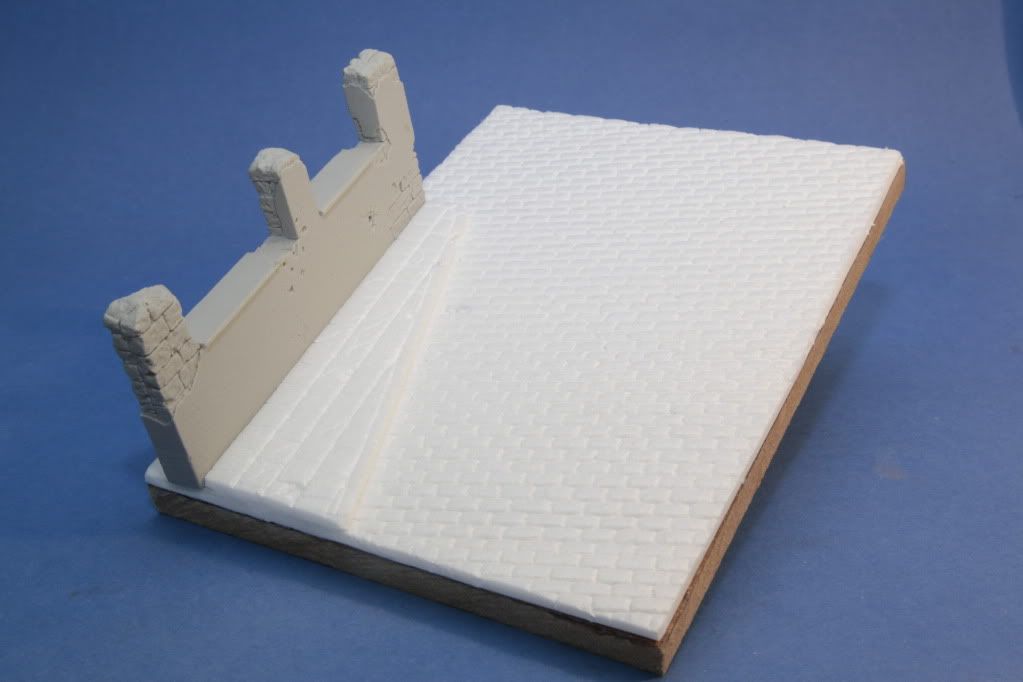 |
|
paulh.
Senior Member
   
Member since: November 2011
build, fail, learn, succeed - ENJOY
Posts: 2,389
Nov 15, 2011 15:54:51 GMT -5
Nov 15, 2011 15:54:51 GMT -5
|
Post by paulh. on May 26, 2012 2:42:10 GMT -5
Chers for that Spud- My problem is tring to get the paper off without tearing lumps out of the polystyrene beneath.
Hit a bit of a snag with this: The space was cut to fit the Miniart door- but I forgot about the polyfilla!
Now I either need to sand back the door(heavily) or create a new one from scratch.
Hey- ho we live and learn!
P
|
|
|
|
Post by bullardino on May 26, 2012 2:59:02 GMT -5
Nice job, paul. Those stones have the right uneven look.
|
|
|
|
Post by spud on May 31, 2012 16:52:19 GMT -5
why not sand back the filler?
|
|
paulh.
Senior Member
   
Member since: November 2011
build, fail, learn, succeed - ENJOY
Posts: 2,389
Nov 15, 2011 15:54:51 GMT -5
Nov 15, 2011 15:54:51 GMT -5
|
Post by paulh. on May 31, 2012 16:53:07 GMT -5
Doh....
|
|
|
|
Post by spud on May 31, 2012 17:43:39 GMT -5
lol
|
|
paulh.
Senior Member
   
Member since: November 2011
build, fail, learn, succeed - ENJOY
Posts: 2,389
Nov 15, 2011 15:54:51 GMT -5
Nov 15, 2011 15:54:51 GMT -5
|
Post by paulh. on Jun 18, 2012 15:43:25 GMT -5
I 've done a bit more; The roof skeleton consists of a piece of card with coffee stirrers from my local Macs(other burger suppliers are avaialble  ) attached for the rafters. Then the "slates" were added -made of black craft card, secured with CA. Once dry a couple of different shades of gray were sponged on for variety. A replacement gate/door was constructed with some more stirrers and then vtreated with various GW washes. Both the roof and gate still need quite a bit of work to get it where I want, also yet to be added will be some guttering and down pipe (MiniArt) 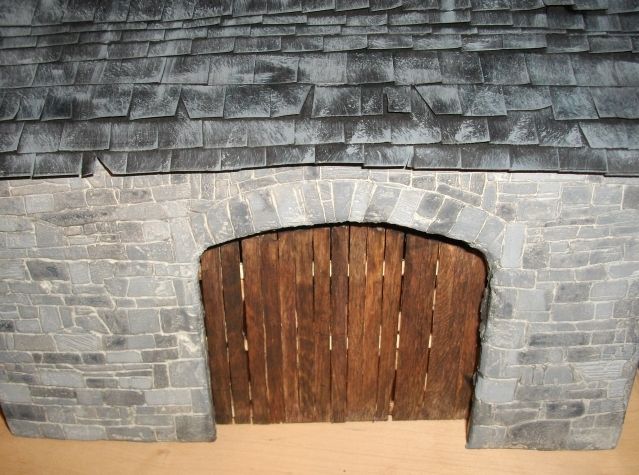 P |
|
|
|
Post by spud on Jun 18, 2012 16:12:47 GMT -5
looks fantastic paul
|
|
|
|
Post by 406 Silverado on Jun 18, 2012 17:16:33 GMT -5
Love the roof. Nice little project you have going
|
|
|
|
Post by wbill76 on Jun 18, 2012 18:12:16 GMT -5
Looking good paul, ditto to the comments on the roof.
|
|
paulh.
Senior Member
   
Member since: November 2011
build, fail, learn, succeed - ENJOY
Posts: 2,389
Nov 15, 2011 15:54:51 GMT -5
Nov 15, 2011 15:54:51 GMT -5
|
Post by paulh. on Jun 19, 2012 2:00:57 GMT -5
Thank you very much Gents.
I've only just come to realise how much of this "stuff" there actually is just around where I live -so I've got plenty of sources for ideas & inspiration, so there might be a few more of these things over time.
|
|
multicam
Senior Member
   
Member since: January 2012
Nate
Posts: 2,039
Jan 10, 2012 14:35:41 GMT -5
Jan 10, 2012 14:35:41 GMT -5
|
Post by multicam on Jun 19, 2012 7:58:00 GMT -5
looks great Paul!
|
|
|
|
Post by deafpanzer on Jun 19, 2012 8:02:16 GMT -5
Gosh, outstanding work especially the stonewall!!!
|
|
WigWag Workshop
Reviews member    
Member since: May 2012
"Keep The Glue On The Styrene"
Posts: 720
May 22, 2012 7:25:45 GMT -5
May 22, 2012 7:25:45 GMT -5
|
Post by WigWag Workshop on Jun 19, 2012 8:08:53 GMT -5
Fantastic work there!
-Steven
|
|
paulh.
Senior Member
   
Member since: November 2011
build, fail, learn, succeed - ENJOY
Posts: 2,389
Nov 15, 2011 15:54:51 GMT -5
Nov 15, 2011 15:54:51 GMT -5
|
Post by paulh. on Jun 19, 2012 13:04:47 GMT -5
Thank you all again gents.
P
|
|
paulh.
Senior Member
   
Member since: November 2011
build, fail, learn, succeed - ENJOY
Posts: 2,389
Nov 15, 2011 15:54:51 GMT -5
Nov 15, 2011 15:54:51 GMT -5
|
Post by paulh. on Jun 24, 2012 15:24:40 GMT -5
A little bit more work on the gate/door; 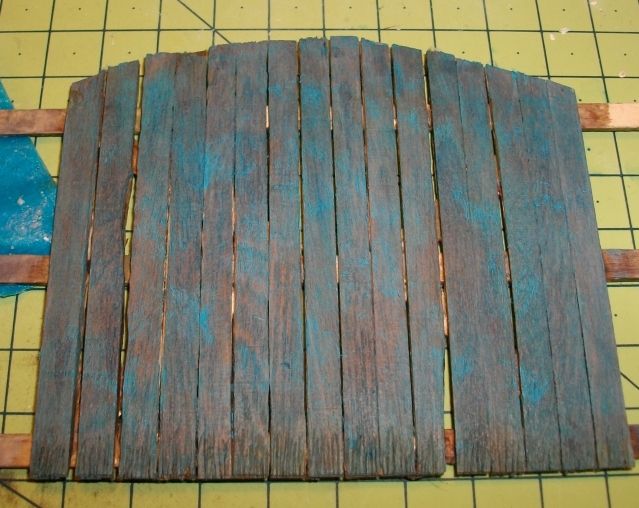 Still plenty to do - Nails - a-la Guys SBS, and some general hardware - hinges, bolts and the like. The distressed bottom edges are way too unifrom so thats going to need significant work to sort as well. As always, comments and suggestions for improvement always very graciously welcomed. P |
|