thug626
Senior Member
   
Member since: January 2013
Posts: 2,035
Jan 15, 2013 13:05:28 GMT -5
Jan 15, 2013 13:05:28 GMT -5
|
Post by thug626 on Jan 11, 2018 1:22:59 GMT -5
With the MiG-21 done, it was time to select another kit to build. I figured it's been a few kits since I've built any armor. So, an Abrams it is. 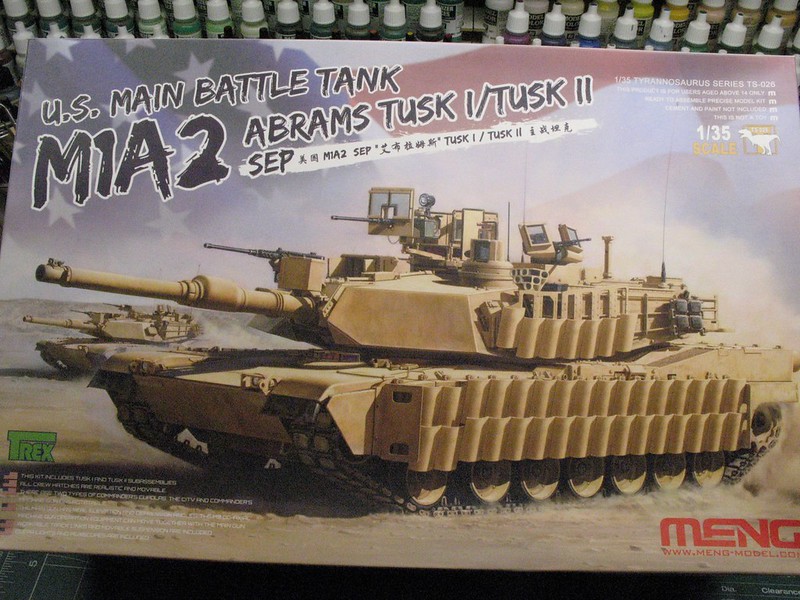 |
|
|
|
Post by Leon on Jan 11, 2018 4:48:42 GMT -5
I'll be following along Dave!
|
|
|
|
Post by mrt51 on Jan 11, 2018 8:46:21 GMT -5
Yep right along with ya.
|
|
thug626
Senior Member
   
Member since: January 2013
Posts: 2,035
Jan 15, 2013 13:05:28 GMT -5
Jan 15, 2013 13:05:28 GMT -5
|
Post by thug626 on Jan 11, 2018 11:04:30 GMT -5
Leon Always glad to have you along my good man.
mrt51 It's good to have you along on the build,
|
|
|
|
Post by wing_nut on Jan 11, 2018 11:25:23 GMT -5
I'M IN!
|
|
thug626
Senior Member
   
Member since: January 2013
Posts: 2,035
Jan 15, 2013 13:05:28 GMT -5
Jan 15, 2013 13:05:28 GMT -5
|
Post by thug626 on Jan 11, 2018 12:49:10 GMT -5
Consider yourself counted in Marc
|
|
|
|
Post by deafpanzer on Jan 11, 2018 13:06:04 GMT -5
Hell yeah, count me in!!! Its real nice kit... box is HUGE! LOL
|
|
thug626
Senior Member
   
Member since: January 2013
Posts: 2,035
Jan 15, 2013 13:05:28 GMT -5
Jan 15, 2013 13:05:28 GMT -5
|
Post by thug626 on Jan 11, 2018 13:26:38 GMT -5
This is last nights progress. The brain would not shut off, so I made the best of it. The detail on the kit is really quite nice. The hull assembly builds up quickly without any fuss. I used a solvent cement for the joins for a quick set. It's kind of faint but there is an anti-slip coating on the upper hull. 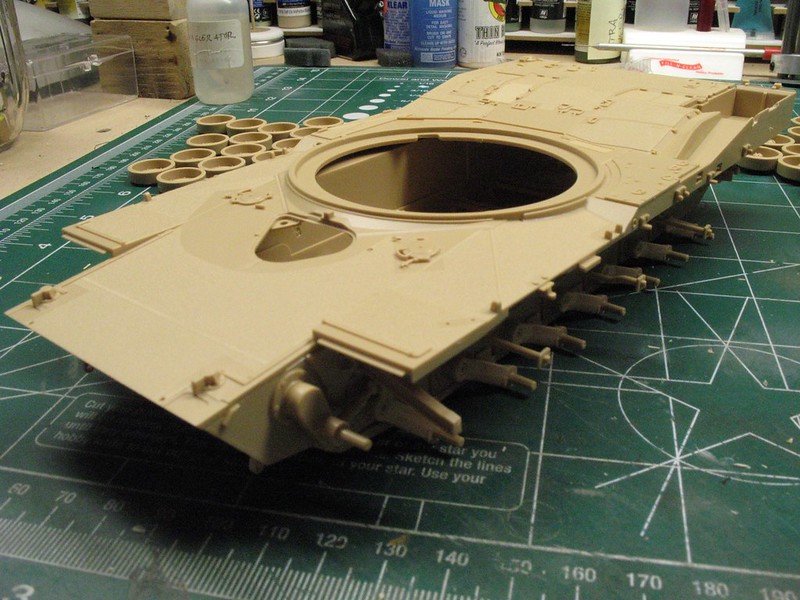 The extra belly armor just slipped right on. 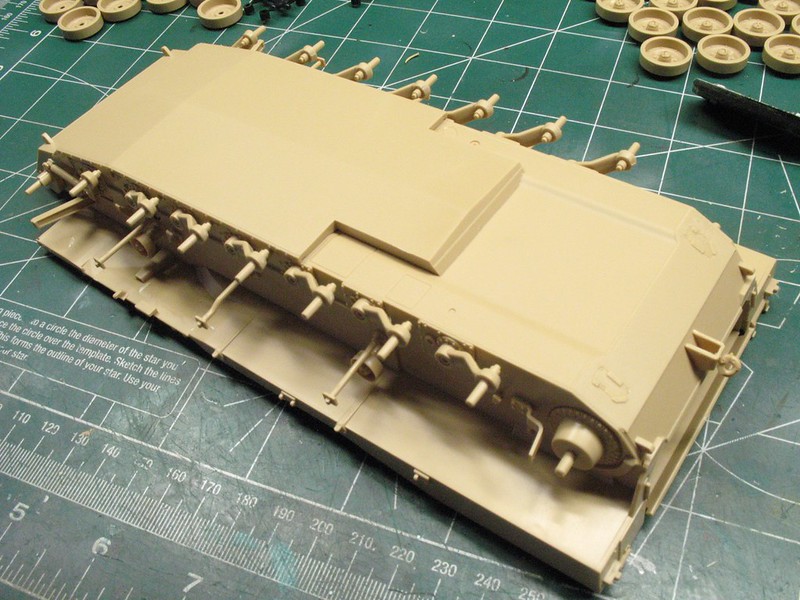 The swing arms are integral to the torsion springs. There is just enough "give" to allow the road wheels to self level. A very nice touch, as getting all road wheels to level sometimes gives me fits. 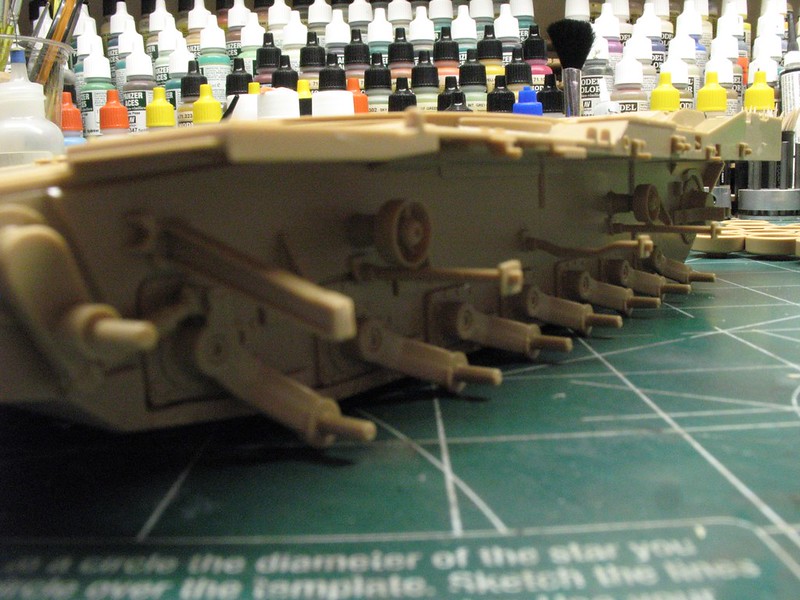 |
|
thug626
Senior Member
   
Member since: January 2013
Posts: 2,035
Jan 15, 2013 13:05:28 GMT -5
Jan 15, 2013 13:05:28 GMT -5
|
Post by thug626 on Jan 11, 2018 13:29:59 GMT -5
Good morning Andy. You snuck in on me. Consider yourself counted. It certainly is a large box, thought is not nearly as crammed as their Bradley kit with the interior. I was eyeballing that one in the stash when I decided on this one. I wanted to build a heavy hitter. Today will I will get more done on the hull, ready the road wheels for paint.
|
|
thug626
Senior Member
   
Member since: January 2013
Posts: 2,035
Jan 15, 2013 13:05:28 GMT -5
Jan 15, 2013 13:05:28 GMT -5
|
Post by thug626 on Jan 12, 2018 12:09:18 GMT -5
A bit of progress was made last evening. Today however, will be spent in front of a computer cranking out CEUs for a certification that is due for renewal in a couple of months. The rear louvered panels are mostly assembled. I left off the outer most panels until a base coat and weathering is laid down. Especially on the turbine exhaust side. I realized when I had cut the right upper hinge point for the panel, that I had cut too much off the left upper part. Hence the missing hinge detail. Styrene stock to the rescue. The amount of detail in the kit is impressive. The towing pintle snaps into place, so that it may pivot. Does anyone know the real pintle pivots? 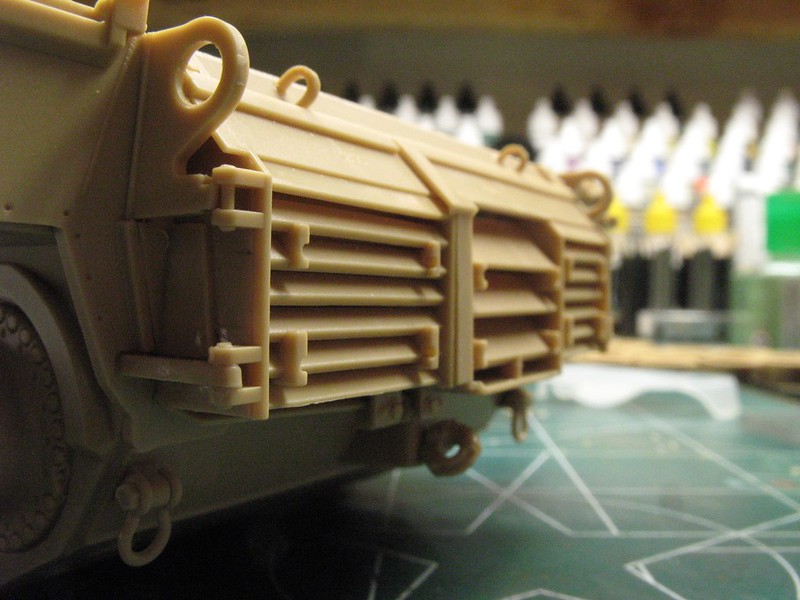 The tail light lenses and guards are going to be left off until a base coat is laid down.  The head lights will get their lenses after the base coat is laid down. The guards assembled with no fuss. 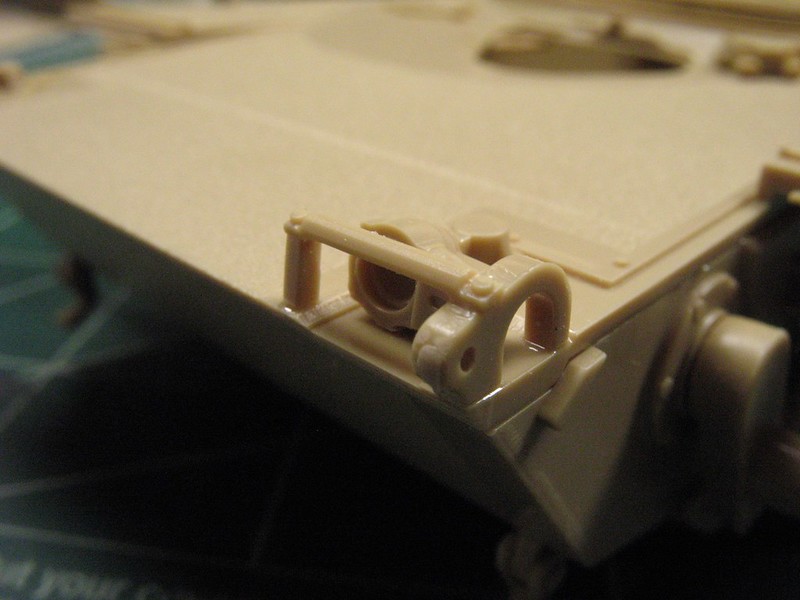 |
|
|
|
Post by Leon on Jan 12, 2018 12:15:14 GMT -5
Making good progress Dave!
|
|
|
|
Post by Tojo72 on Jan 12, 2018 13:59:15 GMT -5
Looking good,I'm working on their AIM version,their Abrams kits are nice I'm sure my kit will benefit by following yours.
Had a lot of fun with that idler assembly up front !!!
|
|
thug626
Senior Member
   
Member since: January 2013
Posts: 2,035
Jan 15, 2013 13:05:28 GMT -5
Jan 15, 2013 13:05:28 GMT -5
|
Post by thug626 on Jan 12, 2018 14:10:43 GMT -5
Leon Thank you kindly my good man.
Tojo72 Thank you kindly my good man. That idler assembly was a fine motor control and dexterity check. Dang!
|
|
thug626
Senior Member
   
Member since: January 2013
Posts: 2,035
Jan 15, 2013 13:05:28 GMT -5
Jan 15, 2013 13:05:28 GMT -5
|
Post by thug626 on Jan 13, 2018 2:21:02 GMT -5
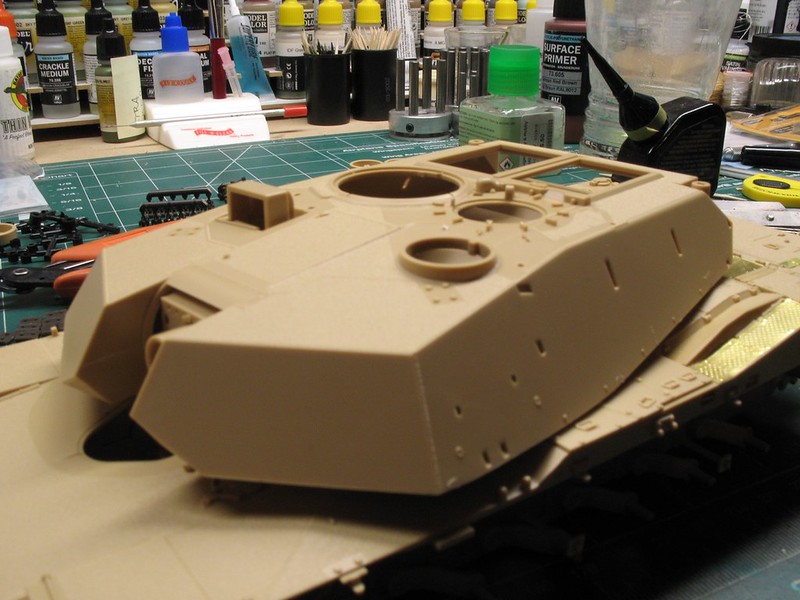
It was a productive day today. Lots of errands run, slow cooked a mess of ribs, fixed the canopy on the truck. Built a run of track for the Abrams. Here you can see the start of the run, the track jig. 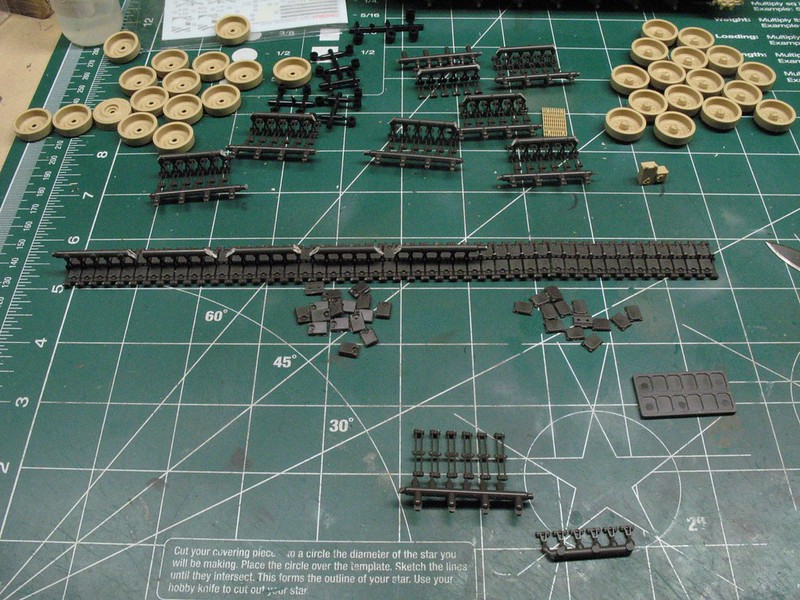 A detail shot of the track rods and guide horns. These two are assembled prior to placing the rods onto the lower pads. 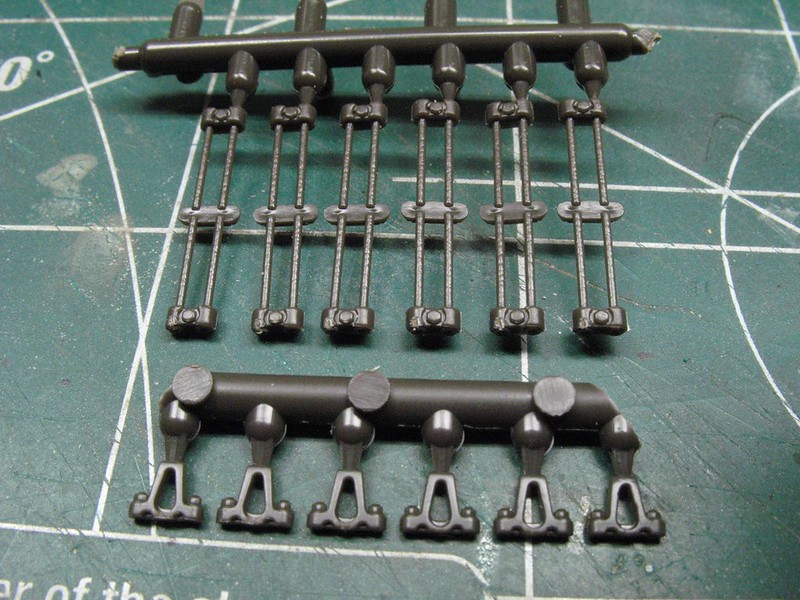 This is the flip side of the rods. They come in batches of six along with the guide horns. There are 81 track pads per run. 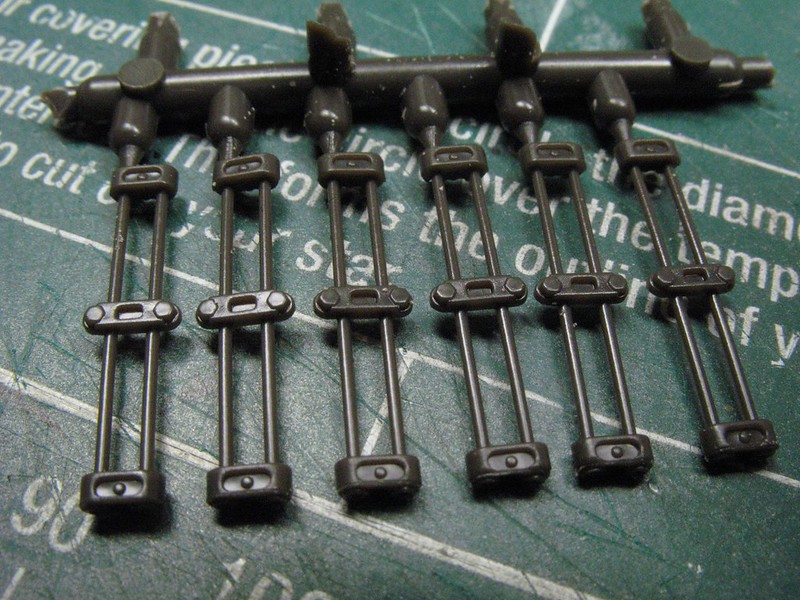 I got one run of track build, and I needed a break from it. So, I started on the turret. 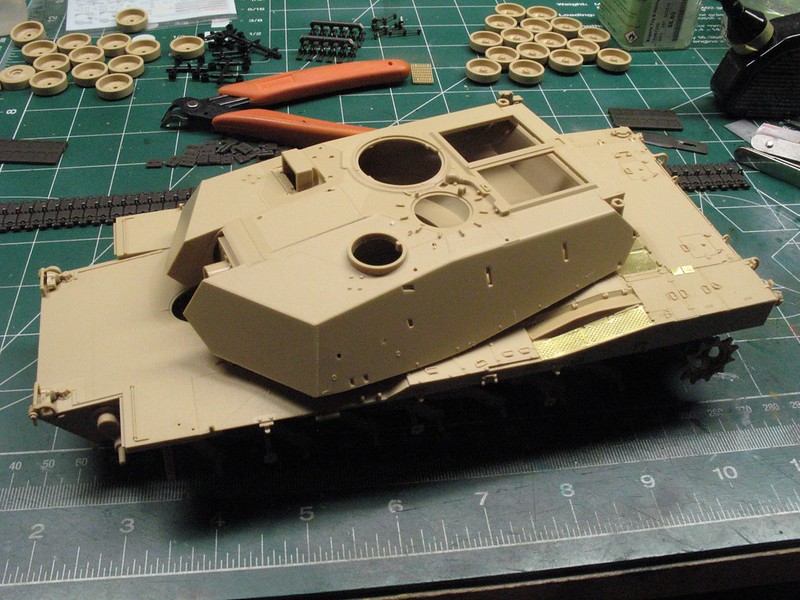
 |
|
|
|
Post by Leon on Jan 13, 2018 6:59:24 GMT -5
Nice days progress Dave!  Those tracks look a little intimidating with all those parts.  |
|
joelsmith
Full Member
  
Member since: July 2012
There no winners in war, only survivors.
Posts: 1,404
Jul 5, 2012 22:33:58 GMT -5
Jul 5, 2012 22:33:58 GMT -5
|
Post by joelsmith on Jan 13, 2018 16:45:00 GMT -5
That looks like a really simple way to do the tracks! Thanks for the photos!
|
|
mrversatile
Full Member
   July '23 Showcased Build Awarded
Member since: January 2013
Posts: 682
Jan 20, 2013 10:52:24 GMT -5
Jan 20, 2013 10:52:24 GMT -5
|
Post by mrversatile on Jan 13, 2018 17:20:54 GMT -5
I am interested in this build bc of all the new M1 kits out there. Unfortunately, I have the Dragon AIM kit with the Voyager Tusk II upgrade kit. These new kits seem easier to build than what faces me.
|
|
|
|
Post by 406 Silverado on Jan 13, 2018 17:59:37 GMT -5
Off to a good start. I built the same kit, except that it got shelved . just need to do the tracks.
|
|
thug626
Senior Member
   
Member since: January 2013
Posts: 2,035
Jan 15, 2013 13:05:28 GMT -5
Jan 15, 2013 13:05:28 GMT -5
|
Post by thug626 on Jan 13, 2018 20:47:25 GMT -5
Leon It was kind of a PITA, but once you find a rhythm it just goes along. Joelsmith They are kind of tight today, but they do indeed articulate. The test section fits like a glove around the drive sprocket. Mrversitile I've got a Dragon M1A2 SEP, and the Tamiya TUSK II kits in the stash. I'll still build them. Though not likely on the heels of this kit. Scratchmod They actually go together quite well. I strayed from the instructions. It shows you to trim off the sprue before fitting the track pins to the lower pads while leaving the sprue on for the track pins. I kind of reversed that. After gluing the horns on I left all the sprues attached. This allowed me to apply even pressure down the middle of the pads while applying gentile pressure with a thin, sturdy straight edge to seat the pins into the lower track pads. Once this was achieved, I used my Testors glue dispenser with a custom small tip (I.D. 0.010"). This allowed me to place a wee drop of cement in the divots for the upper pads. You'll be able to knock out six track pads at a time. I got a bit of progress today as the flu dropped me like a home sick brick last night. I can only watch so much TV. So, I trundled out to the bench for some distraction therapy. I got the smoke dischargers, side boxes, side and rear racks along with the HVAC. 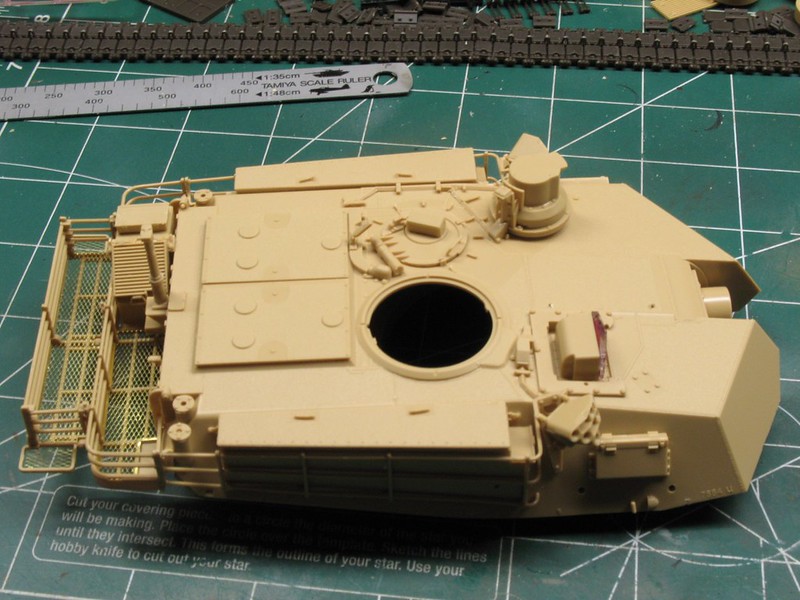
I am not going to hang the crappy pic on the digi cam...most likely operator error today. 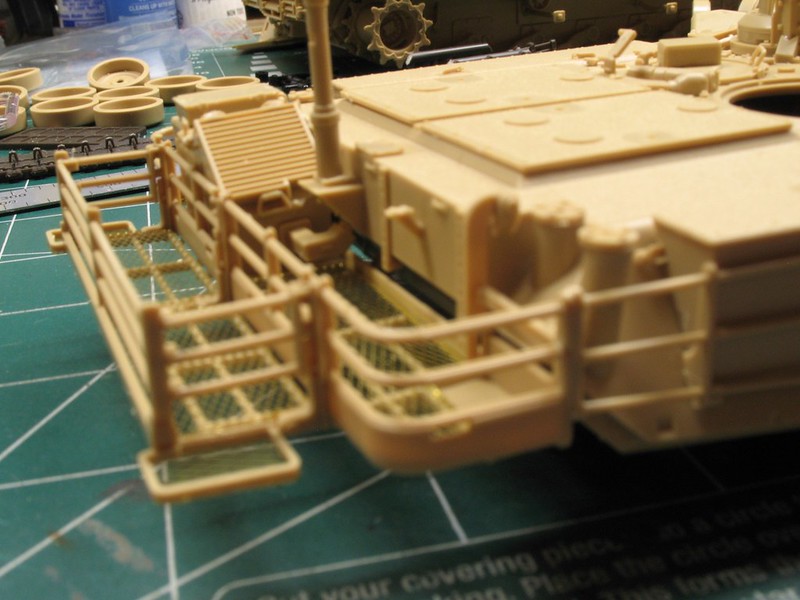
The HVAC unit for the crew. 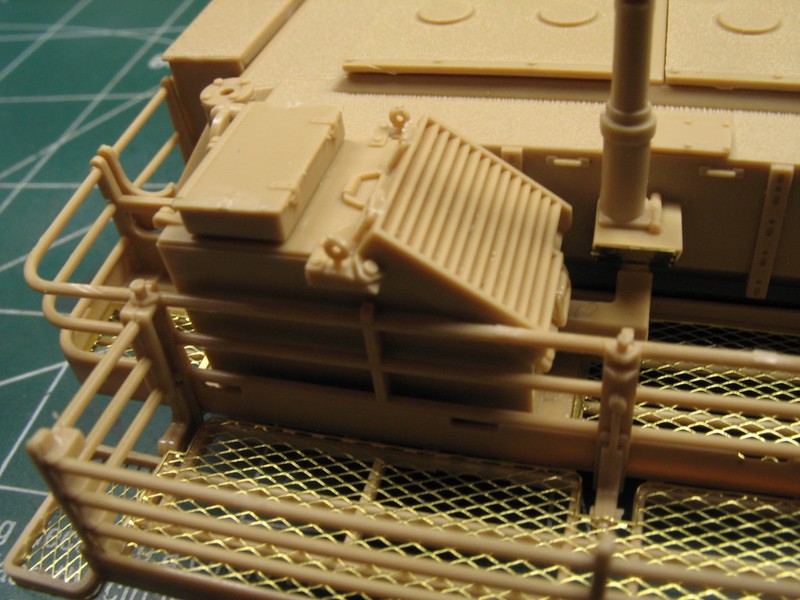
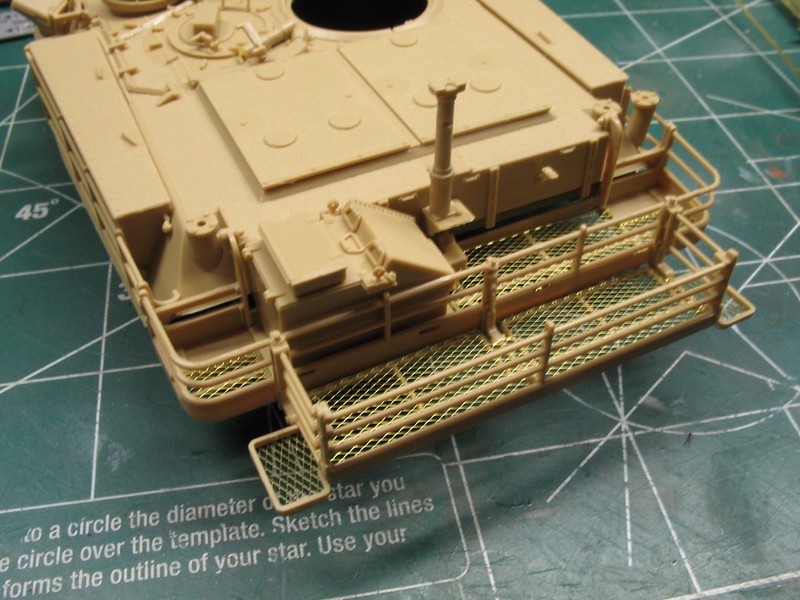 I painted the lens for the CITV on the back side with a custom red, them backed that with chrome paint. I have an idea rolling around in my head to add the iridescence. The smoke dischargers are empty. I'll fill them once the base coat goes on. 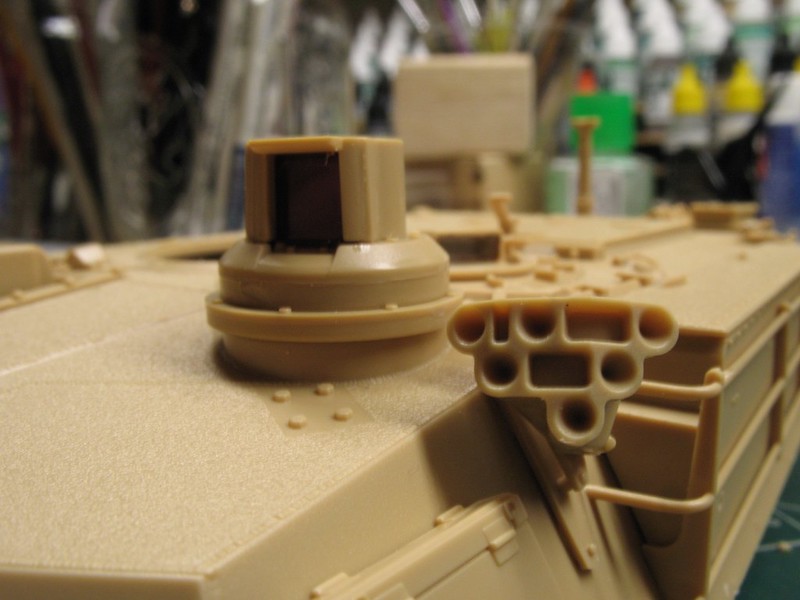
|
|
|
|
Post by Tojo72 on Jan 14, 2018 16:55:22 GMT -5
Details are looking good.
|
|
reserve
Senior Member
   
Member since: July 2012
Si vis pacem para bellum
Posts: 2,373
Jul 11, 2012 9:11:45 GMT -5
Jul 11, 2012 9:11:45 GMT -5
|
Post by reserve on Jan 14, 2018 18:36:13 GMT -5
Looks pretty high end but I think the tracks would drive me to the scotch jug. Fine work
Regards,
Mark
|
|
thug626
Senior Member
   
Member since: January 2013
Posts: 2,035
Jan 15, 2013 13:05:28 GMT -5
Jan 15, 2013 13:05:28 GMT -5
|
Post by thug626 on Jan 14, 2018 18:53:38 GMT -5
Good afternoon Tojo72. Thank you kindly my good man.
Hello Mark. The tracks really are not too bad. The commanders cupola is another story. There was a lot of time spent on it today. For anybody building this or other Meng Abrams kits, sand down the edges of the periscopes so that they are a less snug fit into the ring. Everything was such a tight fit that I ended up distorting the ring enough such that the gun ring wouldn't fit, let alone move. There was a lot of delicate sanding going on. I'll get some pics up later.
|
|
thug626
Senior Member
   
Member since: January 2013
Posts: 2,035
Jan 15, 2013 13:05:28 GMT -5
Jan 15, 2013 13:05:28 GMT -5
|
Post by thug626 on Jan 14, 2018 19:28:13 GMT -5
Here are the pics of the commanders cupola. I am still working on the idea for the iridescent effect. 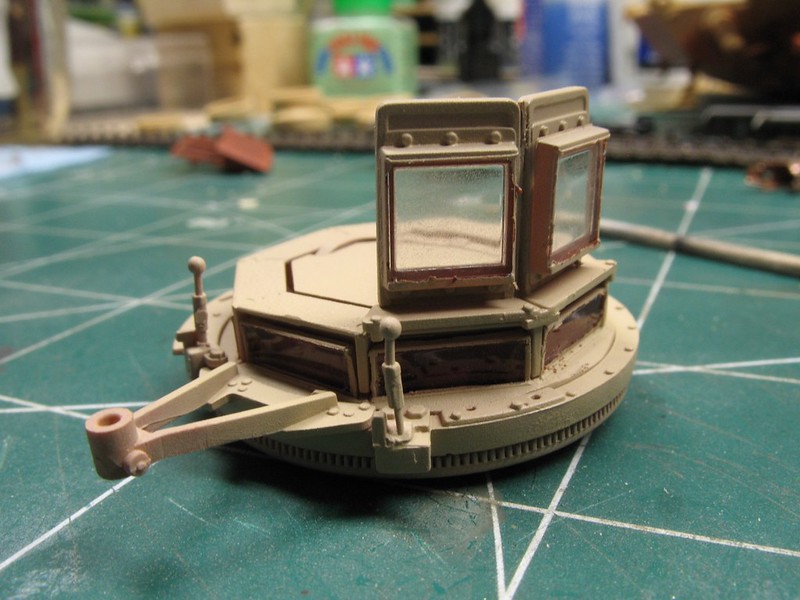 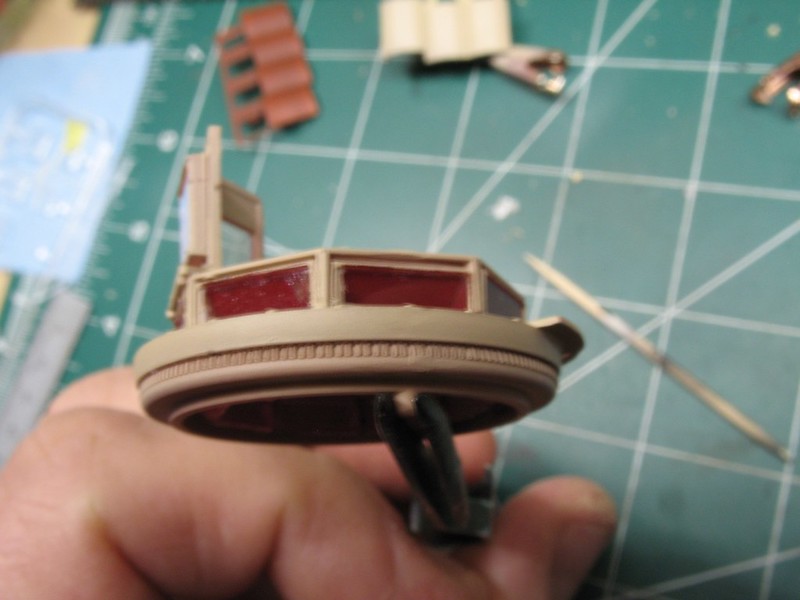 The commanders cupola dry fitted to the turret. I mounted the main gun last night. The turret with the rear racks minus the main gun scaled out to just under 19 feet. That's almost two feet longer than my pickup! 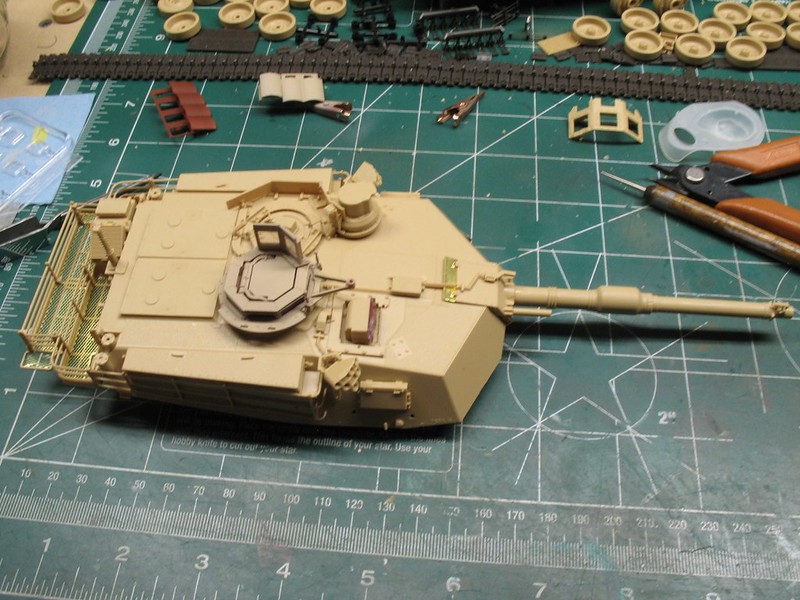 Additional shield dry fitted. 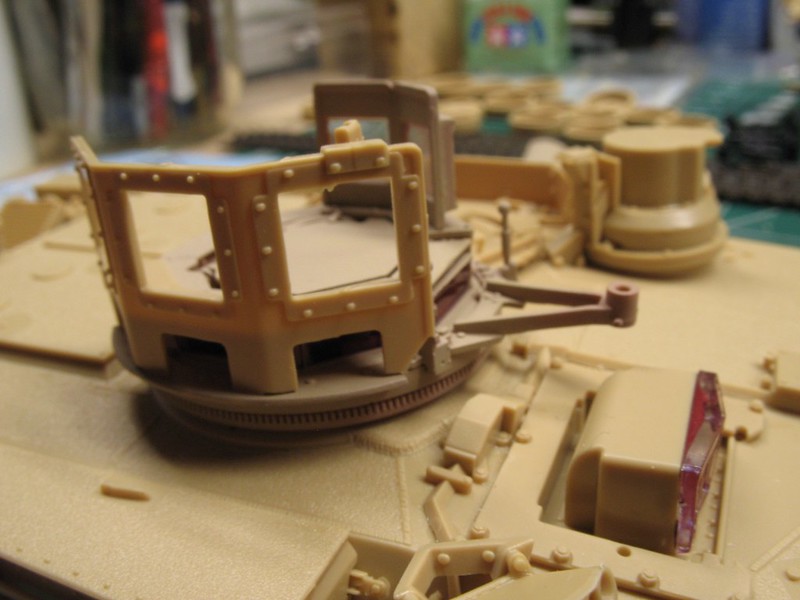 I just had to dry fit the turret to the hull. 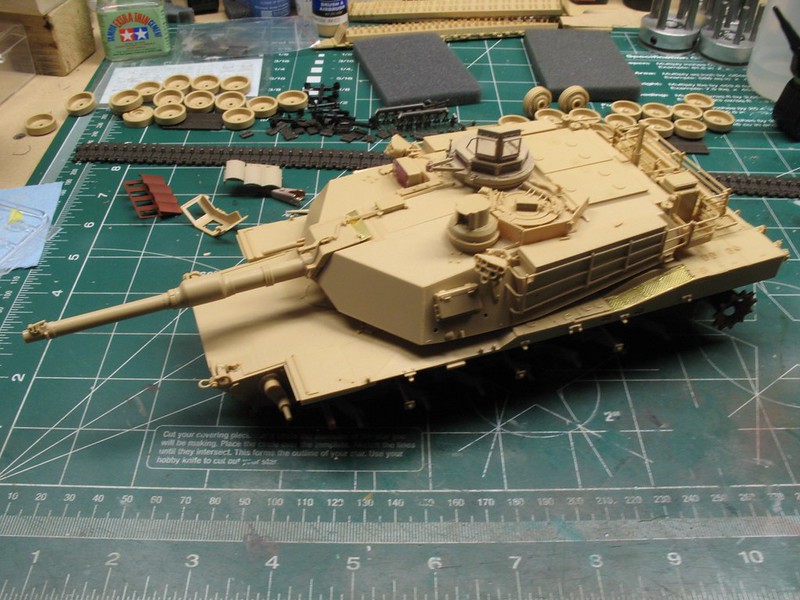 |
|
thug626
Senior Member
   
Member since: January 2013
Posts: 2,035
Jan 15, 2013 13:05:28 GMT -5
Jan 15, 2013 13:05:28 GMT -5
|
Post by thug626 on Jan 15, 2018 20:39:54 GMT -5
Here is some of last nights and todays progress. I used an 8B graphite stick on the inner aspect of the road wheels. 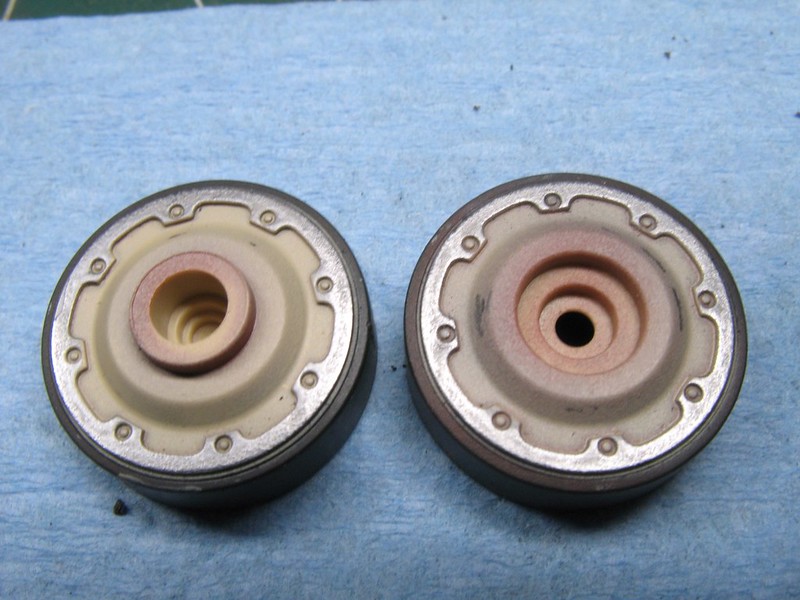 The road wheels and idlers before their wash. I had never realized this before this kit, the idler is a road wheel. What a brilliant reduction of parts. Yeah, it doesn't take much for me. 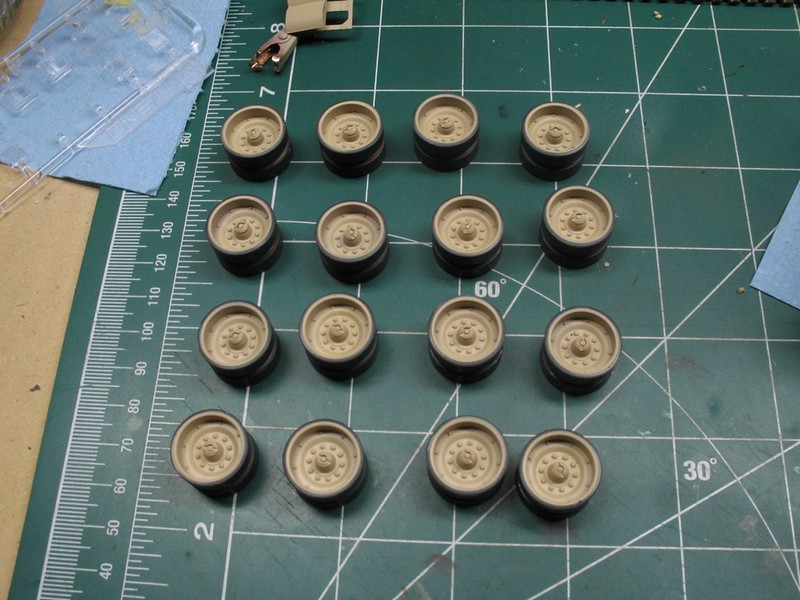 Base color applied to the undersides of the hull. 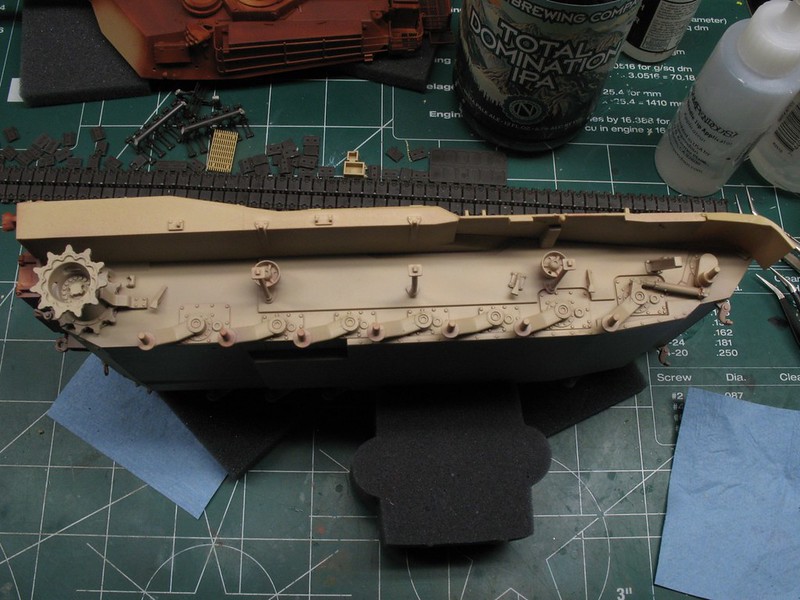 Yet another detail shot of the beast. The mud scrappers were listed as optional. I opted to install them, as one just never knows when they're gonna wish they were installed. 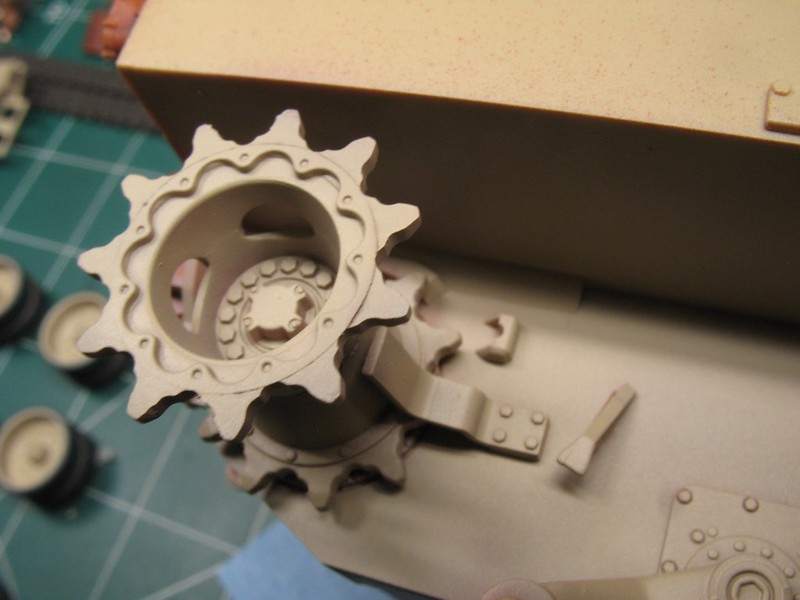 Kind of hard to see with this pic. I used Vallejo Oiled Earth wash. This part was really an exercise, as this likely will not be seen with the TUSK II side armor on. 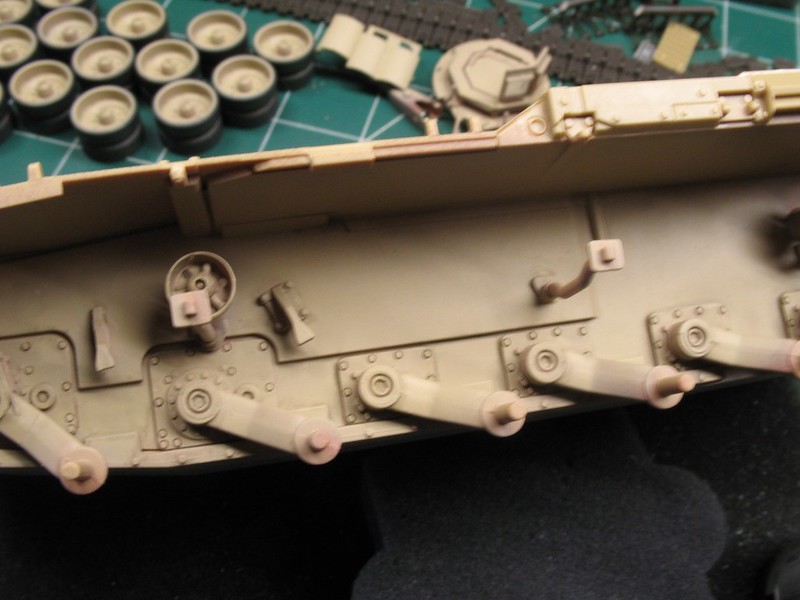 Here's the stuff....  On the left is the road wheel with the wash. On the right...um....no wash 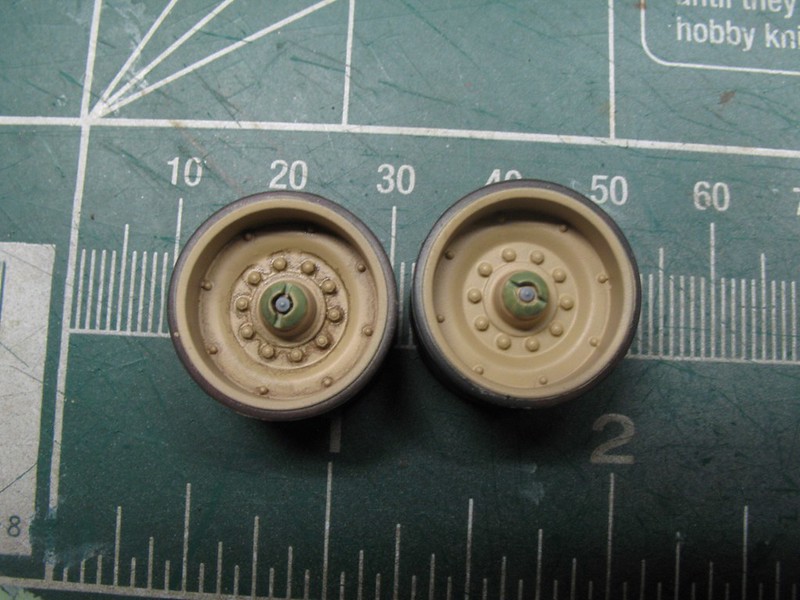 All road wheels and idlers are on.  |
|
|
|
Post by TRM on Jan 15, 2018 21:45:00 GMT -5
WOW....LOL...You just went right to town on this!! Awesome job so far Dave!
|
|
|
|
Post by deafpanzer on Jan 16, 2018 13:23:38 GMT -5
DAMN! That kit is really looking good... I am so glad my wife gave me this kit for Christmas a year ago. Karma +1 for you for all tips you shared with us. Really appreciate it!
|
|
joelsmith
Full Member
  
Member since: July 2012
There no winners in war, only survivors.
Posts: 1,404
Jul 5, 2012 22:33:58 GMT -5
Jul 5, 2012 22:33:58 GMT -5
|
Post by joelsmith on Jan 16, 2018 13:44:14 GMT -5
Dave, not tryin to be a butthead, but aren't the road wheel and idler wheel center caps supposed to be clear so the crew can visually check the oil level?
|
|
thug626
Senior Member
   
Member since: January 2013
Posts: 2,035
Jan 15, 2013 13:05:28 GMT -5
Jan 15, 2013 13:05:28 GMT -5
|
Post by thug626 on Jan 16, 2018 14:34:40 GMT -5
Joel, you’re not being a butthead. It’s actually a good point. At some point they did switch over to clear covers for the reason you stated. Not everyone had them all at once.
|
|
joelsmith
Full Member
  
Member since: July 2012
There no winners in war, only survivors.
Posts: 1,404
Jul 5, 2012 22:33:58 GMT -5
Jul 5, 2012 22:33:58 GMT -5
|
Post by joelsmith on Jan 16, 2018 15:44:03 GMT -5
Thank God I'm not a butthead! Will you tell my Wife?
|
|
thug626
Senior Member
   
Member since: January 2013
Posts: 2,035
Jan 15, 2013 13:05:28 GMT -5
Jan 15, 2013 13:05:28 GMT -5
|
Post by thug626 on Jan 16, 2018 16:36:15 GMT -5
Sorry dude, but my opinion is null and void in that matter. Best of luck though. 🤣
|
|