|
|
Post by Tojo72 on Feb 23, 2019 20:25:07 GMT -5
OMG he looks like a photo of a real person,one of the best figs I have seen.
|
|
|
|
Post by Steve Zuleski on Feb 23, 2019 21:01:25 GMT -5
You are too kind Tojo, thank you very much!
|
|
|
|
Post by Steve Zuleski on Feb 24, 2019 21:20:16 GMT -5
Back to Alpine's 1/16th scale German U-Boat Watch Officer, kit #16036Keeping my method of madness going as before I applied the pre-shade on the upper torso. It may look a bit heavy in some areas, but the gray tones will feather in just fine when I start the process. 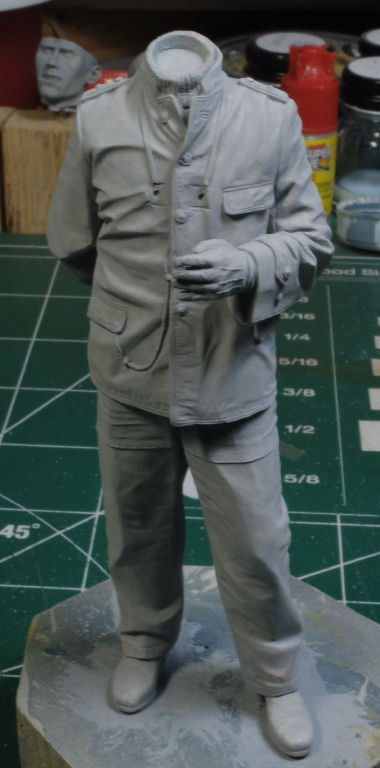 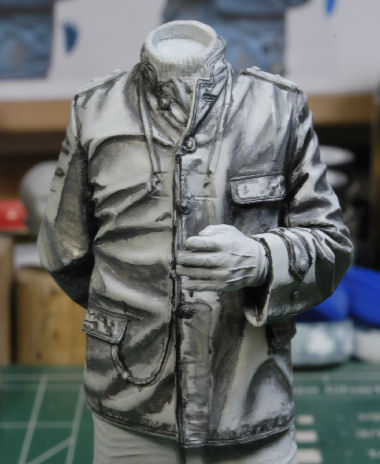 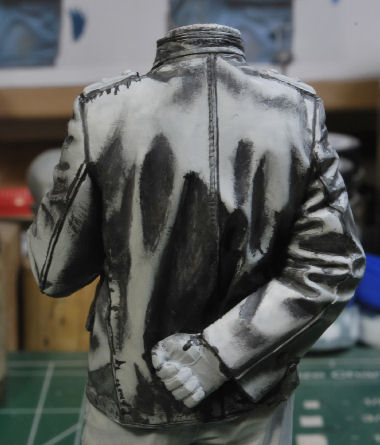 The key here is when the oils are applied I keep them within the same tonal range as the Captain figure. If the tones are too far off the figures won't mesh when it comes time to secure them to the gun deck. So, I'll complete the upper torso first, then move onto the legs just like our Captain figure. Blending the CoatWith the color tones laid out as before I began with the darkest shades first placing a small spread in the upper portion of the creases. Then, taking the wider brush I feathered and blended the oils out to the sides and downward. I will continue with this particular tone until the front of the coat has been treated, then do the same on the back of the coat. After the initial tone is in place I step up a shade lighter and spread just below the prior tone and feather and blend it. As I said, I will continue this same process on the back of the coat as well to insure uniformity with the gray tones. I noticed a slight variation from the front, back, and sleeves on the last figure, so proceeding in this manner will cut down on the variations. Slight variations are not a big deal, it's when you get tone differences that are obvious, then it becomes a problem. 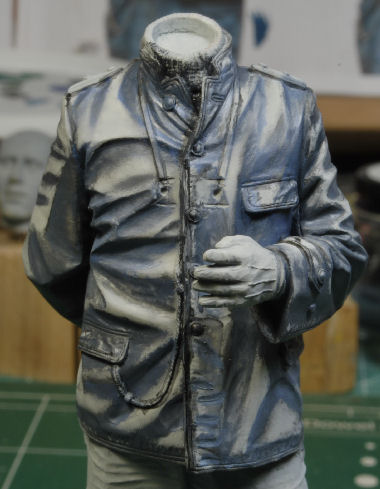  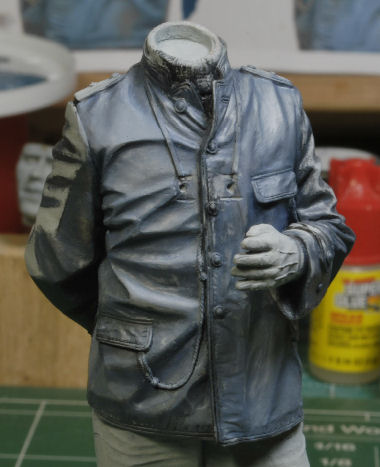 You may not have noticed it, but I did. The tonal difference on the jacket vs. the trousers is more towards the gray, on the trousers, rather than the more bluish tint of the jacket. See the pics below. this really isn't a big deal, they're two separate articles of clothing and should most often have a slight variation. I just don't want to get too far afield with the variations. 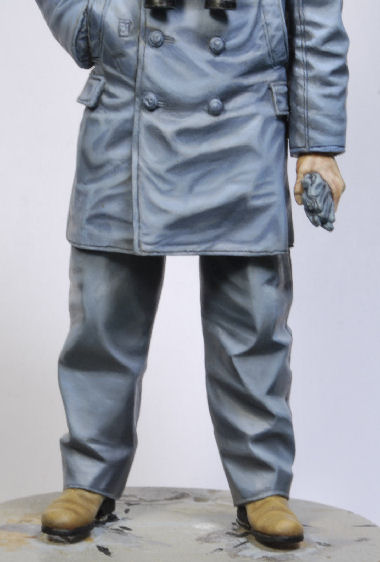 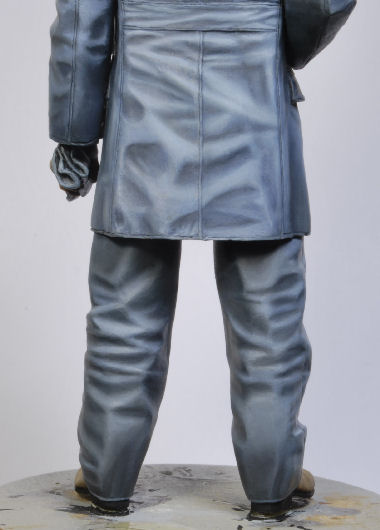 More to follow, and thanks for watchin. Cheers, Ski.
|
|
buddho
Forum Moderator     
Member since: February 2019
Posts: 1,287 
MSC Staff
|
Post by buddho on Mar 6, 2019 16:45:07 GMT -5
Fantastic work on the uniform, Steve.
|
|
|
|
Post by Steve Zuleski on Mar 8, 2019 11:42:37 GMT -5
Thx Buddho, more in a few mikes.
|
|
|
|
Post by Steve Zuleski on Mar 9, 2019 14:02:54 GMT -5
Highlighting the CoatOk, the fun part is upon us. Once the darker shades have been blended it's time to blend in the highlights. An initial medium bluish tone was added to the larger areas needing highlights. After this was blended and feathered a lighter tone was added on all the ridges and creases, slowly working my tones toward the lighter shade of blue/gray. The last highlight is pretty much a full gray tone, just a hint of blue has been added. Since I'm working the entire upper portion of the torso before I move to the trousers I went ahead and painted the epilates, bino strap, and an initial working of the turtle neck sweater. They will be completed, as well as the white chord from his waist pocket and gloves, before I begin working the trousers. I'm handling this figure by the legs and base all day, so primer touch-up will be needed when the time comes.  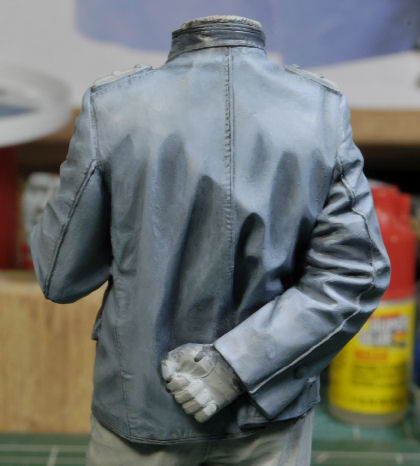 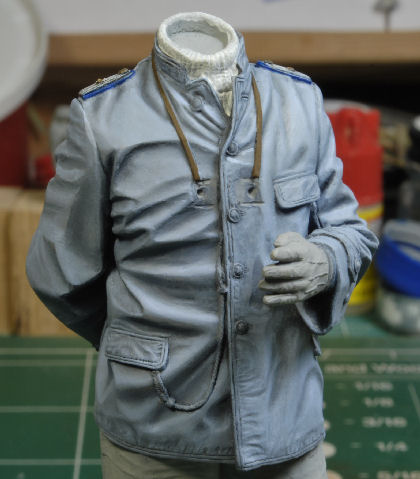 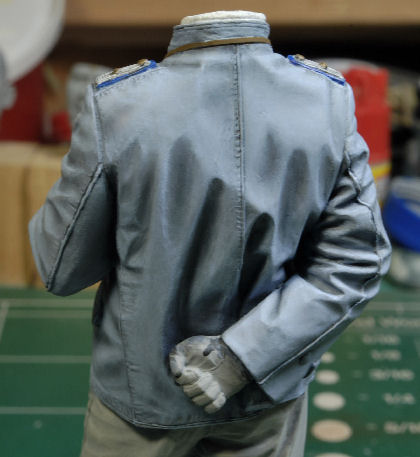 Re-shading the recesses Re-shading the recessesNow the shadows are starting to become accentuated, but we still need more definition added to bring them out. I add a very thin sliver of dark gray, almost a black tone, into the upper portions of all the creases and then feather the oils to blend into the prior shading. This needs to be done very lightly, small areas at a time. It's easy to get carried away and try to rush this portion of the shading. I have to stop and access the progress throughout the process to make sure this step is not over done. As you can see the right side of the coat is starting to take shape rather nicely. 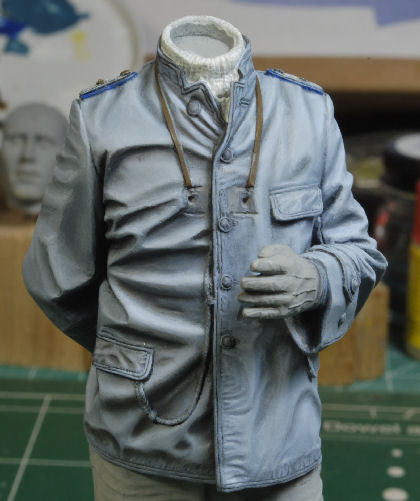 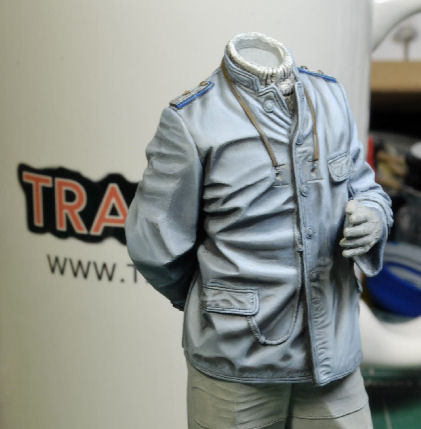 Before I move on to the trouser a final highlighting will be applied as needed to all the high points. Still a ways to go, but we're making progress. More to follow and thanks for watching. Cheers, Ski.
|
|
buddho
Forum Moderator     
Member since: February 2019
Posts: 1,287 
MSC Staff
|
Post by buddho on Mar 11, 2019 5:09:03 GMT -5
Brilliant work, Steve. It is fun to watch a masterpiece in the making. 🤓
|
|
|
|
Post by Steve Zuleski on Mar 12, 2019 22:12:30 GMT -5
Thanks Buddho. You're an oiler too, ain'tcha?
|
|
buddho
Forum Moderator     
Member since: February 2019
Posts: 1,287 
MSC Staff
|
Post by buddho on Mar 13, 2019 6:17:29 GMT -5
Wish I was, but have not gotten past acrylics, yet. Your results are amazing. 😁
|
|
|
|
Post by Steve Zuleski on Mar 14, 2019 8:47:17 GMT -5
Ah, cross over from the dark side and see the "LIGHT", HA!
Which ever works best for you is how it goes. Something about constantly layering reminds me of my old "enamel" days, Yikes.
Cheers, Ski.
|
|
buddho
Forum Moderator     
Member since: February 2019
Posts: 1,287 
MSC Staff
|
Post by buddho on Mar 18, 2019 13:48:42 GMT -5
Ah, cross over from the dark side and see the "LIGHT", HA! Which ever works best for you is how it goes. Something about constantly layering reminds me of my old "enamel" days, Yikes. Cheers, Ski.  |
|
|
|
Post by Steve Zuleski on Apr 16, 2019 20:09:47 GMT -5
A Whale of an Update!In an attempt to get this dio finished before the summer work hits I kept working without updates, only taking photos when i remembered to do so. I backed off the Watch officer figure due to immediate burn out and began to work the gun deck. Now that was a fun change of pace. First I had to decide how I wanted to mount the gun, up down, or just plain locked down flat. I decided on extending the elevation shaft to give the figures a bit more room on the deck. 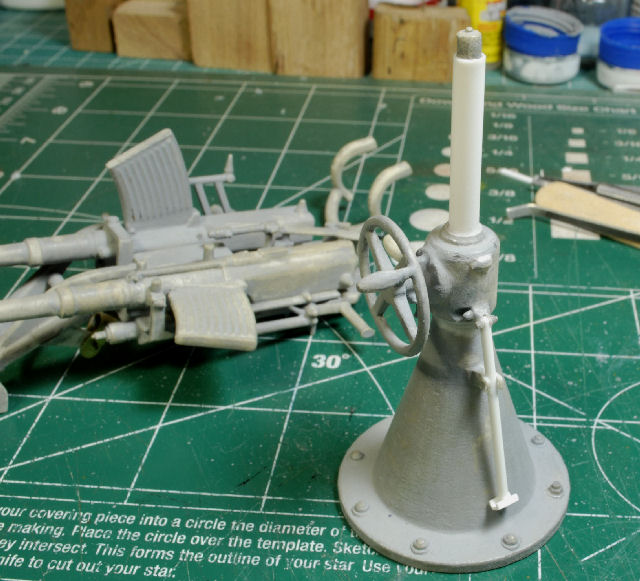 I needed to add details that had be lost during the resin process such as bolt heads, etc. Now it was time to paint both the gun and mount, constantly looking for any missed imperfections from the resin process. 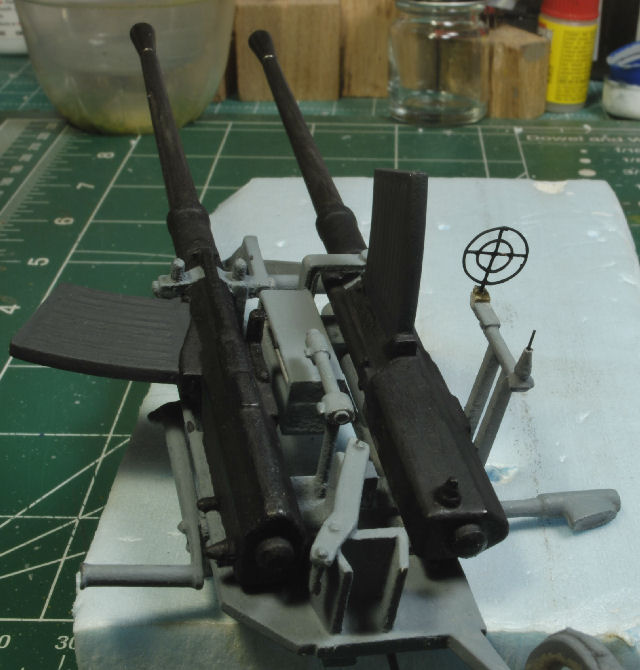 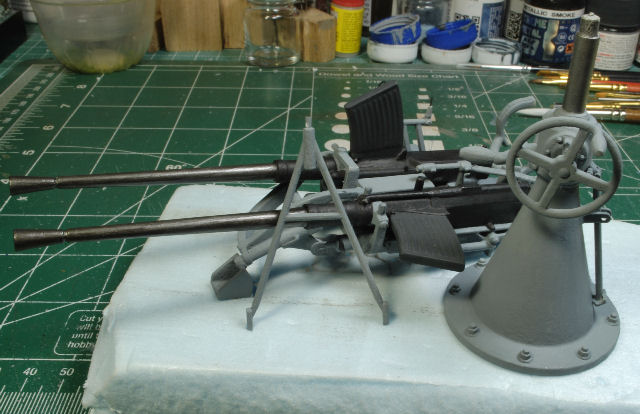 Now it was time for the cables to be made and fitted to the deck. I had to scratch build turn buckles and solder the wire so it wouldn't become an issue later down the road. I don't remember the exact gage of wire, but it's close to 12 gage, braided. The thinner wire for stabilizing the main cable is close to an 8 gage, but I don't recall. At any rate, I've got plenty of wire in the scrap bin for just such an occasion. 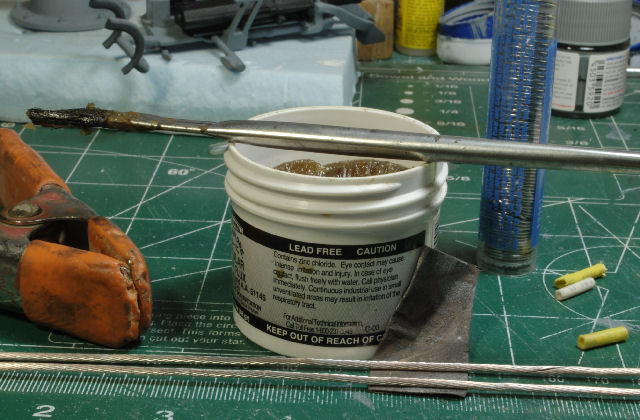 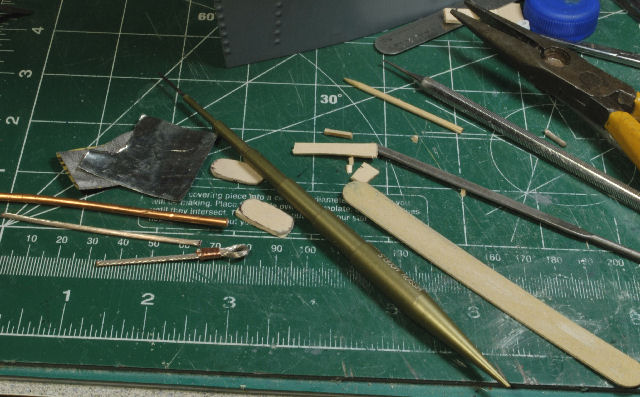 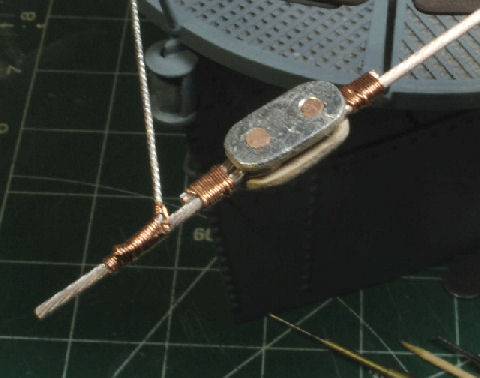 The turn buckle was made from scrap balsa wood and sheet pewter covering, simple enough. Once the cable were cut to fit the entire set up was installed and adjusted as needed. Next up, clean up those ribs from under that deck. I believe they were added for stability in the 3D process, but they aren't in any photos I've ever seen of any Type VIIB sub anywhere. So, I just did a simple, HA!, simple scrape with the flat Xacto knife and sanded, filled, sanded again, and painted. Ah, looks much better, eh? You may notice during this process I had to remove the railing to get into those tight spaces and to avoid destroying all that prior work, lol. That was a real hoot, leme tell yaz. 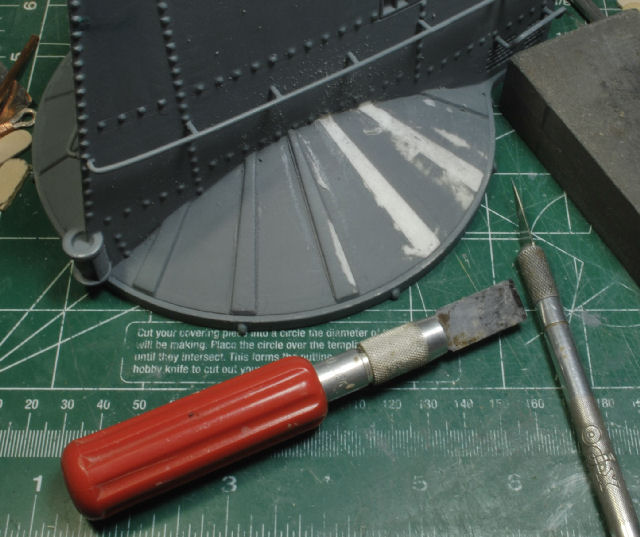 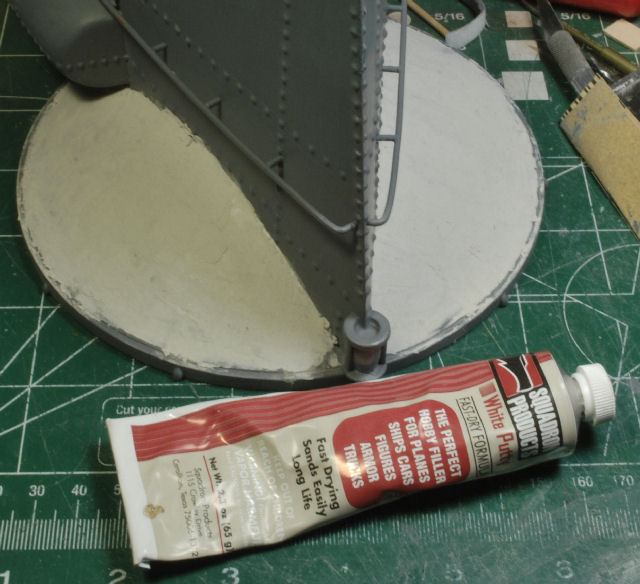 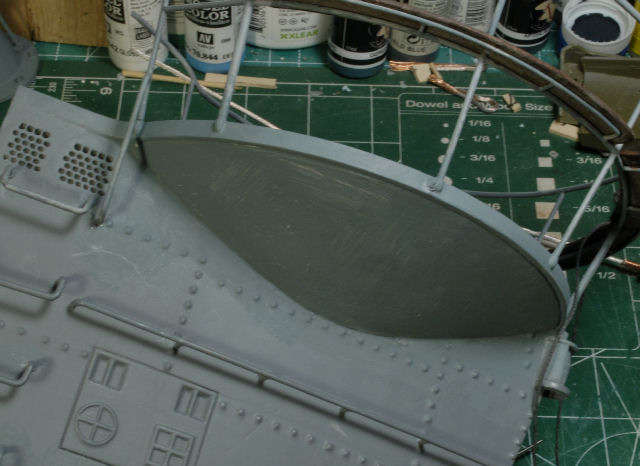 Since this mini-dio/vignette will have a cut off point in the rear I had to fill the void. I used blue construction foam for the edge of the void and placed a piece of sheet styrene on top trying to make it as flush as possible. The I primed it and painted it black. The cables and deck were painted and ready for theweathering process. 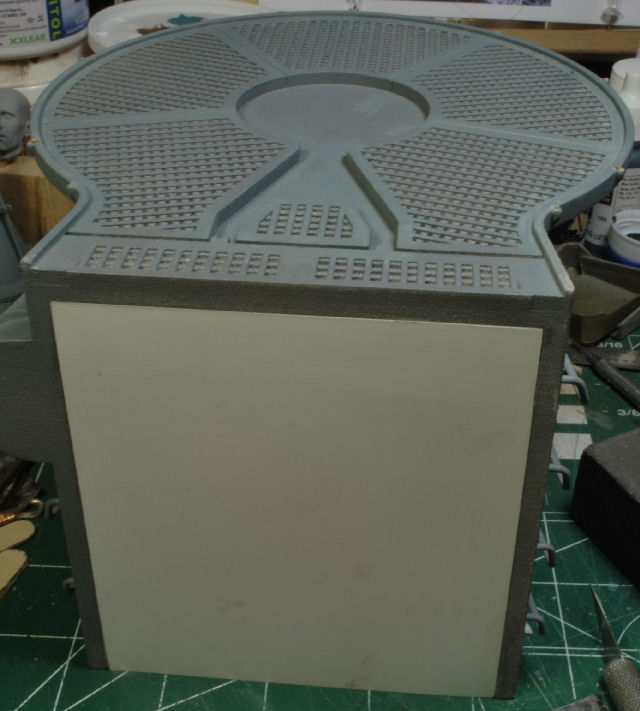 Time to get that deck and gun weathered for battle, right? I used the standard chipping method, sponge and brush, then went back over these areas and added a dark rust tone. Then, with a damp brush I drew that tone in a downward motion to create the streaks. After the entire deck was done I went back to key areas and added a lighter tone of rust and continued the process. The deck itself was said to be wood coated in a water proof type dark colored paint, so I did what other sub modelers have done and attempted to show ware on the deck due to foot traffic, etc. 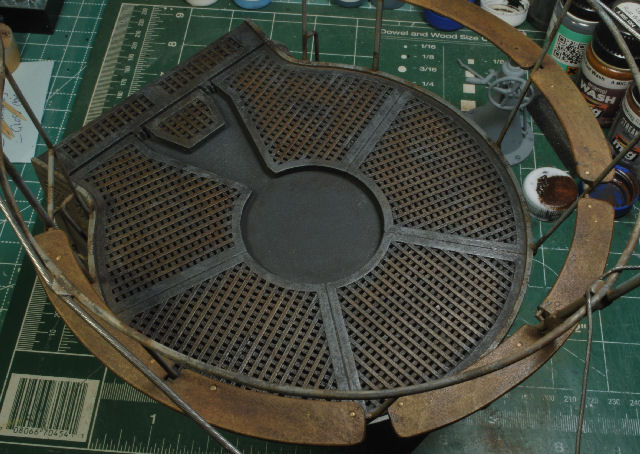 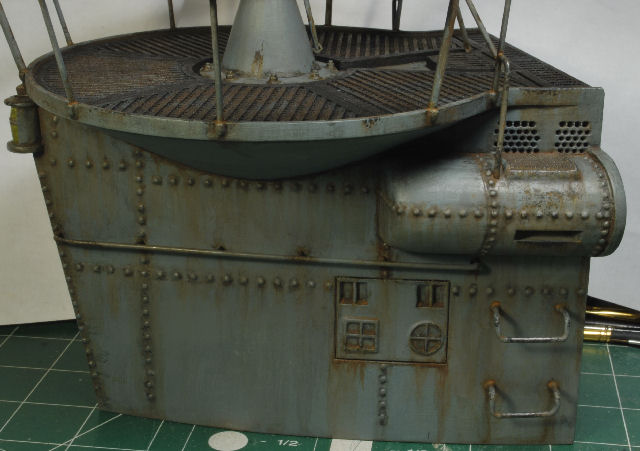 When I was satified with the general overall weathering process I mounted the gun and mount in place using pins, as always. 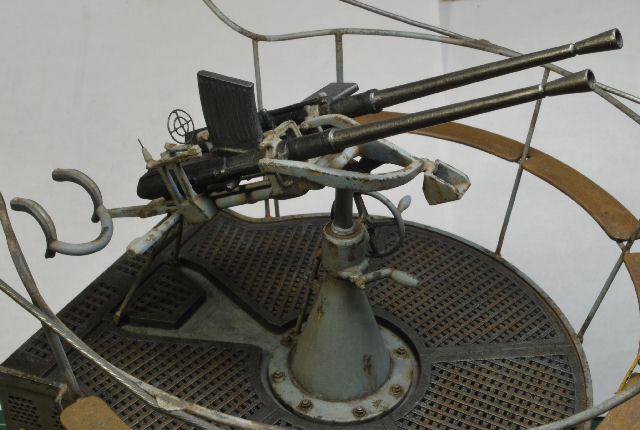 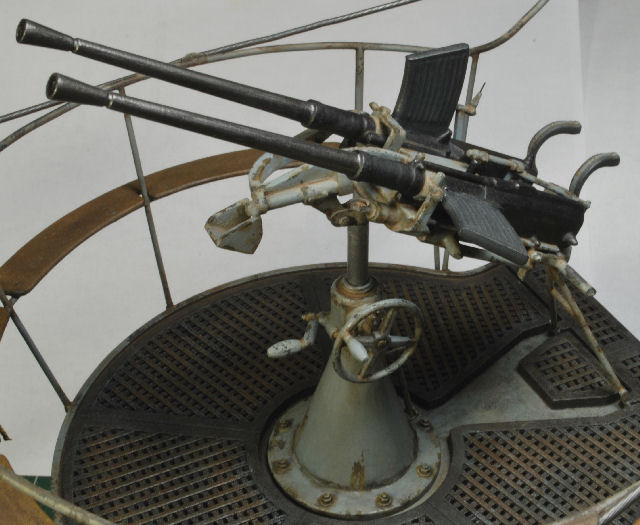 Lastly the flag and rope were added and touched up where needed. It was a bit of a pain to get the rope installed with my sausage fingers at hand, HA! I'm not sure I'll be rigging any sail ships any time soon. 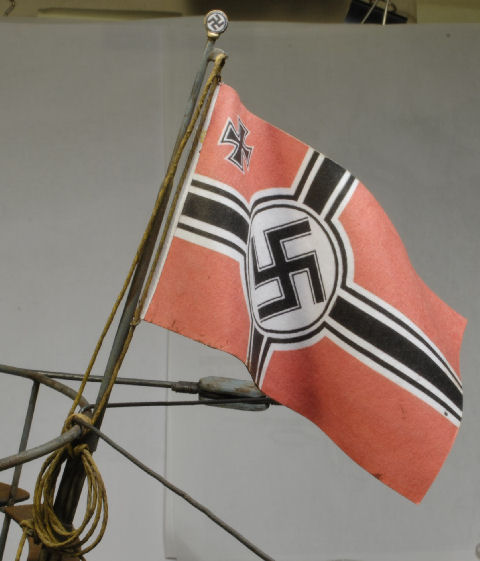 Ok, now the really fun part, making waves. Since I've already done four trial runs I will only show the beginning stages so yall know where I am in the process. This ain't as easy as the videos make it out to be. Reason being, I have such a small area to work with and it's in such a large scale, so I can't get away with a half hearted effort or the whole shebang will look rather pathetic. I have already gone back to painting the Watch Officer to clear my head a bit. I credit these many mistakes to breaking my golden rule, never be in rush, and the Mrs. has made it clear I need to slow down, HA! 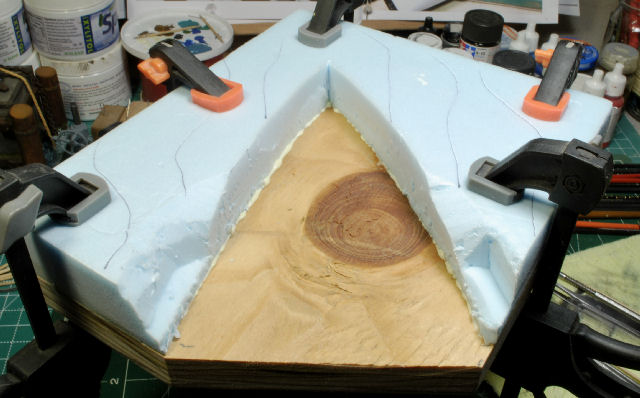 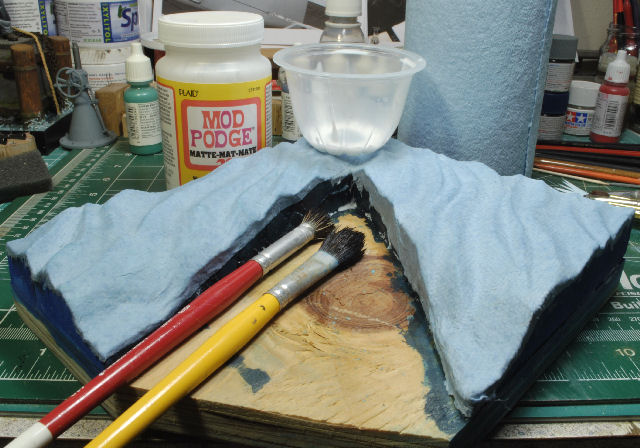 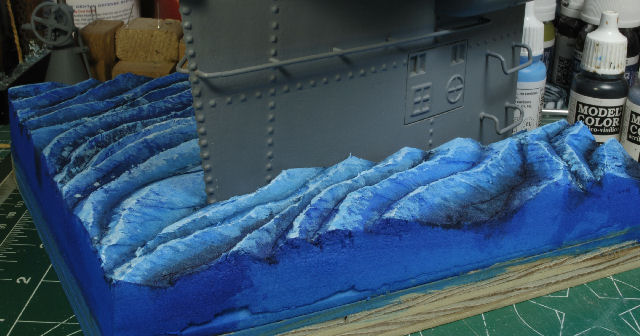 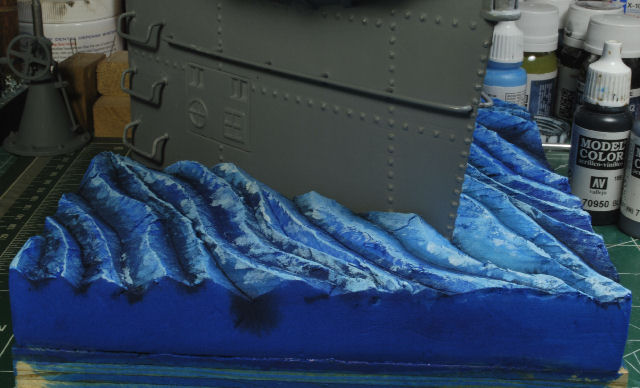 All the standard methods for making realistic waves can be found on the inet, so I won't go over them right now, but if I'm successful, I will, lol, later. It's been a challenge to get this just right, so I'll get back to this before it's all said and done. After all, this is all that is needed to complete this dio. More to follow soon and thanks for watchin! Cheers, Ski. P.S. 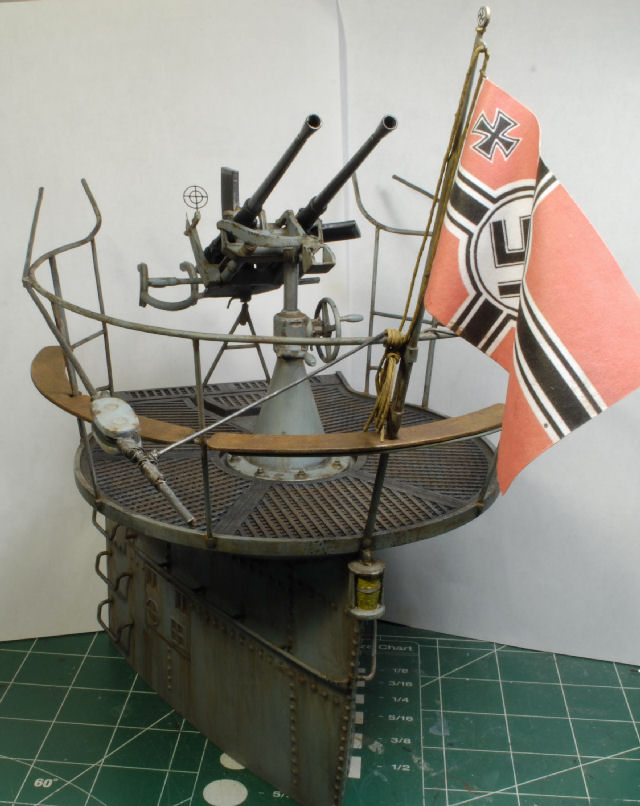 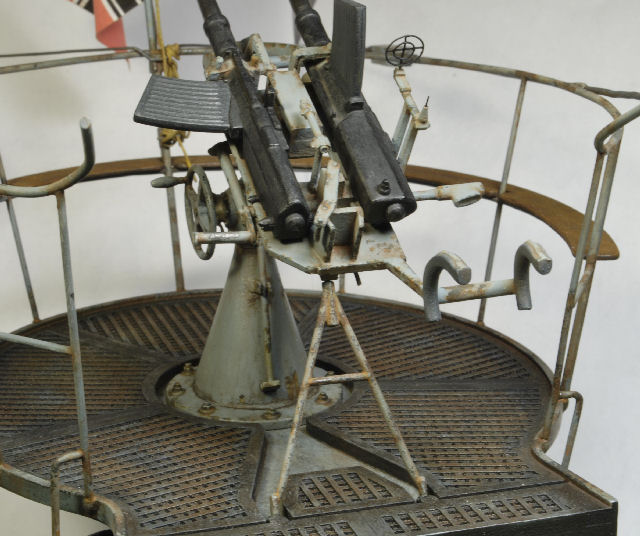
|
|
joelsmith
Full Member
  
Member since: July 2012
There no winners in war, only survivors.
Posts: 1,404
Jul 5, 2012 22:33:58 GMT -5
Jul 5, 2012 22:33:58 GMT -5
|
Post by joelsmith on Apr 16, 2019 22:06:27 GMT -5
Looking real nice Ski! I however have what probably a stupid question; Is this gun mount on the aft end of the conning tower? Thanks for not laughing at me too hard, Joel
|
|
|
|
Post by Steve Zuleski on Apr 17, 2019 11:41:52 GMT -5
No worries, yes it is. This is my first "dive" into the mariner realm myself, so we're good! Thx Bro, Ski.
|
|
|
|
Post by Leon on Apr 20, 2019 10:15:26 GMT -5
This is coming along very nicely Ski!
|
|
|
|
Post by Steve Zuleski on Apr 20, 2019 11:09:19 GMT -5
Thanks Leon. The water works are becoming my most intensive challenge, yikes!
|
|
|
|
Post by Steve Zuleski on Apr 22, 2019 21:37:00 GMT -5
Water Works FinishedAfter countless attempts to get it right I will finally call this good. It was one of those, "Oops,that'll work", moments. So, Ruck On Bby! I've watch numerous videos on the subject, even did several dry runs, but trying to get the waves correct for a scenario depicting the rear of a gun deck, and in this larger scale, it proved to be a bit more challenging than I had anticipated. Most of the boat pics and videos describing water effects are in a much smaller scale, so realism is a bit easier to come by. Not to mention I was rushing myself, something I try never to do, so let that be a lesson to me, HA! Ok, after reshaping the foam to a configuration I felt comfortable with I covered it with heavy blue workshop paper towel using Mod Podge, white glue will work just fine as well. Then I painted the water tones, making sure to highlight the tops of the waves, with Vallejo acrylics in various shades of blue and green. Once this was completely dry, using an old hair dryer, I added a coat of Vallejo's Water Effects and dried it completely as well. Now, here is the departure from all the videos I've seen so far, I immediately added a layer of toilet paper using Mod Podge (glue) and worked small areas at one time. Once the paper was in place I added a bit more "glue" to the surface and forced the paper into a wave shape following the natural direction desired for the effect I was attempting to duplicate. So far, so good. 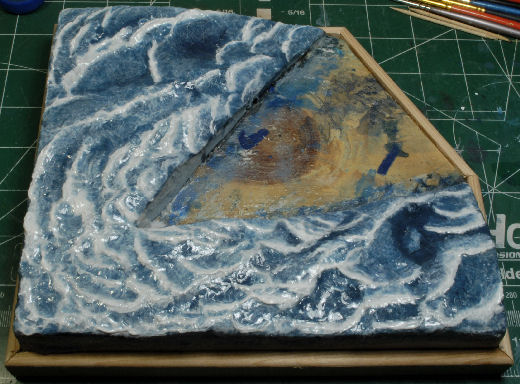 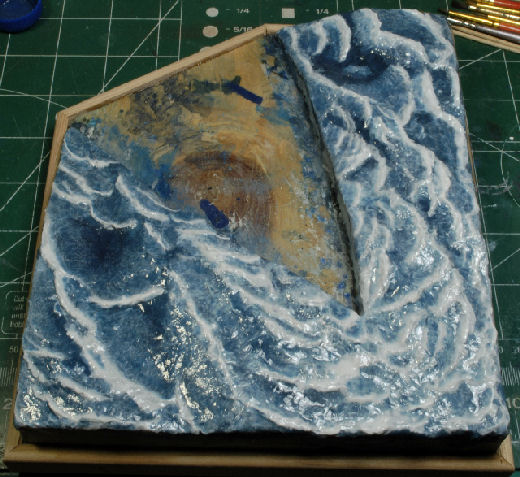 I continued this process all over the underlying waves and added a second and third layer of paper to the back portion of the deck where the most turbulence would occur. All good so far, and the depth of the water color from underneath was starting to come out nicely. The next step was to use heavy Medium Gel, from Liquitex, with a touch of white acrylic paint added. Taking the gel I worked the backs of the paper waves to smooth out the heavy ripples, giving it a much smother transition. I did this over the entire base making sure I didn't get carried away. So far so good, again. Now, to lighten up the effect and knock down all that white action I used Vallejo's Water Effects with a touch of blue acrylic paint and dabbed all the recesses of each created wave and all throughout the larger areas making sure I did not touch the tips or the build up of each wave. Yes, this was time consuming, but it appears to have worked. Hence, "Oops, that'll work!" Ok, lastly I dried everything completely, then touched up a few wave tips with white acrylic paint and gave the entire surface another coat of Water Effects to shine it all up. After all, it is all water, right? The last step was to cut, mount and paint the trim. Then of course, I mounted the finished gun deck. Once the deck was in place I went along the edge of the deck with toilet paper and Mod Podge pushing the paper into a natural position along the base of the deck. I applied the same process as above, then shined it up with Water Effects. So, after all that frustration and one heck of a heavy learning curve I was pretty happy with the finish. 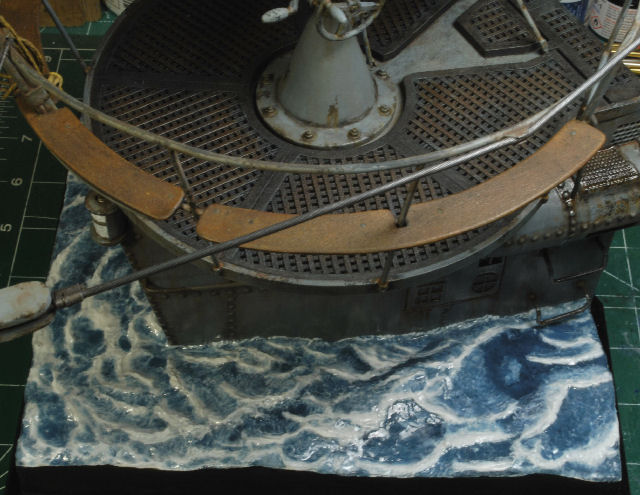 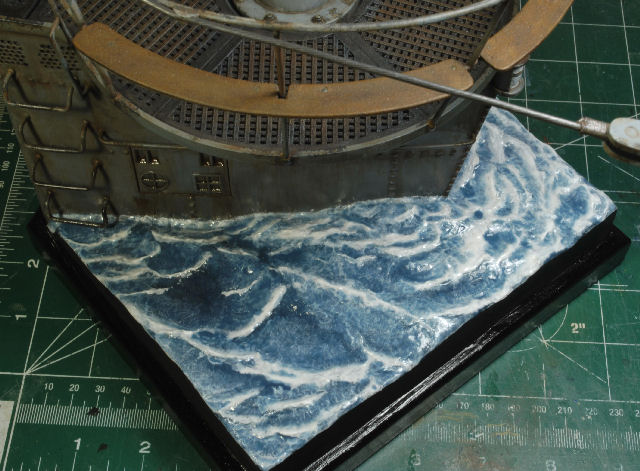 This won't be my last attempt at water works, I'm thinking it's going to be a bit more fun next time. Now, I have one more figure to finish and this dio will be complete. If you have questions or comments, holler. Thanks for watchin. Cheers, Ski.
|
|
|
|
Post by Tobi on Apr 23, 2019 6:14:50 GMT -5
Really stunning, though I have to say the tower is perhaps a tad too grimy and rusty for my taste. I wonder if the boats were that long-lived to develop such a look?
Probably the wood protection was "boat soup" based on tar? When I did some research on the S-100 torpedo boats the sources claimed the wood planks were wrapped in linen first, then tarred and painted over, which is why contrasting wood color would be inappropriate (though indisputable cool looking) for a model.
|
|
|
|
Post by Steve Zuleski on Apr 23, 2019 9:54:08 GMT -5
Thanks Toby. Ya, it's difficult to catch every detail possible, I didn't know that the boards were wrapped. But, the subs did get pretty banged up, so I actually compromised and did go a bit light. I based mine on the RC sub guys, they do great work.
A bit more water work up against the hull, then it's done for sure.
Cheers, Ski.
|
|
|
|
Post by Tobi on Apr 23, 2019 14:52:26 GMT -5
Well, I'm not sure if this wrapping thing was also true for U-boat decks...
In fact I have some problems to imagine it given the dimensions and the layout of the grid. The S-boat planking was much more simpler and also larger, or should I say coarse?
|
|
|
|
Post by Leon on Apr 23, 2019 17:07:22 GMT -5
Really nice work on the water Ski!  |
|
|
|
Post by Steve Zuleski on Apr 24, 2019 0:18:29 GMT -5
Thanks Leon!
|
|
|
|
Post by Tojo72 on Apr 24, 2019 12:25:46 GMT -5
The base looks great
|
|
|
|
Post by Steve Zuleski on Apr 24, 2019 21:45:30 GMT -5
Thanks Tojo, greatly appreciated, Amigo!
Tobi, I added a bit of green in the water works and did some wave ripples along the hull, posting pics soon.
Cheers, Ski.
|
|
|
|
Post by Steve Zuleski on Apr 26, 2019 13:57:18 GMT -5
Water works updateSince the sides of the hull didn't have any transition to the waves I decided on using the silicon caulk method. The only draw back using this type of caulk is that it's not acrylic, so adding paint will be an issue. But, not if you are just making bubbles, HA! It seemed to work out ok. I drew out a line on a sheet of plastic wrap and played with it until I got what looked like mini waves and splashes. I let this dry over night.  Now that the waves were completely dried I pulled them from the plastic wrap and carefully placed them along the hull allowing the splash portions to ride up along the hull. When I was satisfied with the arrangement I glued them in place in only key areas that were prone to lifting away from the base. Then I mixed a tiny amount of blue and green acrylic paint into a small amount of Vallejo's Water Effect and coated/blended the edges and added the mix into all the recesses along the hull and out into the pre-existing waves. Now it was just a matter of adding white bubbles to the splashes using acrylic paint. I had to be careful not to get too carried away. As I mentioned before, the acrylic paint doesn't like to stick to the silicon caulking, but it worked out just fine for the effect I was looking for. 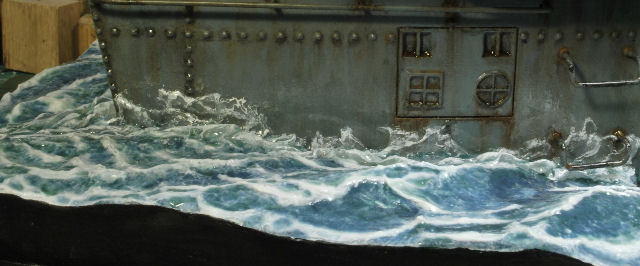 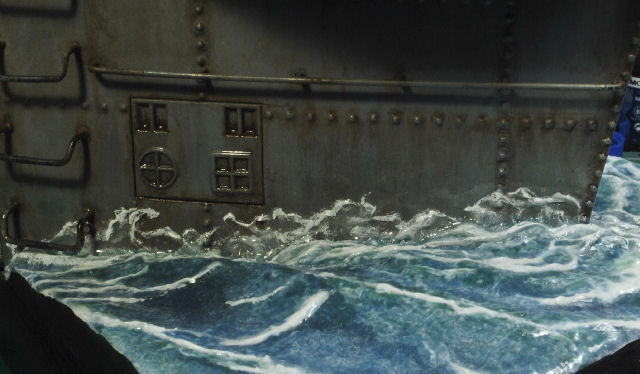 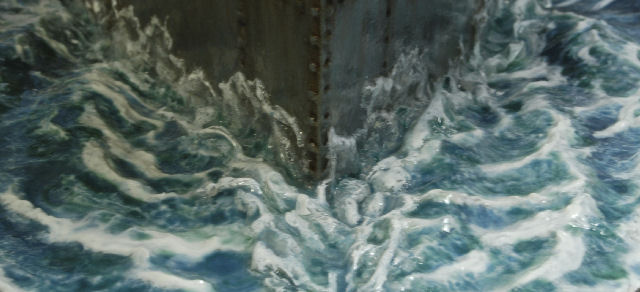 There may be some volume missing within the small transition waves, but I'm going to call this portion of the build complete. I really don't relish the chance of messing it up. I would have to say I'll be needing a lot more experience working with waves, I've got a long way to go before I feel totally confident in my ability to create realistic water works. Thanks for watchin, Ski.
|
|
|
|
Post by Steve Zuleski on May 18, 2019 21:35:44 GMT -5
Watch Officer is Finished Well, I thought I had taken in-progress photos of the legs and shoes, but apparently not. So, refer to the Captain figure, I used the same methods and techniques. Now all that is lacking is attaching these two figures to the deck and taking photos. I felt rushed on this last figure towards the end due to summer outside work fast approaching. But, since my sleep before the night shift was lacking I spent a few hours each night before work to finish this last figure. Boy, work sure does get in the way of this hobby, ya know what I mean? At any rate, come Thursday it won't anymore, Yehaaaaaaaaaaaaaaaa.......! Here's final shots before posting to the gallery. 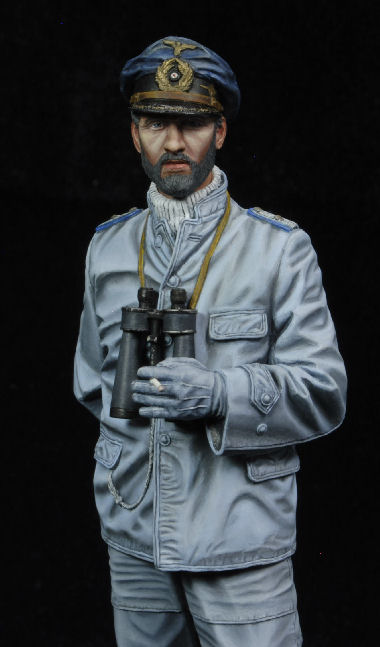  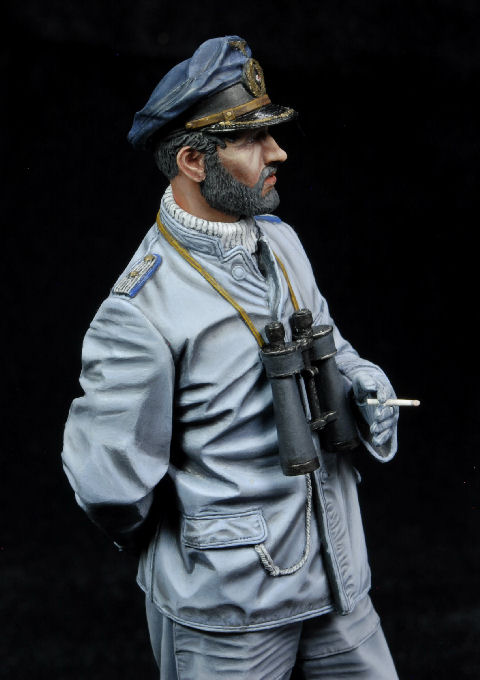 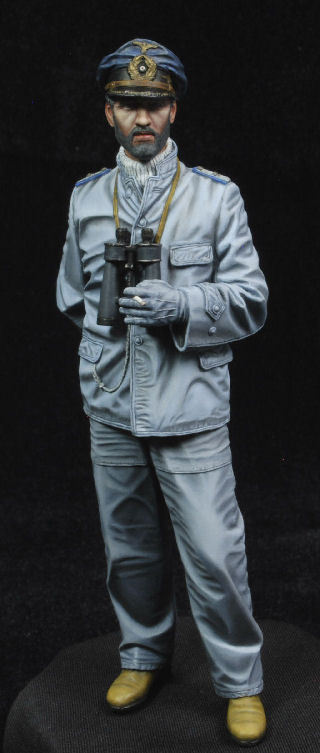 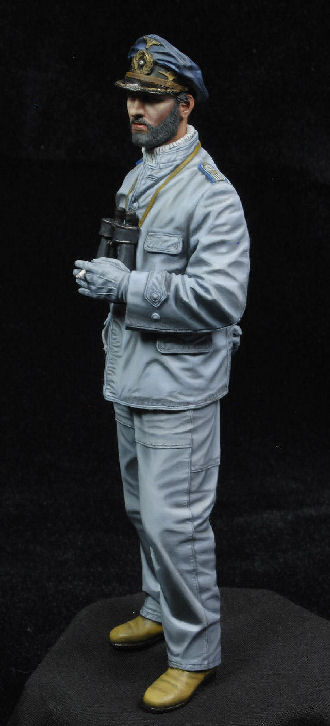 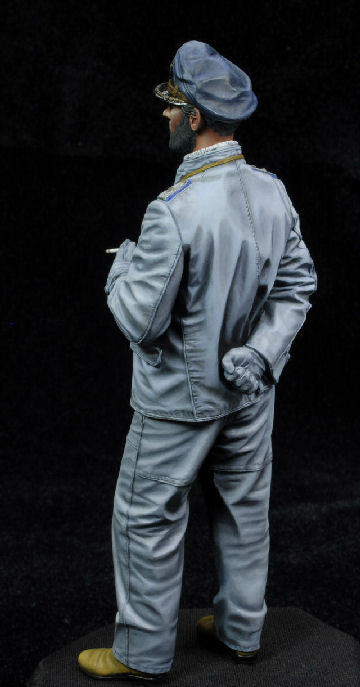 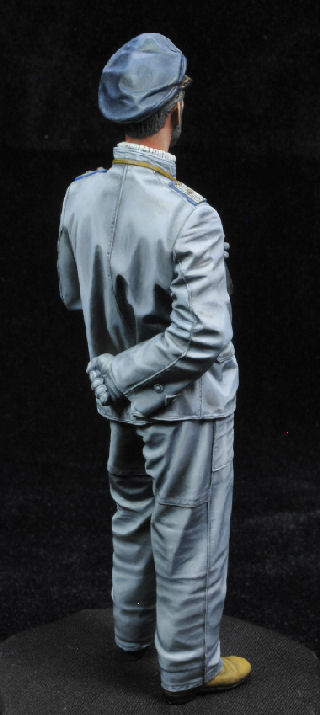 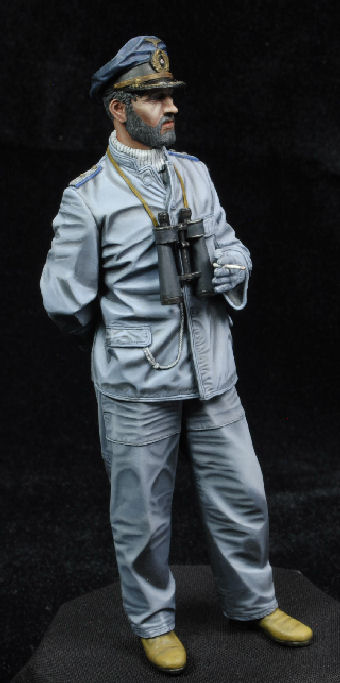 Thanks for watchin. Cheers, Ski. |
|
|
|
Post by Tobi on May 19, 2019 5:48:37 GMT -5
Simply wow! The water splashes on the tower surely do the trick.
Isn't it amazing how sometimes quite easy methods produce most convincing effects? That's what I like about this hobby.
|
|
|
|
Post by Steve Zuleski on May 19, 2019 9:04:26 GMT -5
I agree Tobi, inexpensive too. Thanks for the kind words!
Cheers, Ski.
|
|
|
|
Post by wbill76 on May 19, 2019 9:47:38 GMT -5
Been enjoying watching this all come together Ski! Pretty neat layout and combination!
|
|
|
|
Post by Steve Zuleski on May 19, 2019 21:32:51 GMT -5
Thanks Bill. Here's a better close-up of the face. 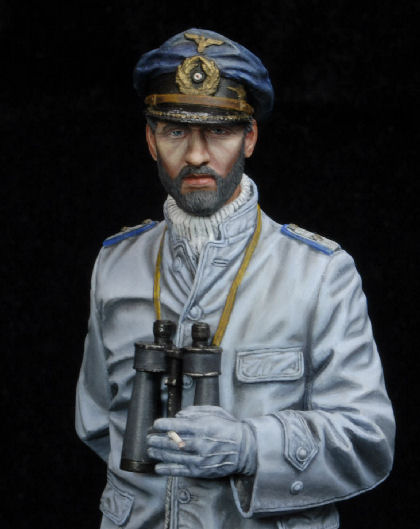 |
|