Post by paulh on May 31, 2012 16:36:15 GMT -5
Following the very positive comments re: the partial barn wall I’ve been trying out , I thought I’d share the technique in a brief SBS.
What you need
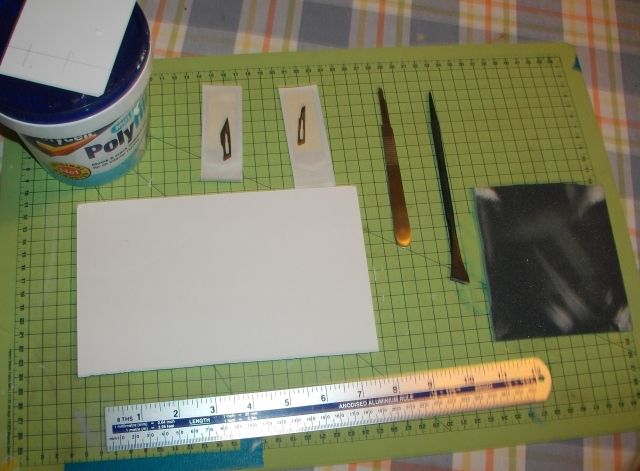
Some foam core board –this is 5mm
Metal Straight edge
Polyfilla or any similar spackle paste- the ready mixed variety is more economical
Sandpaper – here I’m using 240 grit
A fresh blade – 11 or 15 is best. or a Scribbing tool- here I’m using a double ended styrene scribber
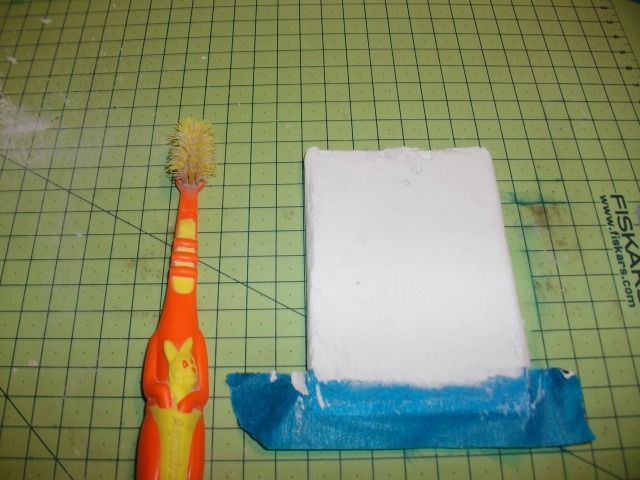
A brush to clean as you go- I’m using one of the kids old toothbrushes
The plan here is for a random stone type finish- as with the barn
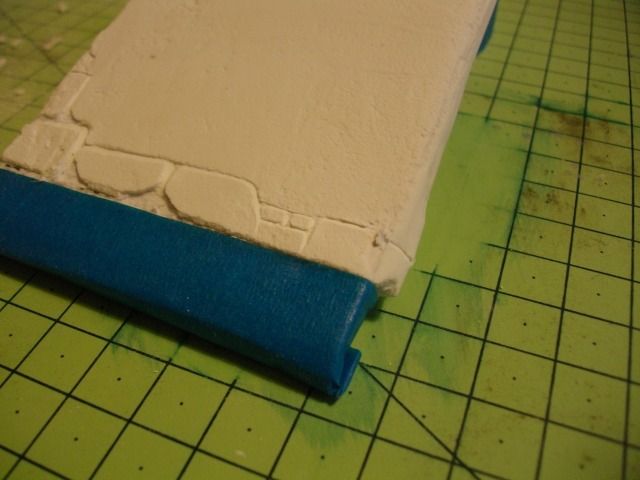
Apply a coat of the Polyfilla as evenly as possible- but don’t worry about being to exact as it will add to the realism set aside to dry
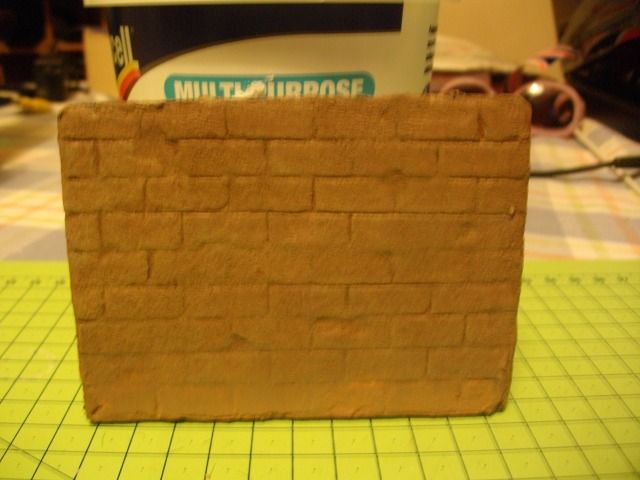
Once its dry- start carving. Using the tip of the blade or scribber start by laying in the bottom course and then just lay on the subsequent courses making sure to overlap joints- its still got to look as though it will stand up on its own. Varying the pressure will add to the resalism. I also scribe into the body of occasional stones to give the impression of tool marks, natural ware or weather spalling damage.

After I started , I decided to try something else- a filled in window The key with these is to scribe in the lintle, sill and sides,. Then its fairly straightforward to fill in the spaces

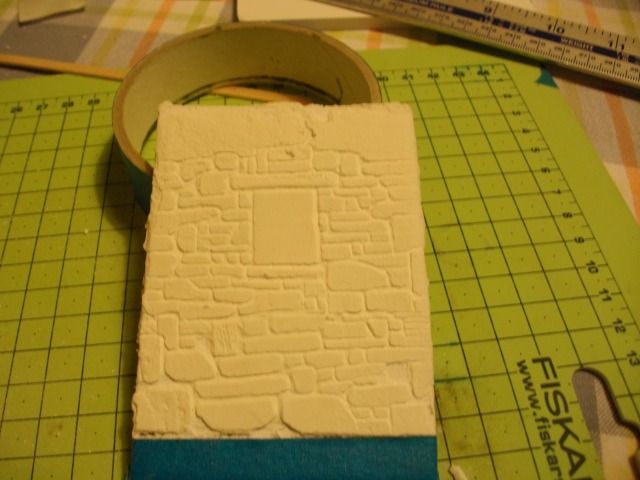
The beauty of this is you can alter the shape and size of the stones to anything you want –like the real thing-but they do obviously have to fit broadly together.
Once finished a quick run-over with the brush should clear any dust ready for painting.
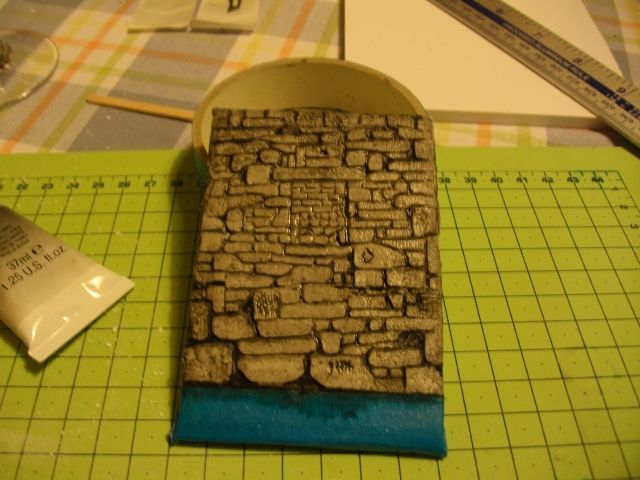
For the first stage of painting I use a heavily diluted wash of black oil paint. This works its way into the mortar lines by capillary action and also helps to pick out additional surface detail. Excess surface colour is then removed with a piece of kitchen towel.
This then needs to dry preferably overnight, and then you can start picking out the individual stones in the appropriate colours.
Depending on your location , dio setting etc., these colours will obviously dependent on the local material. As with bricks variations can and do occur between and within individual stones. With granite, that colour can vary from grey through to tones of blue and even orange!
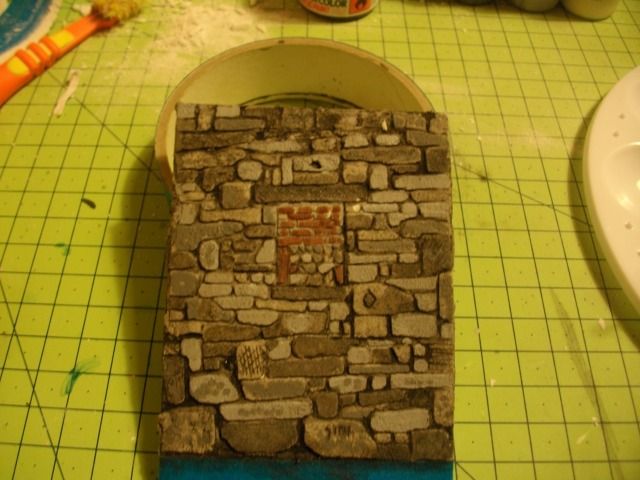
I don’t worry about slight over painting of the mortar line. TBH I generally just use it as a means of demarcation for application of different colours on the stones themselves. The line will get picked out again with pigments later.
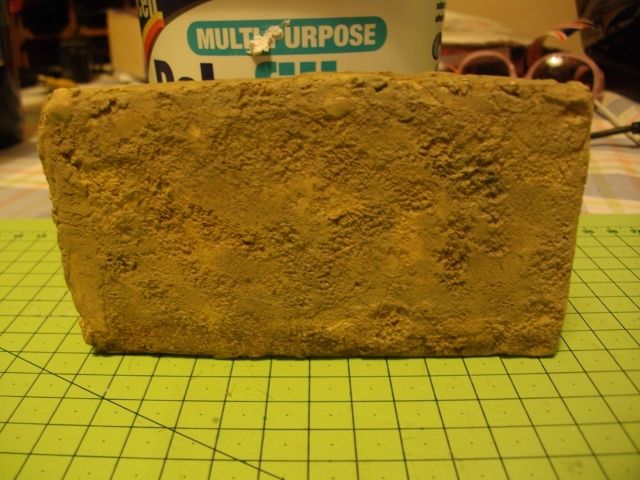
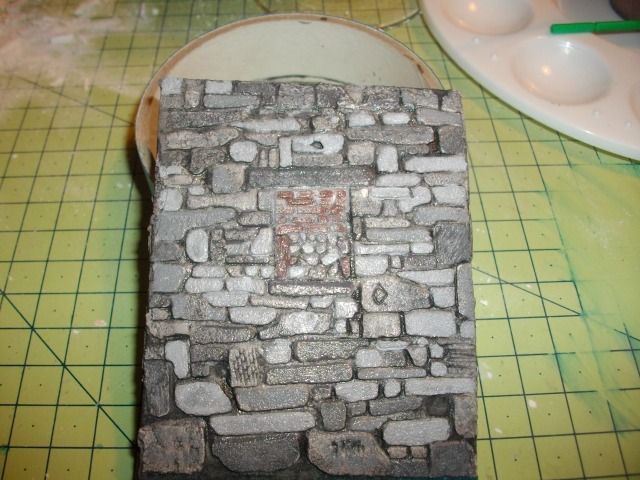
For this SBS I’ve applied a liberal dusting of Vallejo pigment which were then fixed with some Tamiya thinner. Once this dries off you are left with this…

Hope you find it useful
P
What you need
Some foam core board –this is 5mm
Metal Straight edge
Polyfilla or any similar spackle paste- the ready mixed variety is more economical
Sandpaper – here I’m using 240 grit
A fresh blade – 11 or 15 is best. or a Scribbing tool- here I’m using a double ended styrene scribber
A brush to clean as you go- I’m using one of the kids old toothbrushes
The plan here is for a random stone type finish- as with the barn
Apply a coat of the Polyfilla as evenly as possible- but don’t worry about being to exact as it will add to the realism set aside to dry
Once its dry- start carving. Using the tip of the blade or scribber start by laying in the bottom course and then just lay on the subsequent courses making sure to overlap joints- its still got to look as though it will stand up on its own. Varying the pressure will add to the resalism. I also scribe into the body of occasional stones to give the impression of tool marks, natural ware or weather spalling damage.
After I started , I decided to try something else- a filled in window The key with these is to scribe in the lintle, sill and sides,. Then its fairly straightforward to fill in the spaces
The beauty of this is you can alter the shape and size of the stones to anything you want –like the real thing-but they do obviously have to fit broadly together.
Once finished a quick run-over with the brush should clear any dust ready for painting.
For the first stage of painting I use a heavily diluted wash of black oil paint. This works its way into the mortar lines by capillary action and also helps to pick out additional surface detail. Excess surface colour is then removed with a piece of kitchen towel.
This then needs to dry preferably overnight, and then you can start picking out the individual stones in the appropriate colours.
Depending on your location , dio setting etc., these colours will obviously dependent on the local material. As with bricks variations can and do occur between and within individual stones. With granite, that colour can vary from grey through to tones of blue and even orange!
I don’t worry about slight over painting of the mortar line. TBH I generally just use it as a means of demarcation for application of different colours on the stones themselves. The line will get picked out again with pigments later.
For this SBS I’ve applied a liberal dusting of Vallejo pigment which were then fixed with some Tamiya thinner. Once this dries off you are left with this…
Hope you find it useful

P


 . An update sometime later today/tonight I think