|
|
Post by Tobi on Dec 20, 2018 12:00:16 GMT -5
This is again a birthday gift for a friend. She is totally into medieval re-enactment and currently the Jarl (chief) of a group of vikings! Recently she bought herself a double-handed sword, so if you think this is not a proper present for a woman, you might be wrong...  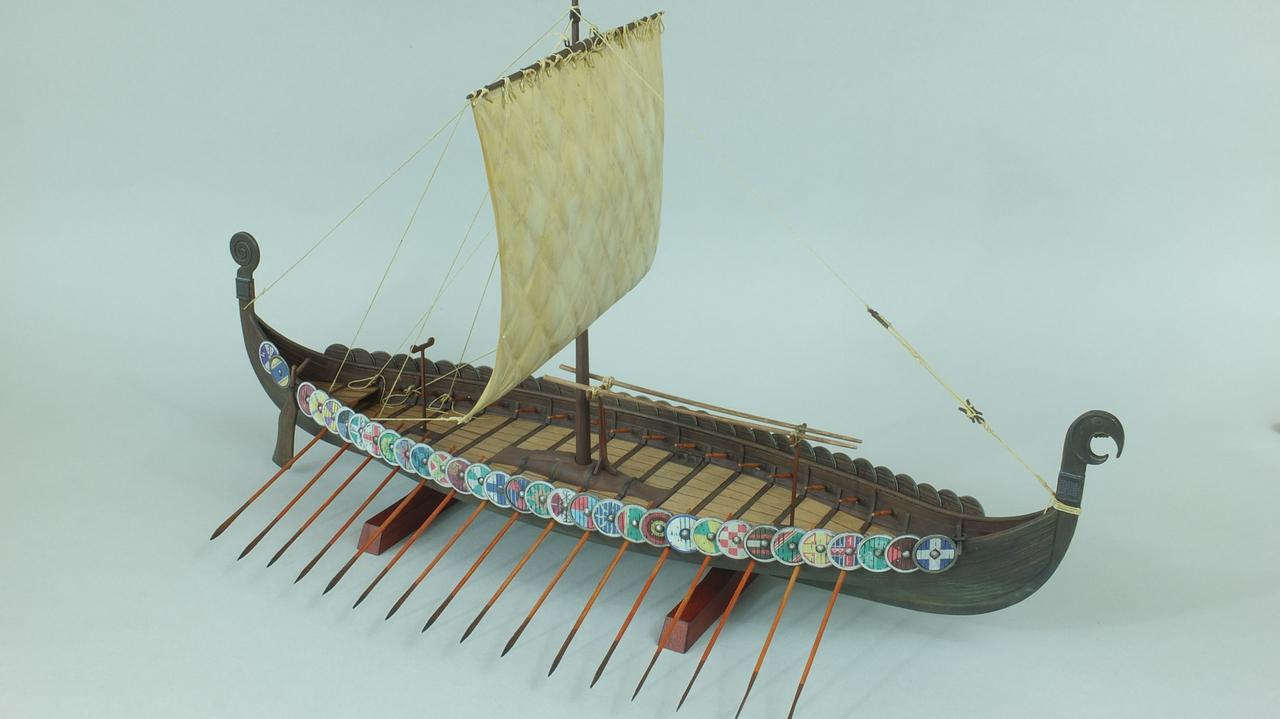 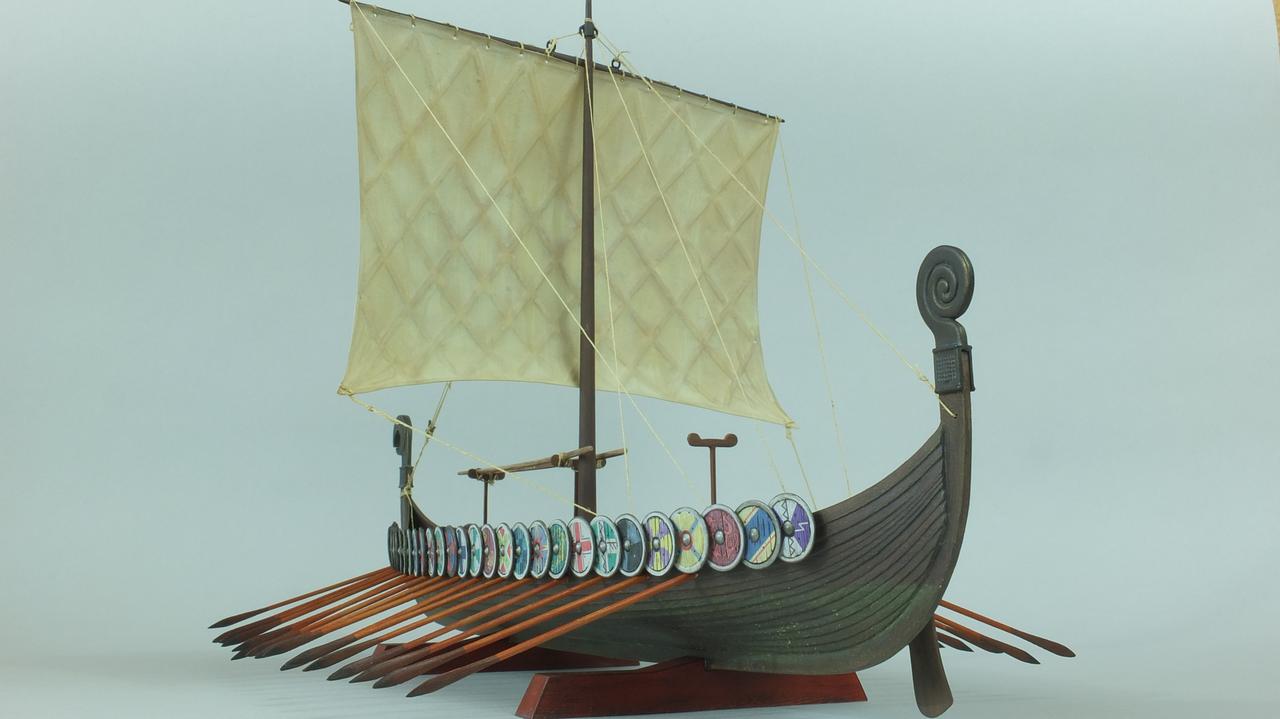 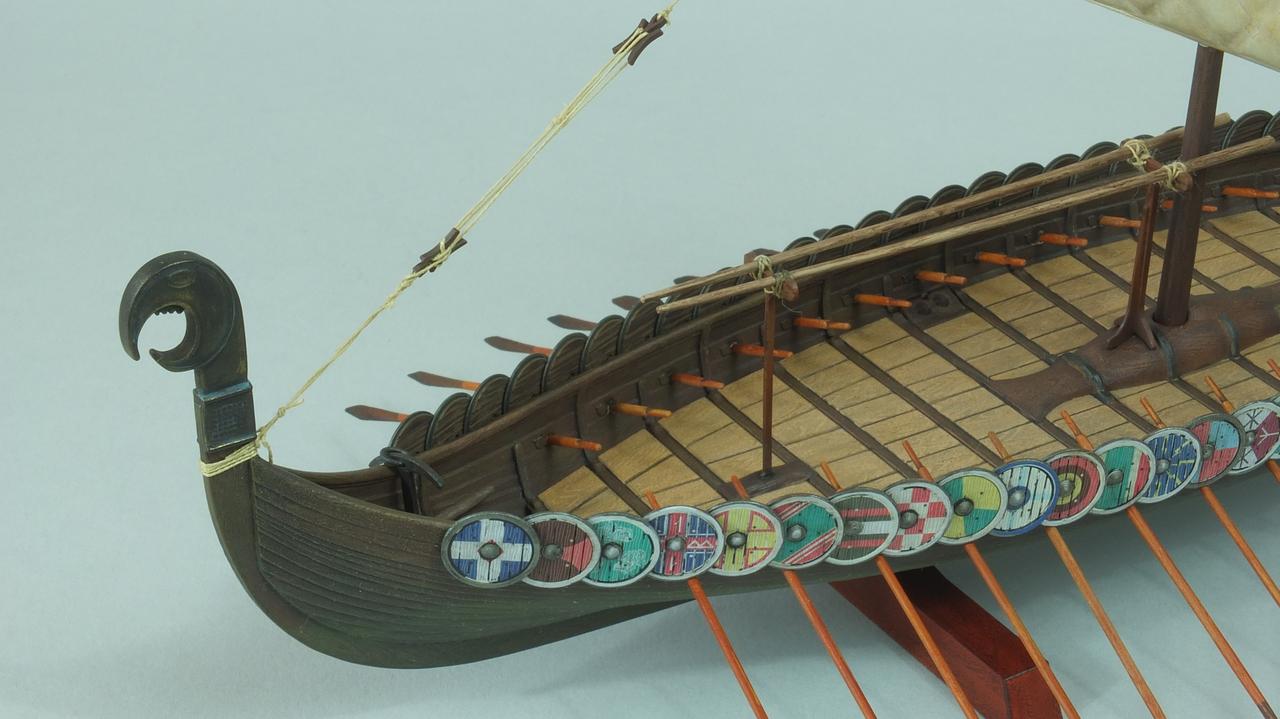 A little SBS on how I made the different wood effects is going to follow. All in all it was an enjoyable project, apart from the 64 warrior shields. Those decals were a nightmare, thick and oversize!  The decal for the sail was not used as I found it ridiculous. There are some versions of this kit with a raven instead, that looks way better. First I wanted to give the sail some stripes, but the paint would peel off too easily when removing the masks. The original mold of the kit is from 1977, but the fit was good. |
|
|
|
Post by Leon on Dec 20, 2018 16:37:54 GMT -5
That looks fantastic Tobi! Very nicely done.
|
|
John Everett
Full Member
  
Member since: January 2012
July, 2016 MoM Winner
Posts: 1,278
Jan 17, 2012 0:53:48 GMT -5
Jan 17, 2012 0:53:48 GMT -5
|
Post by John Everett on Dec 20, 2018 19:17:11 GMT -5
You should name it after her.
|
|
moramarth
Full Member
  
Member since: March 2014
Posts: 455 
|
Post by moramarth on Dec 20, 2018 21:39:18 GMT -5
Superb work, I hope the lady is suitably impressed. I understand that the model actually scales out at about 1:63rd scale, and that the Emhar Viking Oarsmen, although 1:72 scale do actually work well with it. Some years ago a reproduction Longship on its way to Ireland called into a local harbour for repairs - AND I MISSED IT! (One of several callers over the years I'm still annoyed about missing...)
Regards,
M
|
|
|
|
Post by Tobi on Dec 21, 2018 5:16:29 GMT -5
Superb work, I hope the lady is suitably impressed. I understand that the model actually scales out at about 1:63rd scale, and that the Emhar Viking Oarsmen, although 1:72 scale do actually work well with it. Some years ago a reproduction Longship on its way to Ireland called into a local harbour for repairs - AND I MISSED IT! (One of several callers over the years I'm still annoyed about missing...)
Regards,
M
Thank you, that's indeed bad luck missing the boat! During my research I found out there must be several reproductions of this ship type out there. Well, I hope she will like it. Luckily I found the Emhar figures only after I had finished the kit, as this would have meant even more work to do!  |
|
|
|
Post by Tobi on Dec 21, 2018 5:25:07 GMT -5
Thank you Leon! It was way more work than expected. I had assumed 5-6 days to completion, but it took me closer 14-15. With 6-8 hours each day! Anyhow, I think it was worth it as I learned a lot about wood painting that will also be useful later in 1/35. You have a good point there John, but I think I will leave the naming to her. Every ship needs a name, true?  |
|
|
|
Post by Tobi on Dec 21, 2018 5:39:14 GMT -5
Let's get started. The kit has 131 parts and is rated difficulty level 3 of 5 by Revell. I removed everything from the sprues and cleaned it up. At first only the two hull parts and the figureheads are to be glued together. Some parts don't have any surface detail, here I imitated the wood grain with a semi-coarse file, as can be seen on the oars. 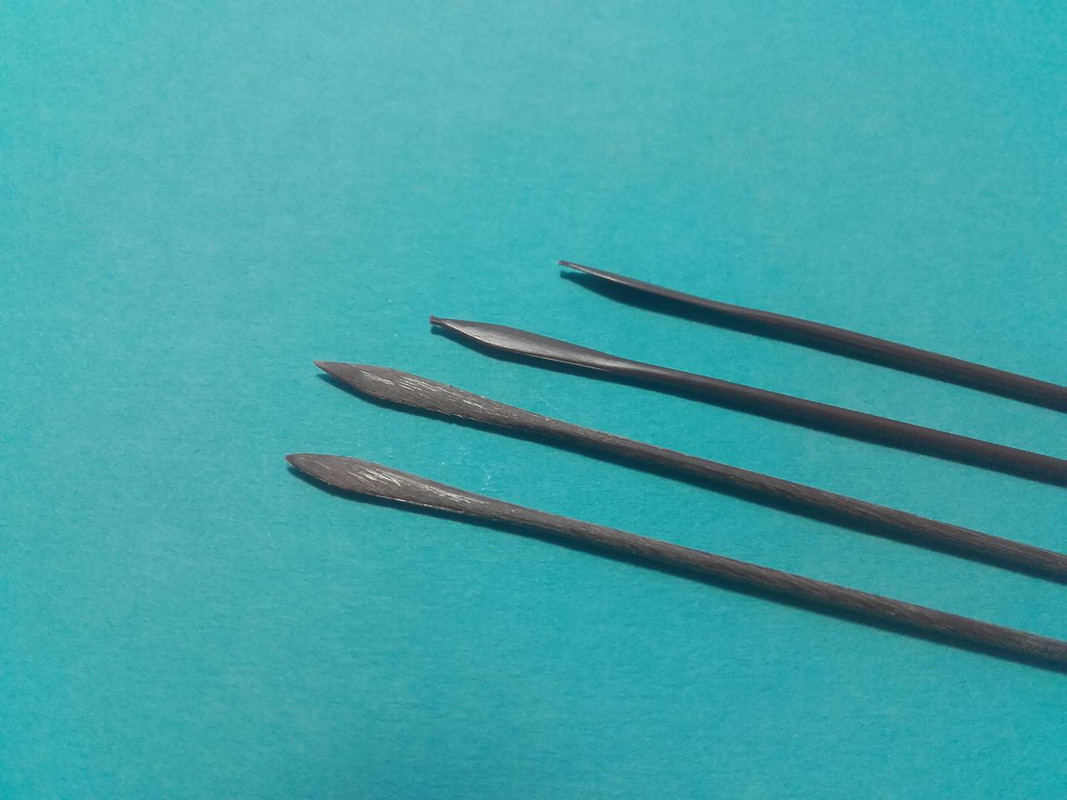 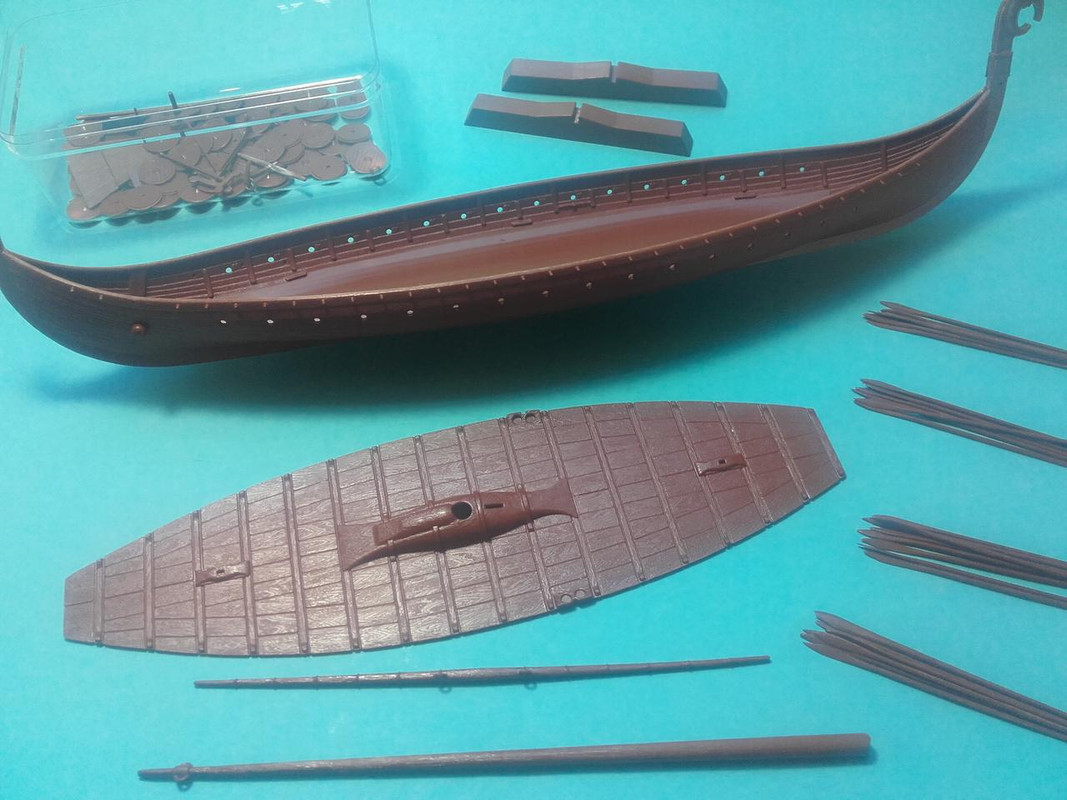 After giving all parts a thorough wash in soap water and a good rinse I started priming them with pink. Yes, that's right: PINK! As the inventor of this technique has put it: "the more pink, the better..." We'll see why later. I used a Mr.Color spray can for this purpose, with #112 "character flesh (2)". 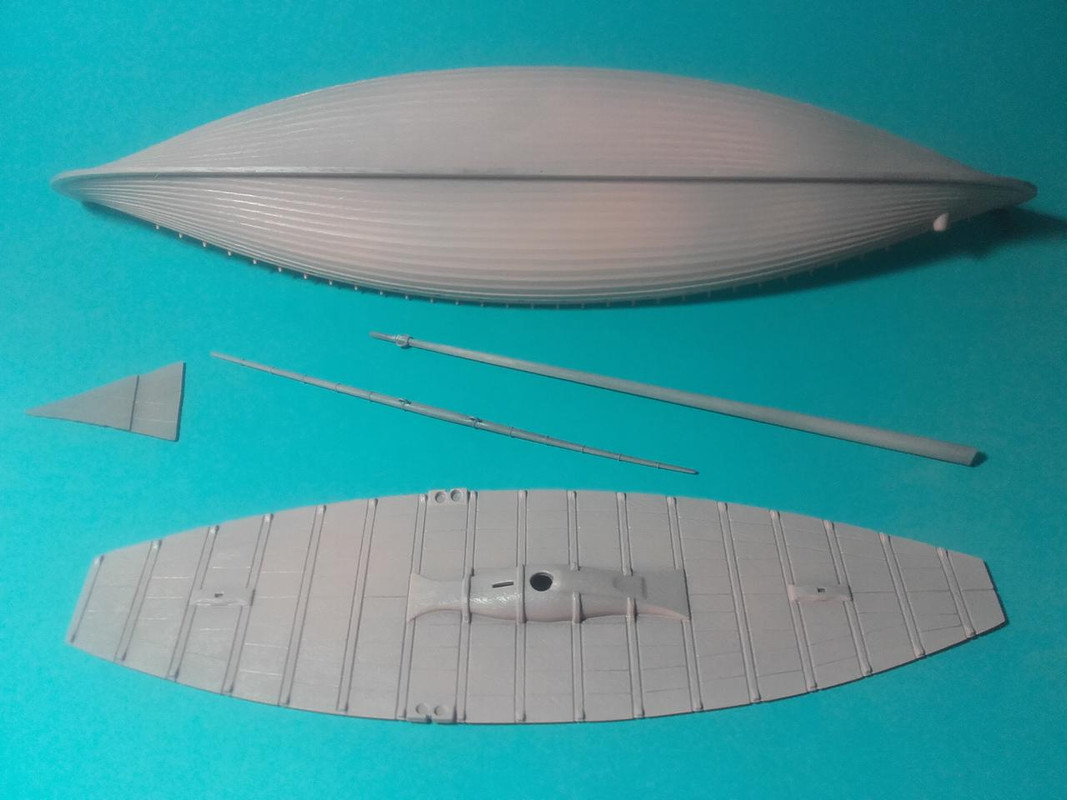 |
|
|
|
Post by Tobi on Dec 21, 2018 8:03:48 GMT -5
After the pink is on, it's time for painting the wood grain. The original technique calls for dark brown oils and a stiff bristled brush. As the large kit parts did have a relief structure to them I opted for drybrushing with acrylics instead, which also dries faster. Regardless if you want to create either light or dark wood, you can apply on this base a transparent(!) color of your choice with your airbrush for the final look. On the quarterdeck can be admired the result of too little pink. The wood looks grey and dirty. This part was later repainted. 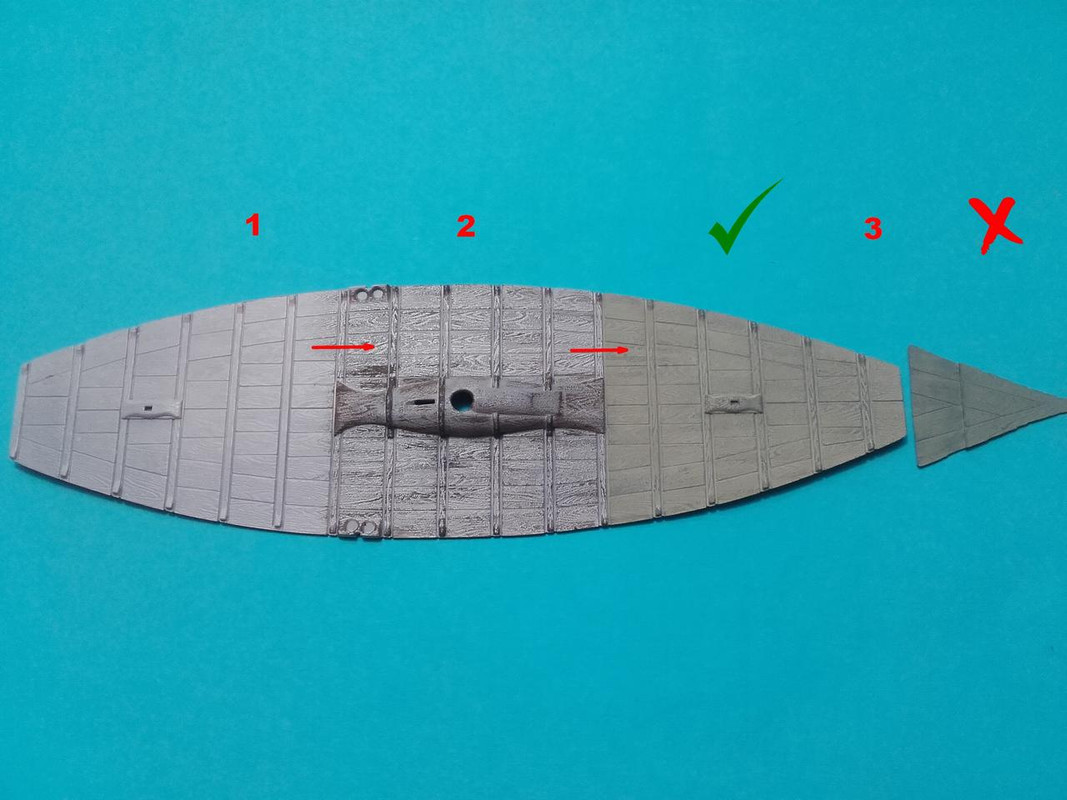 |
|
|
|
Post by Tobi on Dec 21, 2018 14:59:49 GMT -5
Anti-fouling protection seems to be as old as ship building. It's said that already the Phoenicians plated their ships with copper. From ancient Greece there is a mixture reported containing oil, arsenic and sulfur. Also tar, wax and asphalt were in use since the very beginning, often to seal and plane the hull sides, with tarring being the method of choice on a Viking boat. There are different recipes and depending on the ingredients the "boat soup" could look anything from light and honey-colored to red brown, to dark, to almost black. I played with different hues on my model. In modern times the methods were extended in England by charring and lead plating, the later especially against ship worms. For the dark looking wood again the pink primed, dark drybushed surfaces were misted this time with a transparent dark brown mix. On this I applied a wash of "Nuln Oil", one of the most useful colors from the GW series, topped off by a light drybrushing with English Uniform from Vallejo: 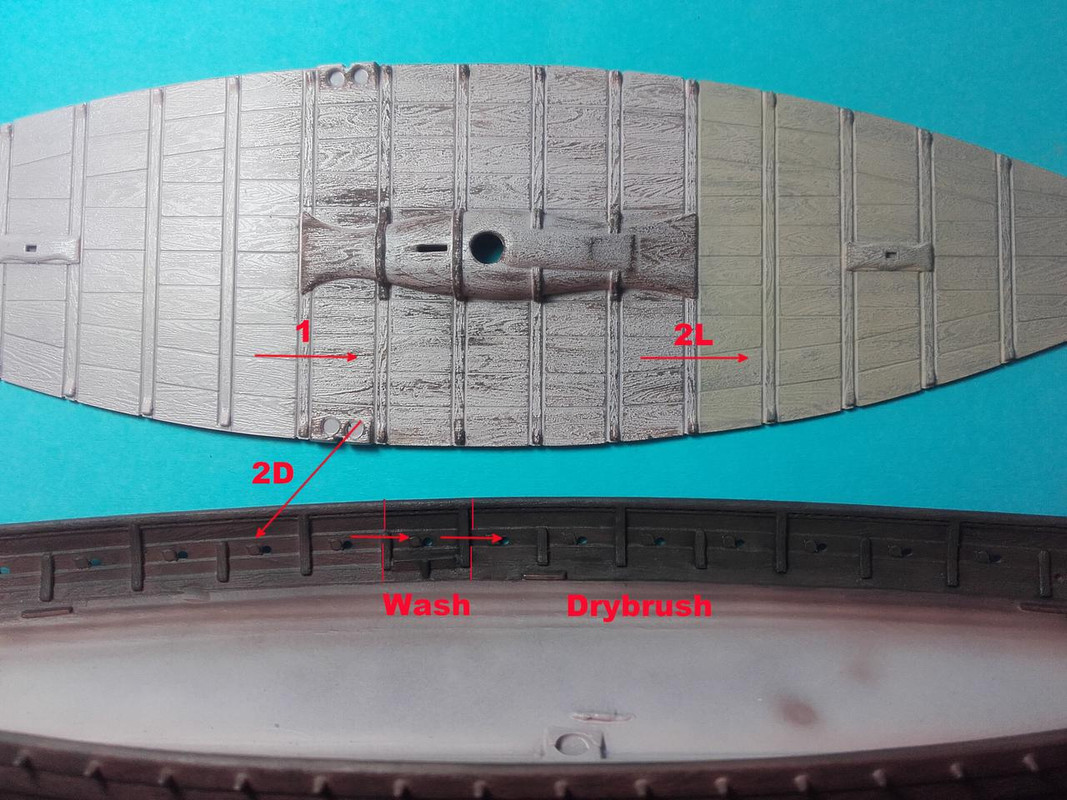 |
|
joelsmith
Full Member
  
Member since: July 2012
There no winners in war, only survivors.
Posts: 1,404
Jul 5, 2012 22:33:58 GMT -5
Jul 5, 2012 22:33:58 GMT -5
|
Post by joelsmith on Dec 21, 2018 18:13:00 GMT -5
Where's the Swedish Bikini Team? ;<P
|
|
|
|
Post by Tobi on Dec 22, 2018 2:52:56 GMT -5
They took the Volvo!  |
|
|
|
Post by Tobi on Dec 22, 2018 3:27:32 GMT -5
The planks on the deck were masked off with tape and the remaining surfaces treated like the rest of the hull. On mast, yard and rudder I used the oils instead of acrylics. 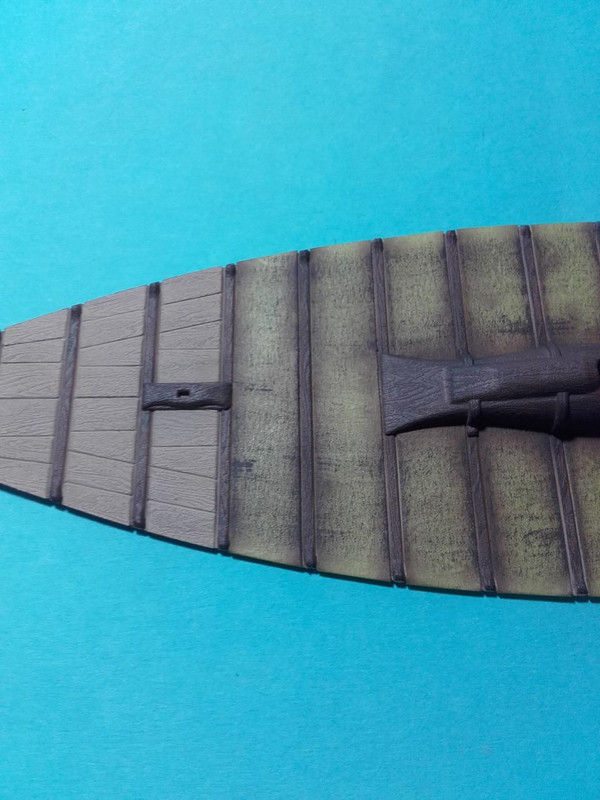 The oars were first primed with XF-78 Wooden Deck Tan, then came orange and dark brown oils and on this MRP-269 Clear Red Brown from Mr.Paint with the airbrush. I dipped the tips in a thinned black brown acrylic tint and taped them to my shelf for drying. 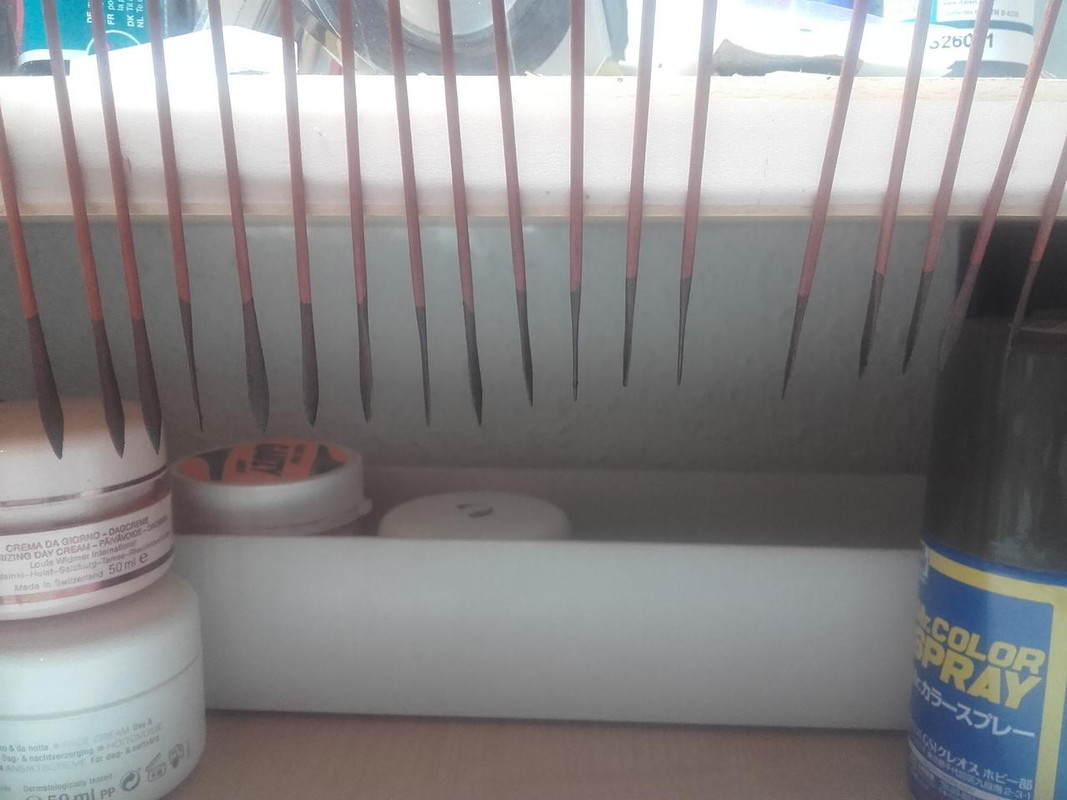 The shields were primed in XF-56 Metallic Grey, and on the back I worked with two different browns and a Voyager airbrush stencil for wood grain to good effect. The application of the decals was tedious. I tried different setting solutions, finding the best is the new two part system from MIG with MicroScale in second place. Tamiya, Gunze and Humbrol did not perform anywhere as well, even not the Tamiya MarkFit "Strong". Did I mention you need to punch a hole in the middle for the shield buckle and cut down the diameter of every decal by one millimeter to make it fit the size of the shield? 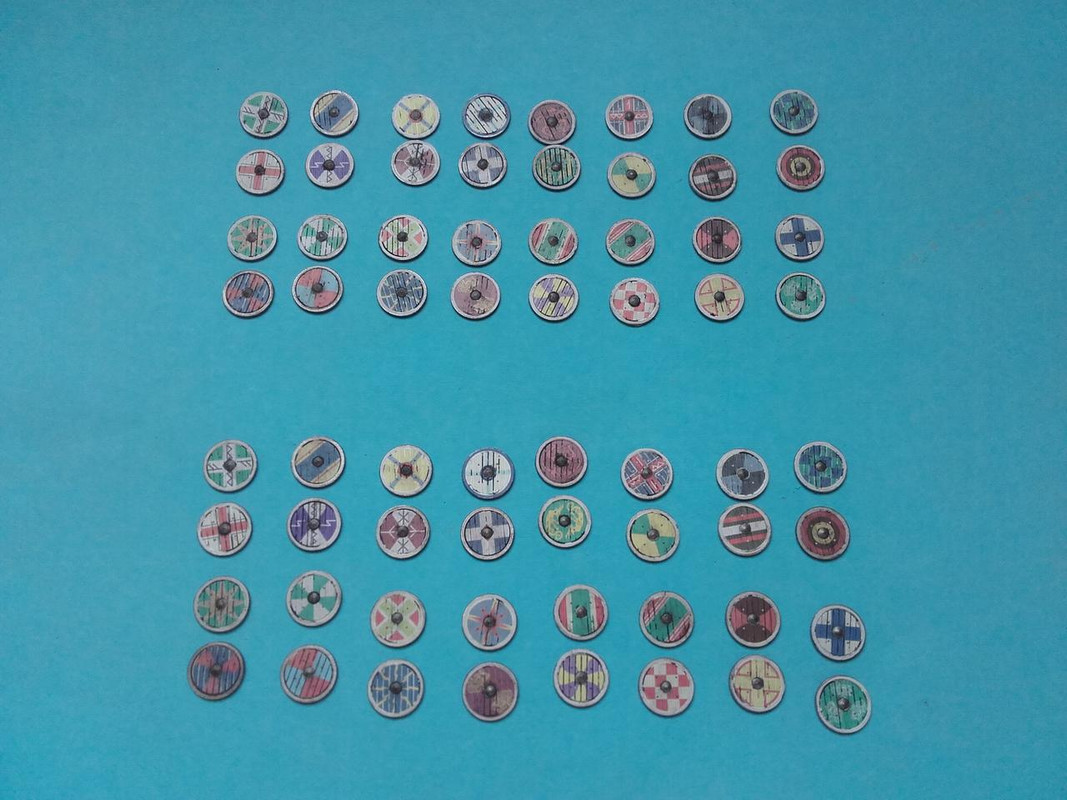 Almost there... |
|
|
|
Post by Leon on Dec 22, 2018 8:43:40 GMT -5
All your time and effort really paid off Tobi! Your wood effect and the shields look great.
|
|
|
|
Post by Tobi on Dec 23, 2018 4:25:43 GMT -5
The last of my different methods to paint the wood is also by far the simplest. A base color of XF-78 followed by brown glaze from Vallejo, applied with a stiff bristled brush. This was used on the tent(?) poles. 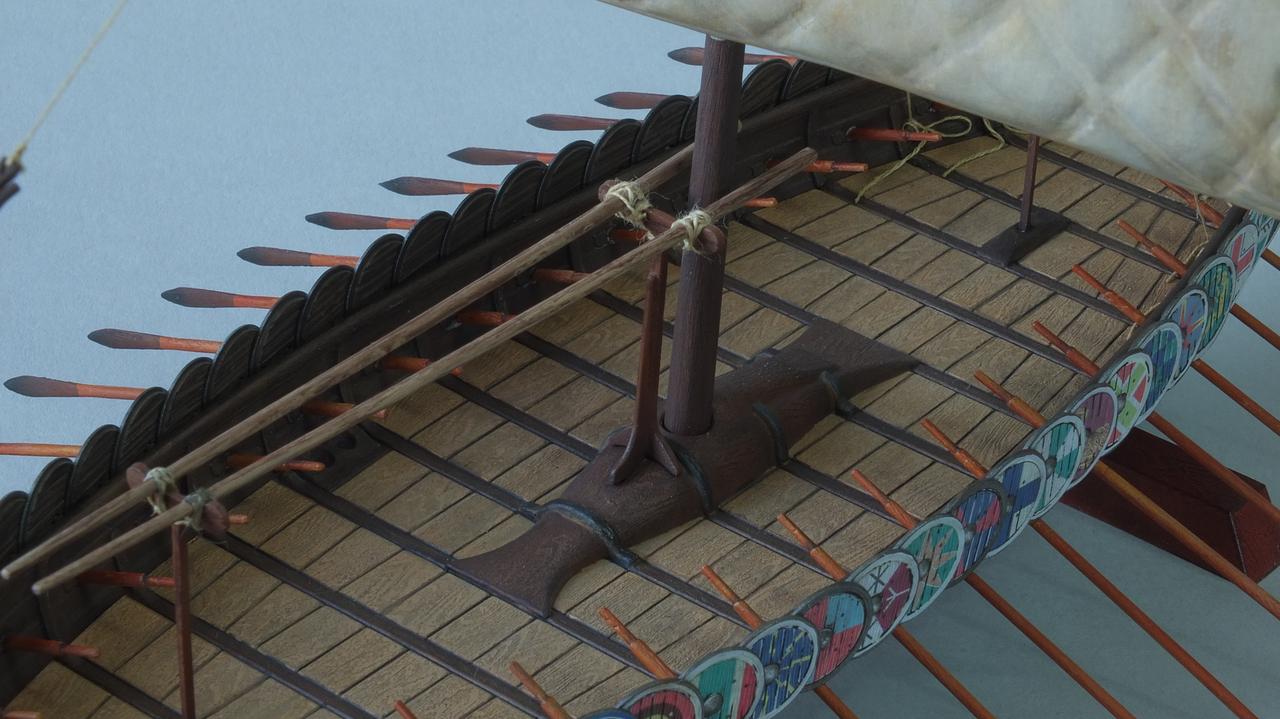 Painting the vacu-formed sail is also really easy. First a coat of Mission Models MMP-082 "Ivory", then a generous wash with thinned Sepia shade from Vallejo and on top of this again the base color. First I picked out the diamonds focusing on the top halves, then I misted over the whole sail again with my airbrush to unify the result. 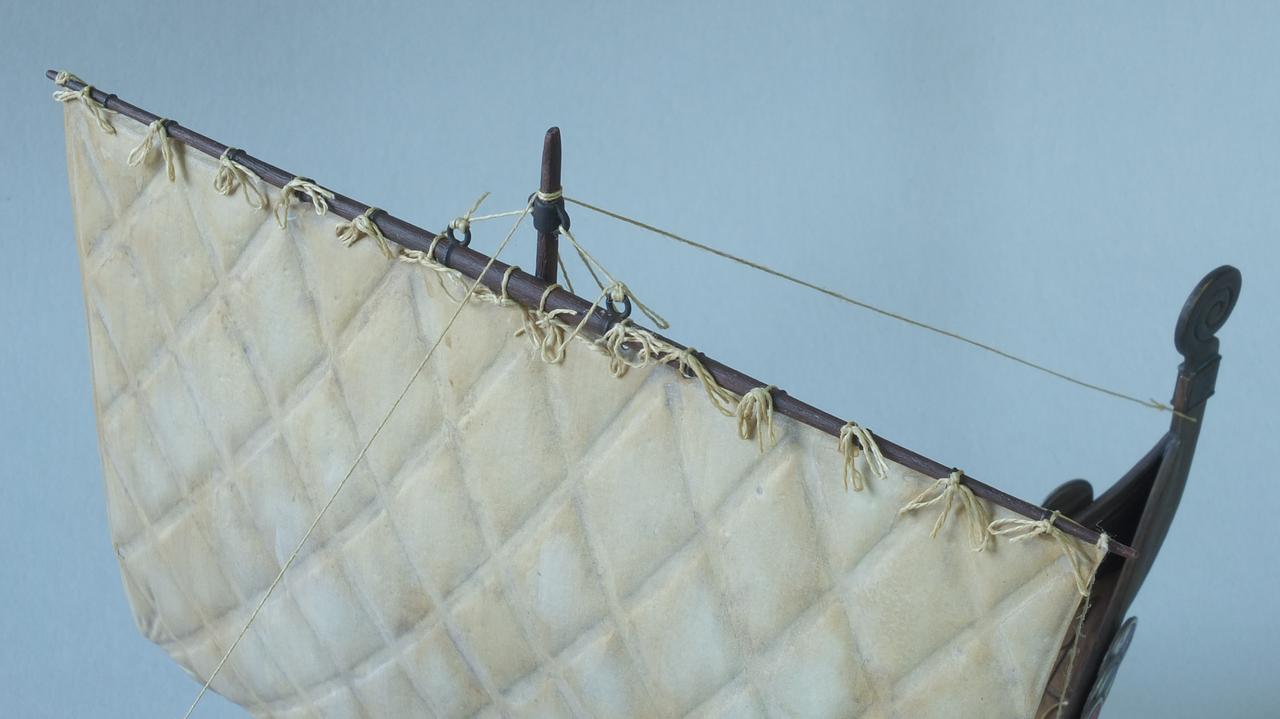 Last job are the bronze figureheads: They were primed in XF-84 "Dark Iron" and heavily drybrushed with an oil color mix made from gold and copper. After this had dried I applied a lavish wash from slightly thinned MIG "Dark Brown". As soon as the thinner had vaporized I immediately buffed them with the skin of my thumb. This was followed by a second more careful drybrush with Vallejo acrylic bronze (sounds logical, somehow). The final touch was a pin wash in selected areas, mixed from Vallejo colors white, park green and mirage blue. 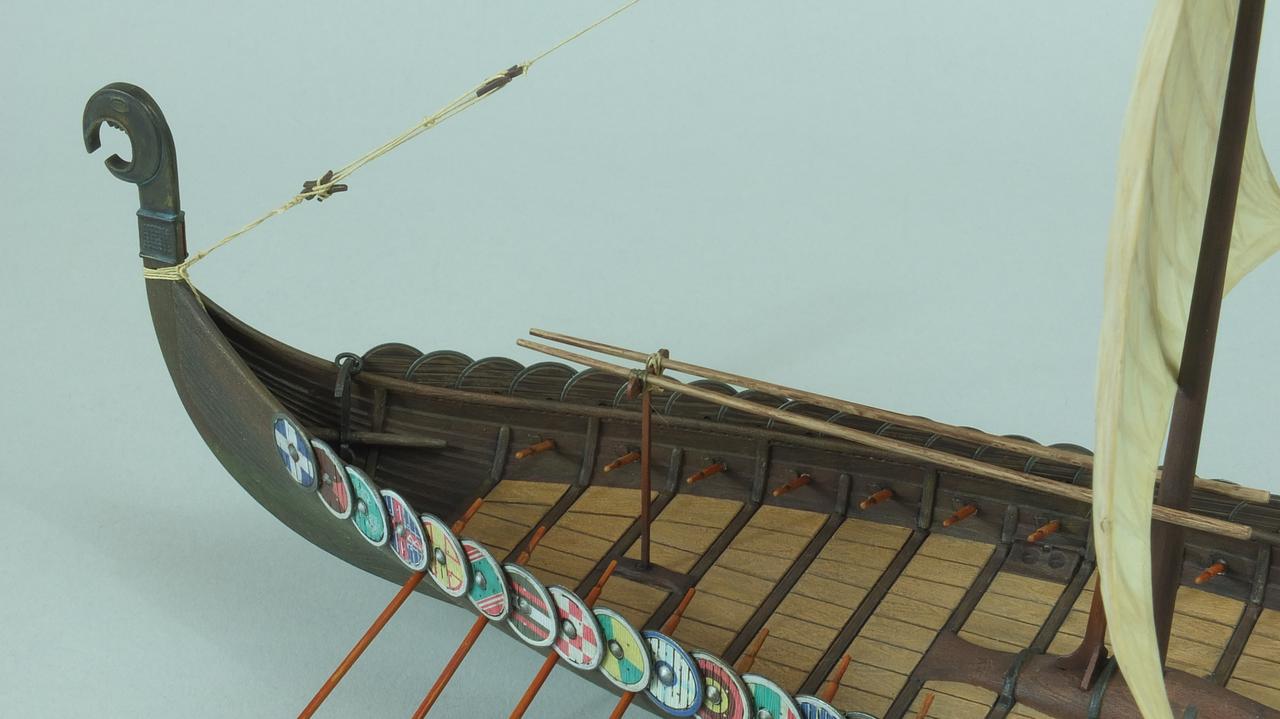 Light Rust effects were also applied very scarcely, as I imagined the ships were always well maintained. A little on the mast base, that's it. Luckily there is almost no rigging to be done on this object. One afternoon was enough for this task, with the most tedious work bending on the sail to the yard. I used the kit's own thread, though it is a little on the rough side, but I think it suits the model perfectly. I dipped the ropes into water first for straightening them. 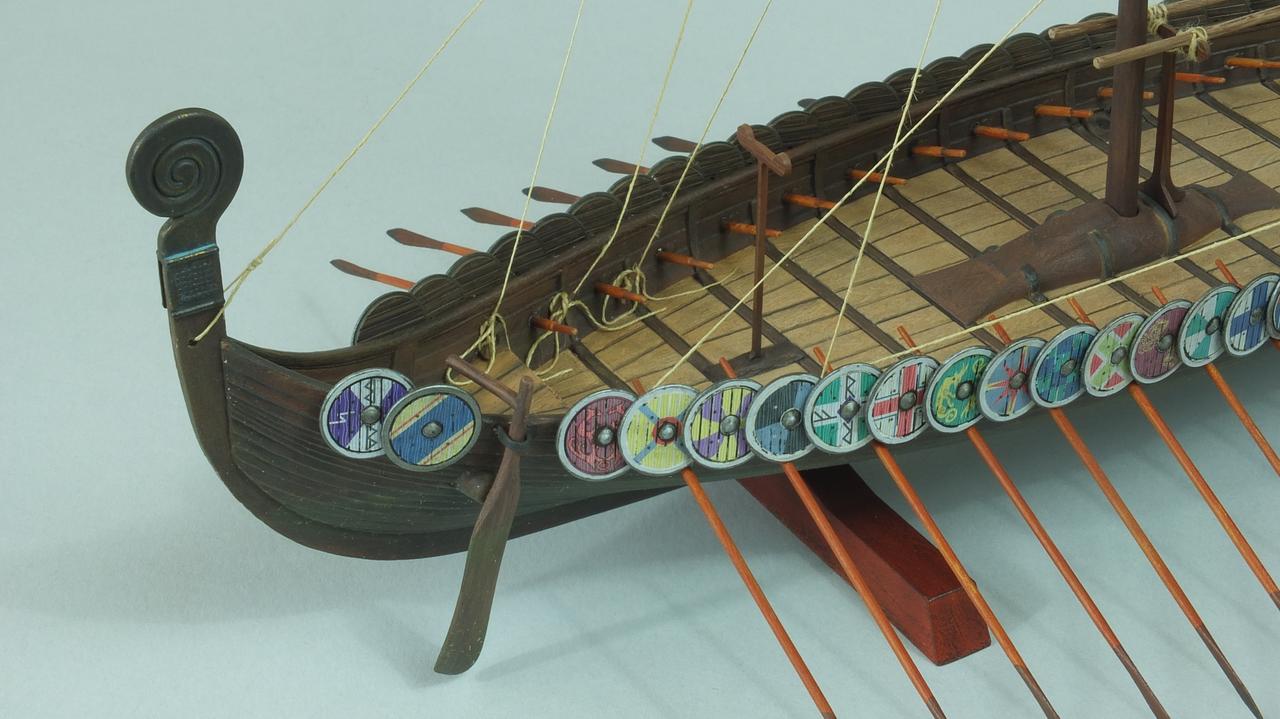 |
|
|
|
Post by Tobi on Dec 23, 2018 4:40:14 GMT -5
|
|
k1w1
Full Member
  
Member since: February 2015
Posts: 873
Feb 18, 2015 8:07:41 GMT -5
Feb 18, 2015 8:07:41 GMT -5
|
Post by k1w1 on Dec 23, 2018 8:26:44 GMT -5
Looking really good.
|
|
|
|
Post by Tobi on Dec 23, 2018 15:49:42 GMT -5
Thx! At least one model finished in 2018.  |
|