|
|
Post by Steve Zuleski on Feb 21, 2022 20:35:19 GMT -5
54mm Resin, Sculpted by Vladimir Danilov, offered by Castle Miniatures. 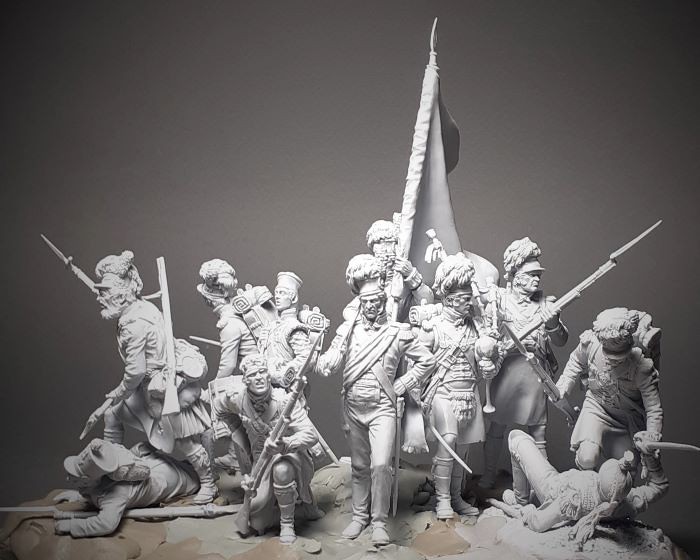 Like a fish out of water I am completely out of my element starting this set. The Battle of Waterloo is not my normal area of study, nor are the bright and brilliant colors something I’m use to painting. In fact, I’ve never done anything so elaborate or complex as this set of figures in such tight proximity to each other, or this color scheme. The sculpting is really impressive, to say the least. I can only hope I do it justice in the end. So, rather than dip my big toe in the pool, I dove right into the deep end, head first. What else was I gonna do? I felt drawn to this set as soon as I saw it offered. It was a serious toss up over a few days of angst as to whether I would build a 1/35th scale UH-1N with a weapons load crew or this set of “Black Watch” figures at Waterloo. I had both scenarios laid out on the bench as I pondered each. Once my mind was made up it was straight off to research, and thankfully, Alexandre Khokhriakov and Castle Miniatures themselves provided plenty of study material. I figured if I could knock out a decent rendition of a Denison Smock camo pattern, I should be able to handle the Black Watch Campbell tartan, and the battle flag, and socks. Well, we’ll soon find out, won’t we? HA! I’ve watched a few gals paint flags for miniatures on YT, they’re incredible. These gals got talent, so I will be using their work as reference material on that portion of this build. This is all new to me! 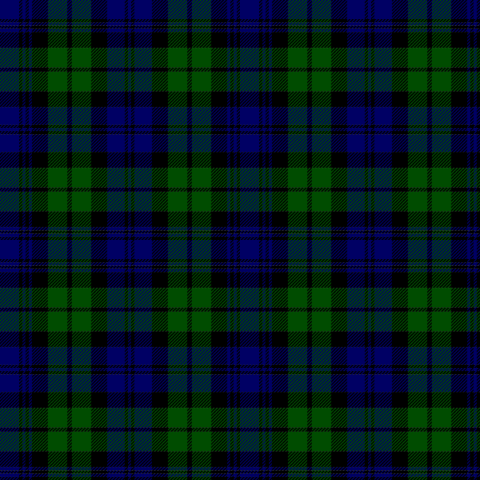 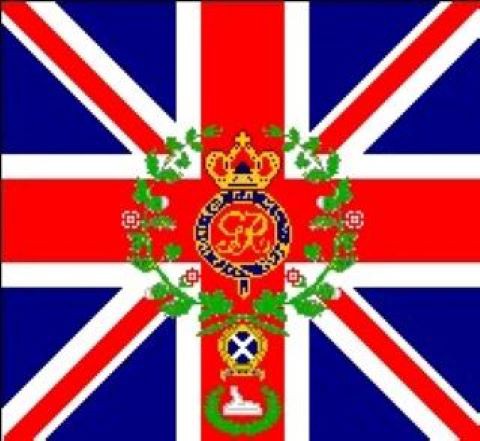 Eleven figures complete this dynamic battle scene, all cast in resin. I was impressed with how clean these figures were and the lack of any major issues to deal with. A little time spent carefully removing any seem lines or slag is all I’m finding necessary to get these figures ready for the brush. I decided to keep some kind of order with all these little parts by using a half pint mason jar crate with some added foam padding at the bottom of each divided section. I numbered these guys as they were being cleaned up and worked, just to keep track of who gets what part. So far, so good. 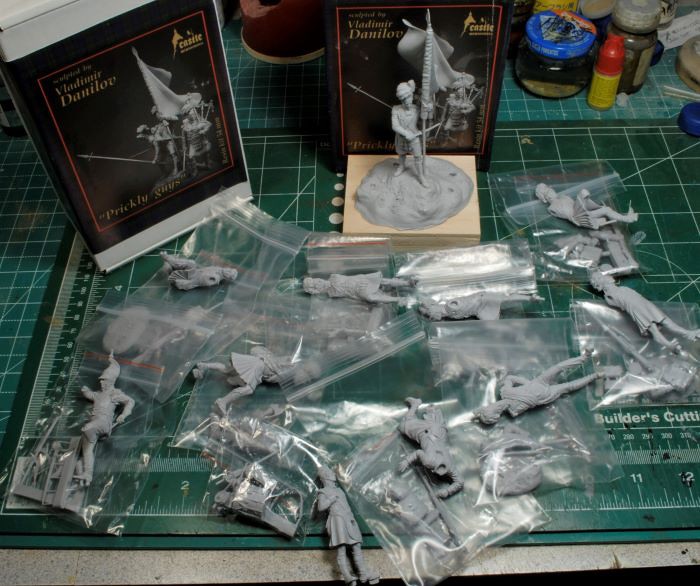 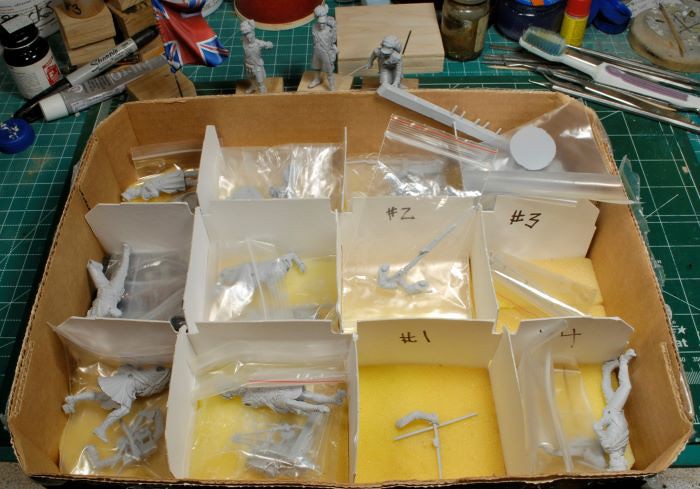 After cleaning three figures I decided to get started on the flag. I wanted to work the emblems and details in between the figure clean-up, (oils take time to dry), so I can spend as much time needed to get this flag correct. There’s going to be a lot of freehand work here and quite a bit of trial and error as well. I’ll seal the oils on this flag in a few days when it’s complete, then start laying out the emblems on both sides. This is gonna be a hoot, I can already tell. Wish me luck! The basic layout of the colors was not too difficult, but only a matter of keeping every section in proper proportion. Tamiya’s model tape really helped work around those curves. I used Vallejo’s Model Colors; Red, Blue, and White acrylics for the base tones. Next was the standard oil applications of shadows and highlights. There are still a few areas of the white stripes that need attention, but this first side is pretty much complete. You can see the new palette of colors I have spread out for this project, mostly Windsor Newton oils. 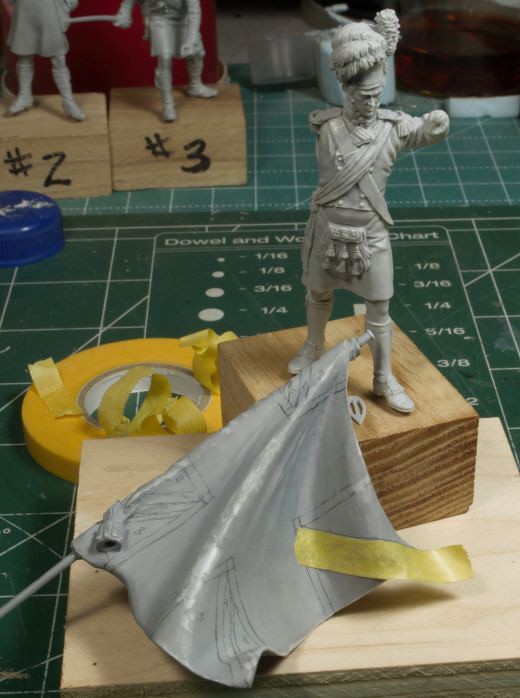 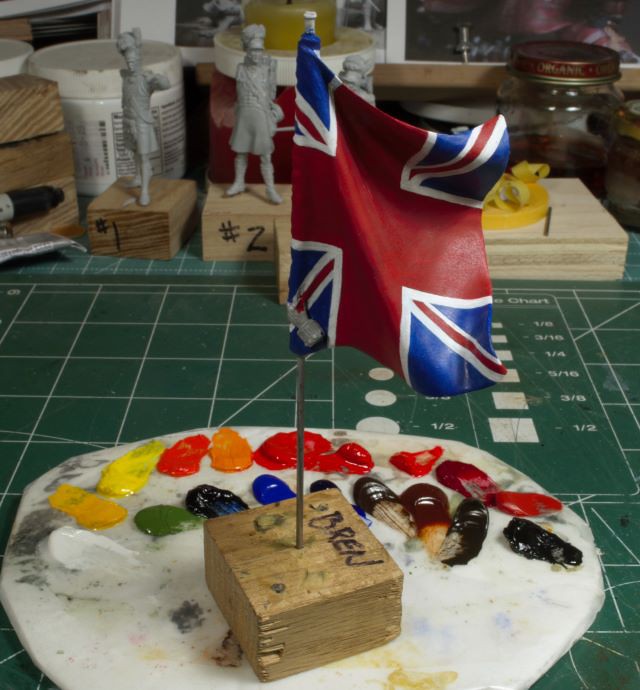 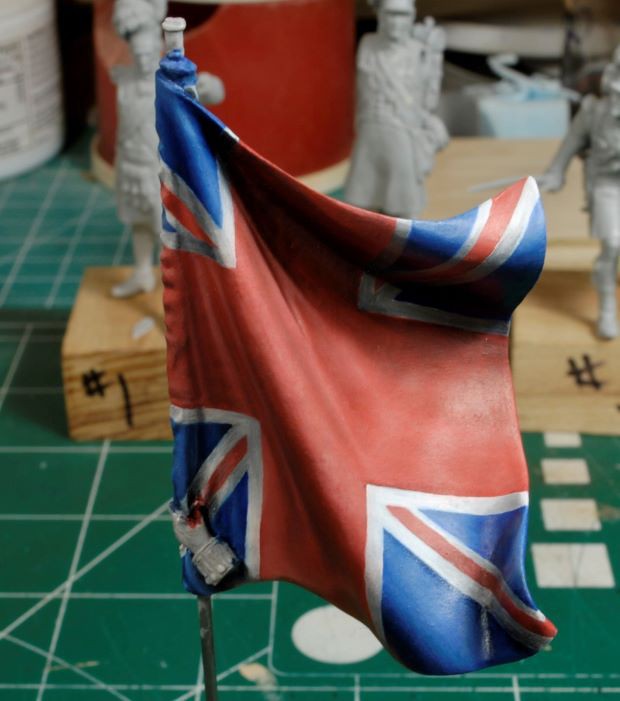 I’m actually pretty excited to be working this set, it’s a challenge. How do we expand our talent, challenge the norm, work it and keep learning? And there you have it, and therefore,……….. I forge onward😉 More to follow soon and thanks for watchin. Cheers, Ski. |
|
captfue
Full Member
  
Member since: October 2012
Posts: 311
Oct 1, 2012 22:25:19 GMT -5
Oct 1, 2012 22:25:19 GMT -5
|
Post by captfue on Feb 21, 2022 23:08:07 GMT -5
Outstanding work so far, can't wait to see the finished piece.
|
|
|
|
Post by Steve Zuleski on Feb 22, 2022 11:20:20 GMT -5
Thanks Brother, this will be interesting, no doubt.
|
|
|
|
Post by Tobi on Feb 24, 2022 5:48:50 GMT -5
Now you're going crazy mate! No stitching on the Union Jack?   |
|
|
|
Post by Steve Zuleski on Feb 24, 2022 11:22:41 GMT -5
Have no fear, Ma Brotha. We booted out the riff-raff over 240yrs ago, HA! Stars and Stripes, all the way for me!
This is a bit of a crazy leap for me, but I loved the sculpting so much, it's astoundingly good.
|
|
|
|
Post by Steve Zuleski on Feb 27, 2022 14:04:41 GMT -5
Still Working the Flag, Cleaning FiguresI finished oiling the other side of the flag. It’s not real clear, but the shadows and highlights have been completed. I gave the flag three days to dry, then applied a dull coat to seal the work. I will begin playing with how to paint the emblems on the flag today. This is going to stretch my abilities, but I’m game. 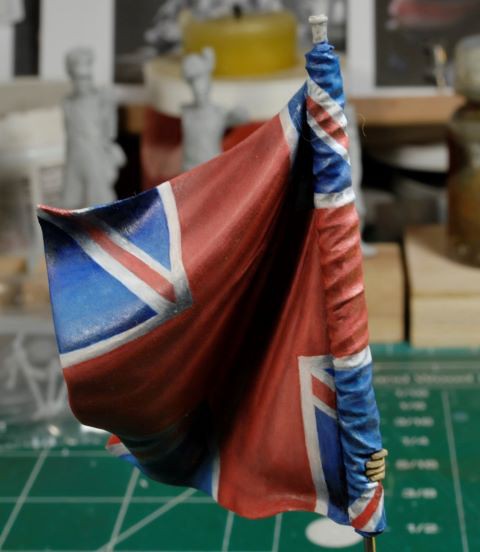 While waiting for the flag to dry completely I continued with prepping the figures. Next up, the Bag Piper, oh boy! There are so many delicate parts on that pipe I really have to take my time. This is gonna be a hoot, cause I’m really not into replacing broken parts. 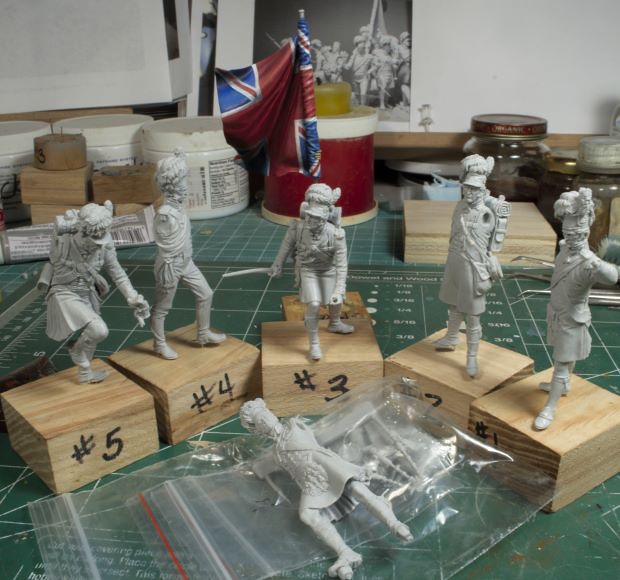 I’ve decided to try and place a printed decal over the flag and mark the key points for reference. Not sure how this will work, but I’m going to get it figured out. If you’ve ever watched these gals paint flags, you’ll be amazed. www.youtube.com/watch?v=BfazmzG5yBY Olga Kropotova www.youtube.com/channel/UCQjlR-iwjhLrAWaeBn2ERNg/videos Julia Moshura My wife watched these videos and said “Women put on war-paint every day, of course they can paint like this.” I recon she’s right, HA! These gals have an incredible talent, to say the least. 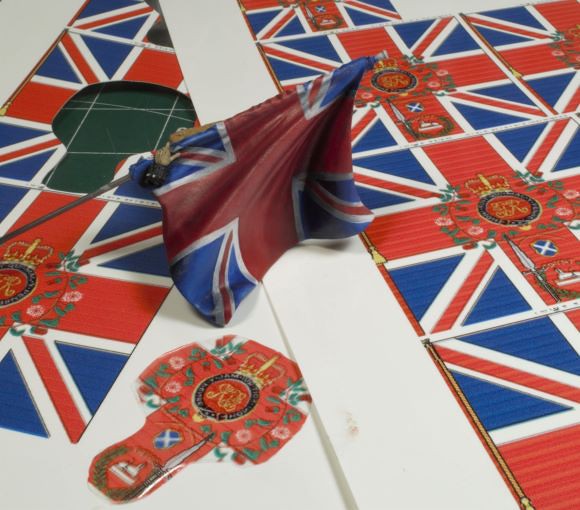 I will post more photos of the flag progress,…………or not. Lol. More to follow soon. Cheers, Ski.
|
|
|
|
Post by Tobi on Feb 27, 2022 16:47:29 GMT -5
I will be curious to see how you compete against the ladies.  A challenge to grow! Very impressive videos, too. I always wondered how figure painters manage to make these complicated ornaments and heraldic symbols? She mentions upon painting the horse that she is using polycolor acrylics. Would be interesting to know if that's also the color of choice for the ornaments. I was impressed how fine the brush strokes were and how opaque and smooth the color goes on with just one pass. Also very quick drying, with instant corrections in the base color. Simply jaw dropping and reminds me how helpless I am compared to such mastery. |
|
|
|
Post by Steve Zuleski on Feb 28, 2022 11:46:39 GMT -5
Lol, aren't we both, Bro. I won't bother trying to compete against that, just trying to do the kit justice. IMHO, the learning curve is too great, time consuming, and just not my normal gig, but I will do my best.
|
|
|
|
Post by Steve Zuleski on Mar 3, 2022 11:38:31 GMT -5
Flag DetailsWell, after playing around with the printed decal I decided the only way to get this done was to trace out a thin sketch of the details free hand, in white acrylics, and get started. The decal proved cumbersome and would not cooperate around all those fine bends and creases. The first photo is the outline laid out, the following are progression photos starting with the gold colors and then the black circle. There’s still a bit of clean-up around that circle, then lay in the letters, but I’m pretty happy with how it turned out. I will go over the gold one more time, it appears a bit faded. I used AK’s 472 Gold for that portion. After the gold was laid in, I started on the flowers. As you can see, I’m nowhere near the delicate and nimble painter Olga or Julia are, but I’m going to run with it. This wasn’t as difficult as I had expected. It looks more dauting than it really is. I recon if I made this a practice, I might actually get good at it, HA,……………..ok, back to work. 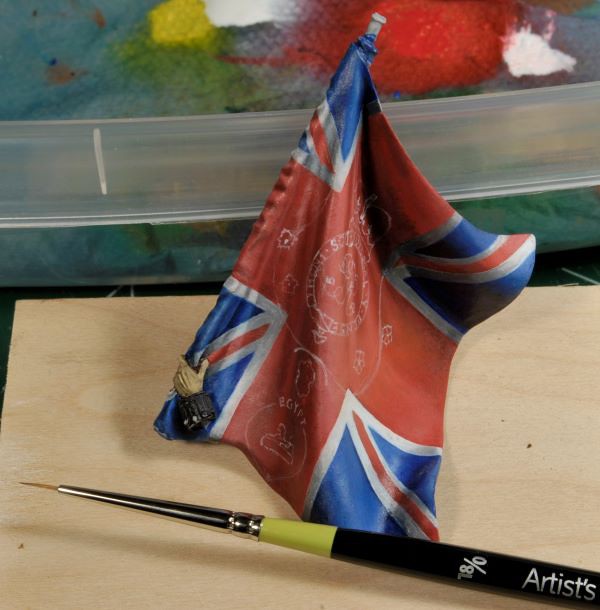 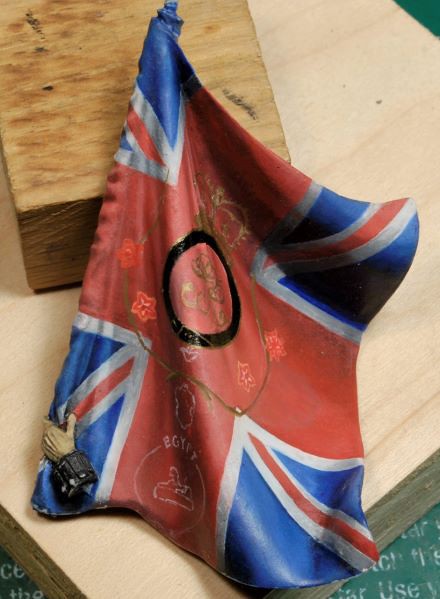 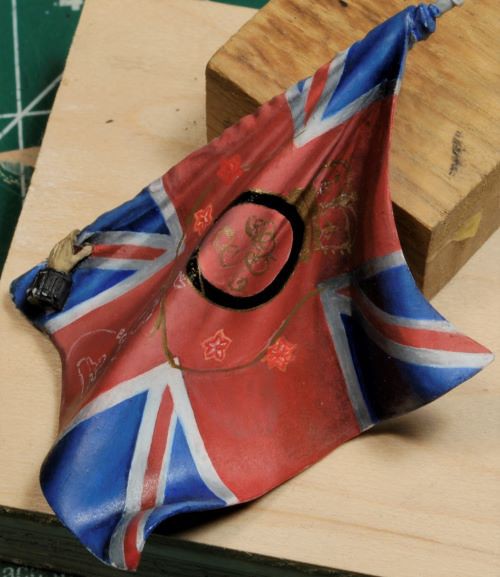 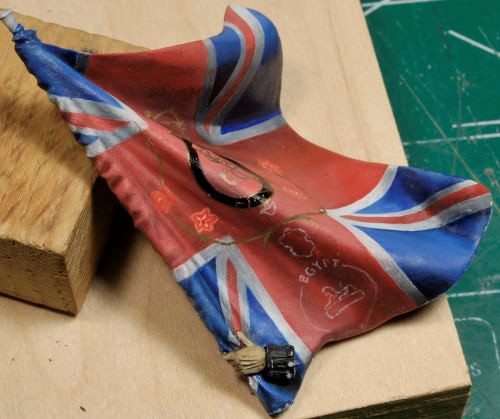 Painting the right side of the flag only took about three hours, so I let it sit over might before continuing on to the left side. Finding a really decent flag to use as reference was not easy at all, so there is a bit of artistic license being used on the actual design. I really could have used an up-close photo of the emblems. The flowers appear a bit bright right now, but I will tone those down just a bit with an oil wash or feathering. They make a good contrast right now, so I won’t get too carried away with it. 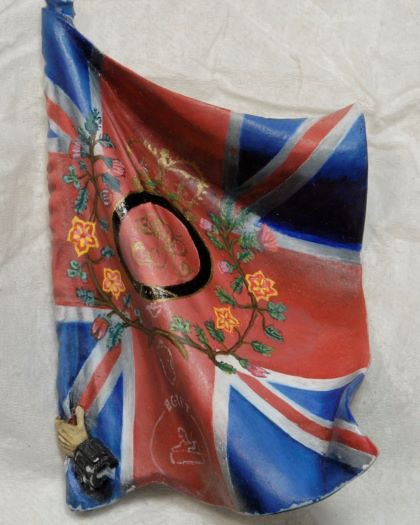 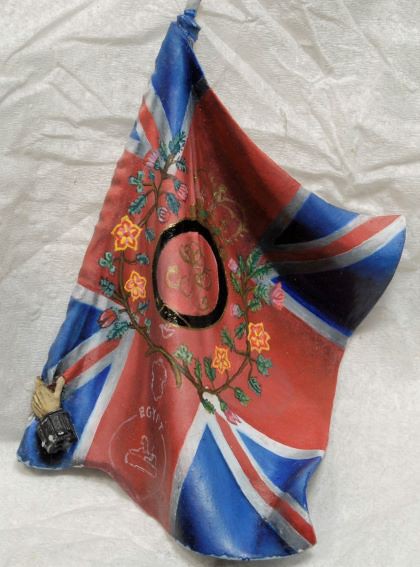 Next up, the Sphinx and wreath, lettering within the circle, and finish any details missed. Thanks for watching. Cheers, Ski.
|
|
|
|
Post by Tobi on Mar 4, 2022 0:51:58 GMT -5
Don't put your light under a bushel.
What you have already achieved there on the flag looks marvelous to my eyes!
|
|
|
|
Post by Steve Zuleski on Mar 4, 2022 13:07:57 GMT -5
Don't put your light under a bushel. What you have already achieved there on the flag looks marvelous to my eyes! Amen to that, Brother. Thanks!! |
|
|
|
Post by Steve Zuleski on Mar 7, 2022 8:36:15 GMT -5
Sphinx, Wreath and Letter DefinitionThis is just a quick update on the smaller details and minor adjustments to the lettering. The left side of this flag is complete for the time being. I know the lettering and other features appear rather bright right now, but they will be toned down later. The AK Gold was a royal pain to work with. Not only are the fumes toxic, but the paint dries faster than I’d like it too. With such a small amount of paint on the brush workability time was too short. My 3M respirator filter is really difficult to work around, the filter impedes the brush when working that close. So, acrylic tones in the golden yellow range became the logical solution. I went over the leaves and other details with oils as well for more tonal definition. I will continue cleaning the remainder of the figures until this sets up for a few days, then work the right side of this flag. Quick note: The sphinx and white “X” within the blue emblem were shaded with oils to coincide with the existing shadows in the appropriate places. 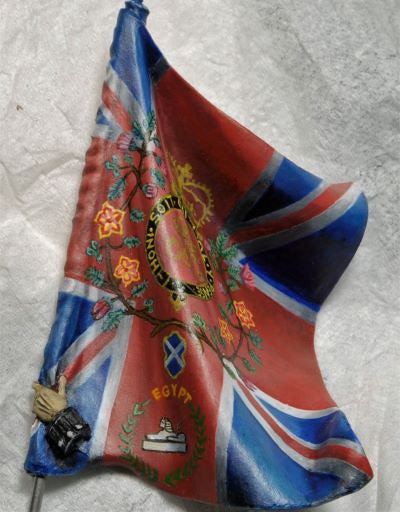 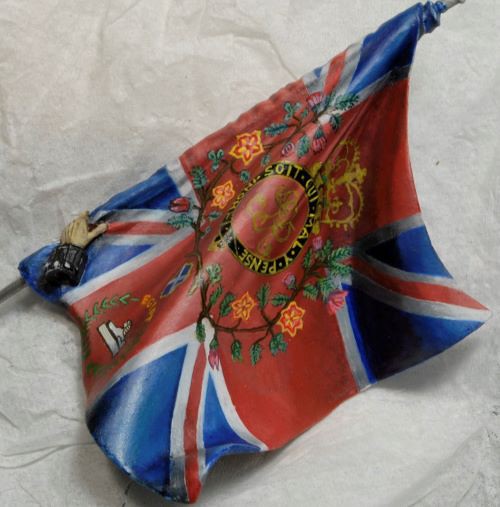 Thanks for watching. Cheers, Ski.
|
|
|
|
Post by Tobi on Mar 7, 2022 9:14:08 GMT -5
Stunning!
I think the lettering is just fine. The smaller the scale, the more contrast is needed, imo.
|
|
|
|
Post by Steve Zuleski on Mar 8, 2022 12:17:31 GMT -5
Thanks, Tobi. I agree, so there won't be too much filtering taking place.
|
|
|
|
Post by Steve Zuleski on Mar 17, 2022 6:03:21 GMT -5
Primed And Ready To Go!Over the last week I’ve been cleaning up the rest of the figures and getting a primer coat on them using Floquils Primer Gray. I’ve been using this Floquil primer for decades, so when I heard the news back in 2013, if I remember correctly, that Testors was going to discontinue its Floquil and Polly S line of paints I hit every hobby store I could to snag the last few bottles of this primer. I have three brand new bottles from that scavenger hunt, so I recon I’m good to go since my last bottle has lasted for years. Like anything else in this hobby, we always hate to see good lines go away, Floquil being one of them. I prefer this primer over any other primer I’ve tried in the past because it’s easy to control with a brush as long as it hasn’t started to dry out. Trying to airbrush these little guys would have only created a build-up in all the wrong places and ruin the incredible detail. This primer is actually pretty thin straight from the bottle anyway. Since I really don’t fancy fabricating broken parts or fighting tight spots when painting, some of the arms and gear will be removed when I start to paint the tartans and other fine details. Somewhere in the process I’ll get back to finishing the flag. I’m already rummaging through my odd chunks of wood in the shop for something that has character for this base. I had my mind set on a gorgeous piece of drift wood that has been hanging out in the shop for the past 20 years only to be over ruled by my wife. She still has something in mind for that chunk, so I’m still looking, HA! Actually, that chunk of drift wood had some incredible details that would have accented this set of figures nicely, but it aint’ worth the tussle later, if ya get my “drift”, HA! Here’s the entire crew ready for the brush. 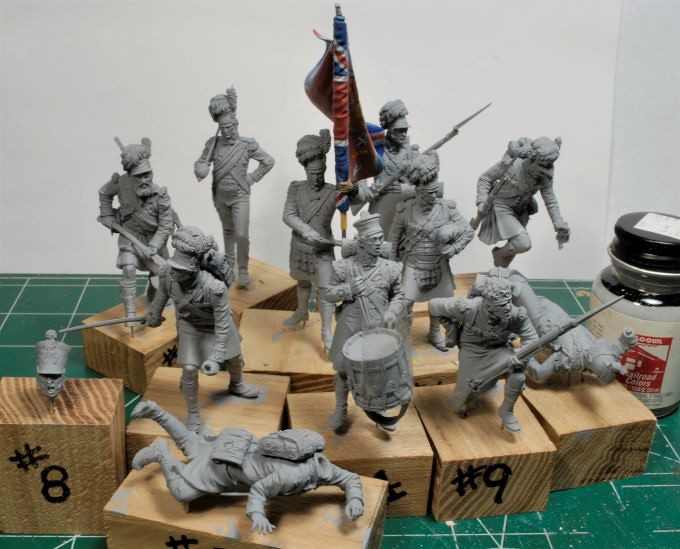 Ok, back to work, we are running out of time, cause Spring is coming up fast. More to follow soon. Cheers, Ski.
|
|
|
|
Post by Steve Zuleski on Mar 20, 2022 10:38:37 GMT -5
Let’s Face It!Having not done 54mm, or 1/35th scale for that matter, in over ten years I don’t think I’m too far off. Let’s face it, this is the first time I’ve ever, ever painted eyes in this scale. I was going to place in a pupil, but decided against it. In this scale I think it’s a bit over the top and you’d only notice them in photos, not the actual figure presented before you in a vignette. Naturally the face looks shiny and will dull as the oils set up, no worries. I did notice this face is a bit on the “tan” side of the tone spectrum, but he’s going to be on the ground in this vignette, so I will leave it as is. I’ve still got a bit of touch up to do on this face, teeth, ears, etc., but for now I’ll set this one aside and work the other ten. Also, you will note the eye you see on the left is not exactly as the right. I had to trim some of the resin and clean up the eye lid a bit to make more room. It was very tight quarters in there, to say the least, so I got it as close as it’s going to get this go round. 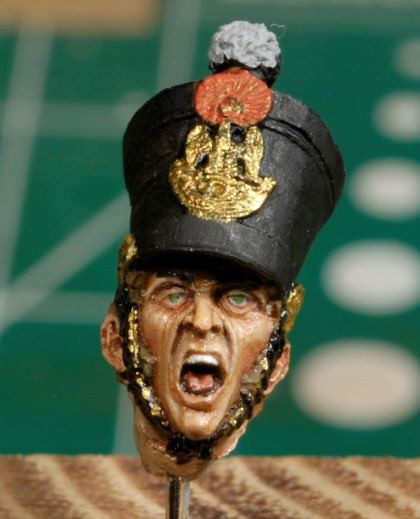 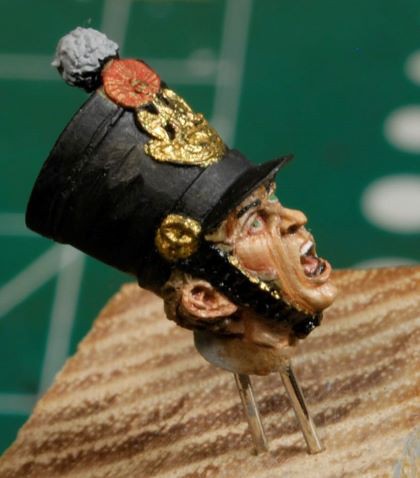 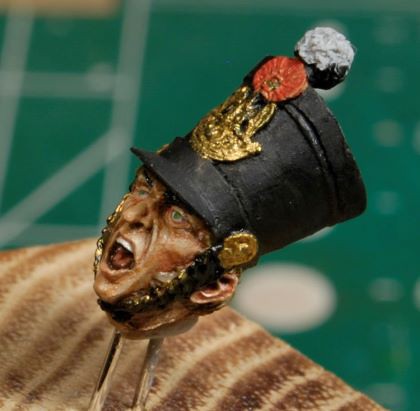 So far, I’m happy with this face, I’ve only washed it off once, so that’s a good thing. And, as you can imagine, with spring coming up fast I’ve got fruit trees to trim and everything else that goes with this time of year. This is crashing my momentum. Happens every year, oh well, I’ll keep going as long as I can. Thanks for watching. Cheers, Ski.
|
|
|
|
Post by Steve Zuleski on Mar 23, 2022 17:47:15 GMT -5
Bag Piper Face WorkOne thing I’ve noticed since getting back to this smaller scale is the fact that if I didn’t have super small brushes and a decent pair of readers I’d be in trouble. I’ve been able to get some seriously small details taken care of without too much difficulty. So, when time comes to get back to them big boys, Large Scale figures, I won’t have any excuses for overlooking any minute details, none whatsoever. Moving right along, the Bag Piper’s face is pretty much set for now. There are a few areas I will adjust, but for right now I’ll let him set up. These eyes are so big I just may have to put pupils in, or maybe not. These are super close-up pics, so it looks a bit odd right now. 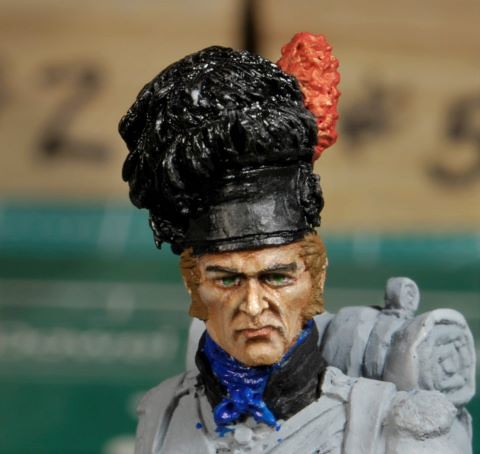 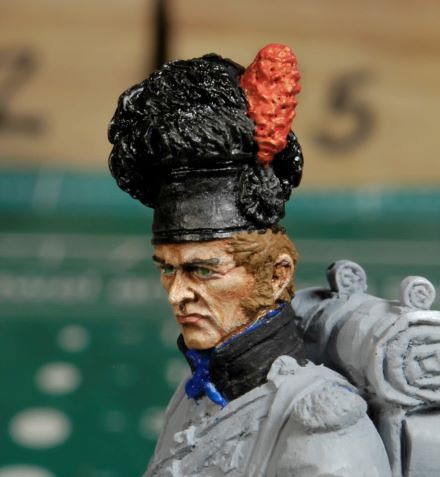 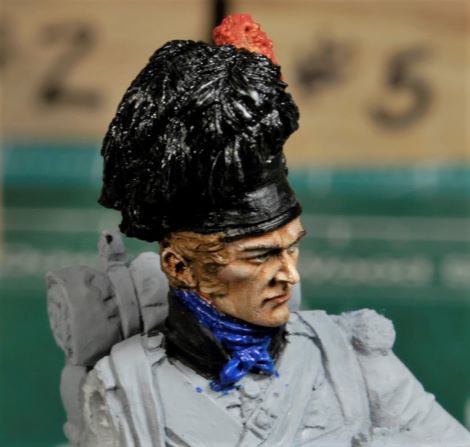 Ok, nine more to go before we tackle those kilts. Cheers, Ski.
|
|
|
|
Post by Tobi on Mar 25, 2022 7:41:38 GMT -5
Happy wife, happy life! Your eye painting is spot on. When I do eyes in 1/35, I simply paint them black and put two white points in each. My ability and my vision with 2.3x magnifiers don't reach any further  But I've learned this method from Mr. Verlinden. |
|
|
|
Post by Steve Zuleski on Mar 27, 2022 9:56:00 GMT -5
Hey Tobi, thanks Bro. I used to do the same, but after acquiring some really good readers I figured, what the heck. I use #'s 4-8 which negates using this bulky visor I have hanging in the bunker. It's a novelty now, HA!
|
|
|
|
Post by Steve Zuleski on Mar 27, 2022 9:58:07 GMT -5
Head #3 and Clean Up on Bag PiperFigure #3 was a lot more fun than the last two. Reason being, I’m in the slot and I see improvements in the skin tones and blending. This is the main reason I prefer to keep the momentum going when doing a set of faces. I don’t have to go back and relearn whatever sequence and techniques that were followed in the past. I know, it sounds strange, but this Sport is seasonal for me, can’t get around that. I’ll do any touch-ups in the next few days after the oils set up, but I think #3 is good to go for now. 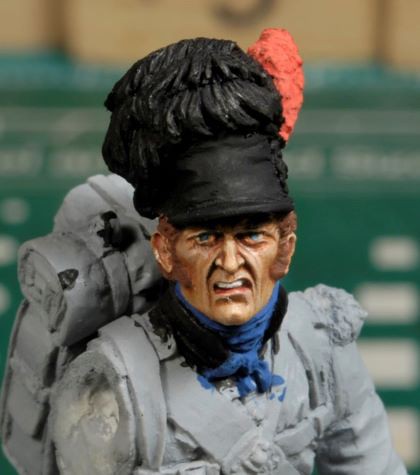 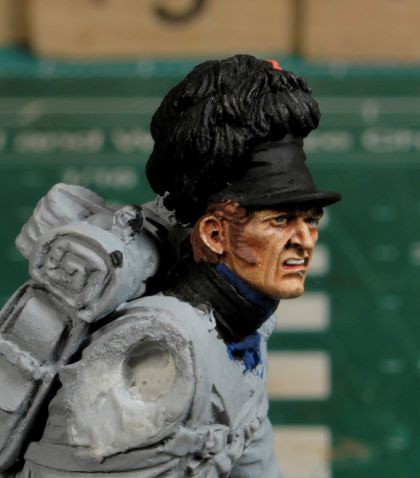 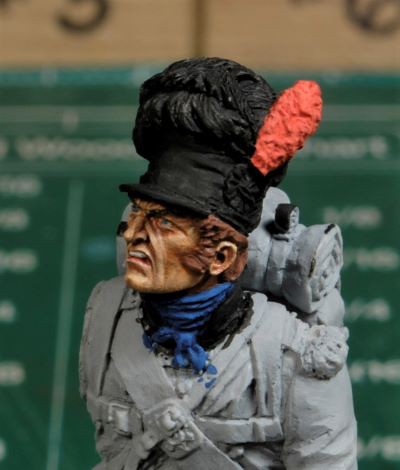 The Bag Piper needed a bit of reworking, especially that cauliflower left ear. I caught that after taking the initial photos. The nice thing about this resin set is that the resin is not super stiff and can be reworked easily. I also went back over the left eye and reduced the size of the iris, but now the right eye looks too big, HA! I’ll get to that one eventually as well. 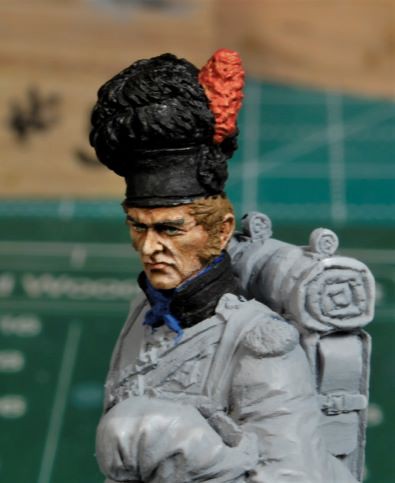 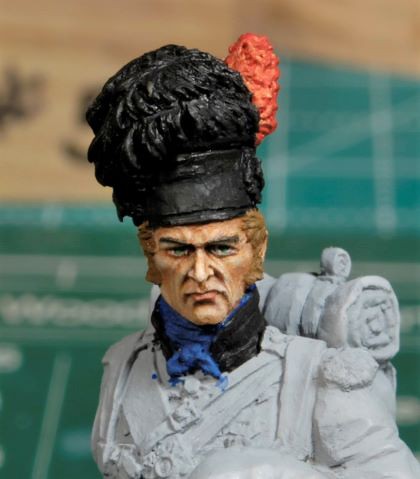 Outside work has already started, so I’m trying to keep the momentum going as long as I can, wish me luck. Thanks for watching and more to follow. Cheers, Ski.
|
|
|
|
Post by Steve Zuleski on Apr 6, 2022 12:56:39 GMT -5
Dynamic DuoThe standard bearer and one of the riflemen have been painted over the past week as time permitted. The standard bearer’s eye sockets had to be cleaned out and refilled with Tester’s tube putty. Fortunately, the resin is soft enough to work small areas without destroying larger sections. This is my third time reshaping a set of eyes, but it’s not a big deal. These figures are incredibly well detailed, but even then, some areas like the eye sockets may need a bit of clean-up after the primer coat, much easier to identify. 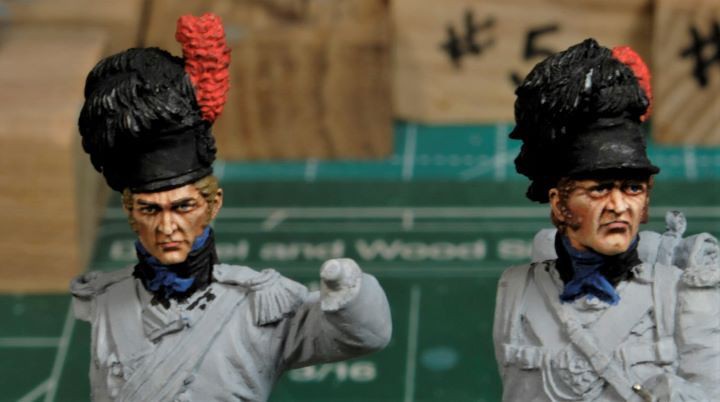 It took me awhile to get the correct tones around the rifleman’s eyes, he was giving me a hard time, lol. I may do a little more touch-up, but for now, he’s ok. The standard bearer was a smooth process, no major issues. 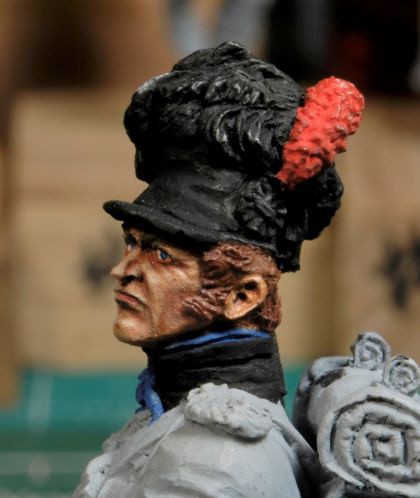 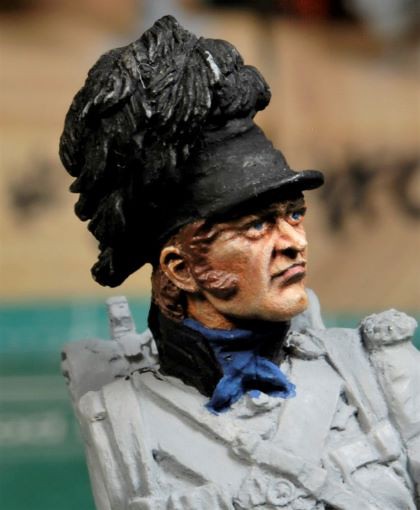 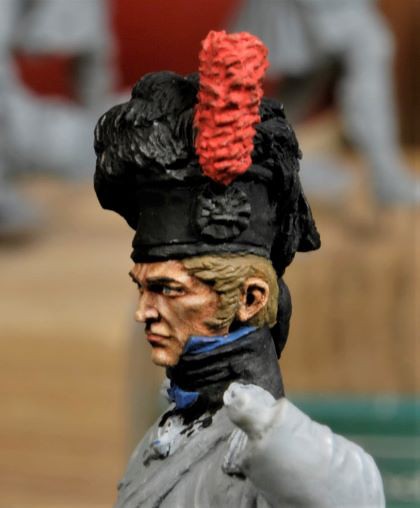 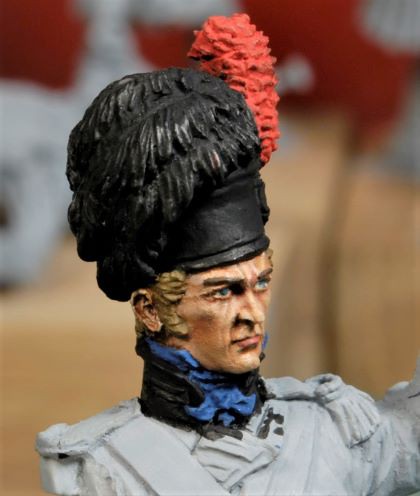 As long as I can sneak into the bunker at least a few days a week, I should be getting to the tartans in short order. Thanks for watching. Cheers, Ski.
|
|
|
|
Post by Steve Zuleski on Apr 12, 2022 15:17:20 GMT -5
Dynamic TrioHere’s the next set of faces done within the last week. The weather has been cold and sometimes wet, with snow flurries, if you can imagine that, in April, HA! T’sall good, I’m taking advantage of the down time and working these figures. This really is a fun set to work with. Kudos to Vladimir, once again. 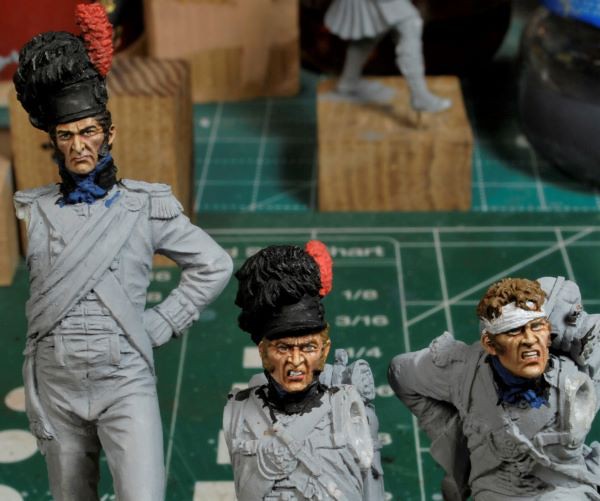 I really like how the standing figure came out; he’s got that dark almost Burgundy color tone to his hair which makes his features more prominent. The wounded figure was pretty straight forward and fun to paint, but the snarling chap leaning forward was a real bear. His facial features weren’t cooperating as well as the others. I recon it’s just a state of mind when dealing with so many faces to paint, you’re bound to get one or two that will give you a hard time. When in doubt, Ruck Over, Bby! 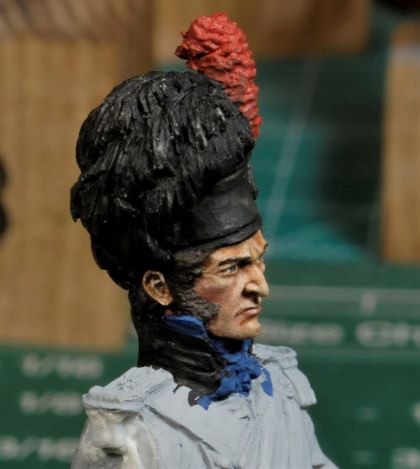 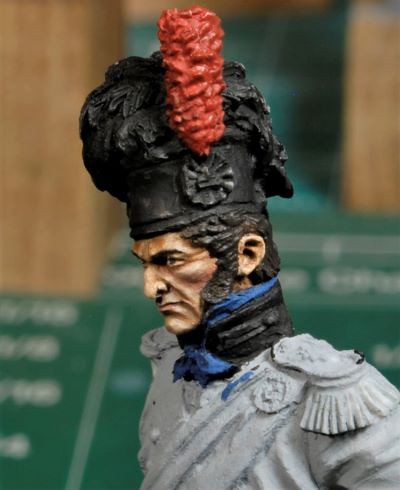 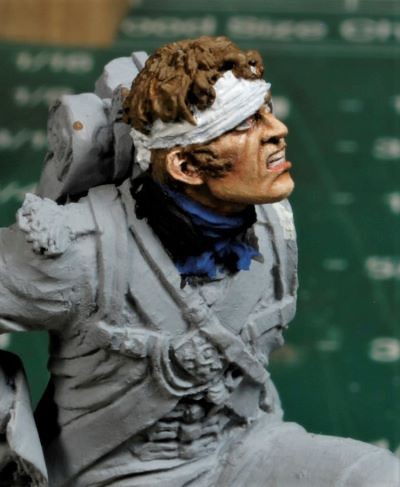 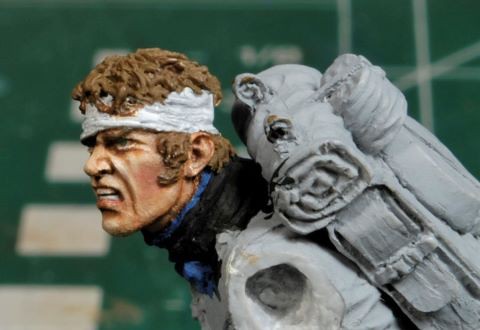 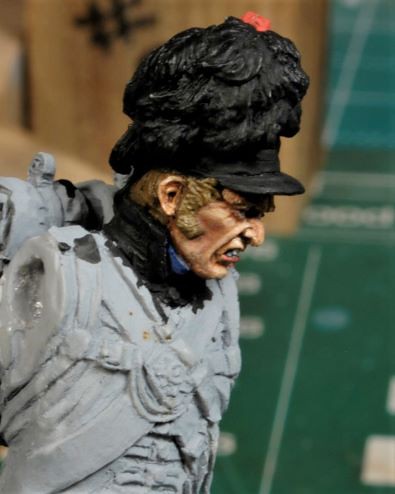 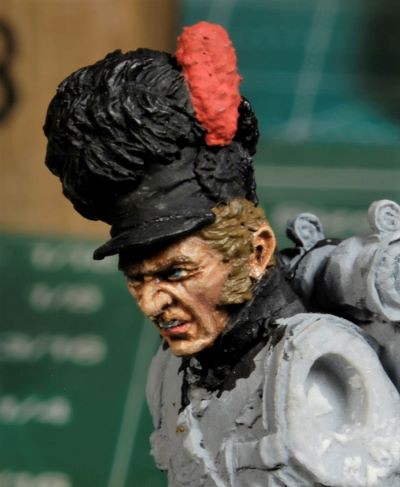 As mentioned before, these will be set aside while I work the last three figures; Hatched man, Baby Face Drummer Boy, and the fallen French horse rider with body armor. I’m sure someone will correct my description of the horse rider, cause right now I forgot what he’s called, HA! No worries, steady ar she goes. Thanks for watchin. Cheers, Ski.
|
|
|
|
Post by Steve Zuleski on Apr 22, 2022 10:37:15 GMT -5
Hatchet Man, French Cuirassier, and Baby Face Drummer BoyThe last three faces are almost done, baby face Drummer Boy being the slacker in this final set. I was fighting the good fight yesterday only to scrub his face with an oven cleaner bath. He too was not cooperating. No worries, I’ll get him done in short order. 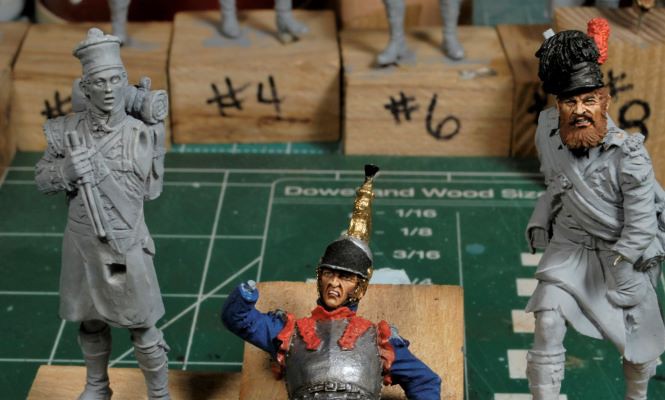 The French Cuirassier was a fun one to paint. He doesn’t have any overly exaggerated features, so it was smooth sailing with this guy. I went ahead and painted much of the surrounding armor and fluff just to get it out of the way and to get a perspective of what it would look like further in the process. 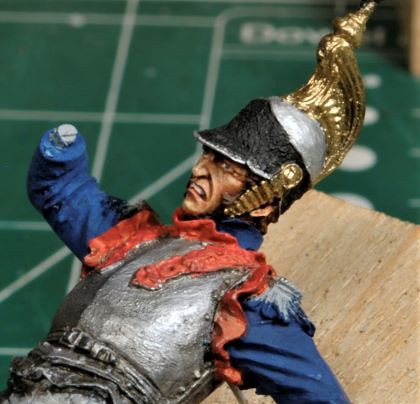 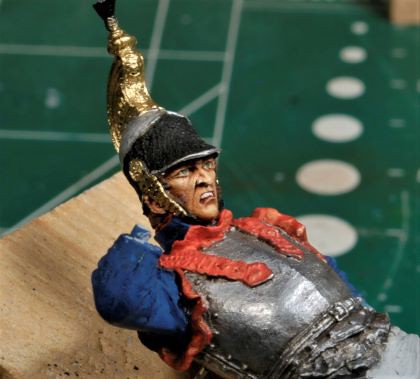 Hatchet Man was a bit more of a challenge due to his sharp features around the nose and mustache; it was tight quarters around the mouth, etc. I had started with this figure in the very beginning, but had to scrub him as well. This time around it was a much easier run. He’s now good to go and like the French Cuirassier he too has been set aside to dry completely. The pics may be a bit fuzzy. 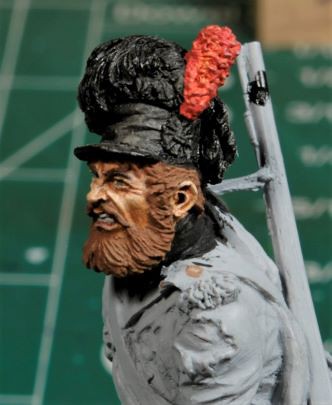 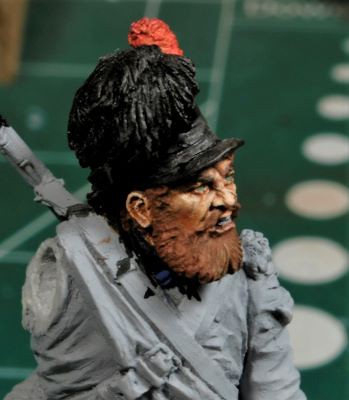 I’ll work Baby Face this week and get him completed. His super light skin tone threw me off for a bit, but I can see where I was drifting from the main objective, so he’ll be dialed in shortly. More to follow and thanks for watching. Cheers, Ski.
|
|
|
|
Post by Steve Zuleski on Apr 27, 2022 10:34:28 GMT -5
Class PhotosHere we have the entire crew, all eleven faces done minus a few touch-ups. It took a bit longer than expected, but now it’s time to review each face in detail. For the most part, I think they came out acceptable enough to continue on to the next stage. 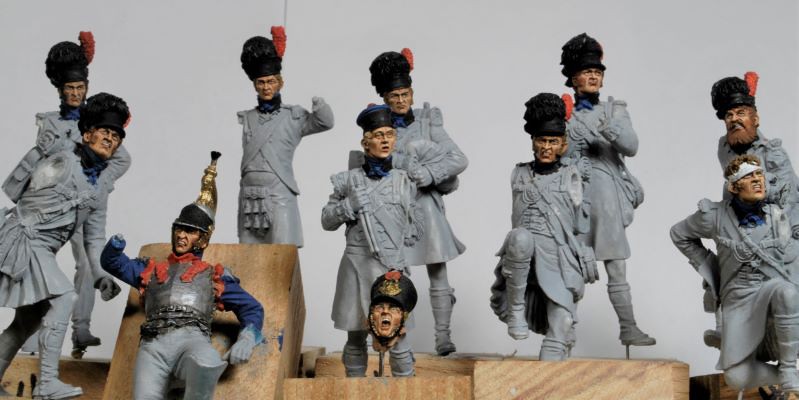 Baby Face Drummer Boy is done for now. His left eye looks like someone socked him a good one, but that will be feathered out. These photos really bring out the errors in blaring color, lol. After a few attempts with dismal results, I decided to just let er rip and paint his face like all the rest. Without prominent features like the others, I improvised to give the face just a little more character. I tried not to overdo it, but I think he’ll do just fine. Looking closer at the eyes I see there needs to be more definition at the lower eye lid areas, they’re too washed out and not defined worth a hoot. When the oils are completely dry, I’ll go back with a very thin line and correct that and maybe whiten them a bit as well. 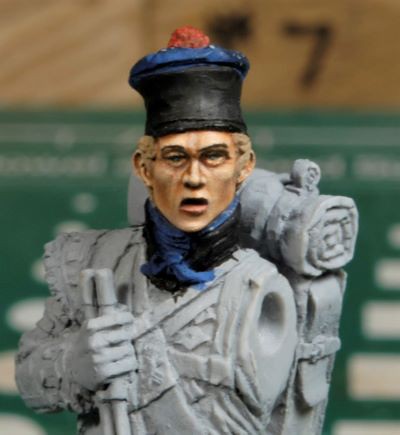 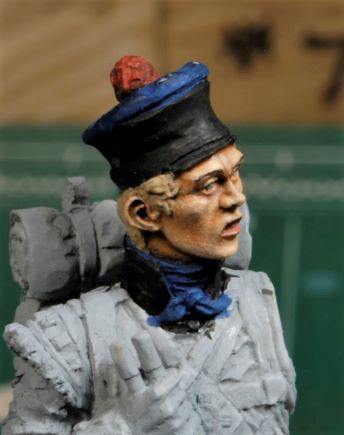 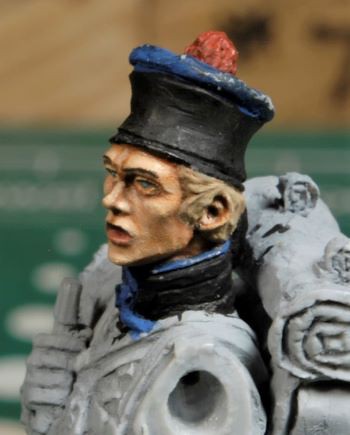 After this face dries for a few days, I’ll go back and check each face for needed corrections. Feathering, or filtering, with oils is not too difficult and helps correct most areas of concern. Just make sure you don’t get carried away with too much thinner. The layer you are trying to adjust may become too thin and actually rub off. It’s a delicate operation and I have had issues in the past. The hat checkered section is up next. Now that is gonna to be a hoot. This will really test my “straight line” abilities. We’ll see soon enough. Thanks for watching. Cheers, Ski.
|
|
|
|
Post by Steve Zuleski on May 6, 2022 10:20:14 GMT -5
Battle of the TartansAfter working the tartan pattern for a few days, yes, a few days, I have finally arrived at a pattern and color scheme that will work. Like you all know, I am “NOT” an acrylic fan other than undercoating, so this was more than just a real hoot. Several attempts at filters came to abysmal failure, so back to the drawing board. This is the fourth attempt, so it stays! Of course, I will work in the lines that crisscross the pattern, but they won’t be accurate, the 0000 brushes and thinned acrylic are not cooperating enough to take on that fight. Whatever I do here has to be repeated for all the tartans/kilts that are in this bunch. 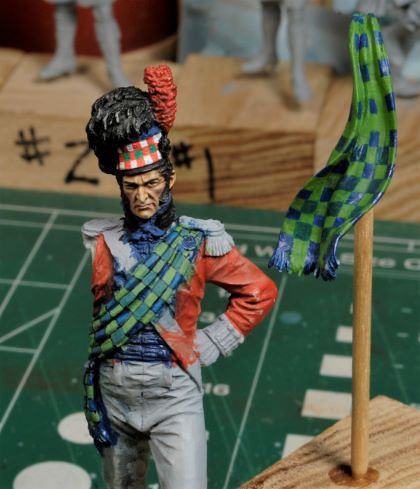 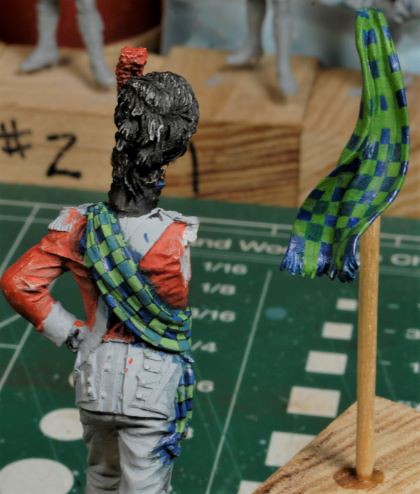 The portion of the tartan that is posted on the right is much closer to the actual pattern required, but I prefer the pattern painted on the Officer. More to follow and thanks for watching. Cheers, Ski.
|
|
captfue
Full Member
  
Member since: October 2012
Posts: 311
Oct 1, 2012 22:25:19 GMT -5
Oct 1, 2012 22:25:19 GMT -5
|
Post by captfue on May 7, 2022 22:15:49 GMT -5
Fantastic work so far, can't wait for the final product.
|
|
|
|
Post by Steve Zuleski on May 9, 2022 13:28:27 GMT -5
Wow, Capt, there's another human here, HA! Thanks, Bro. I recon we're the resident left-overs, lol, this place is and has been a ghost town for months.
|
|
|
|
Post by Steve Zuleski on May 17, 2022 17:19:32 GMT -5
Officer Ready for DutyThere has been quite a bit of progress since my last post mainly because the weather has cooperated and has been wet and unusually cold over the past few weeks. I was able to paint the checker board patterns (dice) on all the hats/bonnets and on this particular Officer figure I painted the highlights of the feathers using a mix of Ultra Marine Blue and Ivory Black oils. After that, I worked the main coat in a red tone and completed all the trimmings. This wasn’t a simple task, there’s a lot of detail to tend to here. After working my way down the figure everything began to fall into place. The oils just do their magic, so to speak. 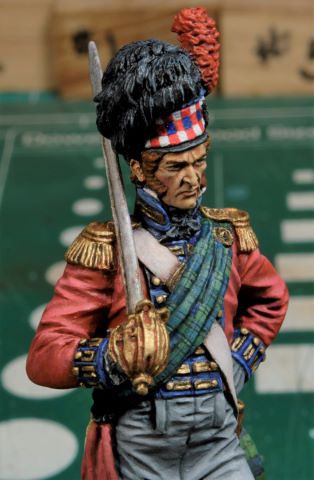 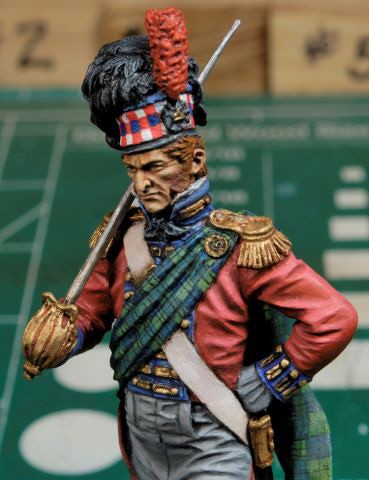 I will say it now, so there won’t be any further debate, the 42nd Highlander kilt/tartan is not correct, but it stays. I may attempt to correct it with the rest of the crew, but to those of you that know, it will be obvious. This was not intentional, it just happened, and after I finished my 4th attempt, I’d had enough, it stays! Like I said, the Denison smock was easier in the scale I rendered, but in this scale, sheeeesh, I give no excuse. 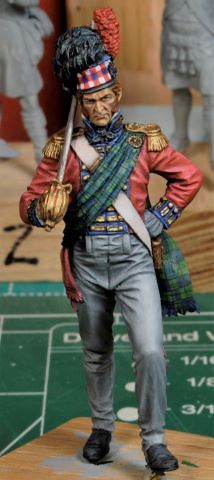 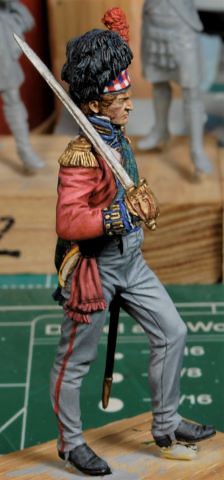 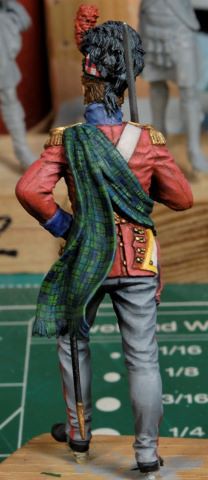 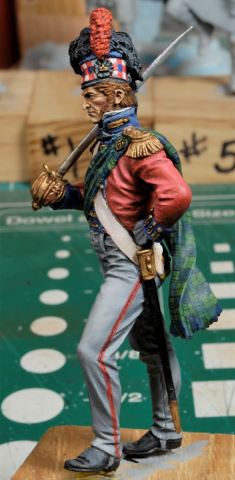 The figure received a Dull Coat and was dried quickly with a hair dryer. I have thoroughly enjoyed working this figure, especially once the oils were broken out and the brush strokes began. Up next, the Hatchet Man! Thanks for watching. Cheers, Ski.
|
|
|
|
Post by Steve Zuleski on May 21, 2022 11:33:14 GMT -5
Hatchet Man in ProgressMoving on in an attempt to keep up the current momentum I started Hatchet Man in the same fashion as the Officer figure, from top to bottom. I changed the dice color to a Royal Blue instead of green and continued from there. Starting with an acrylic coat on the straps, bags, and bed roll, I worked all the way down to the tartan base tone. The small details on the head, collar, and epilate were finished in oils before tackling the larger areas. His beard is a bit more toward the blonde tone than intended so I may add a touch of gray giving him that “battle-hardened” look. There’s some clean-up to tend to on that beard not easily visible in the photos, but nothing major. Working my way down I painted the bed roll before working the coat just to get that portion out of the way. Next, I applied a very light layer of Cadmium red oils on the coat, then feathered in the shadows and highlights. I’ll let this dry a bit before I go back and correct any shadow or highlight issues. So far, it’s rucking along nicely. 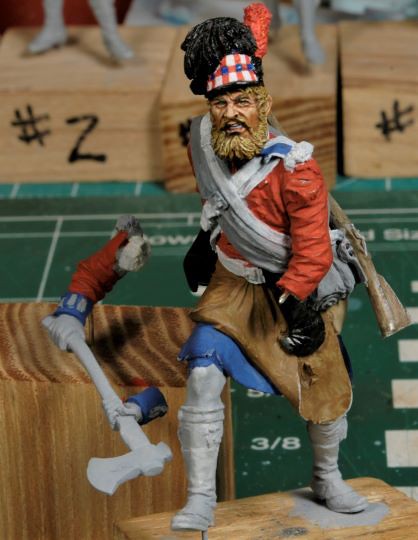 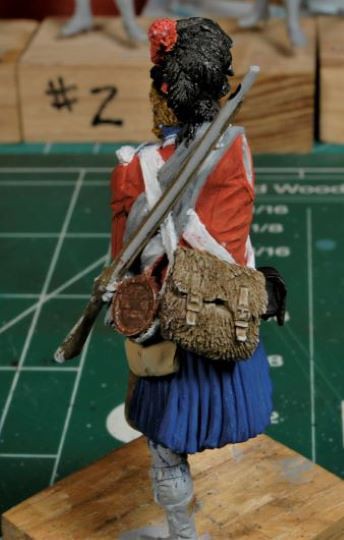 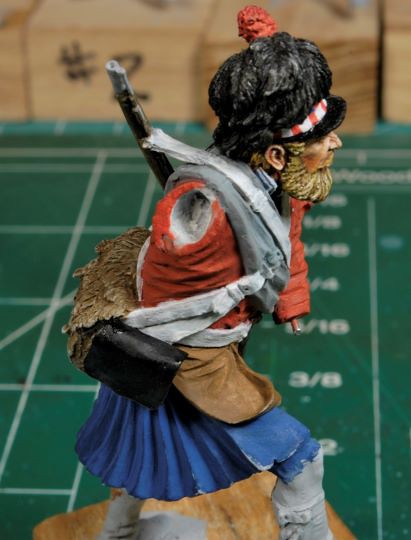 I really like how Vladimir sculpted Hatchet Man’s face, he looks more than peeved, HA! 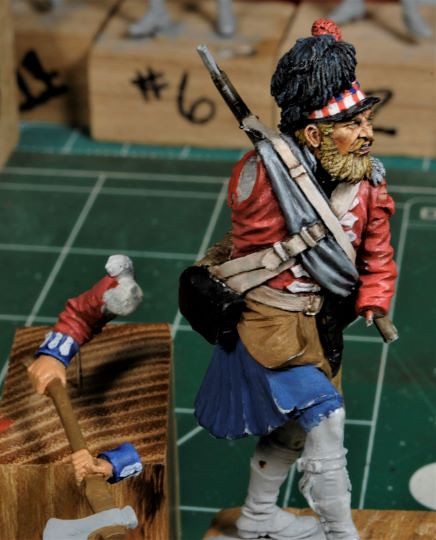 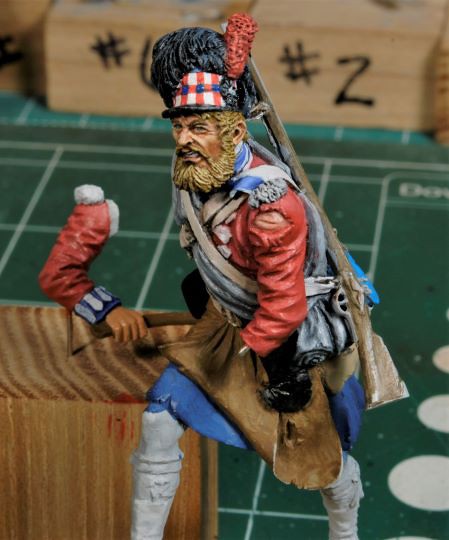 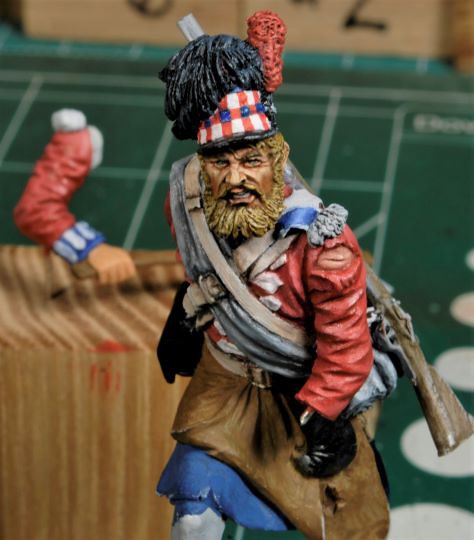 More to follow soon and thanks for watching. Cheers, Ski.
|
|
|
|
Post by Steve Zuleski on May 26, 2022 5:15:40 GMT -5
Hatchet Man Almost DoneStrangely enough the bunker is still up and running. I don’t ever remember working oils this late into the spring season. The bunker is usually powered down by the end of March and we’re already at the end of May. Well, there aren’t any major construction projects to be done nor any overly intense outside projects either. It’s pretty much maintenance this year and that’s a good thing. What do they say, never look a gift horse in the mouth? On a side note, sadly many of us have seen quite a few legends in this hobby pass beyond the veil lately. Not only have we lost a lot of incredible talent, some have lost close friends. One thing I have gathered from them all, in general, is that time is short. Life is but a vapor, in the grand scheme of things, so there really isn’t much time to waste. The younger we get the better our eyes and steadier our hands become, right? Not hardly. I’ve learned quite a bit from some of those fine Gentlemen, so I will carry on as best I can whenever I have time to do so, and “get er done”. Hatchet Man is beginning to take shape rather nicely and the process seems to be flowing well. But I have now come to the two most difficult portions of this figure and those would be the kilt/tartan and socks. Both will require a lot more attention to detail and it will be slow going. Keeping the tartan pattern within the range of acceptability in comparison to the Officer’s pattern will be the challenge. Once I get Hatchet Man figured out, I will have a template to work from for the other nine figures. 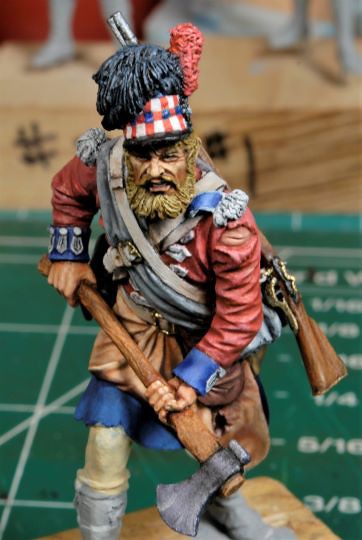 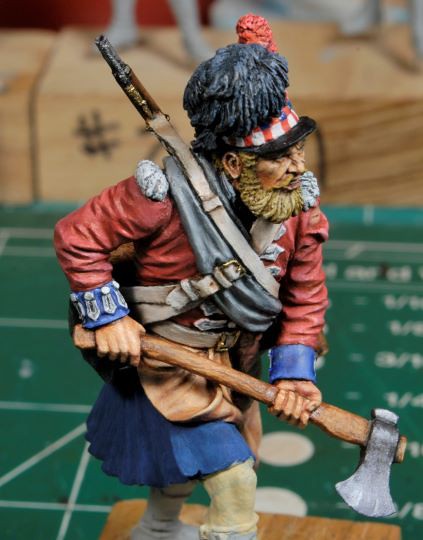 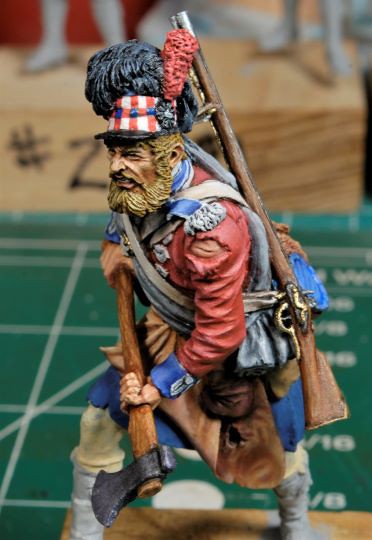 Before attaching the arm, I had to make sure all the minor details within those difficult to reach areas were finished. I will need to go back and increase some shadows, but nothing major. And those ornamental items on the cuffs, sheesh! They were pretty intense in detail (super fine lines) and I’m not exactly thrilled with some of them, but for the most part, they will be fine. The canteen may look a bit bright in color, but I like the tone, so I’ll run with it. I still need to add the lettering on that canteen. Also, the right epilate will need more definition, it appears a little “white washed” right now. 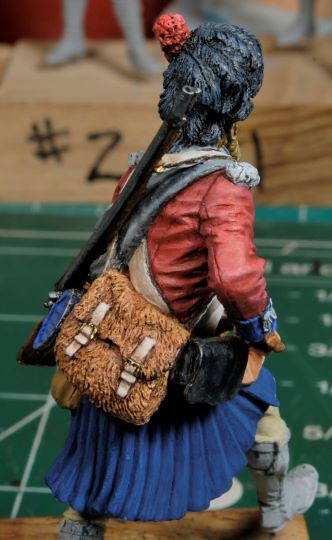 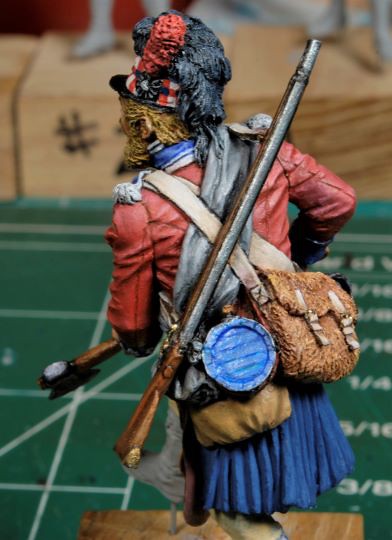 The rifle, havre sacks, and leather cape (I have no clue what it’s called) were not too difficult to complete. The hatchet itself will get some more metal work, but it’s almost done. I’ll work up a punch list for Hatchet Man once the kilt/tartan and socks are completed. This figure is almost at the finish line, so if you see anything I may have missed, please sing out and I’ll get it handled. I’m a slow painter, but this project just might get done within a year and that would be impressive, to say the least, HA! More to follow soon and thanks for watching. Cheers, Ski.
|
|


 But I've learned this method from Mr. Verlinden.


