1/48 Monogram SBD Dauntless-A Trip Down Memory Lane
May 19, 2023 23:17:38 GMT -5
tucohoward likes this
Post by 406 Silverado on May 19, 2023 23:17:38 GMT -5
This SBD is a Confederate Air Force Edition Monogram 1/48 scale SBD Dauntless that was boxed in 1988. The only thing different about this kit from prior boxings is the decal sheet really. I decided to take this kit on largely because I built this thing when I was 12 years old( as I'm sure a lot of us have if we are aircraft buffs) using minimal paint which consisted only of "no name" acrylic black and "green apple green" (no zinc chromate but it was real close), silver enamel, acrylic yellow for the prop tips, some enamel red for the dive flaps, and an enamel grey for the undersides, thinner (which consisted of gasoline-hey gimme a break here, my dad was a mechanic) , and basic model glue. I swabbed the paint on the interior (what little it had) and the undersides. No paint on the top because it was molded in blue, didn't paint the tires or the prop(except for the yellow ends and the silver hub) because they were already molded in black and I guess I did try my hand at painting the canopy frames with some blue paint that I ended up with. Back then I was as happy as a clam! By these days standards it was a disaster! Hasegawa has a hand in this, even though it too has some inaccuracies, because the cockpit is SO lacking. I robbed a lot of parts from this spare Hasegawa kit and used decals from it and some decals from Yellow Wings as well. Was it my best build?? No. But I had fun taking a trip down memory lane building this plane.
Almost the whole cockpit is from the Hasegawa boxing as well as the forward firing gun barrels and main landing gear wheels. There is some PE from Toms Modelworks and the rear gun ammo belts were donated by a fella by the name of Stikpusher. Awesome guy. I drilled out the dive flap holes and did some scratch building throughout the build. This build fairly instrumental to me because it was the first build where I really started getting comfortable with my airbrushing. All exterior paints were Vallejo and interior paints were Model Master.
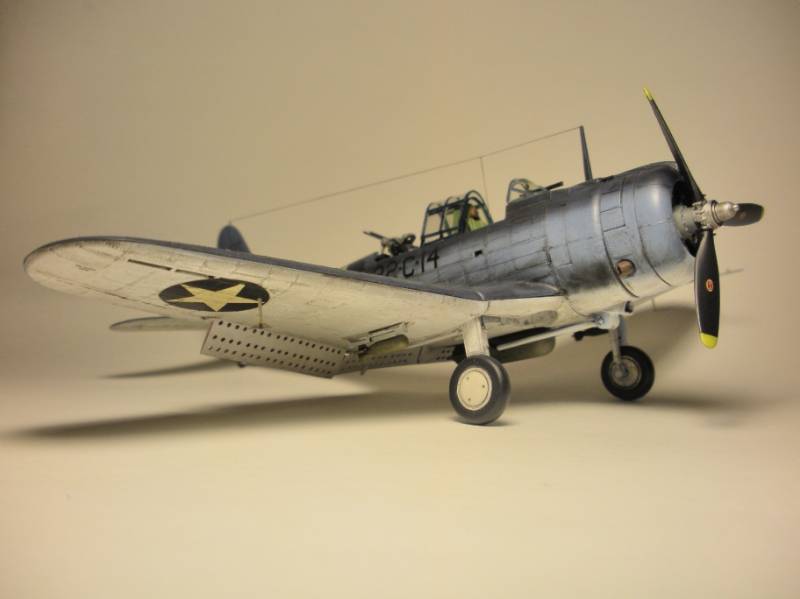
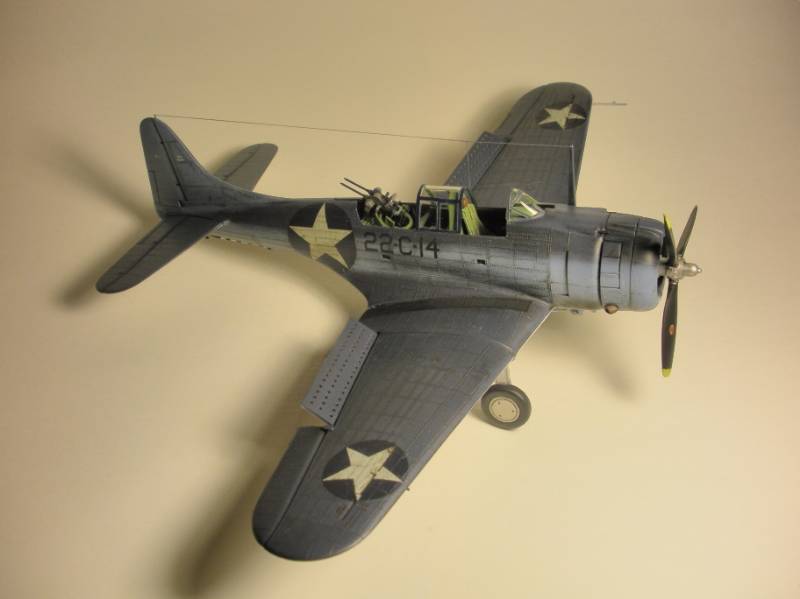
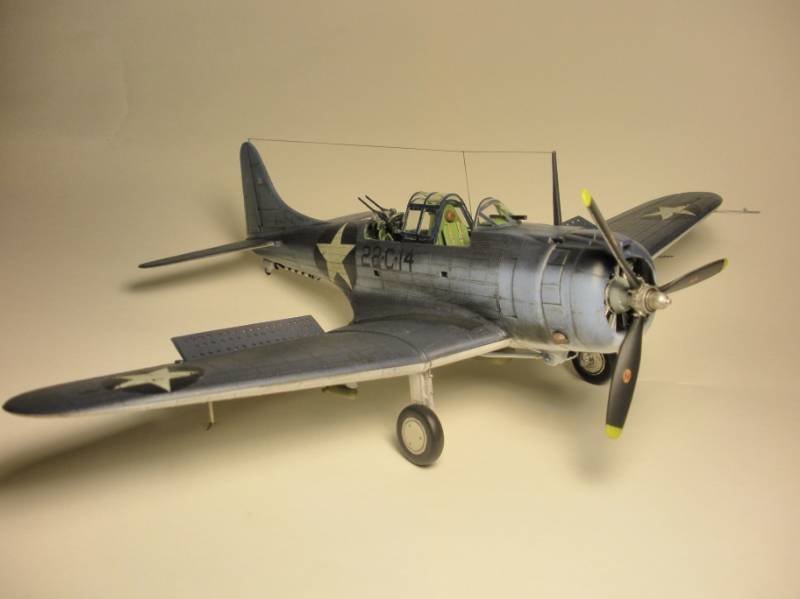
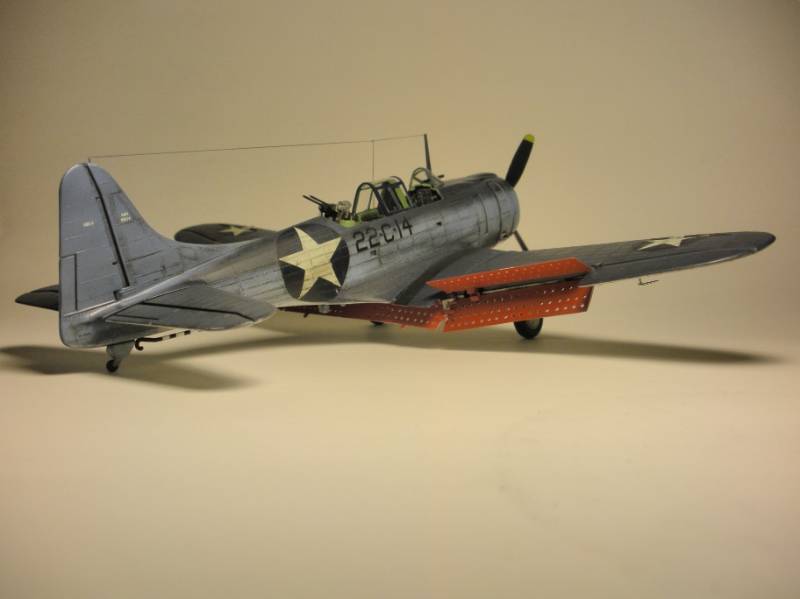
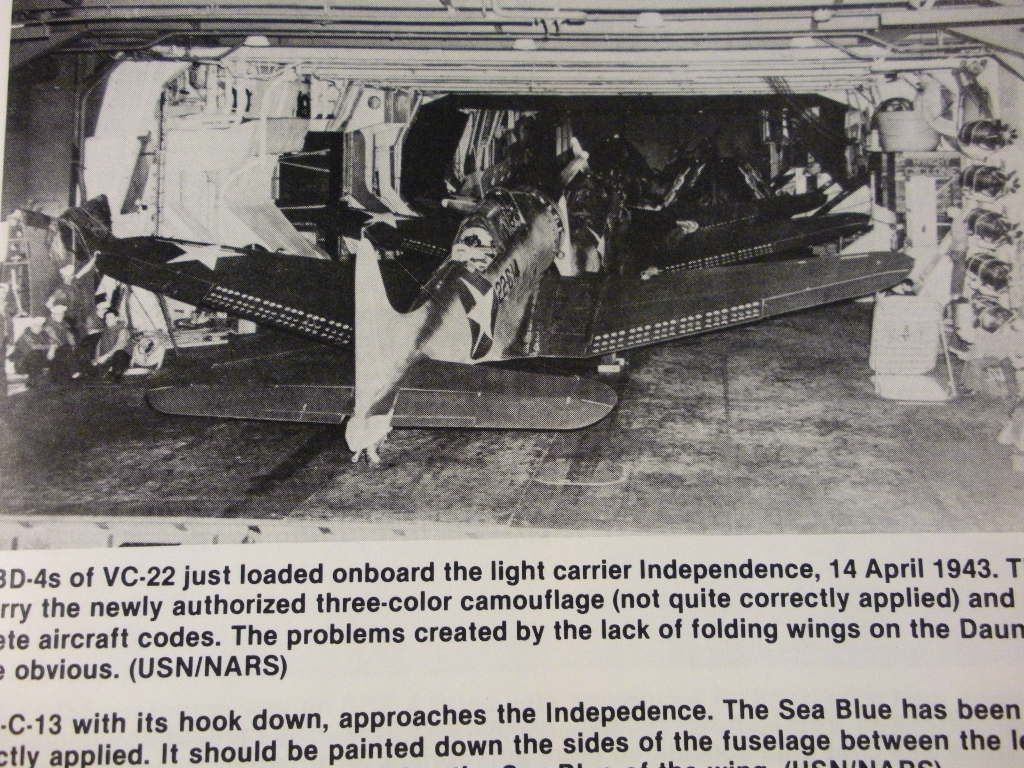
a small comment about the next picture. I took this one with the purpose of showing the model/ replication of 22-C-14 after it was first loaded onto the carrier Independence. I tried to get the paint scheme as close to this bird as possible so I'll have this pic and then following that the actual pic of the plane(which you all have seen here already but not right next to one another). The now so obvious thing that sticks out to me like a sore thumb is the fact that there is actually only one roundel on the upper wing surface on the port wing. I aint going to worry about it now. If this would have been a build for extreme accuracy I wouln't have been very happy. Pictures offer great help in modeling I continue to find out.
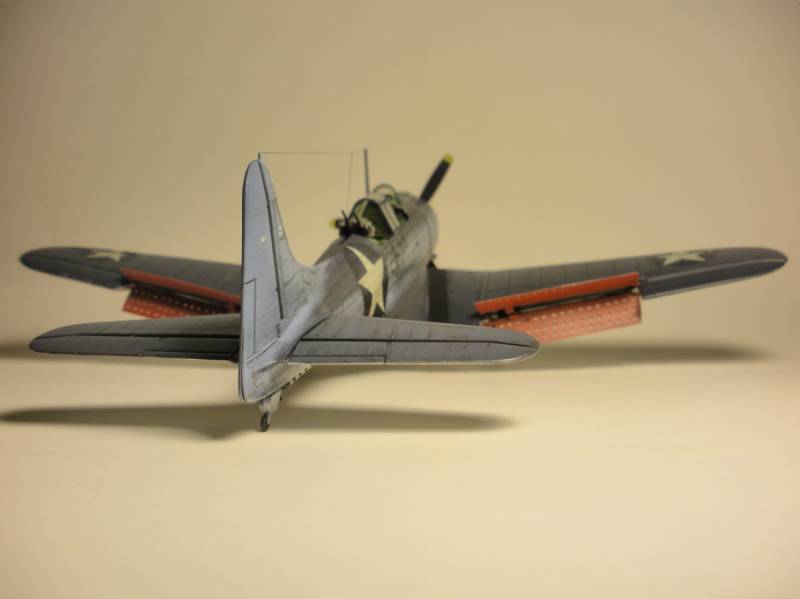
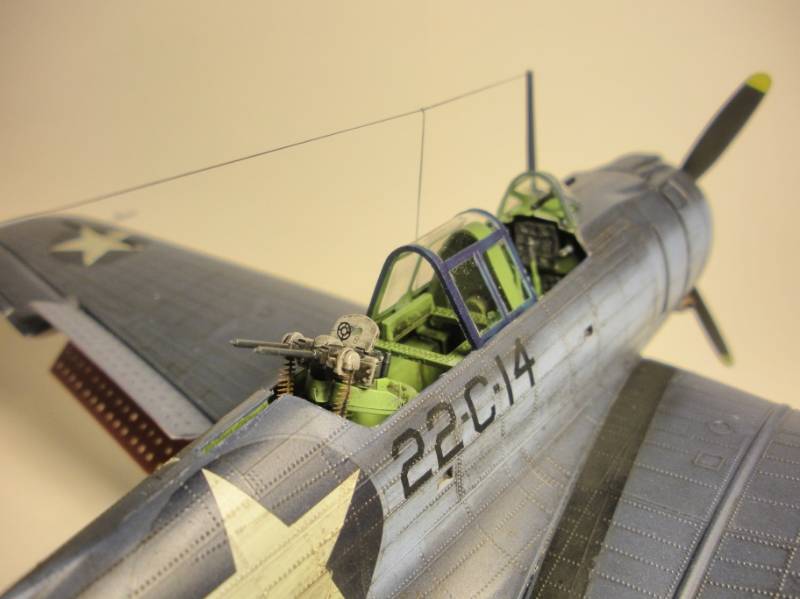
All in all this was a fun build for me. Accuracy was really only there in the paint and there are flaws throughout the build that I would normally take care of. With fun in mind I mixed accuracy with original Monogram intent,however, none of the features that I wanted to work in the beginning of the build work in the name of getting things to fit right and proper so I left alot of Monogram signatures on the aircraft such as the copyright year on the elevators, part numbers in the middle inside portion of the dive flaps and the incorrect centerline bomb and bomb strut.
Thought I'd include a couple of shots of the interior of this thing.
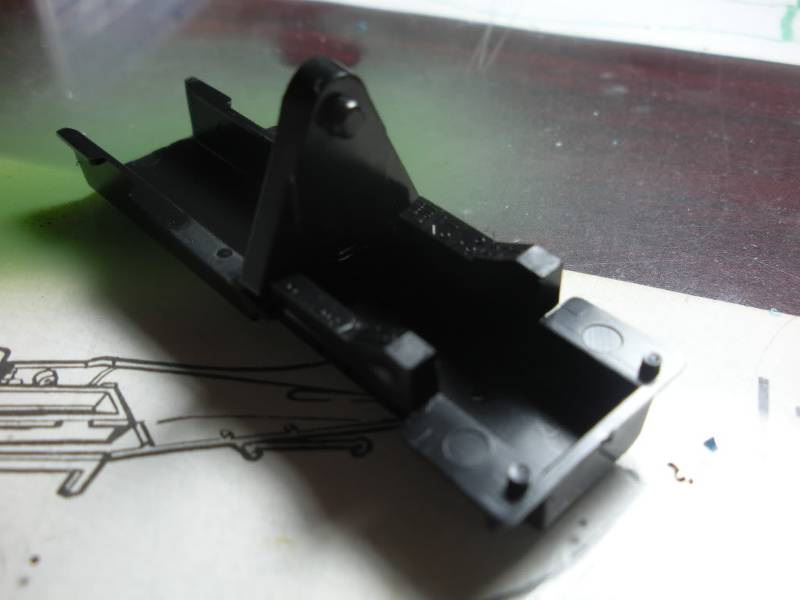
First the OOB pit. Here it is minus the crappy molded pilot and note its molded in black. Yep this is it folks! All two pieces of it!
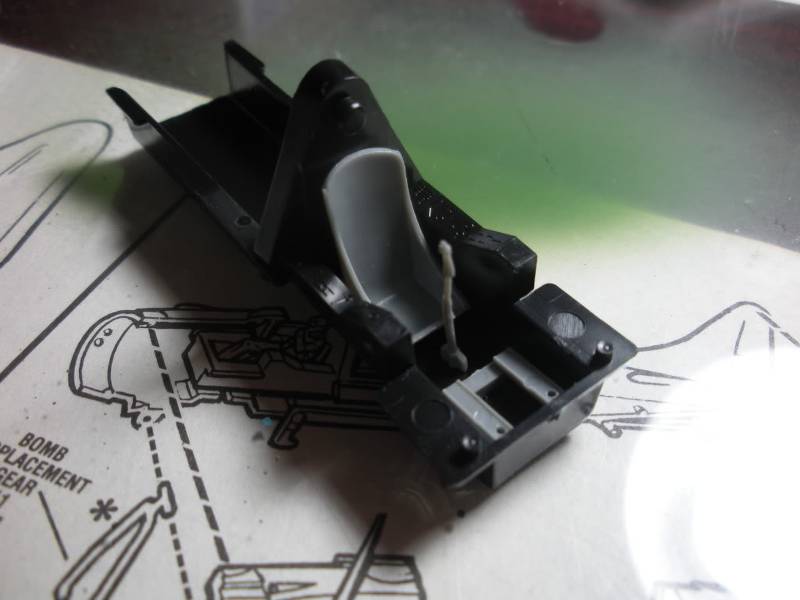
..........and here are the first of many robbed interior parts from the Hasegawa kit. The pilots seat, control column, rudder pedal pedestals and the pedals themselves. If I were to just add these parts and nothing else to the interior it would be a VAST improvement over the stock Monogram cockpit area. There are some that may wonder, "How come he didn't just build the Hasegawa build?" . The whole point is to take a kit that looks awesome from the outside with all that rivet detail and try to make it look just as good on the inside.
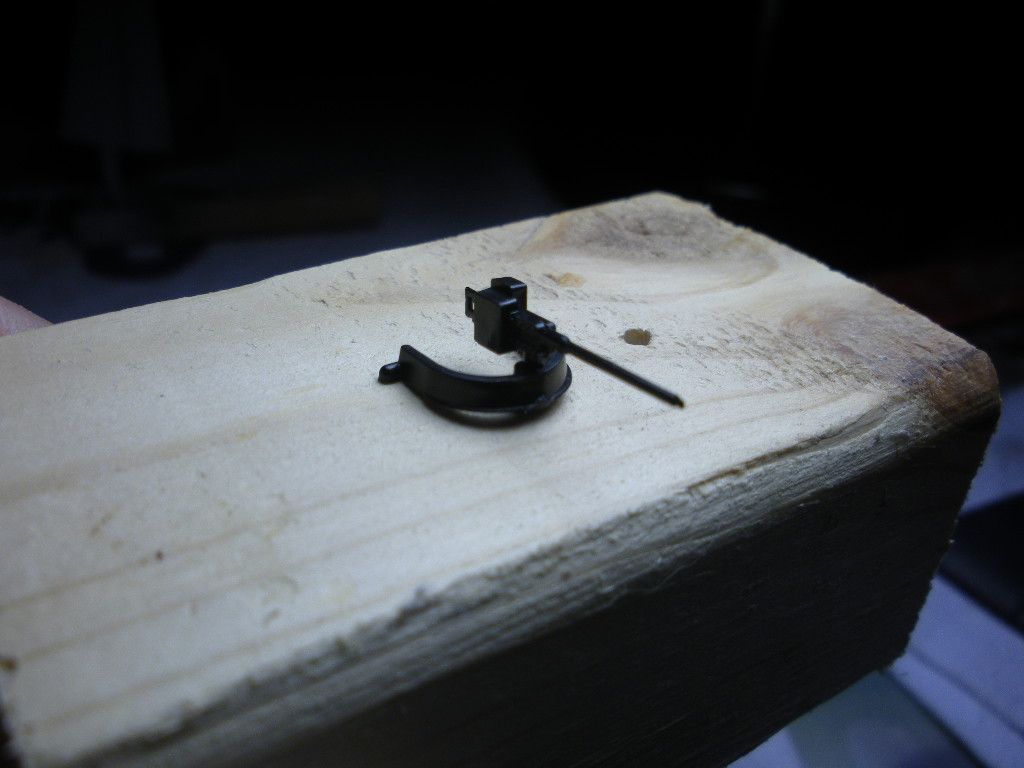
On to the rear gun and turret assy. This kit was supplied with a rear gun but it has absolutely no accuracy at all. A half moon shaped gunners ring is supplied along with what looks like a modified "potato gun" for the rear firing .30 cal machine gun. I don't know what tha heck this is supposed to be!
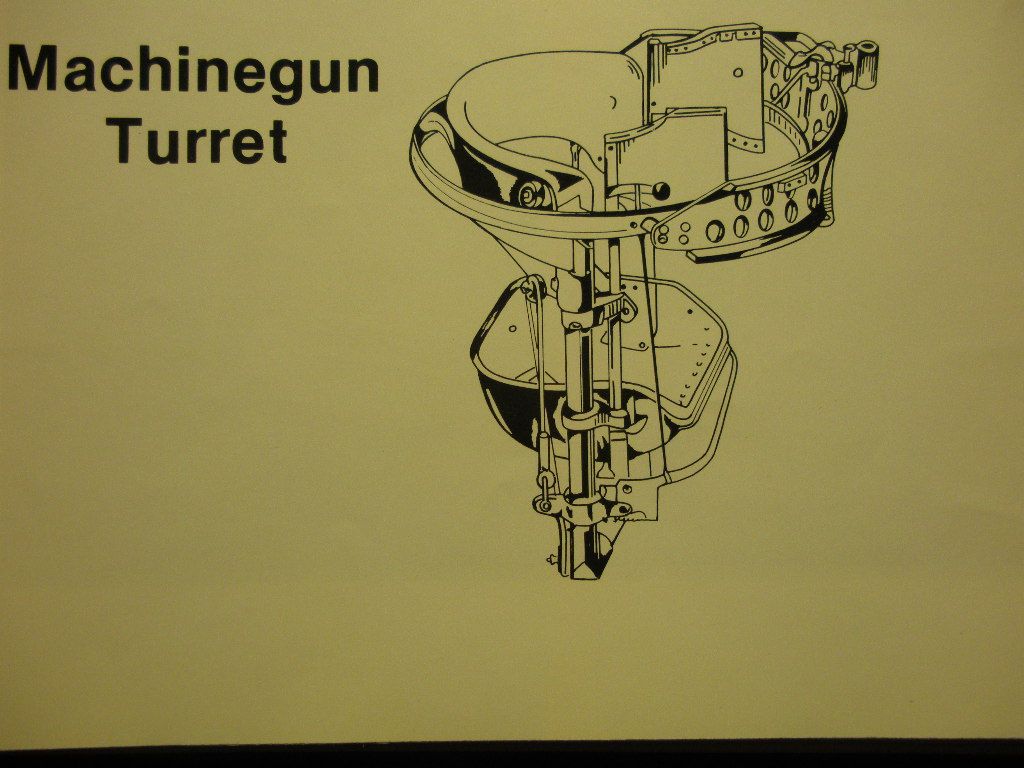
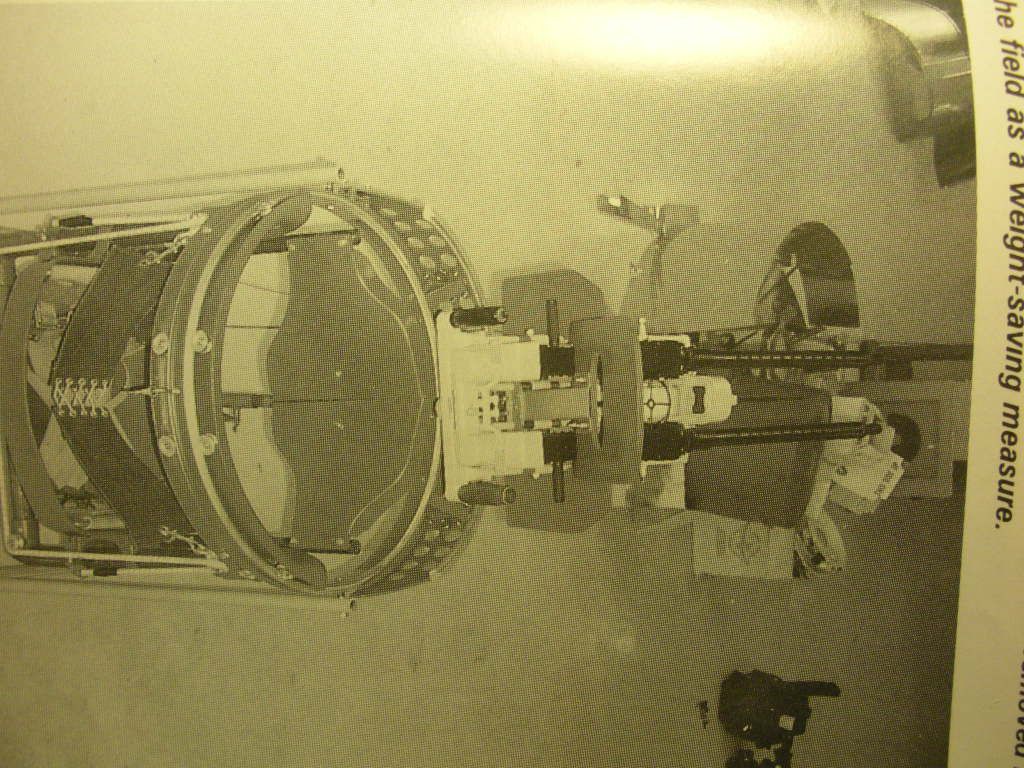
This is how the gunners ring is supposed to look:
I ended up going with a twin .30 cal setup in the back so heres a so-so photo of that :
Here is the cockpit flooring and related parts as well as the gunners ring with the twin .30 cal setup. I first painted the seat with "rattle can" Testors Metallic Silver enamel followed by a coat of Model Master acrylic Zinc Chromate Green. I then took a toothpick and chipped the Chromate as to provide a scratched seat back surface from parachute buckle and seat belt buckle contact for that worn in look. The seat belts were made out of lead foil with PE buckles from Tom's Modelworks. I must have worn that stupid visor for 30 minutes trying to feed those belts through the buckles and through the seat belt end latches! I painted the seat belts a linen color from Humbrol and after the paint cured out hit them with a dry brushing of ground up black pastel to dirty them up. I also applied a black wash to the cockpit tub for the used effect as well. I had to be careful with that because carrier based aircraft are usually corroded and not dirty. The raised detail on the side consoles was completed by using a white lead pencil to bring out the details. The gunners ring , while not totally accurate, at least resembles the reference!!! Seat belts for the gunners seat were made from lead foil as well with PE belt latches/ ends.
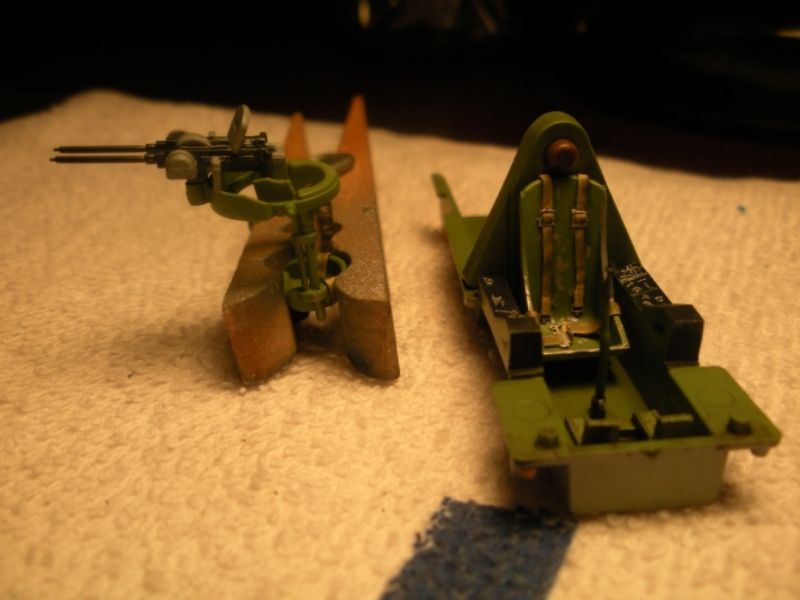
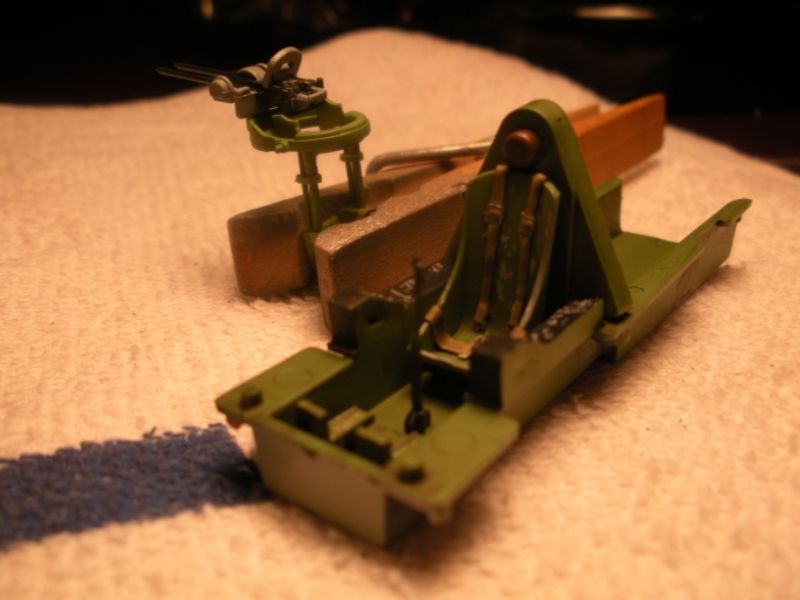
As you can see, this is a FAR cry from the out of box offering that the Monogram kit offers. The only thing missing from the gun at this point is the PE gun ring sight and the PE .30 cal ammo leading from the ammo boxes to the guns. Those got installed at the end of the build.
Almost the whole cockpit is from the Hasegawa boxing as well as the forward firing gun barrels and main landing gear wheels. There is some PE from Toms Modelworks and the rear gun ammo belts were donated by a fella by the name of Stikpusher. Awesome guy. I drilled out the dive flap holes and did some scratch building throughout the build. This build fairly instrumental to me because it was the first build where I really started getting comfortable with my airbrushing. All exterior paints were Vallejo and interior paints were Model Master.


a small comment about the next picture. I took this one with the purpose of showing the model/ replication of 22-C-14 after it was first loaded onto the carrier Independence. I tried to get the paint scheme as close to this bird as possible so I'll have this pic and then following that the actual pic of the plane(which you all have seen here already but not right next to one another). The now so obvious thing that sticks out to me like a sore thumb is the fact that there is actually only one roundel on the upper wing surface on the port wing. I aint going to worry about it now. If this would have been a build for extreme accuracy I wouln't have been very happy. Pictures offer great help in modeling I continue to find out.


All in all this was a fun build for me. Accuracy was really only there in the paint and there are flaws throughout the build that I would normally take care of. With fun in mind I mixed accuracy with original Monogram intent,however, none of the features that I wanted to work in the beginning of the build work in the name of getting things to fit right and proper so I left alot of Monogram signatures on the aircraft such as the copyright year on the elevators, part numbers in the middle inside portion of the dive flaps and the incorrect centerline bomb and bomb strut.
Thought I'd include a couple of shots of the interior of this thing.
First the OOB pit. Here it is minus the crappy molded pilot and note its molded in black. Yep this is it folks! All two pieces of it!

..........and here are the first of many robbed interior parts from the Hasegawa kit. The pilots seat, control column, rudder pedal pedestals and the pedals themselves. If I were to just add these parts and nothing else to the interior it would be a VAST improvement over the stock Monogram cockpit area. There are some that may wonder, "How come he didn't just build the Hasegawa build?" . The whole point is to take a kit that looks awesome from the outside with all that rivet detail and try to make it look just as good on the inside.

On to the rear gun and turret assy. This kit was supplied with a rear gun but it has absolutely no accuracy at all. A half moon shaped gunners ring is supplied along with what looks like a modified "potato gun" for the rear firing .30 cal machine gun. I don't know what tha heck this is supposed to be!

This is how the gunners ring is supposed to look:

I ended up going with a twin .30 cal setup in the back so heres a so-so photo of that :

Here is the cockpit flooring and related parts as well as the gunners ring with the twin .30 cal setup. I first painted the seat with "rattle can" Testors Metallic Silver enamel followed by a coat of Model Master acrylic Zinc Chromate Green. I then took a toothpick and chipped the Chromate as to provide a scratched seat back surface from parachute buckle and seat belt buckle contact for that worn in look. The seat belts were made out of lead foil with PE buckles from Tom's Modelworks. I must have worn that stupid visor for 30 minutes trying to feed those belts through the buckles and through the seat belt end latches! I painted the seat belts a linen color from Humbrol and after the paint cured out hit them with a dry brushing of ground up black pastel to dirty them up. I also applied a black wash to the cockpit tub for the used effect as well. I had to be careful with that because carrier based aircraft are usually corroded and not dirty. The raised detail on the side consoles was completed by using a white lead pencil to bring out the details. The gunners ring , while not totally accurate, at least resembles the reference!!! Seat belts for the gunners seat were made from lead foil as well with PE belt latches/ ends.


As you can see, this is a FAR cry from the out of box offering that the Monogram kit offers. The only thing missing from the gun at this point is the PE gun ring sight and the PE .30 cal ammo leading from the ammo boxes to the guns. Those got installed at the end of the build.


