|
|
Post by chromdome35 on Aug 22, 2023 20:36:41 GMT -5
HAH when you said paint sticks I was thinking of actual sticks with paint in them, I wasn't sure what you were talking about, these never occurred to me. Yes, I have a few myself.
|
|
mz3
Full Member
  
Member since: October 2012
Posts: 649
Oct 14, 2012 21:09:43 GMT -5
Oct 14, 2012 21:09:43 GMT -5
|
Post by mz3 on Sept 2, 2023 18:56:13 GMT -5
Actual progress... Paint... Good...    Primed all the green parts with grey mr surfacer 1500 and black parts with black 1500. Then gave all the green parts a preshade of flat black. The the darker green parts were painted with xf-62 olive drab. The lighter green parts were painted withxf-89 dark green 2. The black parts are painted with xf-63 german grey.  Now, from this point on these parts, I'm not going to post ratios on the paints. When I start fading I just start mixing paints. I've never really had set mixes/ratios. I'm thinking about playing around with hairspray and layering some of the fading. I'll need to reassemble everything so I can properly fade the parts. More fading up top with more chips and damaged paint down low. |
|
Real G
Full Member
  
Member since: April 2023
Posts: 880 
|
Post by Real G on Sept 2, 2023 21:53:31 GMT -5
I can’t wait to see your paint application!
|
|
|
|
Post by dupes on Sept 3, 2023 13:42:27 GMT -5
Mmmmmmm, Zaku!
|
|
mz3
Full Member
  
Member since: October 2012
Posts: 649
Oct 14, 2012 21:09:43 GMT -5
Oct 14, 2012 21:09:43 GMT -5
|
Post by mz3 on Sept 11, 2023 15:38:39 GMT -5
|
|
|
|
Post by deafpanzer on Sept 11, 2023 19:44:20 GMT -5
Excellent painting job! Nothing looks monotoned at all.
|
|
|
|
Post by chromdome35 on Sept 11, 2023 19:55:05 GMT -5
Those highlights and blends look great!
|
|
mz3
Full Member
  
Member since: October 2012
Posts: 649
Oct 14, 2012 21:09:43 GMT -5
Oct 14, 2012 21:09:43 GMT -5
|
Post by mz3 on Sept 12, 2023 17:55:52 GMT -5
PFA...   Today I'm getting thr frame ready for paint. I missed a bunch of nubs and moldlines. Nothing fancy here for paint, probably just black primer. |
|
mz3
Full Member
  
Member since: October 2012
Posts: 649
Oct 14, 2012 21:09:43 GMT -5
Oct 14, 2012 21:09:43 GMT -5
|
Post by mz3 on Sept 17, 2023 19:32:37 GMT -5
Update....  I went ahead and painted the whole frame with mr surfacer 1500 black. I was just being lazy. I didn't want to break the knees and elbows apart for this step, even though I will break them apart fir detail painting. I did not go over the hands yet. I haven't cleaned them. Sanding the individual finger parts can be a pain. When I'm motivated I'll hit them. |
|
|
|
Post by deafpanzer on Sept 17, 2023 20:53:16 GMT -5
Nothing beats Mr Surfacer! I grabbed four spray cans at hobby shop last Friday while they were in stock.
|
|
mz3
Full Member
  
Member since: October 2012
Posts: 649
Oct 14, 2012 21:09:43 GMT -5
Oct 14, 2012 21:09:43 GMT -5
|
Post by mz3 on Sept 17, 2023 21:29:11 GMT -5
I don't even remember when I started using it. It doesn't even come up in my thought process when planning out a kit. First step for painting- mr surfacer.
|
|
|
|
Post by chromdome35 on Sept 17, 2023 22:48:35 GMT -5
Nothing beats Mr Surfacer! I grabbed four spray cans at hobby shop last Friday while they were in stock. I've pretty much locked in on using Mr. Finishing Surfacer 1500 Black Thinned 60/40 MLT/Mr. Surfacer on every model. Its the closest thing to bulletproof I've found. |
|
buddho
Forum Moderator     
Member since: February 2019
Posts: 1,287 
MSC Staff
|
Post by buddho on Sept 18, 2023 11:16:26 GMT -5
The painting looks fantastic!
|
|
mz3
Full Member
  
Member since: October 2012
Posts: 649
Oct 14, 2012 21:09:43 GMT -5
Oct 14, 2012 21:09:43 GMT -5
|
Post by mz3 on Sept 20, 2023 15:52:12 GMT -5
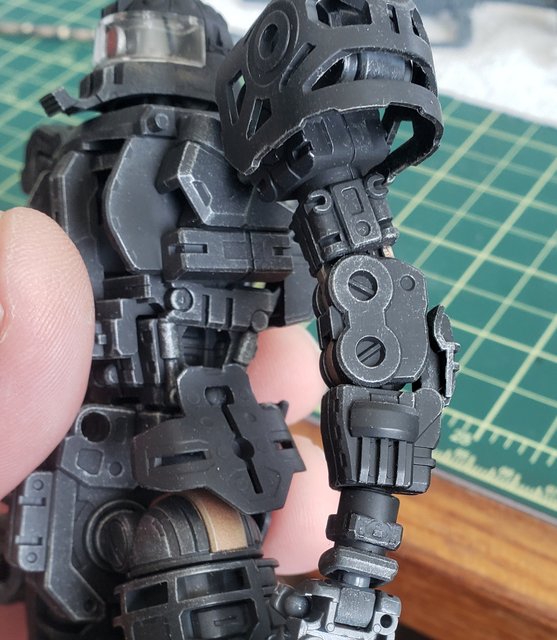
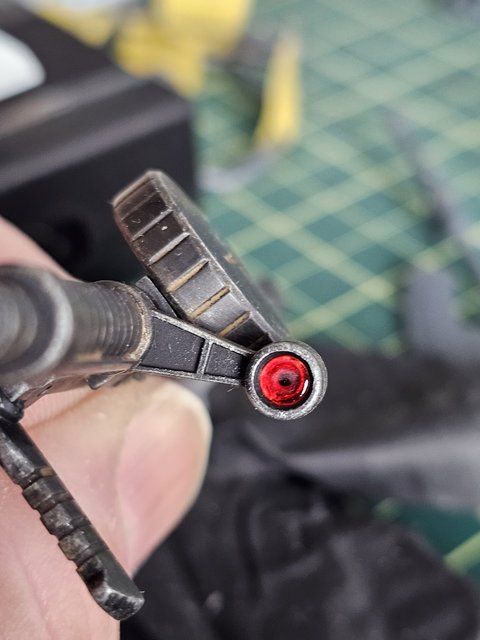
Sooo..... My Zaku got pink eye...      Painting on the frame is done. I tried to keep it simple since most of it probably won't be seen. Dark copper xf-28 and mr color super iron 2 sm203. Then I just drybrushed testors steel all over the areas that will be seen. The eye is a "custom" color I mixed with tamiya clear red, gloss white, x-22 clear, x20a and retarder. I don't have ratios cause I was trying to work fast. I just mixed until I got a color close to the sticker it comes with. The base of the eye is flat black and the edge is testors steal. Under the eye is dark copper with a quick raw umber oil wash. . I think that dark copper there will add more once the armor parts are on. |
|
|
|
Post by deafpanzer on Sept 20, 2023 16:45:16 GMT -5
Oh no, not the pink eye?!?!? I better send you my personal nurse to take care of that...  Excellent chipping work especially on the edges and corners by the way! |
|
mz3
Full Member
  
Member since: October 2012
Posts: 649
Oct 14, 2012 21:09:43 GMT -5
Oct 14, 2012 21:09:43 GMT -5
|
Post by mz3 on Sept 20, 2023 20:47:20 GMT -5
Send her my way😍 Cooling cable beads...  My fingers hurt! |
|
Real G
Full Member
  
Member since: April 2023
Posts: 880 
|
Post by Real G on Sept 20, 2023 22:33:12 GMT -5
I dream of the day when 3D printing makes those power cable segments easy to clean and almost ready to use.
Where do I sign up to get vaccinated? But that needle looks kinda big. And dull...
Tetsujn 28 better watch out, Zaku inbound for a return match!
|
|
|
|
Post by 406 Silverado on Sept 21, 2023 5:23:49 GMT -5
WOW!! This is coming along nicely MZ. All the painting and weathering that you've done on this one is really adding up to yield some very good results bud.
|
|
mz3
Full Member
  
Member since: October 2012
Posts: 649
Oct 14, 2012 21:09:43 GMT -5
Oct 14, 2012 21:09:43 GMT -5
|
Post by mz3 on Sept 23, 2023 19:34:46 GMT -5
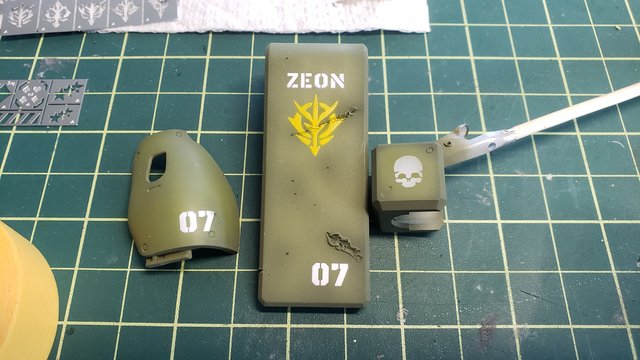
Happy Saturday...  Some template painting. The yellow is fuzzy, the scare under it pushed it a bit off the surface. All of them will get some sanding.   Hit the frame with a light layer of buff to tone it down a bit. And put some "primer" color on the beads.  I started with mr surfacer 1500 then added a mix of tamiya red and re brown randomly mixed. Most of them will be dark green, but a couple will get some heavy chipping. |
|
|
|
Post by 406 Silverado on Sept 23, 2023 19:42:36 GMT -5
Coming along nicely MZ. I envy you guys with all the bench time you have. I may get back on mine tomorrow......
The weathering and paint work that you are putting into this one is bringing out the best. Great work bud.
|
|
mz3
Full Member
  
Member since: October 2012
Posts: 649
Oct 14, 2012 21:09:43 GMT -5
Oct 14, 2012 21:09:43 GMT -5
|
Post by mz3 on Sept 27, 2023 14:14:50 GMT -5
Some painting...   The skull I've been working with water color pencils. Hopefully it stays after I topcoat it. |
|
|
|
Post by deafpanzer on Sept 28, 2023 8:05:20 GMT -5
I really like what I am seeing especially the very faded skull marking!
|
|
|
|
Post by dupes on Sept 28, 2023 9:49:59 GMT -5
I'm always torn as to how much work/detail painting to put on the frame. It always feels like you can't see ANY of it. Excellent paint!
|
|
mz3
Full Member
  
Member since: October 2012
Posts: 649
Oct 14, 2012 21:09:43 GMT -5
Oct 14, 2012 21:09:43 GMT -5
|
Post by mz3 on Sept 28, 2023 10:39:48 GMT -5
Most of the time I will only paint the areas of the frame that show through the armor. The only reason I painted this entire frame was because I put too much primer in my airbrush and didn't want to waste it.
|
|
mz3
Full Member
  
Member since: October 2012
Posts: 649
Oct 14, 2012 21:09:43 GMT -5
Oct 14, 2012 21:09:43 GMT -5
|
Post by mz3 on Oct 1, 2023 21:13:49 GMT -5
Updatesss...   The blackish parts I started with black mr surfacer 1500. Then german grey, hairspray and finally nato black. Then I used a mix of 50/50 water and windex to strip the paint. I'm kinda like whatever on most of these, once a flat coat goes on the chipping will probably disappear. I should have used a lighter color underneath the nato black. Then I had an idea...     I still have about 80 of those little magnets from the last Gundam project, so I decided to use a bunch of them to hold the ax in place. I ended up stacking several in the ax, both hands and the holder. CA'ed everything in place and tested. It all works great. I had to hollow out the holder, if I didn't it would have scratched the ax handle. Next step is to start putting armor back on and figuring out more weathering. |
|
Real G
Full Member
  
Member since: April 2023
Posts: 880 
|
Post by Real G on Oct 4, 2023 13:09:34 GMT -5
The paint and weathering is shaping up nicely. I like the magnet idea; might have to cockroach it for my builds...
|
|
mz3
Full Member
  
Member since: October 2012
Posts: 649
Oct 14, 2012 21:09:43 GMT -5
Oct 14, 2012 21:09:43 GMT -5
|
Post by mz3 on Oct 4, 2023 14:18:50 GMT -5
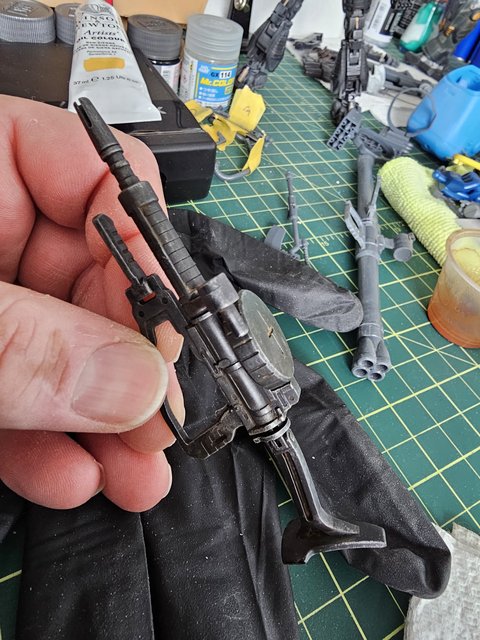
The magnets are awesome! They fit anywhere you can think of. Gun...  I took inspiration from the T-90 tanks on the scope lens. There is a hole in the rear of the clear part so I put some black in before painting the rest of it.   And let the weathering begin!!!  I got a new phone with a fancy new camera in it. I'm still trying to figure it out. But 200 mp is way to much for anything! |
|
mz3
Full Member
  
Member since: October 2012
Posts: 649
Oct 14, 2012 21:09:43 GMT -5
Oct 14, 2012 21:09:43 GMT -5
|
Post by mz3 on Oct 4, 2023 17:07:22 GMT -5
Zaku...   |
|
|
|
Post by 406 Silverado on Oct 4, 2023 17:22:59 GMT -5
You're really doing some mighty fine work to this MZ. All the painting and weathering is making this one some true eye candy. Lookin' great bud.
|
|
mz3
Full Member
  
Member since: October 2012
Posts: 649
Oct 14, 2012 21:09:43 GMT -5
Oct 14, 2012 21:09:43 GMT -5
|
Post by mz3 on Oct 4, 2023 18:22:39 GMT -5
Thank you! Inspiration hit!   Little more damage to it. I might try this on the waist lines if I have some wire thats big enough. I'm still deciding on the desert yellow part/s. |
|