maverick
Full Member

Member since: January 2023
Posts: 298
Jan 24, 2023 20:42:43 GMT -5
Jan 24, 2023 20:42:43 GMT -5
|
Post by maverick on Aug 14, 2023 18:42:22 GMT -5
|
|
eaglecash867
Full Member
Member since: July 2023
Posts: 302
Jul 1, 2023 5:18:34 GMT -5
Jul 1, 2023 5:18:34 GMT -5
|
Post by eaglecash867 on Aug 14, 2023 18:49:12 GMT -5
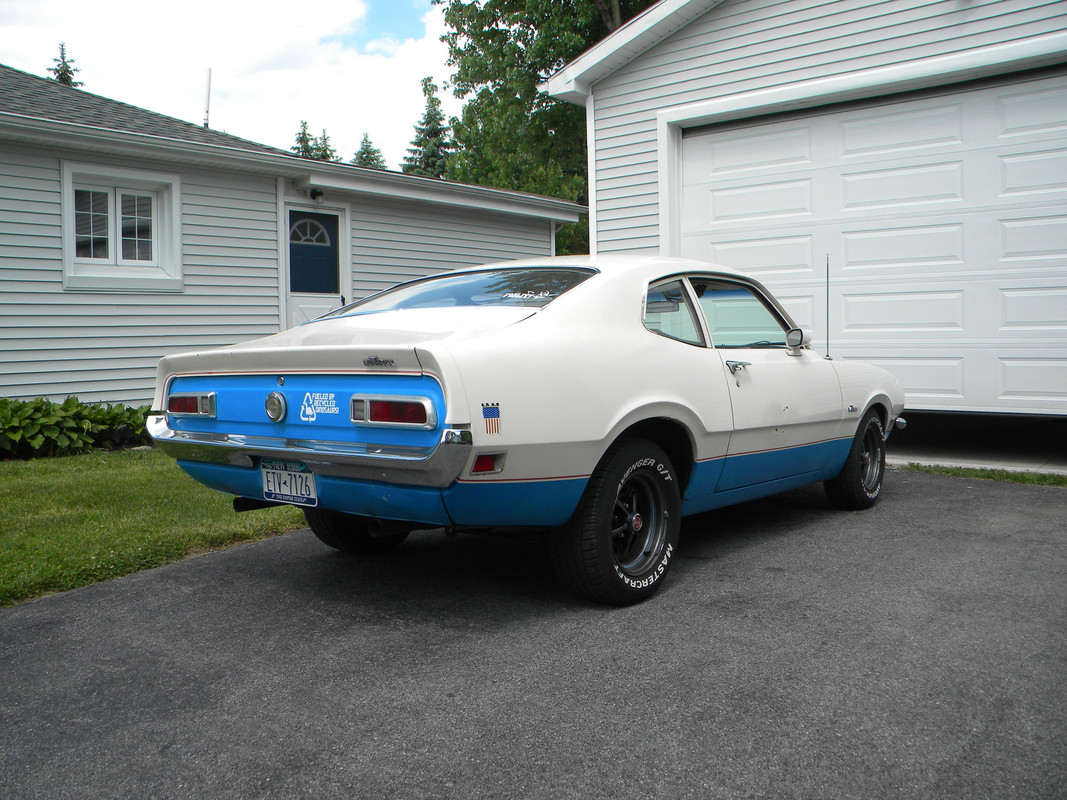
Nice! I'd love to have a Maverick or Comet again. That graphic you have on the back is hilarious. "Fueled by recycled dinosaurs"  |
|
maverick
Full Member
Member since: January 2023
Posts: 298
Jan 24, 2023 20:42:43 GMT -5
Jan 24, 2023 20:42:43 GMT -5
|
Post by maverick on Aug 14, 2023 18:53:05 GMT -5
Just doing my part for the environment...And chapping the backsides of the tree huggers and Prius drivers!!! LOL
They are around. You can find good runners for under 6 grand usually...
Time to go work on the GT 40...
|
|
406 Silverado
Global Administrator 
Member since: November 2011
Posts: 9,632
Member is Online
MSC Staff
|
Post by 406 Silverado on Aug 14, 2023 19:06:12 GMT -5
There's that beauty of a car that I'd love to own someday. And that's how mine and Pete's friendship began at the Maverick/ Comet forum when I was building my Jo-Han Maverick. Such a bada$$ ride Pete. I've just gotta get one of these!!!
|
|
garydavis-Rest In Peace
Full Member
Member since: March 2023
RIP- September 2023
Posts: 440 
|
Post by garydavis-Rest In Peace on Aug 14, 2023 19:08:02 GMT -5
Be very careful when using Methyl Ethyl Ketone. The stuff will blind you if you get it in your eye...Hell the fumes in a high enough concentration can damage your eyesight if not blind you...Also..It is EXTREMELY flammable. I mean it will light off at the drop of a hat. Well ventilated area is a HUGE must with that stuff. Personally, I would use a plastic weld cement instead...MEK is nasty and dangerous... That's not true. I've been using this stuff for over 20+ yrs and haven't had a problem. Look at the labels of Plastruct Plastic weld and Testors liquid cement. It's nothing but MEK. Of course any liquid cement can be HARMFUL if you sniff it or swallow it. Any type of cement will harm your eye site if you get it in your eye without flushing it. Sooo...with all that. Just buy a kit and set it on the shelf and then watch it build itself...LOL |
|
eaglecash867
Full Member
Member since: July 2023
Posts: 302
Jul 1, 2023 5:18:34 GMT -5
Jul 1, 2023 5:18:34 GMT -5
|
Post by eaglecash867 on Aug 14, 2023 19:13:06 GMT -5
Gotta agree with Gary on the MEK subject. I've been working around it for 30+ years in the aviation industry. Never a problem with pretty simple precautions.
|
|
eaglecash867
Full Member
Member since: July 2023
Posts: 302
Jul 1, 2023 5:18:34 GMT -5
Jul 1, 2023 5:18:34 GMT -5
|
Post by eaglecash867 on Aug 21, 2023 18:13:03 GMT -5
|
|
eaglecash867
Full Member
Member since: July 2023
Posts: 302
Jul 1, 2023 5:18:34 GMT -5
Jul 1, 2023 5:18:34 GMT -5
|
Post by eaglecash867 on Aug 27, 2023 12:23:45 GMT -5
|
|
garydavis-Rest In Peace
Full Member
Member since: March 2023
RIP- September 2023
Posts: 440
|
Post by garydavis-Rest In Peace on Aug 27, 2023 12:34:21 GMT -5
Now that's cool eagle. The boots on the block look GREAT!
|
|
Joe Rix
Forum Moderator 
Member since: January 2023
Posts: 1,519
MSC Staff
|
Post by Joe Rix on Aug 27, 2023 18:31:29 GMT -5
You sure have got some great work going on. Everything you done so far looks sharp.
|
|
eaglecash867
Full Member
Member since: July 2023
Posts: 302
Jul 1, 2023 5:18:34 GMT -5
Jul 1, 2023 5:18:34 GMT -5
|
Post by eaglecash867 on Aug 27, 2023 19:10:25 GMT -5
Thanks Gary! Thanks Joe! Really nervous about finally running the plug wires.
|
|
handiabled
Administrator 
Member since: February 2023
Posts: 3,681
MSC Staff
|
Post by handiabled on Aug 28, 2023 9:57:20 GMT -5
Looks great so far! That's a handy result of the paint on the plug boots
|
|
eaglecash867
Full Member
Member since: July 2023
Posts: 302
Jul 1, 2023 5:18:34 GMT -5
Jul 1, 2023 5:18:34 GMT -5
|
Post by eaglecash867 on Aug 30, 2023 7:07:48 GMT -5
Thanks handiabled!
Just a heads up about a BIG gotcha on this kit for anybody who is either currently building it or thinking about building it:
The assembly sequence for the chassis, front suspension, and engine installation is way off. Revell calls for the firewall and front suspension to be assembled before the engine goes in. I did a dry fit of everything last night, and for me, that engine WILL NOT go in after the front suspension is on the chassis without breaking or scraping the hell out of something. The locating pins on all of the front suspension parts fit EXTREMELY snug, so even though it was just a dry fit, I had a hell of a time getting it back apart without breaking something off. So, I'll be finishing the engine and installing the whole thing on the motor and transmission mounts BEFORE the front suspension goes on. Luckily, I didn't scratch or break anything, but MAN was it scary. LOL
|
|
|
|
Post by kyledehart5 on Aug 30, 2023 7:22:28 GMT -5
Good info and glad you were able to get it safely back apart!!
|
|
406 Silverado
Global Administrator
Member since: November 2011
Posts: 9,632
Member is Online
MSC Staff
|
Post by 406 Silverado on Aug 30, 2023 8:51:05 GMT -5
Thanks handiabled! Just a heads up about a BIG gotcha on this kit for anybody who is either currently building it or thinking about building it: The assembly sequence for the chassis, front suspension, and engine installation is way off. Revell calls for the firewall and front suspension to be assembled before the engine goes in. I did a dry fit of everything last night, and for me, that engine WILL NOT go in after the front suspension is on the chassis without breaking or scraping the hell out of something. The locating pins on all of the front suspension parts fit EXTREMELY snug, so even though it was just a dry fit, I had a hell of a time getting it back apart without breaking something off. So, I'll be finishing the engine and installing the whole thing on the motor and transmission mounts BEFORE the front suspension goes on. Luckily, I didn't scratch or break anything, but MAN was it scary. LOL I went through that on my AMT 1970 Z/28 build and had to do the same thing that you're saying here. Thanks for the heads up as I've been looking at getting this kit after watching you and Gil build it up. +1 Karma to you |
|
garydavis-Rest In Peace
Full Member
Member since: March 2023
RIP- September 2023
Posts: 440
|
Post by garydavis-Rest In Peace on Aug 30, 2023 15:42:53 GMT -5
That is very good info Eagle...thanks for the heads up on that.
|
|
eaglecash867
Full Member
Member since: July 2023
Posts: 302
Jul 1, 2023 5:18:34 GMT -5
Jul 1, 2023 5:18:34 GMT -5
|
Post by eaglecash867 on Sept 4, 2023 18:36:25 GMT -5
Always glad to provide a little intel on landmines when I run across them on a build.  Finally got the motivation to give my 90 degree plug wire boot idea a shot this weekend. I used .035" styrene rod that I cut pieces of at 45 degree angles with The Chopper (great little tool) and glued the 45 degree cut ends together with a little Tamiya Extra Thin. After that I cut them down to 1/25 scale plug wire boot size, drilled 0.3mm holes in both ends of each, and glued a little chunk of 0.3mm copper beam into the shorter leg on each one. The copper beam made a great holder while I primed and painted each one...went with MRP Tyre Rubber Black. Drilled more 0.3mm holes into each of the plug wire sockets on the distributor and did a dry fit for proof of concept. Looks like I chose the right diameter of styrene rod, because they all fit at the same time. I was worried they would be just slightly too big and wouldn't all fit.   Now its just a matter of chopping off the tips of the plug wire sockets, drilling the existing holes a little deeper, and permanetly attaching them all once I get wires on them. |
|
|
|
Post by kyledehart5 on Sept 5, 2023 0:10:10 GMT -5
That’s really going to look great once it’s all wired up and everything. Great job.
|
|
garydavis-Rest In Peace
Full Member
Member since: March 2023
RIP- September 2023
Posts: 440
|
Post by garydavis-Rest In Peace on Sept 5, 2023 12:24:49 GMT -5
That's a good technique, Eagle. I'm going to try that myself. Thank you for sharing that idea...
|
|
maverick
Full Member
Member since: January 2023
Posts: 298
Jan 24, 2023 20:42:43 GMT -5
Jan 24, 2023 20:42:43 GMT -5
|
Post by maverick on Sept 6, 2023 14:17:23 GMT -5
Nice, coil wire boot should point straight up though...
|
|
eaglecash867
Full Member
Member since: July 2023
Posts: 302
Jul 1, 2023 5:18:34 GMT -5
Jul 1, 2023 5:18:34 GMT -5
|
Post by eaglecash867 on Sept 6, 2023 14:40:21 GMT -5
Cool! Thanks Maverick! I was wondering about that because I have also seen the coil wire with a 90 degree boot on it. A straight one would definitely make things easier. Edit: I think I might have misread your post, Maverick. Did you mean the clocking of the coil wire boot when you said it should be straight up? If so, no worries there, this is just a dry fit to make sure I used a small enough diameter rod for everything to fit without being smashed together. I'll get the clocking dialed in when I have things routed properly and can permanently install them. |
|
eaglecash867
Full Member
Member since: July 2023
Posts: 302
Jul 1, 2023 5:18:34 GMT -5
Jul 1, 2023 5:18:34 GMT -5
|
Post by eaglecash867 on Sept 6, 2023 14:45:34 GMT -5
That’s really going to look great once it’s all wired up and everything. Great job. Thanks Kyle! That's a good technique, Eagle. I'm going to try that myself. Thank you for sharing that idea... Thanks for looking in Gary! I just wasn't all that crazy about some of the techniques I had seen on YouTube that made use of the DetailMaster boot material. I figured styrene rod welded with Tamiya Extra Thin would be much more solid and durable. I had already done something similar when I scratch-built the JHMCS MTU for the 1/32 Tamiya F-16CJ I built. Made the cable assemblies for that with styrene rod. |
|
406 Silverado
Global Administrator
Member since: November 2011
Posts: 9,632
Member is Online
MSC Staff
|
Post by 406 Silverado on Sept 7, 2023 13:20:23 GMT -5
I've seen plug wire boots that were straight and angled on these. IMO the straight ones would be easier but I'm definitely down for learning how to make the 90 degree wires.
|
|
eaglecash867
Full Member
Member since: July 2023
Posts: 302
Jul 1, 2023 5:18:34 GMT -5
Jul 1, 2023 5:18:34 GMT -5
|
Post by eaglecash867 on Sept 7, 2023 20:20:24 GMT -5
I agree. I think straight boots would be a lot easier, but all of my references show 90 degree boots. My '72 with the standard 351-2V Cleveland that I had in high school had them too. I remember early on in learning how to work on cars that I once got so frustrated with getting those 90 degree boots to all lay flat (the coil wire boot would always stick up at an angle) that I popped all of the wires off the distributor to see what arrangement worked best. LOL! Yeah...I ended up teaching myself a painful lesson in this "new thing" called firing order. MAN...I thought I'd NEVER get that engine running again.  |
|
buddho
Forum Moderator
Member since: February 2019
Posts: 1,278
MSC Staff
|
Post by buddho on Sept 7, 2023 20:27:34 GMT -5
Great touch on the turn lever. Its those minute additions that make such a big leap in authenticity and realism in a small scale.
Also, the chassis and engine are coming along nicely.
|
|
41chevy
Full Member
Member since: June 2023
Posts: 301
Jun 5, 2023 11:01:03 GMT -5
Jun 5, 2023 11:01:03 GMT -5
|
Post by 41chevy on Sept 8, 2023 13:14:10 GMT -5
Your interior is fantastic! I have just painted the body on mine and assembled the engine. It is a beautiful kit.
Just an FYI for those who use the Tamiya Extra Thin Cement, The List of chemicals in it is EXACTLY the same as the Tamiya Lacquer Thinner. 100% the same make up and works the same so far as I've used it.
|
|
eaglecash867
Full Member
Member since: July 2023
Posts: 302
Jul 1, 2023 5:18:34 GMT -5
Jul 1, 2023 5:18:34 GMT -5
|
Post by eaglecash867 on Sept 8, 2023 17:17:11 GMT -5
Great touch on the turn lever. Its those minute additions that make such a big leap in authenticity and realism in a small scale. Also, the chassis and engine are coming along nicely. Thanks Buddho! I guess I can't fault Revell too much on their baseball bat-like lever. That's probably about the smallest they could make the turn signal lever in plastic so it wouldn't snap off as soon as somebody breathed on it. Your interior is fantastic! I have just painted the body on mine and assembled the engine. It is a beautiful kit. Just an FYI for those who use the Tamiya Extra Thin Cement, The List of chemicals in it is EXACTLY the same as the Tamiya Lacquer Thinner. 100% the same make up and works the same so far as I've used it. Thanks 41chevy! Its amazing how much building the interior brought back memories of the 72 Mustang I had. Revell did a really excellent job with the details they molded in, especially the instrument panel. Thanks for the tip on the Tamiya Lacquer Thinner. I actually have a big bottle of their Retarder Type thinner that I bought a while ago and just never found a real use for it. Heh...thanks to your advice, it looks like I have a lifetime supply of cement now with that bottle. I'm thinking about giving MEK a try too, since I usually have plenty of that on-hand as well. Did a test shot on a spoon for the body/stripe colors. Going with Acapulco Blue and Argent Silver stripes. Using MCW enamels for the first time and I'm really impressed with them. The photo just doesn't show how smooth and glossy the finish is with these paints.  |
|
41chevy
Full Member
Member since: June 2023
Posts: 301
Jun 5, 2023 11:01:03 GMT -5
Jun 5, 2023 11:01:03 GMT -5
|
Post by 41chevy on Sept 8, 2023 21:38:30 GMT -5
I primarily use MEK, the Tamiya I use for trim and delicate details.
|
|
eaglecash867
Full Member
Member since: July 2023
Posts: 302
Jul 1, 2023 5:18:34 GMT -5
Jul 1, 2023 5:18:34 GMT -5
|
Post by eaglecash867 on Sept 9, 2023 12:02:57 GMT -5
Got the intake manifold and valve covers painted in Alclad Dull Aluminum. Used MRP005 as my black basecoat. Just a dry fit at this point. Looks like I have a little more painting of Ford Engine Blue on the heads though. The manifold doesn't cover those bare spots like I thought it would. Oh well...easy enough to fix.  |
|
70 STING
Full Member
Member since: April 2023
Posts: 530
Apr 10, 2023 11:44:31 GMT -5
Apr 10, 2023 11:44:31 GMT -5
|
Post by 70 STING on Sept 9, 2023 13:18:40 GMT -5
That is very nice aluminum paint. Actually looks like the real thing. Other brands often appear a touch shiny to me.
|
|