keavdog
Full Member

Member since: April 2023
Posts: 1,345
Apr 2, 2023 21:25:25 GMT -5
Apr 2, 2023 21:25:25 GMT -5
|
Post by keavdog on Dec 19, 2023 21:32:46 GMT -5
I sure do like that Acapulco Blue. Nicely done.
|
|
eaglecash867
Full Member
Member since: July 2023
Posts: 227
Jul 1, 2023 5:18:34 GMT -5
Jul 1, 2023 5:18:34 GMT -5
|
Post by eaglecash867 on Dec 25, 2023 21:26:02 GMT -5
I sure do like that Acapulco Blue. Nicely done. Thanks Keavdog! Finally got the base color looking right on the hood, and did the chrome window trim over the past couple of days using BMF Ultra Bright Chrome. First time really using BMF for its intended purpose (Makes a great paint mask for really complex jobs too. Used it to mask around the ram air apparatus under the hood.) I've been using big pieces of Tamiya Masking Sticker Sheets as elephant skin (as seen along the side of the body) to protect the paint during handling. Not sure its needed, since the MCW enamel with their hardener mixed into it seems to be pretty tough stuff. Not taking chances though.  |
|
|
|
Post by kyledehart5 on Dec 26, 2023 2:21:16 GMT -5
Bright work looks really nice! Coming along well.
|
|
eaglecash867
Full Member
Member since: July 2023
Posts: 227
Jul 1, 2023 5:18:34 GMT -5
Jul 1, 2023 5:18:34 GMT -5
|
Post by eaglecash867 on Dec 26, 2023 9:59:39 GMT -5
Bright work looks really nice! Coming along well. Thanks Kyle! Got the front and rear side marker lights chromed and painted this morning. The Silhouette Portrait 3 I bought a couple of years ago is really starting to pay off after figuring out its quirks. I had it cut tiny rectangular masks out of Tamiya Masking Sticker Sheet material, which I used to mask the area around the marker light lenses. Then I dusted on some Alclad ALC-107 Chrome, followed by some Tamiya X-27 Clear Red for the rear markers, and Tamiya X-26 Clear Orange for the front markers. Just slowly built the opacity of the colors until they looked right to my eye. Just have some touch-ups and a little bit more painting to do in the black areas of the body that will be underneath the hood, and then the stripe decals can finally start going on. Saving the little bit of bright work left to do, which will be done using Testors square bottle Metallic Silver, for last. I know those Testors metallic paints get tracked all over everything really easily, so that is going to be the last step before sealing everything in with the clear coat. Has anybody tried the MCW clear enamel? Not sure if I should use that, or if I should use 2K clear. I want something that'll give me a good, hard clear coat.  |
|
|
|
Post by kyledehart5 on Dec 26, 2023 11:45:25 GMT -5
I love MCW paints but have never tried the clear. Be hard to get something harder than 2k.
|
|
eaglecash867
Full Member
Member since: July 2023
Posts: 227
Jul 1, 2023 5:18:34 GMT -5
Jul 1, 2023 5:18:34 GMT -5
|
Post by eaglecash867 on Dec 26, 2023 11:57:01 GMT -5
Thanks Kyle. I finally ordered a respirator because of the paint volume required for building cars, so I guess I'll just end up using my MRP 2K clear, wear the respirator, and keep my cat out of the basement while it cures.
|
|
|
|
Post by kyledehart5 on Dec 27, 2023 1:26:24 GMT -5
Thanks Kyle. I finally ordered a respirator because of the paint volume required for building cars, so I guess I'll just end up using my MRP 2K clear, wear the respirator, and keep my cat out of the basement while it cures. I put my bodies in a plastic tote with a lid to stop the cats getting to them. 😂😂 I actually put the model on its stand onto the upside down lid of the container and then lower the container down over it. Easier that way. |
|
handiabled
Community Relations Moderator 
Member since: February 2023
Posts: 2,471 
MSC Staff
|
Post by handiabled on Dec 27, 2023 2:16:50 GMT -5
Thanks Kyle. I finally ordered a respirator because of the paint volume required for building cars, so I guess I'll just end up using my MRP 2K clear, wear the respirator, and keep my cat out of the basement while it cures. I put my bodies in a plastic tote with a lid to stop the cats getting to them. 😂😂 I actually put the model on its stand onto the upside down lid of the container and then lower the container down over it. Easier that way. Bright work looks great! I have the same issue with cats especially their hair being everywhere. |
|
|
|
Post by kyledehart5 on Dec 27, 2023 2:20:49 GMT -5
I put my bodies in a plastic tote with a lid to stop the cats getting to them. 😂😂 I actually put the model on its stand onto the upside down lid of the container and then lower the container down over it. Easier that way. Bright work looks great! I have the same issue with cats especially their hair being everywhere. Oh Brent, every build of mine has cat hair in the paint. Unavoidable. I live with it. It's fine. Lol |
|
eaglecash867
Full Member
Member since: July 2023
Posts: 227
Jul 1, 2023 5:18:34 GMT -5
Jul 1, 2023 5:18:34 GMT -5
|
Post by eaglecash867 on Dec 27, 2023 8:20:40 GMT -5
I put my bodies in a plastic tote with a lid to stop the cats getting to them. 😂😂 I actually put the model on its stand onto the upside down lid of the container and then lower the container down over it. Easier that way. Yup. I do the same thing with mine. I usually use Gladware containers. Bright work looks great! I have the same issue with cats especially their hair being everywhere. Thanks, Brent! My cat is a Pixie Bob, so he doesn't shed hair much at all. I'm more concerned about the nasty stuff that 2K paints put into the air while they're curing. He doesn't like to go down to my basement unless I'm down there anyway, and I definitely won't be hanging out long after spraying that stuff, so I probably don't have much to worry about. Here are a couple of pics of my monster, Winston…named him after Winston Churchill because of the face. 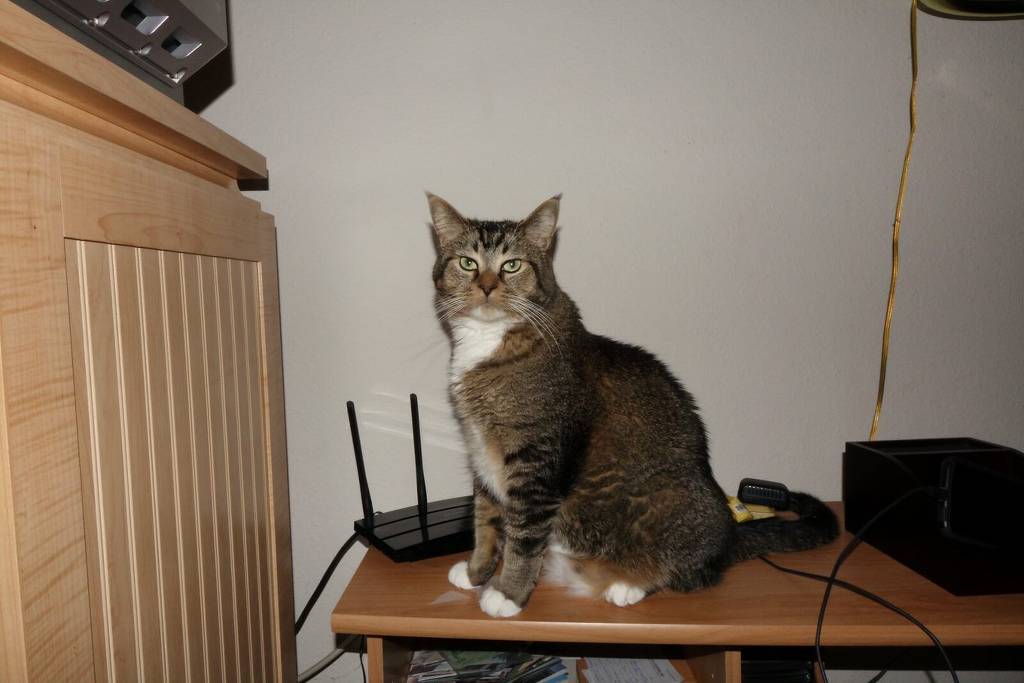  |
|
|
|
Post by kyledehart5 on Dec 27, 2023 10:19:29 GMT -5
I put my bodies in a plastic tote with a lid to stop the cats getting to them. 😂😂 I actually put the model on its stand onto the upside down lid of the container and then lower the container down over it. Easier that way. Yup. I do the same thing with mine. I usually use Gladware containers. Bright work looks great! I have the same issue with cats especially their hair being everywhere. Thanks, Brent! My cat is a Pixie Bob, so he doesn't shed hair much at all. I'm more concerned about the nasty stuff that 2K paints put into the air while they're curing. He doesn't like to go down to my basement unless I'm down there anyway, and I definitely won't be hanging out long after spraying that stuff, so I probably don't have much to worry about. Here are a couple of pics of my monster, Winston…named him after Winston Churchill because of the face. Lol. He says this is my area. |
|
eaglecash867
Full Member
Member since: July 2023
Posts: 227
Jul 1, 2023 5:18:34 GMT -5
Jul 1, 2023 5:18:34 GMT -5
|
Post by eaglecash867 on Dec 30, 2023 13:11:44 GMT -5
Well...ended up burning yet ANOTHER hood. Have another one coming...hopefully 3rd time is a charm. Got back on the body to start getting it ready for the whole thing to finally be dragged across the finish line. Starting the process of putting all of the stripe decals on. Its going well, other than the fact that the front stripe decal isn't quite long enough to contact the fender flare in the right spot, while still being in the correct position over the front side marker light. Since the top stripe decals for the rest of the car all fit perfectly, I had to align the font stripe with those, so its offset to the rear of the marker light. Still looks OK I guess. The stripe decal on the bottom of the rear quarter panel isn't quite shaped right, so it took a lot of MicroSol and some surgery with a #11 blade, but it went down OK.   |
|
|
|
Post by kyledehart5 on Dec 30, 2023 18:22:33 GMT -5
Body looks great with the striping.
|
|
70 STING
Full Member
Member since: April 2023
Posts: 487
Apr 10, 2023 11:44:31 GMT -5
Apr 10, 2023 11:44:31 GMT -5
|
Post by 70 STING on Dec 31, 2023 8:34:21 GMT -5
3 Things:
#1. It’s nice to see perfectly square orange and red side marker lights.
#2. The paint, decals and silver rocker plate look great.
#3. Why is your Tamiya paint stand, car body holder thing so clean? 8^o
|
|
eaglecash867
Full Member
Member since: July 2023
Posts: 227
Jul 1, 2023 5:18:34 GMT -5
Jul 1, 2023 5:18:34 GMT -5
|
Post by eaglecash867 on Dec 31, 2023 9:06:15 GMT -5
Body looks great with the striping. Thanks Kyle! Finally finished the body striping this morning and got the final details painted, so she’ll be ready for a final Novus treatment in a few areas of the paint that got contaminated by something on my hands, and then the 2K clearcoat to seal everything in. 3 Things: #1. It’s nice to see perfectly square orange and red side marker lights. #2. The paint, decals and silver rocker plate look great. #3. Why is your Tamiya paint stand, car body holder thing so clean? 8^o Thanks 70 STING! Really loving that Silhouette Portrait for masking things like those marker lights. Also masked the reverse lamp lenses that way. The idea of using the kit decals for those things just seemed so cheesy. LOL. Heh…the Tamiya paint stand is so clean because this is its first use. Still gonna try to keep it nice and clean though. We’ll see how that works out… 😉 |
|
|
|
Post by 406 Silverado on Dec 31, 2023 9:19:39 GMT -5
This is looking SUPERB so far eagle and I apologize for not chiming in earlier when you asked what kind of clear to use. My go-to is Testors "Wet Look" clear. For factory stock builds it's a little glossier than it should be but it just looks so dang GOOD!!! I simply decant it from the can and shoot it through the airbrush after letting it gas out for around 3-5 minutes to get all the bubbles out of if. Stuff is amazing.
Your decal work and side marker lights look great and that color is "all that". Sorry to hear about your continued issues with the hood and all and indeed hope that the 3rd time is the charm on that. Lookin' good buddy......real good.
|
|
handiabled
Community Relations Moderator
Member since: February 2023
Posts: 2,471
MSC Staff
|
Post by handiabled on Dec 31, 2023 10:22:32 GMT -5
Too bad about the setbacks with the hood. The stripe really makes this look the part!
|
|
eaglecash867
Full Member
Member since: July 2023
Posts: 227
Jul 1, 2023 5:18:34 GMT -5
Jul 1, 2023 5:18:34 GMT -5
|
Post by eaglecash867 on Jan 7, 2024 19:28:38 GMT -5
Had a major disaster with the 4K clear coat on this thing last week, ended up burning through a couple sets of the silver stripe decals trying to fix the 4K disaster twice...and my problems on the hood have mostly been due to just not being able to get that Testors silver enamel to lay down right, so I have decided to start over on the body with a new color scheme. I have zero complete sets of silver stripe decals now, but 3 complete sets of the black. So, I have some Grabber Green Metallic lacquer and enamel coming from MCW, and I'm getting spooled up for painting the black accents on it. Almost bagged everything and put it on the shelf of doom, but just couldn't do that...I have to finish this now, so I changed tactics. Hopefully will have some progress with the new colors soon.
|
|
|
|
Post by kyledehart5 on Jan 7, 2024 21:38:17 GMT -5
Just stick with it!! Green will be a great color as well. You’re going to whip this into shape!!
|
|
|
|
Post by 406 Silverado on Jan 8, 2024 20:17:40 GMT -5
Awwww mayan!!!! That sucks about the clear coat eagle!! I've never used 4K clear before BUT ....I do use decanted Testors Wet Look Clear and shoot it through my Badger 350 airbrush. The results are well worth it and it hasn't reacted with any color coats I've used.
All that aside, I am most certainly looking forward to your recovery efforts brutha.
|
|
eaglecash867
Full Member
Member since: July 2023
Posts: 227
Jul 1, 2023 5:18:34 GMT -5
Jul 1, 2023 5:18:34 GMT -5
|
Post by eaglecash867 on Jan 8, 2024 20:51:36 GMT -5
Thanks for the encouragement guys.
Joe, the sad thing is that it was just the right side of the body that got all screwed up. The rest of it looked really awesome. I made the mistake of putting it on a little too thick on that right side, and it just wouldn't level out. Everywhere else leveled out and cured with a mirror-like shine. It already looked awesome without the clearcoat, but I had the decals and BMF that needed to be sealed. I'll definitely look into getting some of the Testors Wet Look Clear, since I have a pretty good, easy method of decanting stuff. In the mean time, I got some of the MCW clear enamel, so I'll try some spoon tests once I get the green paint from them so I can see what that combo looks like. Probably gonna use Testors square bottle gloss black for the black accents, just so I can do the no-mask fill-in method after the stripes go on
|
|
mrversatile
Full Member
Member since: January 2013
Posts: 630
Jan 20, 2013 10:52:24 GMT -5
Jan 20, 2013 10:52:24 GMT -5
|
Post by mrversatile on Jan 12, 2024 9:12:48 GMT -5
You make it toooo difficult. MCW paint doesn't need clear coat and the decals don't need to be sealed. I have never sealed decals with clear, especially when they are usually a matte or satin finish anyway. Also, decals on the real car are stickers that sit on top of the paint anyway. Just shoot the MCW paint (I prefer lacquer), and wet polish with the lowest grade paper needed to level the paint (usually 4000 grit). I avoid the high spots and concentrate my efforts on the horizontal surfaces. Your labor will be rewarded by a more scale finish which is true to the cars of that period which don't have clear coat. That being said, I have a spare set of silver decals for this kit that I didn't use. You are welcome to it if you want to try again. DON'T GIVE UP....lol
|
|
|
|
Post by 406 Silverado on Jan 12, 2024 9:24:45 GMT -5
You make it toooo difficult. MCW paint doesn't need clear coat and the decals don't need to be sealed. I have never sealed decals with clear, especially when they are usually a matte or satin finish anyway. Also, decals on the real car are stickers that sit on top of the paint anyway. Just shoot the MCW paint (I prefer lacquer), and wet polish with the lowest grade paper needed to level the paint (usually 4000 grit). I avoid the high spots and concentrate my efforts on the horizontal surfaces. Your labor will be rewarded by a more scale finish which is true to the cars of that period which don't have clear coat. That being said, I have a spare set of silver decals for this kit that I didn't use. You are welcome to it if you want to try again. DON'T GIVE UP....lol That's some sound advice Gil. I'm pretty hardheaded when it comes to clearing anything as I just love a high gloss finish. MCW paint does polish up nicely though. +1 Karma to you bud. |
|
eaglecash867
Full Member
Member since: July 2023
Posts: 227
Jul 1, 2023 5:18:34 GMT -5
Jul 1, 2023 5:18:34 GMT -5
|
Post by eaglecash867 on Jan 12, 2024 14:10:38 GMT -5
You make it toooo difficult. MCW paint doesn't need clear coat and the decals don't need to be sealed. I have never sealed decals with clear, especially when they are usually a matte or satin finish anyway. Also, decals on the real car are stickers that sit on top of the paint anyway. Just shoot the MCW paint (I prefer lacquer), and wet polish with the lowest grade paper needed to level the paint (usually 4000 grit). I avoid the high spots and concentrate my efforts on the horizontal surfaces. Your labor will be rewarded by a more scale finish which is true to the cars of that period which don't have clear coat. That being said, I have a spare set of silver decals for this kit that I didn't use. You are welcome to it if you want to try again. DON'T GIVE UP....lol Thanks for the advice, Gil. This one is my first car in almost 40 years, so I'm struggling with the finishing of the body, but learning a lot from it. I'm mostly a military aircraft kind of guy when it comes to modeling, and those are very forgiving. I'm already well underway on the color change. Thankfully, I was able to pop the tail lights out of the rear panel, so I'll just transfer them over to the spare that I have painted black. I think it'll be cooler anyway to paint it a color other than what the two versions of the kit show. The 1:1 Boss 351s that I have seen on-line with the Grabber Green Metallic/Black scheme look pretty freakin' awesome. The biggest let-down on this was that the pics I posted with all of the decals on were without a clearcoat...that MCW enamel lays down really nicely...but I just couldn't leave well enough alone I guess. LOL |
|
mrversatile
Full Member
Member since: January 2013
Posts: 630
Jan 20, 2013 10:52:24 GMT -5
Jan 20, 2013 10:52:24 GMT -5
|
Post by mrversatile on Jan 12, 2024 14:31:06 GMT -5
I can't wait to see the result. The color combinations on these are just plain cool. I usually don't like to build more than one model of a certain make, but the colors on these tempt me.
|
|
|
|
Post by 406 Silverado on Jan 12, 2024 14:42:44 GMT -5
I can't wait to see the result. The color combinations on these are just plain cool. I usually don't like to build more than one model of a certain make, but the colors on these tempt me. Don't they though??!! I'll be tackling one of these at some point. |
|
eaglecash867
Full Member
Member since: July 2023
Posts: 227
Jul 1, 2023 5:18:34 GMT -5
Jul 1, 2023 5:18:34 GMT -5
|
Post by eaglecash867 on Jan 14, 2024 16:09:51 GMT -5
Color change in progress. Got the black tail light panel done. Just got word from MCW today that my Grabber Green Metallic paint is on its way.  |
|
eaglecash867
Full Member
Member since: July 2023
Posts: 227
Jul 1, 2023 5:18:34 GMT -5
Jul 1, 2023 5:18:34 GMT -5
|
Post by eaglecash867 on Jan 24, 2024 19:54:02 GMT -5
MCW was running a little behind on their paint orders, so it took a little bit longer than usual to get the Grabber Green Metallic. I got both the lacquer and the enamel. Lacquered the underside of the hood first and I'm pretty happy with how this color looks too. Hopefully I can manage to get this thing done finally without screwing anything up. I used what is becoming my favorite masking technique for complex shapes such as the ram air ducting...Bare Metal Foil. Lay the stuff down and work it into all of the contours, cut with a fresh #11 blade in the spots you want to make your mask, and then peel it away from only the areas you want to paint. Nice, sharply defined edges, without a whole lot of brain damage to get the masking done. I almost have all of the paint stripped off the body that I screwed up, so I'll have plenty of car bodies. Just in case anybody might have wondered, my favorite paint stripping method (A bath in 99% isopropyl alcohol and a cheap electric toothbrush) also works on a completely cured 4K clearcoat. Almost have it all stripped down to bare, white plastic again with that...just have to work the corners and depressions a little more to make sure I get all of the little scraps of paint off.  |
|
handiabled
Community Relations Moderator
Member since: February 2023
Posts: 2,471
MSC Staff
|
Post by handiabled on Jan 25, 2024 2:17:56 GMT -5
Shot with clear and polished that color is going to be radiant!
|
|
lyle
Forum Moderator 
Member since: May 2013
On the sunny side of the dirt
Posts: 1,220
MSC Staff
|
Post by lyle on Jan 25, 2024 10:28:11 GMT -5
I'll have to try MEK as a cement once I run out of the Tamiya Extra Thin. Acetone is a great solvent for a cement, but a big issue with it is that it evaporates too quickly. Maybe MEK will allow more working time. Give it a try...I've been using it for 20+ yrs. Along with CA, 2 part epoxy and Testors red tube. As far as working time...the MEK is maybe 10 sec or so. I can only find gallon cans of MIK around here (Louisville ky). the quart cans are always the MEK substitute. |
|


