|
|
Post by tcoat on Dec 12, 2023 17:14:07 GMT -5
Since my other "easy" project expanded scope and has to wait I dug through the shelf of doom and came up with this poor old girl.  I did a bunch of the build on this about 10 years ago and have no idea why it got put aside as it is a really nice kit. Probably needed the sand paint, took me a while to get to the hobby shop and it just got forgotten. So this is where I was at:  Went over the whole thing with some NATO green with the intention of wearing a bunch of paint off like my WW2 or Vietnam era builds. Since will be doing this as a very early unit it was likely originally in the tri colour NATO scheme and painted sand just before being shipped or even in theater. Then when looking at many many pictures I found that even these quickly paint jobs stood up well with only some minor wear showing near the bottoms. Guess the lack of real wet weather over there was good on paint. The blotchy base will still work into the little weathering it will get so wasn't a waste of time.   This is what I am going for.   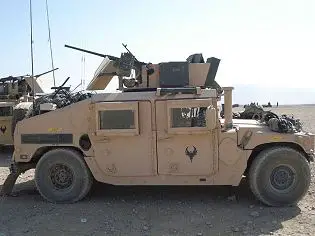 |
|
|
|
Post by deafpanzer on Dec 12, 2023 23:19:47 GMT -5
Sweet! You definitely have my attention. It looks similiar to my 1/48 IDF unarmored humvee that I completed earlier this year. Looking forward to see more of this.
|
|
handiabled
Administrator      Apr '23 Showcased Build Awarded
Member since: February 2023
Posts: 4,475 
MSC Staff
|
Post by handiabled on Dec 13, 2023 3:10:09 GMT -5
Bookmarked to see this one finish! Looks like you are well on your way already
|
|
|
|
Post by 406 Silverado on Dec 13, 2023 4:59:18 GMT -5
Yup......I've got this one bookmarked.
|
|
|
|
Post by tcoat on Dec 13, 2023 8:06:17 GMT -5
Bookmarked to see this one finish! Looks like you are well on your way already It is interesting looking it over and seeing how my techniques have changed over the 10 years since it was shelved. Looks like I went a little overboard on the superglue with some photoetched straps for the rear stowage. They completely disintegrated when I touched them so I had to spend 1/2 an hour picking tiny bits of brass out of solid glue. I will need to do something about my monotone black chassis and my very poor attempt at replicating a rusty exhaust. |
|
|
|
Post by tcoat on Dec 13, 2023 19:38:23 GMT -5
Old Model Master Acryl sand. Colour looks a little light but will soon darken just a tad.  |
|
|
|
Post by tcoat on Dec 13, 2023 20:07:26 GMT -5
Turret with my standard coat of tinted Future. Only slightly darkens the sand but makes detail jump out and gives a worn sort of unevenness to the overall paint.  |
|
|
|
Post by tcoat on Dec 13, 2023 20:51:08 GMT -5
Effect looks heavier in the pics than it really is. Will also tone way down through the following stages and flat coat. 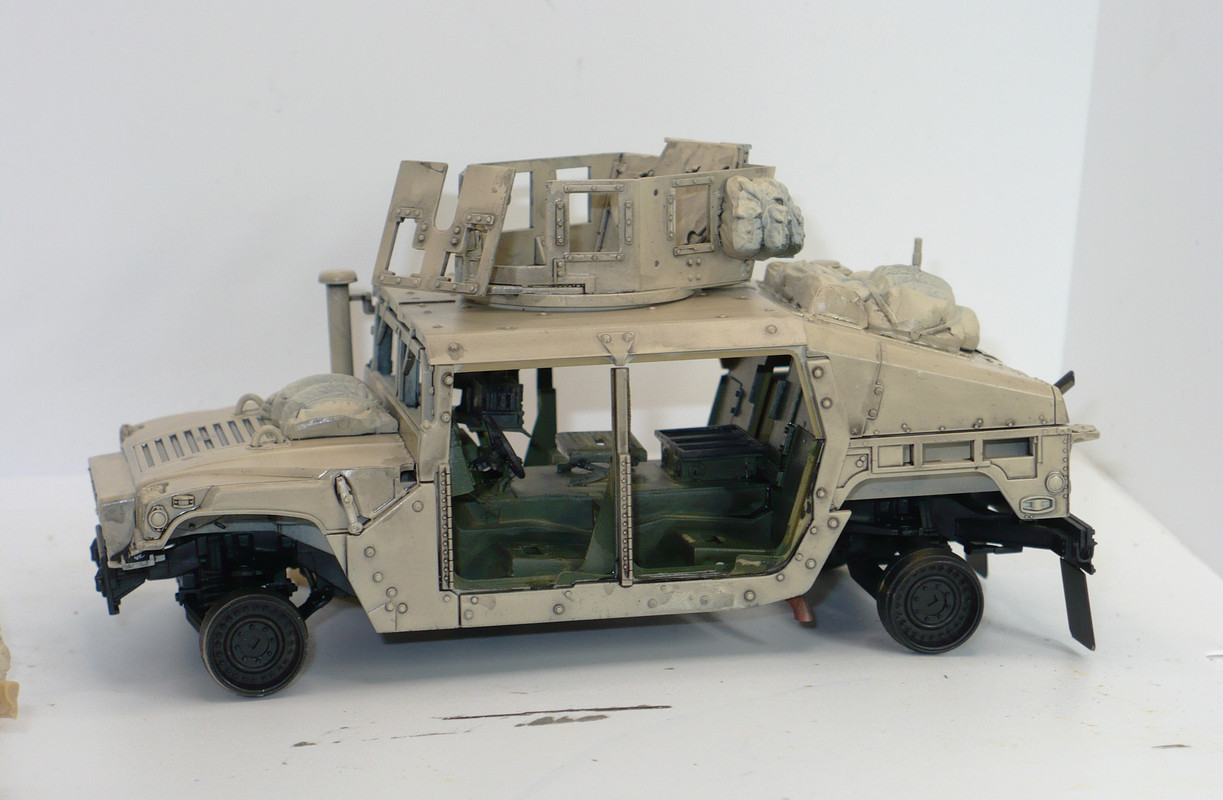 |
|
M1Carbine
Senior Member
    November '23 Showcased Model Awarded
Member since: November 2012
Posts: 1,739
Nov 16, 2012 2:49:11 GMT -5
Nov 16, 2012 2:49:11 GMT -5
|
Post by M1Carbine on Dec 13, 2023 21:01:55 GMT -5
Tcoat - awesome work. Built thus kit a while back, its a little gem of a kit.
-Bob
|
|
thug626
Senior Member
   
Member since: January 2013
Posts: 2,035
Jan 15, 2013 13:05:28 GMT -5
Jan 15, 2013 13:05:28 GMT -5
|
Post by thug626 on Dec 14, 2023 1:57:58 GMT -5
Bookmarked to see this one finish! Looks like you are well on your way already It is interesting looking it over and seeing how my techniques have changed over the 10 years since it was shelved. Looks like I went a little overboard on the superglue with some photoetched straps for the rear stowage. They completely disintegrated when I touched them so I had to spend 1/2 an hour picking tiny bits of brass out of solid glue. I will need to do something about my monotone black chassis and my very poor attempt at replicating a rusty exhaust. As to the rusty exhaust, there's something I have used with good effect. It wont work if you're trying to replicate stainless steel exhaust. However, if you are building something that used regular steel exhaust, then Vallejo has a lovely product. It's by Vallejo and it's called Rust Texture, product # 73.821. I hope this helps. Cheers Dave |
|
thug626
Senior Member
   
Member since: January 2013
Posts: 2,035
Jan 15, 2013 13:05:28 GMT -5
Jan 15, 2013 13:05:28 GMT -5
|
Post by thug626 on Dec 14, 2023 1:59:51 GMT -5
All caught up. I am liking what you're doing with the monochrome color!
Now, I've got this build bookmarked.
Cheers
Dave
|
|
handiabled
Administrator      Apr '23 Showcased Build Awarded
Member since: February 2023
Posts: 4,475 
MSC Staff
|
Post by handiabled on Dec 14, 2023 2:47:50 GMT -5
Your light detailing and flattened color really highlight the detail on this nicely
|
|
|
|
Post by tcoat on Dec 14, 2023 6:45:19 GMT -5
It is interesting looking it over and seeing how my techniques have changed over the 10 years since it was shelved. Looks like I went a little overboard on the superglue with some photoetched straps for the rear stowage. They completely disintegrated when I touched them so I had to spend 1/2 an hour picking tiny bits of brass out of solid glue. I will need to do something about my monotone black chassis and my very poor attempt at replicating a rusty exhaust. As to the rusty exhaust, there's something I have used with good effect. It wont work if you're trying to replicate stainless steel exhaust. However, if you are building something that used regular steel exhaust, then Vallejo has a lovely product. It's by Vallejo and it's called Rust Texture, product # 73.821. I hope this helps. Cheers Dave Oh I have managed to perfect my rusty exhaust methods in the intervening 10 years but as you said it should be stainless and only have discolouring not actual rust. I was so naive back then. Vallejo Rust, Stains and Streaking Acrylics set. .jpg.7eac69a21a6bd00e5dba42fe21bbbfa2.jpg) 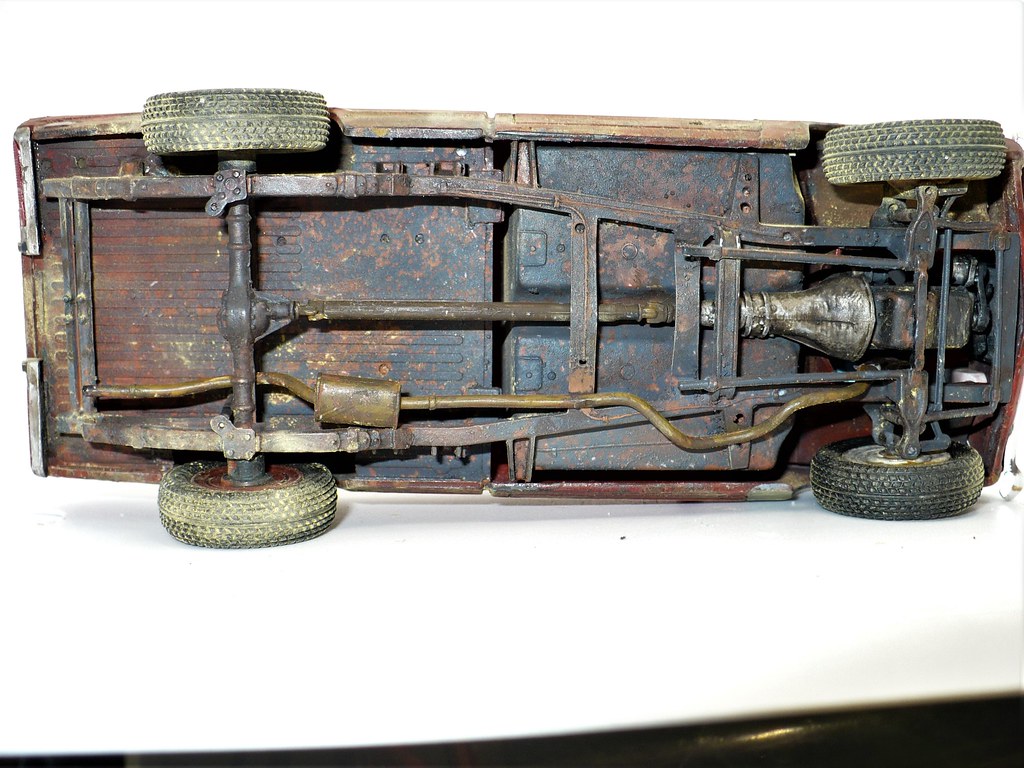 |
|
|
|
Post by 406 Silverado on Dec 14, 2023 6:53:21 GMT -5
You're really bringing the effects portion of this build to the top Tony. Are you gonna open any of those doors when this is all said and done to show off that detail in there? This is looking GREAT so far!!!
|
|
|
|
Post by tcoat on Dec 14, 2023 7:24:51 GMT -5
You're really bringing the effects portion of this build to the top Tony. Are you gonna open any of those doors when this is all said and done to show off that detail in there? This is looking GREAT so far!!! The drivers door will be opened with the driver figure just climbing out. I will not be going nuts on detailing the interior but there will be enough going on to make it look busy. There will be a bunch more stowage going on the outside though. |
|
|
|
Post by 406 Silverado on Dec 14, 2023 7:39:52 GMT -5
You're really bringing the effects portion of this build to the top Tony. Are you gonna open any of those doors when this is all said and done to show off that detail in there? This is looking GREAT so far!!! The drivers door will be opened with the driver figure just climbing out. I will not be going nuts on detailing the interior but there will be enough going on to make it look busy. There will be a bunch more stowage going on the outside though. That'll still be a good thing as the driver will be covering alot of the opening. Looking forward to more on this one Tony. (Deleted yet another spammer this morning before they ever had a chance to post) |
|
|
|
Post by tcoat on Dec 14, 2023 9:12:11 GMT -5
The drivers door will be opened with the driver figure just climbing out. I will not be going nuts on detailing the interior but there will be enough going on to make it look busy. There will be a bunch more stowage going on the outside though. That'll still be a good thing as the driver will be covering alot of the opening. Looking forward to more on this one Tony. (Deleted yet another spammer this morning before they ever had a chance to post) Well the driver will be mostly out so there will be some view inside. As molded he looks pretty goofy so I may nee to rework him a bit.  |
|
|
|
Post by tcoat on Dec 14, 2023 9:55:54 GMT -5
Anybody know how these went on? Pointy bit up? Pointy bit down? Doesn't matter as long as clips are on rings?  |
|
|
|
Post by tcoat on Dec 14, 2023 19:41:39 GMT -5
|
|
|
|
Post by kyledehart5 on Dec 14, 2023 20:05:23 GMT -5
Great work. That’s looking awesome so far. Really liking the look you’re going with.
|
|
|
|
Post by deafpanzer on Dec 14, 2023 20:31:54 GMT -5
Loving it! I am so glad you’re tackling those shelf queens. Now you need to help me deal with mine as soon as I am done with my Humvee and Panther builds. 😂🤣🥲
|
|
|
|
Post by tcoat on Dec 14, 2023 20:45:58 GMT -5
Loving it! I am so glad you’re tackling those shelf queens. Now you need to help me deal with mine as soon as I am done with my Humvee and Panther builds. 😂🤣🥲  |
|
|
|
Post by tcoat on Dec 14, 2023 20:58:37 GMT -5
And gear with a coat of.... Anybody want to guess? This coat is heavier than the main vehicle body to really bring shadows onto the crevices and give a very glossy coat for the next wash to settle in. Notice all those jagged paint edges are gone.  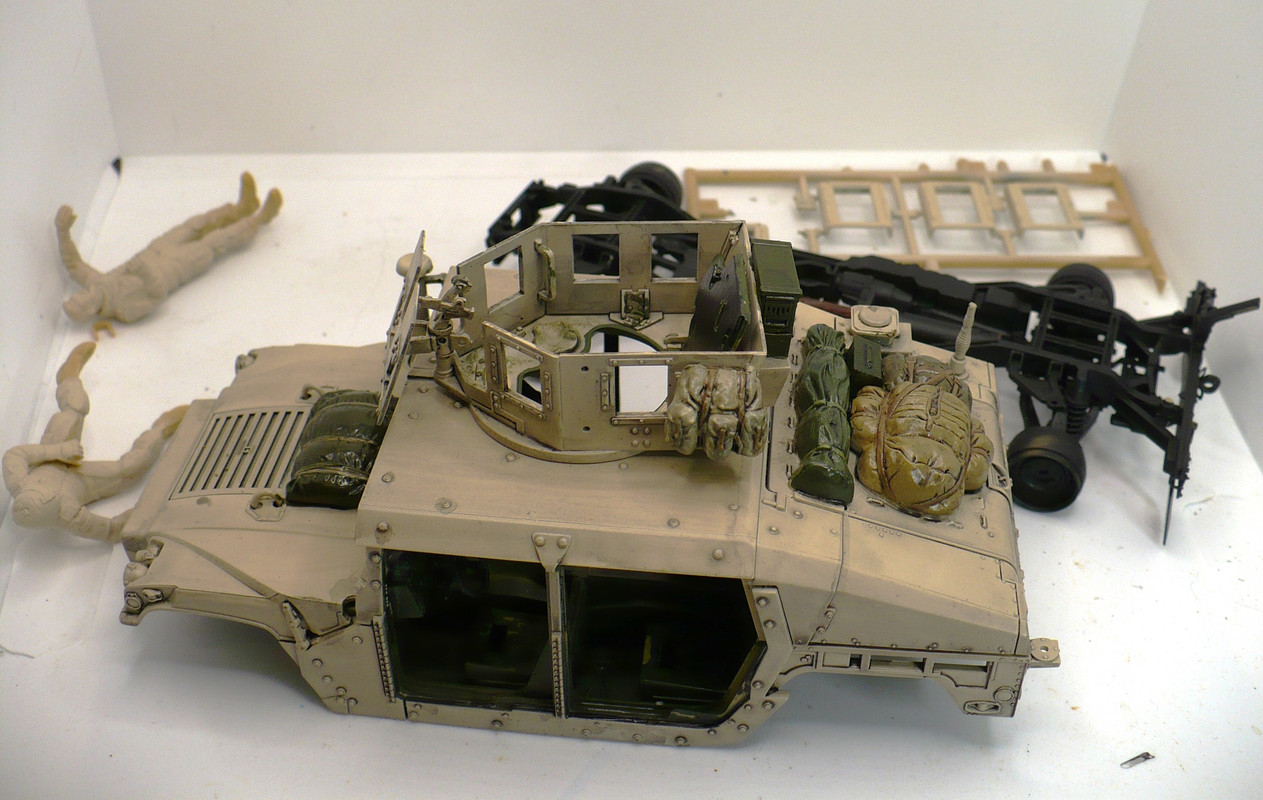 |
|
|
|
Post by tcoat on Dec 16, 2023 2:12:32 GMT -5
Few more washes an small sub assemblies done. Still needs flat coat to tone things down of course.   |
|
handiabled
Administrator      Apr '23 Showcased Build Awarded
Member since: February 2023
Posts: 4,475 
MSC Staff
|
Post by handiabled on Dec 16, 2023 7:40:50 GMT -5
Quite the transformation from a few days ago. Looking wonderful so far!
|
|
|
|
Post by kyledehart5 on Dec 16, 2023 11:11:22 GMT -5
Yes indeed. Looking nicely used now. I really like it.
|
|
|
|
Post by tcoat on Dec 16, 2023 18:12:40 GMT -5
OK so...  Found this and liked it.  And since I keep every piece of trash that could possibly ever be used for modeling I had this stretchy sock sort of thing that something was shipped in.  When contracted it didn't look the part but once stretched out it was perfect. The problem was it wanted to contract so it needed a rigid frame. Some fine wire bent to the basic shap of the load and stowage space would act as a support.  All stretched out and a copious amount for superglue tamed it.  Painted up starting to look the part.  To make some carabiner clips I just drilled through and supper glued some wire then lopped it around to look like it goes under the tie down points. Forgot to take a bent picture. 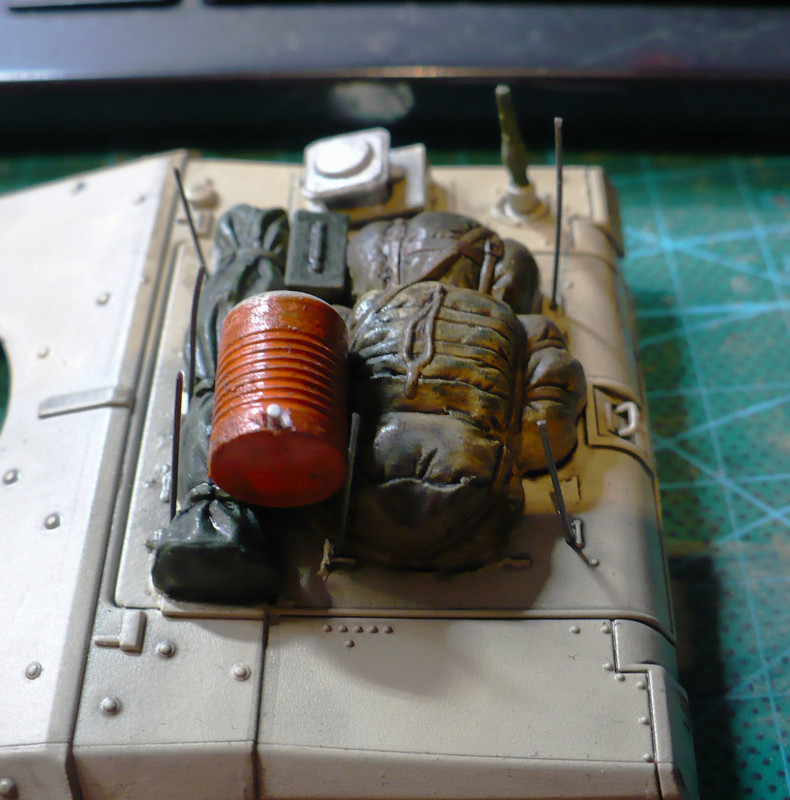 Finally I formed the wire frame to the load, painted up some of my beading thread rope and laced the whole works trough the "clips". I see I have some rope touchup ahead of me! The result is what I think is a credible semblance of a cargo net.    |
|
|
|
Post by tcoat on Dec 16, 2023 21:31:20 GMT -5
Tires on and base coated in dark grey.  |
|
|
|
Post by kyledehart5 on Dec 16, 2023 22:30:58 GMT -5
Very nice. Looks great standing on its own.
|
|
|
|
Post by tcoat on Dec 16, 2023 23:42:17 GMT -5
Black then dark brown washes on tires. 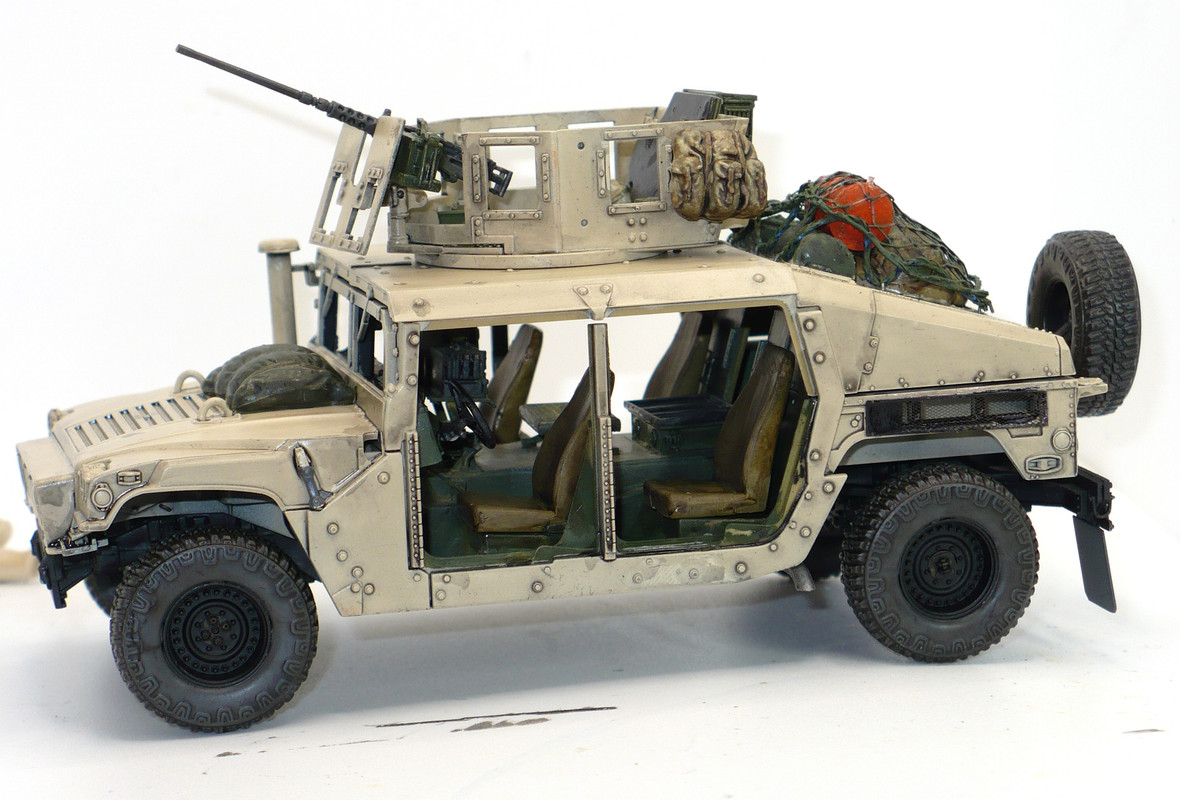 |
|