modelcarjr
Full Member

Member since: March 2023
Posts: 390
Mar 3, 2023 13:07:26 GMT -5
Mar 3, 2023 13:07:26 GMT -5
|
Post by modelcarjr on Feb 15, 2024 21:58:57 GMT -5
This is an old Monogram kit with "Metal Glow" that has long since Glone. It has been rolling along in the closet for many years. I've stolen the wheels, the exterior mirrors, and the long taillight lens. I know I can find some wheels in the parts box and have some suitable mirrors so I'll have to come up with something for the taillight. I may just paint it in. So I wanted to get something painted today as it will rain tomorrow and a cold front will be here for the weekend. I painted the body with Dupli-Color Flash Red and the hood flat black. I also painted all the other parts. I painted the interior with an old can of Color Place (WalMart's brand from years ago) Fire Red since its a little bit darker. I flatted it out with some Dulcote and it looks pretty good and still drying outside. its amazing that it sold for about $1.19 a 10 oz. can about 15 years ago. Its not great paint but its good enough for an interior. But I wouldn't paint a body with it. So everything is painted and ready to go. I'll rub out the body tomorrow and get busy with the foil. Another one will be out of the closet! Trouble is I keep replacing these old kits with new kits! Thanks for looking! 😎     |
|
plstcjunky
Junior Member

Member since: January 2024
Posts: 76 
|
Post by plstcjunky on Feb 15, 2024 22:08:02 GMT -5
Looks nice so far. I just recently started buying car kits, but have not started a build. Been reading about "rubbing-out" the painted finish on a car model. I assume that you refer to using increasingly finer grades of sanding pads?
I've never done this before, can you recommend some video tutorials?
|
|
modelcarjr
Full Member
Member since: March 2023
Posts: 390
Mar 3, 2023 13:07:26 GMT -5
Mar 3, 2023 13:07:26 GMT -5
|
Post by modelcarjr on Feb 15, 2024 22:46:55 GMT -5
Thanks for your question. I don't know if I've seen a video. You might try to find Donn Yost videos and see if he has covered it. I have seen it in an old Scale Auto but don't remember the issue. In any event here is what I do:
1. I use sanding "cloths" backed with a foam rubber pad. They are usually 3200, 3600, 4000, 6000, 8000, 12000 grit and come with a foam rubber block.
2. I usually start with 4,000 and work through 12000 in order. I sand with a water in a back and forth motion being careful around edges. I will even tape off some edges with Tamiya 1 mm to 6 mm tape to keep from "burning through" the paint. I always make sure I have two coats of clear on top of the paint before I start and let it dry overnight. Some people like to wait longer for paint to "gas out" or dry but I normally use lacquer so overnight works for me.
3. I also use some Meguiars Scratch X in between grits just as a rubbing compound and extra help in smoothing the finish.
4. I repeat the process until I am satisfied with the finish. It usually takes 4-6 hours to accomplish the task for me. I don't take it to the Nth degree.
Hope that helps!
|
|
|
|
Post by kyledehart5 on Feb 15, 2024 23:26:42 GMT -5
Excellent. I will watch. Nice color choice.
|
|
handiabled
Community Relations Moderator 
Member since: February 2023
Posts: 2,471
MSC Staff
|
Post by handiabled on Feb 16, 2024 2:32:42 GMT -5
Bookmarked! This is going to look great with the combo hood and T/A stripe!
|
|
|
|
Post by tcoat on Feb 16, 2024 7:37:31 GMT -5
Another cool one.
To replace the tail light lens just take some clear plastic package material and glue it on the rear of the housing, paint the back of it red, lay it flat with the outside up and then pour some white glue into the openings. Once the white glue dry's you can scribe some lines onto it if you wish. This way you will get the depth for the lights and they will look more like glossy covers than just paint.
|
|
|
|
Post by 406 Silverado on Feb 16, 2024 8:13:46 GMT -5
Thanks for your question. I don't know if I've seen a video. You might try to find Donn Yost videos and see if he has covered it. I have seen it in an old Scale Auto but don't remember the issue. In any event here is what I do: 1. I use sanding "cloths" backed with a foam rubber pad. They are usually 3200, 3600, 4000, 6000, 8000, 12000 grit and come with a foam rubber block. 2. I usually start with 4,000 and work through 12000 in order. I sand with a water in a back and forth motion being careful around edges. I will even tape off some edges with Tamiya 1 mm to 6 mm tape to keep from "burning through" the paint. I always make sure I have two coats of clear on top of the paint before I start and let it dry overnight. Some people like to wait longer for paint to "gas out" or dry but I normally use lacquer so overnight works for me. 3. I also use some Meguiars Scratch X in between grits just as a rubbing compound and extra help in smoothing the finish. 4. I repeat the process until I am satisfied with the finish. It usually takes 4-6 hours to accomplish the task for me. I don't take it to the Nth degree. Hope that helps! That's as good as it gets right there. +1 Karma to you for putting that together JR!! |
|
|
|
Post by 406 Silverado on Feb 16, 2024 8:16:12 GMT -5
Looking forward to this project bud. I've built this same kit myself and while it has some short comings, can be built up into a very good outcome.......especially with your skillset.
|
|
modelcarjr
Full Member
Member since: March 2023
Posts: 390
Mar 3, 2023 13:07:26 GMT -5
Mar 3, 2023 13:07:26 GMT -5
|
Post by modelcarjr on Feb 16, 2024 9:23:13 GMT -5
Thanks, plstcjunky, Kyle, Handlabeled, tcoat and Joe for your comments. Tcoat, thanks for the suggestion on the taillights and it sounds like a good method. I'll have to work on that. I am also looking thinking about cutting down the red windshield from the John Masmanian 41 Willys that I didn't use to make a taillight lens. I have a Dodge decal that will fit in the middle section so that might work too.
|
|
modelcarjr
Full Member
Member since: March 2023
Posts: 390
Mar 3, 2023 13:07:26 GMT -5
Mar 3, 2023 13:07:26 GMT -5
|
Post by modelcarjr on Feb 16, 2024 9:44:46 GMT -5
The following is for plstcjunky or anyone else that would like to see how I rub out paint. Its not a video but its what I do in photos. First photo - tools. A water dish, 4000 grit sanding cloth cut down about 1/2 size to fit the foam rubber pad I am using. The foam rubber pad has also been cut down from a larger block using my razor saw at some time in the past. The sanding cloth is well used and the pad is somewhat misshaped over time from use. Second photo - Comparison photo of trunk with no work done yet. Dull finish. Third photo - Top with one pass of the 4000 grit sanding cloth after about 5 minutes of rubbing. Fourth photo - application tools for the Scratch-X. A old cotton kitchen towel for application and rubbing of the Scratch-X and a shoe polishing cloth from a hotel from years ago used to wipe off the Scratch-X and give it some shine. Fifth photo - Finish after 6000 grit sanding cloth. Sixth photo - Scratch-X applied to the top after 6000 cloth. Seventh photo - Finish after Scratch-X wiped off. Eighth photo - Finish after 8000 grit and Scratch-X. So far about 1.5 hours. At this point everything on the top looks OK. No edges have been burned and most of the orange peel is gone. I'll let it "breathe" for awhile and work on the trunk. I will tape off the dart on the trunk as it will lose its paint if I don't. I'll probably go over the top again after everything else is done and give all the surfaces a quick once-over and a coat of Meguiars Gold Class wax. That's it, thanks for looking!    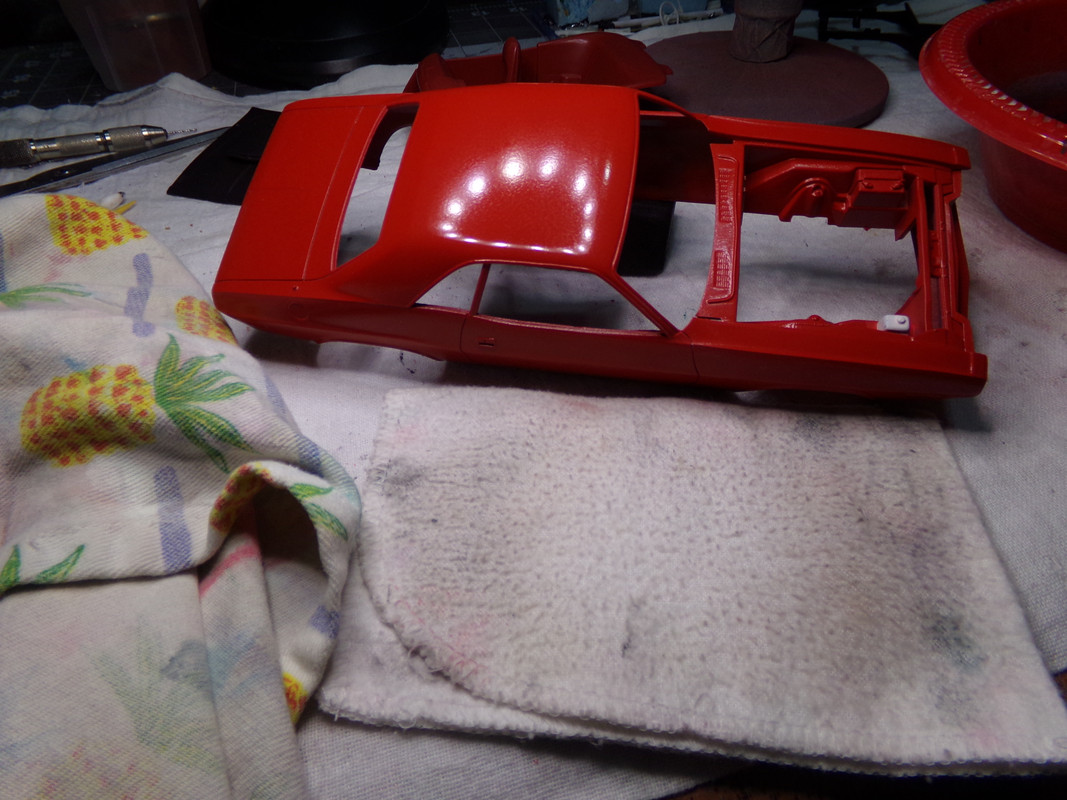     |
|
|
|
Post by kyledehart5 on Feb 16, 2024 10:45:42 GMT -5
Looking great and a nice look into your processes. Thanks
|
|
70 STING
Full Member
Member since: April 2023
Posts: 487
Apr 10, 2023 11:44:31 GMT -5
Apr 10, 2023 11:44:31 GMT -5
|
Post by 70 STING on Feb 16, 2024 11:16:29 GMT -5
Do you ever wet sand the colour coat or just the clear coat?
|
|
modelcarjr
Full Member
Member since: March 2023
Posts: 390
Mar 3, 2023 13:07:26 GMT -5
Mar 3, 2023 13:07:26 GMT -5
|
Post by modelcarjr on Feb 16, 2024 22:33:02 GMT -5
Thanks, Kyle and Sting! I appreciate your comments! Sting, I seldom wet sand the color coat without the a clear coat. In my process of painting everything in 1-2 days. it just doesn't work. Most of the time, I am happy with the color coats. I would only wet sand it if the paint was orange peeled badly or there was a rough surface or maybe a sag somewhere. I normally do a primer coat, wait and hour, then two color coats 10 minutes apart. I let that dry for 30 minutes then two clear coats 10 minutes apart. Painting done on the body! Rubbed out the body and got it foiled today. I had painted the wiper bottle before I painted the body and taped it off while painting the body. I'll paint the black battery, the grill and headlight surrounds, and the chin spoiler with a brush next. After that, the engine and interior are next. Thanks for looking! 😎 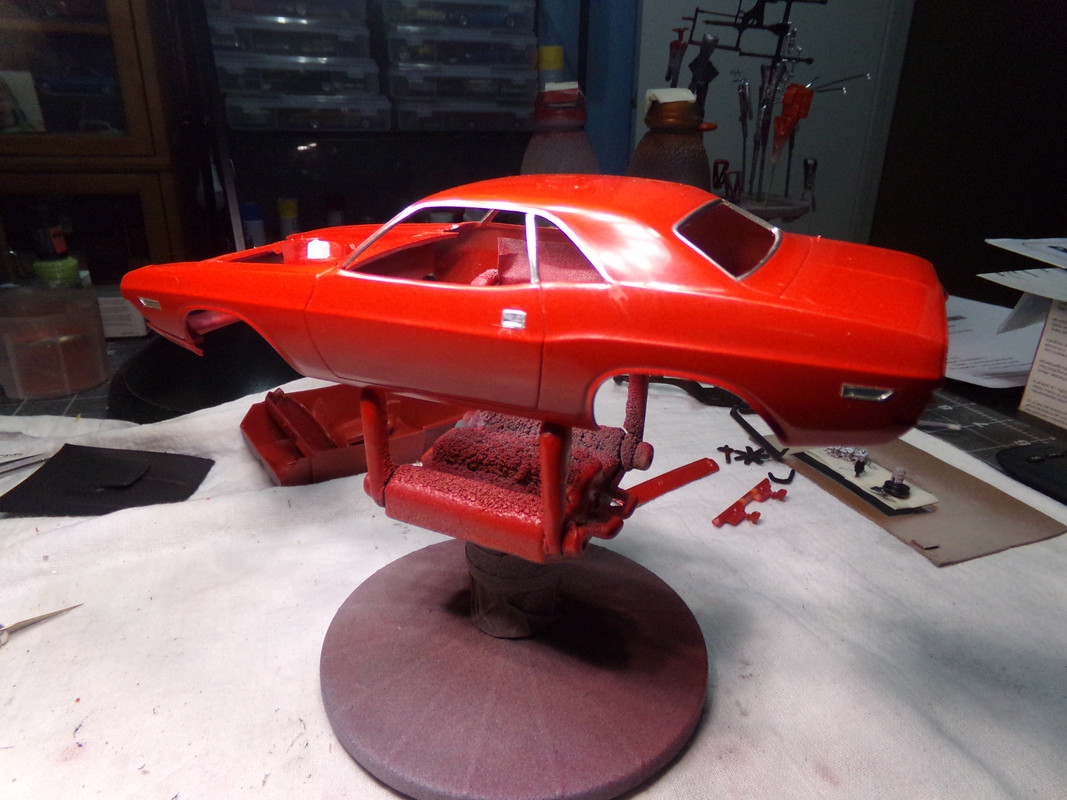  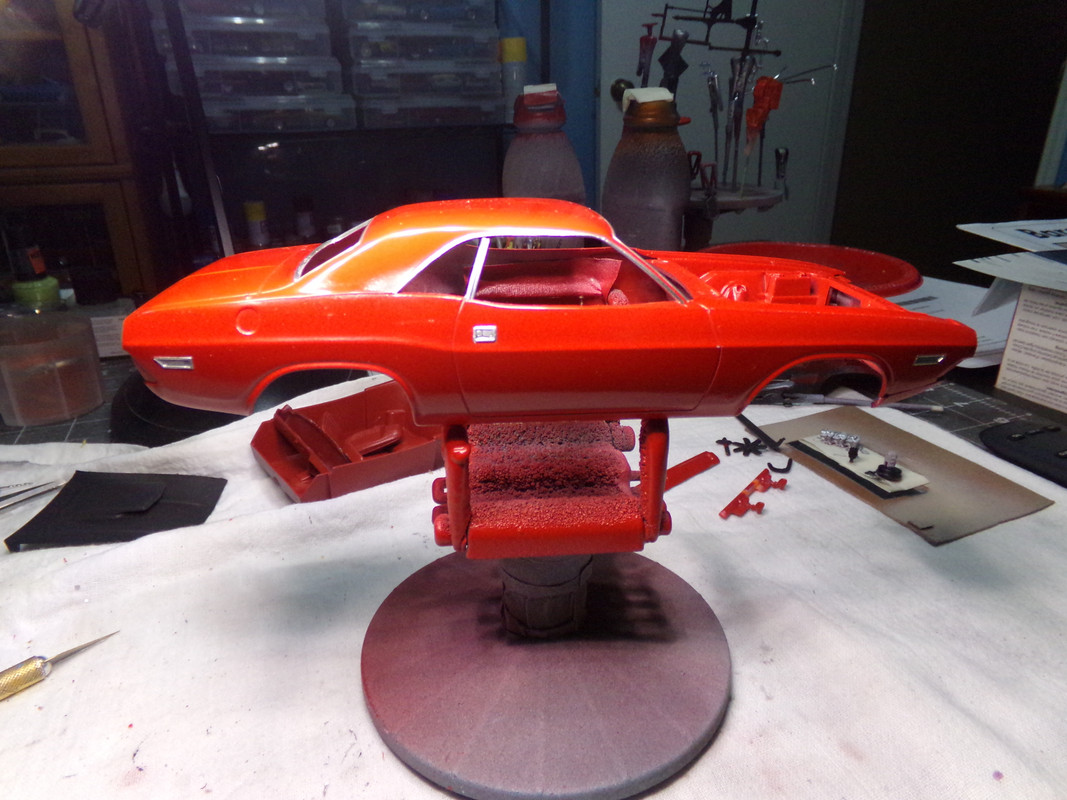  |
|
TJ
Full Member
Member since: May 2023
Posts: 1,356
May 14, 2023 18:18:36 GMT -5
May 14, 2023 18:18:36 GMT -5
|
Post by TJ on Feb 17, 2024 3:59:46 GMT -5
Great tutorial on the succession of finer grit paper. I just re-bought this kit from Michaels of all places
|
|
|
|
Post by 406 Silverado on Feb 17, 2024 7:09:21 GMT -5
I just find this amazing that you do all of your color coating and clearing on the same day. That in itself is surprising to me but it seems to work out exceptionally well for you and thank you again for sharing your processes with us. What's your process for painting your windshield washer fluid reservoir JR? Another +1 Karma to ya bud.  |
|
lyle
Forum Moderator 
Member since: May 2013
On the sunny side of the dirt
Posts: 1,223
Member is Online
MSC Staff
|
Post by lyle on Feb 17, 2024 9:10:17 GMT -5
Great color. the finish looks pretty darn good, too.
|
|
70 STING
Full Member
Member since: April 2023
Posts: 487
Apr 10, 2023 11:44:31 GMT -5
Apr 10, 2023 11:44:31 GMT -5
|
Post by 70 STING on Feb 17, 2024 10:38:46 GMT -5
Interesting. So if I understand you correctly, minor orange peel in the colour coat is hidden/minimized by a well polished clear coat.
|
|
|
|
Post by kyledehart5 on Feb 17, 2024 13:10:16 GMT -5
Nice!! Looks outstanding with the foil work done.
|
|
modelcarjr
Full Member
Member since: March 2023
Posts: 390
Mar 3, 2023 13:07:26 GMT -5
Mar 3, 2023 13:07:26 GMT -5
|
Post by modelcarjr on Feb 17, 2024 19:37:37 GMT -5
Thanks, TJ, Joe, Lyle, Sting, and Kyle! I appreciate your comments and will try to answer your questions as best I can. First let me say that painting is my least favorite part of the building process. I love to foil a 57 Chevy or decal a race car but painting is not my forte so I do it as quickly as I can and try to get a decent result. First to Joe - After I primered the body, I taped off the canister and shot it with Tamiya white primer. Once dry, I taped it off and applied the color coat and then removed the tape on the canister once it was dry. Sting - I don't know if I would say that minor orange peel is minimized by a rubbed out clear coat. I almost always use a lacquer for paint. If I use an enamel I would let it dry for at least a week before touching it. So I normally use Tamiya or Dupli-Color lacquer which both dry dull because its lacquer. Dupli-Color, especially, looks awful while it is drying - it looks blochy, like there is something wrong with the paint. The can indicates that you should let it dry 30 minutes before applying a clear coat. Once applied, the blochyness (is that a word?) goes away. However, as with all painted surfaces, at least the ones I paint, the finish is not quite smooth which is what actually provides the shine. Thus, I rub out the paint to even out the finish and make it shine. I have never been able to rub out paint without a clear coat. When I have tried that I always rub out an edge or many edges immediately and end up having to re-paint or touch up. Maybe if I waited longer I wouldn't have that issue or maybe I need to add more coats of paint. I know there are some people who use and airbrush and 2 part clears and never rub any paint out. But I don't have that skill. The two coats of paint, two coats of clear and then rub out the next day works for me so that what I will continue to do. I can take a few places in shows but I will never have a Best in Show but that's OK with me. So on to today's building! I worked on the front end all morning. Doesn't look like a lot done but its tedious with a brush. This afternoon I got busy on the missing taillight. I cut two pieces of plastic strip and glued them in the middle of the taillight surround for the decal in the center. Then I thought about the extra 69 Camaro taillights that I had in the parts box. They fit fine but were about 1/8" short. So I cut two 1/8" blocks out of a third taillight and glued them in. Now it looks like it was made for it like a kit piece. That's it for today! Thanks for looking! 😎    |
|
|
|
Post by kyledehart5 on Feb 17, 2024 20:59:41 GMT -5
Oh that’s wonderful work finding a solution for those tail lights!! Looks like it was meant to be
|
|
70 STING
Full Member
Member since: April 2023
Posts: 487
Apr 10, 2023 11:44:31 GMT -5
Apr 10, 2023 11:44:31 GMT -5
|
Post by 70 STING on Feb 18, 2024 8:09:34 GMT -5
Thank you for the detailed replies regarding your painting technique… you certainly have your process nailed for speed and quality.
I feel your pain with regards to burning through the paint. :^(
|
|
|
|
Post by 406 Silverado on Feb 18, 2024 8:18:09 GMT -5
Excellent work on those tail lights JR and you're right......it looks like it was made for the kit.  Good stuff all the way around. |
|
modelcarjr
Full Member
Member since: March 2023
Posts: 390
Mar 3, 2023 13:07:26 GMT -5
Mar 3, 2023 13:07:26 GMT -5
|
Post by modelcarjr on Feb 18, 2024 12:41:48 GMT -5
Thanks, Kyle, Sting and Joe! I appreciate your comments! Finished the interior. The bucket is well engraved with separate door panels. No dash decals so I just painted the gauges black, added wood accents to the dash, steering wheel, console, shifter and door panels. I used the chrome pen on the dash, steering wheel, doors and console along with some foil on the door panel hardware. I added a horn button in the middle of the steering wheel and a turn signal indicator lever. The chrome pen might be a bit too prominent but I'd rather have it than not. Engine is next. Thanks for looking! 😎    |
|
|
|
Post by kyledehart5 on Feb 18, 2024 13:13:40 GMT -5
Really nice work!! Interior is looking good too.
|
|
plstcjunky
Junior Member
Member since: January 2024
Posts: 76
|
Post by plstcjunky on Feb 18, 2024 13:33:50 GMT -5
Thanks, plstcjunky, Kyle, Handlabeled, tcoat and Joe for your comments. Tcoat, thanks for the suggestion on the taillights and it sounds like a good method. I'll have to work on that. I am also looking thinking about cutting down the red windshield from the John Masmanian 41 Willys that I didn't use to make a taillight lens. I have a Dodge decal that will fit in the middle section so that might work too. A huge "Thank you" for the additional tutorial info that you have given us here, I'm looking forward to trying your techniques! |
|
cbaltrin
Full Member
Member since: January 2024
Posts: 154
Jan 20, 2024 17:00:59 GMT -5
Jan 20, 2024 17:00:59 GMT -5
|
Post by cbaltrin on Feb 18, 2024 13:53:30 GMT -5
Nice foil job, especially around the curves!
|
|
modelcarjr
Full Member
Member since: March 2023
Posts: 390
Mar 3, 2023 13:07:26 GMT -5
Mar 3, 2023 13:07:26 GMT -5
|
Post by modelcarjr on Feb 18, 2024 22:43:27 GMT -5
Thanks, All! I appreciate your comments! Engine is done. Added plug wires and scratched a coil. I'll add heater hoses once installed in the body. Thanks for looking! 😎    |
|
|
|
Post by kyledehart5 on Feb 18, 2024 23:28:14 GMT -5
Great looking powerplant!!
|
|
handiabled
Community Relations Moderator
Member since: February 2023
Posts: 2,471
MSC Staff
|
Post by handiabled on Feb 19, 2024 9:43:43 GMT -5
Just caught up with your work! Interior and engine are perfect! Your interior shots are making me miss my Cuda while waiting for spring!
|
|
modelcarjr
Full Member
Member since: March 2023
Posts: 390
Mar 3, 2023 13:07:26 GMT -5
Mar 3, 2023 13:07:26 GMT -5
|
Post by modelcarjr on Feb 19, 2024 22:10:36 GMT -5
Thanks, Kyle and Handlabeled! I appreciate your comments! This is a mock-up of the wheels, tires, and rotors. The wheels and tires came from the 2009 Challenger, I think. Nothing is glued on yet and I need to adjust them inward a little bit. They look a little big for this body to me. I could use a set of keystones on some regular tires or maybe just painted wheels with some dog dish hubcaps. What do y'all think?  |
|


