2whl
Full Member
   August '24 MoM Winner
Member since: September 2023
Posts: 445
Sept 10, 2023 12:21:52 GMT -5
Sept 10, 2023 12:21:52 GMT -5
|
Post by 2whl on Jul 30, 2024 10:58:02 GMT -5
Excellent work. This is a beauty!! Thanks Brandon. Looking 1:1 scale to me, wow! Thanks Steve. I wish it were 1:1, I'd like to give it a go. |
|
|
|
Post by Steve Zuleski on Jul 30, 2024 11:00:01 GMT -5
Me too!
|
|
joelw
Full Member
  
Member since: July 2024
Posts: 572 
|
Post by joelw on Jul 30, 2024 15:27:01 GMT -5
Paul,
What a huge difference with the engine/gearbox/suspension hung on the back of the chassis. if looks could kill, you'd be #1 on the FBI's most wanted list.
joel
|
|
|
|
Post by kyledehart5 on Jul 30, 2024 17:13:50 GMT -5
I agree about your reference photo! That one is awesome. Beautiful progress to. That looks so nice mated together.
|
|
2whl
Full Member
   August '24 MoM Winner
Member since: September 2023
Posts: 445
Sept 10, 2023 12:21:52 GMT -5
Sept 10, 2023 12:21:52 GMT -5
|
Post by 2whl on Jul 30, 2024 20:27:47 GMT -5
 Paul, What a huge difference with the engine/gearbox/suspension hung on the back of the chassis. if looks could kill, you'd be #1 on the FBI's most wanted list. joel Thanks Joel. I'm not worried about the FBI, I have a slooped roof....LOL I agree about your reference photo! That one is awesome. Beautiful progress to. That looks so nice mated together. Thanks Kyle. A step backward and a recovery. I managed to twist the end off of one of the heim joints for the trailing arms. So I squared the broken ends and drilled them both with a .8mm drill. then I made a pin out of .8mm brass rod and joined the broken pieces together.   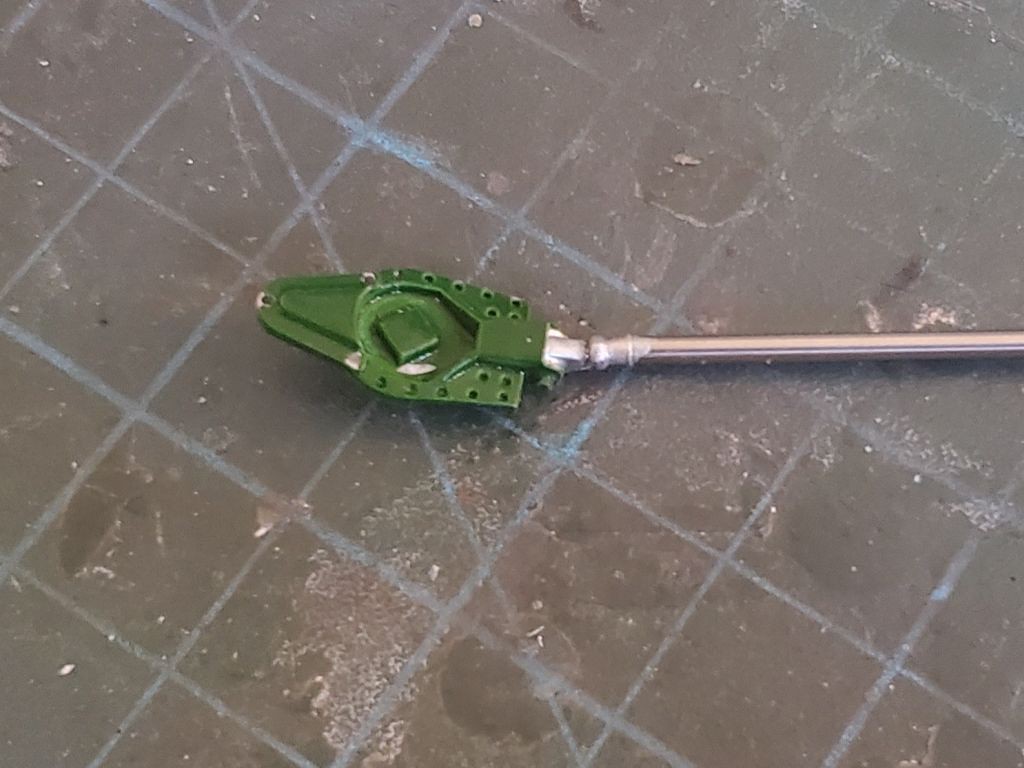 With that fixed, I installed it and plumbed the fuel regulator. The rest of the trailing arms, exhaust and side pipe for the radiator are now on.    1025 |
|
|
|
Post by keavdog on Jul 30, 2024 20:53:16 GMT -5
Oh man this is looking awesome. Nice save - brass rod/tube has so much utility in this hobby of ours.
|
|
|
|
Post by kyledehart5 on Jul 31, 2024 0:25:34 GMT -5
Nice save Paul! Your repair looks as good as new. This is really coming together now.
|
|
handiabled
Administrator      Apr '23 Showcased Build Awarded
Member since: February 2023
Posts: 4,400 
MSC Staff
|
Post by handiabled on Jul 31, 2024 9:00:21 GMT -5
Great looking fix! This is coming together brilliantly!
|
|
406 Silverado
Global Administrator     
Member since: November 2011
Posts: 10,222
Member is Online
MSC Staff
|
Post by 406 Silverado on Jul 31, 2024 9:51:57 GMT -5
Some really inspiring work going on with all of that detail Paul. I love watching these cars come together and this one is doing so in good fashion.  |
|
joelw
Full Member
  
Member since: July 2024
Posts: 572 
|
Post by joelw on Jul 31, 2024 11:17:41 GMT -5
Paul,
Just great engineering in fixing that broken fitting. Looks perfect as does all those details just making the Lotus 49 start to really come to life.
joel
|
|
2whl
Full Member
   August '24 MoM Winner
Member since: September 2023
Posts: 445
Sept 10, 2023 12:21:52 GMT -5
Sept 10, 2023 12:21:52 GMT -5
|
Post by 2whl on Aug 1, 2024 20:54:03 GMT -5
 Oh man this is looking awesome. Nice save - brass rod/tube has so much utility in this hobby of ours. Thanks John. I have several sizes of brass rod stockpiled for just that reason. Nice save Paul! Your repair looks as good as new. This is really coming together now. Thanks Kyle. It's getting close to the finish. Great looking fix! This is coming together brilliantly! Thanks Brent. Some really inspiring work going on with all of that detail Paul. I love watching these cars come together and this one is doing so in good fashion.  Thank you Joe. Paul, Just great engineering in fixing that broken fitting. Looks perfect as does all those details just making the Lotus 49 start to really come to life. joel Thanks Joel. I'm at the point of final details. But they do still take some time. I got the rear brake lines plumbed from the body to the uprights.  Next up is to try to hang the radiator and all these pieces at the same time. Then to trim the windscreen and install it.   1120 |
|
|
|
Lotus 49
Aug 1, 2024 23:54:51 GMT -5
via mobile
Post by kyledehart5 on Aug 1, 2024 23:54:51 GMT -5
Vacuform gives me nightmares. 😂 But I have gotten better about it. Another nice update Paul.
|
|
handiabled
Administrator      Apr '23 Showcased Build Awarded
Member since: February 2023
Posts: 4,400 
MSC Staff
|
Post by handiabled on Aug 2, 2024 2:18:58 GMT -5
I'm not a huge fan of vacuform pieces either but I'm sure you have this well in hand. From the box of pieces you started with you are really constructing another masterpiece!
|
|
|
|
Post by Steve Zuleski on Aug 2, 2024 5:14:22 GMT -5
Excellent recovery, and this just keeps getting better and better.
|
|
joelw
Full Member
  
Member since: July 2024
Posts: 572 
|
Post by joelw on Aug 2, 2024 7:08:26 GMT -5
I've had a model life long loosing battle percentage wise with vacuum canopies, and even some aircraft back in the earlier days. At least the good thing from looking at that windscreen is that it's nicely modeled with clear definition as to the parting lines, and just thick enough to make it so much easier to work with. Still, for a kit of the level, detail, and price, I would have thought that they would have gone the injection route. Needless to say I'm areally looking forward to seeing how you handle it.
joel
|
|
2whl
Full Member
   August '24 MoM Winner
Member since: September 2023
Posts: 445
Sept 10, 2023 12:21:52 GMT -5
Sept 10, 2023 12:21:52 GMT -5
|
Post by 2whl on Aug 2, 2024 17:21:59 GMT -5
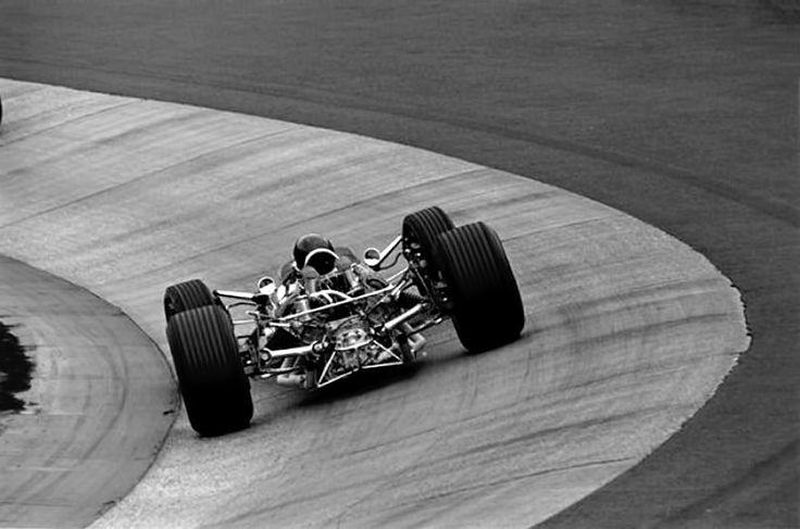 Vacuform gives me nightmares. 😂 But I have gotten better about it. Another nice update Paul. Thanks Kyle. It doesn't give me nightmares, but I still dread doing them. I'm not a huge fan of vacuform pieces either but I'm sure you have this well in hand. From the box of pieces you started with you are really constructing another masterpiece! Thanks Brent. Well in hand is not there yet. But I am getting better at them. Practice does make perfect. Excellent recovery, and this just keeps getting better and better. Thank you Steve. I've had a model life long loosing battle percentage wise with vacuum canopies, and even some aircraft back in the earlier days. At least the good thing from looking at that windscreen is that it's nicely modeled with clear definition as to the parting lines, and just thick enough to make it so much easier to work with. Still, for a kit of the level, detail, and price, I would have thought that they would have gone the injection route. Needless to say I'm areally looking forward to seeing how you handle it. joel Thanks Joel. As much as I dislike having to wrestle with vacuform, I'd rather have it over an injection part. The thickness of an injection part just doesn't look right to me. Hanging the radiator went much better than I anticipated. I got the two bottom parts CA'd on, then did the main top pipe. Once they were firmly in place, I was able to hold the radiator and small top piece in place while I added drops of CA. Then it just a matter of adding the braces.     Next was to add the pipes and the sway bar links.   Once the radiator was mounted, I checked the nose piece to make sure there was no interference. Since there was none, I finished it off with the tiny dzus fasteners.   After many trial fits of the windscreen to the cowling, I was satisfied enough to mount it.   1174 |
|
|
|
Post by kyledehart5 on Aug 2, 2024 18:45:21 GMT -5
Beautiful work on the vacuform. All of this is looking outstanding.
|
|
|
|
Post by project510 on Aug 2, 2024 22:49:44 GMT -5
Wow, nice work Paul. That doesn't look easy at all.
|
|
handiabled
Administrator      Apr '23 Showcased Build Awarded
Member since: February 2023
Posts: 4,400 
MSC Staff
|
Post by handiabled on Aug 3, 2024 3:20:21 GMT -5
You mounted the windscreen perfectly! That is a bunch of attachment points to the radiator
|
|
joelw
Full Member
  
Member since: July 2024
Posts: 572 
|
Post by joelw on Aug 3, 2024 8:59:23 GMT -5
Paul,
Your comment to me about preferring a vac windshield vs an injected one about it being thinner was something that I failed to consider, and in the end would make a visible difference for sure. So it's not always the best option if it's the easiest option.
Excellent job on mounting the radiator which looks quite daunting as misalignment could be a real possibility.
In the final picture of the Cowell with the windscreen, those two beautifully finished Talbot racing mirrors just really are the perfect finishing touch. I just loved the look of my two Talbot mirrors mounted over the front wheels on my MGB. In hindsight having them by the windows would have made a huge difference, but IMHO just wouldn't have nearly the same visual effect.
joel
|
|
2whl
Full Member
   August '24 MoM Winner
Member since: September 2023
Posts: 445
Sept 10, 2023 12:21:52 GMT -5
Sept 10, 2023 12:21:52 GMT -5
|
Post by 2whl on Aug 3, 2024 11:04:28 GMT -5
 Beautiful work on the vacuform. All of this is looking outstanding. Thank you Kyle. Wow, nice work Paul. That doesn't look easy at all. Thanks James. It's not easy, but it's also really not that hard. It's a matter of taking your time and doing some planning. You mounted the windscreen perfectly! That is a bunch of attachment points to the radiator Thanks Brent. Yeah...the radiator did have me scratching my head trying to figure a way to hold all of those parts at the same time. Paul, Your comment to me about preferring a vac windshield vs an injected one about it being thinner was something that I failed to consider, and in the end would make a visible difference for sure. So it's not always the best option if it's the easiest option. Excellent job on mounting the radiator which looks quite daunting as misalignment could be a real possibility. In the final picture of the Cowell with the windscreen, those two beautifully finished Talbot racing mirrors just really are the perfect finishing touch. I just loved the look of my two Talbot mirrors mounted over the front wheels on my MGB. In hindsight having them by the windows would have made a huge difference, but IMHO just wouldn't have nearly the same visual effect. joel Thanks Joel. When you think about it, having vac form glass makes even more sense in the smaller scales. (1/20-1/25 or even 1/43). But with the mainstream companys it really isn't a manufacturing option. With all of the bodywork pieces done, it was time to do a final assembly. Here are my final pictures. Thanks to all who came along with me on this build. I hope you enjoyed it.  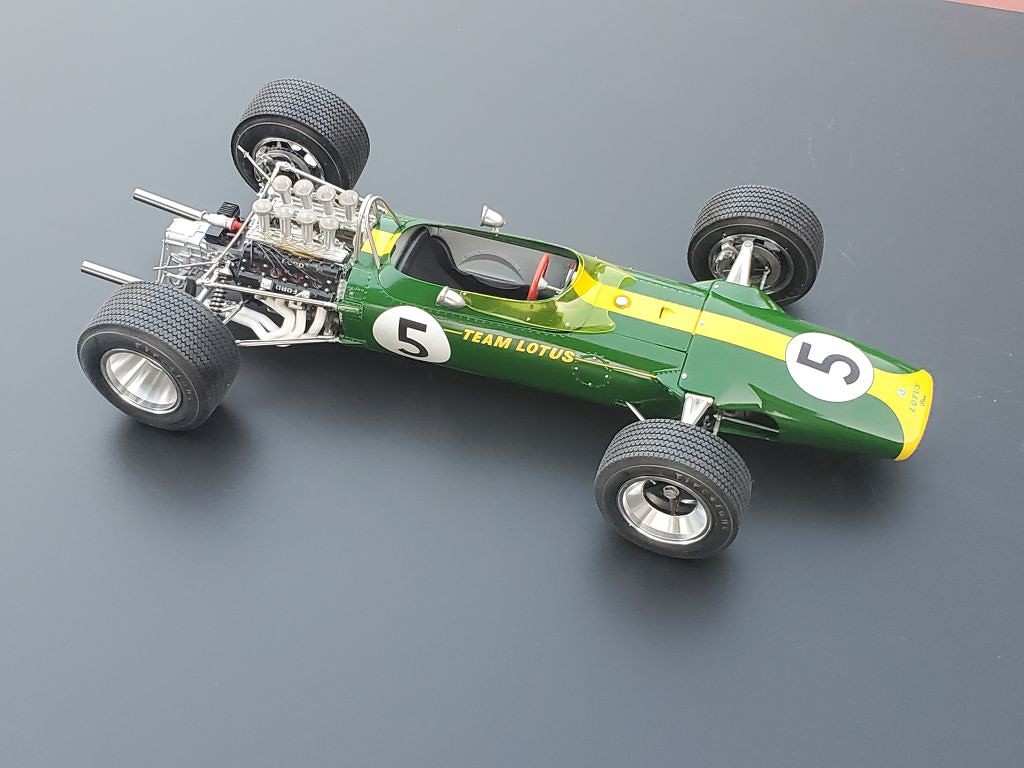 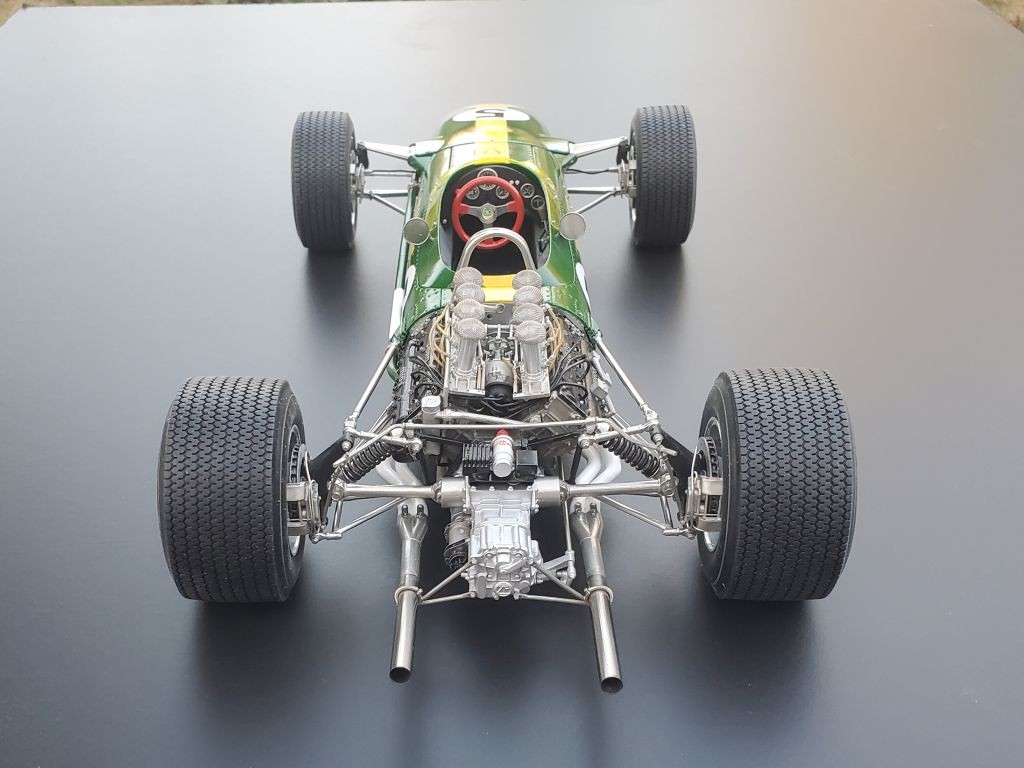 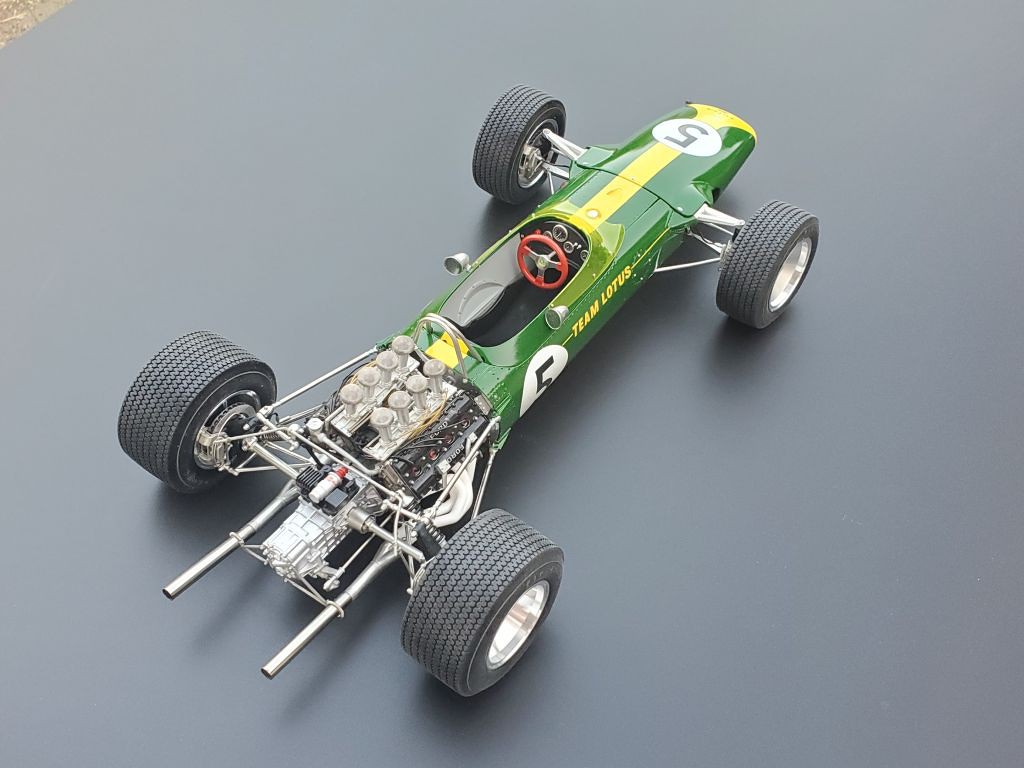       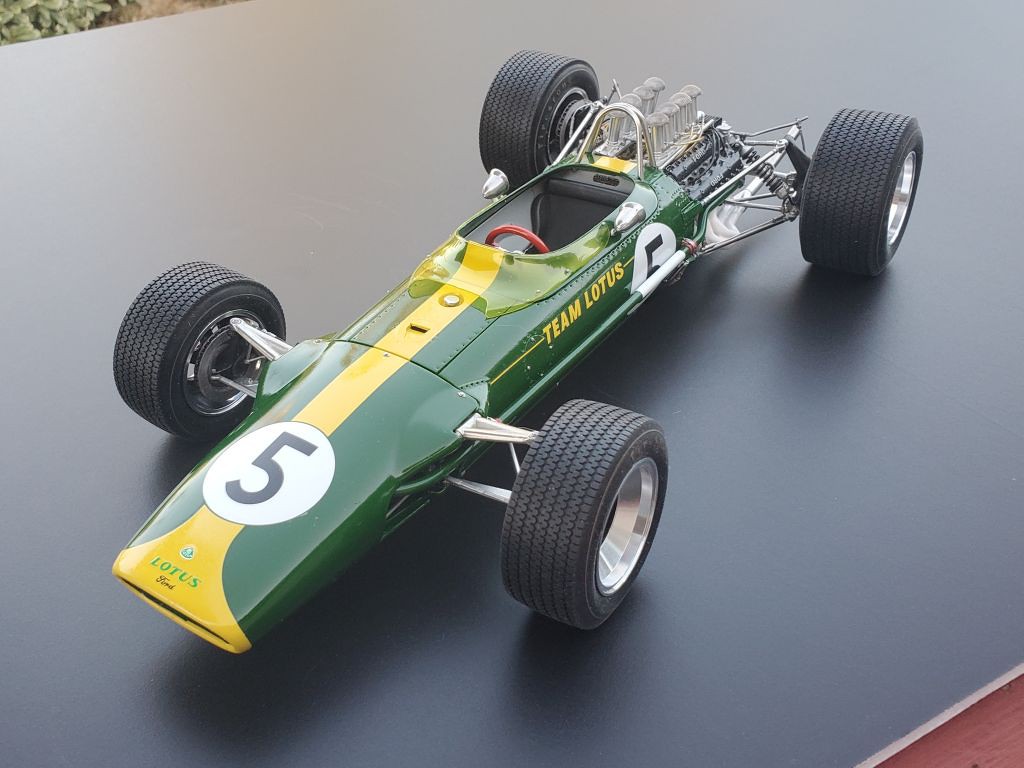  1244 |
|
chrissmith
Full Member
   Sept '24 Showcased Model Awarded
Member since: March 2024
Posts: 131
Mar 2, 2024 11:02:56 GMT -5
Mar 2, 2024 11:02:56 GMT -5
|
Post by chrissmith on Aug 3, 2024 11:37:53 GMT -5
Well done sir👏
Now that you got 2 done already what’s next?
|
|
2whl
Full Member
   August '24 MoM Winner
Member since: September 2023
Posts: 445
Sept 10, 2023 12:21:52 GMT -5
Sept 10, 2023 12:21:52 GMT -5
|
Post by 2whl on Aug 3, 2024 11:40:29 GMT -5
Well done sir👏 Now that you got 2 done already what’s next? Thanks Chris I just started a thread on the Gurney Eagle. Even though there are several others that should get some love. |
|
|
|
Post by keavdog on Aug 3, 2024 11:44:44 GMT -5
Well done. That is a real beauty!
|
|
joelw
Full Member
  
Member since: July 2024
Posts: 572 
|
Post by joelw on Aug 3, 2024 13:21:02 GMT -5
Paul,
Just an absolutely perfect build by one of the two MFH builders we have here, as each of you just continue to turn out museum quality models. It was once again a joy to follow your build from opening the box to crossing the finish line. Jim Clark and Colin Chapman would certainly more then just approve of your results.
Heading on over to sign up for the completion of your Gurney AAR F1 Eagle. Sure hope that you're going to do the 1967 Spa winning car.
joel
|
|
|
|
Lotus 49
Aug 3, 2024 13:22:29 GMT -5
via mobile
Post by kyledehart5 on Aug 3, 2024 13:22:29 GMT -5
Absolutely gorgeous result Paul. Another stunning build. I really enjoyed following along with it. Going to get this out into the gallery of completions.
|
|
2whl
Full Member
   August '24 MoM Winner
Member since: September 2023
Posts: 445
Sept 10, 2023 12:21:52 GMT -5
Sept 10, 2023 12:21:52 GMT -5
|
Post by 2whl on Aug 3, 2024 13:45:32 GMT -5
Well done. That is a real beauty! Thank you John. Paul, Just an absolutely perfect build by one of the two MFH builders we have here, as each of you just continue to turn out museum quality models. It was once again a joy to follow your build from opening the box to crossing the finish line. Jim Clark and Colin Chapman would certainly more then just approve of your results. Heading on over to sign up for the completion of your Gurney AAR F1 Eagle. Sure hope that you're going to do the 1967 Spa winning car. joel Thank you very much Joel. Of course I'll do the Spa car. It's too iconic not to. Absolutely gorgeous result Paul. Another stunning build. I really enjoyed following along with it. Going to get this out into the gallery of completions. Thank you Kyle. |
|
|
|
Post by project510 on Aug 3, 2024 14:05:35 GMT -5
Very well done! This looks just as good, if not better than a Die Cast model I have here. Great work Paul!  |
|
|
|
Post by Medicman71 on Aug 4, 2024 13:43:08 GMT -5
Wow! Awesome build! Love it!
|
|
2whl
Full Member
   August '24 MoM Winner
Member since: September 2023
Posts: 445
Sept 10, 2023 12:21:52 GMT -5
Sept 10, 2023 12:21:52 GMT -5
|
Post by 2whl on Aug 4, 2024 21:12:18 GMT -5
Very well done! This looks just as good, if not better than a Die Cast model I have here. Great work Paul! Thanks James. It looks like your diecast is missing its wings. Wow! Awesome build! Love it! Thank you Mike |
|