|
|
Post by 406 Silverado on Aug 20, 2024 4:28:46 GMT -5
I missed the last couple of updates but I'm back for more now John. Could you elaborate more on the pastel wash that you're talking about jkim? I've seen you talk about this elsewhere but need a refresher in that process of yours. |
|
jkim
Full Member
  
Member since: October 2023
Posts: 116
Oct 19, 2023 12:36:27 GMT -5
Oct 19, 2023 12:36:27 GMT -5
|
Post by jkim on Aug 20, 2024 11:45:46 GMT -5
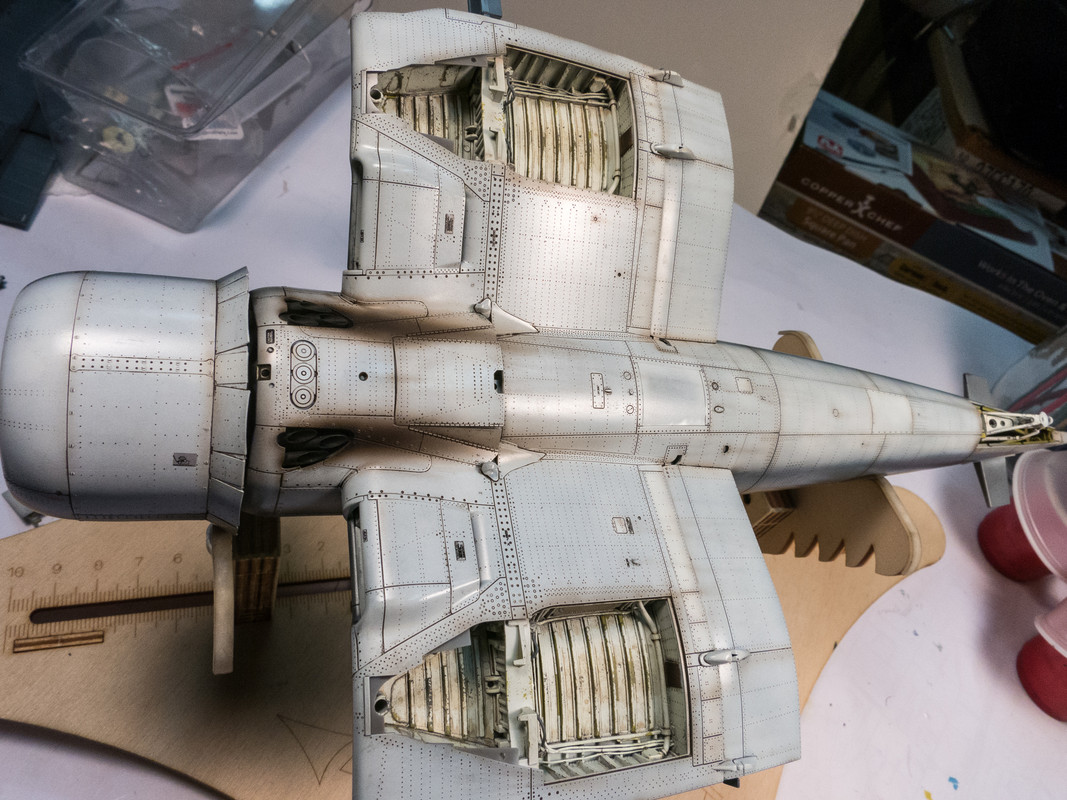
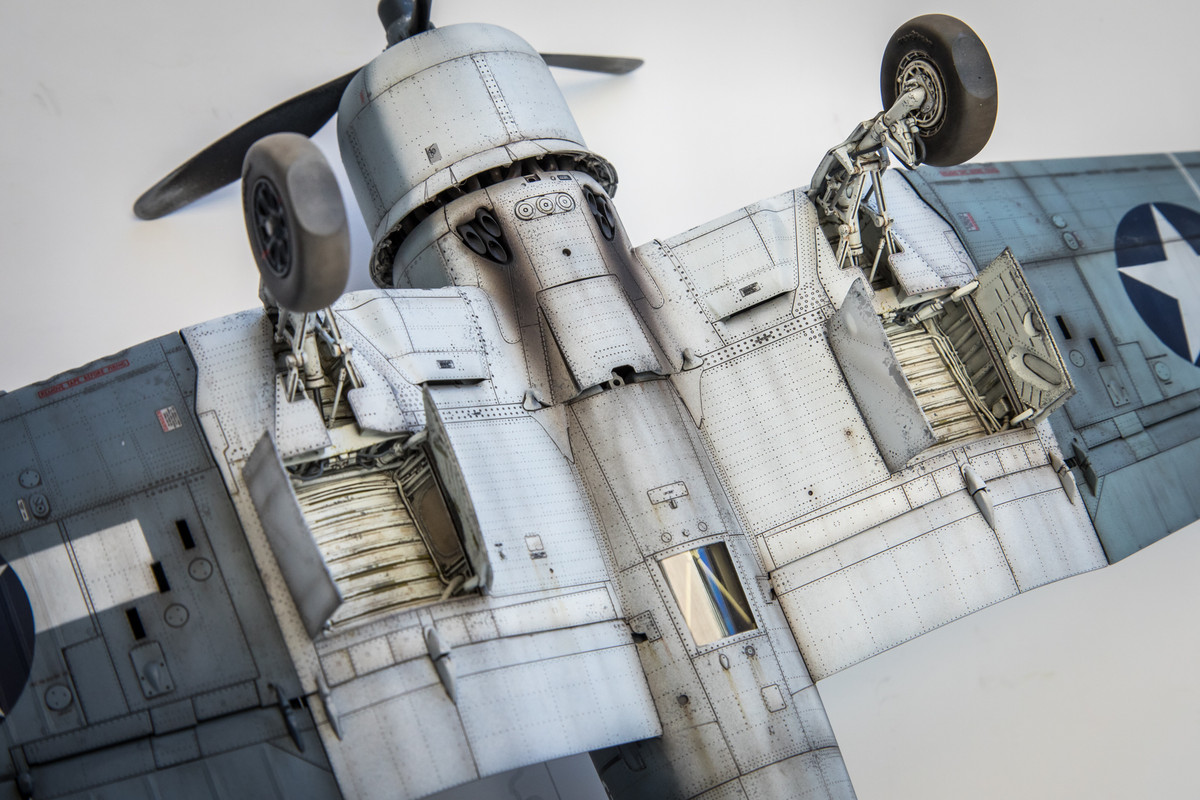
Thanks for the comments, John and Johnny! I missed the last couple of updates but I'm back for more now John. Could you elaborate more on the pastel wash that you're talking about jkim ? I've seen you talk about this elsewhere but need a refresher in that process of yours. Do you mean the making of the wash or the application? I am going to assume that you're asking about application so let me know if this doesn't answer your questions. On my aircraft builds, I like to use a pastel wash to fill in the recessed details after painting. This does a couple of things... first, it helps highlight detail but secondly, and more importantly, it helps to "flatten" the surface of the model. I want my model surface to look like it is comprised of sections of flat surfaces. I don't want to see physical grooves (panel lines) or little holes (rivets), which, to me anyways, seem to scream "plastic model". I want to see lines and dots instead. That's the reasoning behind my panel wash. Using another build as an illustrative example... the painting is sealed with a gloss coat. In most cases, you want to apply the panel wash over a gloss finish because it could possibly stain a flat finish. This is a 1/32 Tamiya Corsair after the gloss coat is applied.  The pastel wash is brushpainted over all of the recessed detail. The color of the wash will determine the contrast and therefore the impact of the effect. I'm learning that subtle is usually better than extreme and I've been dialing my wash colors to try and achieve a more subtle effect. In this case, I used a light brown color.  This is allowed to completely dry. You can tell the wash is dry because it will have a flat finish. A damp (not wet) cloth or paper towel is then used to wipe off the wash, leaving the wash in the recessed details and thereby highlighting them.  The pastel wash is one of many multiple layers of weathering that can be applied to a model after painting. On the bottom of the Corsair, I applied some airbrush post-shading.  All of the weathering layers hopefully add up to create a more realistic appearance on the model.  |
|
jkim
Full Member
  
Member since: October 2023
Posts: 116
Oct 19, 2023 12:36:27 GMT -5
Oct 19, 2023 12:36:27 GMT -5
|
Post by jkim on Aug 20, 2024 14:15:00 GMT -5
The top pre-shading has been completed. I've masked off the black canopy area.   |
|
|
|
Post by kyledehart5 on Aug 20, 2024 16:02:14 GMT -5
Preshading looks outstanding!! And what a great idea about the pastel washes. Thank you for sharing
|
|
jkim
Full Member
  
Member since: October 2023
Posts: 116
Oct 19, 2023 12:36:27 GMT -5
Oct 19, 2023 12:36:27 GMT -5
|
Post by jkim on Aug 20, 2024 19:48:10 GMT -5
Thank you Kyle! It took me a couple of spray sessions to lay down the white (AK Real Colors RC222 Insignia White). I use a fairly thin mix (1:1 Mr Leveling Thinner:Paint ratio) so that I can slowly build up the paint layer and tailoring the pre-shade effect to my liking.   I prefer a subtle effect, one that I can barely detect. It's difficult to see in photos at this distance.   But once you get closer, you can see the effect. Keep in mind that the pre-shade is simply one layer in the weathering process yet to come. There will be less weathering on this one compared to my WW2 builds but I'd like to dirty it up some.   |
|
|
|
Post by keavdog on Aug 20, 2024 19:52:10 GMT -5
White looks great over the preshading. I still tend to lay down too much paint over the shading.
For the canopy/anti-glare mask how do you cut such a nice radius for the nose
|
|
|
|
Post by kyledehart5 on Aug 20, 2024 22:16:34 GMT -5
That really does look excellent.
|
|
|
|
Post by 406 Silverado on Aug 21, 2024 4:13:30 GMT -5
Thank you for sharing that technique with everyone John. I've remembered your ideas on going heavier on the bottom of the aircraft and then going a little lighter on the sides and even lighter on the top of the aircraft in regard to the pastel wash. You just use straight up water in the wash right?
Progress on this project here is coming along well bud. I love all of this layering you do to these things.
|
|
jkim
Full Member
  
Member since: October 2023
Posts: 116
Oct 19, 2023 12:36:27 GMT -5
Oct 19, 2023 12:36:27 GMT -5
|
Post by jkim on Aug 21, 2024 12:24:49 GMT -5
White looks great over the preshading. I still tend to lay down too much paint over the shading. For the canopy/anti-glare mask how do you cut such a nice radius for the nose Thank you! For the black areas in front of the windscreen and behind the canopy, I used a scan of the decal sheet to create a custom mask. This was cut from a sheet of yellow Tamiya masking material on my Portrait 2 cutter. That really does look excellent. Thank you very much Kyle! Thank you for sharing that technique with everyone John. I've remembered your ideas on going heavier on the bottom of the aircraft and then going a little lighter on the sides and even lighter on the top of the aircraft in regard to the pastel wash. You just use straight up water in the wash right? Progress on this project here is coming along well bud. I love all of this layering you do to these things. Thank you Joe! The liquid in the wash is just plain water with a dash of liquid dishwashing soap. |
|
|
|
Post by 406 Silverado on Aug 21, 2024 13:29:29 GMT -5
Thanks John. +1 karma to ya for helping out yet once again.  |
|
jkim
Full Member
  
Member since: October 2023
Posts: 116
Oct 19, 2023 12:36:27 GMT -5
Oct 19, 2023 12:36:27 GMT -5
|
Post by jkim on Aug 22, 2024 11:44:45 GMT -5
|
|
jeaton01
Full Member
   Sept '23 Showcased Model Awarded
Member since: October 2013
Posts: 1,267 
|
Post by jeaton01 on Aug 22, 2024 22:38:36 GMT -5
A nice color base, John.  |
|
|
|
Post by kyledehart5 on Aug 23, 2024 0:00:44 GMT -5
Really awesome paint work. That looks so good.
|
|
handiabled
Administrator      Apr '23 Showcased Build Awarded
Member since: February 2023
Posts: 4,381 
MSC Staff
|
Post by handiabled on Aug 23, 2024 1:39:17 GMT -5
Top notch paint work John! Great job leaving the subtle weathered appearance.
|
|
jkim
Full Member
  
Member since: October 2023
Posts: 116
Oct 19, 2023 12:36:27 GMT -5
Oct 19, 2023 12:36:27 GMT -5
|
Post by jkim on Aug 23, 2024 15:16:11 GMT -5
|
|
|
|
Post by kyledehart5 on Aug 23, 2024 15:40:15 GMT -5
You are doing some exceptional paint work on this. It all is looking fantastic. Well done.
|
|
|
|
Post by keavdog on Aug 23, 2024 17:10:26 GMT -5
Metal finishes look great. Always wondered why one can was in afterburner and one wasn't - I understand that's the shut-down mode, just curious why.
|
|
brandonk
Full Member
   Jan '24 Showcased Model Awarded
Member since: May 2023
Posts: 1,258
May 14, 2023 13:45:45 GMT -5
May 14, 2023 13:45:45 GMT -5
|
Post by brandonk on Aug 23, 2024 18:30:44 GMT -5
Fantastic work. The painting is top notch.
|
|
jkim
Full Member
  
Member since: October 2023
Posts: 116
Oct 19, 2023 12:36:27 GMT -5
Oct 19, 2023 12:36:27 GMT -5
|
Post by jkim on Aug 24, 2024 0:04:11 GMT -5
|
|
|
|
Post by kyledehart5 on Aug 24, 2024 5:44:11 GMT -5
This is going together beautiful. Remarkable work.
|
|
|
|
Post by 406 Silverado on Aug 24, 2024 6:28:10 GMT -5
Progress is looking great on this one John. Good tip on the application of a Neutral Gray to blend repairs involving white color coats and makes perfect sense when you explain the process. I love all of this in-depth foundation work that you bring to the table on your painting processes. Every build you do seems to look the part when it's all said and done.
|
|
jkim
Full Member
  
Member since: October 2023
Posts: 116
Oct 19, 2023 12:36:27 GMT -5
Oct 19, 2023 12:36:27 GMT -5
|
Post by jkim on Aug 24, 2024 23:28:40 GMT -5
Thanks for the comments! Painting is approaching the end. Here is the gun muzzle area all finished.  During this painting stage, I've gotten a lot of handling scratches that need to be fixed.  The last thing to paint is the red line around the rear fuselage. Decals are supplied but I thought it would look better painted. In order to do that, I have to fit the inflatable bags that seal the folding wings. Tamiya supplies two versions of the wing gloves and bags: wing open and wing closed.  I don't like the idea of snapping these parts in and out depending on the pose. I've verified that the wings can be posed open and closed with the CLOSED versions of the gloves and bags, so that I what I am going with primarily.   The bags have been painted dark gray and weathered and snapped into place.  It's a bit of a chore trying to mask a thin line that goes around an irregular shape so to ensure uniformity, I marked the position of the stripe using a thin strip of tape the same width as the stripe. Strips of Tamiya tape are then butted up against the stripe on both sides, forming a uniform stripe mask.  After the red is sprayed and tape removed, there are little bits of overspray and some small paint lifts.  The paint lift got worse during the paint repair phase and I had to bite the bullet and go after this aggressively using tape to lift the paint purposefully to find all of the weak areas in this area. After this pic, I sanded the area using 600# sandpaper and buffed it with 6000 Micromesh and gave it a coat of Mr Primer Surfacer 1000. This was sanded with 1000# sandpaper and then re-sprayed with Neutral Gray before applying the Insignia White again.  After a bunch of small paint repairs and one big one, the red stripes are getting close to finished.   Here is the big repair area. After the Insignia White is dry, I'll add the red stripe and we'll be (hopefully) moving on to the decal stage.  |
|
handiabled
Administrator      Apr '23 Showcased Build Awarded
Member since: February 2023
Posts: 4,381 
MSC Staff
|
Post by handiabled on Aug 25, 2024 3:17:37 GMT -5
Your paintwork is so intricate. Your undetectable recovery from paint peels is stupendous!
|
|
jkim
Full Member
  
Member since: October 2023
Posts: 116
Oct 19, 2023 12:36:27 GMT -5
Oct 19, 2023 12:36:27 GMT -5
|
Post by jkim on Aug 26, 2024 12:06:26 GMT -5
Your paintwork is so intricate. Your undetectable recovery from paint peels is stupendous! Thank you sir! Sad to say but my proficiency at paint repair is directly correlated to how many times paint lift seems to affect my builds. You do something enough times, you're bound to get better at it right? The final red stripe has been masked off and painted.   Oh, I almost forgot about the painted details on the end of the AIM-54 pallets that were masked prior to painting. This is what compromise looks like as I was unwilling to fork over the money for resin replacements for this added detail.  The model has been given a gloss coat. I use Alclad Aqua Gloss thinned with Mr Leveling Thinner for most of my gloss coat needs.     |
|
jkim
Full Member
  
Member since: October 2023
Posts: 116
Oct 19, 2023 12:36:27 GMT -5
Oct 19, 2023 12:36:27 GMT -5
|
Post by jkim on Aug 26, 2024 15:47:40 GMT -5
|
|
|
|
Post by keavdog on Aug 26, 2024 16:12:14 GMT -5
I may have to get those landing gear - the look fantastic.
Great progress John and nice recover on the paint pulling up. Getting close now!
|
|
|
|
Post by 406 Silverado on Aug 26, 2024 19:04:31 GMT -5
Man those main landing gear struts are all THAT!! Heck I would've picked up a set for this bad boy of an aircraft as well after seeing all the detail on them. WOW!!
|
|
|
|
Post by kyledehart5 on Aug 27, 2024 5:27:09 GMT -5
Couldn’t agree more with you gents. Absurdly nice gear. That looks truly jaw droppingly amazing.
|
|
handiabled
Administrator      Apr '23 Showcased Build Awarded
Member since: February 2023
Posts: 4,381 
MSC Staff
|
Post by handiabled on Aug 27, 2024 9:21:49 GMT -5
Your paintwork and light weathering highlights the outstand and crisp detail of the gears and gear bays John.
|
|
jkim
Full Member
  
Member since: October 2023
Posts: 116
Oct 19, 2023 12:36:27 GMT -5
Oct 19, 2023 12:36:27 GMT -5
|
Post by jkim on Aug 27, 2024 11:32:11 GMT -5
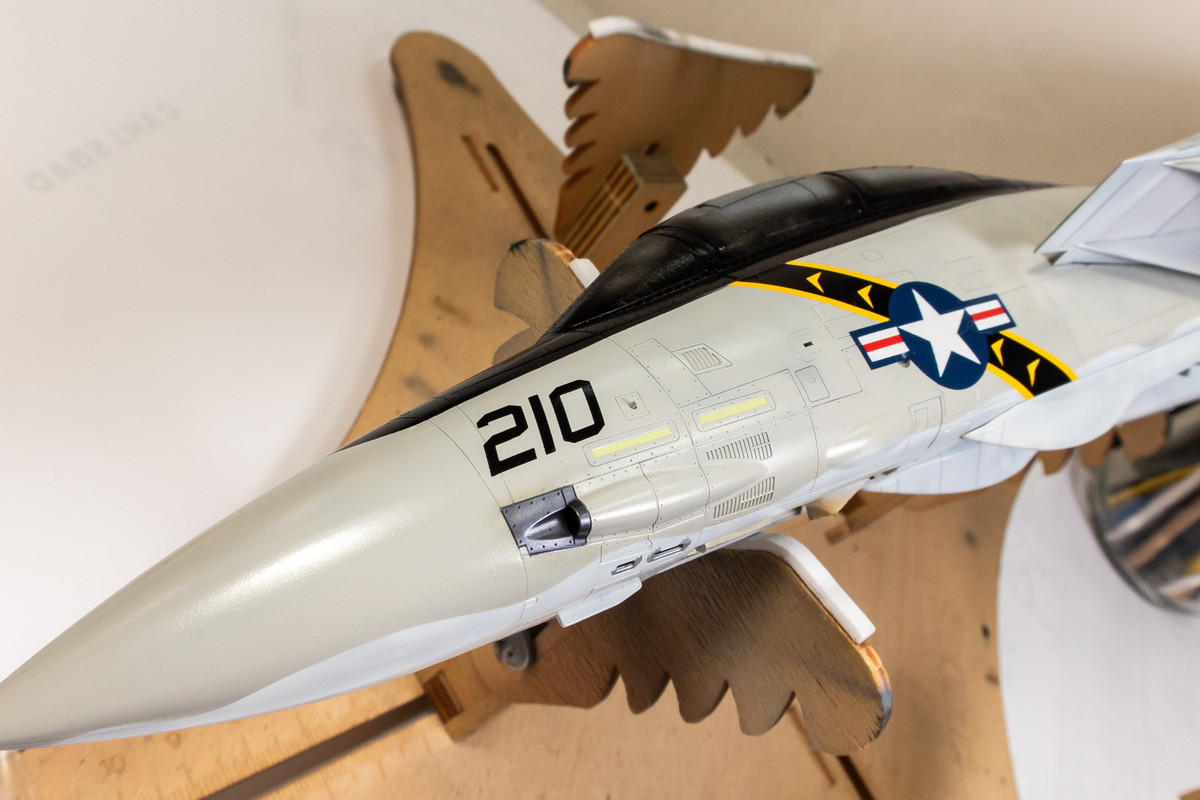
Thanks guys! Appreciate the positive comments! The 3D-printed stuff from D&W and MCC is amazingly complex in detail. So much so that I have to work up the nerve to try and apply paint to it. I've finally started the decaling process. Lots of decals for these modern jets so this will take multiple sessions and I will tackle it one section at a time. The VF-84 specific markings are from Hungarian Aero Decals and the generic maintenance stencils are from Furball Aero Design. I'm using the typical Microset/Microsol solutions and a sharp knife to make sure the decals settle down into all of the panel lines.   |
|